#BakingFromScratch
Explore tagged Tumblr posts
Photo

🍥 Creamy Penne Pasta
🍔YouTube || 🍟Reddit
#BakingTools#BakingFromScratch#DessertGoals#BrunchAndCake#BakingHobby#HealthyFood#FoodTruckNation#lentils#BakingBread#HealthyFoodTips#BakingTime#BakingClass#AsianFoodStory#MexicanFoodIsLife#MexicanFoodie#FoodTruckers#BrunchTime#DessertMasters#AsianFood#SouthEastAsianFood#BakingSoda#FoodTruckSnash#AsianFoodLove#MexicanFoodPorn#HealthyFoodWithMe#DessertLover#HealthyFoodEating#BakingIsMyTherapy#HealthyFoodPost#DessertBuffet
78 notes
·
View notes
Text
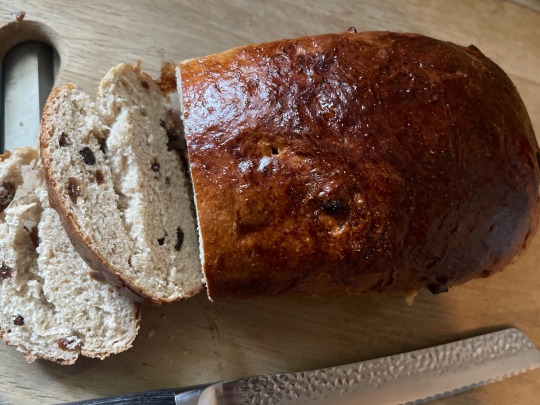
Baked some raisin bread my recipes 🥖✨
#cottagecore#cottagecoreaesthetic#aesthetic#aesthetic#baking fun#baking video#bakingfromscratch#cottagecore baking#baking#fairycore#breadmaking#quick bread
105 notes
·
View notes
Text
How to Make Irresistible Chocolate Hand Pies at Home

#ChocolateHandPies#BakingRecipe#HomemadeDesserts#EasyBaking#HandPies#ChocolateLovers#SweetTreats#BakingFromScratch#PastryLovers#DessertInspiration#FoodPhotography#WeekendBaking#ComfortFood#IndulgentEats#DeliciousDesserts
2 notes
·
View notes
Text
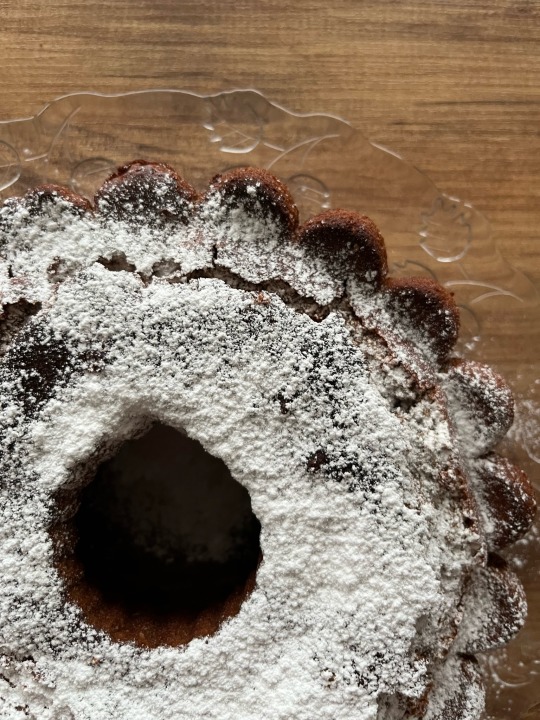
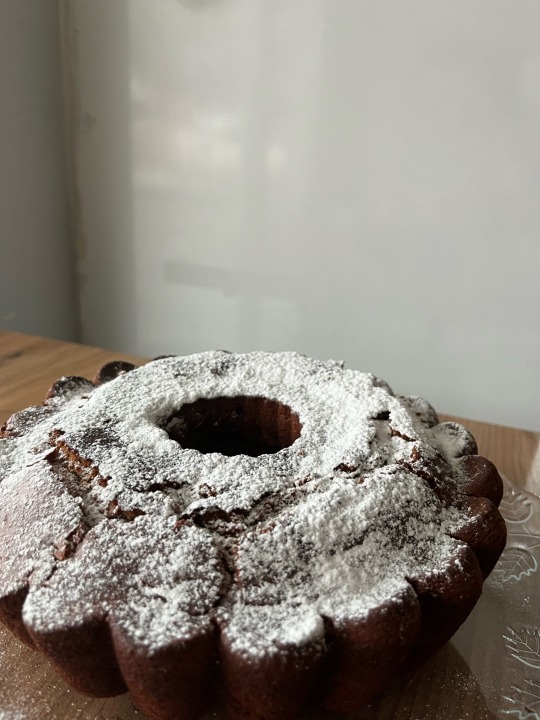
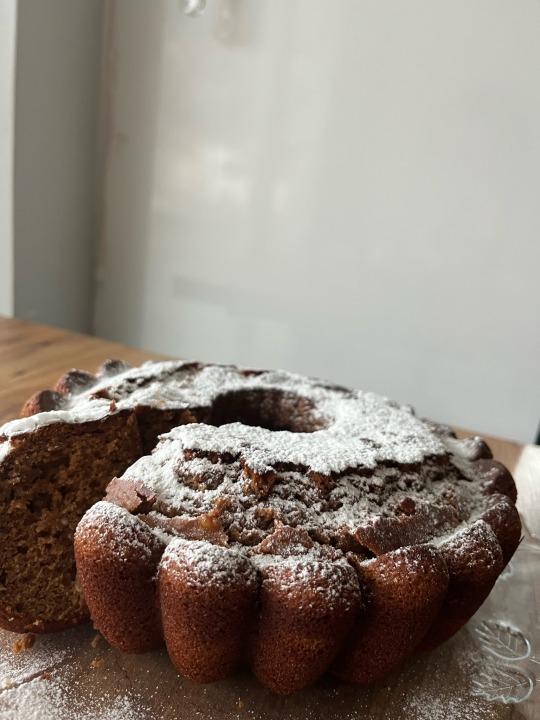
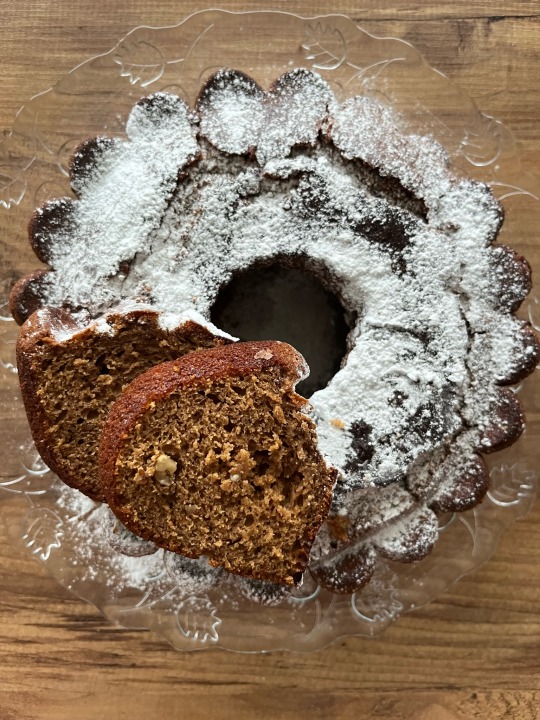
golden tahini cake
- 2 eggs
- 180 grams of molasses
- 120 grams of tahini
- 175 ml of milk
- 220 grams of flour
- 1 tbsp of baking powder
- 1/2 tsp of baking soda
- 50 grams of walnuts
30 min 180C, top the cake with powdered sugar and enjoy. 🤍
3 notes
·
View notes
Text
Almond Love Knots Wedding Cookie Recipe
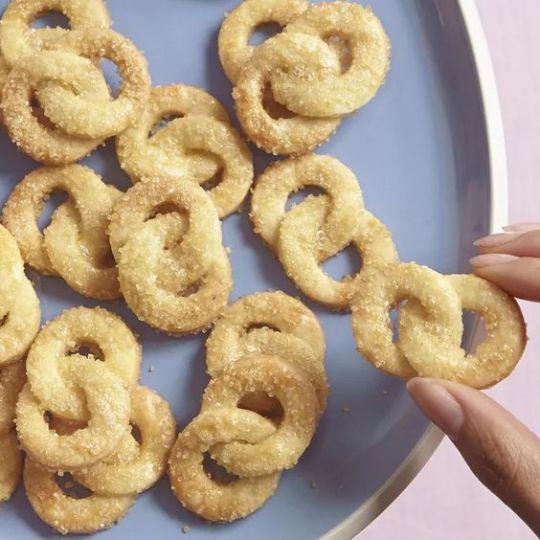
Experience the delightful crunch and tender texture of these buttery wedding ring-inspired cookies. They’re not just your ordinary butter cookies, but a taste sensation that deepens with time. Prepare these sparkling, intertwined ring-shaped treats up to a week in advance and store them in an airtight container at room temperature for an enhanced flavor experience. They’re sure to become your favorite go-to cookie recipe.
ALMOND LOVE KNOTS COOKIE RECIPE
Prep Time: 15 mins Cook Time: 15 mins Servings: 24
Ingredients
1 ½ cups all-purpose flour
½ cup almond flour
½ cup confectioners' sugar
¼ teaspoon salt
¾ cup cold butter, cut into small pieces
1 large egg, separated
½ teaspoon vanilla extract
¼ teaspoon almond extract
3 tablespoons ice water
3 tablespoons turbinado sugar (such as Sugar in the Raw®)
Directions
Blend all-purpose flour, almond flour, confectioners' sugar, and salt together in a food processor. Add butter; pulse until mixture resembles coarse crumbs. Add egg yolk, extracts, and ice water and pulse just until a smooth dough forms.
Turn dough out onto a work surface, divide in half, form into disks, and dust each disk with flour. Wrap disks in plastic wrap and refrigerate until firm and cold, at least 1 hour to overnight.
Preheat oven to 325 degrees F (165 degrees C). Line 2 baking sheets with parchment paper.
Roll 1 dough disk out onto a floured surface with a floured rolling pin to 1/8-inch thickness. Use a floured 1 1/2-inch round cookie cutter to cut dough into rounds. Cut out the center of each round with a 1/2-inch floured round cookie cutter to form rings. Repeat with remaining dough disk.
Cut through side of 1 dough ring and slip it around another to intertwine rings, pressing cut pieces together to seal ring. Place interlocked rings on prepared baking sheets.
Beat egg white until frothy. Gently brush each "love knot" with egg white and sprinkle with turbinado sugar. Bake in the center of the preheated oven until lightly browned on the edges, 15 to 18 minutes. Carefully transfer cookies to a wire rack to cool completely.
#LoveKnotCookies#ButteryCookies#WeddingRingCookies#CookieRecipe#BakingLove#HomemadeCookies#CookieTime#BakingFromScratch#DeliciousTreats#wedding cookies
7 notes
·
View notes
Text
Regular Muffins
Ingredients:
300 g all-purpose flour
150 g granulated sugar
1 tbsp baking powder
1/2 tsp baking soda
1/4 tsp salt
100 g unsalted butter (melted)
2 large eggs
1 tsp vanilla extract
250 mL milk
100 g baking chocolate
Instructions:
In a large bowl, whisk together the flour, sugar, baking powder, baking soda, and salt.
In a separate bowl, mix egg with the melted butter, then add in vanilla extract, and milk until well combined.
Gradually add the wet ingredients to the dry ingredients, mixing until just combined.
Spoon the batter into the muffin cups, filling each about 2/3 full.
Gently fold in the chopped baking chocolate.
Bake at 200°C for 18–20 minutes, or until a toothpick inserted into the center of a muffin comes out clean.
Enjoy <3

1 note
·
View note
Text
Bird's Milk Cake (Ptichye Moloko)

Ingredients
Pastry
3 eggs
200 mL (0.85 cup) white sugar
3 tablespoons honey
1 tablespoon white vinegar
1 teaspoon baking soda
3 tablespoons cow's milk
2 ⅓ cups pastry flour
Cream
200 mL (0.85 cup) white sugar
2 tablespoons pastry flour
400 mL (1 ¾ cups) cow's milk
1 ½ (12 tablespoons/¾ cups) sticks butter
Chocolate Glaze
3 tablespoons cocoa powder
100 mL (~0.4 cup) white sugar
3 tablespoons cow's milk
2-3 tablespoons of butter
Preparation
Pastry Layers
Heat small amount of water in a pot for a hot water bath.
In a glass bowl, beat the eggs with an electric mixer. Add sugar, milk and honey to the eggs, and mix well (with the mixer).
In a small cup combine vinegar and baking soda so it fully reacts (bubbles) before folding them into the main mixture in the bowl.
Put the glass bowl on the pot with the simmering water (the hot water bath) and keep mixing its content until it is warm.
Take the bowl off the pot and add the flour to it while it’s warm. Mix the dough well, cover with a lid and set aside for an hour.
Preheat the oven to 375 F. Cut four foil sheets (or use pre-cut ones) to fit baking sheet.
Divide the dough into four parts and spread a quarter evenly on one of the foil sheets with a spatula. This needs to be done carefully because the layer is thin, and you should be careful not to tear the foil.


Place the foil sheet with the dough on the baking sheet and put it in the oven. The first layer will be ready in approximately 10 minutes (depends on the oven). Keep checking not to burn it: it has to be golden-brown, not pale.
Repeat the procedures with the remaining three layers. Note that these layers will bake slightly faster because you’ll be putting foil on a hot baking sheet (that just came out of the oven).


Once a layer is ready, put it on a flat surface to cool down. Leave for at least an hour (or more) before peeling the foil off. Do it slowly not to break the layer, peel small pieces of foil and make sure there is no foil left, especially at the edges.


Proceed to making cream while layers cool.
Cream
Take the butter out of the fridge for a few hours. It has to be soft (room temperature).
In a glass bowl, mix sugar and flour with a spoon so there are no clumps. Add milk and put in microwave oven.* Heat the mixture in increments of 3 or 2 minutes, mixing with a spoon in between. Add vanilla once it is hot, but has not boiled yet. Get it to boil but not spill (it rises quickly, so watch if you have light and the microwave door is transparent).
The hot milk mixture has to cool down to room temperature, same as butter.
Beat butter with an electric mixer, but do not over-beat it. Then add the milk mixture little by little and keep beating with the mixer. The cream is done once the milk mixture and the butter are fully mixed and uniform.


Divide cream into three parts and spread between the four laters. There should not be cream on top of the last layer (it will be glazed with chocolate).


Use cutting board covered with parchment paper for ‘assembling’ the layered cake. It will be easy to cut it when you’re ready to serve.
Chocolate Glaze
In a small pot, mix cocoa powder and sugar so there are no clumps. Add milk and bring to boil over low heat, constantly mixing. Add butter and mix until it melts.


Once the glaze cools a little, spread it over the top cake layer with a spatula.


The cake should be in a fridge for a few hours (preferably overnight) before serving.
Cut the edges off and make pieces either rectangular or diamond-shaped. If the knife gets covered with cream and glaze, clean or wash it before proceeding to cut the cake further. This way, the edges will be even and neat.

Serve on a tray or a flat dish. Enjoy!

#baking#bakingtips#bakingrecipes#homebaking#bakinghacks#bakingfromscratch#foodphotography#foodie#instafood
4 notes
·
View notes
Photo
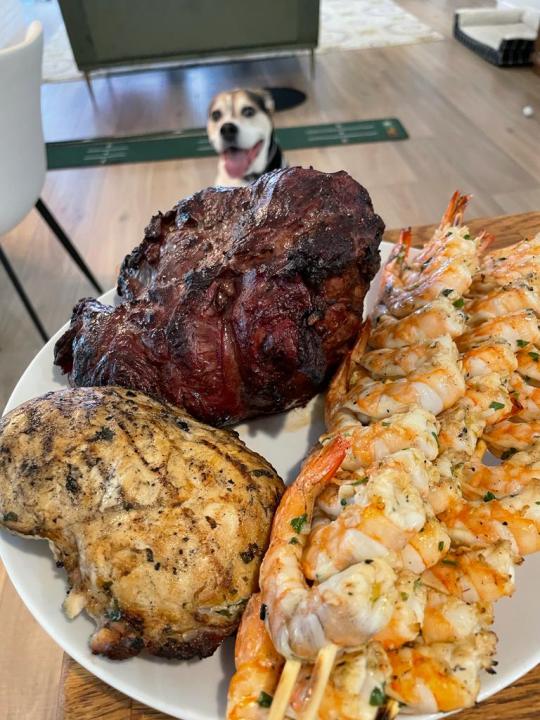
🍥 Grilled lamb, chicken, and shrimp
🍔YouTube || 🍟Reddit
#SouthEastAsianFood#BakingGoals#HealthyFoodGuide#BakingFromScratch#BrunchMunch#DessertMasters#spinach#FoodTruckNight#HealthyFoodRecipes#DessertHeaven#lunch#BakingTips#MexicanStreetFood#CleanEating#olive oil#Baking#BakingACake#HealthyFoodies#BrunchAndCake#LoveToBrunch#DessertShots#DessertGram#FoodTruckFestival#MexicanFoodIsLife#Dessert#BakingCooking#AsianFoodStory#DessertPorn#BakingMakesMeHappy#HealthyFoodForLife
56 notes
·
View notes
Photo

🍥 Cajun shrimp and jalapeño cheddar grits
🍔YouTube || 🍟Reddit
#FoodTruckFriday#FoodTruckFood#BakingIsMyTherapy#SouthEastAsianFood#TopAsianFood#FoodTruckRoundup#BakingFromScratch#DessertPorn#BrunchTime#HealthyFoodSharing#MexicanFoodie#AsianFoodFestival#BakingClass#MexicanFoodPorn#BakingSeason#lentils#HealthyFoodChoices#DessertGoals#Brunch#LoveToBrunch#MexicanFoodies#DessertCups#CleanEating#BakingDay#FoodTruckRally#DessertBox#BakingHobby#BakingGoals#BrunchVibes#FoodTruckStop
118 notes
·
View notes
Photo

🍥 Thai Pineapple Curry Chicken
🍔YouTube || 🍟Reddit
#DessertArt#AsianFoodLove#MexicanFoodIsLife#HealthyFoodSharing#VeganFood#MexicanFoods#BakingFun#FoodTruckRally#Baking#DessertAble#BakingCooking#HealthyFoodChoices#DessertBar#DessertBuffet#LoveToBrunch#NewMexicanFood#AsianFoodBlog#BakingIsFun#AsianFoodPorn#HealthyFoodTips#BakingLove#turmeric#FoodTruckCatering#AsianFoodShare#garlic#olive oil#BakingFromScratch#mint#MexicanFoodLove#parsley
39 notes
·
View notes
Photo
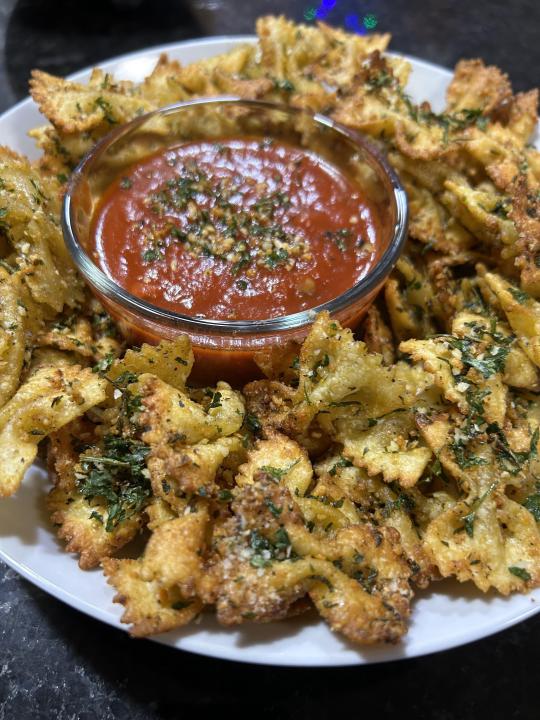
🍥 I made pasta chips
🍔YouTube || 🍟Reddit
#MexicanFoodies#AsianFoodBlog#AsianFoodNinja#BakingClass#Desserts#DessertCups#HealthyFoodEating#GoForBrunch#dinner#BakingSchool#BrunchFriends#MexicanFood#BakingACake#FoodTruckSnash#FoodTruckRodeo#onion#Dessert#BakingFromScratch#cilantro#sea salt#DessertArt#BakingTools#HealthyFoodies#BakingSeason#InstaDesserts#BakingGoals#DessertIdeas#AsianFoodStory#HealthyFoodLover#MexicanFoodPhotography
68 notes
·
View notes
Photo
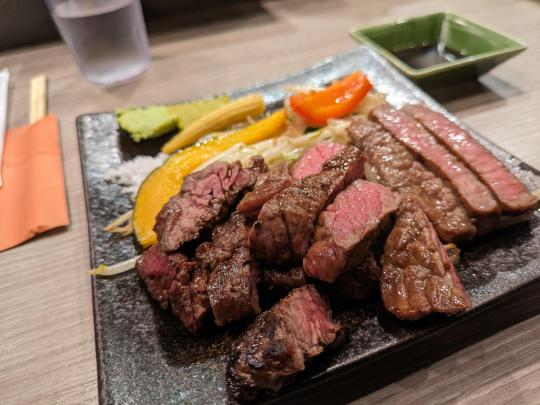
🍥 Noto-Beef Steak
🍔YouTube || 🍟Reddit
#NewMexicanFood#AsianFoodPhotography#BakingClass#olive oil#DessertGram#DessertPic#black pepper#BakingFromScratch#DessertHeaven#BakingPorn#DessertTable#AsianFoodShare#DessertStory#BakingVideo#AsianFoodLovers#FoodAsian#garlic#DessertBuffet#HealthyFoodLover#HealthyFoodSharing#HealthyFoodRecipes#HealthyFoodie#DessertCups#DessertLove#lunch#BrunchFood#BrunchLife#BrunchIdeas#BakingTools#AsianFoodAddict
28 notes
·
View notes
Photo
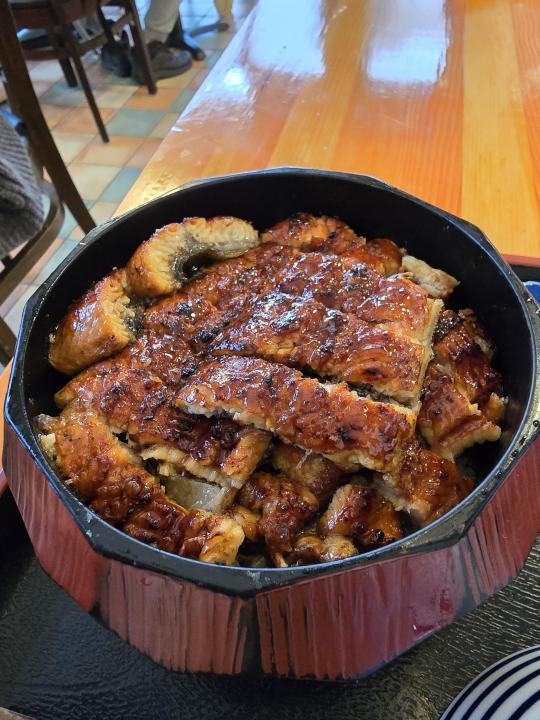
🍥 [i ate] Unagi Don (Eel Rice Bowl)
🍔YouTube || 🍟Reddit
#FoodTruckNation#HealthyFoodLover#MexicanFoodLovers#BakingFun#DessertPic#DessertIdeas#lunch#Baking#Brunching#BakingSchool#BakingFromScratch#FoodTruckSnash#NewMexicanFood#yogurt#DessertGram#HealthyFoodInspo#BrunchLover#Brunchin#AuthenticMexicanFood#HealthyFoodSharing#AsianFoodPorn#MexicanFoodPorn#lentils#HealthyFood#DessertBar#HealthyFoodEating#AsianFoodLove#AsianFoodLovers#BakingHobby#DessertPics
29 notes
·
View notes
Photo
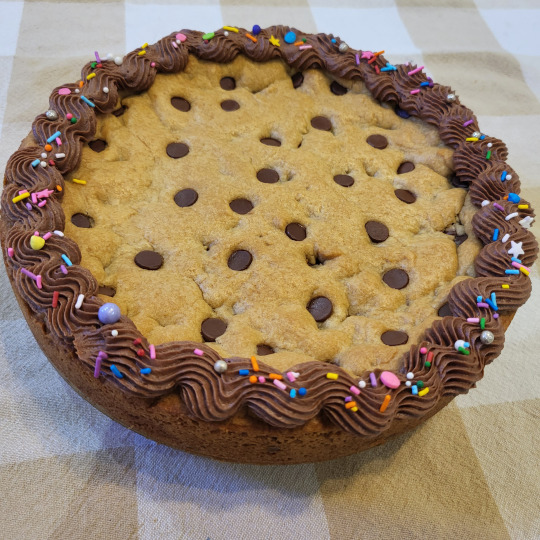
🍥 Chocolate chip cookie cake
🍔YouTube || 🍟Reddit
#Brunch#breakfast#dinner#Desserts#BrunchTime#BakingGoals#HealthyFoodGuide#ILoveMexicanFood#JustEatRealFood#MexicanFoodTour#AsianFoodPhotography#Dessert#AsianFoodLover#BakingFromScratch#BrunchVibes#MexicanFoodRecipes#AsianFoodLovers#FoodTruck#AsianFoodLove#DessertPics#AsianFoodBlogger#FoodTruckCatering#AlwaysFoodTruckin#BakingSeason#BakingClass#FoodTruckLovers#BrunchSoHard#HealthyFoodies#DessertGoals#DessertBar
89 notes
·
View notes
Photo
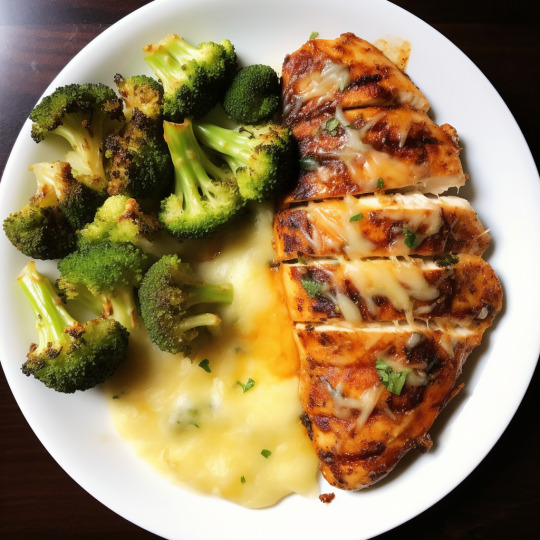
🍥 Keto Baked Chicken with Broccoli and Cheese
🍔YouTube || 🍟Reddit
#HealthyFoodPost#AsianFoodMarket#DessertCups#AsianFoodPhotography#BrunchLife#HealthyBaking#MexicanFoods#BakingFromScratch#HealthyFoodWithMe#FoodTruckRally#AsianFoodLove#AsianFoodLovers#BakingPorn#AsianFoodFestival#InstaDesserts#HealthyFoodGuide#HealthyFoodLover#HealthyFoodChoices#HealthyFoodForLife#MexicanFoodIsLife#MexicanFoodPics#BrunchIdeas#MorningBrunch#FoodTruckFood#garlic#DessertPorn#lentils#MexicanFoodie#HealthyFoodRecipe#FoodTruckSnash
78 notes
·
View notes
Photo
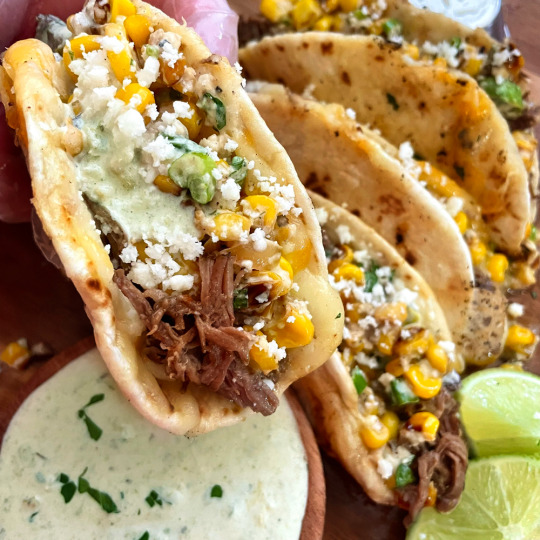
🍥 Barbacoa + esquites cheesy tacos w/ jalapeno lime ranch
🍔YouTube || 🍟Reddit
#AsianFoodLove#BakingFromScratch#BakingPost#Brunching#AsianFoodLover#FoodTrucker#GoForBrunch#HealthyFoodLover#Baking#black pepper#DessertMasters#DessertLover#FoodHealthy#BakingFun#DessertTable#BrunchVibes#BestAsianFood#DessertTime#AsianFoodShare#DessertBar#DessertsOfInstagram#BakingClass#HealthyFoodBlogger#MexicanFoodLove#spinach#AsianFoodChannel#DessertPorn#olive oil#HealthyFood#FoodTruckRally
117 notes
·
View notes