#Aldren Watson
Explore tagged Tumblr posts
Text


Fine Press Friday
This 1944 edition of the biblical Song of Songs, with illustrations and border designs by American illustrator, designer, and wood worker Aldren Watson (1917-2013), was printed for the Peter Pauper Press in Frederic Goudy's Deepdene italic types on Archer paper by the Walpole Printing Office in Mount Vernon, New York.
Both the Peter Pauper Press and the Walpole Printing Office were founded by Peter Beilenson (1905-1962), and later joined by his wife Edna Beilenson (1909–1981), in 1928 and 1929, respectively. They are known for using fine-press principles and practice to produce well-designed, but very affordable publications. Peter Pauper Press is still a family operation, but today it mainly produces commercial novelty, miniature, and children's books.
Art was also a family affair for Aldren Watson. His mother was the American artist Eva Auld Watson and his daughter Wendy Watson is a children's book author and illustrator. Our copy of this book is another gift from our friend Jerry Buff.
View our other posts on books by the Peter Pauper Press.
View other Fine Press Friday posts.
#Fine Press Friday#fine press fridays#Song of Songs#Aldren Watson#Peter Pauper Press#Walpole Printing Office#Deepdene type#illustrated books#fine press books#Peter Beilenson#Edna Beilenson#Jerry Buff
92 notes
·
View notes
Text

Where Everyday Things Come From by Aldren Watson, 1974
1 note
·
View note
Text
IT'S DONE IT'S FINISHED I MADE A BOOK!!!


Technically it's not quite finished, it's pressing overnight, but that's a formality! It's done! I made a book!!!!!
Ok first off, check out how nice my hinges look, that knitting needle trick worked great. I did wake up this morning in a panic bc what if the spine popped off in the night, what if the pressure pushed the book block away from the backbone enough to break the glue holding them together, but it didn't! We're golden!


So now there was only one step left: the end papers. And it turns out I got it WRONG you are NOT supposed to attach the end papers last, they're supposed to go on before you attach the cover at ALL woe woe gnashing of teeth and rending of garments. In my defense my lovely manual LED ME ASTRAY!! ok not actually it's just I misremembered what it was saying. The manual says to glue the first and last pages to the cover boards, and then if you're feeling fancy attach lining paper, like so:

oh I'm just now realizing that I haven't put image descriptions on any of these. oh no. that's so many images. heck. ak ak ok I'll do it later, I promise. right now I want to finish writing this up.
The lovely manual, for the record, is Hand Bookbinding by Aldren A. Watson, and can actually be found on the Open Library here. And its lining paper idea is very nice, but not actually what I was planning on. So I spent all day watching videos on end papers in between work tasks. (I learned a lot actually, this guy is great.) Then I went back to the two case binding tutorials I've been alternating between whenever I need more information, because although my book is not case-bound, many steps of the process are still the same.
At last I took my courage in hand and got to work. This was somehow the scariest step in this whole process, for two reasons, I think. First because the book is nearly done and looks really good, so now I'm afraid of ruining it. Before I was just afraid of doing it badly, but hey if the first one comes out bad, that's almost expected, right? But now it's good so if it comes out bad that's because I ruined it. (The second reason is that I'm starving. Hunger really amps up your anxiety. There's an easy fix for this but it was book time, not food time. Alas, I am like this, and today I don't have the energy to fight it. I'll get food in a bit, it's fine.)
So now comes fuck-up number two: the grain of the cardstock paper I got for the decorative endpapers is such that I should be folding it in half length-wise, not...width-wise? Is that a word? I've never heard it said before I don't think. Anyway, if I fold it with the grain, it won't be big enough to cover the whole of the book the way I need it to. If I fold it against the grain, it will weaken the book.
But too bad, I'm not about to go find new end papers at this stage in the game. First book ever! It's allowed to have problems! Moving on!
The style that most appeals to me is zigzag endpapers, which are designed to absorb the strain that's put on the cover and/or the pasted-down paper whenever you open the book. I appreciate that tidiness. However, I don't think I could add that in with the cover already in place, so instead I went for the simplest possible option, tipped-on endpapers, where you literally just lay down a stripe of glue on the endpaper signature, then attach that to the first page of the book.

I ended up not taking any more pictures than this, because after a great deal of squishing to make sure it lined up neatly with the spine of the book block, I decided I didn't like it after all. The decorative paper and the first page can't really be fully pulled apart, not without creasing one or both of them, and it just doesn't look nice! I don't like it! So instead I just pasted the two together, so now the first page and the decorative paper are functionally just one really thick page.

The bone folder came in really handy for this, because I could scrape it across the paper to make sure it lay flat without worrying about scratching the paper. If you're doing this and you don't have a bone folder, make sure you have something flat you can use to press paper down while you're gluing it to make sure the paper doesn't warp. Use a sheet of waste paper – the manual recommends glossy magazine paper – between the page and whatever you're rubbing it with. I should have done that too, actually, I just forgot.
As for the warping: paper expands when it's exposed to moisture, and then contracts again as it dries. This is actually the big reason paper grain is so important, as it specifically expands along the grain. If the grain goes up and down the page parallel to the spine, then it expands out from the spine, and the motion of its expansion and contraction is completely harmless. If, however, the grain is perpendicular to the spine, then it expands out toward the head and foot of the book, which means it's pulling away from where it was stitched and glued into place at the spine, and that's what ultimately weakens the book. (If that's not clear, see here for more detail + illustrations!)
I remembered all of this when I went to do the second endpaper and applied too much glue :( The paper started to warp and I started to panic. But I kept flattening it with the bone folder everywhere it started to look bad, and after a bit it conceded defeat. I hope. It's in the press now, and if I pull it out and find that it's gone wibbly I will be SO sad.
In hindsight I should probably have put the glue onto the first page, not onto the decorative paper. That one's got the grain in the right direction, after all. But I didn't think of this till I was done, so I've had no chance to try it. (I'm so lucky that the pages are of really thick, watercolor-grade paper. Regular printer paper would definitely have gotten sad and soggy under this sudden onslaught of glue.)
Other things I should have done better: cut the decorative paper more precisely. When I was done pressing it into place I realized that it was extending past the edge of the book block.

So I cut it.

It is an imperfect cut. The line of it is visibly not quite straight. The top of the book is no longer unmarred by my amateur efforts with the craft knife. Did I know this would happen? Yes. Did I do it anyway? Yes. Do I regret my actions? No! Regret is for those who lack the strength of their convictions! I regret nothing!
Except maybe not eating. I'm gonna go do that now. But first, let's pull the book out from the press and see how it's looking.


The pages are smooth! There's no wibbliness of soggy paper!!
Unfortunately the glued-together page did develop a bend. Trying to smooth it back out is a no-go, it just opens up this gape between the glued-together pages.


It's bending toward the paper where I applied the glue, since that's the one that expanded with moisture and is now contracting as it dries. Maybe I should have put glue equally on the decorative paper and the first page? Given their grains don't line up, that might have gone poorly actually, but if I ever do this in future I'll give it a go and see what happens. Especially if the grains do line up.
This is the point where I went off to get some sandwiches. Thus fortified, I went and did the last step: paste down the other half of the decorative end papers.
Having seen how the paper expands and contracts with the gluing, I figured, why not just put the paste on the board? I've been doing that for the whole cover and it's been fine. So that's what I did!


Then I realized that the covers were kind of bowed outwards – you can see it in the right-hand photo – and remembered that all the tutorials agree this is inevitable and expected, and the shrinking endpapers are actually supposed to counter that by pulling them back into shape. Whoops! Guess I do need paste on the paper after all!
I still put most of the paste on the board, though. It can handle that better. I tried to put only enough on the paper to get it a little wet, just enough to make a difference. We'll see tomorrow if it worked, I guess! Right now it's in the press, aka my massive stack of books, to wait for the morrow!
But guys. I made a book. I made a BOOK! from scratch!! and it looks so good and feels like a real book and everything!! I did this! me!!
I've always wanted to learn bookbinding, ever since I was a wee little nerd, but there are a lot of things I've always wanted to learn, and this one has both a daunting upfront materials cost and a daunting upfront research cost. however, my sister is a jewel among siblings and gave me for christmas last year a handy dandy bookbinding manual, a block of good paper, and a little bag of tools.
but I still didn't have a suitable workspace, nor any of the many important tools and materials that she didn't include in her gift. so I just read the manual and pined. until maybe a month ago I got fed up with pining, flattened a cardboard box for a cutting mat, and went to town.
and I'm real proud of myself, so here's me rambling, plus photos!
I went to the thrift store and got glue + some fabric to bind the cover, went to Michaels for a paintbrush (and later went back for a metal ruler lmao it's amazing how useful it is to have a straightedge for cutting the paper), and...could not find material for the cover boards. so I went home and pined some more. but the urges were too strong, so after a couple hours of moping I got a stack of printer paper at the grocery store (I could not bring myself to use the good paper for my first, inevitably weak attempts, I just couldn't do it) and started making a little booklet. which was a great idea, it turned out, since it makes for good practice with cutting the paper, measuring things, punching holes in the signatures, etc.
I have a big box of greeting cards from Michaels, which I used for the covers. it didn't feel like I was making a Real Book, so I got some colored paper from the stationery store and used that for end papers.
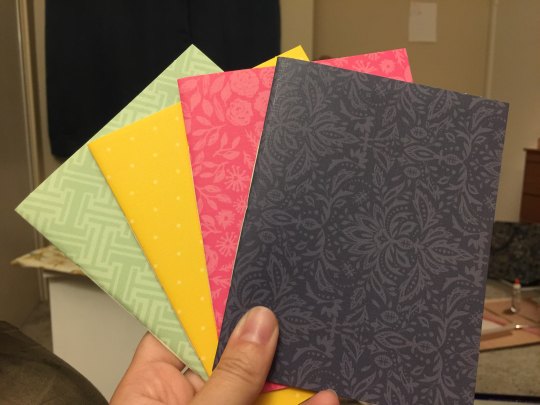
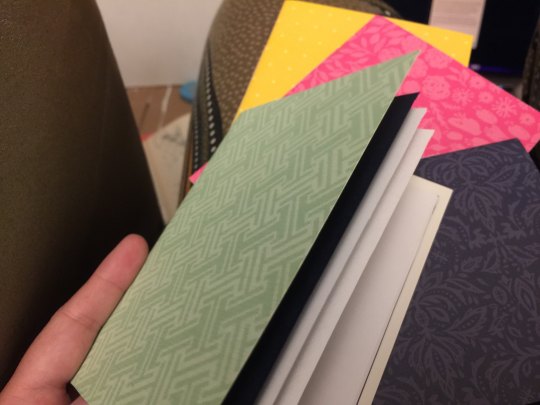
so fancy~
galvanized by this success, I ordered a stack of chipboard online to use for cover boards; and once I was confident that I could cut paper without making it look too stupid (getting that straightedge ruler sure helped lol), I made signatures out of the good paper, left them under some heavy books overnight since I don't have a book press, and then punched holes in them! (huzzah for this nice video on getting the holes right)
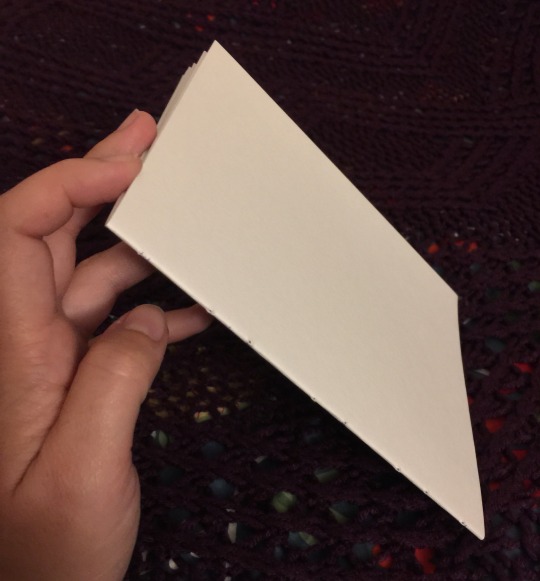
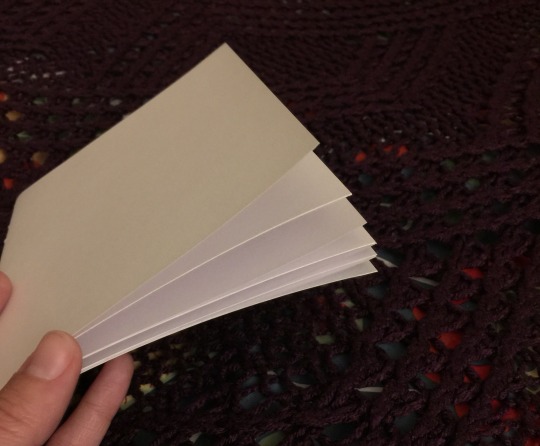
my sister's gift included good linen thread. it's unwaxed, but after some poking around on r/bookbinding it looks like that just means I'll have to be more careful to avoid tangles and keep good tension. I am fine with this. I can be extra attentive. (I considered just running it over a beeswax candle, but one commenter said if your wax has paraffin in it, it could melt in a hot car, ruining the spine. I can't guarantee my candle is 100% beeswax, I didn't make it, so maybe we just move on.)
I don't have good linen fabric to use for the tapes, but the important part there is that the fabric be thin, sturdy, and not stretchy. the probably-cotton I got from the thrift store fits the bill, so it'll do!
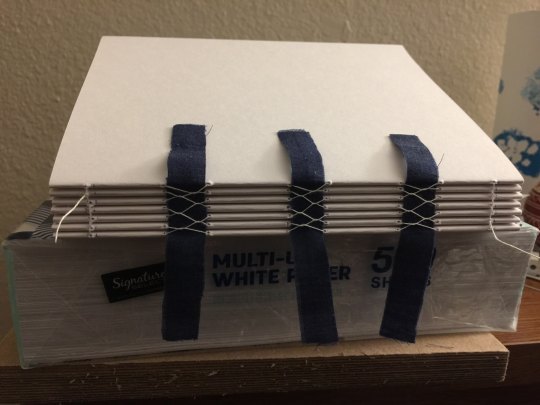
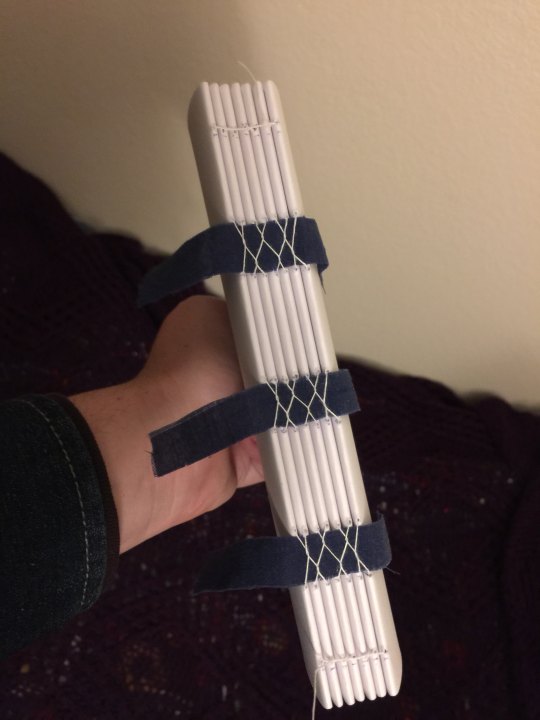
this is a french link stitch, which I got from this exceedingly good tutorial. apparently it's strong enough on its own that for a book of this size, I don't actually need tapes, but I'd already cut the things so eh here we are. and tapes plus french link will make it a stronger binding still (according to a friendly redditor on r/bookbinding), so we carry on.
specifically we carry on to the gluing step. now as I mentioned, I do not have a book press, and you....kinda need one for this step. you need to hold the book block in place with the signatures facing upwards, pressed together hard enough that the glue won't run down between them and stick the pages together (though you do want the glue to get between them just a little, just for like a 16th of an inch). you at least need some clamps and a couple boards to sandwich the book block with.
but you know what? I'm not a professional, this is my first ever book, if it's a little bit off it'll be fine. so we grab all the heaviest books off the bookshelf and improvise.
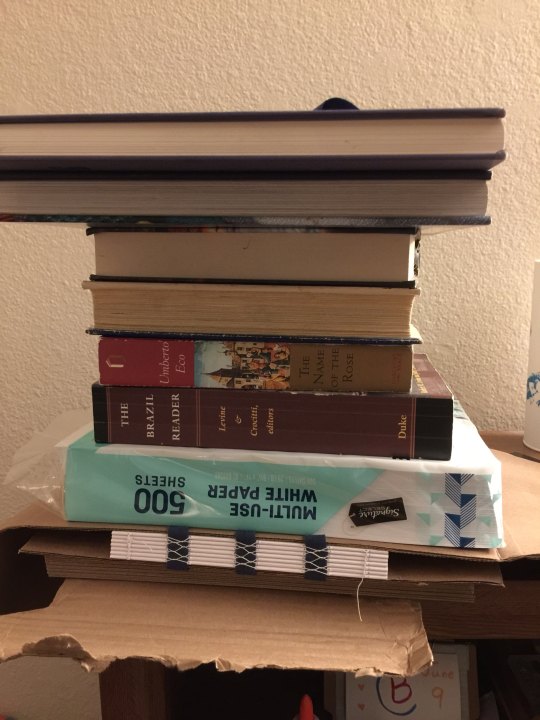
it's fine! I'm sure it's fine! and just in case it's not, I've tucked a bit of cardboard underneath to catch any glue that drips down so it won't land on the floor. see? I'm prepared! I'm acing this.
and actually, it really was fine. I used clear elmer's glue, applied with a flat paintbrush from the art supplies aisle at Michael's, and frankly I liked the way the flat paintbrush let me slip glue in between the signatures. I did poke around on a couple bookbinding sites to see what kind of glue I should use, and the gist is that although there are better options than this, elmer's glue is perfectly serviceable, and the main downside is it's not archival grade. but I don't need my first bookbinding attempts to last 200 years, that's fine.
the next step is to add the mull. mull is a specific type of fabric – extremely loose-weave linen – and the idea is to paste it down over the spine to essentially hold the tapes and signatures all in place in relation to each other.
but I don't have mull! so I'm using more of the thrift store probably-cotton, because it's thin enough and not really stretchy at all. I'm sure this will be fine too. I painted a layer of glue onto the spine, then left it to dry a bit while I measured and cut the fabric, then painted a generous stripe of glue down the center, where it'll affix onto the spine. then I added a bit more glue to the spine, just to be sure, and pressed the mull into place, rubbing it thoroughly to make sure it's firmly affixed to every signature, with no creases in the fabric or air bubbles beneath it.
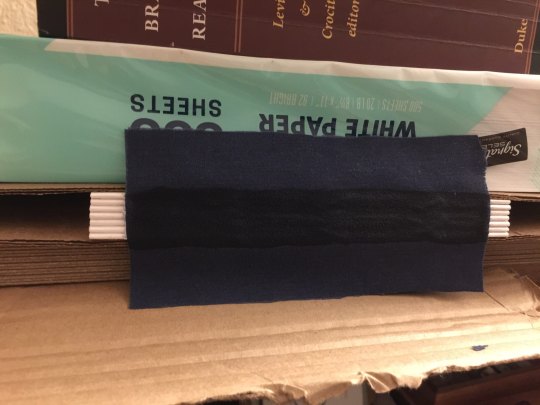
honestly I might have overdone it on the glue. I've never done this before, I don't know! I think it's okay, though – I tried not to ever let it become a thick layer, just a slight coating, since the danger of too much glue is that it might crack once dry and weaken the spine.
and now we leave it in the press overnight to dry, and pick up the next step in the morning!
#finx rambles#finx makes stuff#bookbinding#morning reblog will have stuff I wish I'd done differently/will do better next time#but I'm delighted to report it's mostly small stuff!#I did a great job actually! these tutorials were all really thorough! the book is great!
582 notes
·
View notes
Photo


Walden, by Henry David Thoreau, In Slipcase, Illustrated by Aldren Watson, c1940s
2 notes
·
View notes
Text
homemade bookbinding paste
To make a thick, smooth paste, measure 1 1/2 cups of cold water into a saucepan. Measure 4 tablespoons of plain white wheat flour into a separate container. Add the flour to the cold water a little at a time, beating it in thoroughly with an egg beater. Put the saucepan over medium heat and stir the mixture constantly while the water is brought to a boil ... When it reaches the boil, remove it from the heat and allow the mixture to cool. This paste can be thinned to any desired consistency by adding water that has been boiled and cooled.
~~ from aldren a. watson's hand bookbinding: a manual of instruction
7 notes
·
View notes
Photo


The Song of Songs decorated by Aldren Watson for the Peter Pauper Press, published 1944
46 notes
·
View notes
Text
[PDF] Hand Bookbinding: A Manual of Instruction - Aldren A. Watson
Download Or Read PDF Hand Bookbinding: A Manual of Instruction - Aldren A. Watson Free Full Pages Online With Audiobook.

[*] Download PDF Here => Hand Bookbinding: A Manual of Instruction
[*] Read PDF Here => Hand Bookbinding: A Manual of Instruction
Before the advent of modern mass-production methods, books were bound by hand to remarkably high standards of quality. Beautiful and durable, they appealed to book lovers who appreciated not only a book's content but also the quality and craftsmanship of its binding. Unfortunately, the introduction of machine-binding methods, while making books widely available at reasonable prices, also largely curtailed the art and craft of making fine books by hand.This expert guide offers a solution. In its pages, craftspeople can learn the traditional methods of bookbinding and produce high-quality hand-bound books themselves. Thorough, detailed instructions, with over 270 helpful illustrations by the author, cover materials, tools, and equipment (including making your own); fundamental procedures and technical methods; rebinding an old book; making a slipcase, and other essentials. Also included are well-illustrated, step-by-step directions for eight binding projects: dust jacket; blank book,
0 notes
Text
PDF Hand Bookbinding: A Manual of Instruction EBOOK -- Aldren A. Watson
EPUB & PDF Ebook Hand Bookbinding: A Manual of Instruction | EBOOK ONLINE DOWNLOAD
by Aldren A. Watson.

Download Link : DOWNLOAD Hand Bookbinding: A Manual of Instruction
Read More : READ Hand Bookbinding: A Manual of Instruction
Ebook PDF Hand Bookbinding: A Manual of Instruction | EBOOK ONLINE DOWNLOAD Hello Book lovers, If you want to download free Ebook, you are in the right place to download Ebook. Ebook Hand Bookbinding: A Manual of Instruction EBOOK ONLINE DOWNLOAD in English is available for free here, Click on the download LINK below to download Ebook Hand Bookbinding: A Manual of Instruction 2020 PDF Download in English by Aldren A. Watson (Author).
Description
Before the advent of modern mass-production methods, books were bound by hand to remarkably high standards of quality. Beautiful and durable, they appealed to book lovers who appreciated not only a book's content but also the quality and craftsmanship of its binding. Unfortunately, the introduction of machine-binding methods, while making books widely available at reasonable prices, also largely curtailed the art and craft of making fine books by hand.This expert guide offers a solution. In its pages, craftspeople can learn the traditional methods of bookbinding and produce high-quality hand-bound books themselves. Thorough, detailed instructions, with over 270 helpful illustrations by the author, cover materials, tools, and equipment (including making your own); fundamental procedures and technical methods; rebinding an old book; making a slipcase, and other essentials. Also included are well-illustrated, step-by-step directions for eight binding projects: dust jacket; blank book,
0 notes
Text
Read Hand Bookbinding: A Manual of Instruction EBOOK BY Aldren A. Watson
Download Or Read PDF Hand Bookbinding: A Manual of Instruction - Aldren A. Watson Free Full Pages Online With Audiobook.

[*] Download PDF Here => Hand Bookbinding: A Manual of Instruction
[*] Read PDF Here => Hand Bookbinding: A Manual of Instruction
0 notes
Text
Acknowledgements And References
I like to give credit where credit is due. These are the acknowledgements and references for the information in my book, Hand Tool Basics. I'm a self-taught woodworker. That really means I had many teachers, the many live demonstrators and authors of books, videos, and magazine, online forum, mailing list, and website articles who have provided useful information.
Use the information I provide as a starting point. There's plenty more than what I cover; woodworking is a global activity with centuries of history, creating an infinite variety of techniques. I hope that I'll give you the skills and knowledge to be able to assess and incorporate any new information you find.
In general, the tools and methods I show in the book follow American and English woodworking styles. Continental European and Asian styles share many of the same techniques, but there are some differences in the tools. Where information is available, I strive to show historically accurate methods. In general it's safe to assume everything I show has at least 100 years of history. Some things have 2 or 3 hundred. Dovetails date back to the ancient Egyptians.
We are but the custodians of knowledge, passing it on to the next generation.
Acknowledgements
Below is the list of my teachers, in roughly chronological order. These are my primary references. They offer a range of perspectives that don't always agree with each other but still manage to get the job done, showing that it's worthwhile to look at the variety of techniques available.
If you'd like further information on any of the topics I cover in the book, I highly recommend seeking out their work, or even better, a chance to spend time with them in classes or demos. It's always good to have an opportunity to watch someone closeup and drink in the details. Just one new detail about an otherwise familiar technique can make it worthwhile.
My memberships in the Society of American Period Furniture Makers (SAPFM) and the Guild of New Hampshire Woodworkers (GNHW), as well as the Lie-Nielsen Open Houses and Hand Tool Events, have given me a number of opportunities to meet and watch some of them.
Don Weber: Don's cover story in the April, 2004 issue of Popular Woodworking is what set me off down this path. He built a table from a log using nothing but hand tools. I was absolutely enthralled. It took me a few years of fumbling around to gain traction, until I started following…
Christopher Schwarz: As the editor of Popular Woodworking, it was Chris' articles on hand tools that put me on the road to success, in particular his articles on sharpening and planing. His books and videos form the core of my woodworking library. He went on to found Lost Art Press, where he continues to publish excellent books and videos on hand tool woodworking. He changed my woodworking forever, and gave me the knowledge to start appreciating other teachers, like…
Roy Underhill: When I first saw Roy's PBS show The Woodwright's Shop, long before I knew anything about hand tools, I thought this guy was bouncing off the walls like a superball shot from a cannon. But once I started learning, I realized every episode was crammed with a breathtaking amount of pure gold. His books and DVDs are another core component of my library. While I'll never be the showman he is and be able to do a half-hour video in one take, I've taken a number of cues from his show in my instructional format.
Philip C. Lowe: I've been following Phil's articles for as long as I have Chris Schwarz's. He's what I call a museum-class woodworker, because when museums need to restore or reproduce a finely detailed period furniture piece, he's at the top of the list. He ran the furniture-making program at Boston's North Bennet St. School for 5 years before starting his own Furniture Institute of Massachusetts, and is the winner of the SAPFM 2005 Cartouche Award. I got to know him when he gave a series of live demonstrations to SAPFM members on building several magnificent furniture pieces.
Michael Dunbar: Mike ran the Windsor Institute in New Hampshire, where he taught chairmaking. He's published a number of articles in Popular Woodworking. He takes a very no-nonsense attitude, as exemplified by his "Sensible Sharpening" method of sandpaper on flat substrate. His repeated frustration at having students show up to classes with basic tools they didn't know how to sharpen or use was what led me to start teaching. My goal was to provide that basic knowledge so people could get on with the more advanced topics of the specialized classes offered by others.
Charles H. Hayward: One of Chris Schwarz's heroes, Hayward was editor and "one-man publishing phenomenon" of The Woodworker from 1936 to 1966. He wrote a number of practical books that are simply spectacular. Anything you can find by him, don't hesitate, just get it! In fact, Chris has since anthologized several volumes of his writings from The Woodworker.
Robert Wearing: Wearing, another of Schwarz's heroes and an acquaintance of Hayward in Hayward's later years, wrote an excellent book that has been re-released by Lost Art Press. This was the source of the three classes of saw cuts terminology.
Bernard E. Jones: Jones wrote two encyclopedic books in the 1910's-20's which have been reprinted several times, one of which is now available from Popular Woodworking.
Garrett Hack: Garrett is a professional woodworker and author in Vermont. I've always loved his designs. He's a master of unique stylistic details done with hand tools.
Jim Kingshott: Kingshott was a British woodworker who put out several outstanding books and videos in the 1990's. He's like your favorite uncle. But of course, Bob's your uncle!
Adam Cherubini: Adam's "Arts And Mysteries" column in Popular Woodworking was a huge influence on my work. With his emphasis on 18th-century work, he showed me I could do everything by hand starting from the raw lumber, and taught me how to use wooden handplanes.
Patrick Leach: Patrick is one of the Internet's premier antique tool sellers, with everything from $20 user planes to $10,000 collector's items. He's partly responsible for the unusually large number of chisels you see on my tool wall; his house is dangerously close to mine. But he's also the definitive reference for information on antique Stanley tools. His website www.Supertool.com is encyclopedic, covering the entire line from the late 1800's through the first half of the 20th century.
Pete Taran: Like Patrick, Pete is another encyclopedic source of antique tool information, this time on saws at www.VintageSaw.com.
Erik Von Sneidern: And like Pete, Erik is another antique saw specialist, focusing exclusively on Disston saws at his Disstonian Institute, http://ift.tt/2po3vGB.
Aldren A. Watson: Watson was a professional woodworker, author, and illustrator in Vermont.
Lie-Nielsen Staff: YouTube videos from founder Thomas Lie-Nielsen and demonstrators like Deneb Pulchalski, along with live demonstrations at their Hand Tool Events, cover a great deal about how to use and maintain their tools. I think this educational component is an important part of the company's success, completing the connection with their customers.
Alan Breed: Al is another museum-class woodworker. He's the guy high-end auction houses call when they want a reproduction of an antique that's on the block for millions of dollars, so the sellers will have something to fill the empty spot. He runs the The Breed School in New Hampshire, and is the winner of the SAPFM 2012 Cartouche Award. For a number of years, he's been incredibly generous sharing his time and knowledge in a series of live demonstrations to the GNHW Period Furniture Group on building period pieces.
Paul Sellers: Paul is a British woodworker who put out an excellent book and DVD series. He used to run New Legacy School of Woodworking in Penrhyn Castle, North Wales, possibly one of the coolest school venues around. He's another very no-nonsense guy, attempting to demystify the craft and bring it to the masses without complicated methods.
Christian Becksvoort: Christian is a professional woodworker and magazine author in Maine who specializes in hand tool work.
Peter Galbert: Peter is a professional chair maker in Massachusetts. He's also an inventor, creating several very useful tools and versions of existing tools. He was the one who showed me how to get the most out of a wooden spokeshave, and watching his YouTube videos resulted in a huge improvement in my turning skills on the lathe.
References Some of these may be difficult to find because they're out of print. But they may be available used or as reprints.
Books (including a few useful references from authors not listed above)
Bickford, Matthew Sheldon
Mouldings In Practice, 2012
Blackburn, Graham
Jigs & Fixtures For The Hand Tool Woodworker, 2014
Fine Woodworking
Working With Handplanes, 2005
Hampton, C.W., and Clifford, E.
Planecraft: Hand Planing By Modern Methods, 1934
Hayward, Charles H.
Cabinet Making For Beginners, 1948 (several editions)
The Junior Woodworker, 1952 (don't let the title fool you, it's for any beginner!)
Woodwork Joints, Revised Edition, 1979
Hoadley, R. Bruce
Understanding Wood, 2000
Hock, Ron
The Perfect Edge: The Ultimate Guide To Sharpening For Woodworkers, 2009
Jones, Bernard E.
The Complete Woodworker, 1920?
The Practical Woodworker, 1920? (reissued as a 4-volume set)
Kingshott, Jim
The Workshop, 1993
Sharpening: The Complete Guide, 1994
A Woodworker's Guide To Joints, 1998
Krenov, James
The Fine Art Of Cabinetmaking, 1977
Laughton, Ralph
Success With Joints, 2005
Popular Woodworking
Hand Tool essentials, 2007
Rae, Andy
Choosing & Using Hand Tools, 2002
Schwarz, Christopher
Workbenches: From Design & Theory to Construction & Use, 2007
The Joiner And Cabinet Maker, 2009 (with Joel Moskowitz, update of 1839 anonymous original)
Handplane Essentials, 2009
Sellers, Paul
Working Wood, 2011 (also available as a set with 7 DVD's listed below)
Underhill, Roy
The Woodwright's Shop: A Practical Guide to Traditional Woodcraft, 1981
The Woodwright's Companion: Exploring Traditional Woodcraft, 1983
The Woodwright's Work Book: Further Explorations in Traditional Woodcraft, 1986
The Woodwright's Eclectic Workshop, 1991
The Woodwright's Apprentice: 20 Favorite Projects From The Woodwright's Shop, 1996
The Woodwright's Guide: Working Wood with Wedge & Edge, 2008
Watson, Aldren A.
Hand Tools: Their Ways And Workings, 1982
Wearing, Robert
The Essential Woodworker, 2010
Whelan, John M.
The Wooden Plane: Its History, Form, And Function, 1993
Videos
Kingshott, Jim
Bench Planes, 1996
Special Planes, 1996
Mortise & Tenon, 1996
Dovetails, 1996
Schwarz, Christopher
Coarse Medium & Fine, 2005
Building Furniture With Hand Planes, 2007
Handplane Basics: A Better Way To Use Bench Planes, 2009
Sellers, Paul (available as a set with his book above)
Working Wood: Woodworking Essentials 1 and 2, 2011
Working Wood: Master Sharpening, 2011
Working Wood: Master European Workbenches, 2011
Working Wood: Master Housing Dadoes, 2011
Working Wood: Master Mortise & Tenons, 2011
Working Wood: Master Dovetails, 2011
Underhill, Roy
The Woodwright's Shop, Seasons 1-31 (and counting, starting in 1980)
Online Forums
These are an excellent way to join with like-minded people to learn and discuss hand tools, their use, and how to deal with problems. In fact, as my skills developed, it was seeing the questions posted on these from beginners struggling through the same learning curve I had climbed that motivated me to put together a video course and book. Some forums are extremely active. Participation is global, with people coming from all different cultural backgrounds.
I found these to be a great asset in my learning. Just be prepared for a wide range of information, often conflicting! You'll have to learn to sort through it. That's where I came up with the concept for my "Fistfights And Fundamentals" segments.
These are moderated forums to ensure that everyone stays on their good behavior, but discussions can get heated and feelings can get hurt. Read their policies and spend some time lurking (Internet-speak for reading without responding) before you join in. Don't take things personally, and don't make things personal. Be polite. Remember that different people have different experience, training, and opinions.
There are others besides these, in English and many other languages, as well as Facebook groups such as Unplugged Woodworkers.
www.SawmillCreek.com (US) - Neanderthal Haven forum.
www.WoodNet.com (US) - Woodworking Hand Tools forum.
www.LumberJocks.com (US) - Hand Tools forum.
www.UKWorkshop.co.uk (UK) - Hand Tools forum.
www.WoodworkUK.co.uk (UK) - Hand Tools forum.
http://ift.tt/1gMW5Bf (Australia) - Hand Tools - Unpowered forum.
p.p1 {margin: 0.0px 0.0px 0.0px 0.0px; font: 12.0px Helvetica} p.p2 {margin: 0.0px 0.0px 0.0px 0.0px; font: 12.0px Helvetica; min-height: 14.0px} span.s1 {text-decoration: underline}
Thank You To The MBTA! Finally, I'd like to thank the MBTA. Other than the shop work and photography, I did nearly all the work for this book and the original video series while riding the Commuter Rail. Yes, I wrote a book on the train! I did all the video editing, photo selection, and writing on my Mac laptop an hour each way to and from work in Boston. Thank you to all the folks who took care of my commute and gave me a safe, warm place where I could focus on woodworking!
from Close Grain http://ift.tt/2DGFAFo
1 note
·
View note
Photo

The Jungle Book, 1948, Rudyard Kipling, Vol 1 & 2, Illustrated by Aldren Watson, Doubleday and Co. Hardcover Collection
#the jungle books#rudyard kipling#book set#aldren watson#doubleday#collection#gift for him#christmas gift#mawgli#VTG 1948 books#green book#etsyseller#etsyshop#etsyfinds
0 notes