#540x540
Explore tagged Tumblr posts
Visit Tumblr Blog
Explore Tumblr blogs with no restrictions, modern design and the best experience.
Last Seen Tumblr Blogs


Fun Fact
Users from the US are the majority of Tumblr visitors.
Text

#persona 3#p3d#persona 3 dancing moon night#makoto yuki#mass destruction#flashing light#gif#gifsmade#7.5mb#540x540
8 notes
·
View notes
Text


THE LORD OF THE RINGS || THE TWO TOWERS
#aragorn#brego#tolkienedit#lotredit#tttedit#lotr#ttt#lord of the rings#the two towers#filmedit#*#540x540 why did i ever forsake you#tw blood
1K notes
·
View notes
Text


<3
#peterick#pete wentz#patrick stump#fob#fall out boy#mania#peterickedit#petewentzedit#patrickstumpedit#fobedit#*fob#*#not a fan of these but whatever#this is literally my favorite interview of theirs. like this one + the snack wars one + all of the dnp ones are all overplayed by me#i've watched it like 15 times there's no taking it away from me#mania era my love <3#didn't size the gifs right don't look#it's just ingrained in my brain to make them 540x540#i don't want to pull up the cheat sheet when my computer is about to breakdown over photoshop simply being open
299 notes
·
View notes
Text


DAWSON'S CREEK (1998-2003) Season 3, Episode 1 - Like a Virgin
#dawson's creek#dawsonscreekedit#joey potter#pacey witter#pacey x joey#teendramaedit#filmtv#tvandfilm#tvfilmsource#filmtvdaily#dailytvfilmgifs#cinemapix#cinematv#chewieblog#userbbelcher#userstream#*#gifs#my set for this episode wasn't 540x540 i had to fix my ways
237 notes
·
View notes
Text


#legion#mass effect#omegamedits#can you believe!!!#i'm back with the noise filter :D#though i'm not sure about image sizes#it's 540x540#is that enough
76 notes
·
View notes
Text
POV you're the insect on the wall, that nobody dares to move
#xdinarynet#xdinary heroes#jungsu#o.de#jun han#*m.gif#kbandsnet#useroro#rosieblr#awekslook#usertheos#megtag#kpopccc#malegroupsnet#jype why make the proportions of this video so annoying#I can't make my 540x540 gifs like this
305 notes
·
View notes
Text


First time in a bathroom stall, definitely not the last. Butcher & Hughie | The Boys S01E01
#i should make one of all the times they're in bathrooms together (so many instances oh my god you two)#hughie campbell#jack quaid#billy butcher#karl urban#the boys#cara gifs#like honestly#with other characters it's like#but how will i fit them into a 540x540??#but not these two#always so goddamn close#i'm losing my mind#just touching each other casually#RIGHT AWAY#this is like their second meeting#also that thumbs up is SO just jack quaid jesuschrist
338 notes
·
View notes
Text
"If you would heed my call, prove now your worth."
Savan the Ancient Arisen | Dragon's Dogma (2012)
#savan#dragon's dogma#ddedit#dragon'sdogmaedit#dailygaming#videogamemen#gamingnetwork#gameplaydaily#gamingedit#videogameedit#vgedit#gameedit#gifs#miss shania makes an edit#m: ddogma#today i learned to not make 540x540 gifs of this game#but have this crunchy boah nonetheless#savan my beloved
33 notes
·
View notes
Text
turning on the shorten long posts feature has really changed my life bc why is every gifset nowadays 10000 miles long
5 notes
·
View notes
Text
#“We are afraid to care too much#for the fear the other person does not care at all” - Eleanor Roosevelt [540x540]
13 notes
·
View notes
Note
brought him here to wish a good night and a good week 🥰💕
Yknow what Esme, I seriously love this set so much. I love him so much and I miss him so much... this is by far my most favorite set of him <3 I thank you for your service for this lovely set! I wish you the same and a calm week ahead of you filled with much happiness :)

#asked#itsallaboutzayn#I am debating with myself IF I should gif his handsome face in 540x540#esme 🍬#take care of yourself and stay hydrated ♥️
2 notes
·
View notes
Text
FINALLY
#maja talks#I tried to post these like four times and tumblr just would not let the be on the dash#so enjoy 540x520 gifs instead of 540x540 :/
0 notes
Note
sorry for spamming so many destined with u sets 😭😭 but this show is so good!!! if u have time you should absolutely watch it 🫶
no pls its totally fine !!! it looks so cute and the gifsets u reblogged were freaking stunning im definitely gonna watch <3
1 note
·
View note
Text

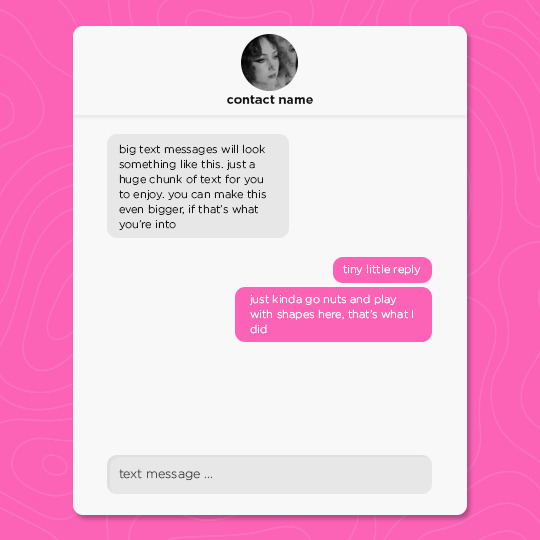


GOOD LUCK BABE! a social media template
I return from the depths with a new and improved social media template. this template includes a lot; an instagram account, post, and story, a text message conversation, a smaller text, a music library, a music player, a tweet, and a camera roll. you need some basic photoshop skills in order to use this template, as it uses a lot of clipping masks and solid color layer styles. feel free to go crazy and adjust anything to your liking. you can download the template here, or by clicking the link in the source. as always, please reblog and credit me if you use this template ♡
INFO
size: 540x540
fonts: gotham bold and light regular
#social media template#instagram template#rph#psd templates#my edits#my templates#idk why im suddenly like. Producing Content. but here we are#these are always so fun to make
1K notes
·
View notes
Text

Someone asked me how I created the fade transition in this gifset which I’ll try to explain in the most comprehensive way that I can. If you've never done something like this before, I suggest reading through the full tutorial before attempting it so you know what you'll need to plan for.
To follow, you should have:
basic knowledge of how to make gifs in photoshop
some familiarity with the concept of how keyframes work
patience
Difficulty level: Moderate/advanced
Prep + overview
First and foremost, make the two gifs you'll be using. Both will need to have about the same amount of frames.
For ref the gif in my example is 540x540.
I recommend around 60-70 frames max total for a big gif, which can be pushing it if both are in color, then I would aim for 50-60. My gif has a total of 74 frames which I finessed using lossy and this will be explained in Part 4.
⚠️ IMPORTANT: when overlaying two or more gifs and when using key frames, you MUST set your frame delay to 0.03 fps for each gif, which can be changed to 0.05 fps or anything else that you want after converting the combined canvas back into frames. But both gifs have to be set to 0.03 before you convert them to timeline to avoid duplicated frames that don't match up, resulting in an unpleasantly choppy finish.
Part 1: Getting Started
Drag one of your gifs onto the other so they're both on the same canvas.
The gif that your canvas is fading FROM (Gif 1) should be on top of the gif it is fading INTO (Gif 2).

And here's a visual of the order in which your layers should appear by the end of this tutorial, so you know what you're working toward achieving:

Part 2: Creating the grid
Go to: View > Guides > New guide layout
I chose 5 columns and 5 rows to get the result of 25 squares.

The more rows and columns you choose, the more work you'll have to do, and the faster your squares will have to fade out so keep that in mind. I wouldn't recommend any more than 25 squares for this type of transition.

To save time, duplicate the line you've created 3 more times, or as many times as needed (key shortcut: CMD +J) and move each one to align with the guides both horizontally and vertically. You won't need to recreate the lines on the edges of the canvas, only the ones that will show.
After you complete this step, you will no longer need the guides so you can go back in and clear them.

Follow the same duplicating process for the squares with the rectangle tool using the lines you've created.
Align the squares inside the grid lines. The squares should not overlap the lines but fit precisely inside them.
This might take a few tries for each because although to the eye, the squares look all exactly the same size, you'll notice that if you try to use the same duplicated square for every single one without alterations, many of them will be a few pixels off and you'll have to transform the paths to fit.
To do this go to edit > transform path and hold down the command key with the control key as you move one edge to fill the space.
Once you're done, put all the squares in their separate group, which needs to be sandwiched between Gif 1 and Gif 2.

Right click Gif 1 and choose "create clipping mask" from the drop down to mask it to the squares group. This step is super important.
After this point, I also took the opacity of the line groups down to about 40% so the lines wouldn't be so bold. Doing this revealed some squares that needed fixing so even if you aren't going dim the lines, I recommend clicking off the visibility of the lines for a moment to make sure everything is covered properly.

Part 3A: Prep For Key framing
I wanted my squares to fade out in a random-like fashion and if you want the same effect, you will have to decide which squares you want to fade out first, or reversely, which parts of Gif 2 you want to be revealed first.
In order to see what's going on underneath, I made Gif 1 invisible and turned down the opacity of the squares group.

If you want text underneath to be revealed when the squares fade away, I would add that now, and place the text group above Gif 2, but under the squares group.

Make a mental note that where your text is placed and the order in which it will be revealed is also something you will have to plan for.
With the move tool, click on the first square you want to fade out. Every time you click on a square, it will reveal itself in your layers.
I chose A3 to be the first square to fade and I'm gonna move this one to the very top of all the other square layers.
So if I click on D2 next, that layer would need to be moved under the A3 layer and so on. You'll go back and forth between doing this and adding key frames to each one. As you go along, it's crucial that you put them in order from top to bottom and highly suggested that you rename the layers (numerically for example) which will make it easier to see where you've left off as your dragging the layers into place.

Part 3B: Adding the Keyframes
This is where we enter the gates of hell things become tedious.
Open up the squares group in the timeline panel so you can see all the clips.
Here is my example of the general pattern that's followed and its corresponding layers of what you want to achieve when you're finished:

So let’s try it!
Expand the control time magnification all the way to the right so you can see every frame per second.

As shown in Part 3A, select your first chosen square.
Where you place the time-indicator on the panel will indicate the placement of the keyframe. Click on the clock next to opacity to place your first keyframe.

Move the time-indicator over 3 frames and place the next key frame.

Things to consider before moving forward:
Where you place your very first keyframe will be detrimental. If you're using a lot of squares like I did, you may have to start the transition sooner than preferred.
If you're doing 25 squares, the key frames will have to be more condensed which means more overlapping because more frames are required to finish the transition, verses if you're only using a 9-squared grid. See Part 4 for more detailed examples of this.
The opacity will remain at 100% for every initial key frame, and the second one will be at 0%.

Instead of creating two keyframes like this and changing the opacities for every single clip, you can copy the keyframes and paste them onto the other clips by click-dragging your mouse over both of them and they'll both turn yellow. Then right click one of the keyframes and hit copy.
Now drop down to your next clip, move your time-indicator if necessary to the spot where the first keyframe will start and click the clock to create one. Then right click it and hit "paste".


Tip: When you have both keyframes selected, you can also move them side to side by click-dragging one of them while both are highlighted.
Your full repetitive process in steps will go as follows:
click on square of choice on the canvas
drag that square layer to the top under the last renamed
in timeline panel: drop down to next clip, move time-indicator tick to your chosen spot for the next keyframe
create new keyframe
right click new keyframe & paste copied keyframes
repeat until you've done this with every square in the group
Now you can change the opacity of your squares layer group back to 100% and turn on the visibility of Gif 1. Then hit play to see the magic happen.
PART 4: Finished examples
Example 1

the transition starts too soon Cause: initial keyframe was placed at frame 0
the squares fade away too quickly Cause: overlapping keyframes, seen below. (this may be the ideal way to go with more squares, but for only 9, it's too fast)

Example 2

more frame time for first gif
transition wraps up at a good point Cause: in this instance, the first keyframe was placed 9 frames in, and the keyframes are not overlapping. The sequential pair starts where the last pair ended, creating a slower fade of each square.


Part 5: Final Tips and Saving
You can dl my save action here which will convert everything back into frames, change the frame rate to 0.05 and open the export window so you can see the size of the gif immediately.
If it's over 10gb, one way to finesse this is by use of lossy. By definition, lossy “compresses by removing background data” and therefore quality can be lost when pushed too far. But for most gifs, I have not noticed a deterioration in quality at all when saving with lossy until you start getting into 15-20 or higher, then it will start eating away at your gif so keep it minimal.

If you've done this and your gif is losing a noticeable amount of quality and you still haven’t gotten it below 10mb, you will have no choice but to start deleting frames.
When it comes to transitions like this one, sometimes you can't spare a single frame and if this is the case, you will have to return to the timeline state in your history and condense the key frames to fade out quicker so you can shorten the gif. You should always save a history point before converting so you have a bookmark to go back to in case this happens.
That's pretty much it, free to shoot me an ask on here or on @jugheadjones with any questions.
#gif tutorial#photoshop tutorial#transition tutorial#grid tutorial#usergif#ps help#tutorials#tutorials*#resources*#requested
420 notes
·
View notes
Note
hello!! I really hope this isn't a rude question, bc I'm genuinely curious. I've been wondering for a while now why people who make gifs from a movie or a show or whatever get upset when somebody else uses the gif in something or want credit for it. Is the process difficult? I'm not 100% how to make a gif but I can't imagine it being that arduous. Anyway like I said not trying to be rude have a good day :D
hey there! it's not a rude question if only because you're asking in the first place instead of just discrediting it.
the thing a lot of people don't understand is how much work actually goes into making a gif, because we don't just plug the video into a gifmaking program and call it a day. a lot of us start JUST with the process of pirating the highest quality video we can find, which can be anywhere from an hour or two of downloading to days at a time (my record is five days for all five seasons of the a-team, but that's a story for another day)
so there's already at least a few hours potentially, just from downloading. granted, we do other things obviously but that's still time that's going into the process.
so you have to download those videos, find the clip you want, and then there are several different methods of getting the clip into whatever program you use (i use photoshop). most of the time i have to reformat the video from .mkv to .mp4, because PS doesn't take .mkv but the highest quality videos are typically in that format. so i put that into a reformatting program, which can take at least another hour depending on how long the file is.
so i've finally got the file ready to go in photoshop, and then i can actually start working on the gif itself. i've now spent at MINIMUM two or three hours just getting this video ready. then i personally clip it down to the exact scene i want it and go from there. if you're just doing a random assortment of scenes, you can choose whatever you want. but if you're doing a scene itself, you have to clip that scene in bursts so you can add the subtitles based off the mouth-movement.
so say you're doing a gifset of your favorite character from a tv show. well, you don't want to just have all of the gifs come from the same episode. so you do the reformatting process all over again. more hours. you do that eight or nine or ten times until you have all the scenes you want. and THEN you can start the actual editing process.
what size should it be depending on what kind of gifset you want to do? 540x540? 540x405? do you just crop it first or should you resize it? the resolution might go down depending on how you resize it. do you know what smart sharpen is, and which levels you should have it on in order to make the scene look the best? what's a smart object? what percentage should your frame rate be so it doesn't look too fast? it's completely different between live action and animation, after all. do you know which colors you should use in the adjustment layers, like selective color? does levels or curves work better for what you're trying to do? how do i get rid of the yellow in this scene so it matches the other gifs? what's the difference between linear contrast and medium contrast? should you use exposure or vibrance to get the shadows you want?
you've done all that, it looks good! you go to export it as a proper gif so you can post it to tumblr. but don't forget your settings on that either! transparency dither, web snap, the amount of colors and what size it should be. you do all that and the gif ends up being over the 10mb limit. so now you have to go back and carefully chip away at the frames until it's under the limit, which means you ultimately have to choose what to sacrifice from that scene so you can properly export it.
so you try again. okay, it's on 9.7MB. that's going to read as 10MB on tumblr. back in you go to chip at it again until it's going to read as 9MB instead. finally. you export the gif, add it to tumblr, and then tumblr doesn't like how it looks when you import it and destroys the quality, so you have to go back and try different export settings until it looks the way you want it.
so you do that nine more times. The Entire Process. downloading and reformatting the .mkv, getting the scene you want, clipping it, resizing and cropping it, coloring it, exporting it, and if you're adding subtitles then it's an entirely new process to add on! and don't forget that if you're doing a mix of scenes, you have to color them all depending on their own lighting, so you're basically doing the process again from scratch.
then you try to think of a fun caption. maybe you want to choose a line you feel best summarizes the character or scene. you put that caption through an HTML formatting program so it can be a gradient (the easiest part!), make the caption look pretty, and then tag it and press send.
you've spent HOURS on this process. literal fucking hours. you've been learning how to carefully manipulate the colors to look good, you know what frame rate looks the best, you have all of your settings saved as .psds.
and then someone right clicks, saves the gif (or just copies it) and posts it to twitter with their own funny little caption.
they get 26k likes, who knows how many retweets, a bunch of new follows. they get all the attention for that gif when they put zero work into it. all they did was write a caption and press send.
you got 400 likes and 165 reblogs on your gifset over on tumblr. maybe you get some tags on it if you're really lucky.
so tell me. wouldn't you be a little frustrated, too?
and just in case anyone wants to try and tell me this doesn't happen, you're welcome to compare the stats on this gifset of godzilla versus the repost on twitter.
#so yes it's a very arduous process#and yes we DO have a skillset that no one really acknowledges#part of the reason i stopped making gifs is simply because they kept getting stolen#and i was tired of seeing it#replies!#and i'm not putting this under a read more so yall can read it yourselves
260 notes
·
View notes