#2021 MacBook Pro
Explore tagged Tumblr posts
Visit Tumblr Blog
Explore Tumblr blogs with no restrictions, modern design and the best experience.
Last Seen Tumblr Blogs


Fun Fact
China blocked Tumblr because of pornography and censorship problems in 2013.
Text
Orbyt Studio / Supply.Family / MacBook Pro (02B) / Mockup / 2021
Download
#orbyt studio#supply.family#macbook pro#02b#mockup#2021#device#digital#glass#laptop#metal#psd#screen
0 notes
Text
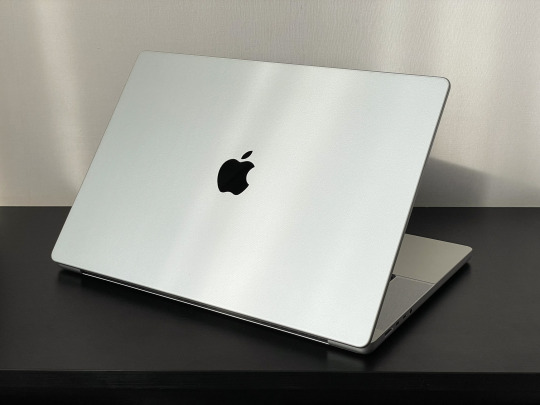
Macbook Pro 2021 cũ
Macbook Pro 2021 cũ hay macbook lướt, macbook đã qua sử dụng là dòng laptop cao cấp của Apple, được trang bị con chip M1 Pro hoặc M1 Max, mang lại hiệu năng vượt trội cho các tác vụ đồ họa, thiết kế, lập trình và chơi game. Macbook Pro 2021 cũ có thiết kế mỏng nhẹ, màn hình Retina 14 inch hoặc 16 inch, bàn phím Magic Keyboard, Touch Bar và Touch ID. Macbook Pro 2021 cũ còn có nhiều cổng kết nối tiện lợi như Thunderbolt 4, HDMI 2.0, MagSafe 3 và khe cắm thẻ SDXC. Macbook Pro 2021 cũ có giá rẻ hơn so với Macbook Pro 2021 mới, nhưng vẫn đảm bảo chất lượng và bảo hành tốt.
Macbook Pro 2021 cũ: Hiệu năng cao với bộ đôi Chip M1 Pro hoặc M1 Max
Macbook Pro 2021 được trang bị con chip M1 Pro hoặc M1 Max, mang lại hiệu năng vượt trội cho các tác vụ đồ họa, thiết kế, lập trình và chơi game. Chip M1 Pro có CPU 10 lõi hoặc 12 lõi, GPU 16 lõi hoặc 19 lõi, Neural Engine 16 lõi và băng thông bộ nhớ 200GB/s. Chip M1 Max có CPU 12 lõi, GPU 30 lõi hoặc 38 lõi, Neural Engine 16 lõi và băng thông bộ nhớ 400GB/s. Cả hai chip đều có Media engine hỗ trợ tăng tốc phần cứng cho các định dạng video H.264, HEVC, ProRes và ProRes RAW.
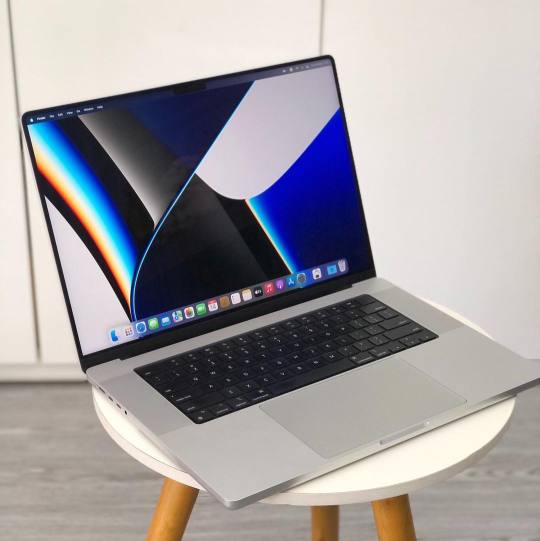
Màn hình 14 và 16 inch sắc nét đáng tiền
Macbook Pro 2021 đã qua sử dụng có hai phiên bản kích thước cho người dùng lựa chọn: 14 inch và 16 inch. Cả hai đều được trang bị công nghệ màn hình Mini LED ấn tượng, màn hình Liquid Retina XDR, với độ sáng XDR 1.000 nit liên tục ở chế độ toàn màn hình, độ sáng đỉnh 1.600 nit (chỉ nội dung HDR) và tỷ lệ tương phản 1.000.000:12. Màn hình còn có công nghệ True Tone điều chỉnh màu sắc theo ánh sáng xung quanh và công nghệ ProMotion với tốc độ làm mới thích ứng l��n đến 120Hz2.
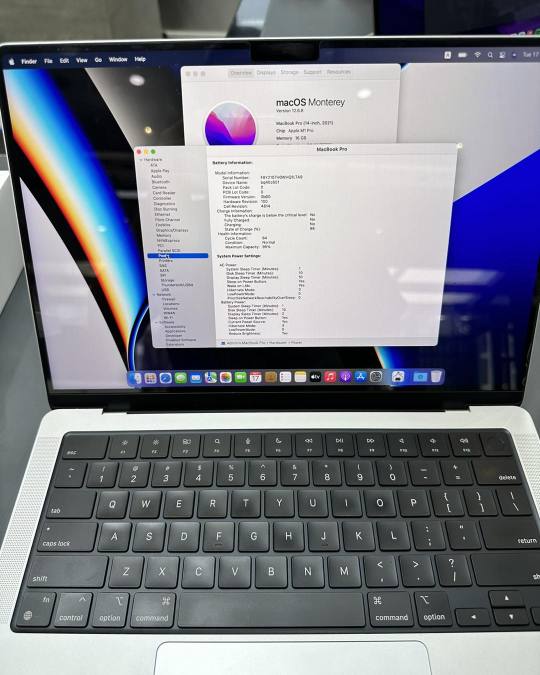
Bộ nhớ:
Macbook Pro 2021 có bộ nhớ thống nhất (Unified Memory) cho phép CPU, GPU và Neural Engine truy cập chung một không gian bộ nhớ để tăng hiệu suất và tiết kiệm điện năng. Bộ nhớ thống nhất có dung lượng từ 16GB đến 96GB, tùy theo chip và cấu hình. Ngoài ra, Macbook Pro 2021 còn có dung lượng lưu trữ SSD từ 512GB đến 8TB, cho phép người dùng lưu trữ nhiều dữ liệu.
Pin và nguồn điện:
Macbook Pro 2021 có pin Li-Po có dung lượng 70 watt-giờ cho phiên bản 14 inch và 100 watt-giờ cho phiên bản 16 inch2. Thời gian sử dụng pin của Macbook Pro 2021 là 18 giờ cho phiên bản 14 inch và 21 giờ cho phiên bản 16 inch khi xem phim trên ứng dụng Apple TV2. Macbook Pro 2021 được sạc qua cổng MagSafe 3 với Bộ Tiếp Hợp Nguồn USB-C có công suất 67W hoặc 96W, tùy theo chip và cấu hình. Macbook Pro 2021 còn có khả năng sạc nhanh với Bộ Tiếp Hợp Nguồn USB-C 96W, cho phép sạc từ 0% đến 50% trong vòng 30 phút.
Kết nối hiện đại đáp ứng nhu cầu người sử dụng
Macbook Pro 2021 cũ có nhiều cổng kết nối tiện lợi như Thunderbolt 4, HDMI, MagSafe 3 và khe cắm thẻ SDXC. Cổng Thunderbolt 4 hỗ trợ sạc, DisplayPort, Thunderbolt 4 (lên đến 40 Gbps) và USB 4 (lên đến 40 Gbps)2. Cổng HDMI hỗ trợ kết nối với màn hình ngoài với độ phân giải lên đến 8K2. Cổng MagSafe 3 hỗ trợ sạc và kết nối với các thiết bị MagSafe2. Khe cắm thẻ SDXC hỗ trợ đọc và ghi dữ liệu từ các thẻ nhớ SD.
Mua macbook pro 2021 cũ giá tốt uy tín
Nếu bạn đang có nhu cầu tìm mua một chiếc Macbook Pro 2021 đã qua sử dụng nhưng còn rất chất lượng, giá tốt nhất thị trường thì có thể ghé qua Macstore để xem trực tiếp sản phẩm bạn nhé.
Liên hệ với chúng tôi:
MacStore chuyên dòng sản phẩm Macbook, iMac, Mac mini, MacPro và phụ kiện Apple. Kho Macbook mới/cũ chính hãng, giá tốt nhất tại TPHCM.
Trung Tâm Mua Sắm Macstore
Địa chỉ: Số 132, Lê Lai, P. Bến Thành, Quận 1, Hồ Chí Minh.
Điện thoại mua sắm - tư vấn: 0935 023 023
Email: [email protected]
Website:
0 notes
Text


Neural Filters Tutorial for Gifmakers by @antoniosvivaldi
Hi everyone! In light of my blog’s 10th birthday, I’m delighted to reveal my highly anticipated gifmaking tutorial using Neural Filters - a very powerful collection of filters that really broadened my scope in gifmaking over the past 12 months.
Before I get into this tutorial, I want to thank @laurabenanti, @maines , @cobbbvanth, and @cal-kestis for their unconditional support over the course of my journey of investigating the Neural Filters & their valuable inputs on the rendering performance!
In this tutorial, I will outline what the Photoshop Neural Filters do and how I use them in my workflow - multiple examples will be provided for better clarity. Finally, I will talk about some known performance issues with the filters & some feasible workarounds.
Tutorial Structure:
Meet the Neural Filters: What they are and what they do
Why I use Neural Filters? How I use Neural Filters in my giffing workflow
Getting started: The giffing workflow in a nutshell and installing the Neural Filters
Applying Neural Filters onto your gif: Making use of the Neural Filters settings; with multiple examples
Testing your system: recommended if you’re using Neural Filters for the first time
Rendering performance: Common Neural Filters performance issues & workarounds
For quick reference, here are the examples that I will show in this tutorial:
Example 1: Image Enhancement | improving the image quality of gifs prepared from highly compressed video files
Example 2: Facial Enhancement | enhancing an individual's facial features
Example 3: Colour Manipulation | colourising B&W gifs for a colourful gifset
Example 4: Artistic effects | transforming landscapes & adding artistic effects onto your gifs
Example 5: Putting it all together | my usual giffing workflow using Neural Filters
What you need & need to know:
Software: Photoshop 2021 or later (recommended: 2023 or later)*
Hardware: 8GB of RAM; having a supported GPU is highly recommended*
Difficulty: Advanced (requires a lot of patience); knowledge in gifmaking and using video timeline assumed
Key concepts: Smart Layer / Smart Filters
Benchmarking your system: Neural Filters test files**
Supplementary materials: Tutorial Resources / Detailed findings on rendering gifs with Neural Filters + known issues***
*I primarily gif on an M2 Max MacBook Pro that's running Photoshop 2024, but I also have experiences gifmaking on few other Mac models from 2012 ~ 2023.
**Using Neural Filters can be resource intensive, so it’s helpful to run the test files yourself. I’ll outline some known performance issues with Neural Filters and workarounds later in the tutorial.
***This supplementary page contains additional Neural Filters benchmark tests and instructions, as well as more information on the rendering performance (for Apple Silicon-based devices) when subject to heavy Neural Filters gifmaking workflows
Tutorial under the cut. Like / Reblog this post if you find this tutorial helpful. Linking this post as an inspo link will also be greatly appreciated!
1. Meet the Neural Filters!
Neural Filters are powered by Adobe's machine learning engine known as Adobe Sensei. It is a non-destructive method to help streamline workflows that would've been difficult and/or tedious to do manually.
Here are the Neural Filters available in Photoshop 2024:


Skin Smoothing: Removes blemishes on the skin
Smart Portrait: This a cloud-based filter that allows you to change the mood, facial age, hair, etc using the sliders+
Makeup Transfer: Applies the makeup (from a reference image) to the eyes & mouth area of your image
Landscape Mixer: Transforms the landscape of your image (e.g. seasons & time of the day, etc), based on the landscape features of a reference image
Style Transfer: Applies artistic styles e.g. texturings (from a reference image) onto your image
Harmonisation: Applies the colour balance of your image based on the lighting of the background image+
Colour Transfer: Applies the colour scheme (of a reference image) onto your image
Colourise: Adds colours onto a B&W image
Super Zoom: Zoom / crop an image without losing resolution+
Depth Blur: Blurs the background of the image
JPEG Artefacts Removal: Removes artefacts caused by JPEG compression
Photo Restoration: Enhances image quality & facial details
+These three filters aren't used in my giffing workflow. The cloud-based nature of Smart Portrait leads to disjointed looking frames. For Harmonisation, applying this on a gif causes Neural Filter timeout error. Finally, Super Zoom does not currently support output as a Smart Filter
If you're running Photoshop 2021 or earlier version of Photoshop 2022, you will see a smaller selection of Neural Filters:


Things to be aware of:
You can apply up to six Neural Filters at the same time
Filters where you can use your own reference images: Makeup Transfer (portraits only), Landscape Mixer, Style Transfer (not available in Photoshop 2021), and Colour Transfer
Later iterations of Photoshop 2023 & newer: The first three default presets for Landscape Mixer and Colour Transfer are currently broken.
2. Why I use Neural Filters?
Here are my four main Neural Filters use cases in my gifmaking process. In each use case I'll list out the filters that I use:

Enhancing Image Quality:
Common wisdom is to find the highest quality video to gif from for a media release & avoid YouTube whenever possible. However for smaller / niche media (e.g. new & upcoming musical artists), prepping gifs from highly compressed YouTube videos is inevitable.
So how do I get around with this? I have found Neural Filters pretty handy when it comes to both correcting issues from video compression & enhancing details in gifs prepared from these highly compressed video files.
Filters used: JPEG Artefacts Removal / Photo Restoration
Facial Enhancement:
When I prepare gifs from highly compressed videos, something I like to do is to enhance the facial features. This is again useful when I make gifsets from compressed videos & want to fill up my final panel with a close-up shot.
Filters used: Skin Smoothing / Makeup Transfer / Photo Restoration (Facial Enhancement slider)
Colour Manipulation:
Neural Filters is a powerful way to do advanced colour manipulation - whether I want to quickly transform the colour scheme of a gif or transform a B&W clip into something colourful.
Filters used: Colourise / Colour Transfer
Artistic Effects:
This is one of my favourite things to do with Neural Filters! I enjoy using the filters to create artistic effects by feeding textures that I've downloaded as reference images. I also enjoy using these filters to transform the overall the atmosphere of my composite gifs. The gifsets where I've leveraged Neural Filters for artistic effects could be found under this tag on usergif.
Filters used: Landscape Mixer / Style Transfer / Depth Blur
How I use Neural Filters over different stages of my gifmaking workflow:
I want to outline how I use different Neural Filters throughout my gifmaking process. This can be roughly divided into two stages:
Stage I: Enhancement and/or Colourising | Takes place early in my gifmaking process. I process a large amount of component gifs by applying Neural Filters for enhancement purposes and adding some base colourings.++
Stage II: Artistic Effects & more Colour Manipulation | Takes place when I'm assembling my component gifs in the big PSD / PSB composition file that will be my final gif panel.
I will walk through this in more detail later in the tutorial.
++I personally like to keep the size of the component gifs in their original resolution (a mixture of 1080p & 4K), to get best possible results from the Neural Filters and have more flexibility later on in my workflow. I resize & sharpen these gifs after they're placed into my final PSD composition files in Tumblr dimensions.
3. Getting started
The essence is to output Neural Filters as a Smart Filter on the smart object when working with the Video Timeline interface. Your workflow will contain the following steps:
Prepare your gif
In the frame animation interface, set the frame delay to 0.03s and convert your gif to the Video Timeline
In the Video Timeline interface, go to Filter > Neural Filters and output to a Smart Filter
Flatten or render your gif (either approach is fine). To flatten your gif, play the "flatten" action from the gif prep action pack. To render your gif as a .mov file, go to File > Export > Render Video & use the following settings.

Setting up:
o.) To get started, prepare your gifs the usual way - whether you screencap or clip videos. You should see your prepared gif in the frame animation interface as follows:

Note: As mentioned earlier, I keep the gifs in their original resolution right now because working with a larger dimension document allows more flexibility later on in my workflow. I have also found that I get higher quality results working with more pixels. I eventually do my final sharpening & resizing when I fit all of my component gifs to a main PSD composition file (that's of Tumblr dimension).
i.) To use Smart Filters, convert your gif to a Smart Video Layer.
As an aside, I like to work with everything in 0.03s until I finish everything (then correct the frame delay to 0.05s when I upload my panels onto Tumblr).
For convenience, I use my own action pack to first set the frame delay to 0.03s (highlighted in yellow) and then convert to timeline (highlighted in red) to access the Video Timeline interface. To play an action, press the play button highlighted in green.

Once you've converted this gif to a Smart Video Layer, you'll see the Video Timeline interface as follows:

ii.) Select your gif (now as a Smart Layer) and go to Filter > Neural Filters

Installing Neural Filters:
Install the individual Neural Filters that you want to use. If the filter isn't installed, it will show a cloud symbol (highlighted in yellow). If the filter is already installed, it will show a toggle button (highlighted in green)

When you toggle this button, the Neural Filters preview window will look like this (where the toggle button next to the filter that you use turns blue)

4. Using Neural Filters
Once you have installed the Neural Filters that you want to use in your gif, you can toggle on a filter and play around with the sliders until you're satisfied. Here I'll walkthrough multiple concrete examples of how I use Neural Filters in my giffing process.
Example 1: Image enhancement | sample gifset
This is my typical Stage I Neural Filters gifmaking workflow. When giffing older or more niche media releases, my main concern is the video compression that leads to a lot of artefacts in the screencapped / video clipped gifs.
To fix the artefacts from compression, I go to Filter > Neural Filters, and toggle JPEG Artefacts Removal filter. Then I choose the strength of the filter (boxed in green), output this as a Smart Filter (boxed in yellow), and press OK (boxed in red).
Note: The filter has to be fully processed before you could press the OK button!

After applying the Neural Filters, you'll see "Neural Filters" under the Smart Filters property of the smart layer

Flatten / render your gif
Example 2: Facial enhancement | sample gifset
This is my routine use case during my Stage I Neural Filters gifmaking workflow. For musical artists (e.g. Maisie Peters), YouTube is often the only place where I'm able to find some videos to prepare gifs from. However even the highest resolution video available on YouTube is highly compressed.
Go to Filter > Neural Filters and toggle on Photo Restoration. If Photoshop recognises faces in the image, there will be a "Facial Enhancement" slider under the filter settings.

Play around with the Photo Enhancement & Facial Enhancement sliders. You can also expand the "Adjustment" menu make additional adjustments e.g. remove noises and reducing different types of artefacts.

Once you're happy with the results, press OK and then flatten / render your gif.
Example 3: Colour Manipulation | sample gifset
Want to make a colourful gifset but the source video is in B&W? This is where Colourise from Neural Filters comes in handy! This same colourising approach is also very helpful for colouring poor-lit scenes as detailed in this tutorial.
Here's a B&W gif that we want to colourise:

Highly recommended: add some adjustment layers onto the B&W gif to improve the contrast & depth. This will give you higher quality results when you colourise your gif.
Go to Filter > Neural Filters and toggle on Colourise.

Make sure "Auto colour image" is enabled.
Play around with further adjustments e.g. colour balance, until you're satisfied then press OK.
Important: When you colourise a gif, you need to double check that the resulting skin tone is accurate to real life. I personally go to Google Images and search up photoshoots of the individual / character that I'm giffing for quick reference.
Add additional adjustment layers until you're happy with the colouring of the skin tone.

Once you're happy with the additional adjustments, flatten / render your gif. And voila!

Note: For Colour Manipulation, I use Colourise in my Stage I workflow and Colour Transfer in my Stage II workflow to do other types of colour manipulations (e.g. transforming the colour scheme of the component gifs)
Example 4: Artistic Effects | sample gifset
This is where I use Neural Filters for the bulk of my Stage II workflow: the most enjoyable stage in my editing process!
Normally I would be working with my big composition files with multiple component gifs inside it. To begin the fun, drag a component gif (in PSD file) to the main PSD composition file.
Resize this gif in the composition file until you're happy with the placement

Duplicate this gif. Sharpen the bottom layer (highlighted in yellow), and then select the top layer (highlighted in green) & go to Filter > Neural Filters

I like to use Style Transfer and Landscape Mixer to create artistic effects from Neural Filters. In this particular example, I've chosen Landscape Mixer
Select a preset or feed a custom image to the filter (here I chose a texture that I've on my computer)

Play around with the different sliders e.g. time of the day / seasons
Important: uncheck "Harmonise Subject" & "Preserve Subject" - these two settings are known to cause performance issues when you render a multiframe smart object (e.g. for a gif)

Once you're happy with the artistic effect, press OK
To ensure you preserve the actual subject you want to gif (bc Preserve Subject is unchecked), add a layer mask onto the top layer (with Neural Filters) and mask out the facial region. You might need to play around with the Layer Mask Position keyframes or Rotoscope your subject in the process.
After you're happy with the masking, flatten / render this composition file and voila!

Example 5: Putting it all together | sample gifset
Let's recap on the Neural Filters gifmaking workflow and where Stage I and Stage II fit in my gifmaking process:
i. Preparing & enhancing the component gifs
Prepare all component gifs and convert them to smart layers
Stage I: Add base colourings & apply Photo Restoration / JPEG Artefacts Removal to enhance the gif's image quality
Flatten all of these component gifs and convert them back to Smart Video Layers (this process can take a lot of time)
Some of these enhanced gifs will be Rotoscoped so this is done before adding the gifs to the big PSD composition file
ii. Setting up the big PSD composition file
Make a separate PSD composition file (Ctrl / Cmmd + N) that's of Tumblr dimension (e.g. 540px in width)
Drag all of the component gifs used into this PSD composition file
Enable Video Timeline and trim the work area
In the composition file, resize / move the component gifs until you're happy with the placement & sharpen these gifs if you haven't already done so
Duplicate the layers that you want to use Neural Filters on
iii. Working with Neural Filters in the PSD composition file
Stage II: Neural Filters to create artistic effects / more colour manipulations!
Mask the smart layers with Neural Filters to both preserve the subject and avoid colouring issues from the filters
Flatten / render the PSD composition file: the more component gifs in your composition file, the longer the exporting will take. (I prefer to render the composition file into a .mov clip to prevent overriding a file that I've spent effort putting together.)
Note: In some of my layout gifsets (where I've heavily used Neural Filters in Stage II), the rendering time for the panel took more than 20 minutes. This is one of the rare instances where I was maxing out my computer's memory.
Useful things to take note of:
Important: If you're using Neural Filters for Colour Manipulation or Artistic Effects, you need to take a lot of care ensuring that the skin tone of nonwhite characters / individuals is accurately coloured
Use the Facial Enhancement slider from Photo Restoration in moderation, if you max out the slider value you risk oversharpening your gif later on in your gifmaking workflow
You will get higher quality results from Neural Filters by working with larger image dimensions: This gives Neural Filters more pixels to work with. You also get better quality results by feeding higher resolution reference images to the Neural Filters.
Makeup Transfer is more stable when the person / character has minimal motion in your gif
You might get unexpected results from Landscape Mixer if you feed a reference image that don't feature a distinctive landscape. This is not always a bad thing: for instance, I have used this texture as a reference image for Landscape Mixer, to create the shimmery effects as seen in this gifset
5. Testing your system
If this is the first time you're applying Neural Filters directly onto a gif, it will be helpful to test out your system yourself. This will help:
Gauge the expected rendering time that you'll need to wait for your gif to export, given specific Neural Filters that you've used
Identify potential performance issues when you render the gif: this is important and will determine whether you will need to fully playback your gif before flattening / rendering the file.
Understand how your system's resources are being utilised: Inputs from Windows PC users & Mac users alike are welcome!
About the Neural Filters test files:
Contains six distinct files, each using different Neural Filters
Two sizes of test files: one copy in full HD (1080p) and another copy downsized to 540px
One folder containing the flattened / rendered test files
How to use the Neural Filters test files:
What you need:
Photoshop 2022 or newer (recommended: 2023 or later)
Install the following Neural Filters: Landscape Mixer / Style Transfer / Colour Transfer / Colourise / Photo Restoration / Depth Blur
Recommended for some Apple Silicon-based MacBook Pro models: Enable High Power Mode
How to use the test files:
For optimal performance, close all background apps
Open a test file
Flatten the test file into frames (load this action pack & play the “flatten” action)
Take note of the time it takes until you’re directed to the frame animation interface
Compare the rendered frames to the expected results in this folder: check that all of the frames look the same. If they don't, you will need to fully playback the test file in full before flattening the file.†
Re-run the test file without the Neural Filters and take note of how long it takes before you're directed to the frame animation interface
Recommended: Take note of how your system is utilised during the rendering process (more info here for MacOS users)
†This is a performance issue known as flickering that I will discuss in the next section. If you come across this, you'll have to playback a gif where you've used Neural Filters (on the video timeline) in full, prior to flattening / rendering it.
Factors that could affect the rendering performance / time (more info):
The number of frames, dimension, and colour bit depth of your gif
If you use Neural Filters with facial recognition features, the rendering time will be affected by the number of characters / individuals in your gif
Most resource intensive filters (powered by largest machine learning models): Landscape Mixer / Photo Restoration (with Facial Enhancement) / and JPEG Artefacts Removal
Least resource intensive filters (smallest machine learning models): Colour Transfer / Colourise
The number of Neural Filters that you apply at once / The number of component gifs with Neural Filters in your PSD file
Your system: system memory, the GPU, and the architecture of the system's CPU+++
+++ Rendering a gif with Neural Filters demands a lot of system memory & GPU horsepower. Rendering will be faster & more reliable on newer computers, as these systems have CPU & GPU with more modern instruction sets that are geared towards machine learning-based tasks.
Additionally, the unified memory architecture of Apple Silicon M-series chips are found to be quite efficient at processing Neural Filters.
6. Performance issues & workarounds
Common Performance issues:
I will discuss several common issues related to rendering or exporting a multi-frame smart object (e.g. your composite gif) that uses Neural Filters below. This is commonly caused by insufficient system memory and/or the GPU.
Flickering frames: in the flattened / rendered file, Neural Filters aren't applied to some of the frames+-+
Scrambled frames: the frames in the flattened / rendered file isn't in order
Neural Filters exceeded the timeout limit error: this is normally a software related issue
Long export / rendering time: long rendering time is expected in heavy workflows
Laggy Photoshop / system interface: having to wait quite a long time to preview the next frame on the timeline
Issues with Landscape Mixer: Using the filter gives ill-defined defined results (Common in older systems)--
Workarounds:
Workarounds that could reduce unreliable rendering performance & long rendering time:
Close other apps running in the background
Work with smaller colour bit depth (i.e. 8-bit rather than 16-bit)
Downsize your gif before converting to the video timeline-+-
Try to keep the number of frames as low as possible
Avoid stacking multiple Neural Filters at once. Try applying & rendering the filters that you want one by one
Specific workarounds for specific issues:
How to resolve flickering frames: If you come across flickering, you will need to playback your gif on the video timeline in full to find the frames where the filter isn't applied. You will need to select all of the frames to allow Photoshop to reprocess these, before you render your gif.+-+
What to do if you come across Neural Filters timeout error? This is caused by several incompatible Neural Filters e.g. Harmonisation (both the filter itself and as a setting in Landscape Mixer), Scratch Reduction in Photo Restoration, and trying to stack multiple Neural Filters with facial recognition features.
If the timeout error is caused by stacking multiple filters, a feasible workaround is to apply the Neural Filters that you want to use one by one over multiple rendering sessions, rather all of them in one go.
+-+This is a very common issue for Apple Silicon-based Macs. Flickering happens when a gif with Neural Filters is rendered without being previously played back in the timeline.
This issue is likely related to the memory bandwidth & the GPU cores of the chips, because not all Apple Silicon-based Macs exhibit this behaviour (i.e. devices equipped with Max / Ultra M-series chips are mostly unaffected).
-- As mentioned in the supplementary page, Landscape Mixer requires a lot of GPU horsepower to be fully rendered. For older systems (pre-2017 builds), there are no workarounds other than to avoid using this filter.
-+- For smaller dimensions, the size of the machine learning models powering the filters play an outsized role in the rendering time (i.e. marginal reduction in rendering time when downsizing 1080p file to Tumblr dimensions). If you use filters powered by larger models e.g. Landscape Mixer and Photo Restoration, you will need to be very patient when exporting your gif.
7. More useful resources on using Neural Filters
Creating animations with Neural Filters effects | Max Novak
Using Neural Filters to colour correct by @edteachs
I hope this is helpful! If you have any questions or need any help related to the tutorial, feel free to send me an ask 💖
#photoshop tutorial#gif tutorial#dearindies#usernik#useryoshi#usershreyu#userisaiah#userroza#userrobin#userraffa#usercats#userriel#useralien#userjoeys#usertj#alielook#swearphil#*#my resources#my tutorials
509 notes
·
View notes
Text

☆ UPSCALING LOW QUALITY FOOTAGE
what i used: • 2021 macbook pro with m1 chip (390/500gb storage used she's hanging in there) • photoshop 2020 • mpv (for screencaps but this isn't needed!) • handbrake (available for linux, mac and windows here) • video source to gif
what is handbrake? basically its a software that helps you change the format of videos, such as for certain devices or screens, or in the case that we're going to utilise, quality and frame rate!
disclaimer: handbrake is super easy to use and very beginner friendly for this procedure and it can make a video go from 30fps to 60fps however it does not replace the quality of true 4k/blue/master-pro res files. in the gif below, this is the level of detail in a master pro-res file.

getting started it's easiest first to note the timestamps of the video you want to encode, and keep in mind that unless your computer is incredibly powerful, i wouldn't try to encode an hour worth of footage in one run! my laptop could handle about 30 seconds in one go before she started toasting.
using handbrake: once you've downloaded the software, open the software and it will come up with a pop up window asking you to open the video source (that is presumably saved within your folders) and go ahead and do so!
in the range section, use the drop down button to navigate to seconds and enter your timestamp. the duration on the side will show how long of the footage you're gonna encode is!

then go down to the save as, and give your footage 'to be snipped' a name. this isn't necessary but useful because if you're planning to say, encode 3 or 4 small parts of footage in one sitting, each encoding instance will overwrite the previous one. so i just call mine 'cut 1', 'cut 2' and so on.

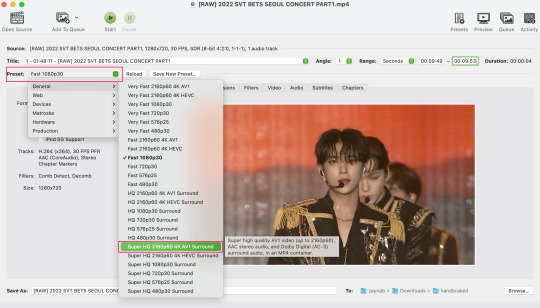
next go to preset, and there you'll see such a wide variety of options that you can play around with, with differing qualities, frame rates, sound options, and so on. for the sake of this tutorial, i'm using 'superhq 2160p60 4k av1 surround' and i've used the drop down menu to select it! then go ahead and press start! the time taken to complete depends on the duration of footage that you sent to encode! you'll find your encoded video as an .mp4 file in your designated folder (which you can change via browse at the bottom)
what next? • if you prefer to open footage directly into photoshop (my ps can't handle it), then go for it! • if you screencap as i do, then just use mpv or whatever screencapping program you prefer to make the screencaps and open in ps in your usual manner. • you can use the timestamps to further process the video through vapoursynth to denoise, but i've yet to try that!
the results for this first set of example footage, i used footage from the be the sun concert file, which is almost 2 hours in length and 4gb in file size.


you can see the difference in the smooth frame rate of the footage, as well as the quality of the sharpening!
and to utilise the bane of gifmaking, a gose episode, notorious for dodgy pixelated frames and less hd quality in 1080p on youtube, i ran it through the same settings!


these are the exact same files, downloaded using 4k video downloader and with the same sharpening, but see how on the original file, the sharpening looks a bit more harsh and 'outlined' while it seems to sit softer on the encoded 4k version!
so i mainly use handbrake for dvd files, or not-so-hd 1080p youtube videos or videos that seem a bit clunkier but i had never tried them on a tv/film file so take a look below! i used a 1gb (so not very good quality) of a show (as compared to its 4gb files).
as i said at the start in the disclaimer, handbrake can't replicate true file quality, as you'd expect to see in a proper hd bluray/t*rrent file of a show but there's an interesting difference in the frame rate. personally it's not something i would utilise much there but its all up to individual preference on how someone prefers to have their gifs <3
this is a very basic run-through of how i used handbrake, as i haven't really explored all its features and i use this as a quick process when i'm running through seventeen dvd/dl files but i feel like it would work well on general youtube videos (such as interviews, episodes, behind the scenes) and feel free to send an ask/message for any help/clarification! <33
#ps help#usergif#gif tutorial#kpop gif tutorial#seventeen#completeresources#2605#userace#niniblr#emification#usershreyu#heymax#arieslofi#tusermlee#userbloomingwarrior#uservivaldi#userzil#userfanni#userrozza#usermoonchild#userraffa#tuserjen#usernik
353 notes
·
View notes
Text
This is actually crazy like.. I know dragons tend to hoard things (especially shiny or valuable things) but I didn't think it would be LITERAL COMPUTERS FOR ME
Ive got computers released from 1995-2021
-A 1995 Quantex Desktop
-A 2009 HP Palivion that's the most dogshit 16 year old computer I've used
-A 2009 DELL Studio 1737 that's actually pretty decent still thanks to having every port known to mankind
-2019 MacBook Pro (16", core i9)
-2021 HP Omen desktop (Ryzen 5)
Honorary mentions:
-Game Boy Color
-Assorted old Android phones
-1996 NEC MultiSync M500 CRT Monitor
And I have no idea what the hell to do with all these
Oh yeah and I have a shitty ACER laptop
5 notes
·
View notes
Text
Apple M4 Powers Up the iMac: Blazing Speed for Creatives
Apple M4 iMac Predictions
24 Apple iMac
Apple M4 chips may be introduced when Apple updates the 24-inch iMac in 2024. Apple intends to update the Mac series, including the iMac, with AI-focused M4 CPUs. This document details Apple’s M4 iMac ambitions.
Apple M4
Apple may incorporate the M4 chip from the latest iPad Pro models in the forthcoming 24-inch iMac. Since iMacs have M3 chips, the M4 will be a direct upgrade.
Apple M4 is a second-generation chip based on the M3’s 3-nanometer technology with performance and efficiency improvements. Apple M4 CPU outscored M3 chip by 25% in Geekbench benchmark test, suggesting considerable performance boost.
The Apple M4 had 3,695 single-core and 14,550 multi-core scores, compared to 3,087 and 11,702 for the M3.
Apple’s M4 processor has a 10-core GPU and CPU with four performance and six efficiency cores. Apple uses an M4 with a 9-core CPU in the iPad Pro, but the iMac may not have it.
Other Macs will have upgraded M4 Pro, M4 Max, and M4 Ultra CPUs, while the 24-inch iMac, which is equal in price to the MacBook Air, will only have the M4 chip.
Create
No signs suggest Apple will revamp the iMac soon the last overhaul was in 2021. The 2024 iMac refresh may focus internal improvements over exterior design changes.
Computers and displays are merged in the iMac. It fits on a desktop due to its narrow profile and 11.5mm thickness. It has a pastel chin and comes in bright shades.
They know of no iMac enhancements other than the Apple M4 chip.
Larger iMac?
Despite rumours, a 30-inch iMac was still in development in mid-2023. Its release date is unknown. As of May 25, 2024, Apple has no larger iMac. Current 24-inch iMacs include M3 chips. In 2024, rumours of a bigger iMac with an M-series CPU had faded. Apple hasn’t confirmed a 30-inch model for 2025.
Expect a larger iMac: Rumours say Apple may sell a larger iMac in the future.
Connect Mac to external display: You can add a larger external monitor to your iMac or Mac mini. This maximises screen space and lets you choose size and resolution.
Consider Mac Studio: The Mac Studio is fast and may be used with a larger display for a strong desktop arrangement.
Launch Day
Bloomberg’s Mark Gurman expected a 24-inch iMac M4 processor update “around the end of the year.” The iMac may launch at October or November Apple events with new Macs. Pre-year MacBook Pro and Mac mini improvements are anticipated. Since the iMac was updated in October 2023, an October 2024 release would conclude the year.
The M4 processor outperforms the M3 with a 10-core CPU (6 efficiency and 4 performance) and GPU. Hardware-accelerated ray tracing and 16-core Neural Engine are featured. The M4 iMac could handle video editing and 3D rendering.
Apple iMac M3
They expect the new iMac to have a 24-inch Retina 4.5K display like the M3 model. Apple may possibly offer more colours for the upcoming iMac, like the M2 model. The M4 iMac will be a major upgrade from the M3. Keep an eye out for Apple’s M4-powered iMac later this year if you want a powerful and adaptable desktop.
Based on rumours and leaks, the M4 iMac may include these features:
The next-generation 24-inch iMac is believed to have the M4 chip, which Apple used in the current iPad Pro versions.
The M4, a second-generation microprocessor with faster and more efficient performance, uses the same 3-nanometer technology as the M3.
The M4 outperformed the M3 on Geekbench by 25%. Apple’s M4 processor contains a 10-core CPU and GPU with six efficiency and four performance cores.
Design: The M4 iMac will have a slim, colourful aluminium casing like the M3.
Seven brilliant colors blue, green, pink, silver, space grey, yellow, and orange are likely.
256GB of M4 iMac storage can be expanded to 2TB of SSD storage.
The M4 iMac will have 8GB of starting memory and up to 16GB of unified memory.
Reports and leaks suggest these specs for Apple’s M4 iMac:
M4 Chip had 10 cores: 4 efficient, 6 performant.
Ten cores and second-generation 3-nanometers make the GPU more efficient and performant than M3.
24-inch 4.5K Retina screen, True Tone, P3 colour gamut.
SSDs start at 256GB and RAM up to 2TB.
Standard unified memory is 8GB, customisable to 16GB.
Dual SDXC card slots, USB-C connections, Thunderbolt 4 connectors.
From last update, there was no mention of a “M4 iMac.” Apple regularly updates their products with newer processors and features. Apple’s custom Mac CPUs are generally labelled “M”.
The M1 chip, which delivered exceptional performance and energy economy, changed Apple’s desktop and laptop computers. An M4 iMac may use this special silicon to boost power and efficiency. I prefer Apple’s official releases or trusted tech sources for the most accurate and current information.
Read more on Govindhtech.com
3 notes
·
View notes
Text
macOS Sonoma

macOS Sonomaは、生産性と創造力を高めるまったく新しい機能を搭載しています。美しいスクリーンセーバとデスクトップに追加できるウィジェットでMacをパーソナライズしましょう。プレゼンテーションの一部に常に自分が表示される新しい方法で成果を発表すると、ビデオ通話中にあなたの存在感を高めることができます。SafariのプロファイルとWebアプリを使うと、まったく新しい方法でブラウズを管理できます。ゲームモードでは、ゲームのパフォーマンスが大幅に向上します。アップグレードを実行すると、Macで使用可能な最新のセキュリティとプライバシー保護機能が適用されます。
スクリーンセーバ
• 世界各地の風景の美しいスクリーンセーバは、ログインすると途切れることなくデスクトップの壁紙に移行
ウィジェット
• ウィジェットはデスクトップ上のどこにでも配置でき、アプリで作業している間は壁紙のカラーに適応
• iPhoneが近くにあるか、同じWi‑Fiネットワークに接続されている場合、iPhoneのウィジェットをMacに追加することが可能
• インタラクティブなウィジェットで、ウィジェットから直接、ショートカットの実行やメディアの一時停止などのアクションが実行可能
ビデオ会議
• 発表者オーバーレイを使うと、画面共有中に常に自分を中央か前面に表示(Appleシリコンを搭載したMac)
• ビデオ通話で自分の周囲にハート、風船、紙吹雪などの3Dエフェクトのリアクションを追加可能(Appleシリコンを搭載したMac、iPhone 12以降を使用した連係カメラ)
Safariとパスワード
• プロファイルによって仕事用や個人用などのテーマ別にブラウズが可能
• Webアプリにより、どのWebサイトもアプリのように使用でき、Dockのアイコンからの素早いアクセスやシンプルなツールバーによる容易なブラウズが可能
• 強化されたプライベートブラウズにより、プライベートブラウズウインドウは使用していないとロックされ、既知のトラッカーをWebページの読み込み時にブロックし、WebページのURLからあなたを特定するトラッキングを削除
• 信頼できる連絡先とのパスワードとパスキーの共有
メッセージ
• ライブステッカーがiOSとiPadOSからmacOSに同期され、iPhoneやiPadで作成したライブステッカーにアクセス可能
• 検索フィルタで人名、キーワード、コンテンツタイプ(写真やリンクなど)などを指定可能
• iMessageの吹き出しをスワイプしてインラインで返信可能
ゲーム
• ゲームモードでは、CPUとGPUがゲーム最優先で使用され、フレームレートの安定性が向上し、ワイヤレスコントローラのレイテンシが低減(Appleシリコンを搭載したMac)
キーボード
• 音声入力機能が向上し、声とキーボードを一緒に使用してテキストの入力が可能
AirPods
• 適応型オーディオによって、アクティブノイズキャンセリングと外部音取り込みモードが動的にブレンドされた新しいリスニングモードが提供され、周囲の状況に合わせたノイズコントロール体験を実現(最新ファームウェアのAirPods Pro(第2世代))
• 通話中にマイクの消音と消音解除が可能(AirPods(第3世代)、AirPods Pro(第1世代と第2世代)、または最新ファームウェアのAirPods Max)
• AirPodsの自動切り替え機能の向上により、Macを最大2倍の速さで検出可能(AirPods(第2世代と第3世代)、AirPods Pro(第1世代と第2世代)、最新ファームウェアのAirPods Max)
プライバシー
• “センシティブな内容の警告”を有効にすることで、“メッセージ”で、センシティブな画像が予期せずユーザに表示されるのを防止
• “コミュニケーションの安全性”によるお子様の保護が拡張され、ヌードを含む写真に加えてビデオも、“メッセージ”や写真ピッカーで共有する際に検出可能
アクセシビリティ
• ライブスピーチにより、話したいことを文字で入力して、FaceTime通話や対面の会話で読み上げさせることが可能
• パーソナルボイスで、自分の声を失うリスクのあるユーザが自分の声のように聞こえる声をデバイス上の機械学習を使用して非公開で安全に作成するのを支援
• “Made for iPhone”対応補聴器をMacとペアリングして使用することが可能(MacBook Pro(2021)、Mac Studio(2022)、M2チップを搭載したMacコンピュータ)
このリリースには、以下の機能と改善も含まれています:
• 1回限りの確認コードをメールからSafariに自動入力する機能によって、素早くSafariでサイトにサインイン可能
• “メモ”で埋め込まれたPDFとスキャン書類が画面幅で表示され、簡単に閲覧可能
• “リマインダー”の買い物リストで、品物を追加すると関連する品物をセクション別に自動的にグループ化
• “画面共有”の高パフォーマンスモードにより、Appleシリコンを搭載したMacにリモートアクセスするときの反応が向上
一部の機能は、地域やAppleデバイスによっては使用できません。
4 notes
·
View notes
Text
Thank you @l8tof1 for tagging me! 🥰 1) where do you follow a race? I watch it via F1TV, because I sure as hell won’t pay to hear Dutch commentary😜. For FP and Quali I always have the same set-up: Mainfeed on my tv (with Sky commentary) and on my MacBook splitscreen. So on my left side the F1.com livetiming and on the right side Lewis onboard. Only thing I change for the race day is that I change the F1 livetiming for the F1TV timing board. I like to watch the mini sectors and timing (for long runs for example) a bit closer during FP and quali, but during the race just the lap times are enough. 2) Do you watch by yourself or with others? By myself. When I was a kid I used to watch it with my father (since he’s also the one who got me into this sport), but ever since I live by myself I watch it on my own. It’s because 1) I’m from Max Verstappen land what the hell am I going to do in the middle of all these Max fans? 2) I like my set-up (as written above) and I get a bit anxious when I don’t know why Lewis is slow/not set a lap etc etc. With his onboard I know he’s managing or was held up etc etc. I did it once for a race in 2021 - when my friend had her bday party in a room full of Max fans - and luckily for me it was a race not much much happened between those 2. And twice during FP in 2022 (one at the office and Lewis was P1 so I said: ‘So we gonna watch together on Sunday again? haha😂). 3) Do you watch every race and all sessions? Yes. That’s one of the pro’s of the new way of working: from home and at the office. So on F1-weekends I always work from home on Friday. I luckily rarely have meetings during FP so I can watch it haha. If I miss something during the F1-weekend I 99% of the time make sure it isn’t raceday. The 1% for this season was last Sunday when I went to the Nations League final haha. 4) Do you have any superstitions? ... *runs* *hides*. OK BUT I AM NOT CRAZY. I have a few ok. I’m already a very superstitious girl in general so... Ever since the mess in Monaco I have a new ‘ritual’. So we all know it was not a good weekend with Lewis crashing during FP3 as the cherry on top. So I bought a certain drink for quali and Sunday and put on my Plus44 shirt and for quali it worked (at least out-qualifying his teammate). Sunday I put the same shirt on, open up the drink during the formation lap and take seven sips (now don’t come for me with EIGHT EIGHT!!!!). Mind you I watched the start inside a football stadium last Sunday and during the formation lap I took seven sips of whatever drink I had just to be sure. My friend was: ?????? HAHAHHA. And you all be DAMN sure when that formation lap starts in Austria and I’m standing in the stands watching him warm up next week I WILL take my seven sips 😂😂😭
5) what do you do after a race? Put F1TV on on mute waiting for Lewis’s interview and put a Sky stream on. Besides that scroll, scroll, scrolllllll. On here, Twitter and Reddit. Just scroll and take in the comments/reaction/content.
3 notes
·
View notes
Note
I’m sorry if someone already asked this, but which laptop do you have?? I’m browsing around for a decent 2-in-1
Hi, don't be sorry! This is the first ask I've ever gotten, so it's kinda exciting loll. My laptop is the 14-inch 2021 Macbook Pro, and I also use the iPad Pro 11-inch (4th generation) and Apple Pencil (2nd generation) for note-taking. They're good, but they're not actually 2-in-1s. Depending on your intended use, though, the iPad might be able to act as a 2-in-1 laptop for you. They can do almost everything that a laptop can if you buy a keyboard to go along with it. The only tricky thing is if you need to run special software for your classes because they might not be available on the iPad.
The laptop that I almost bought instead of my Macbook and spent a lot of time researching is the Dell XPS 13. You can buy a touch-screen version of it. The reviews I've seen are fantastic, so I'd recommend looking into it. They do actually have a 2-in-1 version of the Dell XPS 13, and they have the Dell XPS 13 Plus.
Anyway, thanks for asking and good luck in picking a laptop :)
#ask response#laptop#computer#gadgets#pc#laptops#ipad#computers#macbook#apple#iphone#tech#studying#study#studyblr#student#university#college#study blog#productivity
3 notes
·
View notes
Text
Apple Repair Montreal | MacBook Repair Montreal
Apple MacBook Repair Montreal Our Apple repair experts are specialized in Apple computers, MacBook Pro 2020, 2019, 2018, 2017 MacBook Air 2019, iMacs Screen repair and upgrades, Apple Mac mini 2017 to 2022.

MacBook Water Damage Repair Loosing your data can be very distressing, whether it's your personal or work data. We can recover your MacBook 2018, MacBook 2019, MacBook 2020, MacBook 2021 and 2022 data from any Apple computer even Apple MacBook Retina 12'' 2016 or later year! MacBooks data recovery is very difficult to recuperate as they have built-in soldered SSDs chip on the Logic Board. The Apple company made those MacBooks almost impassable to repair. Our engineers keep finding different ways to fix and recover all the Apple MacBook Pro, MacBook Air, MacBook Retina, Mac mini, iMac 27" as well if they are setup as fusion data recovery.
Mac Repair Montreal Water damage Apple MacBook Pro or any Mac computer:
Spillage happens and your Apple MacBook falls victim, little of water or tea can damage your Apple computer. Many users in Montreal tries to repair their MacBooks by searching on Google on how to repair their Mac at home! After encounter is such as bad idea. Many of our client's bring their Apple MacBook Air or Pro after putting it in rice or attempt to open the MacBook cover which resulted to physical damages. If you follow those over 10million hits on google, you will most probably loose your MacBook Pro or retina or will probably cost you triple from the original repair. Even if your MacBook Air starts again in couple of days, it will most probably stop working in a week or months due to corrosion extend. The Logic boards are designed with a high quality boards, the downside of liquid spilled on your MacBook Pro is the corrosion buildup. The logic board corrosion cases can expands by time (just like the car batteries) and damage your logic board (like acid) capacitors or will rust your MacBook touchpad where there is metal.
Tel: (514) 731-3386
3 notes
·
View notes
Text
Promises, more Promises to Myself

I promise that I will pick up my heavily neglected Nikon Z5 and go take some pictures in 2023.

Its one of those regrets that resulted from my action of picking up an Apple Macbook Pro 14 M2 recently. You see, in my last round of review, I was heavily immersed in some work involving structuring a company for IPO. I still am.
But the entire crap came down on me, when I got a little more serious with what I wanted the laptop to do for me, besides just looking cool in all her pristine space-age goodness. It was not love on first sight I must admit, even after the first raw reinstallation in recovery mode.

But then, it quietly took in Microsoft Windows 11 Pro ARM without so much as a glitch, except for a few unaddressed drivers still lingering in her Device Manager. Vmware Fusion 13 got the OS humming before I tried readying it for my full-tilt developer environment setup. After a few intensive days later, I now possess a 4C/6GB/180GB virtual rig that has successfully compiled my first REACT framework.
Yes, for good measure, it even took in my Microsoft Office Pro 2021 suite and helped me churn out a few decent presentation decks. On the mac of things, yes, Shapr3D ran as smoothly as I would expect from my Alienware 15R4, even with Steam able to properly launch several XCOM 2 WOTC missions over lunches.
It ran on my first few instances for over 15 hours without a power chord, and then turn back to push through several episodes of Apple TV as the clock struck twelve midnight.

I don’t know what this is, but the sheer capability of this laptop is giving me real headaches, in that, its forcing me to do more than what I usually would like to over the course of each day...and I need it to give me a break...a chance to pick up my camera and get out of the country to do some shoots!
Yes, I have scheduled two such shoots in the next two months...and I guess a forced booking to Hong Kong and Bali Indonesia would help keep that promise of mine.
Bad Apple!
PS Do not get the Apple Macbook Pro 14 M2 if you treasure your freedom off work.
2 notes
·
View notes
Text
oh another apple silicon mac thing
the wifi isn't as good as the 3 spatial stream solution in the x86 15"/16" models (and apparently some of the 13" ones), to a degree that's quite noticeable. AX1200 might have only a slightly lower "the number that they put in the marketing materials sometimes" than AC1300, but that's making up for the lack of a third antenna with a bump in "perfect conditions" per-stream throughput that you'll basically never see. (wifi is complicated.)
of course, this likely only matters if you pay for like 300mb/s internet or better and want to take full advantage of it on wifi (haven't tested but the range should be excellent on this), but it does feel bad to have the typical-use performance of a 2021/2023 model be noticeably worse than that of my 2013 model in any way.
I was rather hoping that Apple would go the other way, jam an exorbitant number of antennas all over the place, and launch the first-ever laptop with a 4x4 wifi solution. do a "live" demo during the M2 Pro announcement video and show a speedtest on wifi that hits 3.5 gigabit with 160MHz channels on wifi 6E. why not? but, no, we have your run-of-the-mill 2x2 solution.
I was going to say maybe all of the apple silicon stuff has the wifi solution built into the SoC so it the number of streams can't be customized per-device, but it seems like no; teardowns list a USI 339S00912 package that I think probably still has a Broadcom chip in it?
edit: oh, interesting; from the linked page earlier:
Client MIMO: Almost all battery powered wireless devices are stuck at 2×2 MIMO for wifi, and this seems unlikely to change anytime soon. The extra power requirements of 4×4 MIMO causing reduced run times is just not worth the tradeoff (yet).
I guess that is fair. still though
2 notes
·
View notes
Text
Macbook Pro 16 inch 2021
Trong sự kiện mới nhất của Apple vào ngày 18/10, tâm điểm của cả sự kiện này chính là phần notch của chiếc MacBook thế hệ mới. Tuy nhiên thì chúng ta vẫn không thể nào bỏ qua chiếc MacBook Pro 16 inch 2021 mới nhất sử dụng chip M1 Pro và Max. Theo Apple giới thiệu thì đây chắc chắn sẽ là một siêu phẩm khiến cho người yêu chuộng trong thời gian sắp tới.
Thiết kế
MacBook Pro 16 inch 2021 đã được Apple thiết kế lại từ trong ra ngoài. Máy tiếp tục sử dụng thiết kế nhôm nguyên khối (màu Grey và Silver), nhưng hình dáng tổng thể của máy lại phẳng hơn và ít cong hơn ở phía dưới.
Thực tế thì điểm bị “chê” nhiều nhất đó chính là phần tai thỏ trên màn hình của MacBook Pro 16 inch 2021 mới. Không dừng lại ở đó, phần đế của máy cũng trông khá dày trông không còn là chiếc “MacBook sexy” mà mọi người vẫn yêu thích trước đó. Phần viền ngoài của máy có sự thay đổi khi có thiết kế vuông vức hơn so với các phiên bản trước đó.
Logo quả táo cắn dở quen thuộc cũng xuất hiện sau lưng máy. bên dưới là 4 phần chân đế của máy – thứ mà Apple nói rằng để máy có thể tản nhiệt tốt hơn.
Về mặt trong, Apple cũng sử dụng tone màu đen trên toàn bộ phần bàn phím của chiếc máy; không còn là những đường xen kẽ theo màu của MacBook nữa. Ngôn ngữ thiết kế này cũng nhận được khá nhiều ý kiến trái chiều.
Apple cũng đã bỏ thanh TouchBar và thay vào đó là dải phím chức năng F1-F12. Dải loa 2 bên của máy khá to đi cùng với đó là Trackpad được thiết kế lớn hơn chút so với trước đó.
Màn hình
Màn hình của MacBook Pro 16” 2021 là một nâng cấp đáng chú ý của Apple, với màn hình Liquid Retina XDR có công nghệ đèn LED mini cho độ sáng toàn màn hình lên đến 1000 nits. Tuyệt hơn thế, MacBook Pro 2021 16 inch có khả năng đạt độ sáng tối đa lên đến 1600 nits và tỷ lệ tương phản 1000000:1.
Màn hình với phạm vi bao phủ gam màu rộng P3 và hỗ trợ lên tới1 tỷ màu giúp chuyển màu mượt mà hơn. Đồng thời, màn hình cũng đi kèm với tần số quét là 120Hz. Những điểm trên sẽ giúp đây là chiếc MacBook 16” 2021 có màn hình nhanh nhất thời điểm hiện tại.
Do viền xung quanh màn hình đã được Apple làm mỏng để giúp máy sang hơn, bắt kịp xu hướng thiết kế hiện nay. Apple đã cho phép tăng kích thước màn hình lên 16,2 inch so với 16 inch của mẫu trước đó. Màn hình có 7,7 triệu pixel nhờ kích thước 3.546 x 2.234 – nhiều nhất từ trước đến nay trên dòng MacBook.
Hiệu năng
Trong buổi ra mắt, Apple đã đưa ra những điểm số Benchmark của con chip mới nhất trên chiếc MacBook này. Có thể nói hiệu năng sẽ là thứ khiến cho nhiều người xuống tiền nhất đối với chiếc MacBook Pro 16 inch sử dụng chip M1.
CPU trong các con chip M1 Pro và M1 Max nhanh hơn 70% so với hiệu suất CPU từ M1; vốn dĩ đã rất nhanh và vượt trội so với nhiều PC có bộ vi xử lý cùng phân khúc. Về hiệu suất GPU, M1 Pro nhanh hơn M1 đến 2 lần và M1 Max nhanh hơn gấp 4 lần so với M1.
Theo Apple, Chip M1 Pro mang lại hiệu suất CPU cao hơn 1,7 lần so với chip máy tính xách tay PC 8 nhân mới nhất; trong khi nó sử dụng ít năng lượng hơn 70% và GPU nhanh hơn 7 lần so với đồ họa tích hợp trên cùng một máy tính PC. Hiệu suất GPU ngang bằng với GPU rời mạnh mẽ trong PC, nhưng M1 Pro lại sử dụng ít năng lượng hơn 70%.
Đối với M1 Max, nó là con chip lớn nhất mà Apple từng chế tạo cho đến nay. Apple cho biết GPU của con chip này cung cấp hiệu suất tương đương với GPU cao cấp trong một PC chuyên nghiệp; trong khi nó tiêu thụ ít điện năng hơn đến 40%. Hiệu suất tương tự như GPU cao cấp nhất trong các PC cấu hình cao; trong khi nó sử dụng ít năng lượng hơn đến 100 watt.
M1 Pro và M1 Max có thể cung cấp cùng 1 mức hiệu suất cho dù đang sạc hay sử dụng pin nhờ vào hiệu suất của chip. Các con chip M1 Pro và Max cũng tạo ra ít nhiệt hơn so với chip Intel tiêu chuẩn; nó cho phép các mẫu MacBook Pro mới chạy nhẹ nhàng và ít thường xuyên hơn.
Đối với M1 Pro:
RAM tối đa 32GB
Tốc độ đọc ghi dữ liệu 200GB/s
Bao gồm 10 nhân CPU và 16 nhân GPU, 16 nhân Neural Engine (xử lý tác vụ AI)
Hỗ trợ tối đa 8TB SSD.
Với các thông số kỹ thuật trên, cùng các con số mà Apple đưa ra thì có thể tin chắc rằng chiếc MacBook Pro 16 Inch M1 sẽ là 1 sự lựa chọn tốt dành cho các công việc đồ họa, lập trình AI, …
Đối với M1 Max:
RAM tối đa 32GB
Tốc độ đọc ghi dữ liệu 400GB/s
Bao gồm 10 nhân CPU và 32 nhân GPU, 16 nhân Neural Engine (xử lý tác vụ AI)
Hỗ trợ tối đa 8TB SSD.
Apple sẽ hỗ trợ tùy chọn phiên bản 24 nhân GPU với mức giá thấp hơn.
M1 Max sẽ có sức mạnh GPU mạnh mẽ hơn so với M1 Pro; còn các thông số khác sẽ tương đương nhau.
Để dễ hình dung sức mạnh, thì con chip M1 8 lõi CPU và 8 lõi GPU nhưng đã có được sức mạnh đáng kinh ngạc; thì những cải tiến trên con chip mới này chắc chắn sẽ mang đến trải nghiệm công việc mượt mà cho người dùng.
Webcam
Apple cũng đã nâng cấp phần camera của Macbook Pro 16 inch 2021 lên đến 1080p – Điều khá dễ hiểu khi xu hướng hiện nay là học tập, hội họp, làm việc trực tuyến chiếm phần lớn.
Bàn phím & Touchpad
Apple đã đại tu hoàn toàn bàn phím của chiếc MacBook Pro 16 inch 2021. Bàn phím có đế toàn màu đen; loại bỏ lớp nhôm nhẹ hơn từng được sử dụng giữa các phím trên các mẫu máy trước đây.
Bàn phím của chiếc Macbook này không còn có Touch Bar. Mà thay vào đó, Apple thay thế nó bằng 1 hàng kích thước đầy đủ bao gồm 12 phím chức năng và phím Escape lớn hơn nhiều ở bên trái. Ở bên phải sẽ có một phím Touch ID hình tròn.
Phần phím điều hướng sử dụng dạng chữ T – sau khi nhận ra những vấn đề khi thiết theo mẫu 2019 thì Apple cũng sử dụng bàn phím cắt kéo; thay vì cánh bướm như trước đây. Phần trackpad thì không có gì nâng cấp, Apple vẫn sử dụng hệ thống ForceTouch trên chiếc MacBook Pro mới nhất này.
Cổng kết nối
Trên MacBook Pro 16 inch 2021 có gần như đầy đủ các cổng kết nối quan trọng.
Ở cạnh phải có 1 cổng HDMI, ThunderBolt và khe thẻ SD (hỗ trợ UHS-II với tốc độ lên đến 250MB / giây và thẻ SD UHS-I với tốc độ lên đến 90MB / giây).
Cạnh bên trái sẽ là 2 cổng ThunderBolt, 1 jack tai nghe và 1 cổng sạc Magsafe.
Điểm đáng chú ý đó là cổng sạc MagSafe đã được Apple mang trở lại trên phiên bản MacBook Pro lần này. Apple cũng đã công bố cổng sạc cho khả năng sạc nhanh hơn cổng USB-C. Ngoài ra thì bạn cũng có thể sử dụng cổng USB-C để sạc pin.
Âm thanh
Macbook Pro 16” 2021 trang bị hệ thống âm thanh với 6 loa độ trung thực cao. Bao gồm 2 loa tweeter và 4 loa trầm loại bỏ lực để tăng thêm 80% âm trầm. Apple cho biết, đây là hệ thống âm thanh tốt nhất trên máy tính xách tay của hãng ở thời điểm hiện tại.
Hệ thống loa này cũng hỗ trợ Dolby Atmos. Khi được kết nối với AirPods 3, AirPods Pro hoặc AirPods Max, thì tính năng dynamic head sẽ được hỗ trợ.
Ngoài ra máy còn có một cụm 3 micrô giúp loại bỏ tập âm bên ngoài khi nói, cho giọng nói rõ ràng và trong trẻo hơn. Đây là công cụ hỗ trợ tốt cho các hoạt động làm việc online, meeting, … của bạn.
Thời lượng Pin
Macbook Pro 16 inch 2021 sở hữu viên pin chỉ 100Wh. Nhưng với sức mạnh của con chip M1 mới, Apple khẳng định chiếc máy vẫn có thể sử dụng lên đến 17h và 21h liên tục lần lượt cho chip M1 Pro và Max.
Tuy nhiên, một số Youtuber nước ngoài đã test thử; thì thực tế chiếc máy chỉ đạt 14 giờ sử dụng liên tục với Wifi và các công việc lướt web.
Nếu bạn là Coder hoặc Photographer, thì bạn không cần quá lo lắng. Apple cũng công bố rằng người dùng có thể sử dụng thời lượng pin lớn hơn nếu nhưsử dụng XCode hoặc Adobe Lightroom để làm việc. Đây sẽ là một tin tốt dành cho những Dev và Photographer.
Mua Macbook Pro 16 inch 2021 ở đâu uy tín?
Nhìn chung thì chiếc MacBook Pro 16 Inch 2021 vẫn là một cỗ máy mạnh mẽ để phục vụ công việc của người dùng hiện nay.
Bỏ qua những thiết kế có phần gọi là “cách mạng” của Apple với nhiều nhiều ý trái chiều. Thì mức giá từ 1999$ để sở hữu 1 chiếc máy hiệu năng mạnh mẽ, nhiều nâng cấp công nghệ, đồng bộ hệ sinh thái của Apple, hỗ trợ công việc tối đa, … Thì đây vẫn là chiếc MacBook Pro đáng để sở hữu.
Nếu bạn đang có nhu cầu tìm mua một chiếc Macbook Pro 16 inch 2021 chất lượng, giá tốt nhất thị trường thì có thể ghé qua Macstore hoặc vào website: https://macstores.vn/macbook-pro-16-inch-2021/ để xem trực tiếp sản phẩm bạn nhé.
0 notes
Text
16-inch MacBook Pro w/ Apple M-series CPU (2021-current)
17K notes
·
View notes
Text
Price: [price_with_discount] (as of [price_update_date] - Details) [ad_1] Amazon Basics USB hub 3.0 for Type-c Port,8 in 1 Adapter for pc Accessories with USB-C 4K HDMI SD/TF Ethernet,Dock Station for Tablet PC Phone,Compatible with HP Dell Switch Lenovo Galaxy Thinkpad iPad iPhone MacBook Pro M1 M2 8 in 1 Expansion: The docking station hub bridges the gap between your laptop’s (also Tablet / Phone / Desktop) USB-C port and 4K@30Hz HDMI, Ethernet SD card reader, USB-A / USB-C data ports, as well as high-speed pass-through charging with Power Delivery. Blazing Speed: high-speed pass-through charging to your laptop at up to 100W. Sync data at blazing speeds up to 5Gbps—fast enough to transfer an HD movie in seconds. Wide Compatibility: the usb c adapter works perfectly with All Laptop with USB-C / Type-C / Thunderbolt 3 port. it also compatible with tablets, kindle, switch and phones that comes with usb c port. Some (but not all) of the tablets and phones (e.g. iPad Pro 2018-2021 / iPad Mini 6 / iPad Air 4 ) are even supported to connect a monitor using an 4K HDMI Durability: as a must-have computer accessory, this usb peripheral comes with aluminum alloy, precision-designed for heat resistance and incredible durability 100W Power Delivery Supported: The USB C Hub supports a 100W USB C pass-through charging, ideal for MacBook Pro/Air or and other USB c devices, your primary choice of USB C Hub; [ad_2]
0 notes
Text
Điều hòa nhanh GaN UGREEN Nexode 65W USB C Charger: Sạc nhanh cho MacBook, iPhone, Samsung và nhiều thiết bị khác!
Giới thiệu 【GaN】UGREEN Nexode 65W USB C Charger PPS PD Fast Charger Power Adapter for MacBook iPhone 14 13 Pro Max Samsung S23 S22 Ultra iPad Pro 2022 2021 iPad Air Laptop model:10334 UGREEN Nexode 65W USB C Charger là bộ sạc nhanh PPS PD tiên tiến, được thiết kế đặc biệt để sử dụng cho MacBook, iPhone 14 13 Pro Max, Samsung S23 S22 Ultra, iPad Pro 2022 2021, iPad Air và các dòng laptop khác. Sản…
0 notes