#((i slow down the file to 0.25× speed
Explore tagged Tumblr posts
Visit Tumblr Blog
Explore Tumblr blogs with no restrictions, modern design and the best experience.
Last Seen Tumblr Blogs


Fun Fact
Total funding amounts to $125.3M.
Text
I was going through old messages, since we keep files of them. Mostly went through Preston's. Anyways, I'm already aware of this because he messages me all the time, however you all are not. Mr Cromeans is very bad at typing. I managed to snag some pictures of old messages that were on video files, before they were autocorrected. I thought you all would like to see them ;)
Don't tell him I told you guys.
-Spann


#((so here i am watching ltr2#((then out of the corner of my eyes i see something say autocorrect#((i slow down the file to 0.25× speed#((and i find#((that jesse is literally so bad at typing#((as in these are actual photos i took from the movie. this is canon#((please ignore the captions u can see in the pics i am very bad at understanding verbal speak
2 notes
·
View notes
Photo
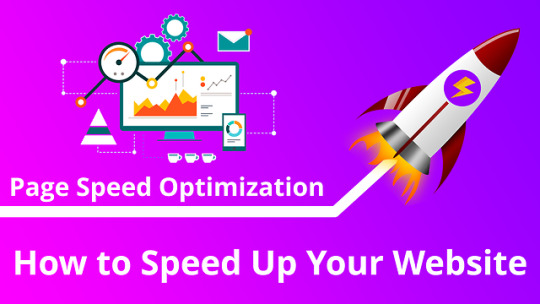
Page Speed Optimization: How to Speed Up Your Website
You’ve built your website, you’re getting traffic through your analytics but you just aren’t getting the kinds of benefits you’ve expected. Your repeat visitor rate may be low and the time people spend on the site doesn't suggest interest or engagement.
One possible culprit may be your website speed or loading time.
Why speed matters?
The speed of your website is directly responsible for determining its performance, in terms of attracting visitors and keeping them interested for the longest time. If a website takes ages to load, users are bound to lose interest and move on to another website that offers the same services as yours but is much faster.
Moreover, your website speed is very important for your SEO. If your website loads fast, your ranking in search engines will be higher. This is because Google prefers fast websites, and it rewards them by ranking them higher in search engine results. Apart from speed, the user experience is another factor in Google’s ranking algorithm. So, by boosting the speed of your website and improving your user experience, you will eventually improve your SEO ranking. As a result, you’ll get higher traffic and attract more quality leads that you can convert into customers, ultimately increasing your sales and generating more revenue.
How to Test the Website Speed?
There are a couple of ways to test the speed of a website - by monitoring what real users are experiencing, or with 3rd party test tools that run tests to measure performance. Tools like Pingdom or PageSpeed Insights is recommended as they are very easy to use. These tools also tracks your website’s performance history, so you can have insight into any potential changes regarding your website speed.
So, let’s take a look at a few ways in which you can use website speed optimization to your advantage:
#1 Upgrade Your Web Hosting Plan
The major factor that influences the speed of a website is the hosting of your website. It might seem like a good idea to host your new website on a shared hosting provider that offers “unlimited” bandwidth, space, emails, domains and more. However, the point that we usually miss out on regarding this offer is that shared hosting environments fail to deliver good loading times on peak traffic hours, and most fail to provide 99 percent uptime in any given month.
Shared hosting tends to deliver a poorer performance because you are sharing the same server space with countless other websites, and there is no telling how much resources others are using. Plus, you don’t know exactly how well the servers are optimized.
#2 Enable Browser Caching
Microsoft speed specialist and computer scientist Harry Shum believes 0.25 seconds of difference in page load time — faster or slower – is the magic number dictating competitive advantages for online businesses. Enabling caching can improve your website speed significantly and give visitors to your site a more rewarding user experience.
Caching refers to the process of storing static files, such as HTML documents, media files, images, CSS and JavaScript files, for easier and faster access, so that the database does not have to retrieve each and every file every time there is a new request. The more requests are being made to your server, the more time it will take for your website to load.
#3 Use a CDN
A CDN (Content Delivery Network) is a network of multiple servers located around the world that deliver web content to end users according to their geographic location. A CDN can host the static files of your website in order to deliver them more efficiently and reduce bandwidth and your server load. With a CDN, the requested web content will be delivered to end users much quicker, since a CDN will use a server closest to users to deliver the files they request.
As a result, not only will there be no latency, but your website will also become much faster. This is due because your visitors will access your cache instead of requesting files directly from your server.
#4 Use a Good Theme (if using WordPress)
Prevention is usually a better strategy than cure. To prevent lots of page speed issues in the first place, you should opt for a good host, a good CDN, and good theme / design.
As a digital marketer, it’s frustrating when web designers build sites that look beautiful but perform terribly from an SEO perspective or a speed perspective. I remember once having to deliver news to a client who spent one quarter of a million pounds on a new website, only to have it scrapped because it would have obliterated their digital marketing efforts. This is the most extreme example I’ve ever experienced, but it’s etched a scar that I’ll always remember.
#5 Minify your CSS and JS Files
When you look at what’s causing your pages to load slowly, chances are that it’s got something to do with lots of clunky Javascript files or CSS being loaded inefficiently. One of the pitfalls of WordPress and other content management systems is that a new JS or CSS file is added virtually every time you install a new plugin.
There are several ways to minify your files. The first way involves squishing all of your files into one – so instead of calling ten individual javascript files, you simply place all of your javascript in one file.
#6 Detect 404 Errors
A 404 error means that a “Page isn’t found”. This message is provided by the hosting to browsers or search engines when the accessed content of a page no longer exists. In order to detect and correct a 404 error, you can use error detection tools and plugins. As we mentioned, additional plugins can negatively affect your website speed, so we advise running the resource through external tools for error detection.
#7 Remove Extra Ads and External Services
Tempting as it may seem, selling too much real estate to third-party advertisers drastically degrades website performance. Too many ads or slow loading ads drive bounce rates and negatively impact online marketability. The financial losses that come with high bounce rates outweigh the monetary benefits of handing over vast website spaces to advertisers.
#8 Optimize The Size of Images
Everyone loves eye-catching images. In the case of successful eCommerce sites, images are the vital part. A lot of photos, images, graphics on your product pages improve engagement. The negative side of the image use is that they are usually large files that slow down a website.
Conclusion
Hence, these were some of the outstanding website speed optimization techniques for you. Improving site speed is part of conversion optimization. It’s often a low-hanging fruit that you can get done right away – improving user experience and revenue at the same time.
Looking to develop scalable websites with faster load speed times? Choose SEO Ninja Softwares for expert agile teams for all kinds of web development projects. With more than 5000+ satisfied clients and over 2000+ raving fans , our search engine optimization skills have been proven to help businesses just like yours find success online. We offer On-page SEO, Premium Local SEO, E-Commerce SEO, and global SEO from startups to Corporate businesses from startups to Corporate businesses. Our pricing is reasonable, high-retentionable and offer #1 Ranking on Google. Feel free for any queries or questions you may have to our 24/7 customer support. So if you don’t see results, we’ll give you your money back. We’d be happy to answer any questions you may have about our SEO pricing plans or any other queries, or the methods we use to improve your site’s visibility in search engines such as Google . Feel free to contact us at any time!
#optimize#optimization#seo ninja softwares#page#faster#performance#tips#guide#tricks#improvement#website#speed#site#page speed#website speed#website optimization#ebsite optimization tips#website optimization tips#seo#ncrease website speed#pagespeed insights#google#reduce page load
0 notes
Text
Constructing Assignment 1 mod in Unity
For assignment 1 the re-skin game mod, it was my job to construct the entire game in Unity, which was both challenging and very educational, that I at times also had a lot of fun with, as I found it enjoyable learning new things within unity and understanding how the software worked, to create a finished game.
Firstly I replaced the background files with my background art work, which was fairly simple, however had to change the speed of the main background to 0 so that it would stay static and not repeat, as when it was repeating it was just stretching the image which did not work very well.


After doing that I then imported the sprite sheet I had made, replacing it with the original, ensuring I kept the file name the same, which now worked perfectly after I edited the handle position on each sprite. I then replaced the original bullet image files with the new ones, now making them red and green, also ensuring that the names of the files were kept the same so they’d work with the code.

I then went ahead and found a background soundtrack and a shooting sound effect to replace the original sounds with. As the game is a Star Trek theme I wanted to keep the continuity of that theme, so found a free to use “Enterprise – Mirror Universe Theme” to be used as the background track, then found another free to use “Borg Phaser” shooting sound effect to replace the original shooting sound file. However I did encounter a small problem, as even when I kept the name of the new file the same as the original and replaced it, the sound would not play, after some investigating I discovered that when you replace a sound file it deletes the whole component for that sound effect, so had to go through the files to find my background image then add the background theme sound track component there, then go into the bullet file and add the new shooting sound track component to the bullet, so it would play after the player presses X to trigger the game play. However I had to edit the new shooting sound track in audacity to the part of the sound I wanted to play, as the original code only played a small part of the beginning of the sound.


I then edited the GUI of the game within Unity and also some mechanics. Firstly for the GUI I want to the Title GUI folder then changed the original main title to “Star Trek Shooter”, also making the sub title say “Press X to play”. I then changed both of these title colours to red to make them stand out on my new background, however I wasn’t happy with the sub title’s placement as I felt it was too close to the main title, so changed the pixel offset Y axis to -50. I then went into the ScoreGUI and changed both of those colours to red also to keep continuity throughout.


I had to then edit the shooting speed of the Borg, as with my new sound effect the shooting speed was to fast in order to hear the sound effect correctly, so I had to go into prefabs and select the Borg player file, then within those settings, change the shot delay to 0.25, to slow it down, as this speed sounded best to me.

Lastly as the shooting mechanic was broken within the game, (Couldn’t kill enemy spaceships or get killed) I had to fix that, I found out the problem to be missing layers that needed to be created, in order to do this i had to go to backgrounds, then under layers click create new layers, i then typed in the correct naming conventions of the layers that I needed to add. then i had to link the corresponding prefabs to the layers, I did this by going into the prefabs folder, selecting the file i wanted to link to the layer, then while selected, under layer selected the correct layer for the prefab, after doing this the game then worked.


Game in action

0 notes