Just a college student that finds it too pricey to buy food at the cafeteria. So here you'll find easy, simple and hoping-for-healthy lunch ideas that I've either come up with or discovered online, tweaked them to my liking and kept inside my budget.
Don't wanna be here? Send us removal request.
Text
🌈Psychology behind a colorful meal
On my first post where I shared the Colorful Tuna Wrap recipe idea I mentioned how I suspected the vibrant colors of the veggies got me to enjoy my meal. So today I share an interesting article I found on www.katiesplates.com about the relationship between color psychology and food.
Just click on the website’s address to read the cool article! and if you want to take a look at the recipe you can tap on it’s tittle above ;)
#colorful#colorful food#color psychology#psychology#food#food articles#articles#psychology articles#color#lazylunch
3 notes
·
View notes
Text
Easy Shrimp for Lunch
I’ve been making cold lunches for work recently as to avoid using the microwave there but I think it’s time to change things up a little before I get sick of the same recipes. It can happen. So I started thinking about what could be a warm lunch that didn’t take me too much time to make overnight. I love rice, don’t have a rice maker (shame on me, they are great) and making rice in a pot involves me checking up on it til I decide to let the water evaporate in peace. So... rice cups!
Got two for $2.50 at my local supermarket, had a half used pack of precooked shrimp on my freezer, garlic butter from when I wanted to make restaurant like toasts and some leftover corn from the tuna wraps I made earlier this week. More than enough!

HERE WE GO!
Ingredients:
1 microwavable cup of white rice (1.5 mins to make)
the desired amount of shrimps (chopped- not necessary though)
chopped green onions
black pepper
garlic butter
For the simple side salad:
corn
diced tomatoes
DIRECTIONS:
1. Cook the cup rice according to the pack’s instructions.
2. If frozen, defrost the shrimp in the microwave after rinsing them. They don’t have to be hot, just microwave them enough so they don’t feel like a block of ice.
3. In a small heated pot add some garlic butter, the chopped shrimps, sprinkle some pepper and add more butter if you like. Let the boiling butter reduce and add the green onions. Stir the content and you’re done!
4. Serve the rice and place the shrimp on top of it. If there is some spiced butter left on the pot, pour that over the serving as it’ll help moisten the rice when you re-heat it the next day.
5. Mix the corn and diced tomatoes for a simple and fresh side salad!

Enjoy!
#salad#dish#side dish#meal#lazylunch#lunch#food#yummy#tasty#recipes#easy recipes#easy#cheap meals#cheap iphone#shrimp#rice#rice and shrimp dish#shrimp dish#microwavable#work lunch#simple lunch#tomatoes#garlic#corn#fresh
2 notes
·
View notes
Text
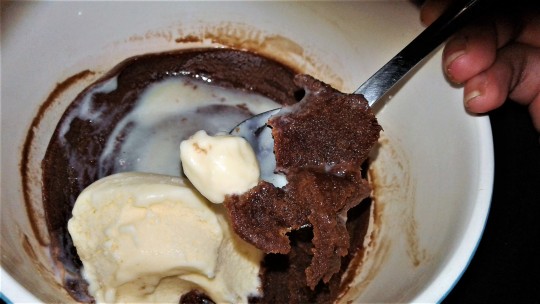
Choco Cake in a Bowl
Mmm... this is not a lunch... it’s a lunch’s dessert! Okay, perfect.
I’m sure we’ve all heard of cake in a mug. I’ve done some myself and while they’ve been really tasty, it has been sort of a stressful experience. I’m sure is just because my mugs aren’t the right size but they all start to overflow in a flamboyant kind of way. Gotta accept, it’s quite interesting to watch but I don’t want to deal with the mess.
So how about I try the same mix in a microwavable bowl? Hu... I can even comfortably add a scoop of ice cream there...

PROS:
One serving just for you
Easy ingredients
The bowl provides a suitable space for a ball of ice cream!
HERE WE GO!
Ingredients:
2 tbsp of cocoa powder (no fancy one, the one for hot cocoa will do just fine)
1 egg
1/4 cup flour
3 tbsp of milk
2 tbsp vegetable oil
Sugar (I just used 1 Splenda packet)
Pinch of salt
Ice cream
DIRECTIONS:
1. Mix the flour, egg, cocoa powder, milk, vegetable oil, sugar and pinch of salt in your microwavable bowl.
2. Bake in the microwave for 3 minutes
3. Once done just scoop a ball of your favorite ice cream and place it in it’s middle!

Enjoy!
#cake in a mug#cake in a bowl#cake#chocolate cake#chocolate#cocoa#chocolate cake in a mug#chocolate cake in a bowl#ice cream#dessert#tasty#yummy#sweet treat#sweet#lazylunch#sugar#flour#baking#microwavable
3 notes
·
View notes
Text
✔️Recipes’s Size Reducing Cheatsheet!
I mainly cook for myself and most of the recipes out there yield for 4 or more people. Dividing the sizes is not a terrible experience but it’s a modern world and we got to take advantage of the resources out there! So I found this really helpful article on food.unl.edu about reducing the size of recipes and thought I might share it with ya’ll.
Just click on the website’s address and get in on their trick!
#recipes#recipe#reducing recipes sizes#two servings#food#hacks#foodhacks#recipehacks#easy#cheatsheet
0 notes
Text
Decoded Grilled Cheese
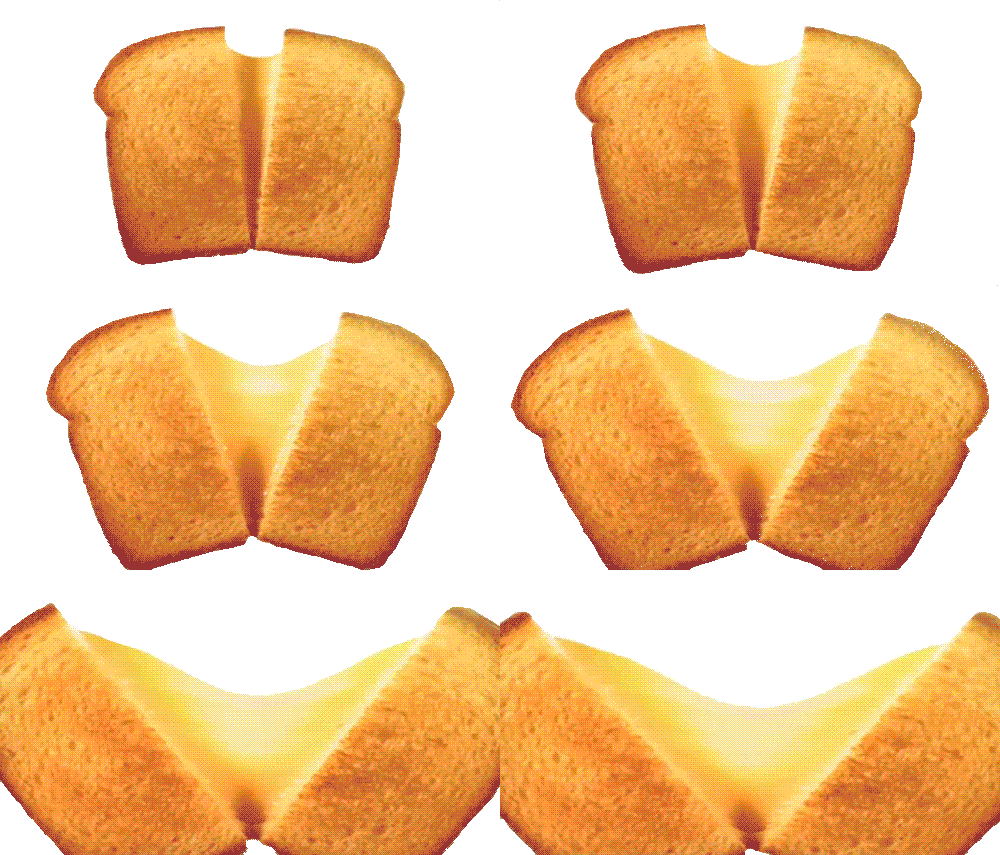
So at least where I grew up grilled cheese wasn’t a popular snack. I would only see it on Velveeta TV commercials and since they were promoting sliced cheese I just thought grilled cheese consisted on heating two slices of bread with one of their cheeses in the middle. I have to admit, what really used to interest me about grilled cheese as a little girl was the cheesy effect when the two halves of the sandwich were separated. IT’S STILL MAGICAL!

I remember my dad and I used to try and recreate it. He tried everything! from heating it on the microwave when the pan didn’t cut it, to actually pre-cutting the slices of bread and leaving the cheese intact before heating the sandwich. I proudly inform that we did get the cheesy effect once, after many many tries... But now as I browse for this simple tasty snack, I see the difference.
This recipe is not my own and I did not change a bit of it. I got it from allrecipes.com and it worked perfectly! I guess you could eat a grilled cheese any time a day... I’m not too sure about how it’ll taste if you pre-make it and take it to college or work but I’ll surely give it a try and let ya’ll know. Thektchn.com has a cool article on how to pack it so that it’s still warm for lunch! Click on the website’s address and learn their trick.

HERE WE GO!
Ingredients:
two slices of bread
shredded cheddar cheese
butter and cooking spray (the latter for the pan if you don’t like to use butter)
DIRECTIONS:
1. Preheat a non stick pan at the heat you know your stove won’t burn your bread. Usually heat 7 or 6 works just fine. Just make sure to keep an eye on it.
2. When is hot enough, add some cooking spray and put the two slices of bread.
3. Butter the side up of each slice and add shredded cheese to one of them.
4. When you feel they’re warm and golden enough, place the slice without the cheese on top of the other one, butter up! It’s crazy but it works.
5. Add some shredded cheese to the buttered top of the sandwich.
6. Spray some more butter on the pan and flip the sandwich, cheese down!
7. Butter the new top side, add cheese and flip once the other is golden and crispy.
8. Wait for both sides to be equally toasted and serve.
NOTES:
Mine does not look half as nice as the one from the website but I assure you it was delicious! Easy to make recipe that surpassed my preconceived ideas of a grilled cheese.
Enjoy!
#grilledcheese#cheese#sandwich#snack#grilled#lunch#tasty#yummy#food#cheesy#crispy#easylunch#easy recipes#recipes#lazylunch#childhood#childhood food#packed lunch
2 notes
·
View notes
Text
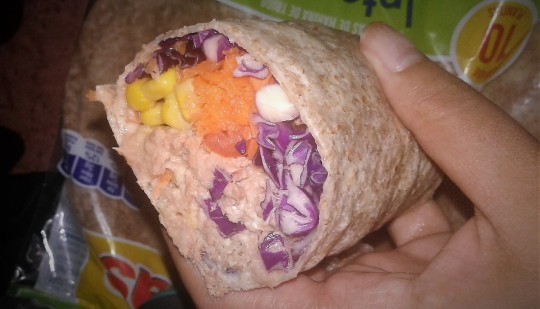
Colorful Tuna Wrap
I’ve been looking at my expenses lately and, even though nothing beats going out for a midday-getaway-from-work-lunch, I’ve been spending sorta too much on food. I think it’s mainly because I don’t like having to ask for permission to use the fridge or wait in line for the microwave, so I started thinking... and typing...”easy no fridge no microwave lunches for work”...and google had the answer!
I found this cool spicy tuna wrap recipe on ambitiouskitchen.com that helped me make a great ranch dressing and pushed me to add some color to my food...which I’m certain psychologically motivates me to eat.
I left out some things on the ranch recipe, exchanged some veggies for the ones I had on my fridge and it went great, so just know you can always tweak it!

PROS!
Yields two servings = two days of the week down! Of course, you can always double the amounts if you want to make more; way easier to multiply than divide ;)
Does not require to be kept in a fridge once you take it to work, nor does it need to be heated before eating.
Involves budget friendly ingredients you might already have on your fridge and can use for many other recipes!
HERE WE GO!
Ingredients:
whole wheat tortillas... or regular ones
shredded red cabbage
tomato slices
shredded carrots
canned corn
drained tuna can (if it was in water, add a bit of olive oil)
For the spicy ranch dressing:
1/4 cup plain yogurt
1/2 tsp Adobo Goya all purpose seasoning (which substitutes the separate measurements of salt and garlic and onion powder)
a squeeze of lemon
cayenne pepper to taste
sugar to taste to cut the tartness of the yogurt (I just use a packet of Splenda)
DIRECTIONS:
1. Mix all the ingredients for the dressing in a small bowl.
2. Place a tortilla and add the red cabbage, carrots, tomatoes, corn and tuna.
3. Drizzle about half the portion of the dressing (it’s all about personal taste really) over the loaded tortilla and roll it up.
NOTES:
It’s really just the dressing what makes two portions so if you’re not going to use it all right away you can store it in the fridge for up to a week which I absolutely loved. I make these around 11:00 p.m. while watching TV so I can’t really say how long it takes me to prepare them but I’m sure that if you’d want to make them real fast, it wouldn’t take you more than 15 minutes. I usually cut the roll in two, individually wrap them in foil paper and store them in an insulated bowl I bought at an economy store that proved to be great for keeping the food fresh! If you do this, you will notice the tortilla will soften up as it absorbs the humidity of the veggies and tuna but it does not affect the taste and the texture actually works well altogether.
Enjoy!
#lunch#easylunch#lunchforwork#tuna#tunawrap#veggiewrap#wraps#healthy#cheaprecipe#recipe#coldlunch#yummy#food#dressings#ranchdressing#lazylunch#tastyfood#workfood#collegemeals
2 notes
·
View notes