28 Wife. Mother. Simmer. Maxis Mix Welcome to my blog. I'm a builder and sometimes a storyteller. I'm currently working on setting up a Rococo-Esque save in a world I'm calling Simsailles. I'm WCIF Friendly. But some of my CC is private-release, meaning you might not have access to it. Peace & Love. <3
Don't wanna be here? Send us removal request.
Note
Hey! WCIF Siobhan's shawl? Thanks :)
Siobhan’s Shawl is a recolor of Acanthus Sims’ Fichus that I did.
You’ll need the original meshes from Acanthus to make these recolors work.
Here is the link to my recolors.
https://drive.google.com/drive/folders/1RwjjZJT-wf1BkxqkNmCbmK4kWDE7eN5c?usp=sharing
You’ll need these as well:
https://www.patreon.com/posts/robe-langlaise-42154740
14 notes
·
View notes
Photo
The Link has been fixed. I did a silly and forgot to edit it in.
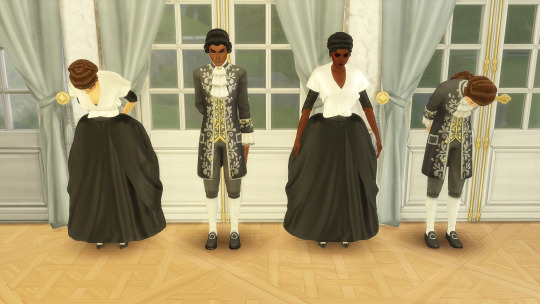
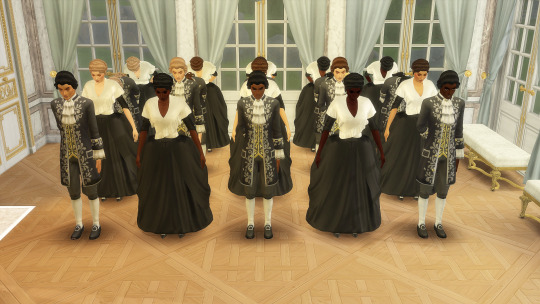
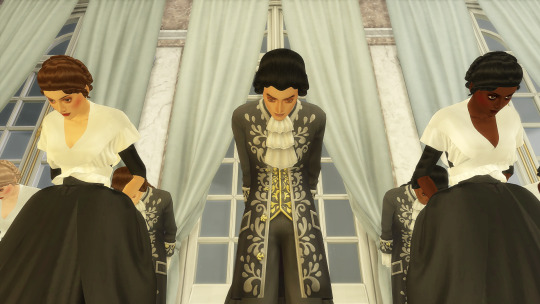
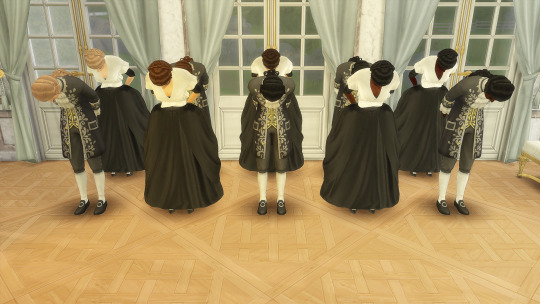
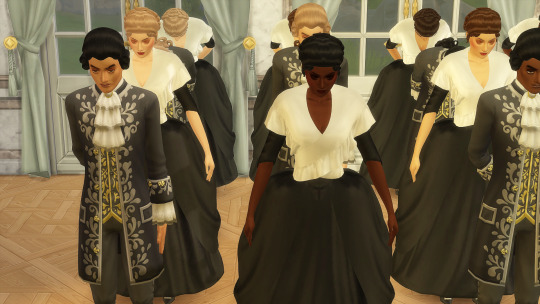
So. I’ve been taking a break from furnishing Simsailles for the last couple days in order to learn how to make Deco Sims!
I present to you: 4 New Deco Sims
2 Maids, and 2 Butlers/Valets.
The maid and butler each have a bowing pose and a standing pose. The come in 5 swatches of varying skintones and hair colors.
Keep reading
308 notes
·
View notes
Note
hi I love your 18th century maids, I already have all the cc and would like to download but your link isn't work. Thanks in advance!
https://drive.google.com/drive/folders/1FeEf43So6jSUiRAU9HEIi-TX83qbbSV7?usp=sharing
1 note
·
View note
Note
could you fix the download link of rococo butler deco sim? :'(
https://drive.google.com/drive/folders/1FeEf43So6jSUiRAU9HEIi-TX83qbbSV7?usp=sharing
1 note
·
View note
Note
Hello Hello! I hope you're doing well & I love your deco sims. I was wondering where's the link to download them (If you're already publish it for download) because there's no download link on the post. Thank you so much for creating them xx
https://drive.google.com/drive/folders/1FeEf43So6jSUiRAU9HEIi-TX83qbbSV7?usp=sharing
Woopsie! I’m a silly
2 notes
·
View notes
Photo

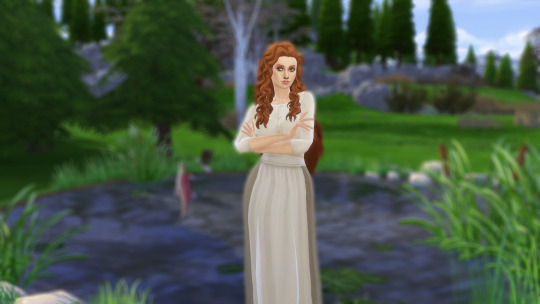
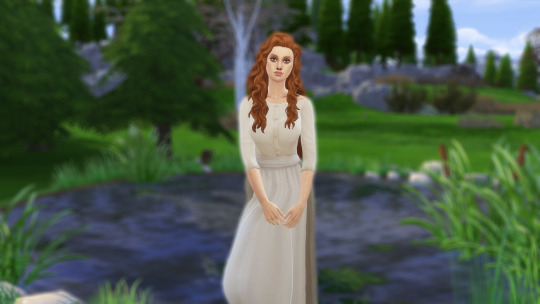
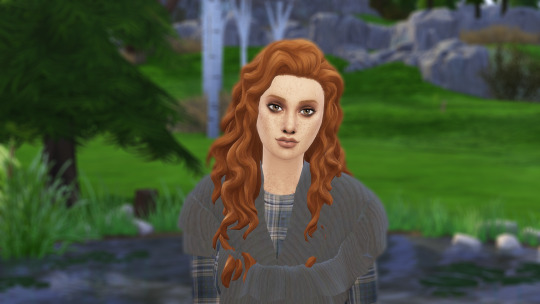
Meet Siobhan Fraser-Montgomery. One of the Founders of my Simerican Settlers Challenge.
She is: - Lawful Good - Family Oriented - Neat
Aspiration: Successful Lineage
Siobhan is the middle of 7 children. She’s a Scotch-Irish Immigrant who came to America with 3 of her 6 siblings, two older brothers and one of her younger sisters. Her sister, Ailis, died on the journey over to America due to illness. Siobhan, Patrick and Killian continued on their travels together. Once they arrived in New York, Patrick fell in with a gang and lost contact with his siblings. Siobhan and Killian left information for him, if he ever cared to look, saying they were headed west to Illinois.
Illinois was great for Killian, who met a fine woman and married her fairly quickly. Siobhan, however, was left wanting. Nothing seemed to fit her in Illinois. So she decided to press on further west and try to find better fortunes for herself.
As soon as she was able to hook up with a wagon train, she left Illinois behind. Somewhere along the trail, she met a man named Benjamin Montgomery. He was a hard worker and smitten with Siobhan rather quickly. Being a practical woman, she decided that if Benjamin asked for her hand, she would say ‘yes’. Love isn’t particularly important when you’re one of seven children and know that there’s only so well you can do in marriage.
She and Benjamin were, indeed, married on the trail to Oregon. The journey was long and fraught with danger. But they managed to make it to their new home relatively in one piece.
Now, the real work must begin.
1 note
·
View note
Photo


So. I’ve been taking a break from furnishing Simsailles for the last couple days in order to learn how to make Deco Sims!
I present to you: 4 New Deco Sims
2 Maids, and 2 Butlers/Valets.
The maid and butler each have a bowing pose and a standing pose. The come in 5 swatches of varying skintones and hair colors.
https://drive.google.com/drive/folders/1FeEf43So6jSUiRAU9HEIi-TX83qbbSV7?usp=sharing
These are decor objects. You’ll find them in your Buy Mode Catalog under “Rococo Maid” or “Rococo Butler”. They cost 1 Simoleoon per Sculpture.
A Big Thank You to the Creators of the CC I used to make these decosims, specifically, @acanthus-sims, whose Rococo hairs are on both the maids and butlers, and whose clothes are on the maids. Go check out their Tumblr/Patreon pages!
308 notes
·
View notes
Photo
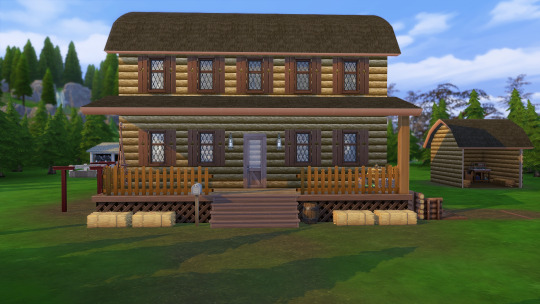
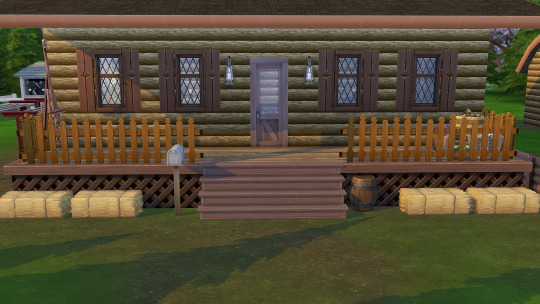
So, I’m starting the Simerican Settler Challenge. This is the lot I’ve built for my founders.
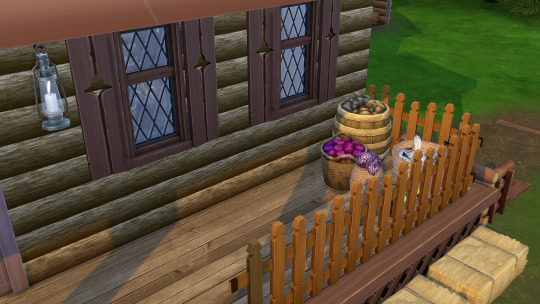
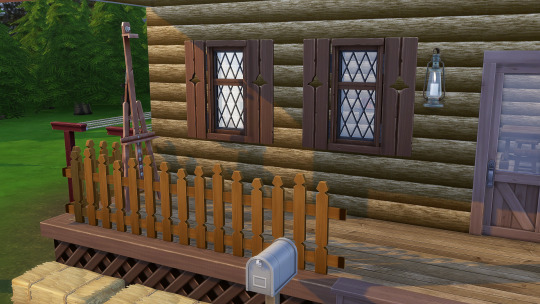
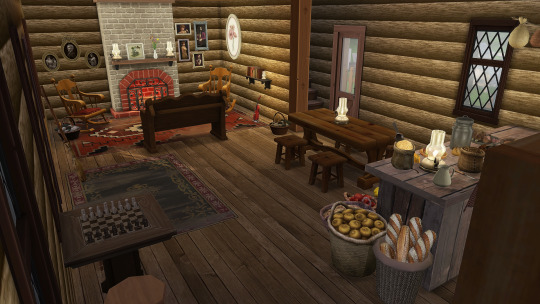
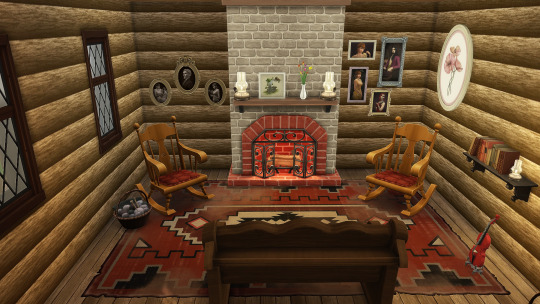
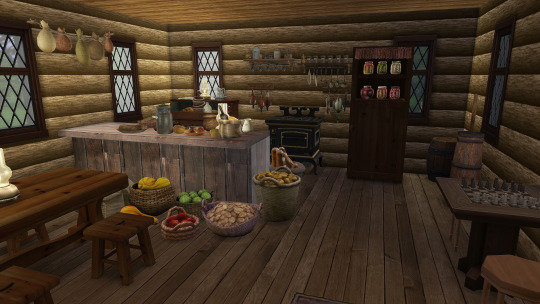
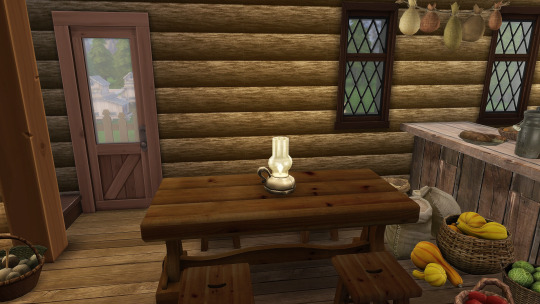
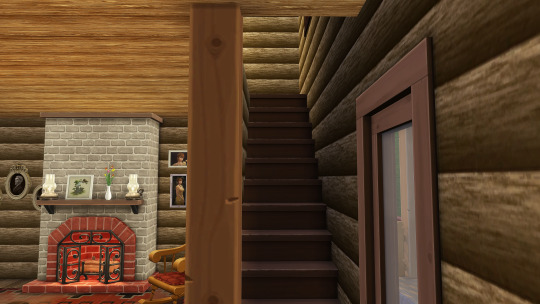
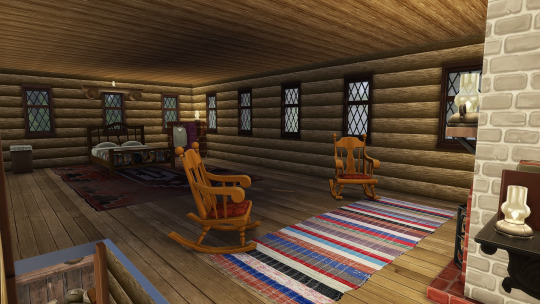
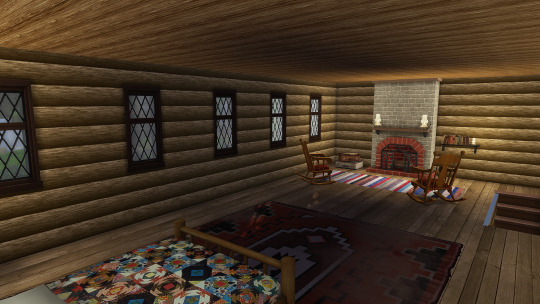
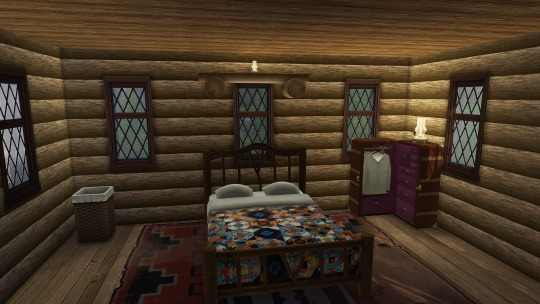
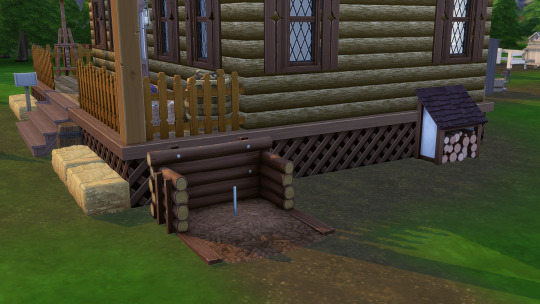
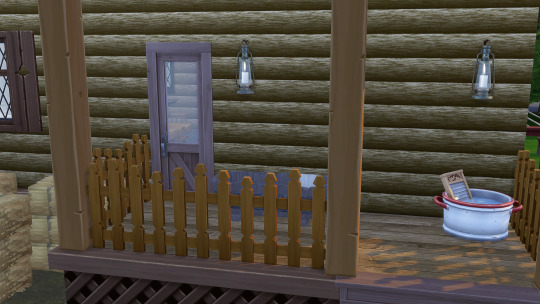
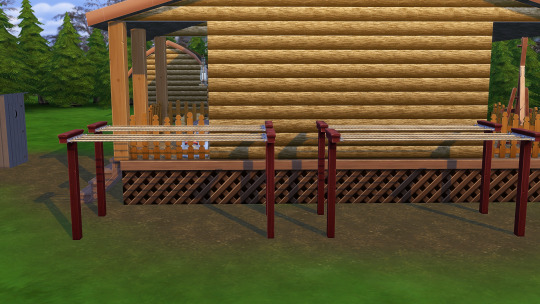
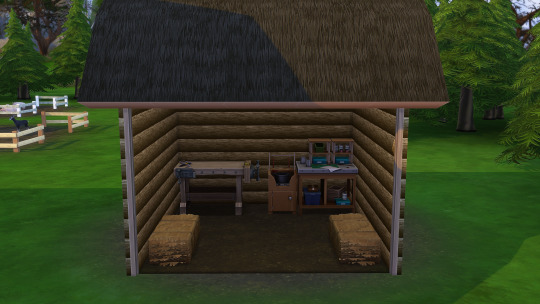
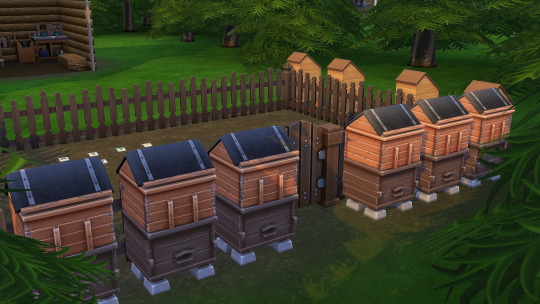
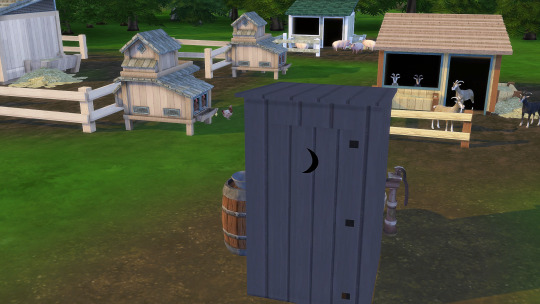
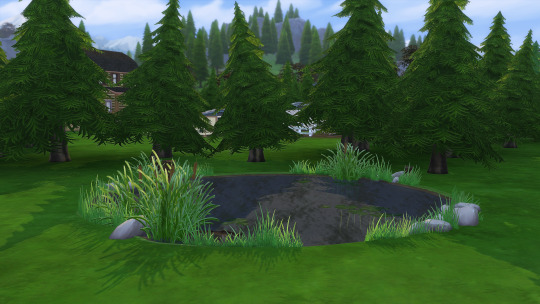
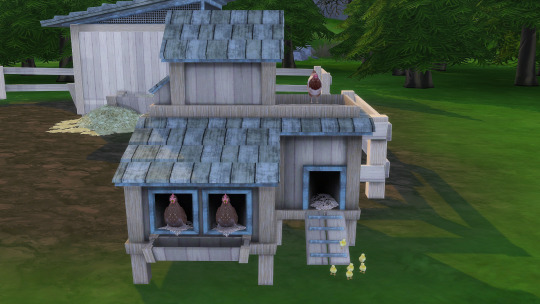
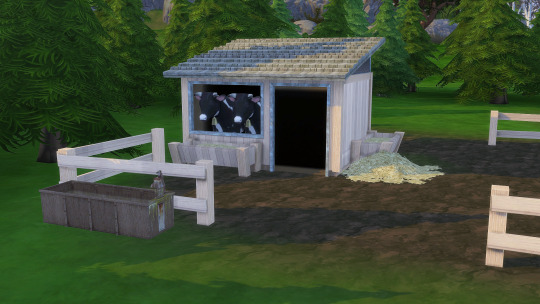
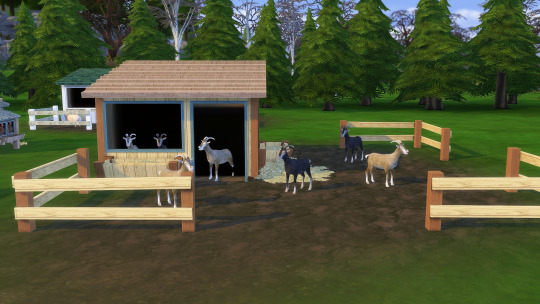
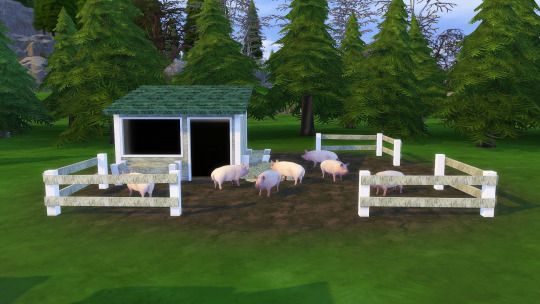
Stuff
#TS4#ts4 build#ts4 lot#ts4 residential#ts4 res lot#simerican settlers#ts4 challenge#simblr#the sims 4
6 notes
·
View notes
Photo
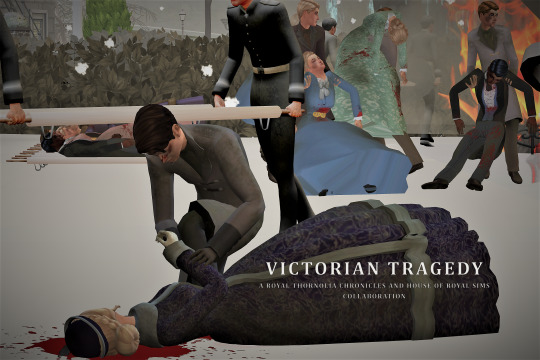


Hello again!
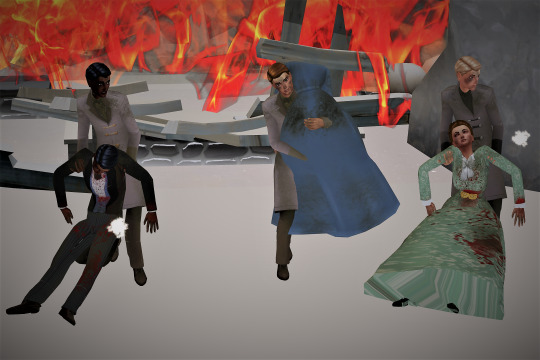
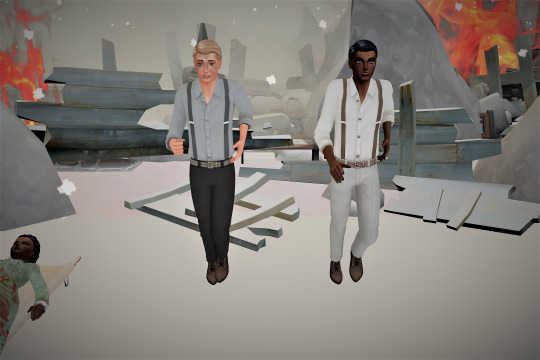
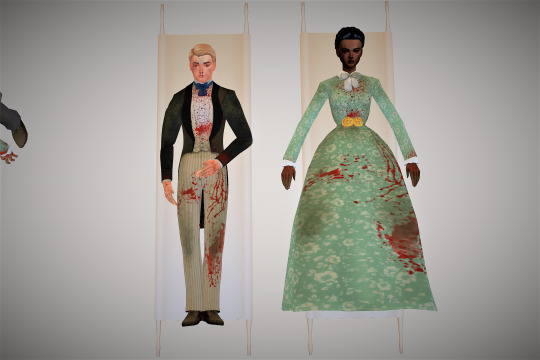
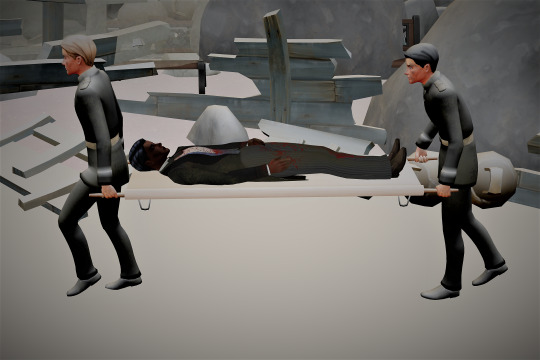
Over the last month I’ve been working hard on a lot of creations to share with you all!This time around I, together with @houseofroyalsims, have put together a few decos in case you ever find yourself in need of some sims involved in an…explosion, or any sort of distressing life event! These were made with my current storyline in mind (if you read my story you may recognize them!), but I felt that in case there were other truly chaotic storytellers out there, these might come in handy!
I think it’s super important to express how grateful I am to House of Royal Sims for their help! Our collaboration was born during a very distressing time in my life when I was in desperate need of some help, and without their willingness to jump into the mid-victorian era during my hour of need who knows where we would be!
And of course, a huge thank you to @melonsloth who created the stretchers! She is truly a godsend in the cc making world and you should all make sure to show her some love! <3
Included:
House of Royal Sims:
Two Running Male Decos: 18 Swatches Each
Female on Stretcher: 18 Swatches
Male on Stretcher: 9 Swatches
Male Carrying Female: 9 Swatches
Female Being Carried: 9 Swatches
Male Dragging M/F: 9 Swatches
Male/Female Being Dragged: 9 Swatches Each
The Royal Thornolia Chronicles:
Dead Females One, Three, and Five: 52 Swatches Each
Dead Females Two and Four: 65 Swatches Each
Two Stretcher Bearers (Front and Back): 8 Swatches Each
Raised and Lowered Stretcher Bearer Created by MelonSloth
Resources:
Marie-Louise and Sissi’s Dress Created by @linzlu.
Fancy Fascinator by Plumbob Society.
Men’s Day Wear by Simmer of the Dawn.
@simstomaggie‘s Recolour (N/A) of Melonsloth's RAF Uniform Without Sash.
My TOU:
Please do NOT claim as yours.
Do NOT put behind paywalls.
Do NOT reupload.
If you feel so kind, please tag me if you use them! Would love to see your sims! (@theroyalthornoliachronicles)!
DOWNLOAD
@ts4-poses
290 notes
·
View notes
Text
[TS4] PSA/REQUEST: Japanese murals & wall coverings...
In celebration of the new EP coming up, I’ve felt inspired to make Japanese wall coverings ranging from traditional to more modern to “inspired by.”
However, I am mostly unfamiliar with Japanese motifs and symbols and I would like to be sensitive to both Japanese culture and surrounding Asian cultures so that I don’t include something super terrible.
I essentially need to know 2 things:
- What kind of walls would Japanese players like to see? I’d like to do a wide variety if possible, so the sky is the limit!
- What kind of walls would people in general like to see?
- What would be some good resources on Japanese motifs? Obviously I’m searching Google, but I’d rather err on the side of caution and reach out to the TS4 community to be sure I’m doing things right.
Feel free to reblog this!! Also, if someone has any ideas, you can send in an ask or dm me. (I’m working on one more commission today and then I can devote the rest of my time to this so please bear with me.)
3 notes
·
View notes
Text
A Quick Tutorial: Weird Shadows on Deco Sims.
Hi All!
I have spent the last week AGONIZING over shadows that kept appearing on my deco sims creations. When I say I was nearly close to pulling out my hair and throwing my laptop out the window, I am not joking.
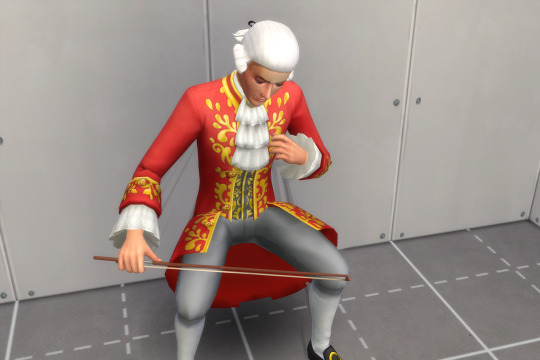
Do you see them? For SEVEN DAYS I did nothing but cry over the fact that nothing I could do would get rid of those condescending little lines (I’m not bitter at all…). It was seriously the most irritating thing!
But as of an hour ago, I FINALLY CRACKED THE CODE! And I’m here to share my knowledge with you, because currently there seems to be no proper tutorial to help people solve this problem. So…I hope this helps other people from going as insane as I have in the last week.
1. First thing to do of course, is to build your deco sim. I highly recommend the tutorials from both @melonsloth (Found Here) and Neutral Supply (Found Here). These are extremely useful guides! You’ll also have to make sure that your SSAO’s are set to 0. For that tutorial, click here.
2. Once you’ve uploaded both meshes and shadow meshes into s4s, you need to go to the warehouse tab.
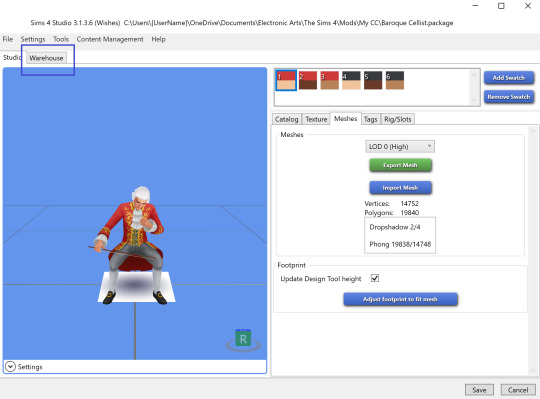
3. Once in the warehouse tab, click on the Model LOD with the group ID 00010000. This is the first of your shadow LODs. Then click on the data tab there on the top right, and then click edit items.
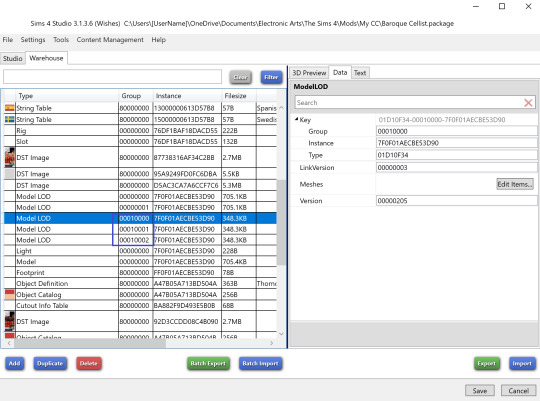
4. Scroll down until you see the ScaleOffsets section. Under that tab, click the Edit Items button in the Materials section.
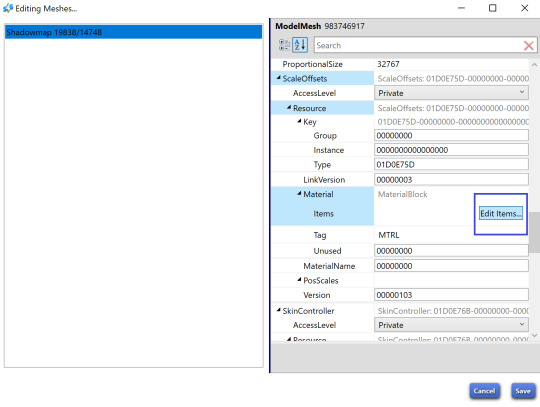
5. Click on the PosScale and change all the values to 1. Click save and the go back and do the same thing for the other two shadow LODs (Group IDs are 00010001 and 00010002).
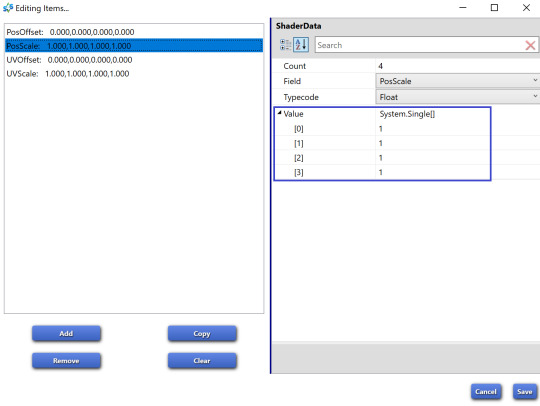
Then click save and test it out in game.
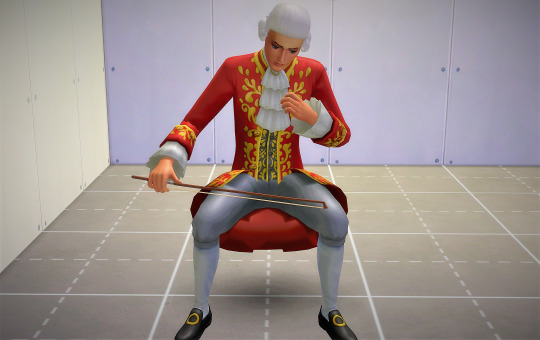
TA DA! Success!
I hope this tiny tutorial will prove useful to anyone who makes, or plans to makes deco sims in the future! Now you won’t have to pull out your hair like I tried to do all this last week (and yes….this means I will be sharing some decos with you in future)!
Now…back to preparing for the next chapter with our favourite Thornolians…
Once I stop crying with relief that is…
179 notes
·
View notes
Photo

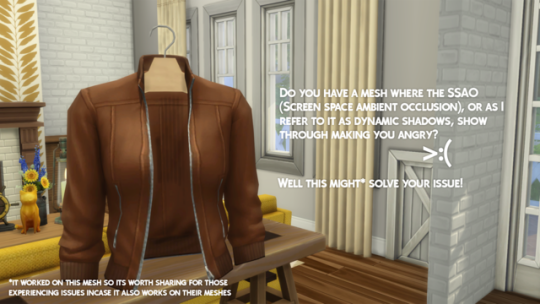


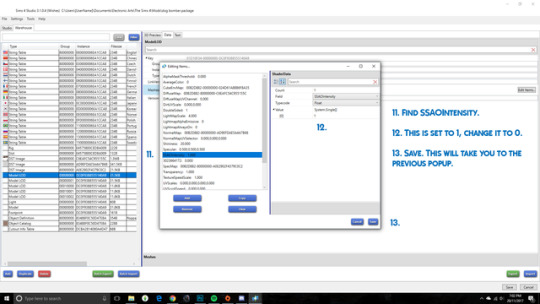
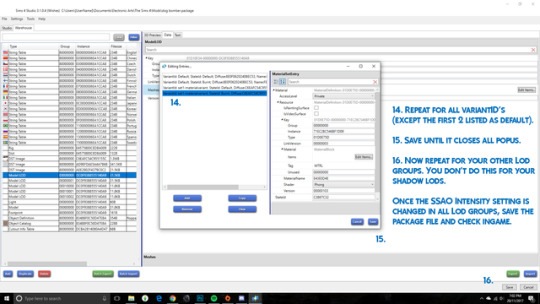
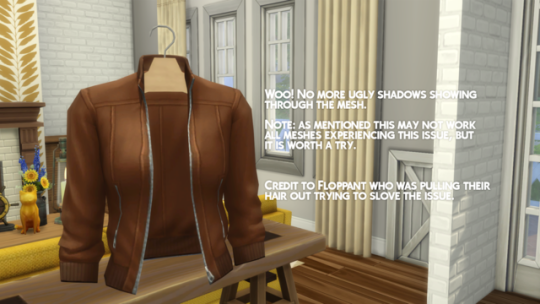
Stopping Shadows from Showing Through A mesh
@floppant was having an issue where the SSAO was projecting through their mesh when it should have been cutting it out from view. This seems to have become a problem since the last patch, so I helped out and found a solution.
This may not work for all meshes as I have seen a few people saying this is now an issue. It is worth a shot though and might resolve the problem.
Note: this is designed for creators not downloaders are it requires some knowledge of the warehouse section of S4S to navigate and change values.
Basically the method is:
Open the package and go to the warehouse tab.
Find the model lod entry with a group ID of 00000000. Click on the data tab then the edit items button.
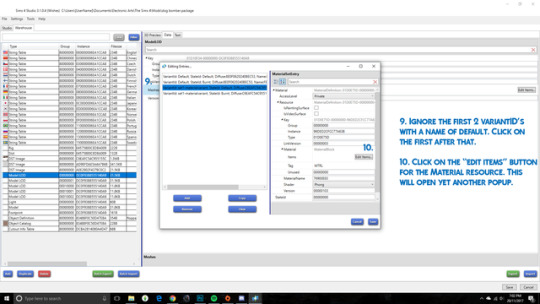
Navigate to the phong mesh group then the material resource and click the edit items button.
Find the variantID for your object (not the ones with default in the name) and click the edit items button under materials.
Find the SSAOIntensity setting. Change from 1 to 0.
Save and repeat for other variantID entries.
Save to exit all popup and repeat for other lods.
Save then test ingame.
Hopefully this helps a few creators out there finding out their meshes are doing this weird thing.
756 notes
·
View notes
Text
Deco Sims - A Tutorial
FINALLY IT HAPPENED!!
I promised this tutorial forever ago and I finally got around to writing it.
DISCLAIMER: This tutorial assumes you have a basic knowledge of blender/studio. The steps described below aren’t advanced by any mean, but they do require you to know your way around the programs.
THINGS YOU WILL NEED:
a. Blender
b. Studio
c. Photoshop
d. THESE psd’s for the sims’ base (they include three skintones and three eyecolors already, feel free to add your own)
STEPS TO FOLLOW:
1. In studio, go to CAS -> create 3D mesh

2. Choose whatever dress you want your deco sim to wear and create a package. You will be throwing this away when done so don’t worry about keeping it safe.

3. Export both the diffuse map and the mesh of the dress.
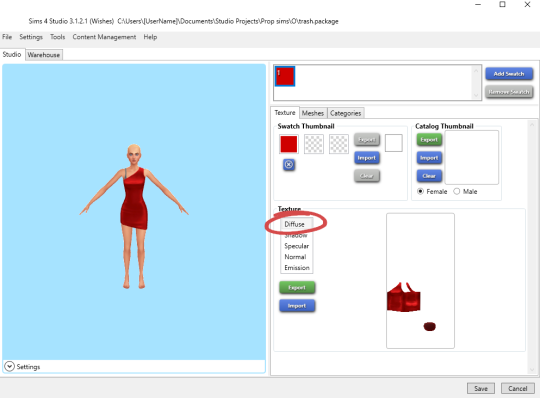
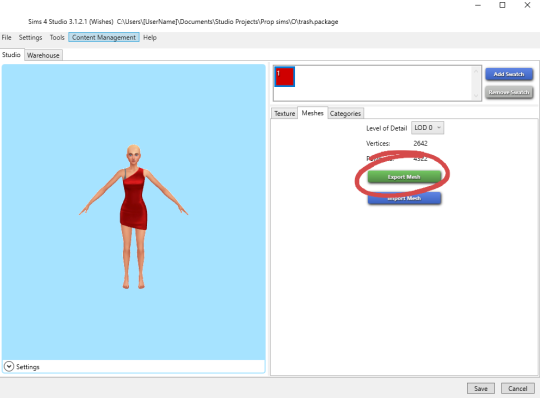
4. Repeat steps 1-3 for shoes, hair, and any other accessories you would like to apply to your sim.
5. Back in the Studio main menu, select Animation -> clip pack
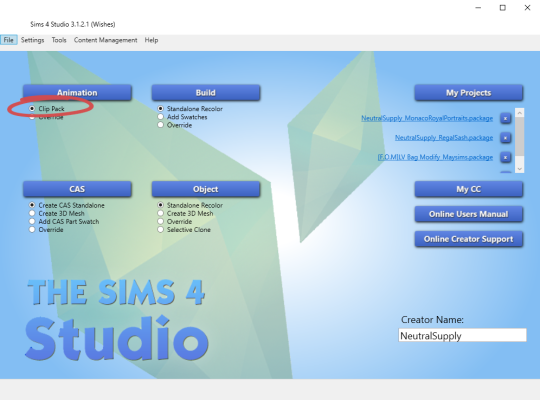
5. Select EA Clip and click export. Choose whatever animation you want to use. Most are self explanatory, others you can just play around with.

6. Open the animation in blender. Drag the timeline along until you find the frame you want to use.
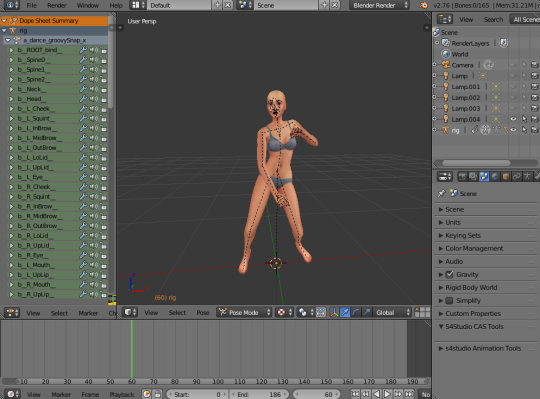
7. Append the dress mesh you exported earlier to the animation (it may have more than one mesh).
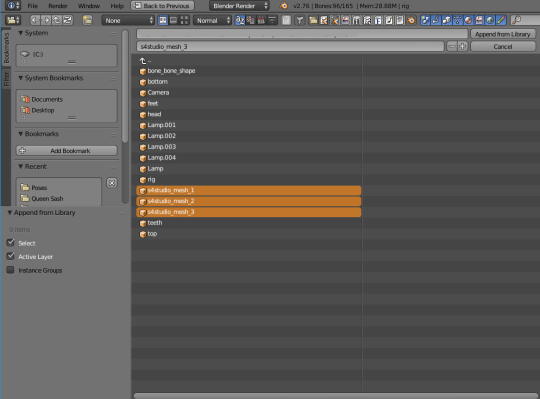
8. Select all the meshes in the dress and join them. Delete the rig that came with the dress (it should be rig.001) and any other “bones” or “empty” that came with the mesh.
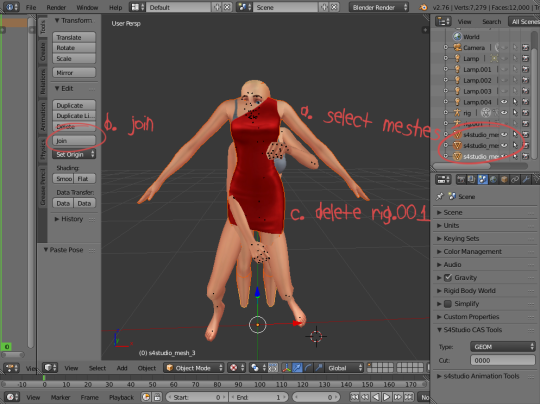
9. With your dress mesh selected, go into your modifiers tab. The armature modifier should already be there (if not, add it). Select “rig” as the object and the dress will mold to the rig. Click “apply”.
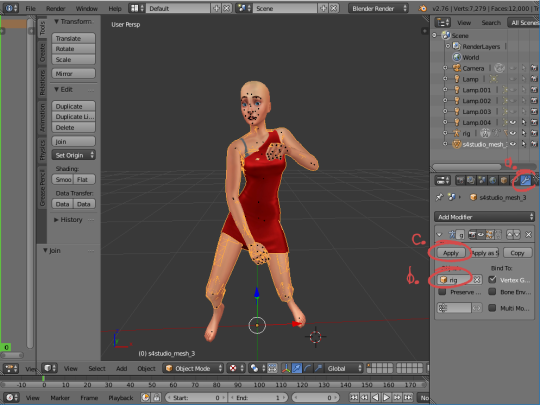
10. Repeat steps 7-9 for hair, shoes, etc.
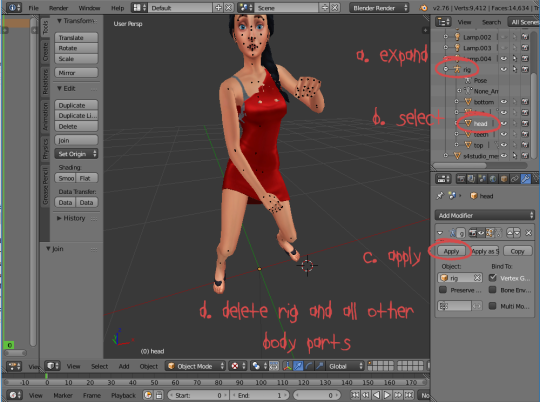
11. Expand the rig so it shows all the sims body parts. The only one you will need is the head, as the dress and shoes already have all other body parts covered. Select the head, go into modifiers, and click “apply”. Now delete the rig, as well as all the other body parts. Join the head, dress, hair, shoes, etc, together.
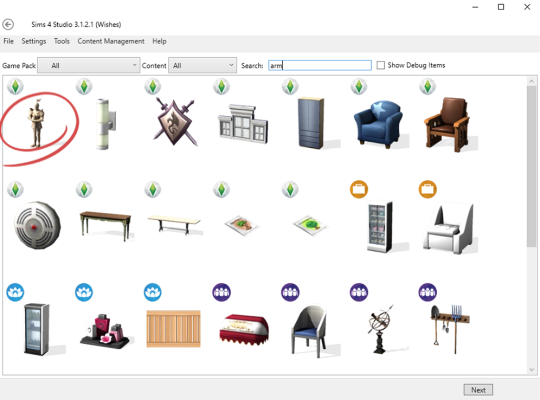
12. Go back into studio and select Object -> Create 3D mesh

13. Choose a statue mesh. I like to use the suit of armor. Select it, and export it. This will be the file that will become your deco sim, so you want to name it and store it properly. Once in the file, export the statue’s mesh.
14. Append the statue’s mesh (both mesh and shadow mesh) to the sim. Edit the shadow mesh to fit under the sim’s feet.
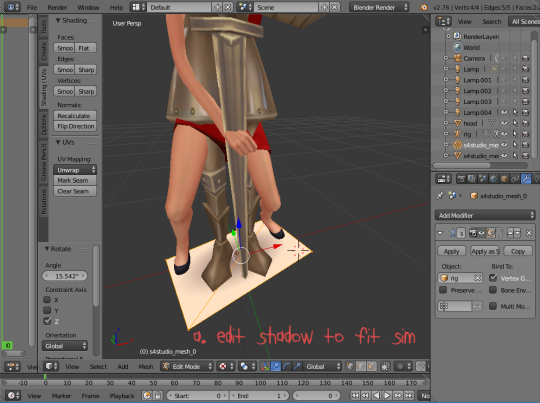
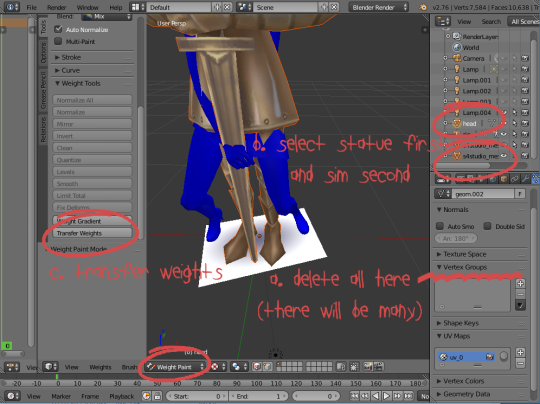
15. With the sim mesh selected, go into the object data tab. Delete all the vertex groups you find there (there should be many). Now select the statue first, then shift+click on the sim mesh, and go into weight paint mode. Transfer weights.
NOTE: You can obviously also just add a “TransformBone” group and weigh the mesh 100% on it, I’m just too lazy to type and would rather click 100 times.
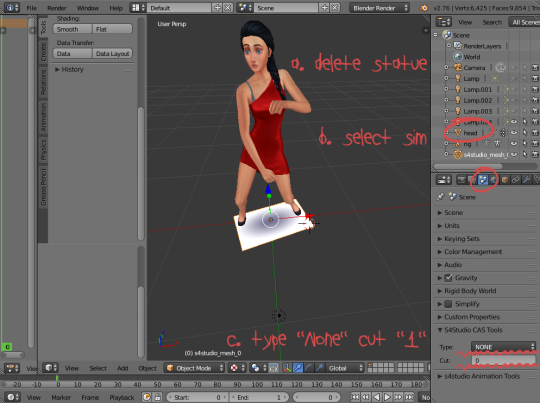
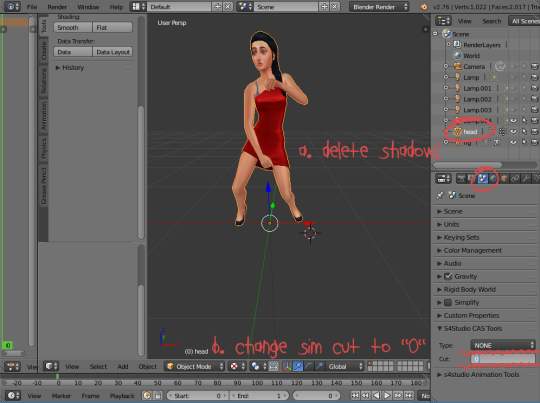
16. You can now delete the statue. Select your sim mesh, go into scene tab, and in the studio CAS tool change type to “none” and cut to “1″ (do as I say, not as I show - I accidentally took the pic with the shadow mesh selected).
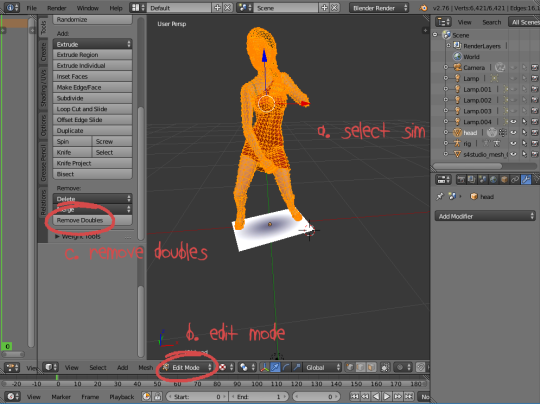
17. With the sim still selected, go into edit mode. In the tools panel, click “remove doubles”. This will help reduce vertex count and keep the mesh intact when you decimate it to make lower LODs.
18. Save the mesh as DecoSimYOURNAME
19. Now select the shadow mesh and delete it. Select the sim mesh, go into scene tab, and change cut from “1″ to “0″.
20. Save this file as DecoSimYOURNAMEShadow
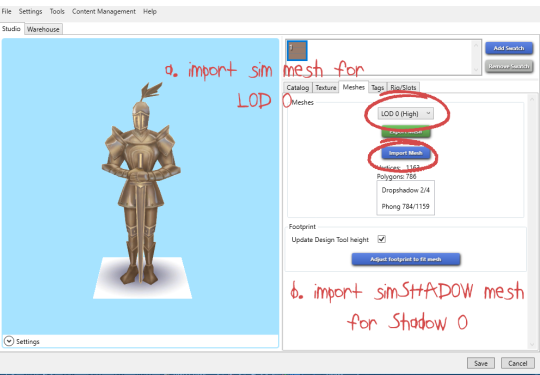
21. Back to studio. Go to your deco sim file (that is currently still the statue) and import your DecoSimYOURNAME mesh for LOD 0. Import your DecoSimYOURNAMEShadow for your Shadow 0. For LOD 1 / LOD 2 and Shadow 1 / Shadow 2, simply decimate your sim mesh in blender and save the result as DecoSimYOURNAMELow and DecoSimYOURNAMEShadowLow.
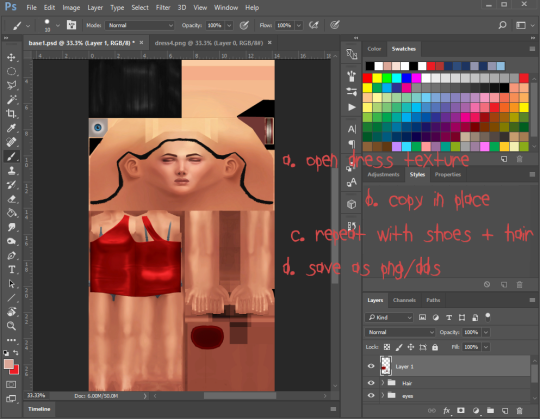
22. Now onto editing the texture. Open the PSD that is linked at the beginning of the tutorial. Also open the dress texture. Copy the dress texture, go back to the psd, and “paste into place”.
23. Repeat the same steps with shoes and hair.
24. Save as either png/dds (I just use png tbh).
NOTE: because this dress doesn’t cover the bra straps, I had to edit them out in PS. You might have to that depending on what clothes you choose to use.
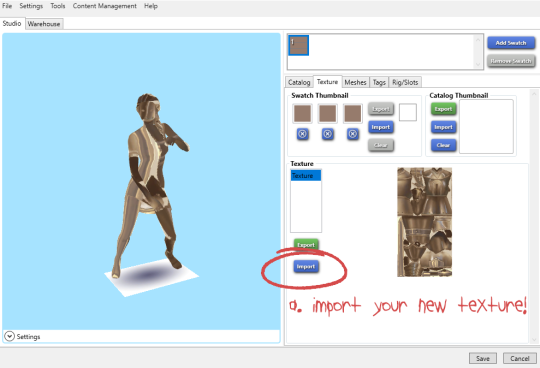
25. Go back to studio, and import your new texture. And TAAA DAAA!! You are done. I don’t have a photo of the finished product because my computer crashed, but you get the idea.
Hopefully these steps are easy and clear enough to follow! As I have mentioned before, making deco sims is not hard, just time consuming.
Also! Don’t forget to change the catalog name/description and give your deco sims the correct tags :)
HAPPY SIMMING EVERYONE!!
1K notes
·
View notes
Photo
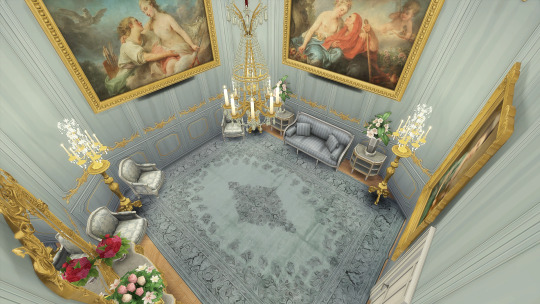
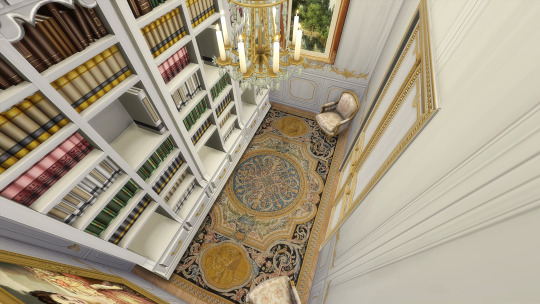
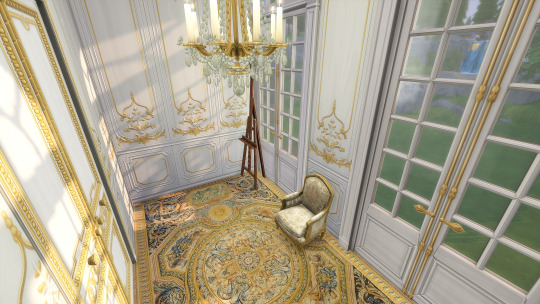
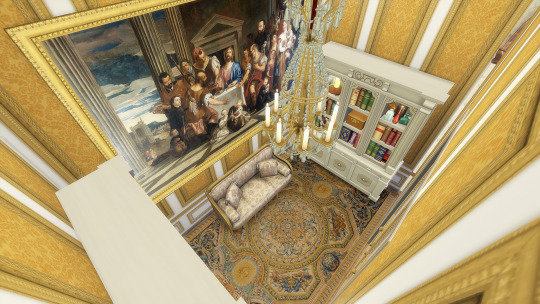
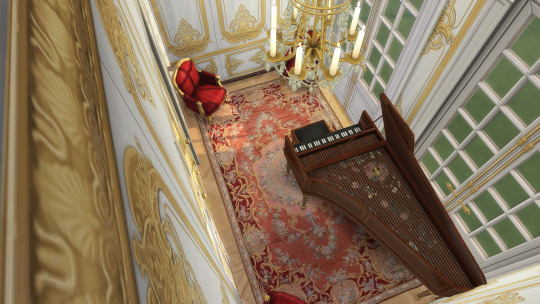
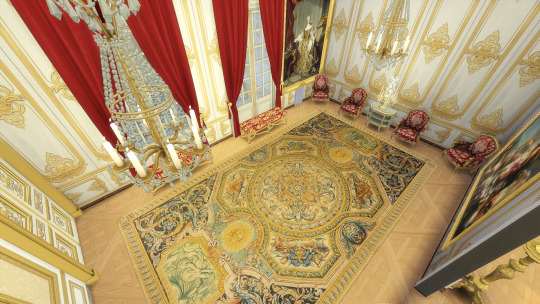
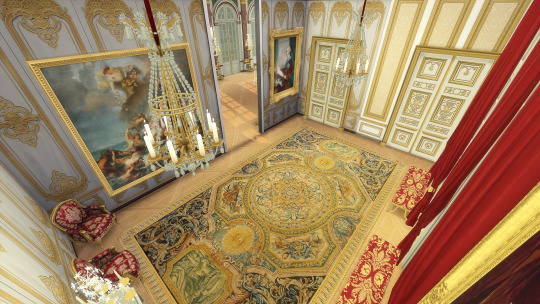
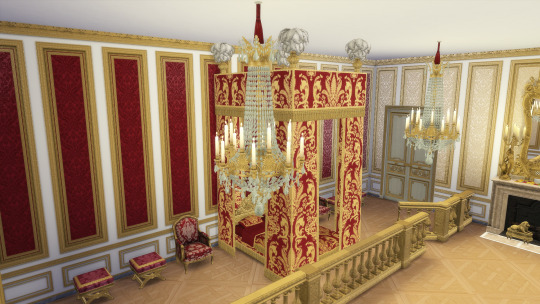
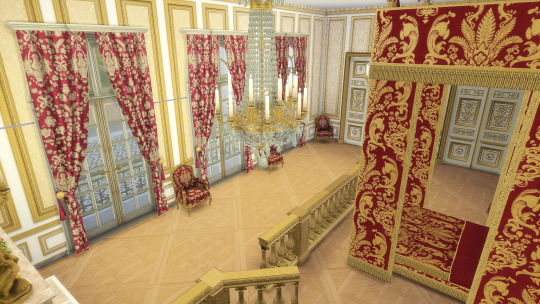
Because of the extra space in my game, I added 4 rooms which do not exist in the real Chateau de Versailles. They are:
Peace Salon Library
Peace Salon Painting Room
War Salon Library
War Salon Music Room
I updated the Cabinet of the Meridian to include a rug, and am working on the King’s Bedchambers. They seem to need something else, but I can’t put my finger on it yet.
7 notes
·
View notes
Photo
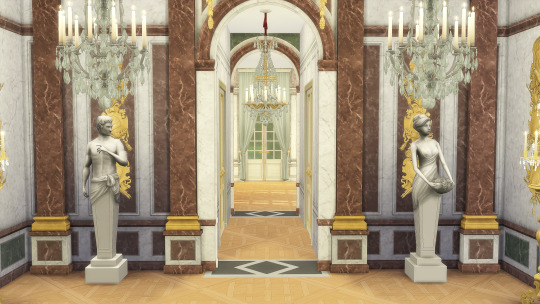
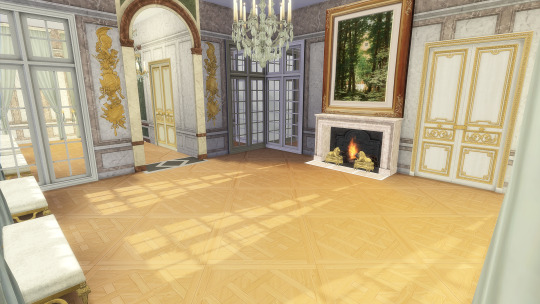
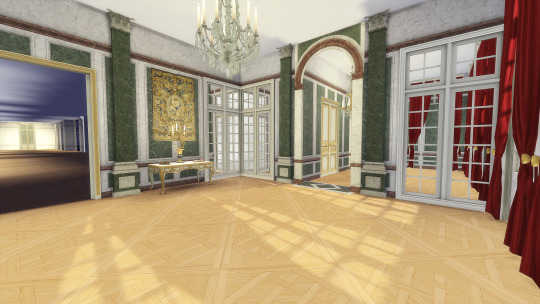
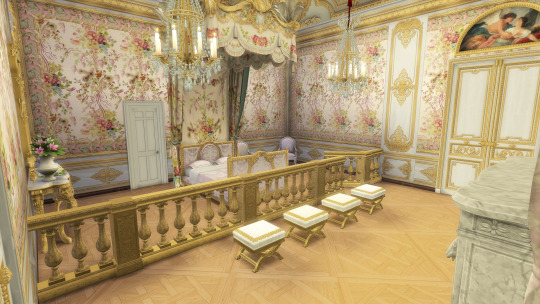
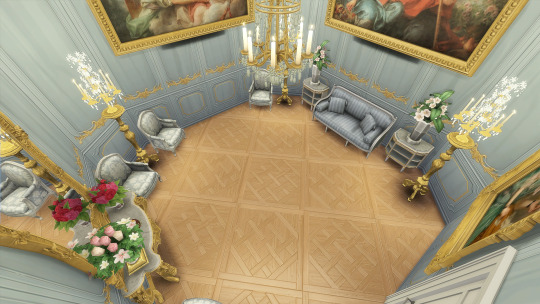
Some more shots of Simsailles. 5 rooms are completely finished.
In order to make the War and Peace Salons perfectly square, I added some hallways, which gives us 4 extra rooms on either end of the Hall of Mirrors. I plan to use 2 of these rooms as small libraries, one as a painting room, and the fourth and final room is to be determined.
The project is coming along nicely, in my personal opinion.
57 notes
·
View notes
Photo
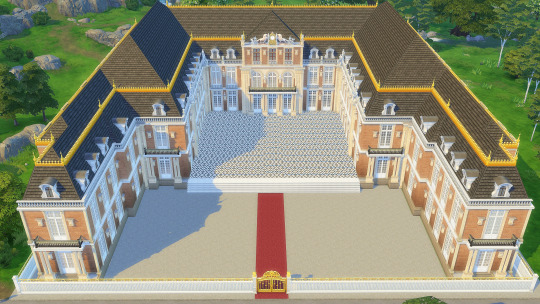
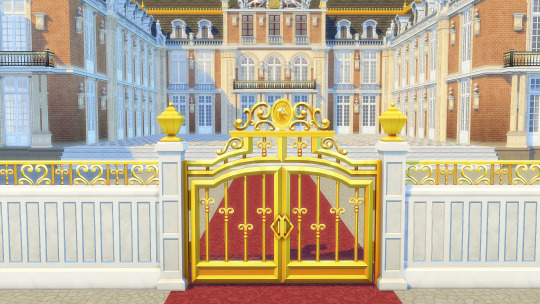
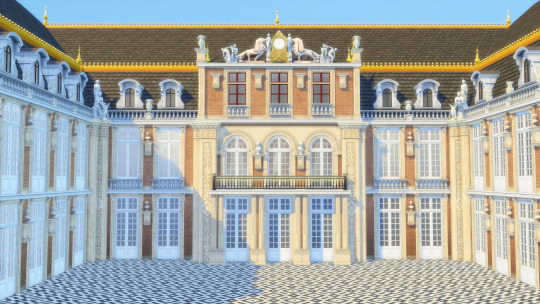
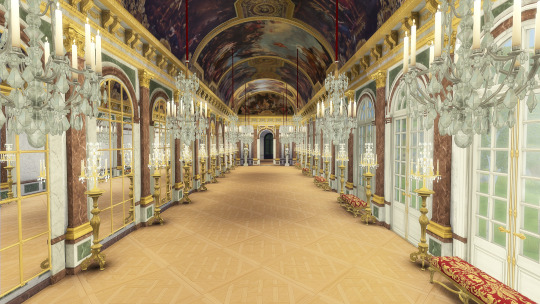
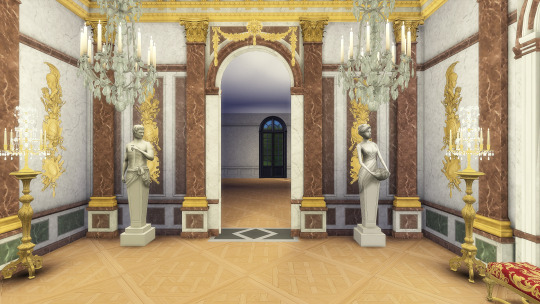
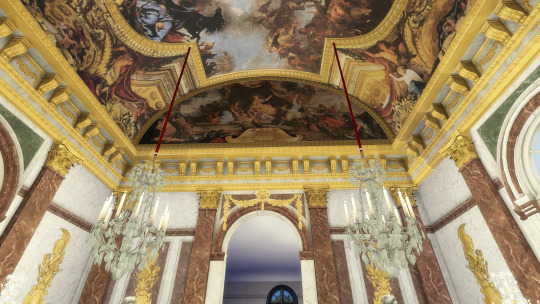
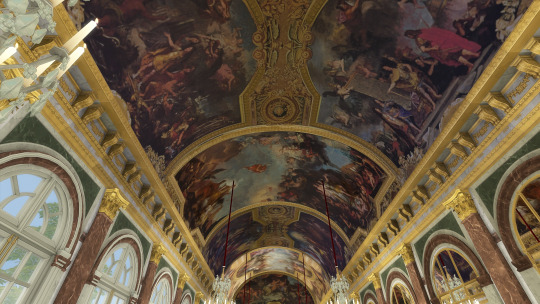
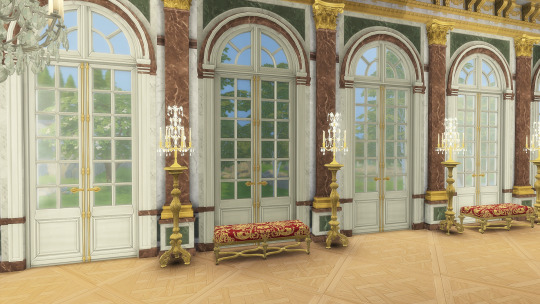
Versailles is coming along wonderfully! A big huge thank you to @mrtri91 for all the help in figuring out how to make it a more accurate representation of the beautiful palace!
The Hall of Mirrors is done! And it only took a couple of days. Much less time than I had expected it to.
43 notes
·
View notes
Photo
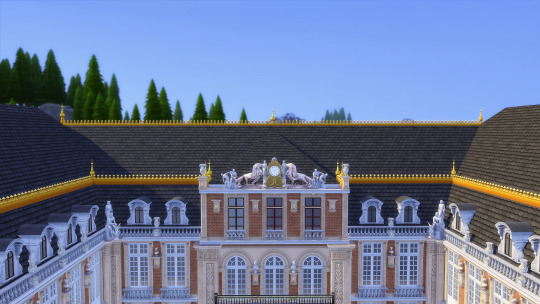
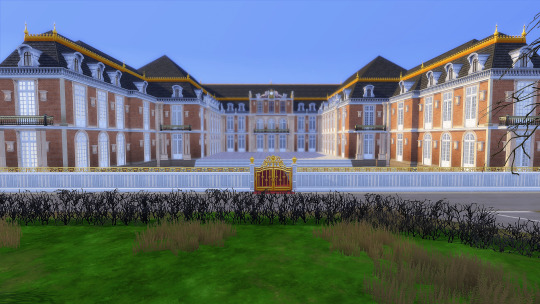
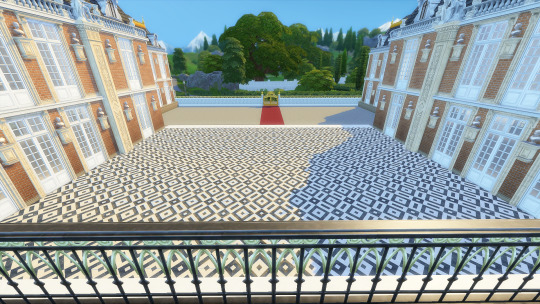
Here are a couple of teaser shots for my current WIP build. It is, of course, based on the center of the Château de Versailles. Currently, I’m working on the Galerie des Glaces (the Hall of Mirrors).
I’m hoping to stick as close to the original lay out of the palace as possible. But some rooms will obviously have to be removed, as this is the Sims and we unfortunately have lot size restrictions.
Fun Fact: One reason the Galerie des Glaces was built to connect the left and right wings of the palace, as it was an uncovered courtyard before this. Many of the courtiers actually became ill and died from having to traverse the long courtyard in the winter and poor weather.
10 notes
·
View notes