A small place to share our inspiration and current works with everyone.
Don't wanna be here? Send us removal request.
Text
How to Create a Planet in Inkscape.

Creating a planet can be simple using the Shape Tools and Masks.
We need to set up our document to make it easier for us to work. Let's get started.
Setting Up Your Document.
1. Start up Inkscape and it should open a new document. Toggle off "Snapping (%)" by holding Shift + %. You'll see snapping is disabled in the Snap Bar.
Snapping Enabled in the SNAP BAR:

Snapping Disabled in the SNAP BAR:

2. Now save your document by hitting "CTRL + S". Name your document "PlanetTutorials". Click on "Save" to save your document. You are now ready to start.

Creating Your Planet.
3. Click on the "Rectangles and Squares tool (F4)" in the tool box.

4. Draw a large square. Click on the lightest brown color in the "Color Palette" menu along the bottom. You'll add new rectangles on top of this large square.

5. Create multiple rectangles that are darker shades of brown. Overlap the rectangles to add variety to the planets surface.

6. Select the "Circles, ovals, ellipses, and arcs tool (F5)" to create a white circle on top of the group of objects.

7. Click on the center of the group. Now hold “SHIFT + CTRL and drag“ to create a circle. Duplicate this circle by hitting “CTRL + D”.

8. You'll have to remove the stroke from all the objects. Select all the objects by holding “CTRL + A”. Hold SHIFT and click on the "RED X" in the Color Palette menu along the bottom. Now click anywhere in the canvas to unselect all the objects.

9. Open the Objects Window by going to MENU > OBJECTS > Objects. Now you will lock the duplicate circle object in the Objects Window. Click on the "Lock icon". Now hide this object by clicking the "Eye icon".

10. Click anywhere on the canvas to select all the objects. Hit "CTRL + A" to select all the objects. We will create a Mask with all the items selected.
11. Go to the MENU > OBJECT > MASK > Set. Now go to the object menu. Make the circle object visible by clicking on the "Eye icon". Unlock the layer by clicking on the "Lock icon". Select the circle in the Object Window.

12. Now open up the "Fill and Stroke (SHIFT + Ctrl + F) window" by going to MENU > OBJECT > Fill and Stroke.

13. In the "Fill and Stroke (SHIFT + Ctrl + F) window" under the "Fill" tab click on the "black X" or "No paint". Now click the "Stroke paint" tab and click the "Flat color" square next to the "black X".

14. Click the "Stroke style" tab and click on the drop down menu next to “Width:” with "mm" and change it to "pt". Change the width to "15".

15. Click in the Canvas Window to deselect objects. Select all the objects by hitting "CTRL + A". Now go to the MENU > OBJECT > Transform to open the "Transform Window".

16. Click on the "Rotate" tab in the "Transform Window". In "Angle:" enter "30.0" and click on the "Apply" button. That's it. Your planet is done. Now save your planet by hitting "CTRL + S".

17. Marvel at your new planet. Now go on and create the rest of the solar system.

#inkscape#boxcenturydesign#tutorial#tutorials#planet#vector#how-to#how to#planets#vector art#vector tutorials
2 notes
·
View notes
Text
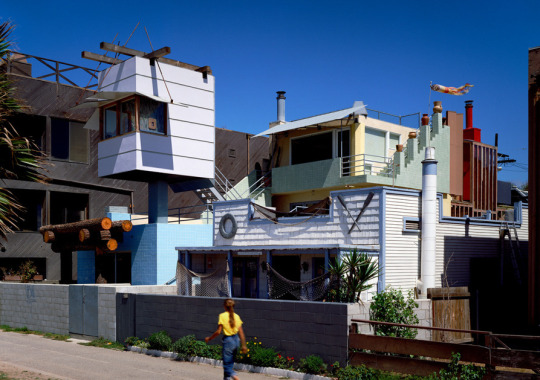
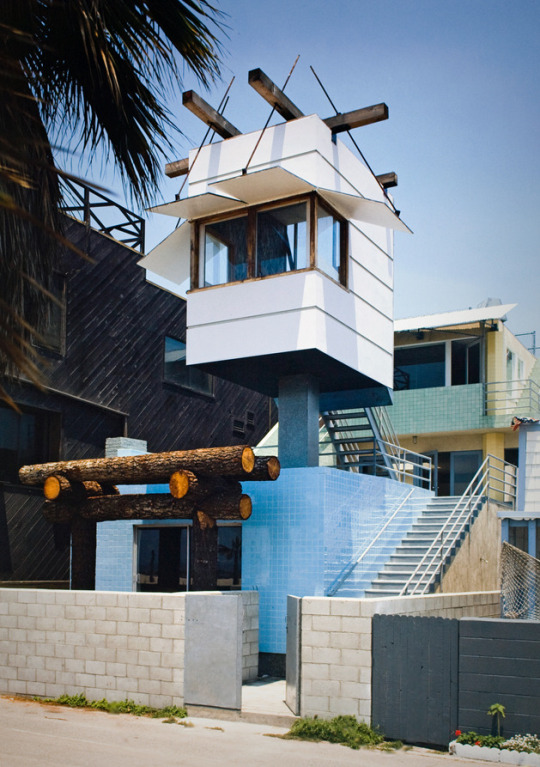
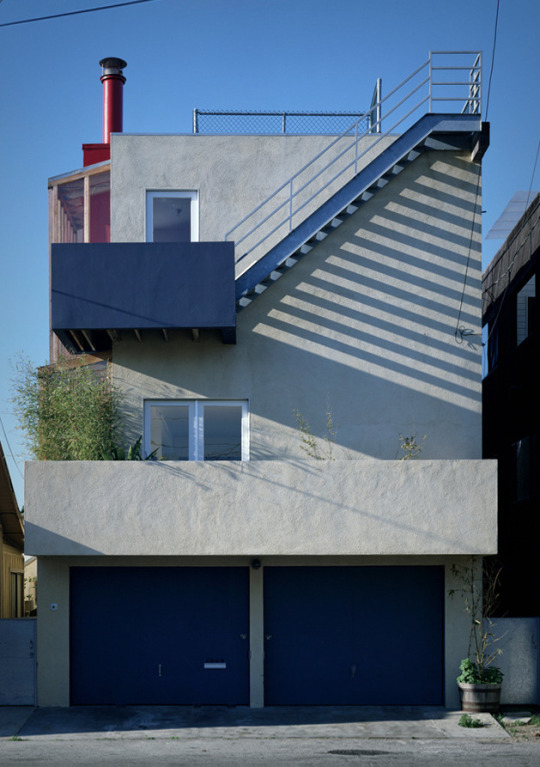
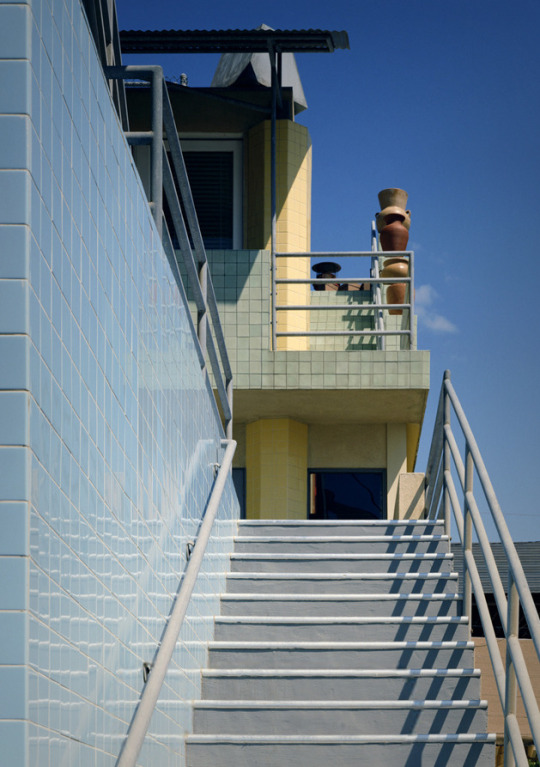
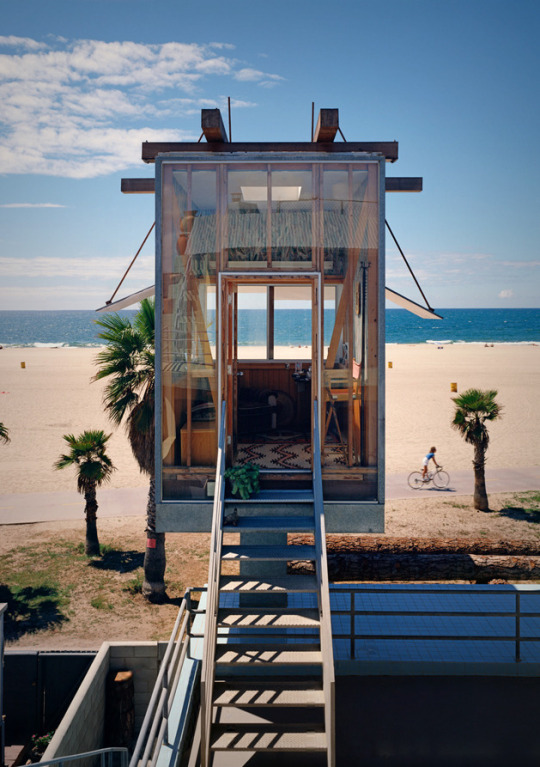
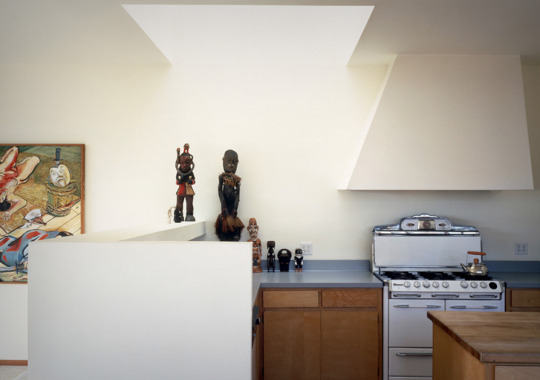
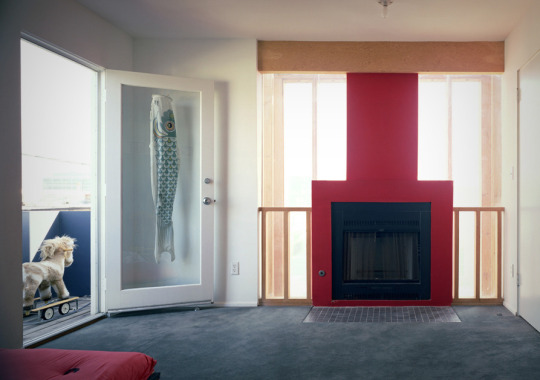
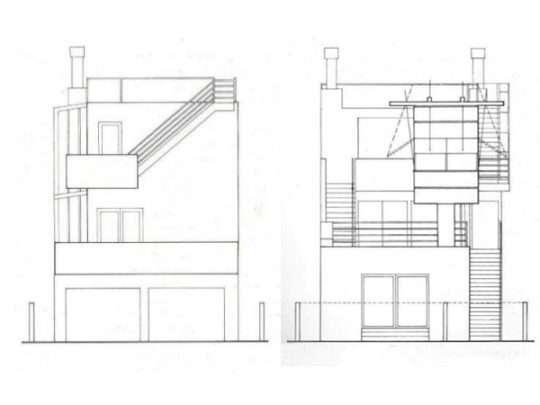
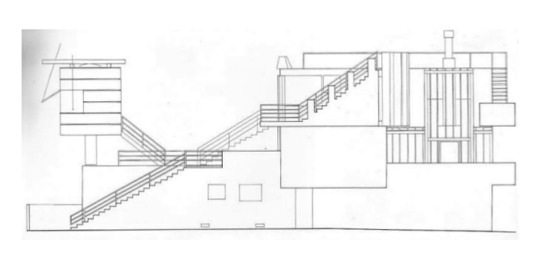
Frank Gehry - Norton House
1984, Venice, California (US)
via #1, #2, #3

208 notes
·
View notes
Photo
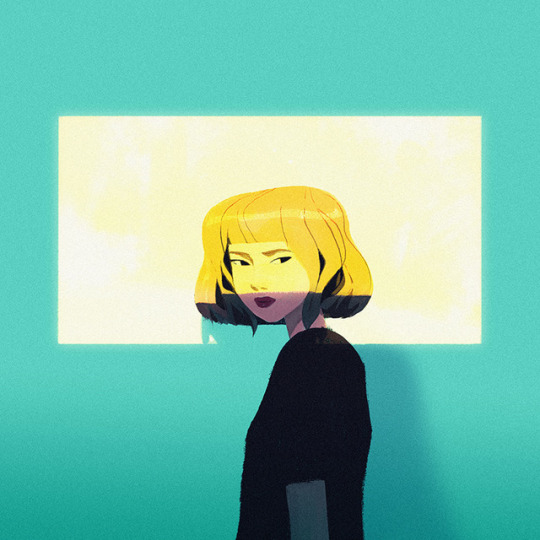
i said “i’m not something to butter up and taste when you get bored”
22K notes
·
View notes
Text
How to Create a Simple Heart Icon in Inkscape.

Creating a heart icon can be simple using grids and the Beizer tool in Inkscape.
We’ll need to set up our Document Properties to make it easier for us to work. Let's get started.
Setting Up Your Document.
1. Open a new document. Go to File > Document Properties (Shift + Ctrl + D).

2. The Document Properties window should open to the Page tab. Under the General sub-menu you should see "Display Units:". Click on it and select the "in" (inches) units from the drop down menu.
3. In the "Custom Size" sub-menu section change the "Units:" to "in" (inches) units.
4. Change the size of the document. Enter "2" for the width and height.

5. Now we need to create a new grid for our document. This will be our guide for easier icon creation.
6. Click the "Grids" tab. Under the "Creation" sub-menu option select "Rectangular grid" and click on the "new" button.

7. The "Defined grids" sub-menu should appear. Under the "Rectangular grid" options menu. Make sure "Enabled", "Visible", and "Snap to visible grid line only" are selected.
8. Change the "Grid units:" to "in" (inches). Enter "0.25" for "Spacing X:" and "Spacing Y:".
9. Now change the "Major grid line every:" to “4″. This will create a grid that will be easier to work with.
10. Now save your document. Go to File > Menu > Save (Ctrl + S). Name your file "heartIcon". Leave "Save as type" to "Inkscape SVG". Click "Save" to save your document.
11. Now close the "Document Properties" by click on the "X" in the top right on menu bar of the window.

12. Go to Menu > View > Zoom > Page or hit the number "5" on your keyboard. This view will make it easier to create the icon.
Creating Your Heart Icon.
1. Click on the Beizer tool (F6) in the tool bar. Go to MENU > Object > Fill and Stroke (Shift + Ctrl + F) to view the fill and stoke options window.

2. Draw a "V" shape that is 1 grid high and 2 grids wide and hit ENTER to apply a stroke the path.

3. In the "Fill and Stroke" window click on the tab that reads "Stroke style". The line width will be in "mm" (milimeters), but we need to change it to "pt" (points). Click on the "mm" option and choose "pt" from the drop down menu.

4. Enter "40" in the "Width" and hit "ENTER" on your keyboard to apply the changes to the lines. Change the "Cap" type from "butt cap" to "round cap". You should now have a heart shape.

5. To turn the line into an Object. Select the line with your Select tool (F1).

6. Go to the Path > Stroke to Path (Ctrl + Alt + C) to turn it into a path. That should make the shape editable. Enjoy your new heart shape.
#inkscape#boxcenturydesign#tutorial#tutorials#icon#icons#vector#how-to#how to#vector art vector tutorials
0 notes
Photo

Hey everyone, just posted my first free brush texture @ http://boxcenturydesign.deviantart.com/. Download it and try it out. I'll be posting GImp tutorials soon that will help you create some amazing work. Check back very soon.
Sorry for the delay. I will not be posting Gimp tutorials. I will instead post Inkscape tutorials.
0 notes
Photo
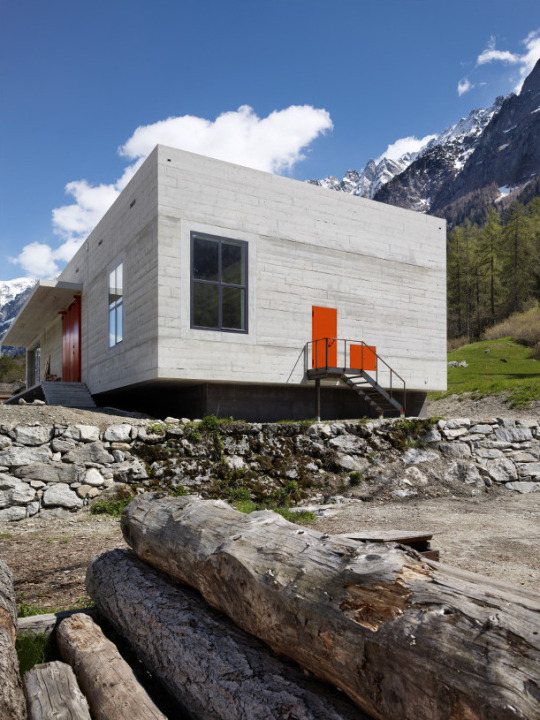
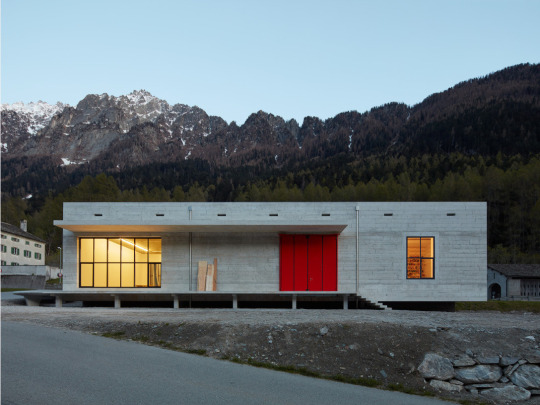
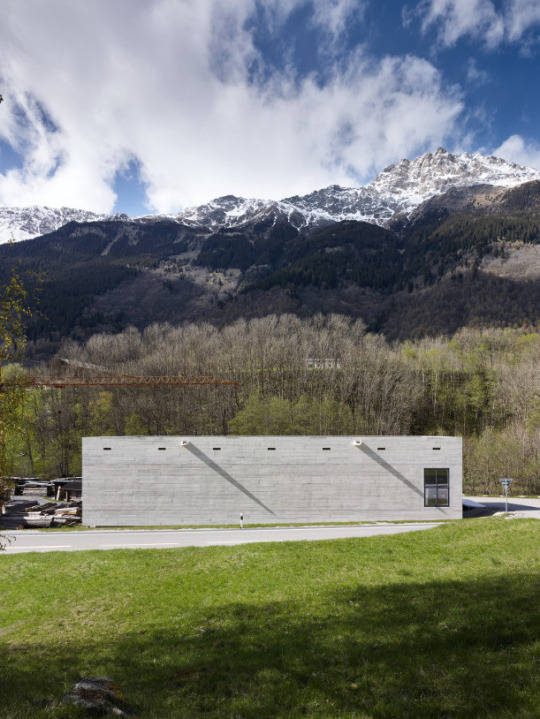
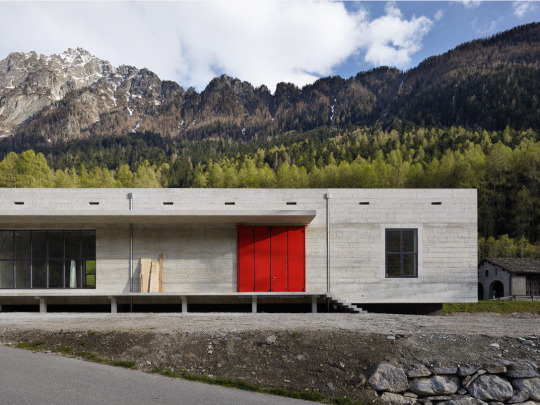
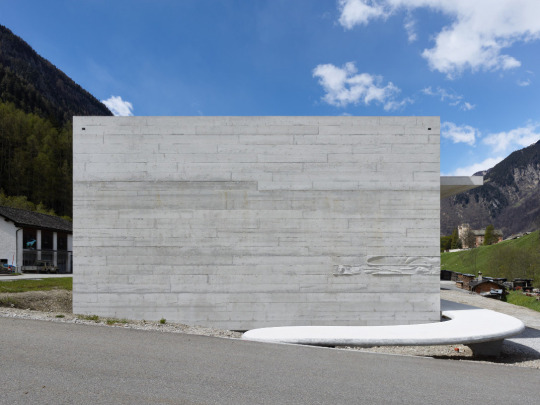
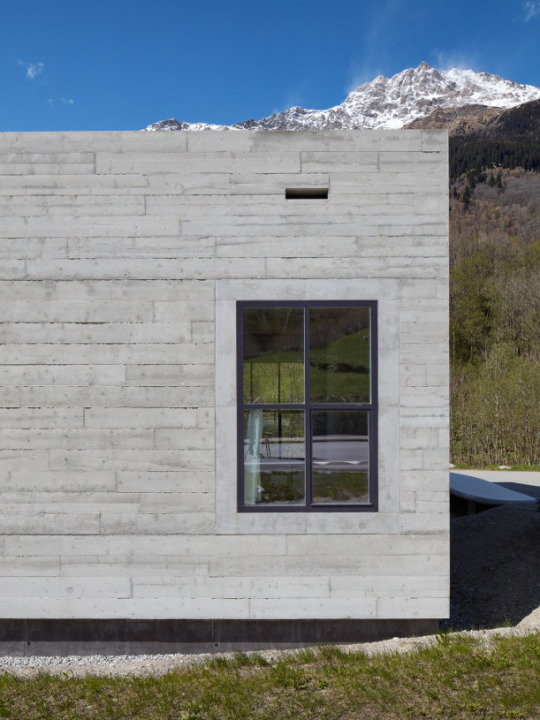
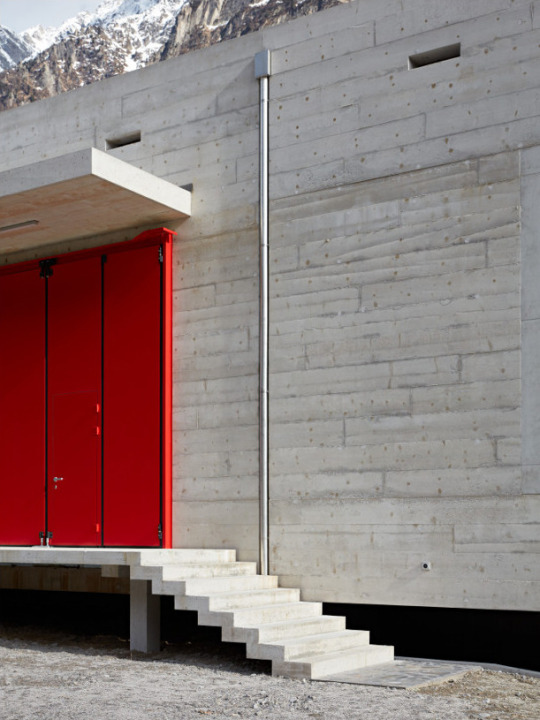
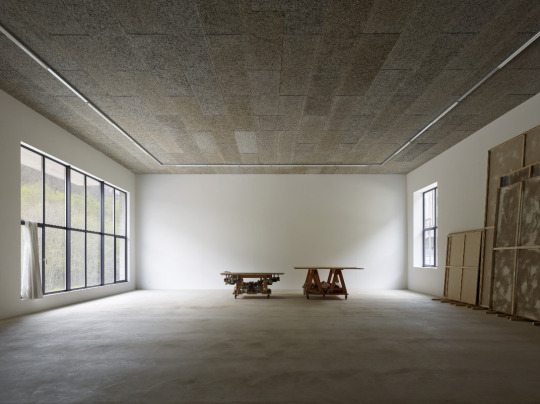
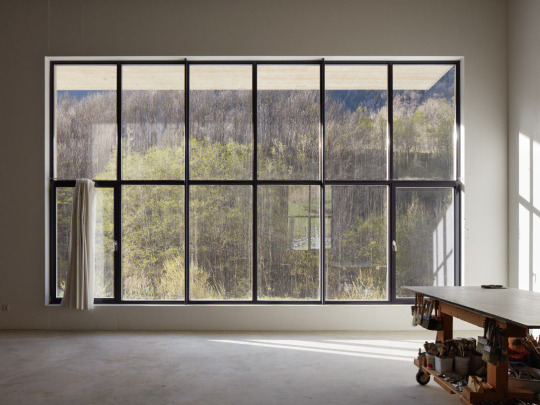
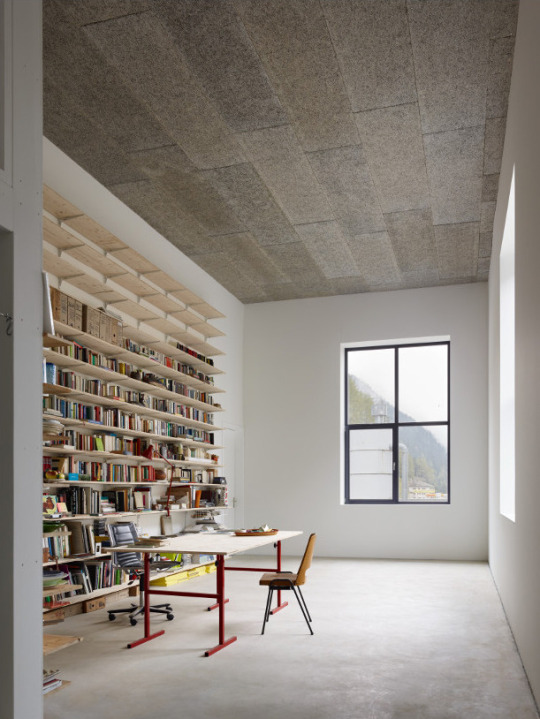
Ruinelli Associati - Studio and workshop for Miriam Cahn, Stampa 2016. An exploration of the of the contrast between industrial building and work space, the hand-made shed and the architectonic. The monolithic structure appears to be embedded into the ground from one view, but also floats above the adjacent river cantilevered off a dark base to exaggerate shadow. The weight of the concrete exterior begins to dematerialize at closer glance, as carefully planned imperfections in the formwork create the appearance of an almost textile finish (see below). Photos © Ralph Feiner.
Keep reading
248 notes
·
View notes
Photo
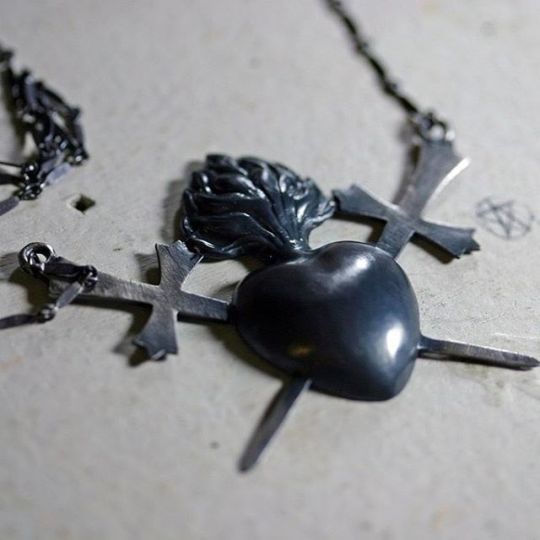
Amour Fou. Part II. 🖤 #BloodMilk jewels on the #HauteMacabre Valentine’s Day gift guide 🖤 HauteMacabre.com
94 notes
·
View notes
Photo
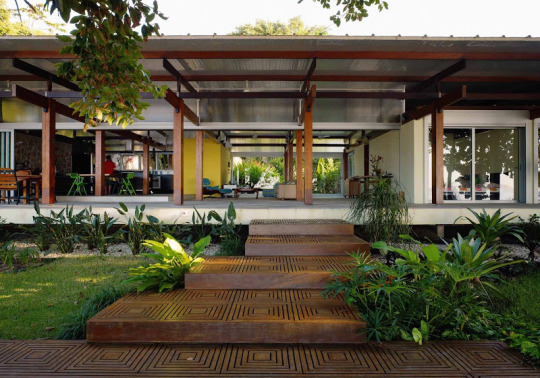
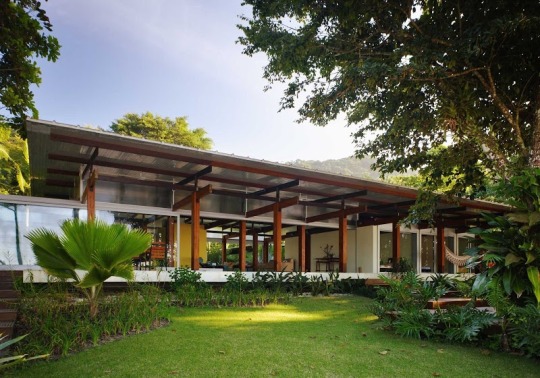
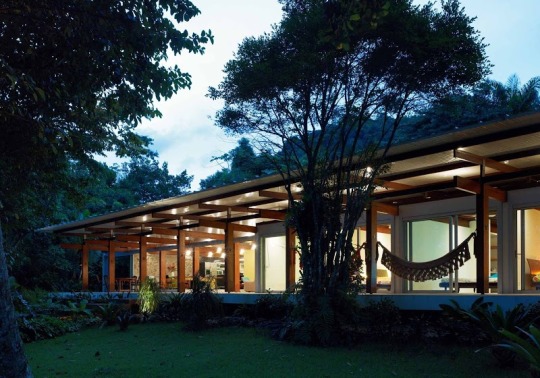
Casa en Praia Preta - Nitsche Arquitetos
displayed on: Tecnohaus
TECNOHAUS: facebook | twitter | pinterest | Google+ | subscribe
50 notes
·
View notes
Photo
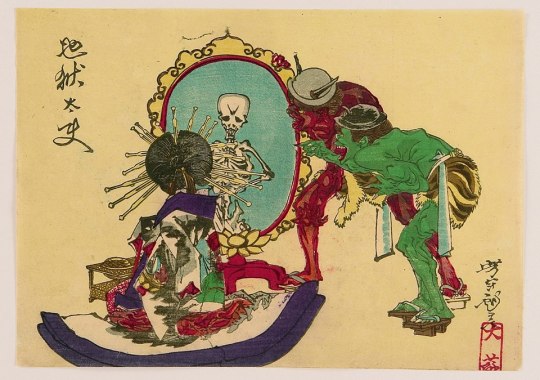
“The Courtesan Jigokudayū Sees Herself as a Skeleton in the Mirror of Hell” by Tsukioka Yoshitoshi (Color woodcut, 1880s, Japan)
412 notes
·
View notes
Photo
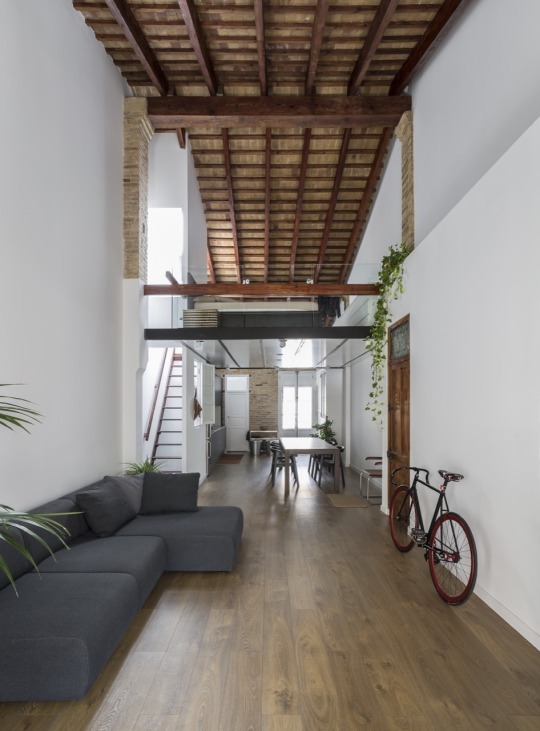
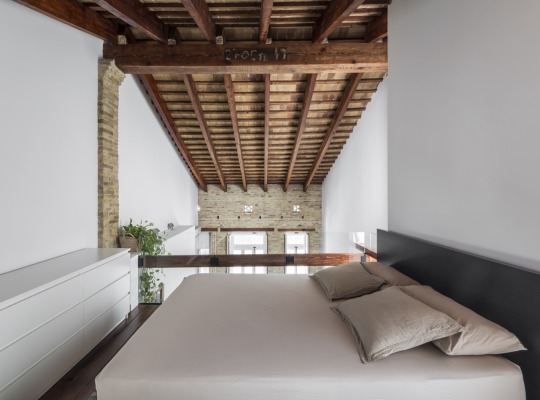
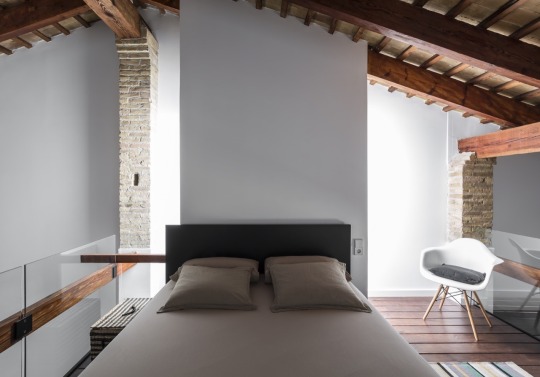
el cabañal loft ~ ambau taller d’arquitectes | germán cabo photography
2K notes
·
View notes
Photo
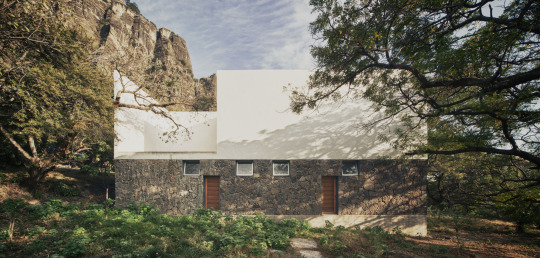
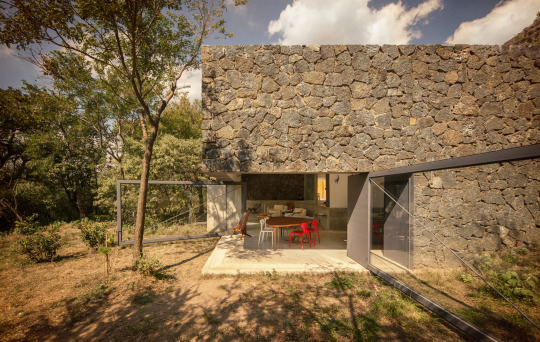
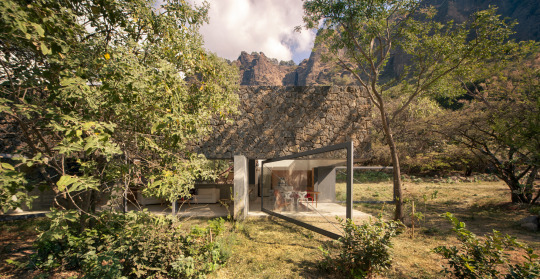
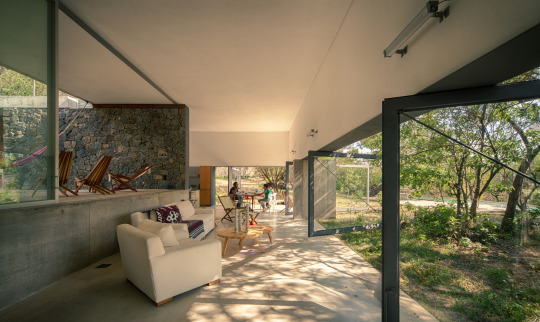
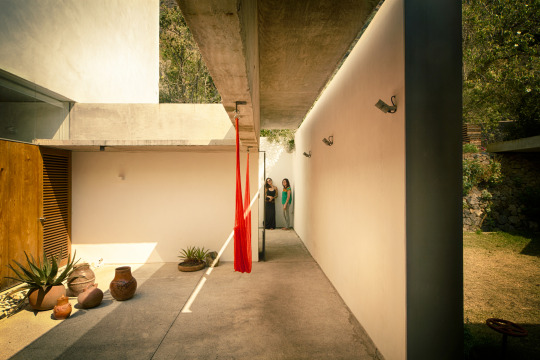
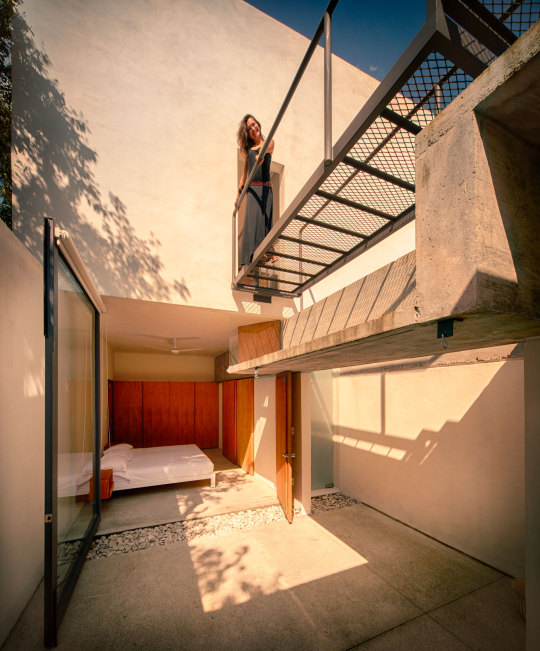
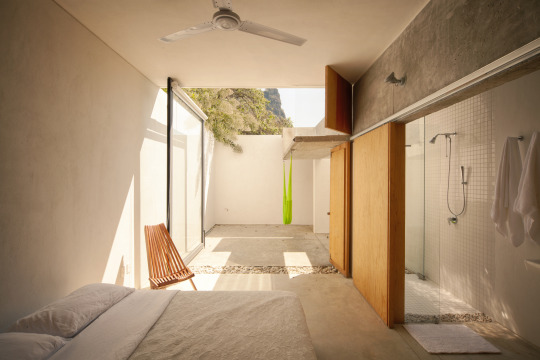
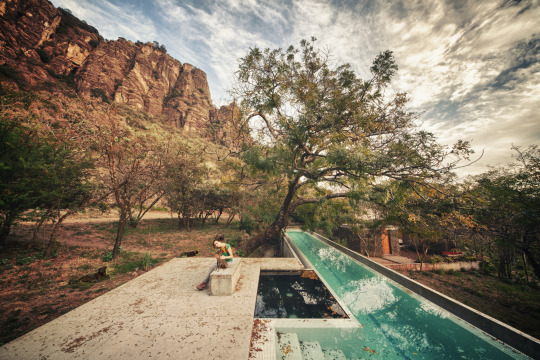
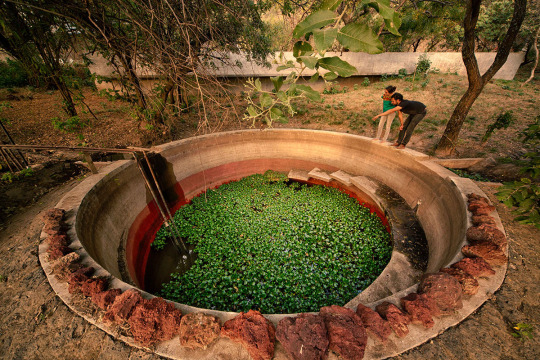
EDAA - Casa Meztitla, Tepoztlán 2013. Photos © Yoshihiro Koitani.
766 notes
·
View notes
Photo


Harpa Light Organ
Project by Atli Bollason is an interactive facade of lights which react to a performace of music played on a keyboard inside the Harpa Music Hall, Reykjavík:
vimeo
For a few days in February 2016, visitors of Harpa Music Hall in Reykjavík were invited to play the façade of the building as they would an instrument. A “light organ” was placed on the 4th floor balcony, with a stunning view of the inside of the geometrical glass front and the downtown area. Anyone who passed through could learn how to play in blue or red or green, with quick flashes or swelling pads of light, and impress the whole city with an optical performance.
Link
766 notes
·
View notes
Text
Jane! Stop this crazy thing!
Hi, all.
We’re setting up the place to share, view, and inspire. Keep an eye out for us.
0 notes


