
amphipodiel
my ocs and my world and my art :)
Camille | he/him | 3D art and game environment student !
497 posts
Don't wanna be here? Send us removal request.
Last Seen Blogs

solokingitachiuchiha-blog
SoloKingItachiUchiha

deep-into-the-truth
Smart Oldman

3somewebsite
3some Websites To Find A Threesome

survivorsolomonislands
Tumblr Survivor: Solomon Islands

3orodegy
عروض ايجى
Text
How to get rid of those pesky sharp corners in Unreal Engine. - Creating Edge Damage decals.
In pursuit of keeping the polycount of my latest project low and enabling quick texture iterations for modular assets I chose to create decals for edge damage simulation. It really made some props stand out more and feel more grounded in the scene and my modular pieces really benefited from an additional level of damage. Here is how I made it work.


I started by creating a cube in Maya. Something simple which I UV'ed and immediately exported as an FBX. Then I opened ZBrush. You could probably do this with Nomad or any other sculpting tool though.
I will now go step by step on how to do this in ZBrush because I am not personally super comfortable with the software and I assume anybody following this might need it. All screenshots from ZBrush is from this very helpful youtube tutorial from FastTrackTutorials which I strongly recommend you check out. I did not get screenshots of my sculpting process so hence taking from this video.
This is about to get very wordy, so please click Read More to continue.
Click on Import and bring in your cube. Then click Dynamesh and increase your resolution so that we are able to modify this cube as it is too low poly for now.
Next we are going to create some damage. Here I'm most comfortable usign the brush named Trim Dynamics. I think it leaves some great result but this is highly dependable on what the look of the desired damage is. This, below, is what your cube should look like. When you are happy with the damages, export the cube back into Maya.


Now, Back in Maya, take your low poly cube that you have created at the beginning of this process, and delete all faces so that you only have a corner left. Give the edge of that corner the tiniest of bevel. Something like 0.02. The reason we are doign this is because, upon creating damages in Zbrush for our High poly model, we created a bevel. We need to replicate this for our Low poly mesh. Make sure your UVs and Mesh look like so.


Now, because we want our UVs to be tileable, grab the vertex of each ends and make them go ever so slighlty off the edge. This will prevent us having to fix this visible seam over photoshop. Also, make sure your mesh is set to Soften Edge so there is no hard corner visible when you put the mesh into Unreal. Export your mesh as a Low poly.
Now, it's time to bake your lwo poly and high poly mesh. if all has gone well, those two meshes were not moved from their center location 0,0,0 in Maya, which means they will perfeclty match up in your baking software. I will be using Substance Painter. Simply upload your low poly mesh and upon baking, add your high poly mesh. Bake. You should have a normal map that looks something like this, except with a single lien and lots of empty space. Go to photoshop and crop it (for example, 128 x 2048), so you are left with just this line.
Now, we need to create our alpha mask. Very simple. Grab a brush and trace the line in the normal like the screenshot below. Make your background black and you have your mask!


Now let's go back to Maya! Go back to your low poly shape. Create edge loops on each side of it at about 90% and delete the excess corner like so. We only need the edge of the mesh.


Then right click on your mesh, go all the way down to "assign new material". (For any reason, if your new lambert isn't showing on the right side, click on "focus" and "lambert" , it will show up, like in the third screenshot below). Click on the little checker board sign and under "create render node" select "file". Upload your normal map.


At this point, you should have a very stretched out picture in your UVs. Simply grab your UV shell and stretch it to match the UV image like the screenshot below. Doesn't this look awesome?


Now let's go to Unreal engine. Upload your mesh, your normal and your mask. Create a new material and make the material domain (on the right handside) A deferred decal, blend mode should be translucent and the decal blend mode should be translucent normal.
I have added a few more scalar parameters to make my life easier but please ignore them. The second image is a more accurate screenshot of what your screen should look like from Fast Track Tutorials. Either is fine.


And you're done! To see what your decal look like, unlike usual decals you cannot drag and drop it in your scene. Take your edge mesh, and put it against the corner you want to damage with the new material applied. It should look something like this.
Enjoy your weathering and destruction!
#3d modelling#3d art#game art#unreal engine#material shader#shader magic#maya#substance painter#marmoset
1 note
·
View note
Text
How I made a writhing flesh monster material in Unreal Engine

I started with a basic flesh texture from Texturecan.

I created a copy of my usual master material and plugged the texture as normal like so:

Here is where it gets a bit more complciated but not by much. I wanted to add movement to this texture, some normal displacement and a writhing effect. Here is what I did:

To create movement, I put in a world position node outputed on the XYZ axis to a subtract node on the B input. The A input received an Object Position. Basically, this is data representing the location of the object with this material on it in world-space. It is used to find the radial distance from the camera to a pixel In simple term, this tells the material where the object is in the scene. Here is a visualisation from the Unreal documentation to make this clear.

Moving on, the Object Position and World Position are connected to a subtract node. It's purpose is to take in two inputs, subtracts the second input from the first, and outputs the difference. This is connected to a multiply and scalar parameter set to 0.5. This will be our settings to input movement size. Now we are able to create displacement.
Now we will create a Constant 3 Vecotr and connect it via a multiply to a Time node. This literally adds the passage of time to a material. This will determine our movement speed once we connect the multiply output to another multiply which has a scalar parameter on the B input which I set to 8.0. Now our underlayer is writhing! Oh boy!
This multiply that we just created and the multiply from the scalar parameter that creates the size of our movement form earlier will be connected to an Add node. Let's create a Noise node to plug into the World Position input. Now our slime ball should look like this. This will be a nice layer mask for our original texture from texturecan.

I prefer to have it inverted though so let's add a one minus node and plug that into a multiply with a scalar parameter that we will name Intensity Offset and set to 1.0. Now we can control the shape of our noise. From your Noise node output, pull a multiply and plug in another constant 3 vector and set your slime to be whatrever colour you want. This entire node setup should be plugged into World Position Offset.
Now let's move on to the Normal part of the material. From the UV output of the Normal texture from Texturecan, add a tiling system. Mine is a material function which I highly recommend you create, it streamlines the creation of material and pays off as your project grows. Here is what mine looks like. It's super simple. If you do not create a material function. Simply drag the Multiply output into the UVs of the Normal

Then, from the RGB output of the Normal texture, create a component mask with Red and Green ticked on. COnnect this to a multiply and create a scalar parameter to control the intensity. Set it to 1.0.
From the multiply, create an append node to combine channels together and create a vector which has more channels than the original so that you can plug from the B input of the append to the B output of the normal texture. This way we reordered the channels to get the blue channel back after maskign it for our scalar parameter. This whole node set up gets plugged into and Add which connects to the whole movement set up we made earlier via the end of the multiply we made earlier. Then the A output of the add gets plugged directly into the Normal input of our main texture.
And there you have it. Now enjoy your horrifying flesh monster texture in all it's glory!

#unreal engine#material shader#shader magic#3d modelling#3d animation#game art#texturing#video game#horror game#control#alan wake
3 notes
·
View notes


Text

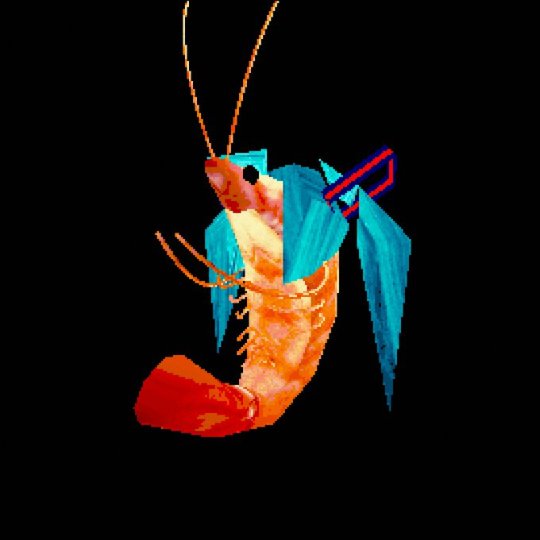
Evening Surf
Thalassophonea Thalassophobia Thalassophilia
Art Print | RedBubble Shop
Also, anyone remember this dude from 'Walking With Dinosaurs'?

(and I just realised this was probably from after one of the most traumatic TV moments I have seen in my life)
3K notes
·
View notes

Text
Here’s that horse again
*in the tone of a estranged grandmother*
You love horse
Horse was always your favourite what happened?
27K notes
·
View notes

Text
Under the cover of darkness, Nipponites come out to feed. Their shells contorting into Ox-bow bends make them clumsy swimmers
1K notes
·
View notes
Text


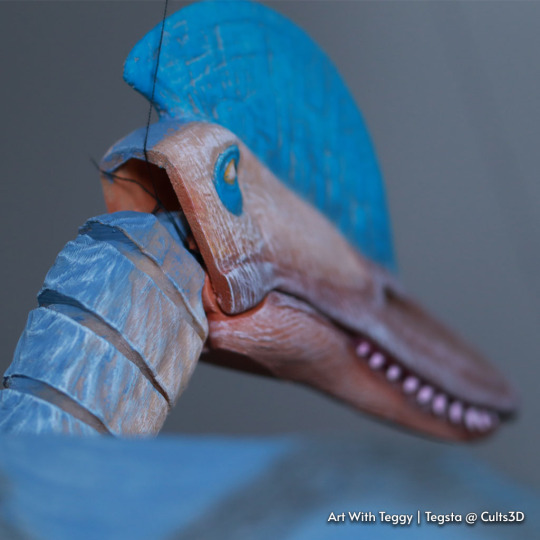
And I'm finished, photoshoot planned for Saturday. Time to take a break from this pterosaur pterodactyl 3D model 3D print.
40 notes
·
View notes
Text


I'm extremely proud of this Articulated Ankylosaurus model and now she can be printed in full colour. This print took 33 hours but boy was it worth it. She looks beautiful 🤩. Printed using 4 different Filament colours with the use of my Bambu Lab AMS and P1S. once I've set up my Etsy Shop she will be available to purchase, she would make the perfect gift for a kid! Let me know what you think 🤔 I'll be updating this file on my Cults3D store soon to include full colour AMS compatibility 👍🏼. Please let me know what you think.
132 notes
·
View notes
Text
Pterodactyle Poseable Model

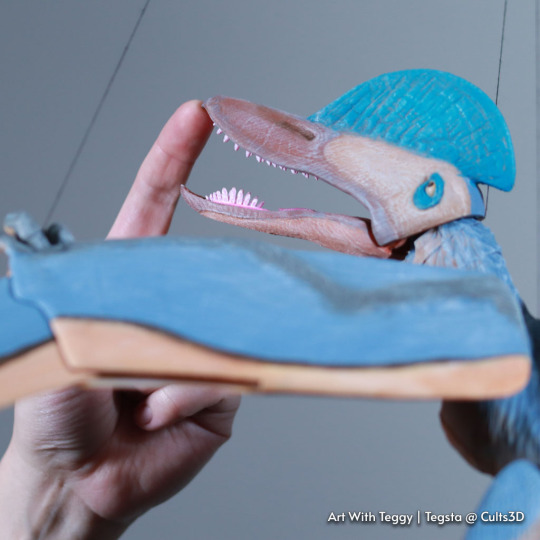
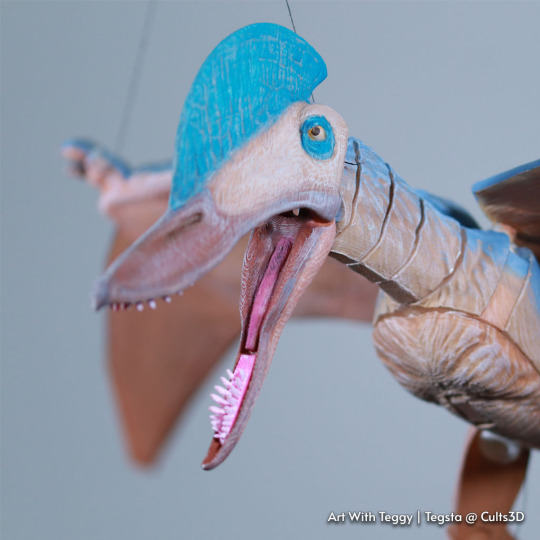
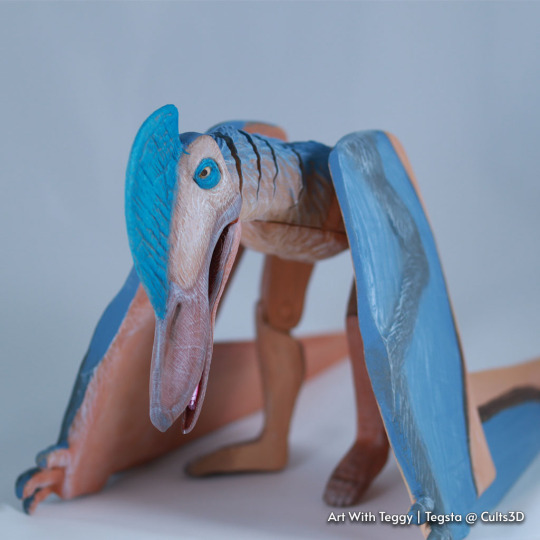
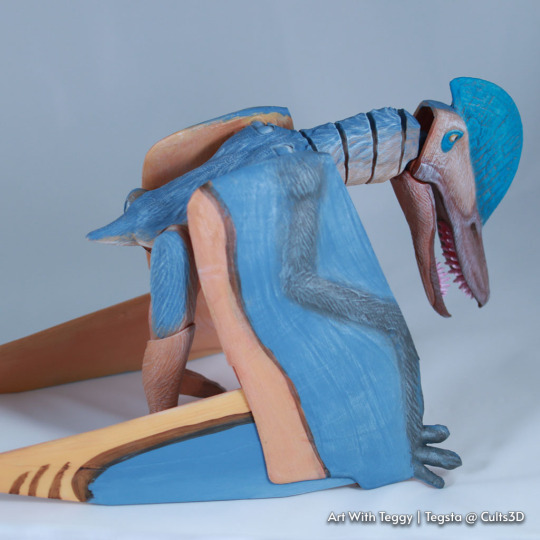
over the past few months, I have been slowly learning how to articulate my models. A key takeaway from making this model is working out how to keep a round belly on my models with the use of a clip. This will change the game for my models going forward as well as the cleaner neck joints.
I had way too much fun making the assembly animation.
This model is now available at my Cults3D shop now.
Thanks again for your support, what should I do next? I'm thinking about a Dragon? what do you think?
752 notes
·
View notes
Text
Rows of Hyphantoceras drifting near the sunlit surface
3K notes
·
View notes
Text
Adding super simple birds with Niagara System in Unreal Engine.
So you want your scene to have a couple of extremely low poly flying birds like this?
Here's what I did to make that happen.
First you nee dto go into Maya/Blender or whatever you use to 3D model and create a shape similar to this. It can have as many polys as you want but it needs to this semi circular shape and about 10 "pages". These will act as a flipbook.

Next, go on google and get a picture of the kind of bird you want, it doesn't matter much for my purpose because I don't need th ebird to be anywhere near the camera. I grabbed a dove, removed the bacground and cut it in half. You could also add a butterfly wing, or a bat as logn as it's transparent and symmetrical.


Bring your mesh into unreal and create a new material. You'r egoing to create the panning systme that makes it look like the wings are moving.
This is the basic node layout. Make sure your blend mode is Masked and your shading model is subsurface and two sided.

Plug the transparent texture RGB output into Base Colour and subsurface colour. Download the texture below or make your own. It is a mask that will make the panning act like animation frame. Multiply it with the alpha of your wing texture and your opacity mask.

Not ot set the frame rate. Because we are using a particle emitter later when we set up the niagara system, we put in a dynamic parameter node. Use the set parameter of speed and multiply it against an added time node. Mulitply this against a scalar parameter which is going to be the set frames. Because we don't want half a frame, or to skip frames, just for safety we add a Ceil node. Divide the output through the frame count. This informs the time parameter of the panner. Add a texture coordinate nod into the coordinate input of the panner. Finally, plug all of that into the UVs of your Texture sample. And you're done with your material.
Now create a new Niagara System. Add your mesh which has had the material you've just created applied to it via the asset manager.

In the Emitter State, make sure the life cycle mode is set to Self and the Loop Behaviour to Infinite. In Spawn Rate, I had what I wanted with a value of 1.0 but it is highly dependable on the project.
The shape location should be a Box. I set the midpoint way off so that my birds woudl spawn off screen. This will let them fly in one direction once I set the Gravity Force.

Scale mesh size helps you decide the size of your bird.
Now, Gravity Force is important if you want your bird/butterfly etc.. to fly in a straight line. Set a value that goes in the direction that you want. You might have to fiddle with this until it looks natural.

However, birds don't fly in a straight line, so add a curl noise force and play with the noise strenght and noise frequency value.

Now place your Niagara System into the scene and you should be good. All of those settings will need heavy adjusting but I find that this is a really great way to add some life into a scene and some visual noise.
4 notes
·
View notes


Text


pool pics I took recently with my newly bought canon powershot s45
14 notes
·
View notes