Text
Progress on my latest armguard design:


Guest star: a helpful d6 die clamping the circular bearing to the forearm piece! The clamp would have smushed the little socket coils otherwise. (I'll make a more permanent connection once I've got the forearm finished.)


#wire#crafting#cosplay#aetherpunk#armguard#this is 12 gauge galvanized steel for the main elements with 20 gauge galvanized steel for the thin supports#the circular bearing is the one I made like a year ago#and it still spins super well! very satisfied with that
4 notes
·
View notes
Text
In-progress impulse project, still in the rough stage where I'm not sure how everything needs to fit together. But it does already make a very satisfying clicky sound. And once I figure out how to add the electromagnets, it will make the very satisfying clicky sound AUTOMATICALLY and EXTREMELY FAST. <insert evil laughter here>
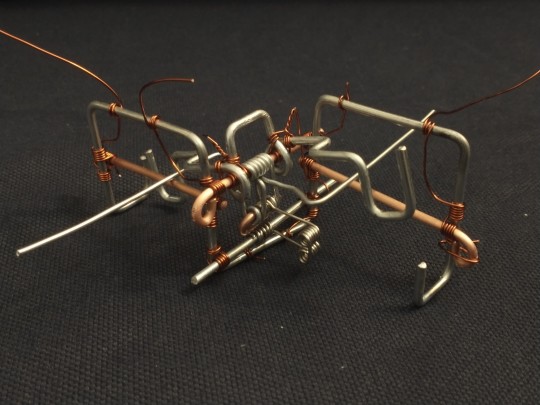
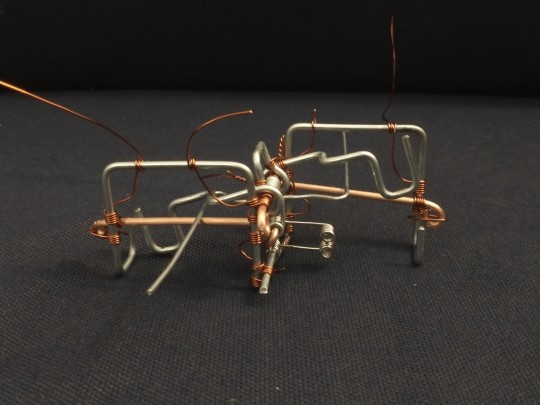
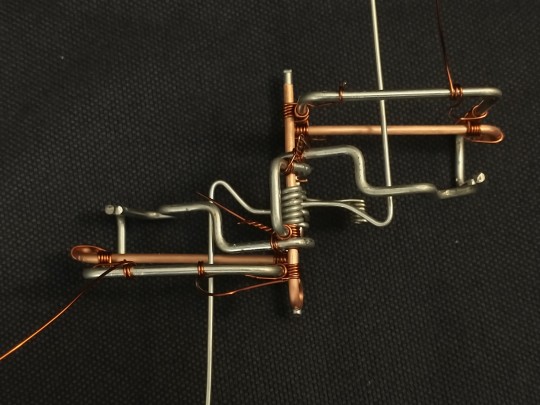
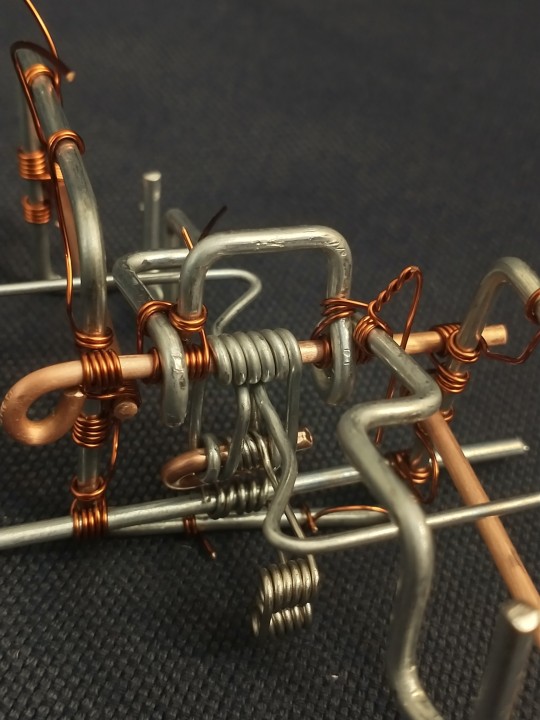
#wire#crafting#automatic electronic clicky machine#yes there are two separate seesaw arms in the middle there#I'm moving the thick one which is where the magnet coils will go#and then it bonks into the smaller second set which will control the electrical flow#and it's spring-loaded so that it will stay pinned in place and keep sending power even as the main arms tip back the other way#and then the main arms hit it and it snaps to the other switch position to power the other set of magnets to shove the main arm back again#click-click click-click
11 notes
·
View notes
Note
Hi, your crafts are so incredibly cool! How did you get into wirecrafting? Do you have any favorite resources for learning about it?
Thank you! Unfortunately no specific tutorials or anything because I never really decided to get into this as a hobby. Rather I started playing with paper clips and staples when I was bored in lower school, and then over the years things... escalated. Better materials, better tools, more ambitious projects. Some day I will learn to weld these thin pieces of metal together instead of just tying them in place or twisting them together, and then I will be unstoppable.
If it helps, the two ways I think of wire is (a) lesser blacksmithing/machining and (b) that game where you try to draw a shape without your pencil leaving the paper. I pick a shape I want, figure out the path (or paths) to "draw" it in 3D space and how to anchor those strands to each other, and then immortalize that idea in metal. No heat, just pliers sturdy enough to bend the wire and reduce the number of times I stab myself on the loose ends.
I can definitely recommend some specific wire suppliers and materials and their tradeoffs, but really anything will work as long as you are physically able to bend it and as long as it holds its shape when bent. The "picture hanger" section of many hardware stores is a great place to look. Find something between about gauge 18 and 24 to start, and try it!
14 notes
·
View notes
Text
@reptilerex To be honest I was instinctively thinking to back it with black cloth or something, just because that's what I usually do. But now that you mention it, leaving it bare would probably work better. Good call!
Trying out a new type of design and I think it came out much closer to the fantasy armor ideas that live in my head! Much cleaner lines and less clutter from criss-crossing supports.


However, to my symmetry-minded irritation it turns out that shoulders are NOT perfectly symmetrical front and back, so I'm gonna need to make another one with a better shape for a pauldron. But as a DESIGN I love it. It's even reasonably strong!
67 notes
·
View notes
Text
Trying out a new type of design and I think it came out much closer to the fantasy armor ideas that live in my head! Much cleaner lines and less clutter from criss-crossing supports.


However, to my symmetry-minded irritation it turns out that shoulders are NOT perfectly symmetrical front and back, so I'm gonna need to make another one with a better shape for a pauldron. But as a DESIGN I love it. It's even reasonably strong!
#wire#crafting#wire armor#aetherpunk#I bet I can quietly swap out one strand for EL wire so that one ring of the design can glow...#this is 12 gauge galvanized steel for the main elements with 20 gauge galvanized steel for the thin supports#cosplay
67 notes
·
View notes
Note
Does the motor heat up the longer it's running, or does it maintain the starting temperature?
The inner set of electromagnets don't heat up much, they're only powered a third of the time and also they're cooled by the breeze of themselves spinning. The outer pair of electromagnets are powered constantly, though, and those absolutely heat up. After about 20-30 seconds they're hot to the touch and the motor starts slowing down. I think the heat increases the resistance and lowers the current. Though I might be overthinking it, it might just be the bearings heating up or something.
I'm planning to build a larger pair of outer electromagnets with some air channels or cooling vanes or something built in to help with the heat. We'll see if that changes anything.
10 notes
·
View notes
Text
IT SPINS! Handmade electric motor! Entirely out of wire! They said it couldn't be done, but I have proven -- it merely shouldn't be done!
Photos don't really capture how ridiculously complicated this thing was to build, so I managed to film myself assembling the components too! Very proud of that.
In total, I've been working on this project on and off for roughly two years. This motor is my third version, though I went through something like seven designs of the commutator section (not counting how many failures it took to build a working example of a given design). I'm very proud of getting this to work at all.
Some close-up photos of all the components:
Six-way commutator. As the motor spins, this delivers electricity to only the correct pair of magnets at a time, leaving the other four off.


Magnet coils. I wound these by hand from very thin insulated wire. The center is a spiral of thicker insulated wire (darker orange) that protects the thin stands from the steel core and then wraps around the outside to hold everything in place.


Spring-loaded arms. These deliver electricity from the stationary frame into the rotating axle. They also have to hinge up out of the way or else there's no room to fit the rotor in place during assembly.


All the components laid out together before assembly.

And the full motor in all its glory!


#wire#crafting#electric motor project#steampunk I guess#IT FINALLY SPINS#and it's made entirely of wire#no permanent magnets just metal and electricity#even just making the video was a decent-sized project on its own#so proud of this
4K notes
·
View notes
Text
A few months ago, my electric motor project was on the verge of success. So now that I have time to work on it again, I immediately did what any sensible person would do: start over from scratch with an entirely different design!


The old version(s) were inside-out from the traditional brushed-motor design because I thought that would look cooler. Unfortunately it also gave me ten opportunities for friction to ruin my day: two axle bearings, two power feed contacts, six commutator contacts. The new version with a more sensible design has a total of only four friction opportunities! (Two axle bearings, two electrical contacts.) And so far it still looks plenty cool.


The axle has six spikes for the six magnets to mount and a six-way commutator ring that I am very proud of. It's six separate pieces of copper, all electrically insulated from each other and from the steel axle, so that the magnets can be individually switched on and off as the axle rotates.
Next up: wrapping more magnet coils!
18 notes
·
View notes
Text
I was not intending on adding the thin copper decorative bits. I was planning to just stick with the bare steel outlines.
But I'm going to sew these pieces onto cloth later, and the thread stitches will show up against the bare steel and look ugly. So I decided to add embellishments so the stitches won't stand out.
...I may have accidentally committed myself to hours of the wire equivalent of embroidery.


On the plus side, it's very nostalgic: I spent a lot of high school trying to make fancy netting using 24 gauge wire, but haven't used it much since. There's nothing quite like working with thin whippy wire in a moving vehicle during a commute.
44 notes
·
View notes
Text
I have built a thing of beauty! Of elegance! Of careful measurements and sufficiently identical contact pads and an awkwardly large number of pinpricks on my fingers! Seriously, did I sharpen those wires by accident? I swear, this steel forms itself into points when I cut it.


#wire#crafting#electric motor#this seems like a good stopping point to duplicate this post over here
34 notes
·
View notes
Text
Happy first night of Channukah!


(Yes the candles are removable. Also yes I need to go make more candles, I was running late enough as it was)
34 notes
·
View notes
Text
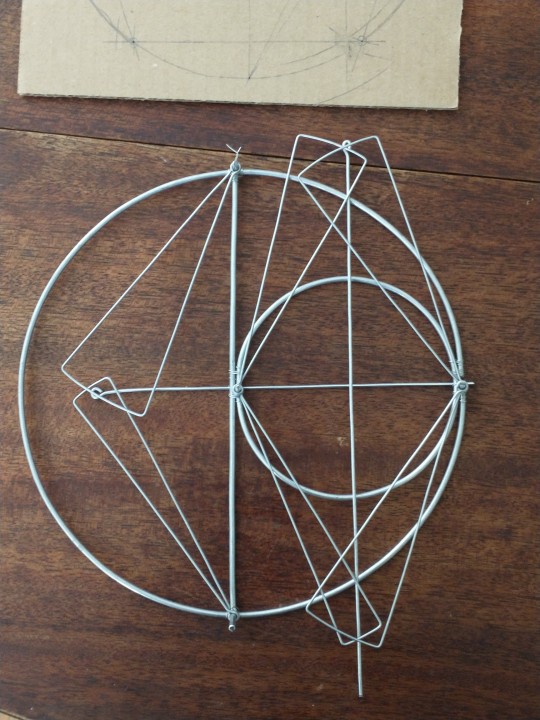
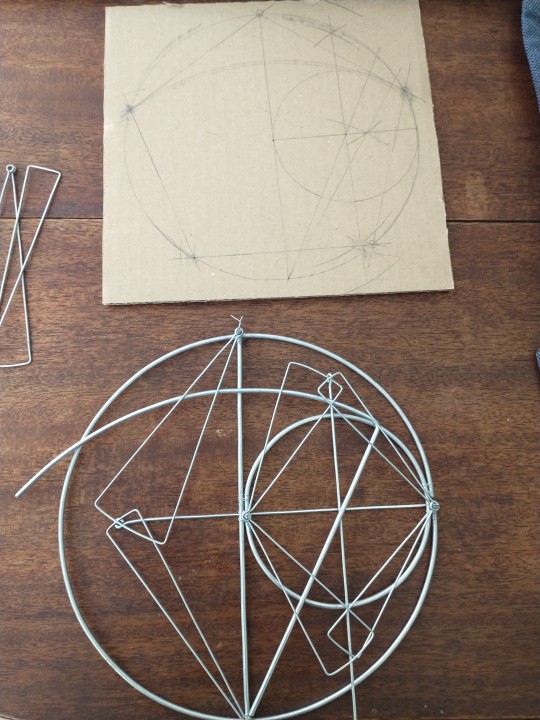
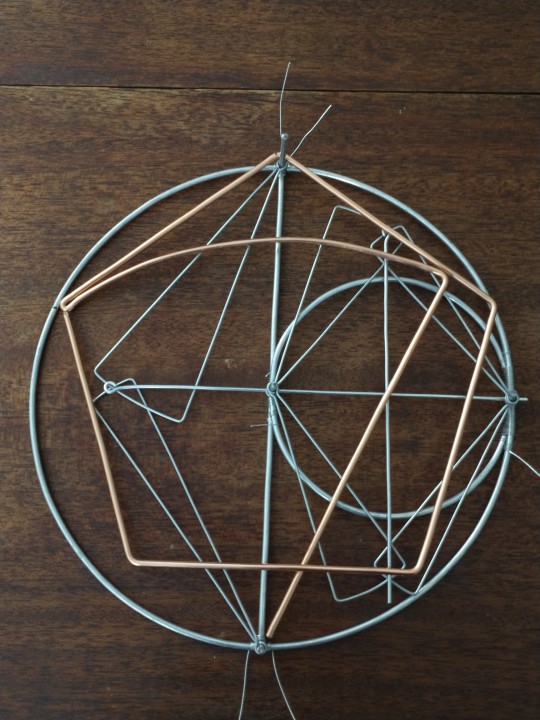
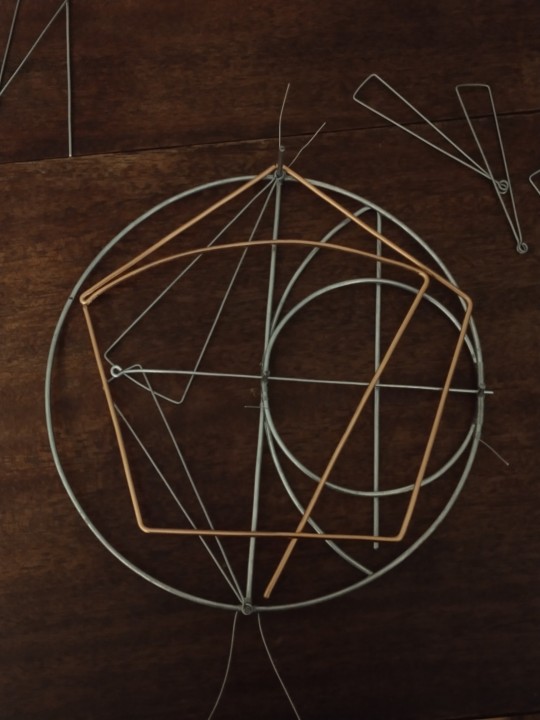
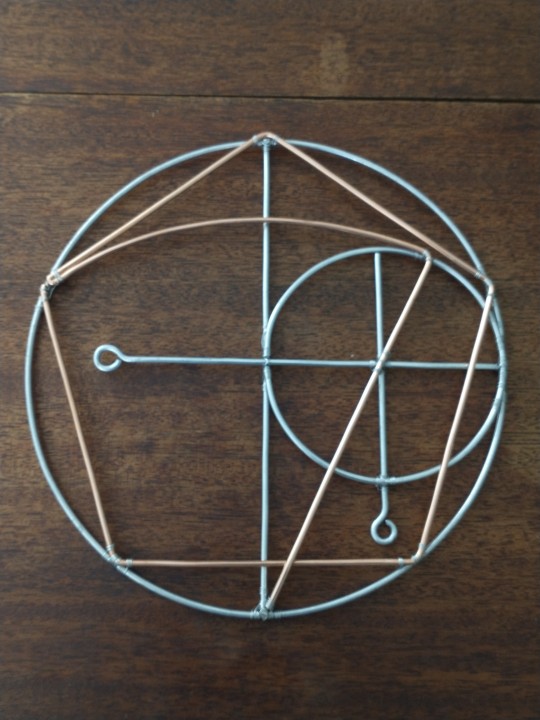
A circle for summoning pentagons
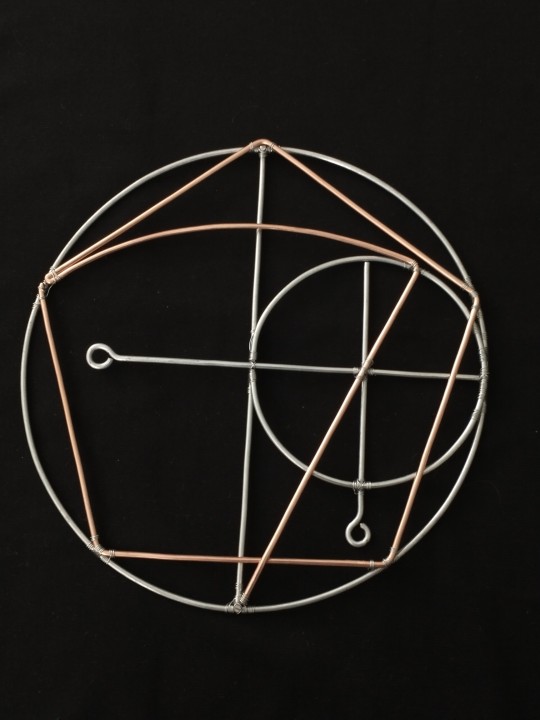
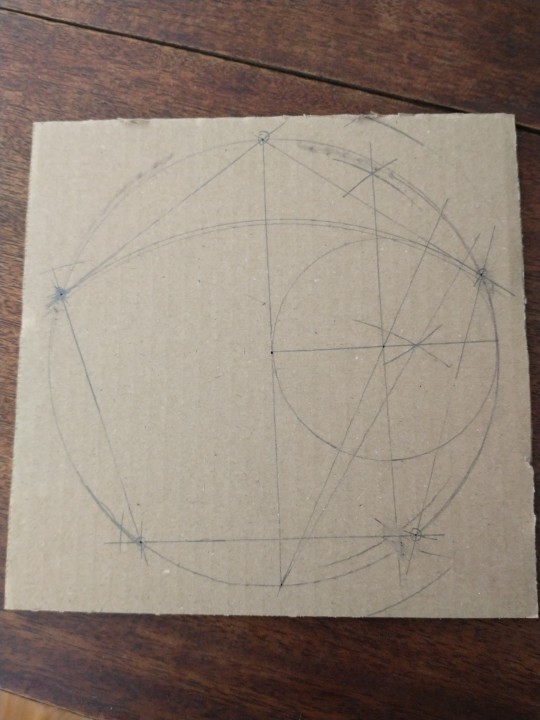
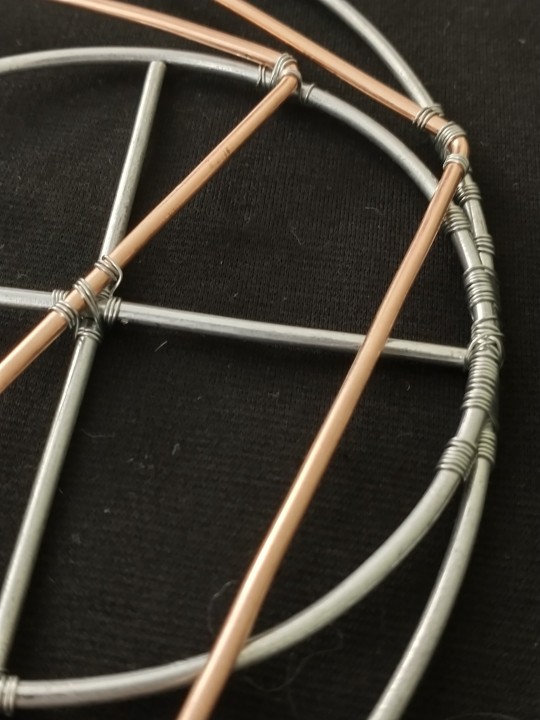
A few months ago I needed a pentagon so I used ruler-and-compass construction to make one. But then I kept walking past the cardboard where I'd drawn it going "wow, this is a really cool design, it looks like an arcane sigil, I should really make something based on it." Two weeks of obsession later, here we are!
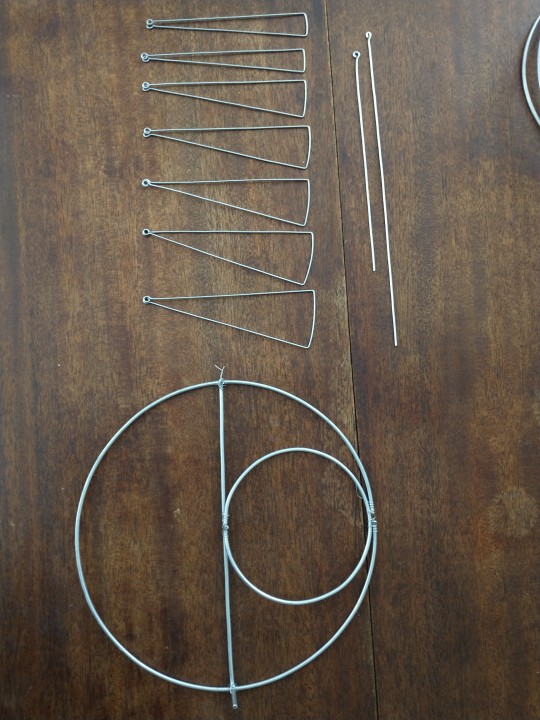
A few in-progress photos. For once, all the design changes were for aesthetic reasons not functional ones! Made for a nice change of pace, really.
Initially I had planned to use thin wire to make little arcs representing the compass marks, but it felt too crowded so I eventually got rid of them entirely.
1K notes
·
View notes
Text
Part of my watch band snapped a few weeks ago, and I finally got around to finishing the replacement:


The new strap is the one on the near side. The far strap is old but doesn't seem broken so I'll wait on replacing it. Biggest differences are the material (old used stainless steel, new uses slightly thicker galvanized steel because that's what I had on hand) and that the new one has more cross-braces to anchor the copper better and make the band slightly more flexible.
10 notes
·
View notes
Text
Latest project: a clock!

Well, more precisely, a clock face. The hands and clockwork are a DIY module. I built the face out of wire and cloth and then plugged the clockwork into a hole I'd left in the middle.
I've been working on this one for months, very slowly, because I was juggling several projects at once and also I kept changing my mind about the design. Very glad it's finally done and very happy with how it turned out!
Some in-progress shots below the readmore


31 notes
·
View notes
Text
Happy first night of Channukah!


(Yes the candles are removable. Also yes I need to go make more candles, I was running late enough as it was)
34 notes
·
View notes
Text
A circle for summoning pentagons


A few months ago I needed a pentagon so I used ruler-and-compass construction to make one. But then I kept walking past the cardboard where I'd drawn it going "wow, this is a really cool design, it looks like an arcane sigil, I should really make something based on it." Two weeks of obsession later, here we are!
A few in-progress photos. For once, all the design changes were for aesthetic reasons not functional ones! Made for a nice change of pace, really.
Initially I had planned to use thin wire to make little arcs representing the compass marks, but it felt too crowded so I eventually got rid of them entirely.


1K notes
·
View notes
Text
A CURVED tube!
A curved tube at long last! I've been intending to try this for literally years, but kept getting distracted with other projects. (A shocker, I know.) I've made straight tubes lots of times using this wrapping technique but never had the courage to try a curve like this.*
But it worked! Which means that I can make ALL KINDS of complicated shapes and designs, and jewelry, and possibly a cosplay costume I've been contemplating for years...
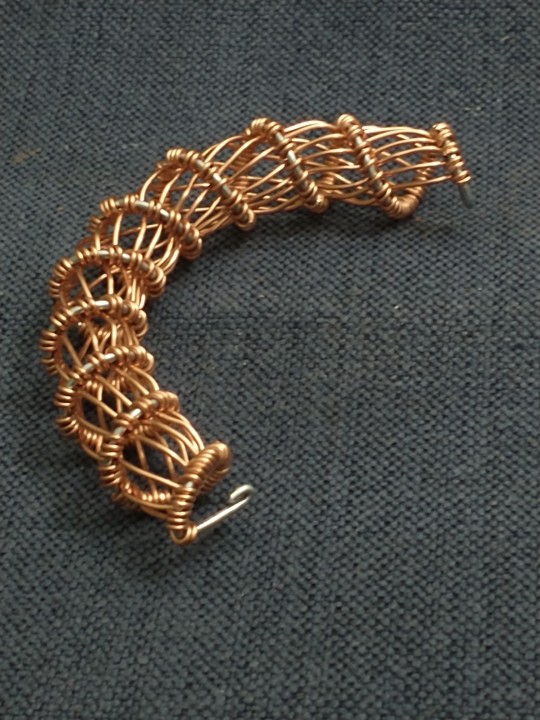
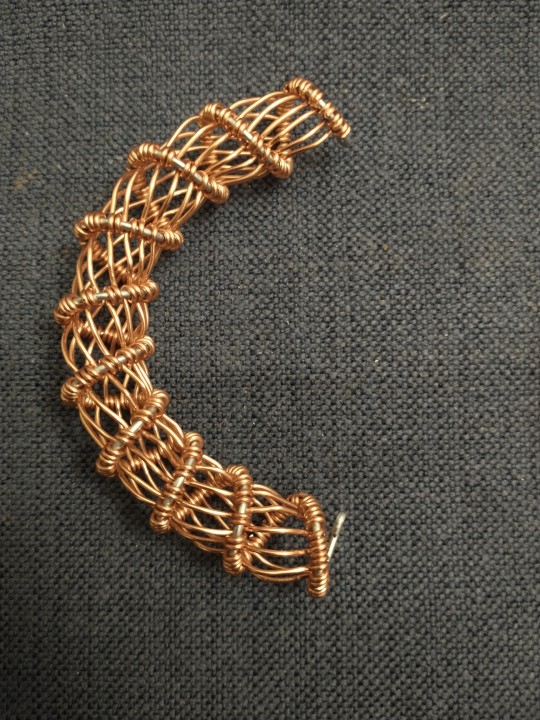
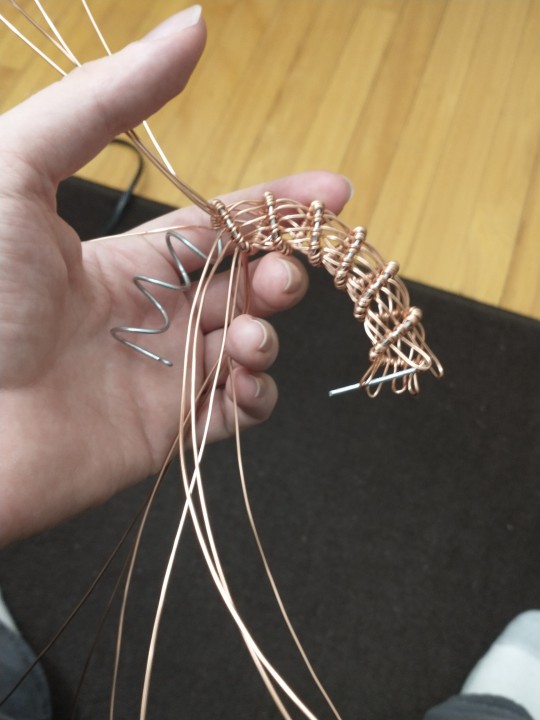
*Normally, with a straight tube, I can keep the copper strands equally spaced along the steel helix and everything works. If the tube is curved, the copper needs to bunch together for the inside of the curve. Which means I need to vary the spacing between strands, by eye, to give it room to bunch up. And do it during the part where I have the least finger room. Tricky! There might be some clever way to describe the spacing using math, but it would probably need Evil Math and it is too early in the morning for Evil Math.
30 notes
·
View notes