#xb2002
Explore tagged Tumblr posts
Visit Tumblr Blog
Explore Tumblr blogs with no restrictions, modern design and the best experience.
Last Seen Tumblr Blogs


Fun Fact
1,644 Tumblr posts in 1 second.
Text
XB2002 3D modelling
Lesson 1
For the first assignment, we need to create a low poly (under 2000 triangle) prop model to quickly get back into Maya.
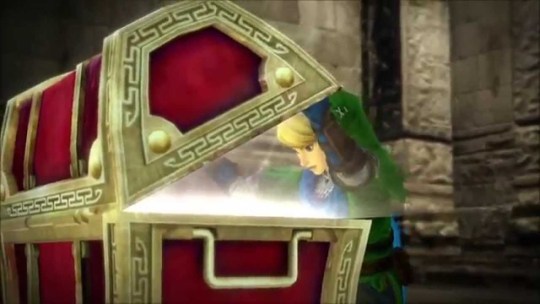
I chose to create a treasure chest.
Research
For this task I chose to create a treasure chest. This is because the treasure chest will work well with the criteria, in that it will be low poly, work with the 1024px limit for the texture and is a commonly seen game prop.
I began researching treasure chests, firstly from Google images and secondly from different games.
Google Images research
Google images gave a few examples of real and cartoon looking treasure chests to get some inspiration from. I firstly looked at the shape of the treasure chests and noticed they all followed a very similar structure. This was that they were rectangular at the base with a curved lid which could be opened to allow people to look inside. Inside is where my coins are going to be placed. The second thing which I noticed was that they were mostly made from wood, meaning the texture for my treasure chest would most likely have to be wood. Thirdly, most of them contain gold metal holding the wood in shape. I also found a chest which another designer has modeled and used that as a reference too.


Game research
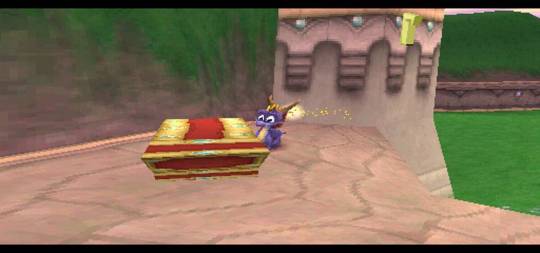
I then went on to research treasure chests in other games. These games included Skyrim, Legend of Zelda and Spyro. One thing which I noticed to be different from the images from Google were that they were not all created from a wooden texture. I also noticed that they all featured patterns and symbols to add detail to them, something which not all of the Google images above contained.

Sketchfab
I also looked on Sketchfab to view other 3D treasure chests which other designers had created. The advantage of viewing these were that I could get a 3D perspective and analyse the wireframe involved, which in turn, could benefit my 3D model, as I could look at the way others created their models and replicate parts of it which I may not know how to fully create whilst keeping the chest low poly.
The ones which I looked at were:
https://sketchfab.com/models/0b8cbed26343414ab9f28ba6b5f023de
https://sketchfab.com/models/1e6f70cd55f5479bb9ab552f119ea9c4
https://sketchfab.com/models/b67d504dddeb436e823bf36defc2ed8b
What I noticed from these models were that they followed the shape of the chests from Google images and were all made out of a wood texture with metal hinges to hold the wood structure in place and to make it solid enough to be able to hold the coins inside it. I also noticed that they were a lot similar in the design than the ones from professional games were.
Images of creating the 3D treasure chest with process
After researching these treasure chests, I began creating my own. I am going to create it out of wood with metal hinges holding it together and have a lock on it, with some finer details being placed on the metal sections to give it more of a professional look. I will also have the chest open so that the coins inside are visible, with them being created low poly with a high resolution texture placed over the top, most likely in Substance Painter. I feel the rectangle ‘box’ look is too overdone and simplistic, so I am going to give it more detail by making the base a little bit thinner and the top of the chest a little bit wider. This should make it look more professional too, as the ones I have seen where the designer has done this look more unique and are rarer to see.

The creation of the 3D treasure chest
I opened Maya and began creating the treasure chest. I began by creating a cube and modifying the scale so it was a lot wider than it was tall. I then selected the front and back faces and added 2 edge loops horizontally and vertically. From there I scaled them out so they were near the edges of the face, as these will become the metal sections holding the wood together. I then took the top face and extruded it downwards to create the inside of the chest for where the coins will be placed.

From here, I extruded the faces inwards; starting with the front and back ones together, then the 2 sides. This adds depth to the chest, meaning more detail is added, allowing it to look more professional due to the treasure chest having more realism.

I then created the lid of the chest by creating a cylinder and cutting it in half before scaling it so it was in line with the base which I had created before.

I then added 2 edge loops across the top of the lid and moved those to be in line with the edge loops on the base of the treasure chest.

From here I took the faces from the 2 top edge loops and extruded them upwards to create where the metal arcs will be on the lid of the chest.

I changed the pivot point for the lid to the center of the back bottom edge and rotated it round so that the lid opens in the same way a normal real life chest would open.

By the end of the first lesson I had reached this point, moving the back down to where it would be in order to open realistically, with the gap on the back being there to allow for the hinges to be placed on the back later on. I feel like I have achieved quite a lot in this lesson, especially as I have not used Maya properly for a few months and the structure of the object is beginning to resemble a ttreasure chest.

The next job was to put splits in the front of the chest. To do this, I added 4 edge loops vertically and moved them into place to look like 2 wood panels down the front. I then selected the 3 faces between the front panels and the same 3 faces on the back and extruded them into the chest. This created the structure of the wooden chest, which will be made out of metal once textured and is used in real life to hold the chest’s wooden structure together. I then took a sphere, split it in half and placed duplicates around the chest to act like jewels.

From there, I added 2 edge loops down the lid of the chest and extruded the middle faces outwards.

After that I created a sword to go into the chest to give it more purpose and story, as just having a chest with coins in would not be very rewarding compared to finding a sword which can be useful. I began by creating a rectangle for the top of the handle. I then added 3 edge loops down the middle and moved the vertex’s inward on one side to create the shape which the blade would be. I also added one edge loop horizontally, moved those vertices around then extruded that shape out to create the blade. For the end of the blade, I extruded out the two top faces and moved the vertices to meet in the center using the merge to center tool. For the other side of the rectangle, I extruded the 2 faces out to create a rectangular handle.

From here, I gave more shape to the top of the handle by scaling the end of the handle faces inwards (towards the center) on each side, leaving the middle faces higher than the sides.

I then rounded the rectangular handle by moving the vertices on both sides more towards the center and creating the more rounded shape by eye.

Before extruding the end faces, adding edge loops and creating a spherical shape out of them to create a base for the sword by manipulating the vertex.

I then moved the faces of the inside of the chest upwards so the sword was not sitting to far into the chest and could be easily visible, scaled the sword down and placed it into my chest.

I then added 2 cylinders to the back of the chest to create hinges which would be used to allow the lid of the chest to open and close. I created a cylinder, scaled it down, placed it into position, duplicated it and placed the second one into position.

I then created another cylinder, scaled it outwards and made it thin in height to create a coin shape, placed it into position around the sword in the chest, duplicated it a few times and placed a few of them in.

I found that I had some double extrusions in the front of the chest when I had moved the faces back. This caused issues when trying to UV the chest. To overcome this, I selected over each vertex to see how many were overlapping, for example, the one in the image below has 5 vertices selected on the green dot, which can be seen on the poly count on the top left, first row, last number (5), then clicked on the ‘merge (vertices) to center’ tool, which merged all of the vertices into 1 vertex.

Another problem I faced was that the inside faces of the chest lid disappeared and became uneditable. To fix this, I selected the left edge and the right edge of the bottom of the lid of the chest and bridged across it to form a base for the lid. When I come to editing this chest before the summative hand in, I would like to indent this inwards, as the chest would not have a flat base to the lid as it would not close correctly, especially if a sword was in the chest, as it would stick out too much for the lid to close.

The image below is an example of UVing the lid of the chest. As can be seen, it is split up into parts to UV, unwrapped mainly using planar unwrapping, as well as automatic unwrapping in small complex parts of the unwrap before they were edited in the UV editor. I selected all the different components using object selector, i.e. the lid, sword, base, jewels, coins and hinges and combined them together so they made 1 object which could be textured using 1 texture sheet.

After all the pieces were unwrapped, my unwrap looked like this in the UV editor:

With the untextured version looking like this:

This is the unwrap for the coin:

And for the jewels in more detail.

This is a closer look at the unwrap as shown above.

I then neatened the UV up in the UV editor, moving all the different components of the unwrap into one sheet (grid square) so that it was easier to texture and so that each part could be textured through 1 sheet, as using multiple sheets not only gets messy as to where each part is but also would cause the engine to have to load more elements when it was placed into an engine. The image below is what the unwrap looks like from the back.

The side:

And the front. I overlapped the coin and jewel UV’s as they are going to be the same colour and textured the same anyway so it made sense to have them overlapping and use the same texture, plus it saved space on the texture sheet.

I then began texturing in Substance Painter. This was the first time I had used this software so took a bit of time to get used to the different functions, but with a lecture based on it, it was not too long before I had a basic knowledge of how to use it. I began by adding a wooden texture onto the chest, with a leather handle for the sword and a steel blade.

This is a screenshot of Substance Painter with the 3D object on the left and the 2D flat texture sheet on the right. I added a copper metal texture to the front and round the edges to make the metal structure of the chest which would be used to keep the wood panels in place, added a red aluminium look to the jewels and gold colouring to the coins and the end of the sword.

This is how it looked in render:

I also added the ‘gold armor’ material to the middle of the sword handle too:

Once I got to this point I decided I did not like the bronze metal on the chest so changed it to a rough steel texture with ‘iron old’ markings on it. I feel this gave the treasure chest more colour and made it look brighter.

Once I had created the treasure chest I decided I wanted to see what it looked like with an emissive blade to the sword to give the illusion that it was enchanted. To do this I created a blue emissive layer on the steel blade and it was fairly effective in giving the illusion I was looking for.

This is the UV with the emissive blade texture:

This is a close up of the treasure chest with the emissive sword. As can be seen, it is quite bright, so would stand out in a dark room inside of a game, making it noticeable to players as a stronger weapon, as that is the common feature of enchanted weapons.

Just to extend on that point, an example of enchanted emissive swords can be seen in World of Warcraft:

Image from: http://wowwiki.wikia.com/wiki/File:Enchanted_sword.png
In the end I am happy with how my chest came out with it looking a lot more realistic than anything I have ever created before using Photoshop. It looks exactly like a treasure chest which could be found in an RPG game, which is the look I was going for. In terms of changes, I would like to create an indent in the base of the lid to create a more curved and realistic chest lid and use a different texture for the metal, as it is too bright and does not look as realistic as it could do. Below are the 3 pages which I created for my PDF hand in. I did not hand in the emissive textured treasure chest, as I created this after the formative hand in, however, for the summative one once changes have been made, I may hand in the emissive one.
Here are some beauty shots of the rendered treasure chest:


Beauty shots:

UV sheets:

Final texturing and texture sheets:

Sketchfab link for the treasure chest:
https://sketchfab.com/models/6eb48ecb052b4fa3ac64a8f8df098f53
1 note
·
View note
Text
Chapter 38: Modular Asset Challenge

My God, why were you such a pain, project? Honestly, I know why.
This was quite an interesting and different project, taking into account the way I had to model the asset and unwrap the UVs; but let’s be clear: the worst part was the positions. The grid. Making every module ‘snap’ to each other was the hardest thing of all. I got bored of trying to understand and exporting selections and importing them in Unreal again.
Exhausting. The result, however, was an amazingly easy way to a non-stop creating tool of different buildings.
You don’t quite get it yet? Let me introduce you to my modular building:
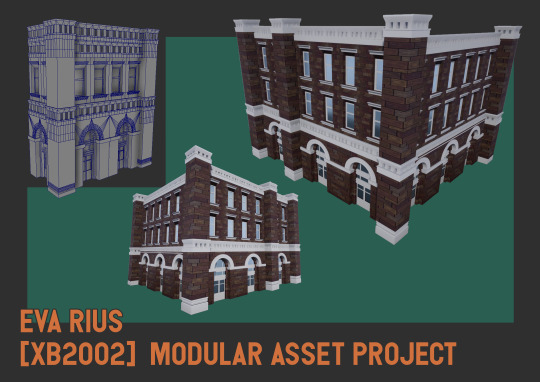
The concept is quite smart: It consists on modeling different parts of the building to be able to create ‘blocks’ of it (like Lego), so that you can create a 3-floor building and then change it to a 5-floor building in seconds, without altering any geometry or textures. Fascinating, because with a couple of blocks, you could build hundreds of different combinations.
I can really talk much about my experience with it. It was fun, yet stressing (I ran out of time to work on it so the deadline was approaching and more errors kept popping up). Good thing is now I have a modular set to create some cool building or town (if I decide to do more modules) for my portfolio.
What do you think about this method? Clever, uh?
0 notes
Video
youtube
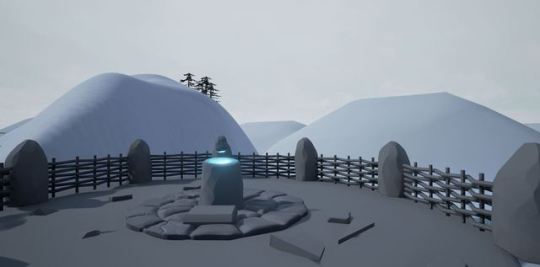
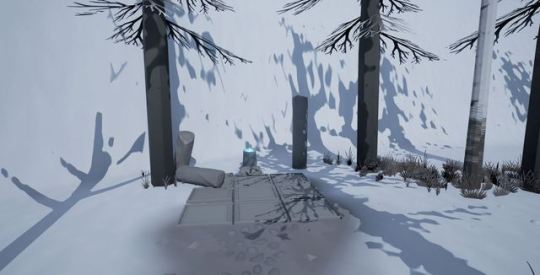
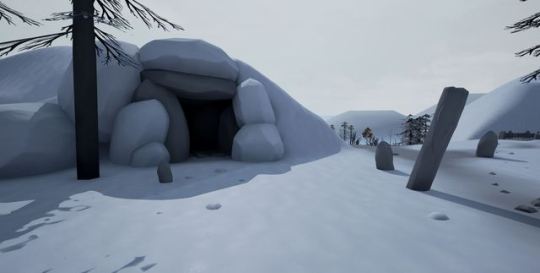
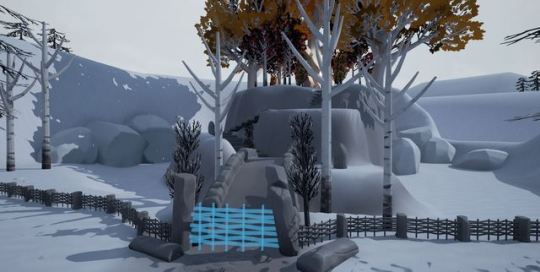
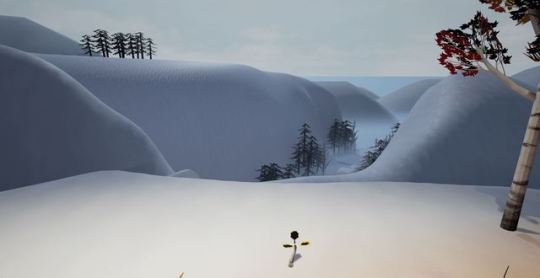
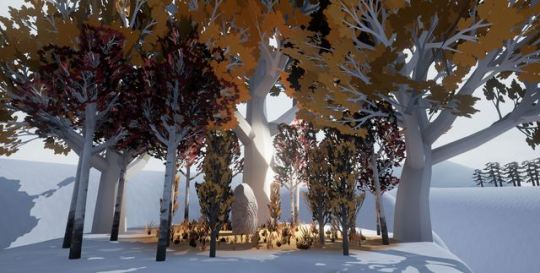
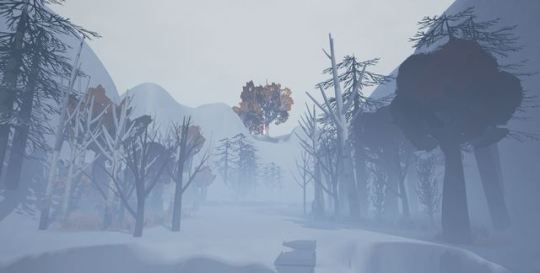
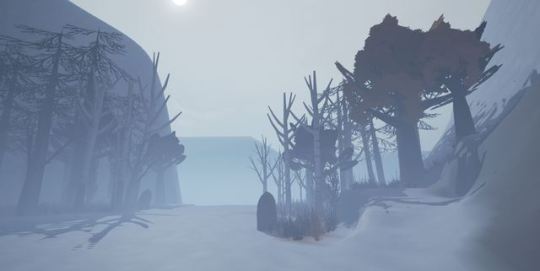
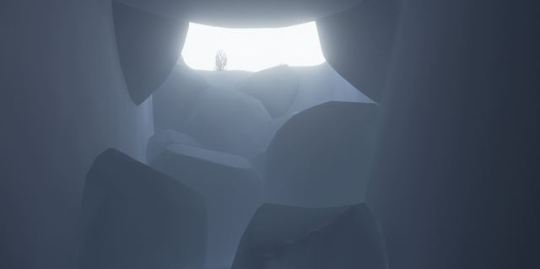
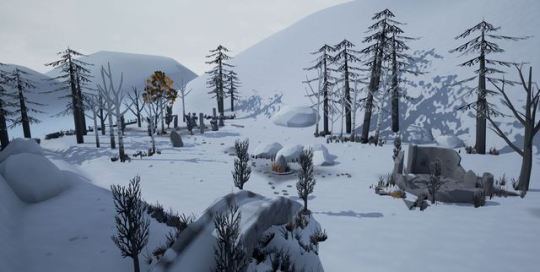
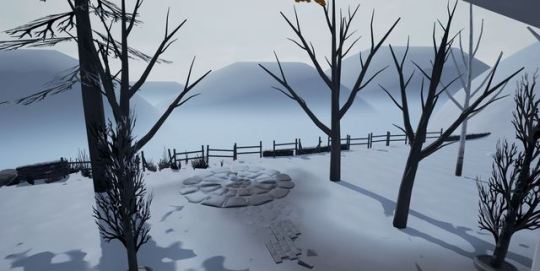
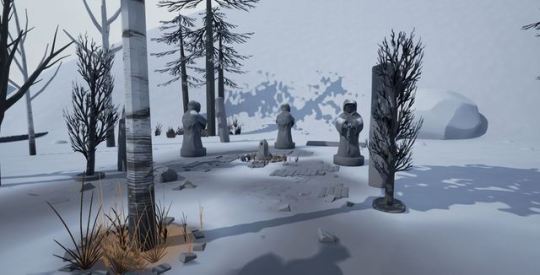
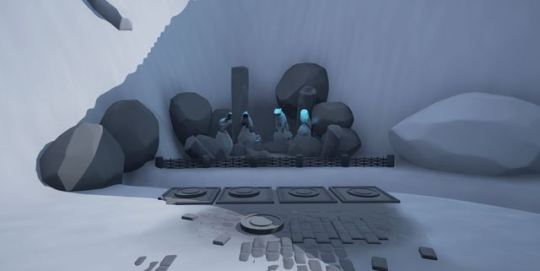
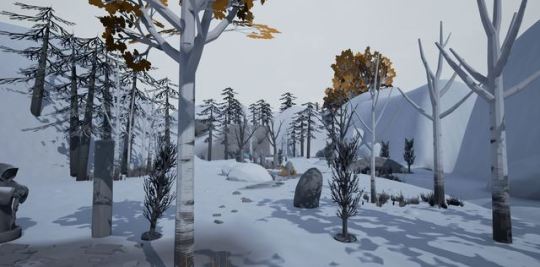
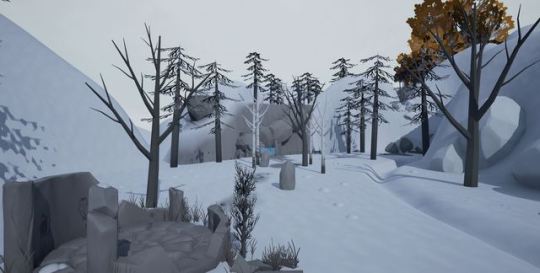
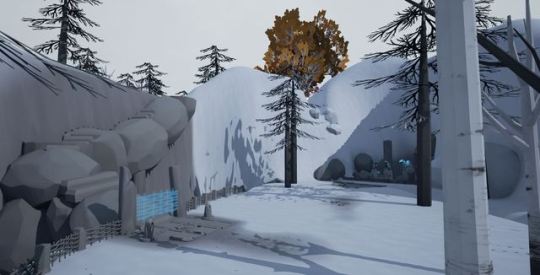
XB2002 Assignment Three - Environment Art
The Environment Art Scene Fly Through and Trailer:
For my final development milestone of my low poly environment, I created a flythrough/reveal trailer for the whole environment scene itself.
For the trailer, my main focus was to capture the majority of the environment within the Unreal project and have a seamlessly smooth transition throughout the whole thing for the camera’s projectile path it takes.
For the camera and video itself, the video was captured on a matinee keyframe animated camera, and upon completion of the matinee’s route rendered out the Matinee’s movie projected path at a 1080p 60 frames per second video at the MP4 format.
From here it was the case of taking the Unreal matinee movie and importing it into Adobe Premiere Pro and adding visual effects such as the transition to white in the title and credits scene and adding the soundtrack Floating Home over the video.
Within Adobe Premiere Pro I also compressed and rendered the video from its initially slow speed Unreal video file, and from here was able to acquire the smooth flow of movement visible in the video above.
I am very satisfied with the final version of the reveal trailer for the whole low poly environment scene, as it has allowed me to develop my 3D modelling, environment art, and Unreal materials skillsets.
One of the design challenges I faced within the video creation process of the project was creating the right visual effects for the video to make it more professional, as my creative milestone aim for this video was to create a fly through that resembles that of an actual game reveal trailer.
Overall I believe the trailer video manages to good a good job of showcasing the environment itself and capturing the emotional feeling of the visually displayed environment and it’s narrative and matches that of the initial concept idea I had for the environment from the beginning of the project.
#FWXB2002#XB2002#XB2002FW#XB2002Futureworks#FutureworksXB2002#Futureworks#BAGDYear2#LowPoly#EnvironmentArt#Gamedev
2 notes
·
View notes
Photo
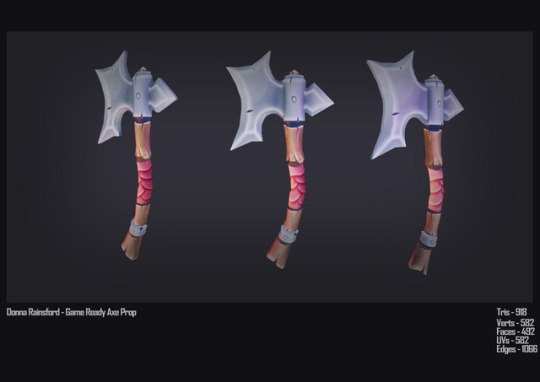
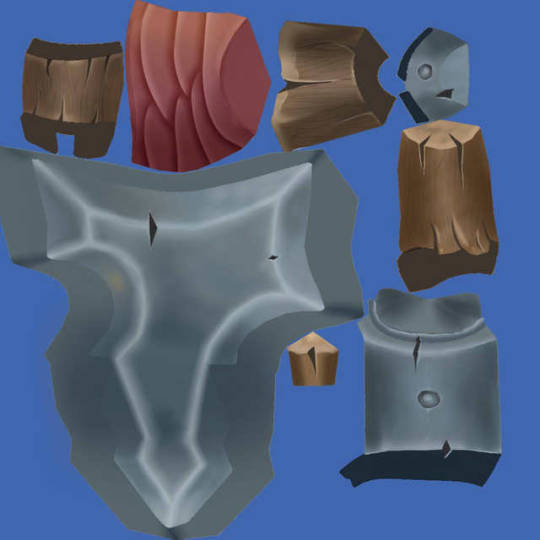
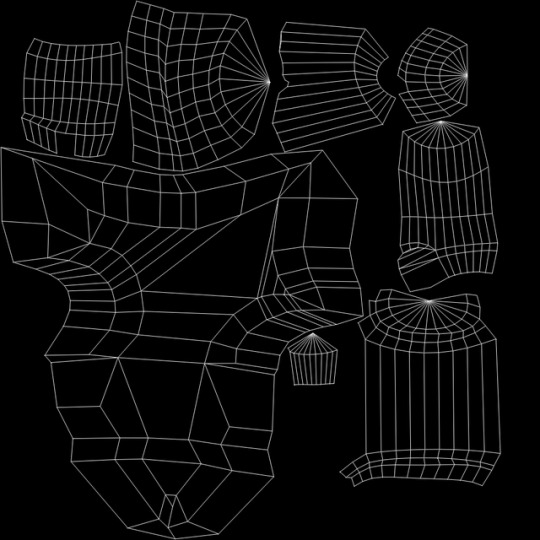
XB2002 (3D Modelling) Assignment 2: Game Ready Prop - Axe
0 notes
Text
Low Poly Teapot Redo

This is my progress of my low poly assignment, I kept the main parts of the teapot separate to save time in the UV mapping process.


I mapped out the pieces separately, this split my time nicely and helped avoid any bad UV mapping.


I tried out a few different colours and materials on the teapot, choosing the orange texture for the pot as the pale blue, white and greys looked very boring.


Screenshot from SketchFab.

0 notes

Photo
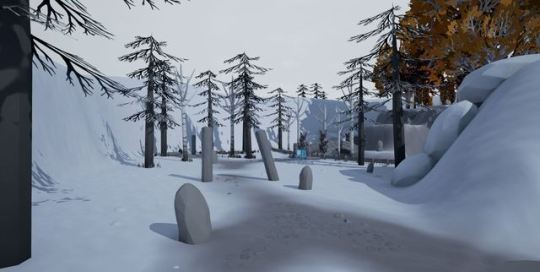
Environment/Level Design
Images from the level
0 notes
Text
XB2002 - High Poly Model Progress - Blog Post 2
Below are some quick renders of my model in its current state with smooth preview enabled.
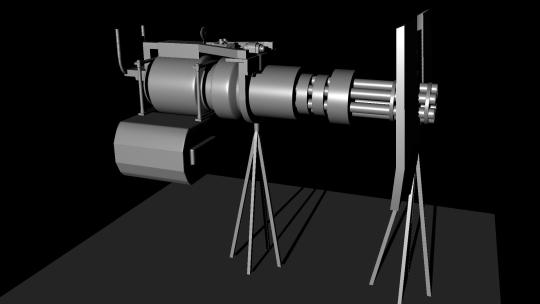
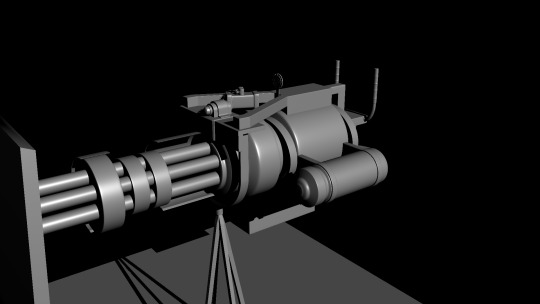
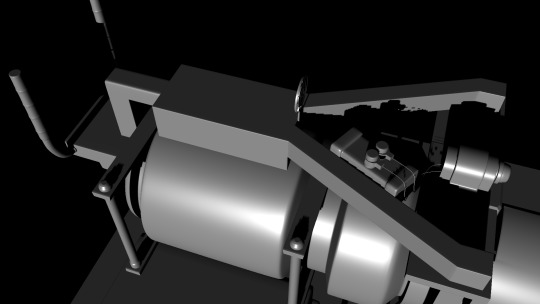
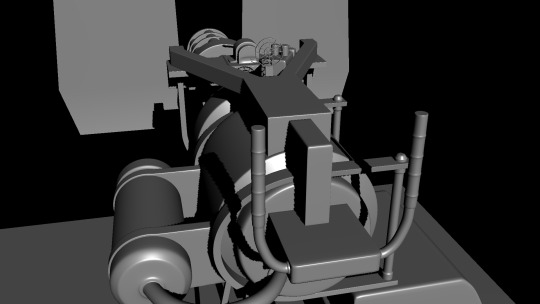
I have made several alterations since my last update and I have separated low poly and high poly versions of each part of the model into layers, ready for the baking process.
My current tri count for the low poly version of this model, as you can see below, is 21,574.
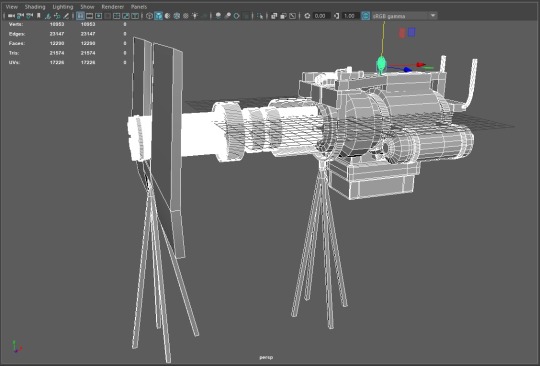
Below you will find my current progress uploaded to Sketchfab, smoothness has been applied for this upload.
Minigun (WIP) by FWLukeSummers on Sketchfab
1 note
·
View note
Text
Chapter 49: ZBrush Challenge

Hi, all. Let me say this first: ZBrush can do amazing things, that’s true, but that’s because the person behind it has suffered uncountable hours trying to understand this damned program.
I hate ZBrush. I hate it with all my heart. It’s the most unintuitive software that exists on Earth. It’s confusing and stressing. It’s almost like a beast you have to tame with years of training, and it makes no sense whatsoever. I have no clue how anyone can find this program logical.
And I had to redo this project. I already had an idea, several sketches, I had half of the sculpting done already, and then I had to start again. From scratch.
Nevertheless, I survived the project. I learned to approach ZBrush (no saddle yet), and I learned how to retopologize a bust with Maya. It’s easy yet laborious and time-consuming.
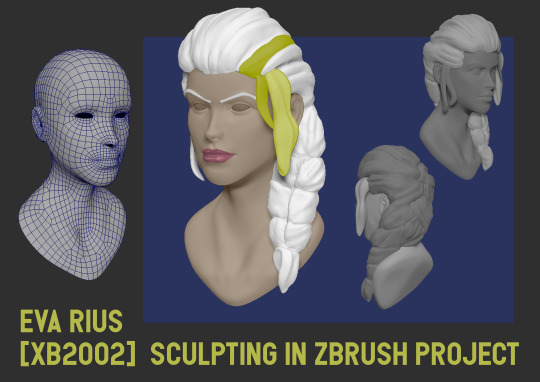
Well, what do you think of my attempt to model Jaina? I love the new appearance they gave her for BFA :) She’s so cool. If she keeps being badass she will become one of my favorites for sure.
0 notes
Text
Props for Environment
Here are some screenshots of the props I am making for the environment.


This is a table piece, my environment will be filled with tables each with a lamp, light and a prop such as a book or a mug on it.
I will be dressing each table and chair a little different as I would like to give the illusion of the library/home being lived in.
I chose a home library as the environment instead of a typical library as there isn’t much to a library, books, shelves and chairs would be the only assets I would need to make as food/drink is banned in libraries and they also have constant clean ups to keep it tidy and spotless.

I made 2 styles of books and lay them out in a disorderly fashion, this way of doing it was a bad idea as it bumped up the poly count even though it doesn’t need to be high for the books as they will only have to suggested.
They don’t have to detailed unless they’re out on a desk or table.
I will creating a higher poly book with detailed textures for the decorative books, the ones on the shelves however will only be simple shapes/textures.
0 notes
Text
XB2002- Downloaded Images
Here are the images which I downloaded from google images and used in the creation of some of my models.


I downloaded and used this image in my alphas within Substance painter to create height decals on some of my models.
Hammer


I downloaded and used both of these images on my hammer model. They are located on opposite sides in a central position on the hammer head.
0 notes
Photo
Environment/Level Design
Images from the level
0 notes
Photo
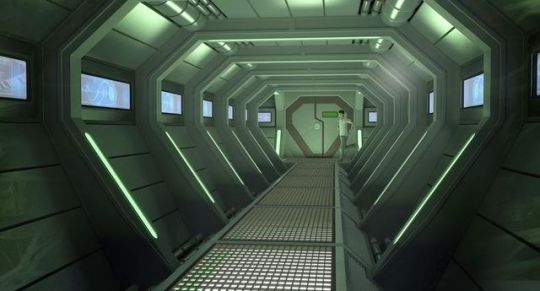
BAGD Year 2: XB2002 - Spaceship Interiors Research
0 notes
Text
Chapter 46: PBR SD Challenge

From the producers of: ‘PBR SP, Substance Painter is an amazing software’, comes: ‘PBR SD, we only have amazing softwares’.
Substance Designer, guys. Here it comes. I found this another fascinating invention. Creating realistic materials in real-time, being able to change its characteristics at any time without losing your progress? Wow. That’s powerful.
If you know the program, you know what I’m talking about. For those who don’t:
Let’s say you want to create cheese. Like I did. You finish it, and you don’t like the position of the holes or the shape, or the mold is too thick. No worries, you can acces that part of the information, and change that and only that. The program will do the rest. This is not like a painting. You don’t have to erase everything. Each detail is separate and can be accessed and edited at any time.
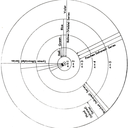
That’s why the aspect of the software is something like this:
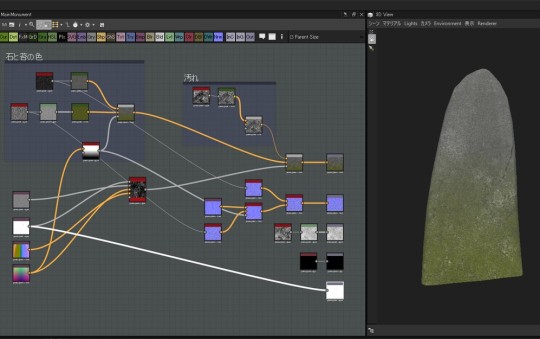
A big chart of squares, each of them containing a part of your design: the color, the texture, the noise, the normals, the roughness, the highlights, the shadows...
It’s a bit confusing when you first use it. Especially because, like in SP, you aren’t aware of its potential and tools. And practice is the one who teaches you how to mix those modules to make amazing stuff. Just this simple rock needed a hell of a lot of squares to do.
For my project, I wanted to innovate a little, like always, and wanted to do some cheese and jello. However, they were so simple that they were a joke. In the end, I gave up with jello and changed to ice, but I couldn’t forget about the cheese.
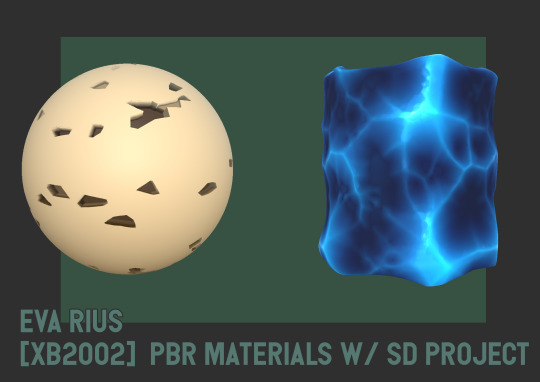
Obviously, my cheese material ended being too bland. But I think it’s not so bad for the first time with this software. And the ice turned out well. Thanks, internet tutorials!
Have you done some amazing materials you want to show off? If you want to teach me I’d be happy to learn! ... No? Ok.
#XB2002#2ndYear#SubstanceDesigner#PBR#CreatingMaterials#Cheese#Ice#Jello#Potential#IWantToLearnHowToUseThis#AndSubstancePainterToo
0 notes
Photo


After I made the circular room I added in my assets into the scene then worked on lighting, I wanted the room to be dark and the main sources of light to be the lamps on the desks, however this proved difficult as the lighting on the lamps wasn’t strong enough/or was too strong in places to light up what I needed so I tried a few ways to improve the quality of the lighting.
0 notes