#www.mywifiext.net setup
Explore tagged Tumblr posts
Visit Tumblr Blog
Explore Tumblr blogs with no restrictions, modern design and the best experience.
Last Seen Tumblr Blogs


Fun Fact
In Q3 of 2020, 31% of US users access the Tumblr app daily.
Text
How do I reset my Netgear Extender Login?
Use these procedures to reset your Netgear extender login:
First, find your Netgear extender's "Reset" button.
Usually located on the device's back or side, this is a tiny, inset button.
Press and hold the button with a paperclip or other pointed item until the power LED begins to blink.
This restores the extender to its factory default settings, erasing any previously saved login credentials.
Await the extender's reboot after the reset.
Then, connect to the extender's default Wi-Fi network.
The network name will typically be something like “NETGEAR_EXT,” and you won’t need a password initially.
Open a web browser and go to either www.mywifiext.net or 192.168.1.250. This will take you to the Netgear extender login page.
You will be asked to create a new admin username and password on the login page.
To configure the extender for your network, according to the setup wizard's instructions. For future reference, be sure you write down your updated login information.
Make sure your browser's cache is empty and that the device you are using is linked to the extender network if you are having trouble seeing the login page.
Your Netgear extender login should be successfully reset after completing this method. Go to our website to know more about it.
0 notes
Text
https://erobideonetto.com/how-to-perform-factory-default-reset-of-netgear-extender/
0 notes
Text
How to login the Netgear Extender Using Web Address?
www mywifiext net is a popular web address for accessing the setup page for Netgear range extenders. Netgear WiFi extenders help to enhance the range and coverage of your existing wireless network. The mywifiext.net login address offers a user-friendly interface for setting up and configuring Netgear WiFi extenders.
You can go about multiple modifications and configurations using www mywifiext net. They can set up their range extenders by following the website's step-by-step instructions. Connecting the range extender to a power source, connecting it to a computer or mobile device, and then entering the website to configure the Netgear extender's settings are common steps in the setup procedure.
In order to login to the Netgear extender using this web address, follow the steps below:
Firstly, make sure the Netgear extender is connected to your device.
Open a web browser on your system and fill the default login address in the address bar.
Type www mywifiext net in the address bar and hit Enter.
You will reach the login page of your Netgear extender.
Enter the login credentials, such as the username and password.
Click Login. After that, you will be logged into the Netgear extender.
0 notes
Text

www.mywifiext.net – Netgear Extender Setup & Login
To access the admin panel of the Netgear Extender, open the web browser and type the www.mywifiext.net web address in the browser bar. Then, enter the default admin details on the login window. Afterward, you reach the smart home page of the device and configure the device's settings. For more related info, get in touch with us freely!
1 note
·
View note
Text
How do I setup Netgear Ex6110?

The Netgear EX6110 setup is a fast procedure. First, connect it to a power source. Open a web browser and navigate to http://www.mywifiext.net/ after connecting your device to the extender’s WiFi network. To choose and establish a connection to your current WiFi network, adhere to the on-screen directions. After adjusting the extender’s parameters or leaving them as they are, click “Finish” to finish the configuration. Move the extender to a location with a strong WiFi signal for best coverage.
How to setup Netgear EX6110 setup manually?
When the Power LED on the Netgear EX6110 illuminates, it is ready to be used.
Make that your device is connected to the “NETGEAR_EXT” default WiFi network.
Type http://www.mywifiext.net/ or http://192.168.1.250/ into the address bar of an open web browser.
Select the WiFi network you already have and input its password by following the on-screen directions.
You may choose to use the default values or modify the extension settings.
In order to maximize WiFi coverage, move the extender and click “Finish” to finish the manual setup.
Read More:-
1 note
·
View note
Text
Ultimate Guide For Netgear Nighthawk X4 ac 2200 Setup Issue
Netgear Nighthawk X4 ac 2200 Setup is quite an easy and straightforward task. In this, you will get a step-by-step guide to do the same. If you are unable to find how to Netgear Nighthawk X4 ac 2200 Setup. Then you are at the right place, here you will learn how to do so. Netgear Nighthawk X4 ac 2200 is a WiFi range extender, that expands your existing WiFi range with speeds up to 2200 Mbps.
It also provides the most steady WiFi and the most instantaneous internet connection. But many users don’t know how to Netgear Nighthawk X4 ac 2200 Setup. And some of them find doing this difficult, especially, those who are non-technical. If you are one of them, then do not get upset. Below is the guide for Netgear Nighthawk X4 ac 2200 Setup. Simply go through the following instructions.
Step-by-Step Guide for Netgear Nighthawk X4 ac 2200 Setup
Netgear Nighthawk X4 ac 2200 Setup is not a complicated task as you think, it is more straightforward than you think. In this, you will get to know how to do this. With this, extender device, you can develop a better vigorous WiFi network at home. This is the most simple and effective way to extend the WiFi range of the router.
There are three methods through which you can easily Netgear Nighthawk X4 ac 2200 Setup. The first is through Netgear Installation Assistance, the second is through the WPS button, and the third is through Fastlane Technology.
Steps for Netgear the Nighthawk X4 ac 2200 Setup Via Installation Assistance
Doing this through the Netgear Installation Through is not a complicated task, it is simpler than you think. Follow the below instruction to do the same via the installation assistance.
Turn on your Nighthawk X4 ac 2200 by connecting it to the power outlet.
After this, place your wireless router near the extender.
Now you need to plug your Netgear extender into a power outlet.
Then wait for some seconds, until the extender LED light turns green.
Now you have to attach the extender to the router and launch the web browser in your system.
And then enter www.mywifiext.net in the search field, and you will see Netgear installation assistant on the screen.
After this, you have to follow the on-screen instructions and attach the Netgear extender to the existing network.
Now place your extender in the most suitable location.
If still, the connection is poor, then move the extender closer to your router, and try again. Do this, until you see the link status LED light turn white.
Once you have located the most acceptable location, then connect the other device to the extender.
Techniques for the Netgear Nighthawk X4 ac 2200 Setup through the WPS button
If you don’t want to Netgear Nighthawk X4 ac 2200 Setup through the Netgear Installation Assistance. Then here is another method to do the same, that is through the WPS button. To do this, you just need to read and follow all steps.
Turn on the WiFi extender, and place your extender close to the router in the same place.
Then plug in your Netgear WiFi extender into the power source, and wait until the power LED light on the extender turns green.
Now press the WPS on the extender, located on the rear or back side of it.
The white LED light on the Netgear Nighthawk X4 ac 2200 indicates a good connection between the router and the extender.
Now you can move your Netgear extender to a new location.
Try to place it in the location, where you have poor or weak WiFi coverage.
Ways for the Netgear Nighthawk X4 ac 2200 Setup Via FastLane Technology
Setup through FastLane Technology, allows you to enjoy maximum WiFi performance. Here are the steps to do the setup via the FastLane technology.
Firstly, connect your router to the Netgear Nighthawk X4 ac 2200.
After this, use any internet browser, and make sure that you use the latest version of your preferred browser.
After this, in the search field of the web browser, enter mywifiext.net.
Then the login page of the extender will appear, in this fill in your username and password and click on the login button.
Now when the Netgear Genie page appears, click on “Do More” and then on “FastLane.”
Then there are two options for users. The first option is, the device is connected to the extender at 2.4GHz.
And the second is, it is connected to the extender at 5 GHz, and the extender is connected to the router at 2.4 GHz.
You can choose according to your preference. And then click on the button to save the changes you made.
Binding Up
It is quite frustrating when you are unable to set up your Netgear Nighthawk X4 ac 2200. Follow the above instructions for the Netgear Nighthawk X4 ac 2200 Setup. And hopefully, this above guide will help you with the same. You just need to follow the above easy and detailed instructions as given to do the same.
Doing setups of the Netgear Nighthawk X4 ac 2200 extender is not a complicated task, it is simpler than you think. If you don’t know how to do this, then simply obey the above instructions. So, before seeking assistance from someone else, try to go through the techniques, that are given above for Netgear Nighthawk X4 ac 2200 Setup.
1 note
·
View note
Text
How To Netgear wifi extender IP address setup?
Netgear wifi extender is used to boost the speed of the internet and provides better coverage in hard-to-reach areas. Wifi extender is placed between the device and the wireless router. It is the most satisfactory method to stimulate the speed of the network, and it should be within the range of the wireless router. Sometimes it is also called a range expander and provides ultra-fast speed. Preserving your wifi extender safe is vital and it is easier to access speedy and lag-free internet in every location of your home.
Netgear wifi extender IP address prevents others from using the extender and permits the extender to talk to the main network. The IP address is a series of numbers, which is allocated to an internet-connected device. Setting up a Netgear wifi extender IP address is not a tough task, you can do it without asking for help from someone. You can set up the Netgear wifi extender IP address in two ways, the first is via the WPS button and the second is through the ethernet cable. Here are the methods for How To Netgear wifi extender IP address setup. Go through the below steps for Netgear WiFi Extender login.

Steps for Netgear WiFi Extender login
It is a must to log in to the official page of the Netgear extender setup before proceeding with further steps. After logging in users can easily install, set up, and update the Netgear Range Extender firmware. So in order to do so, go through the below instructions.
Firstly, launch the web browser on your device which is connected to the extender.
If the extender and the router have different names for the wifi network. Then the users have to confirm that both devices are connected to the same network.
Or if both devices are using different wifi network names, then users are suggested to enter www.mywifiext.net in the browser's search section.
Then, you have to enter the IP address of their Netgear extender.
After this, click on the enter button. And you will jump to the Netgear login page.
Now you have to fill in your username and password in the given areas on the login page.
And then click the login button, and the Netgear Extender Setup page will appear on the screen.
From here you have to find and click on the menu icon. And then click on the settings option to check and adjust the wifi extender settings.
By following the above steps, you can easily access the Netgear extender.
Netgear wifi extender IP address through WPS
These steps are for the Netgear wifi extender IP address through the WPS button. Go through the below instructions to do so.
Firstly, turn on the wifi extender, by plugging it into the power socket.
Then, search for the WPS button on their device.
After this, you have to long-press the WPS button for a few seconds.
And then wait till the LED light turns solid green.
If the users have a dual-band wireless range extender, then repeat the same process.
At last, connect the router to the wifi extender, and use the same password as on the router.
After completing the above steps, perform the Netgear WiFi Extender login. Once you completed all the steps, you can connect your devices to the wifi extender.
Netgear wifi extender IP address through ethernet
The following are the steps for How To Netgear wifi extender IP address setup. Simply follow the given steps to the Netgear wifi extender IP address.
Before continuing with further steps, connect the Netgear range extender to the computer with an ethernet cable.
Then open the web browser on the computer.
After this, search for http://mywifiext.net and you will be transferred to the official page of the Netgear extender setup.
Now you have to fill in the username and password, make sure that you fill in the correct password because this case is sensitive.
And click on the login button, then under the wireless setting, click on the setup option.
Then on the security option, verify that the value in the password field matches the router password.
Lastly, click on apply option and reconnect the wifi to the wifi extender.
Sum up:
Hopefully, the above steps will help you with the How To Netgear wifi extender IP address setup. Performing this is not as challenging as it looks, this is easier than you think. You just have to get through the above methods step by step to the Netgear WiFi Extender login. Make sure that you follow each and every step very carefully, to do so. If the above steps are unable to help you out, then you might need some expert assistance. Try to get in touch with the Netgear experts, they will provide you with full assistance.
0 notes
Text
How do I setup Netgear genie login?
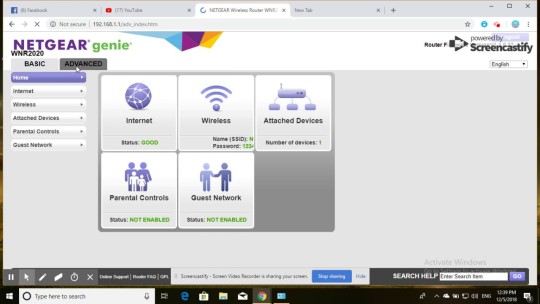
We'll explain the Netgear genie setup setup app on your laptop, desktop, or smartphone in this blog post. An app called Netgear Genie allows you to easily and quickly manage your Netgear extender and router. Users of this programme will be able to manage and fix their home networks. You may adjust your network settings, identify network problems, and set up parental controls with the aid of the genie application. The application's main function is to manage and set up your Netgear device. If you wish to use a Netgear genie programme to graphically setup and manage Netgear home routers.
Netgear Genie Smart Setup
To set up your extender using the Netgear genie smart setup method, follow the instructions below:
You should join a wireless network with your extender.
Connect any device to the current network.
Launch a web browser.
Enter mywifiext.net as the URL.
Your default username and password should be entered.
The Genie setup page will open on your device.
After that, change the technical setting as necessary.
Don't worry; if you run into any problems while completing the tasks above, we can assist you. Simply get in touch with our technical experts and ask them to set up your Netgear extender.
Note:- If you need any assistance regarding your Netgear genie setup so contact our technician or visit the official website that is www.mywifiext.net setup
Netgear Genie Wizard to set up my Netgear extender?
Here, we explain how to set up your Netgear extender for Netgear Genie setup. For Netgear Genie setup, follow to the instructions displayed on-screen:
Connect your extender first.
Your device must be connected to the accessible network.
Fire up your web browser.
Type 192.168.1.250 or mywifiext.net.
Next, select New Extender Setup.
Your default username and password should be entered.
Then, set upd your Netgear Genie by following the instructions displayed on the screen.
You've now finished the Netgear genie setup procedure. We will discuss how to access Netgear genie in this blog.
What does Netgear Genie be used for?
The objective of Netgear genie is to make managing and configuring Netgear devices simpler than by using the standard way. Netgear genie can be installed on a PC or Macbook as well as Android and iOS smartphones. A dashboard called Netgear Genie makes it simple to control your network. You can control your router's settings with it. enabling you to control and turn on parental controls. If your computer loses connection to the internet, Netgear Genie will be able to assist you in resolving the issue because it continually tracks your internet connectivity. Any wireless network can be accessed using Netgear Genie. The Netgear Genie can set the most typical wireless issues and will be able to automatically remedy the problem.
What is the Netgear genie login procedure?
You should need to download the Netgear genie in order to log in to the app. In Windows 10, Netgear Genie is employed.
The Netgear genie login procedure only takes 5 simple steps:
Connect to the extender first.
Launch your browser.
Visit mywifiext.net now.
Use your username and password to log in.
Click again to log in.
Please remember not to remove your extender while attempting to log in.
How is Netgear Genie firmware updated?
The purpose of a firmware upgrade is initially to boost extender performance. If your internet connection is slow and you have trouble with buffering. If so, just click on firmware upgrade.
Follow the instructions provided to update the most recent firmware for your extender on your Netgear device.
You can upgrade your Netgear extender by following these easy steps:
To the Netgear extender, connect.
Restart your browser.
Visit mywi-ext.net
Use your username and password to log in.
Select "Firmware update" from the menu.
Select the most recent firmware from the administration bar.
The firmware upgrade will take a few minutes, perhaps two.
Don't switch the power off when performing the upgrade.
Your Netgear extender then begins to reboot.
You may upgrade your Netgear firmware using this method. If your Netgear extender is providing you any problems after the setup process. Then you may easily phone or use live chat to speak with our experienced professionals.
0 notes
Text
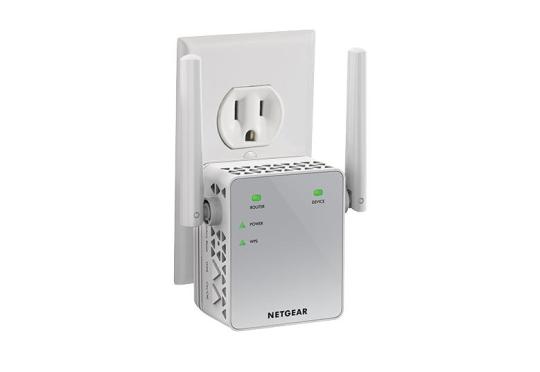
Netgear EX3700 Setup
One of the most popular extenders is the Netgear EX3700, which lets you extend the range of your wifi and decrease disconnectivity. The best part is that there are no dead zones to prevent you from enjoying yourself when using your laptop, phone, or gaming console. For Netgear EX3700 Setup, there are two practical methods:
WPS allows you to connect to a secure WiFi network without having to enter the network name or password.
Establish a connection with the NETGEAR installation assistant: To utilise the NETGEAR installation assistant, a web browser must be opened from a computer or mobile device.
Setup Guide for the Netgear EX3700
Using installation aid, perform the following steps for Netgear EX3700 setup:
Turn on your Netgear AC750 EX3700 extender.
Put your WiFi extension close to the router.
Connect your extension into an electrical outlet.
Connect your router to the extender.
On a PC or mobile device, open a web browser and type www.mywifiext.net.
Displayed is the NETGEAR installation assistant.
To connect your extender to your current WiFi network, follow the on-screen instructions.
Your extender should be relocated.
Moving the extender closer to your router until the Link Status Light turns white will allow you to retry if you have poor or no connectivity.
After choosing the best location for your extender, connect your client devices to the enlarged WiFi network.
How to Setup Netgear EX3700 using WPS?
WPS setup instructions for the Netgear EX3700 Extender:
Your Netgear AC750 EX3700 WiFi range extender should be turned on.
Put your WiFi extension close to the router.
Connect your extension to a power outlet.
Watch for the Netgear EX3700's Power LED to become green.
The extender's WPS button should be pressed.
If you still have any issue regarding Netgear EX3700 Setup, then don’t feel ashamed to contact our experts via live chat or toll free helpline number.
Common Netgear EX3700 Setup Issues
Not working is Mywifiext.net
Password for mywifiext not correct
Although WiFi is not extended, the Internet is accessible.
Mywifiext.local cannot be contacted
The network is not connected to the WiFi extension.
The Netgear Genie app won't launch.
Accessing 192.168.1.250 IP address has problems
Misplaced configuration CD
WiFi connection problems
Login issues with the Netgear EX3700 extender
Internet connectivity is lost on the EX3700.
Updating Netgear firmware is not possible
With a Netgear EX3700 extender upgrade, mywifiext.net is no longer accessible.
Problems in MAC address filtering
Update failure: Netgear EX3700 not working
How to Solve Netgear AC750 EX3700 Setup Problems?
Use the troubleshooting instructions listed below to solve Netgear EX3700 Setup issues:
Check to see that the Netgear AC750 EX3700 extender is getting the right amount of electricity from the wall outlet.
Before connecting the extension, make sure the wall plug is not broken or short-circuited.
Use your device to get a high-speed internet connection.
Verify each and every electrical connection. Use only undamaged cables.
Keep your extension away from things like aluminium studs, microwaves, fish tanks, cordless phones, room corners, metal items, walls, and walls.
Make sure you put the right URL in the address box if you are experiencing problems with mywifiext.net.
After doing a power cycle, try restarting the extender's configuration on your Netgear AC750.
To log onto My WiFiext.net, only use the most recent version of your web browser.
Upgrade your extender's firmware to the most recent Netgear version.
Restore the factory default settings for the extender.
Netgear EX3700 Firmware Update
The Netgear extender firmware essentially functions as an operating system designed to run on the specific brand and model of the extender. So make sure your extender has the most recent firmware. Follow these procedures to upgrade the Netgear EX3700 firmware:
Turn on your Netgear AC750 EX3700 WiFi extender first.
Attach the extender to your router.
Once finished, open your preferred web browser.
Type "mywifiext.net" into the address area after typing it in.
Use the login and password to access your extender.
Click the Firmware Update option under Settings.
How to reset Netgear EX3700?
One of two approaches will allow you to return your EX3700 to its factory defaults. both through the use of the online user interface and by first selecting the Factory Reset option (GUI).
Hard Reset:
Find anything, like a paper clip or a pen.
On the extender's bottom, locate the Factory Reset button.
Before pushing and holding the reset button with a paper clip or pen, hold the button down for at least five seconds or until the Device to Extender LED begins to flicker amber.
Release the Factory Reset button after the extender has restarted.
After rebooting, the factory default settings for your extender have been reinstated.
Reset Using Web GUI
Utilise a PC that is wired or wirelessly connected to the extension.
Launch a web browser, such as Google Chrome, Mozilla Firefox, or Internet Explorer.
Enter www.mywifiext.net in the address bar of your web browser.
Enter your email address and password on the login screen, then click Log In.
Click Settings and then Additional Settings on the NETGEAR genie page.
Tap Reset. To continue, press Yes.
Wait for the device to finish returning to factory default settings on the web interface.
If you still have any issue regarding Netgear EX3700 Setup, then don’t feel ashamed to contact our experts via live chat or toll free helpline number.
0 notes
Text
How To Setup WiFi Range Extender Netgear
Learn How to Setup WiFi Range Extender Netgear, plug it into a power outlet within the range of your existing WiFi network. Wait for the power LED to light up solid green. Connect to the extender's WiFi network on your device. Open a web browser and enter "www.mywifiext.net in the address bar. Follow the on-screen instructions to complete the setup process, including connecting the extender to your existing WiFi network.
#How To Setup WiFi Range Extender Netgear#How To Setup WiFi Extender Netgear#How To Setup Extender Netgear#Extender Netgear Setup
1 note
·
View note
Text
0 notes
Text
Quick Steps For Login To Netgear Extender Using www.mywifiext.net
The quick steps for login to Netgear extender using www.mywifiext.net are very easy. You need to begin by connecting your device to the extender’s network. After that, open a web browser and enter the mywifiext.net address to open the login page of the Netgear extender. Now, you can set a login username and password and follow the instructions to setup your device.
0 notes
Text
What to Do When 'mywifiext.net' Refuses to Connect?
If mywifiext.net refused to connect then, this happens when there is a power outage, wrong admin credentials, browser issues, network interruptions, and more. To fix this, ensure to have an adequate power supply, enter the correct login details, fix the browser issues, and remove the network obstacles. To know more troubleshooting steps regarding the same, reach us here freely!
0 notes
Photo

To get the detail steps to setup and login into Netgear Extender on Mac OS X or IOS, visit www.mywifiext.net login webpage. You can call us at our toll-free number if you are unable to login. For more info: http://www.supportmywifiext.net/mywifiext-net-login.html
#www.mywifiext.net login#192.168.1.1#192.168.0.1#192.168.1.254#How to Setup Netgear WiFi Extender#Netgear Extender Setup#www.mywifiext.net setup
2 notes
·
View notes
Text
How To Easy Setup Netgear AC1750 Wifi Mesh Extender Setup
If you are unable to Netgear AC1750 Wifi Mesh Extender Setup, then no need to worry. Here you will get to know how to do the same. Netgear WiFi mesh extender is a range expander, which expands your home WiFi network by connecting to your existing network and also helps in improving coverage.
It simply extends the range, even taking on the same network name, which you have always used. And it is an amazing device, that allows users to create a home wireless mesh, by using their existing router.
Netgear WiFi mesh extender with an ethernet port, which helps you to in connecting with wired devices like gaming consoles, streaming players, smart TV, and many more. And if you want to access the full functionality of the WiFi extender, then you need to perform the Netgear AC1750 wifi mesh extender setup. Doing this isn’t as challenging a task as you think, it is simpler than you think.
If you are unable to do this on your own, then here we have some simple steps for extender setup. Go through the following instructions.
Techniques for How to Netgear AC1750 wifi mesh extender setup
Netgear WiFi mesh extender provides internet coverage with your existing home network to create a secure and powerful network. It easily works with a wireless router and is also ideal for gaming and HD videos.
There are two ways for the Netgear AC1750 wifi mesh extender setup, you can use any of them for the same. The first is through the WiFi Protected Setup (WPS) button, and the second is through the ethernet cable.
Netgear AC1750 wifi mesh extender setup through the WPS button
Setup through WiFi Protected Setup (WPS button), lets you join a secure WiFi network without selecting the network name and entering the password. Obey the following instructions to do the Netgear AC1750 wifi mesh extender setup.
Firstly, you have to turn on your Netgear AC1750 wifi mesh extender.
Then ensure that you have placed both the router and extender in the same room during the setup process.
After that, press the WPS button on the extender and check the LED link status on the extender.
If the link status LED light blinks white on your extender, then it indicates that the established connection is good between the WiFi devices.
Now press the WPS button on the router as well.
With this, the Netgear AC1750 wifi mesh extender setup is finished successfully by using the WPS method.
Then move your extender to a new location, where you have a poor internet connection. And see if it works.
Also, connect your WiFi enabled devices to the Netgear AC1750 extended network and enjoy the internet.
Netgear AC1750 wifi mesh extender setup without WPS button via ethernet cable
If in case, there is no WPS button on your router or you are unable to connect it manually. Then the second and last method to do the Netgear AC1750 wifi mesh extender setup is, to connect through an Ethernet cable. Below are the techniques to do the same.
First, insert the ethernet cable into the port of the WiFi extender and the router as well.
After this, launch the web browser and enter www.mywifiext.net in the search field to access.
And then go through the on-screen instructions, until the router link LED illuminates. This means, that the extender gets connected with the current WIFI network.
Now relocate the WiFi extender, to extend the speed of your existing WiFi network. To do this, you just need to unplug the extender and relocate it.
While doing this, make sure, that the extender and router are midway between the area where the WiFi signal is poor, and the extender router connection is best.
Now at the new location, plug in the extender and let the LED light turn green.
And use the router link LED to find a spot, where the connection of the router and the extender is good.
If the LED light on the router does not turn amber or green, then plug the extender into another power socket, which is nearer to the router, and try again.
Keep moving the extender to outlets nearer to the router, until the LED lights turn amber or green on the router.
Binding Up
Hopefully, these above techniques will help you with How to Netgear AC1750 Wifi Mesh Extender Setup? And you can use any of these methods to set up the WiFi extender.
So, before asking for help from someone else, go through the above techniques for the Netgear AC1750 wifi mesh extender setup. And once you set up the Netgear WiFi mesh extender properly, then it acts as a single device expenditure for all your network, which requires a larger area range due to its mesh creation ability.
1 note
·
View note