#which would cancel me out of tab mode in the middle of taking pictures
Explore tagged Tumblr posts
Text


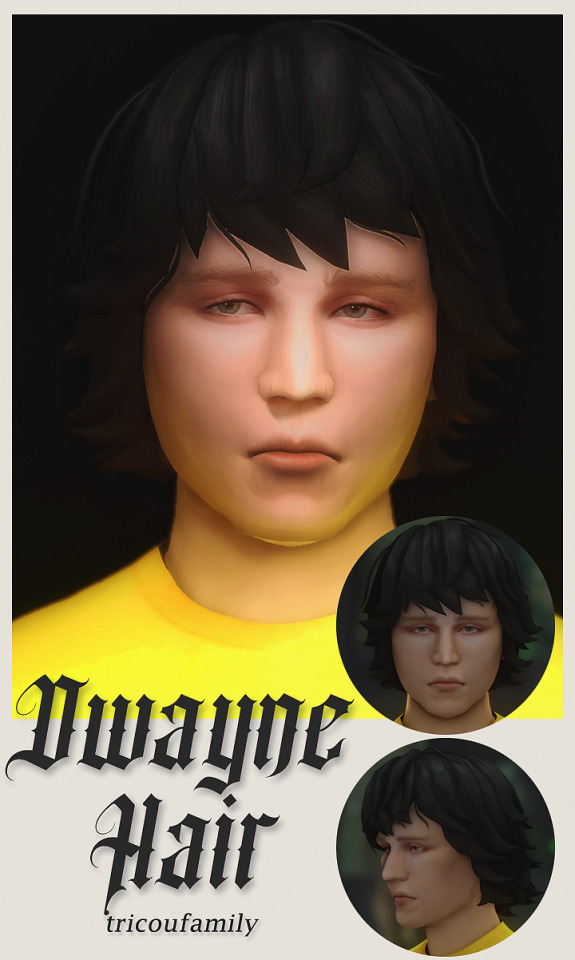

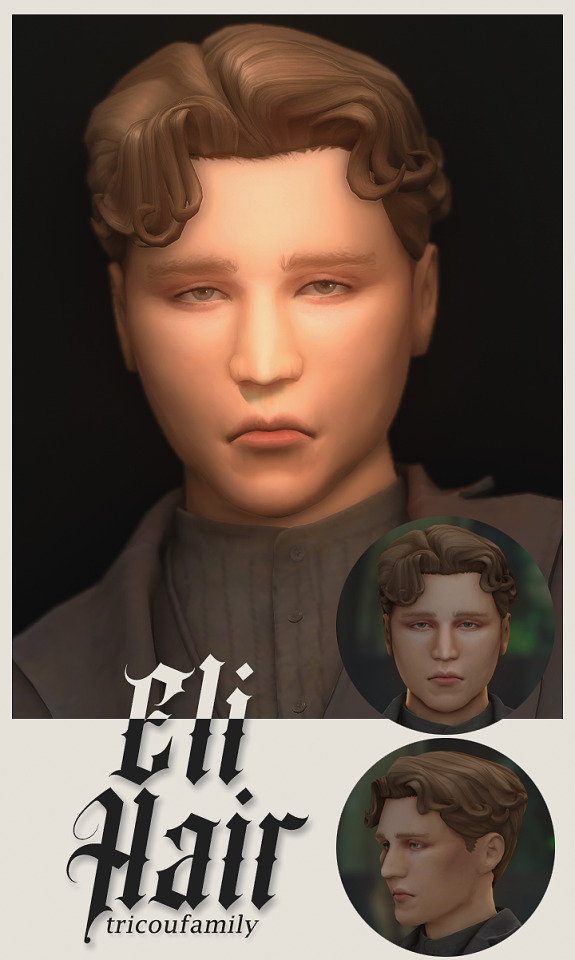

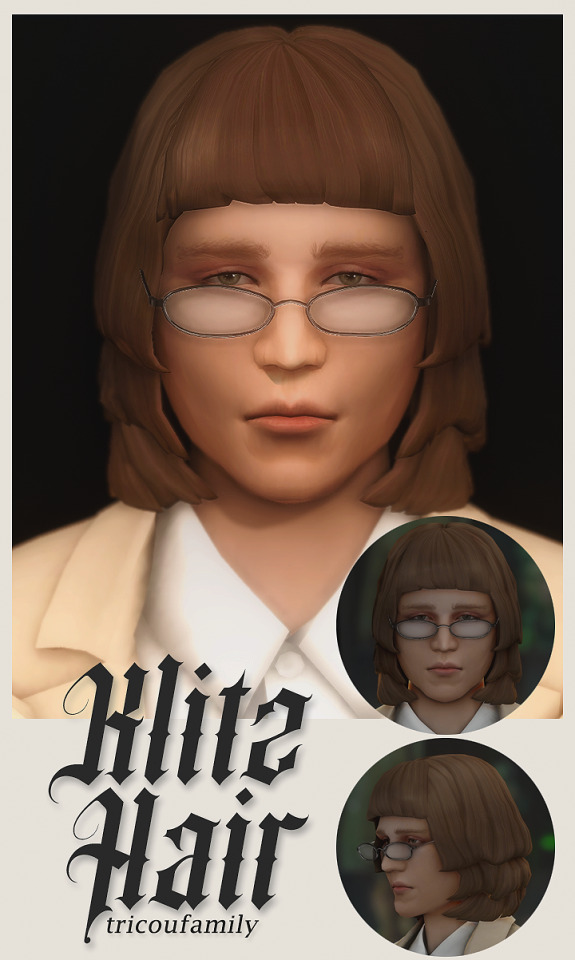
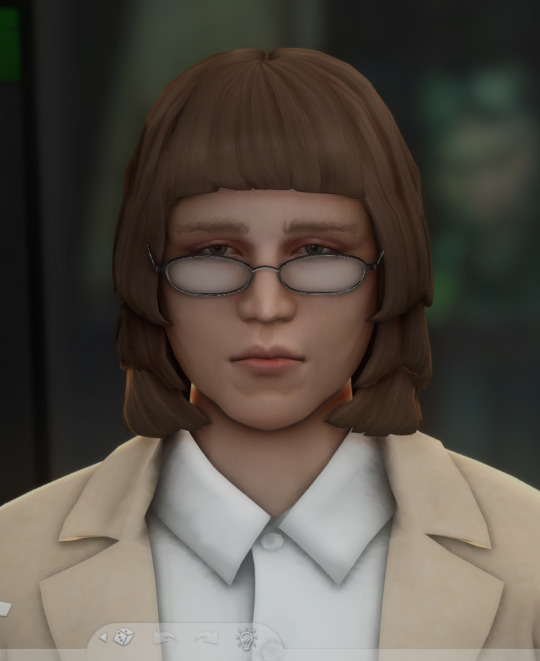
dano hair set
i rise from a years long cc retirement i post this i leave with no explanation
inspiration comes from edward from the batman, dwayne from little miss sunshine, calvin from ruby sparks, eli from there will be blood, jay from okja, and klitz from the girl next door :)
base game compatible
tagged masculine, but they do all work on feminine frames
hat compatible
all lods
all ea swatches
i'm using this hairline in the previews
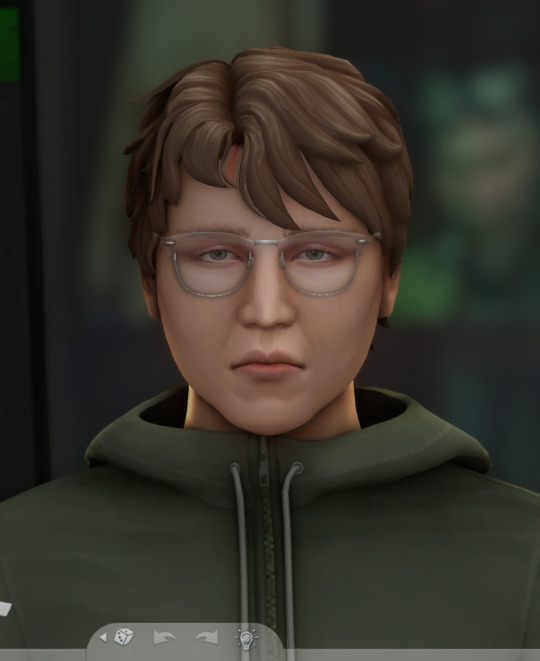
calvin hair was colored thanks to simandy's eaxis actions (because i felt morally obligated to include the sideburns instead of using a facial hair version)
bigger cas screenshots:
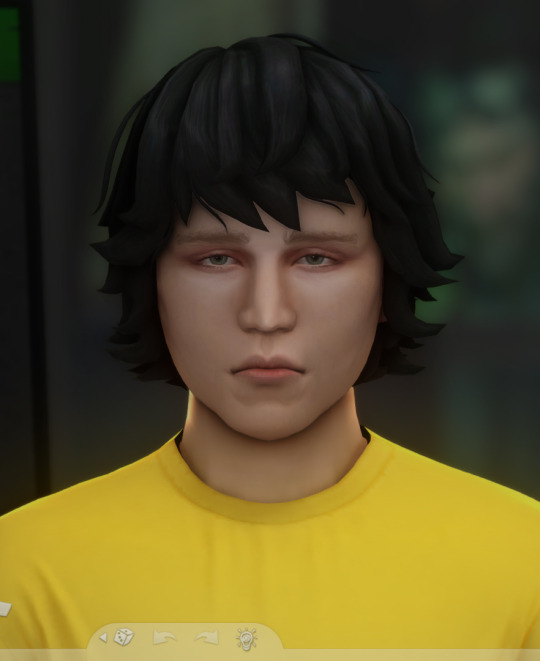
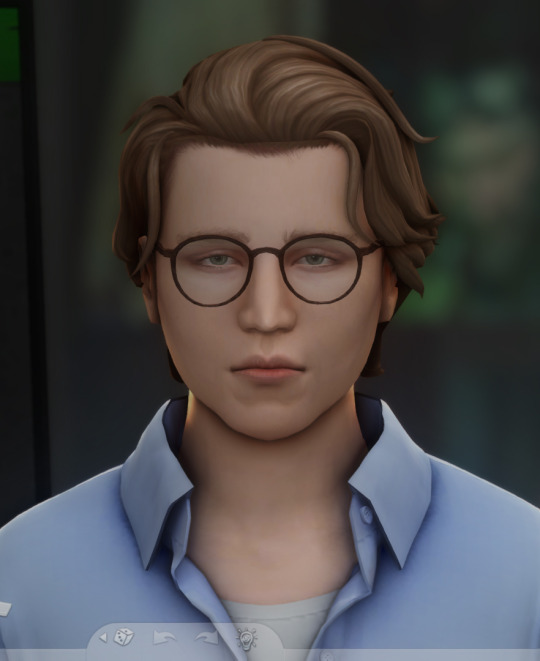
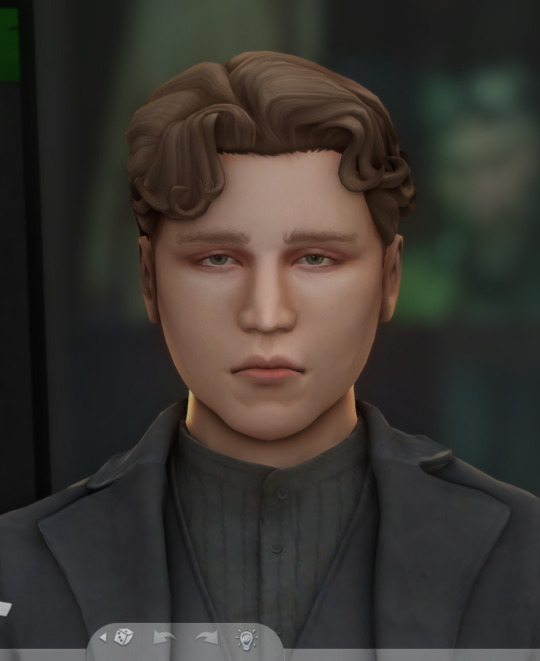
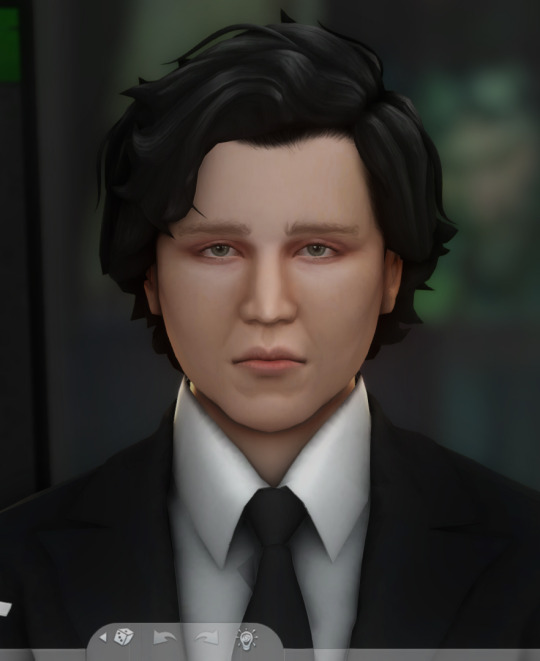
download (sfs)
#ts4#ts4cc#the sims 4#s4#s4cc#ts4mm#s4mm#sims 4#eli needs to be put down he was a menace to this photoshoot#he would not stop screaming at everyone and then they'd get a 'do you want the paranoid trait?' pop up bc he scared them#which would cancel me out of tab mode in the middle of taking pictures#like you ARE the afterbirth that slithered out on your mother's filth BITCH
1K notes
·
View notes
Photo
so, you have photoshop and want to use it to edit your pictures? there’s so many buttons and modes, it can be a little overwhelming at times, so here’s your go-to guide for everything you’ll need to make a nicely edited studyblr picture! it’s a rather long guide, so buckle up and hit that read more button.
this guide uses photoshop CS3 which is rather old, but the applications are the same for all versions, the newer versions will just be a little bit shinier. if you don’t have photoshop and want to get it, i believe CS2 is still free. Read this article if you’re interested.
getting started
First, open up photoshop! Once you have it opened, look in the upper lefthand corner for the menu bar and find the one that says File.

Click on it and then click on Open, and it will bring you to a box where you can look through your files to find the picture you’re looking to edit. For the purposes of this tutorial, I’ll be editing a picture I used for a post but didn’t have time to actually edit. Once you open the file, it’ll be displayed in the middle of the screen like this:
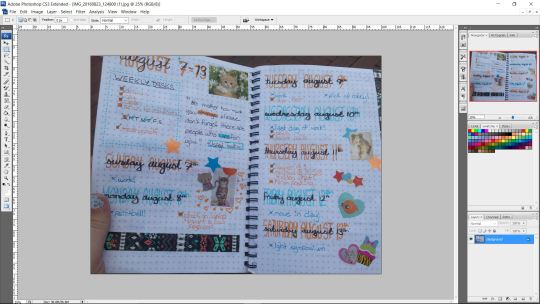
Everywhere that you see your picture is now the canvas, and the area around it is just background area that you can’t edit but is there to fill space.
In the upper right you’ll see the Navigator, which allows you to zoom in and out as well as move your view around the canvas. In the lower right is the Layers panel, which allows you to reorder layers and make new ones as you wish. There are three icons of importance. One looks like a half black, half white circle; this makes an adjustment layer which we’ll talk about later. One looks like a half peeled sticky note, this makes a new layer. The other looks like a trash can, this deletes the layer you have selected.
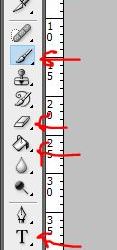
On the left is the toolbar, displayed above. The tools with the little black arrow in the corner have different tools assigned to the same slot, and click and holding the icon will allow you to select between the different tools. All the tools in each slot have similar functions. The tools I’ve drawn arrows to are the ones I’ll be explaining in order from top to bottom: Move - self explanatory. Moves things. Select - makes a selection of the current layer that can then be edited while everything outside of the selection can’t. Crop - self explanatory. Brush - self explanatory. Draws things on the current layer. Eraser - Creates transparent pixels on the current layer, or if the current layer if the background layer makes pixels the background color. Fill/Gradient - Fill fills in spaces with the foreground color, and gradient makes various different gradients between the foreground and background color or other preset options. Text - creates a new text layer Shape - creates various shapes Color Picker - the square on top is the foreground color (used by the brush) and the square on bottom is the background color. Click on the square to change the color.
Also, an important distinction is the difference between undo/redo and step forward/step backwards. Those of you versed in shortcuts will know that control+z is the universal undo shortcut, but in photoshop undo toggles back and forth between undo and redo. So, control+z will only put you back and forth one change. If you want to take away many changes, you’ll need to use alt+control+z, or step backwards. Inversely, to go back to where you were after step backwards, you can use step forwards.
editing pictures
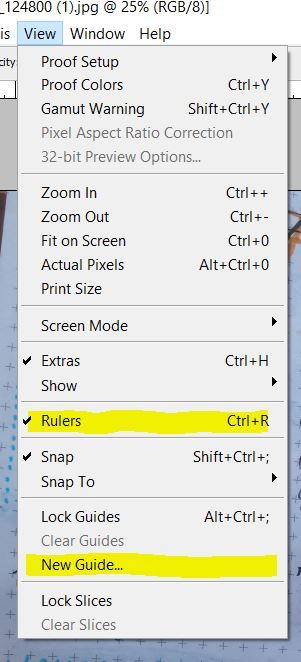
First thing after you open up your picture, I suggest turning on rulers. This can be done via control+r or by going up to the menu bar, clicking view, and then rulers. These will create bars around the side and top of the workspace, and right-clicking these bars can change the units that they measure in. I usually keep mine in percentages to help with placing things directly in the middle or in thirds. If you want a grid that shows halfway points vertically or horizontally, or a rule of thirds grid, you can add a guide (also found under view), that will create a line at whatever point you designate that will NOT show up in your final drawing.
The first step to editing pictures is often to fix any brightness issues. In order to do this, make a new layer above the picture by clicking that little black and white circle at the bottom of the layers bar, and selecting curves from the menu that pops up. This will bring you to a dialog box that looks something like this:

Hitting “auto” is usually enough to make the picture look decent, but if you like you can manipulate the curves further to produce a desired result. In this case, hitting auto gave me a balanced image, but it was still a little too dark for my tastes, so I grabbed the black curve and manipulated it until it looked better. If you manipulate the curves too much and would like to start over with a blank slate, you can always hit cancel and just make a new curves layer.
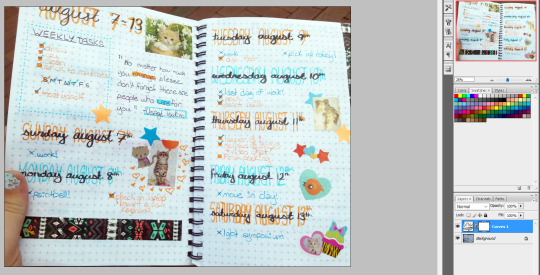
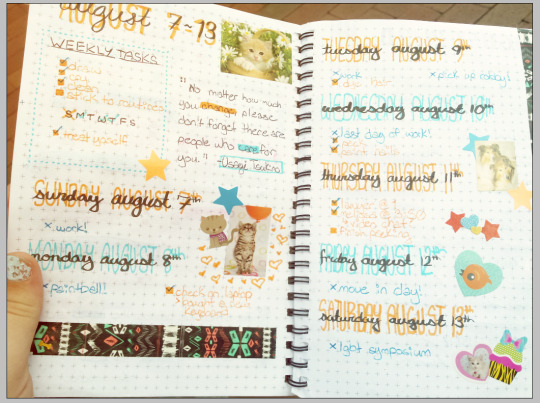
Now, as you can see, the image is a lot brighter, and there is a layer above the image where the curves adjustment lies. Clicking the little eye besides the curves layer toggles it on and off, and you can look at the image with and without the adjustments that way. If you’d like to adjust the curves further, clicking on the icon beside the eye will bring you back to the dialogue box you saw when you first made the layer. For now, I’m rather happy with the brightness, and I’ll go to the next step.
Looking at the picture, the white background of my pages seem a little bit bluer than neutral. This is easy to tell when you’re editing a picture with any sort of white object, which is most studyblr photos, but if you’re editing a picture of something else and it seems to have a yellow or blue tint, you know you need to adjust the white balance. There’s many ways to adjust the white balance, but my personal favorite is to add a photo filter.
To add a photo filter, click the black and white circle again, and select photo filter from the menu. A dialogue box will then pop up:

If your picture looks blue, you’re going to want to pick one of the warming filters. If your picture looks yellow, pick a cooling filter. The density slider indicates just how strong the filter will be. Think complementary colors that you learned in elementary school. For this picture, I found the closest white with the 85 warming filter with a density of 20. Hit ok, and view your picture.

At this point, I would consider the picture post-worthy, but there are more options to spice it up a bit. You can use the brush tool to draw designs on top, or add more color effects with patterns and gradients.
One of my favorite gradient effects to use creates a little bit of a false color effect. Make a new layer, and pick two colors that you want your gradient to be between. For this picture, I’m going to use a light orange and a light blue. On the new layer (above the others!), make your gradient.

Find that little box underneath the layer tab (it should say “Normal”), and click the arrow to change the normal to Soft Light. This will give your picture a glow-y look.
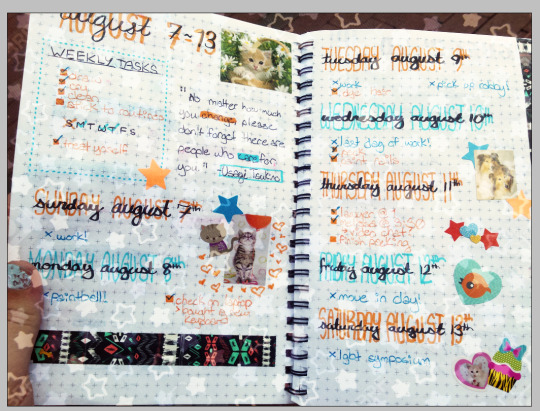
Alternatively, you can use layer modes to apply a pattern. Find a cute pattern online (I quickly grabbed one off of shutterstock just for the purpose of the tutorial, so you can still see the watermark. I wouldn’t use one like that for an actual picture, though.) Paste the pattern on a layer above all of your edits, and find the little box again and set the pattern to overlay or soft light (whichever looks best to you.) You’ll end up with a result that’ll look something like this:
You can mix and match all of these effects to make your photos truly unique and make even the blandest of notes look special! The trick is to play around until you get into a groove and find a style of editing that you really like.
106 notes
·
View notes