#wait for 10 seconds then cut the heat and fold the egg in half. serve on some of your favorite bread with the bacon and done
Explore tagged Tumblr posts
Visit Tumblr Blog
Explore Tumblr blogs with no restrictions, modern design and the best experience.
Last Seen Tumblr Blogs


Fun Fact
Mobile Tumblr US users spend an average of 4.04 minutes per session on the app.
Text
basically the trick to good food is put some honey in that thing
#personal#beat two eggs add a dash of milk put it in the pan you just did your bacon in#make sure the whole bottom of the pan is covered with the eggs season it with aromat (google it) and salt and pepper#toss in some honey just drizzle that shit right on top i don't CARE. fucking wait for the egg to set then flip it over#wait for 10 seconds then cut the heat and fold the egg in half. serve on some of your favorite bread with the bacon and done#bone apple fucking teeth
5 notes
·
View notes
Note
post pie recipe please!!
London Fog pie recipe under the cut! (basically earl grey custard with a vanilla cream top layer)

Ingredients
4 cups whipping cream
4+ tablespoons powdered sugar
1 teaspoon vanilla extract
10 earl grey tea bags
4 cups whole milk
1 tablespoon vanilla bean paste
0.5 teaspoons salt
8.5 tablespoons cornstarch
1.25 cups sugar
4 large eggs
8 tablespoons unsalted butter
2 pie crusts
Equipment
stand mixer
oven
strainer
whisk
spatula
Instructions
Add 4 cups whole milk to a large pot. Then add the 10 tea bags of earl grey tea to the milk. Turn the heat on to low and bring the milk to a simmer. Be careful not to bring it to a boil as it can easily overflow once boiled. Once the milk starts to simmer, turn off the heat and let it sit for 15-20 minutes.
After waiting the 20 minutes, squeeze the tea bags to extract as much flavor.
Add 1tbsp vanilla bean paste and 0.5 tsp salt to the milk mixture. Turn the heat back onto low to return the mixture to a simmer.
While the milk is heating up, add the cornstarch and sugar to a bowl and whisk to combine. Then add the 4 eggs and whisk once again to combine.
Temper the eggs by slowly adding the heated milk to the egg mixture while continuously whisking.
Then return everything back to the pot and turn the heat to medium, while constantly whisking. The pastry cream will suddenly start to change from a liquid to more of a whipped cream consistency.
Once the pastry cream starts to boil (the custard will start to release bubbles), keep whisking for around 30 more seconds. Then turn off the heat.
Wait 10-15 minutes and then add the butter one tablespoon at a time.
Transfer the pastry cream to a bowl, straining the cream through a metal sieve to get rid of any lumps or loose tea leaves.
Cover with plastic wrap, making sure the plastic is touching the surface of the pastry cream so that a skin does not form.
Refrigerate the pastry cream.
Pour 4 cups of heavy whipping cream into stand mixer bowl.
Add 4+ tablespoons powdered sugar and 1 teaspoon vanilla extract.
Whisk with the stand mixer on medium-high speed until medium peaks forms. Refrigerate the whipped cream and save for later.
After 3-4hrs, take the earl grey pastry cream out of the fridge and use the stand mixer to whisk it well to break it up.
Add half of the whipped cream to the loosened pastry cream and fold the mixture by hand using a spatula, maintaining the light airiness of the whipped cream.
Divide the pastry cream + whipped cream combination equally and fill the two pie shells. Smooth out the cream to create a flat surface.
Divide the remaining whipped cream in half and place evenly on top of the pastry cream.
Refrigerate for a few hours, ideally overnight, then serve!
23 notes
·
View notes
Text
Making RDR2 characters into bagels: Charles Smith
Hyperfixation is evil but also great so. Ever wanted to take a bite out of charles?yeah me too. So have this recipe for a herbal sweet savoury gingery bagel
(Recipes for Arthur and John are made and coming, just need to get photos ❤️ Expect the rest of the camp too)
Results:


Recipe:
Usually I'd be batch making bagels, but I'm just going to make 2.
1 cup of plain flour
Bloom 1/2 tablespoon of yeast in warm water (wait 10 mins) then add water as needed til dough comes together
(I don't like measuring liquid as it may over hydrate the dough and that's uncomfortable to work with)
2 tablespoons maple syrup
Pinch of salt
2 tablespoons of ginger
1 tablespoons of thyme
1 teaspoon of nutmeg
1/2 table spoon of cinnamon (because I’m evil and really like cinnamon)
You can also just measure seasonings with your heart if you are brave enough
Half your dough for the marbling. Add a teaspoon of blue food dye and the slightest dash of red
Knead each dough for 10-15 minutes. Put a cute video or music in the background as you knead if you want. And yes im sorry for making there be two doughs, you will need to knead separately for a combined time of 20-30 minutes 😞
Let doughs rest for an hour, or however long your ADHD brain deems an hour. The doughs should have doubled in size
Start working on the water you are going to boil the bagel in, I put a gulp of molasses in my big pot, turn the heat up and put the lid on, get it boiling! You can use other sweeteners too; honey, brown sugar, maple syrup.
Also preheat your oven to 180C/350F (fan-forced)
Third each ball of dough and then sandwich them randomly together. Mush the dough around for a bit to make sure there stuck to each other but not enough for the colour to start mixing. Then you can half the dough again and begin making the bagel shape via this method:
make a dough ball by rolling it around on your surface. Puncture your finger through the middle to make the hole (HINT: the hole will close in during the second rising and possibly during boiling, so make the hole bigger than you think it would need to be!)
Let the bagels rise for 10-15 minutes on some baking paper. I like to cut the baking paper underneath it into squares, it helps with placing it into the boiling water (as a guy with nasty burns from baking I get Very scared) and just falls off.
Once they've risen for the second time, place those bad boys in the water! Air lift them by the sides of the baking paper and drop them in carefully please I don't want anyone getting burnt. Now here is where you get to decide on texture;
Boil for a minute minimum, this gives the shiny effect and sets the bagels size but keeps a fluffier texture. If you like your bagels chewier and tougher like me, I go with 5 minutes lol.
Consider what texture you want!
Put the bagels on baking paper in a tray but before putting them in the oven, add an egg wash. Mix a whole egg together and brush that shit on top, makes the bagel brown nicely. If you don't have a brush, just use paper towel; dip it in the egg and brush it over the bagel.
For the decorative effects I put poppyseeds and chia seeds on the pale dough coloured side, and used the clean flat end of a texta (bit less than 1cm) dipped slightly in egg and then in flour for the dots.
OVEN TIME!!!!!! Put them in for 35-45 minutes (I accidentally under baked mine at 35 mins and they were a bit gummy…)
I would serve with well marinated meat though I Am pescatarian and fold salmon slices worked quite well too, of course veggos can use tofu too. used some stronger herbs instead of a salad, like rocket ect 😗
Enjoy!
#charles smith#charles rdr2#rdr2#red dead redemption 2#red dead redemption#bagel#recipe#baking#sorry i just have to fuse my two hyperfixations
21 notes
·
View notes
Text
Poker Party Foods & advices to have perfect gambling night
So you and the guys (and/or gals) are getting together for a little Texas Holdem or Seven Card Stud. This isn't the online version you play in your pajamas, potato chip fragments wafting gently over your keyboard. You've got real, live people coming into your real-life home, with expectations of at least the minimal comfort of a folding chair at a folding table, and they expect at least a hearty nosh. You can't just limp in with a bag of cheese twists, and soup isn't practical. But you've got a spread limit here: you can't serve anything that needs two hands to hold, nor even anything that will stick your friends with foul hands, or they'll be out the back door in no time. On the other hand, you can't serve bellybusters or they'll be running for the family pot, crying "Must move!"

You don't want to muck it up.
You need some poker party food ideas, and fast!
If it's a poker-dinner party, you want to have the dinner before the game, and needn't worry about drip or stick. You can even serve food that requires two hands! Here are some quick entrées, before we ante up:
Kitchen Sink Spaghetti
Enough dry spaghetti noodles to feed your friends Enough water to boil the noodles 1 large onion, peeled 1 large clove of garlic, peeled 1-2 large handsful of shredded cheese, any variety 1/2 -1 can chick peas/garbanzo beans 1/2-1 can pitted black olives 1-2 fresh zucchinis any amount of other veggies you like, cut into bite-sized bits 1.2-1 tspo oregano (chopped leaves or powder) pinch salt small quantity of canola oil
Boil the water with a drop of canola oil and the pinch of salt. When boiling, add the noodles, stir them immediately and let them boil on medium for six minutes. Drain immediately and do not rinse!
While boiling the noodles, slice the onion into thin rings, chop the garlic and sautée them together in a little oil, in a large frying pan. Cut the zucchini into small bite-sized bits and add, along with any other veggies you;'ve chosen (except mushrooms -- if you use them, add them with the sauce). One minute later, add the noodles, chick peas, olives and cheese. Stir well and continue to cook on medium for another minute. Cover, turn hear to low, and make sauce.
Sauce:
1 cup plain, unsweetened yoghurt 1/2 cup grated parmesan cheese 1-2 ripe tomatoes, chopped 1 tsp lemon pepper 1 tsp paprika 1 tsp dill 1 tbs butter or butter substitute
Simmer the above ingredients in a saucepan until almost boiling. Remove from heat and stir.
Add sauce (and mushrooms if desired) to the spaghetti mixture, mix well, simmer another five minutes.
Serve!

Dill-Rubbed Salmon and Spinach
Salmon fillets, frozen, thawed or fresh Fresh spinach Salt Dill seed, preferably crushed Butter of butter substitute Milk
Preheat oven to BROIL.
Put as much fresh spinach as you can fit into a baking pan. (Spinach shrinks.) Salt it a bit. (Spinach absorbs salt.) Place salmon fillets atop the spinach, place little pats of butter atop the salmon, and a couple little drips of milk atop the whole thing. Sprinkle all over with dill. How much? That depends on the size of the pan, the amount of spinach and the size of the fillets. Just little pats, just little drips, just little sprinkles.
Broil this for five minutes, longer if you like your fish well done. If your broiler turns out to be slow, just keep broiling until the salmon doesn't look raw (slice carefully at the thickest part to take a peek).
This is also good with a squirt of lemon juice!
And now that dinner is over, here are some relatively dripless, unsticky poker party foods that can be enjoyed (not just tolerated) with a few fingers while clutching those killer hands (close to the vest, of course!)
First of all, it doesn't hurt to have bowls of nuts set about. The unsalted sort are cleaner. Baby carrots, cut celery stalks, raw broccoli and cauliflower florets,, these are easy to prepare and a bowl of THICK, nondrippy dip next to the discards will be easy to scoop up.
Horseradish Onion Dip:
16 oz. plain, unsweetened yoghurt four tsps prepared horseradish, red or white one large onion, peeled paprika, lemon pepper, to taste
Chop the onion into tiny bits, mix well with all other ingredients, serve!
Gen's Spinach Dip
16 oz. plain, unsweetened yoghurt 1 tsp lemon pepper 1 tsp honey 1 big bag or bunch of fresh, raw spinach 1/4 milk
DO NOT BOIL THE SPINACH!
Microwave the spinach and milk in a big bowl for two minutes.
Put this with HALF the yoghurt and ALL of the other ingredients into a blender or food processor, on CHOP or the equivalent, for ten seconds, or as long as your equipment takes to chop but not fully blend the spinach. We don't want green yoghurt; we want yellowish yoghurt with lovely green bits in it.
Turn out into a serving bowl, bledn in the rest of the yoghurt and slap it on the table.
Cheese and crackers work well too. Cheese-flavored crackers, however, tend to have cheese powder on them that rubs off on your hands. Try smooth vegetable crackers, and use block cheese you've sliced to cracker-size rather than cheese spreads, which require utensils and can be messy.
For players with a sweeter tooth, try a batch of cookies.
Mohn Cookies
1 cup sugar 3 eggs 3 cups wheat flour 1/2 cup poppy seeds (black) 2 tsp baking powder 1/3 tsp almond extract 1/4 tsp salt 1/4 cup butter
Sift flour, baking powder and salt into a bowl In another bowl, cream together sugar and butter. Mix in the sifted ingredients, little by little, and then the poppyseeds. Punch a well in the center and add eggs and almond extract. Stir well.
If the mixture is now too sticky to manipulate by hand, add flour little by little until it is JUST past that too-sticky stage.
Refrigerate for an hour.
Preheat oven to 375 degrees.
Roll the dough out on a floured cutting board and cut by hand or with cookie cutters. For your poker-playing purposes, suit shapes are nice! (You can cut diamonds by hand but spade-, heart- and club-shaped cookie cutters are readily obtainable wherever you purchase your kitchenalia.)
Bake on a greased cookie sheet for about 13 minutes, or until a light, golden brown. Remove from cookie sheet (carefully, without smooshing them!) as soon as possible to avoid burning the bottoms, UNLESS you've got a lightweight aluminum pan, in which case you they shouldn't burn.
Cake Mix Cookies
You've got a cake mix but cake would be messy to eat while playing cards. You can still use this mix! (Yes, any flavor will do.)
Preheat the oven to 375 degrees and grease up a cookie sheet.
Ignore the directions on the cake mix package.
In a large bowl, mix the contents of the box with softened butter, butter substitute or (for peanut-butter cookies) peanut butter. How much, you ask? First add half a cup, then keep adding until the dough sticks together. It's all right if it's sticky. You just have to get it to the point that you can form balls of it without its all remaining on your hands. Then add one more tablespoon for luck. Mix well. Form balls, then flatten them out between your palms. You're making cookies about two to three inches in diameter here.
Put the flattened cookies onto the cookie sheet and bake for 10 minutes. It's okay if they seem undone. They will harden as they cool, so don't wait for them to get hard in the oven!
To sweeten the pot, try adding chopped walnuts or slivered almonds. For peanut butter cookies, if you have used smooth peanut butter, try adding some peanuts.
Finally, you're going to need some coffee.

Thai Iced Coffee
Use the strongest grind you've got in your coffee maker. Put in enough water for a whole pot MINUS a cup. Add the contents of an 8-oz. can of sweetened, condensed milk to the pot and let the coffee drip right into it.
Stir, refrigerate, serve!
Sweet Nothing
Mix together one part coffee-flavored liqueur, such as Kahlua, one part Irish cream liqueur, one part Amaretto and one part orange-flavored liqueur, such as Triple Sec or Cointreau. Serve straight, over ice or with cream.
Now you're all ready to play, right?
Sure, if you don't feel the need to decorate. Everyone's going to be keeping one eye on the cards, the other eye scanning for tells and a third eye on who's nabbed the last cookie. The fourth eye will be judging your ambience.
Little things you can do to perk up the table:
* Shape aluminum foil into suit shapes and spray-paint them black or red, as appropriate. Punch a small hole at the top of each and use string or ribbon to hang them from overhead light fixtures.
* Obtain a paper tablecloth. It can be red and/or black and ready to use, but it might be more fun to get a white one, give everyone marker pens or crayons (prior to the game) and tell them before Omaha, they're playing Draw. Then draw! (Make sure all artistic output is dry before proceeding.)
* Obtain photos of your guests. Digitally enhance them in one or more of the following ways: put their heads on the bodies of famous opposite-sex poker players; alter their expressions; draw funny party hats on them; place their faces on pictures of paint (royalty cards). Hang these in strategic places or incorporate them into the tablecloth. (You can even print them on napkins, but then no one will want to wipe their fingers!)
* Even for finger food, plates are convenient, paper plates doubly so. Drinks tastes just as good, and have just as much of a caffeine kick, in a paper cup as in a demitasse or snifter. However, you can jazz up plain plates and cups without toxifying them. Try using a marker (well in advance of the game) on just the edge of the plate, to draw simple diamonds or hearts. (Spades and clubs are harder.) Use cups with handles, and tie small trinkets to the handles. For handleless cups, glue red ribbon around the center. (This makes the cup easier to grip, too, especially if you use a ribbon with texture.)
Now unless you're bringing in a live band, crank up the CD or MP3 player, get ready for that monster hand, and let the cards speak!
0 notes
Text
austrian torn, fluffy pancake
A month ago, I made kaiserschmarrn, a shredded pancake, for my kids for a weekend breakfast at the suggestion of my neighbor (coincidentally the partner of the neighbor who challenged me to make dutch apple pie, and thus definitely someone with good taste). It was, as predicted, delicious, and as it’s the year 2019, I posted a photo of it on Instagram Stories in the moments before my children demolished it. It was only then, through an avalanche of DMs, that I learned how deeply beloved it is.
Here’s a small sampling of responses: “You made Kaiserschmarrn!!!” “This is Austrian!” “This is German!” “This is Czech!” “We make this in Hungary!” “Looks spot on, just like the ones I had in Salzburg many years ago!” “We eat this for dessert!” “This is Christmas breakfast every year with tart jam and pureed plums!” “We call this Emporer’s Mess.” [Apparently Franz Joseph I was very fond of it.] “Besides apple strudel, traditional Kaiserschmarrn is one of the most famous and iconic Austrian dishes.” “If you order it at any Austrian restaurant, it’s almost guaranteed to come with stewed plums (zwetschkenröster) and/or applesauce.” “It’s best when cooked in butterschmalz [clarified butter or ghee].” “I hope you skipped the rum soaked raisins — yuck.” But also: “You forgot the rum-soaked raisins!” [I didn’t but found them distracting.] “Tip: Kaiserschmarrn is perfect when it’s still a bit creamy inside.”
To try it is to understand why. The batter is simple, close to that of a crepe or dutch baby, but you whip the egg whites separately and fold them in at the end, resulting in a puffy butter-fried mega-pancake. But wait, there’s more! You then shred, tear, or chop it into bite-sized pieces and continue to fry it until each is a glorious golden-edged, custardy-centered nugget. It’s finished with a drift of powdered sugar and served with tart fruit compote (I tried my hand at plum below) or applesauce and is a dream of a weekend breakfast. It could also be dessert. It could also be lunch, which is how my neighbor has been enjoying it. Mostly, I love the way it seems simple but feels a bit festive, just like I hope all of our weekends ahead are.
Previously
One year ago: Chilaquiles Brunch Casserole Two years ago: Rhubarb Upside-Down Spice Cake Three years ago: Perfect Garlic Bread, Shaved Asparagus Frittata and Palm Springs Date Shake Four years ago: Potato Scallion and Kale Cakes, Salted Chocolate Chunk Cookies, and Crispy Broccoli with Lemon and Garlic Five years ago: Blue Sky Bran Muffins and Fresh Spinach Pasta Six years ago: Spring Vegetable Potstickers and Essential Raised Waffles Seven years ago: Bacon, Egg and Leek Risotto Eight years ago: Sour Cream Cornbread with Aleppo and Ribboned Asparagus Salad with Lemon Nine years ago: Radicchio, Apple, and Pear Salad, New York Cheesecake and Shakshuka Ten years ago: Black Bread and Ranch Rugelach Eleven years ago: Chocolate Walnut Cookies + More Flourless Dessert, Almond Cake with Strawberry-Rhubarb Compote Twelve years ago: Corniest Corn Muffins and Pineapple Upside-Down Cake
And for the other side of the world: Six Months Ago: Roberta’s Roasted Garlic Caesar Salad 1.5 Years Ago: Endive Salad with Toasted Breadcrumbs and Walnuts 2.5 Years Ago: Broken Pasta with Pork Ragu and Roasted Cauliflower with Pumpkin Seeds and Brown Butter 3.5 Years Ago: Baked Potatoes with Wild Mushroom Ragu, Twinkie Bundt and Oven Fries 4.5 Years Ago: Cauliflower Cheese, Squash Toasts with Ricotta and Cider Vinegar, and Smoked Whitefish Dip with Horseradish
Austrian Shredded Pancake (Kaiserschmarrn)
1/2 cup (75 grams) raisins (optional)
2 tablespoons (30 ml) fruit juice or rum (only if using raisins)
4 large eggs, separated
2 tablespoons (25 grams) granulated sugar
1/4 teaspoon kosher salt
1 teaspoon baking powder
3/4 cup (100 grams) all-purpose flour
1/2 cup (120 ml) milk, any kind
2 to 3 tablespoons (30 to 40 grams) unsalted butter or ghee (clarified butter)
Powdered sugar
Jam, applesauce or another fruit sauce, or stewed plums/plum compote (recipe below) to serve
If you’re using raisins, soak them in the hot rum or juice and set aside until needed.
Make batter: In a large bowl, whisk together egg yolks, sugar, salt, and baking powder. Whisk in milk, then flour, whisking just until mostly smooth. (A few tiny lumps proved inconsequential.) Let rest for 10 minutes. Meanwhile, in a second (medium-large) bowl or the bowl of an electric stand mixer, beat egg whites until they hold firm peaks. Fold into egg yolk mixture, trying not to deflate the egg whites. Gently fold in raisins, if using.
Cook pancake: Heat a medium-large skillet (10″ to 12″) over medium heat. Add 2 tablespoons butter or ghee and let warm. Pour batter into pan and spread smooth. Cook for 3 to 4 minutes, lifting an edge to peek occasionally, until it’s a deep golden brown underneath; reduce the heat if it’s browning very quickly. If you feel like you can pull off flipping it in one piece, go for it. I cannot and loosen the edges to slide it onto a large plate. With a potholder on each hand, invert empty frying pan over pancake and plate, grab both together tightly, and quickly flip the pancake back into the pan. Continue cooking until deeply golden underneath on the second side, about 3 minutes.
Shred/tear pancake: There are two ways to do this: You can use two forks or the edge of a sharp spatula to tear/chop the pancake into 1″ to 2″ pieces right in the skillet. However, I prefer to slide it back onto the plate I just used to flip the pancake and chop it there. This allows me to melt another tablespoon of butter in the pan for extra-buttery and lightly crisp edges in the final pancake. Return pancake shreds and any batter that has spilled out — it’s supposed to still be very runny in the center at this point — to the skillet and cook, stirring, until pancake shreds are mostly but not fully cooked through. A custardy center in each bite is ideal.
To serve: Scrape pancake shreds onto plate and sprinkle generously — and I mean generously — with powdered sugar. Serve with lemon wedges, jam, a fruit sauce (applesauce is a popular accompaniment), fresh berries or as shown, with stewed plums/plum compote (zwetschgenröster), directions below. Eat right away.
A quick plum compote (zwetschgenröster): Combine 1 pound fresh black or prune plums* (unpeeled, pitted, and cut into quarters or eighths), 1/3 cup granulated sugar, 1/4 cup water, 1 cinnamon stick or 1 teaspoon ground cinnamon and 1/8 teaspoon (or more to taste) ground cloves over medium heat and bring to a simmer. Simmer gently, stirring occasionally, until fruit is saucy and tender enough that you can break a piece in half with the side of you spoon, about 20 minutes (and up to 25 minute for fruit that’s more broken down). Stir in juice of half a lemon and set aside to cool until needed.
Source: https://smittenkitchen.com/2019/05/austrian-torn-fluffy-pancake/

0 notes
Text
sunken black forest cake
My kids will be at least 25% candy for the rest of the week, as the season demands. If it doesn’t come individually wrapped, if the first, second, or third ingredient isn’t chocolate, a food dye, or high fructose corn syrup, if it doesn’t have a marketing tie-in with Spongebob or Legos, they’re not eating it. Which means, since they’ve now definitely left the room, we get this cake all for us. You’re welcome, because we’re not going to share it anyway.
This whole fall — save a brief but devoted two weeks of apple pie studies — I have craved chocolate almost nonstop, and I don’t mean at perfunctory square of 72% and calling it a day. I mean, chocolate éclairs and chocolate brownies and molten chocolate cakes and chocolate pot de cremes and so when I spied this riff on a black forest cake in Julia Turshen’s new cookbook, Now & Again, I really couldn’t think about anything else until I made it.
We’ve talked about Julia Turshen before. This avocado-cucumber salad remains my favorite thing I’ve spied on the side of a plate on Instagram, ever; these merguez patties are still a weeknight favorite. I’ve always loved the way she assembles meals for friends and family. She so naturally answers the forever question, but what should I serve with it?, that when I learned her new book was built around collections of recipe that both work together but also new recipes to make with their leftovers, I couldn’t wait to dig in. The menus are fun and delightfully unpredictable — Red-Checked Tablecloth Late Saturday Lunch but also a No-Stress Thanksgiving — but my favorite, the one I’d like to believe was written just for me, the girl who loved going to steakhouses when she was a vegetarian because the sides are so good, is the Steak House Dinner for Vegetarians. Maple syrup old fashioned! Wedge salad! Stuffed mushrooms! Charred broccoli! Baked potatoes with horseradish and cheddar! And as a finale: this cake.
Let’s be absolutely clear: this is not a traditional black forest cake. A black forest cake (the German Schwarzwälder Kirschtorte), is a chocolate layer cake sandwiched with whipped cream and boozy cherries, finished with shaved chocolate and more cherries. It’s fancy. It’s complex. We’ll make one… one day. But this is for today, with everything good about the layer cake, abbreviated: a fudgy-centered, puffy-edged flourless chocolate cake that sinks in the center after it bakes. This space perfectly allows for a raft of barely sweetened whipped cream. And then, instead of imagining for a moment that anyone wishes to chase down sour cherries in October, she recommends using storebought cherry preserves and adding kirsh. I found several online; this was my favorite (it reminded me of Luxardo cocktail cherries) but there are plenty of other great ones out there. Honestly, the cake doesn’t “need” it — it works without the cherry sauce — but it’s so good, I do. Grownups need candy too.
Previously
One year ago: Bakery-Style Butter Cookies Two years ago: Winter Squash Pancakes with Crispy Sage and Brown Butter and Broken Pasta with Pork Ragu Three years ago: Salted Peanut Butter Cookies, Baked Potatoes with Wild Mushroom Ragu and Twinkie Bundt Four years ago: Carrot Cake with Cider and Olive Oil, Homemade Harissa, and Cauliflower Cheese Five years ago: Apple Slab Pie and Potato and Broccoli Frittata Six years ago: Seven years ago: Homesick Texan Carnitas Eight years ago: Cauliflower and Parmesan Cake and Spiced Applesauce Cake Nine years ago: Apple Cider Doughnuts and Cauliflower with Almonds, Raisins and Capers Ten years ago: Meatballs and Spaghetti and Cranberry Walnut Chicken Salad and Pumpkin Swirl Brownies Eleven years ago: Pumpkin Butter and Pepita Granola and Sweet Potato and Sausage Soup Twelve years ago: Easiest Baked Mac-and-Cheese
And for the other side of the world: Six Months Ago: Triple Coconut Cream Pie 1.5 Years Ago: Pistachio Cake 2.5 Years Ago: Sheet Pan Chicken Tikka, Perfect Garlic Bread and Shaved Asparagus Frittata 3.5 Years Ago: Obsessively Good Avocado Cucumber Salad and Strawberry Rhubarb Soda Syrup 4.5 Years Ago: Lamb Meatballs with Feta and Lemon
Sunken Black Forest Cake
Servings: 8 to 12
Time: 2hr 30mins
Source: Adapted from Now & Again
Print
This recipe is adapted from the flourless chocolate cake in the Buvette cookbook, a project Turshen worked on. However, in the Buvette, the recipe has more butter and sugar; in Turshen’s book, it has less. When I tested it, my happy place was in the middle — too little sugar and the cake was dry, too much and the sweetness of the preserves overwhelm — and that’s what I’ve shared below. The kirsh in the cherries both loosens them and gives them a little kick. If you don’t have it, try light rum. If you don’t use either, try a tablespoon each of lemon juice and water.
Cake
12 tablespoons (170 grams or 6 ounces) unsalted butter, cubed
12 ounces semi- or bittersweet chocolate chips (2 cups), or chopped chocolate
6 large eggs, separated
1/2 teaspoon fresh lemon juice, distilled white vinegar, or apple cider vinegar
3/4 cup (150 grams) granulated sugar, divided
1/2 teaspoon kosher salt
To finish
3/4 cup heavy cream
2 teaspoons granulated sugar, or more to taste
2 teaspoons vanilla extract
1/2 cup sour or regular cherry preserves
2 tablespoons kirsch (sour cherry brandy, optional)
Make the cake: Heat butter and chocolate together until about 75% melted in the microwave or over the lowest heat in a saucepan. Remove from heat and stir until it’s finished melting and is smooth. Let it cool while you prepare the rest of the cake.
Heat your oven to 350°F (175°C). Coat the bottom and sides of a 9-inch round cake pan with nonstick cooking spray and line the bottom with a circle of parchment paper. Set it aside.
Place egg whites in the bowl a stand mixer fitted with a whisk attachment, in a large bowl and use a handheld electric mixer, or use a large whisk and a lot of elbow grease. Beat on medium-high speed until they’re foamy, then slowly pour in the lemon juice and half the sugar, continuing to beat until the egg whites are billowy and almost glossy and hold a soft peak. This is important: try not to overbeat them until they’re stiff and tight foam-looking; it leads to more dry cakes. Set the egg whites aside (if you only have one stand mixer bowl, scrape them into a separate bowl so you can use it again).
Place the egg yolks, remaining sugar, and salt into an empty bowl and beat on medium speed until thick and pale yellow, about 1 to 2 minutes. With the mixer running, slowly pour in the chocolate-butter mixture, and mix well. Use a rubber spatula to fold one-third of the beaten egg whites into the chocolate cake batter to lighten in. Fold half the remaining egg whites in carefully, then the second half. Turshen says to fold them into the batter by “cutting your spatula downward through the middle of the bowl, scraping it along the bottom of the bowl, and then pulling the mixture back up… folding them with the batter.”
Transfer batter to prepared cake pan and smooth the surface. Bake until the center is puffed up, and just barely firm/dry to the touch, and a toothpick inserted into the center comes out with just a few dry crumbs clinging to it, about 35 to 40 minutes. Try not to overbake it (the chocolate at the edges will smell toasty) or that cake can taste dry at the edges. Place the cake on a wire rack to cool completely; it will sink in the center.
To finish: Once cake is completely cool, beat the cream, sugar, and vanilla together until medium peaks form (I overbeat mine, whoops). In a small bowl, combine combine the preserves and kirsh.
Use a knife to loose then edges of the cake from the pan and invert it onto your rack. Peel off parchment paper, then invert it back onto a serving plate. Spoon the whipped cream into the center and then the preserves mixture on top. Cut into wedges and serve.
Do ahead: Leftovers keep covered in the fridge for 3 days, however, if the cherry-cream appearance doesn’t look great after a couple hours, although this has no effect on taste. To avoid this, you can just put the cherries on as you’re serving the cake in slices.
Source: https://smittenkitchen.com/2018/10/sunken-black-forest-cake/
0 notes
Text
10 food ideas for Baby Shower
data-image-title=" child shower food concepts" data-image-description ="
infant shower food concepts
. "data-medium-file =" https://i0.wp.com/nursingfreedom.org/wp-content/uploads/2017/09/baby-shower-food-ideas.jpg?fit=300%2C169&ssl=1 "data-large-file=" https://i0.wp.com/nursingfreedom.org/wp-content/uploads/2017/09/baby-shower-food-ideas.jpg?fit=800%2C450&ssl=1" > If you preparing approaching infant shower and searching for appropriate menu for the event, you're on the right location. Here some ideas for you. Many of them rather basic however yummy food, a few of them just so meant-to-be on infant shower occasion. Pink and White Marsmallow Pops
, "credit":""," video camera":" ", "caption":"", "created_timestamp ":" 0 "," copyright": ""," focal_length ": "0", "iso ":" 0", "shutter_speed":" 0"," title ":"", "orientation ":" 0"' data-image-title=
"pink and white marshmallow "data-image-description =" "data-medium-file=" https://i2.wp.com/nursingfreedom.org/wp-content/uploads/2017/09/pink-and-white-marshmallow.jpg?fit=108%2C300&ssl=1" data-large-file= "https://i2.wp.com/nursingfreedom.org/wp-content/uploads/2017/09/pink-and-white-marshmallow.jpg?fit=289%2C800&ssl=1" src=" https://i2.wp.com/nursingfreedom.org/wp-content/uploads/2017/09/pink-and-white-marshmallow.jpg?resize=542%2C1500&ssl=1" alt ="" width= "542" height=" 1500" data-recalc-dims =" 1 "> by means of honeyandlime.co Active ingredients Marshmallows Sprinkles( crushed graham cracker, coconut, etc. )White chocolate Paper straws or popsicle sticks and food coloring Guidelines Initially cut a small slit in the top of the marshmallows to permit you to insert your straw.
If you avoid this step you just may mash your marshmallows! Place the straws or popsicle sticks and put them in the freezer for about 5-10 minutes. They do
not take long to freeze and by doing this, the marshmallow is adhered more safely to the straw Melt the white chocolate in
the microwave on medium
heat and stir every 30 seconds. White chocolate seems to burn a lot much easier than regular chocolate so watch it carefully! Include your food coloring if preferred. Next is
decorating. Put the frozen marshmallows in the white chocolate.
You will wish to strike lighly the excess white chocolate off. Do not wait too long prior to dipping them into the sprinkles, since frozen marshmallow will make
the chocolate harden quickly. Easy Caprese Skewers with a Balsamic Decrease Drizzle =" 545,1500" data-comments-opened =" 1" data-image-meta =' p>
":" 0"," copyright ":""," focal_length":" 0
'data-image-title
=" caprese skewers" data-image-description="" data-medium-file=
"https://i2.wp.com/nursingfreedom.org/wp-content/uploads/2017/09/caprese-skewers.jpg?fit=109%2C300&ssl=1" data-large-file=" https://i2.wp.com/nursingfreedom.org/wp-content/uploads/2017/09/caprese-skewers.jpg?fit=291%2C800&ssl=1"
src=" https://i2.wp.com/nursingfreedom.org/wp-content/uploads/2017/09/caprese-skewers.jpg?resize=545%2C1500&ssl=1 "alt= "" width =" 545"
height =" 1500"
data-recalc-dims=" 1
"> through yummyhealthyeasy.com Components Cherry tomatoes Fresh mozzarella Fresh basil leaves 1 cup good balsamic vinegar Wooden skewers Guidelines Prepare Components and cut fresh mozzarella into cubes stick in order: cherry tomatoes -- fresh mozzarella-- freshbasil, until wood skewers full Serve it to your guest Sweet and Easy Onesie Cake through craftsy.com Active ingredients Rectangular cake Small knife Buttercream Star sprays( or ones that match your occasion) Parchment paper Little round piping idea Piping bag Directions Trim the top of your cake flat and flip it onto a plate. I baked my cake in a 15 ″ x 10 ″ glass baking meal, however the method will work with any rectangular cake. A small
little bit of my cake adhered to the bottom of the pan and I have a little fracture from turning it out. Not to fret! Buttercream will concern the rescue! Cut a half circle from the middle of among the short ends of the cake. This will be the onesie's neck hole. Cut the corners off the opposite end of the cake to make the onesie's
leg holes. Make your cuts slightly arched, not straight across. Get rid of the neck cut-out, however, conserve the leg cut-outs to
make the onesie's sleeves. Cut the curved sides of
the edges so they're flat. Find the
cut edges against the sides of the cake, lining the edges up with the top edge of the cake
. Currently, you have your
onesie's shape! Ice the cake with buttercream icing and coat the newly iced
surface with a layer of sprays. I utilized intense star sprinkles, however you can
use any color or shape of sprays you like.
282" data-permalink=" https://nursingfreedom.org/10-baby-shower-food-ideas/strawberrrynappytart/" data-orig-file=" https://i2.wp.com/nursingfreedom.org/wp-content/uploads/2017/09/StrawberrryNappyTart.jpg?fit=600%2C600&ssl=1" data-orig-size =" 600,600"
data-comments-opened =" 1" data-image-meta=' " aperture":" 0", "credit ":""," video camera ":" "," caption":" ", "created_timestamp":" 0", "copyright ":""," focal_length":" 0"," iso":" 0"
"1" > through ideas.hallmark.com Active ingredients 1/4 cup strawberry jam 1 box refrigerated piecrust dough( enough for 2 crusts) 1 egg Little ribbon bows for design( optional) Turbinado sugar for cleaning Scalloped pastry wheel, knife or pizza cutter Directions Preheat stove
to 425 ˚F. Enable dough rest at area temperature level while assembling active ingredients. The dough should be cozy adequate to unfold, yet still trendy sufficient to lower rapidly. Cut
sharp types from the dough utilizing a scalloped bread wheel, blade or pizza cutter. Move tarts to parchment-paper-covered flat pans. Location 1 tsp strawberry jam in the facility of each sharp. Fold sharp inning accordance with style template, securing the front layer with a bit
of water if important. Brush top
of sharp with
ruined egg mixed with 1 tbsp of water.
Sprinkle with turbinado sugar. Cook for 10
mins or till gold brownish. Transfer to a rack to cool down. Decorate tarts with little bow bows (optional).
https://i2.wp.com/nursingfreedom.org/wp-content/uploads/2017/09/panna-cotta.jpg?fit=460%2C306&ssl=1" data-orig-size=" 460,306" data-comments-opened= "1" data-image-meta =' li>
"caption ":"", "created_timestamp":" 0", "copyright ":"", "focal_length":" 0"," iso": "0 ", "shutter_speed":" 0 "," title ":" "," orientation":" 0"
'data-image-title= "panna cotta" data-image-description="" data-medium-file =" https://i2.wp.com/nursingfreedom.org/wp-content/uploads/2017/09/panna-cotta.jpg?fit=300%2C200&ssl=1" data-large-file=" https://i2.wp.com/nursingfreedom.org/wp-content/uploads/2017/09/panna-cotta.jpg?fit=460%2C306&ssl=1" src=" https://i2.wp.com/nursingfreedom.org/wp-content/uploads/2017/09/panna-cotta.jpg?resize=460%2C306&ssl=1" alt=" "width=" 460" height =" 306" data-recalc-dims= "1" > through allrecipes.com Components 1/3 cup skim milk 2 1/2 cups whipping cream 1 1/2 teaspoons vanilla extract 1(.25 ounce) envelope unflavored gelatin 1/2 cup white
sugar Directions Put milk right into a small meal, in addition to mix in the jelly powder. Reserve. Put the
jelly in addition to milk right into the cream, mixing up until
absolutely liquified. Get rid
of from warm, mix in the vanilla and also put
right into 6 personal ramekin meals. Great the ramekins discovered at area temperature level
. When cool, cover with stick wrap
, and also cool for at
the really least 4 hrs, nevertheless preferably over night prior to offering. ABCs Cheese Block Cake with Blackberry Sauce for B
aby Shower Cakes
" https://nursingfreedom.org/10-baby-shower-food-ideas/alphacheeseballblackberrysauce-600x600/" data-orig-file=" https://i0.wp.com/nursingfreedom.org/wp-content/uploads/2017/09/AlphaCheeseBallBlackBerrySauce-600x600.jpg?fit=600%2C600&ssl=1" data-orig-size=" 600,600" data-comments-opened=" 1 "data-image-meta =' by means of ideas.hallmark.com/ Ingredients For the cheese block 2 cups white cheddar cheese, shredded 16 oz. cream cheese, softened 3 Tbsp. mayonnaise 1/2 tsp. garlic powder 1/2 tsp. onion powder 3 dashes hot sauce 5 pieces American cheese For the sauce
1 cup blackberry jam 1 Tbsp. jalapeño, minced fine Active ingredient Directions For the cheese block mix all the cheese components in a food processor, and press into a 4-inch-square storage lined with cling wrap or
sprayed with nonstick
spray. If you can't find a storage to utilize, put the cheese on refrigerator up until it's firm however still malleable-- about 30 minutes-- and develop it into a square block shape with
your hands( cleaned, naturally). Freeze cheese block for at
least 1 hour. Then move it out from the storage, and clean the edges with a sharp knife. Trim cheese block with cut of
American cheese into alphabet shapes utilizing knife or cookies cutter. Serve at room temperature level
. For the sauce Mix the minced jalapeño and jam. Freeze for about 1 hour.
Serve on the side.
Totally Packed Taco Bites
," camera":" 500" height=" 750" data-recalc-dims=" 1" > through christenehouston.com/ Active ingredients 1 pkg Won Lot wrappers (in the vegetables and fruit area).
1 pound ground turkey. Taco Flavoring package. 1 might black beans, drained pipelines, cleaned as well as approximately sliced. 3/4 mug shredded cheese. Garnishes of your option. Guideline Carefully shredded lettuce, diced tomatoes, diced eco-friendly onions, sour lotion and also sliced up olives. Preheat stove to 350 levels. With cooking spray, layer a nonstick muffin tin.
Thoroughly press one wrapper right into each muffin mug
. Brownish ground turkey. Consist of flavoring package and likewise chef as routed. Mix cut black beans right into skilled turkey. Using a Tbsp, fill won stack wrappers with one inside story each along with spray gently with cheese. Prepare in range for 8 minutes. Eliminate from the range in addition to spray with your preferred garnishes. Deal while relaxing or cool.
They're tasty! Makes approx. 42 Taco Bites. INFANT SHOWER
COOKIES MEAL
=" 298" data-permalink=" https://nursingfreedom.org/10-baby-shower-food-ideas/cookies/" data-orig-file
=" https://i0.wp.com/nursingfreedom.org/wp-content/uploads/2017/09/cookies.jpg?fit=500%2C652&ssl=1" data-orig-size=
" 500,652" data-comments-opened=
"1" data-image-meta=' h4>
, "orientation":" 0"' data-image-title =" cookies" data-image-description=" "data-medium-file=" https://i0.wp.com/nursingfreedom.org/wp-content/uploads/2017/09/cookies.jpg?fit=230%2C300&ssl=1" data-large-file=" https://i0.wp.com/nursingfreedom.org/wp-content/uploads/2017/09/cookies.jpg?fit=500%2C652&ssl=1" src=" https://i0.wp.com/nursingfreedom.org/wp-content/uploads/2017/09/cookies.jpg?resize=500%2C652&ssl=1" alt =" INFANT SHOWER COOKIES DISH" width =" 500" height =" 652 "data-recalc-dims=" 1 "> through ahelicoptermom.com
data-permalink=" https://nursingfreedom.org/10-baby-shower-food-ideas/cookies2/" data-orig-file=" https://i2.wp.com/nursingfreedom.org/wp-content/uploads/2017/09/cookies2.jpg?fit=600%2C461&ssl=1" data-orig-size=" 600,461" data-comments-opened=" 1" data-image-meta =' " aperture":" 0"," credit":
.' data-image-title=" cookies2" data-image-description=" "data-medium-file =" https://i2.wp.com/nursingfreedom.org/wp-content/uploads/2017/09/cookies2.jpg?fit=300%2C231&ssl=1" data-large-file =" https://i2.wp.com/nursingfreedom.org/wp-content/uploads/2017/09/cookies2.jpg?fit=600%2C461&ssl=1" src=" https://i2.wp.com/nursingfreedom.org/wp-content/uploads/2017/09/cookies2.jpg?resize=600%2C461&ssl=1" alt=" BABY SHOWER COOKIES MEAL "width="
600" height= "461" data-recalc-dims =" 1" >
by means of ahelicoptermom.com Ingredients For Cookies 6 mugs flour 3 tsp. cooking powder 2 mugs saltless butter 2 mugs sugar( white granulated )2 eggs 2 tsp. vanilla eliminate, almond or desired flavor 1 tsp. salt For Glaze Garnish 2 pounds of powedered sugar 1/3 mug light Karo corn syrup 1-2 TBS of clear vanilla along with or clear almond essence( or numerous of both) Milk or water to adjust harmony Guidelines For Cookies Cream butter as well as sugar up till light in addition to cosy. Mix entirely dry parts and likewise include a little at a time to butter combination.
Cool for 1 to 2 hrs. This meal could make up to 5-dozen 3" cookies. For Glaze Garnish Divide the topping right into smaller sized quantities for tinting. I utilize these for tinting topping. For thicker topping to make use of for explaining or developing, consist of additional powdered sugar till you get the favored uniformity. For thinner topping to finish designs, include incredibly portions of milk or water up until you get the harmony you want. Might be kept in the fridge for a week, yet should be area temperature level once again prior to making use of. Consist of summary garnishes to parchment paper cones or topping bags with
small concepts. Set out the style into your cookie with the thick topping. Use thinner topping to complete the layout by either spooning portion in and likewise spreading
out around or using topping bags to eject and likewise expanded about. When the cookies are totally dry, return with the thicker topping as well as use any type of included layouts or info you such as. Different the topping right into smaller sized amounts for tinting. I utilize these for tinting topping. Consist of rundown garnishes to parchment paper cones or topping bags with small concepts. Detail the style into your cookie with the thick topping. Usage thinner topping to load in the layout by either spooning small quantity in addition to spreading out around or utilizing topping bags to push out and likewise spread out about.
Polka Dot Baby Shower Cupcakes
data-permalink=" https://nursingfreedom.org/10-baby-shower-food-ideas/baby-shower-polka-dots-cupcakes/" data-orig-file="
https://i1.wp.com/nursingfreedom.org/wp-content/uploads/2017/09/Baby-Shower-Polka-Dots-Cupcakes.jpg?fit=669%2C574&ssl=1 " data-orig-size=" 669,574" data-comments-opened="
1" data-image-meta=' li>
0 "," credit": ""," video camera ":""," caption ":""," created_timestamp":" 0"," copyright":"" 'data-image-title=" Baby-Shower-Polka-Dots-Cupcakes" data-image-description=" "data-medium-file="https://i1.wp.com/nursingfreedom.org/wp-content/uploads/2017/09/Baby-Shower-Polka-Dots-Cupcakes.jpg?fit=300%2C257&ssl=1" data-large-file= "https://i1.wp.com/nursingfreedom.org/wp-content/uploads/2017/09/Baby-Shower-Polka-Dots-Cupcakes.jpg?fit=669%2C574&ssl=1" src= "https://i1.wp.com/nursingfreedom.org/wp-content/uploads/2017/09/Baby-Shower-Polka-Dots-Cupcakes.jpg?resize=669%2C574&ssl=1" alt =" infant shower cupcakes "width=" 669" height= "574" data-recalc-dims =" 1 "> via kimberleysbakeshoppe.com Active ingredients 3 1/2 oz( 100 g) pink or blue rolled fondant Topping( confectioners) sugar for cleansing 4 Kimberley's Bakeshoppe Vanilla Bean Cupcakes Guidelines Knead fondant to
soften. Turn out extremely finely on a board gently sprayed with topping sugar. Get rid of 32
tiny circles and also 4 strips 7 ″ x 1/4" (18 centimeters x 5 mm). Cut strips right into 2( 3 ″/ 7.5 centimeters) along with 1( 1 ″/ 2.5 centimeters )items. Use the staying lengthy and also brief strip to make a bow.
Establish 8 polka dots on each cake. If you doubt, utilize yellow or light eco-friendly fondant. Rolled fondant is offered wholesale stores and also cake developing supply shops. Double or three-way the dish as
required. Knead fondant to soften. Eliminate 32 small circles and also 4 strips 7 ″ x 1/4 "( 18 centimeters x 5 mm).
Cut strips right into 2( 3 ″/ 7.5 centimeters) and likewise 1( 1 ″/ 2.5 centimeters )items. Pregnant Stomach-- Child Shower Cakes for
Girls
https://i0.wp.com/nursingfreedom.org/wp-content/uploads/2017/09/coolest-pregnant-belly-baby-shower-cake-39-21328136.jpg?resize=500%2C602&ssl=1 "alt =" child shower cakes for girls- Pregnant Stomach Child
Shower Cakes" width="500" height="602" data-recalc-dims =" 1 "> Via www.coolest-birthday-cakes.com Components Wilton ball cake pan( both halves) 2 Sugar flowers Big half ball cake pans Fondant in
skin tone, hot pink, purple and white. Quarter sheet cake pan
Instructions
Base Cake( 11 x 15 x 2 Wilton Efficiency Fry pan) could make usage of 2 fundamental cake blends or increase a homemade dish in any kind of selection of taste.
Stubborn tummy Cake (Wilton Football sphere frying pan) holds essentially a standard cake mix-- utilize the staying for the boobies.
Boobies, utilized Spoiled Cook preparation bowls (take much less time to prepare compared to the larger cakes-- watch on them).
Iced up the cakes, they're easier to ice if they been iced up.
Cold all the cakes with standard buttercream (Wilton meal. I such as Almond essence instead of Vanilla), took three-way meal for all cakes plus designing (prefer to heavily ice, particularly under fondant).
Colored fondant with blue Wilton topping shade, just included a little till you obtained the color you desired-- rolled and likewise covered B & & B's
. Made use of the Wilton fondant embossing roller in addition to rolled fondant to produce the "handmade bands".
Tinted the continuing to be buttercream to "match" with the exact same topping shade, utilized colored and also white buttercream to make "dots"-- this was for accent In addition to cover a couple of little small booboo's that occurred when put the B & & B's cake on the base cake. Cleaned up the white bands with white twinkle dirt. Hopefully this baby shower cakes for girls will be okay for our celebration.
Galleries-- 10 food concepts for Baby Shower
0 notes
Photo

Check out my new stuff on http://www.gingerwithspice.com/recipe/tiramisu-cake-white-chocolate-mousse/
Tiramisu Cake with White Chocolate Mousse
In order to keep the blog up and running this post contains affiliate links, it will be at no extra cost to you, please read the disclosure for more information.
JUMP TO RECIPE
It’s December 1st! This means a few things in our family. First, it’s my sister’s birthday (Happy Birthday Ingvild), and second, it’s the beginning of a Christmas baking spree! We always begin with a birthday cake, obviously. And this year, I wanted to try something different.
In Norway, a birthday cake is usually a sponge cake in two layers, with a vanilla filling and/or some kind of jam. This cake is then spread with a cream layer and/or marzipan. It’s good, it is, but it is normal, you eat it at least once every year (on Norway’s national day 17th of May), and it’s December, people, time for extravagance!
I then present to you, the extravagance of extravagant cakes – Tiramisu Cake with White Chocolate Mousse. My sister loves tiramisu, so it was also the perfect excuse to try this on her.
Needless to say,
she loved it.
And my dad, who does not like tiramisu.
So, this is a cake you will love either way. It feels light and airy, with a slight tang of cream cheese, coffee liqueur and a light ricotta sponge cake. I thought it had to be good, but then I tasted it, and oh man – it was the bomb.
Tiramisu Cake with White Chocolate Mousse
This recipe is adapted from Olgas Cooking. Preheat your oven to 150C (300F). Grease a round baking spring pan with melted butter and add parchment paper to the bottom. Beware that this pan needs to be at least 11 cm or 4.3 inches tall and 25-26 cm (10 inches) in diameter. I thought a 10×3 inch pan would be enough, and it’s just enough for the ricotta cake, but whenever you are adding the ganache and white chocolate mousse, it is just not big enough. However, as I searched the web, it seems to me that that kind of pan does not exist, but perhaps this one could be used.
Evidently, I used a 10×3 inch round baking spring pan, and I had to get creative. So if you don’t have a large enough pan, just use the largest you have and supplement with a parchment paper to give it the length it requires. Bake the ricotta cake normally in this pan, and then add the parchment paper later on, whenever layering is ready. You should then fold the parchment paper once to make it a little sturdier, and add it along the rim of the pan, going all the way to the bottom to make it even stronger. Tape it together.
Light and Moist Ricotta Cake
When this cake was ready to take out of the oven, I contemplated the need to even add the extra stuff. I mean, what, this must be the most delicious sponge cake I have ever tasted. So extremely moist, and the smell that filled my kitchen, wow… I will try to just eat this cake with a little lemon and powdered sugar once, but now it’s time for delicious tiramisu!
In a medium bowl, whisk together ricotta, lemon juice, vegetable oil and vanilla extract until a creamy consistency. In another bowl, whisk together (hand or stand mixer) 6 eggs and 470 gr of sugar, medium high speed for about 7 minutes. Add the ricotta mixture into the eggs and whip until just incorporated.
Sift 380 gr (3 cups) with 3 tsp baking powder into the batter. Be careful here as to not ruin the bubbles of the egg/sugar mixture (we call it eggedosis in Norway, I suggest you do the same!). Using a rubber spatula, fold it in and take it in small portions, maybe around 40 grams, then fold, then 40 new grams. This is a boring and tedious task, but it really does wonder for the end result, which makes it massively worth it. The cake was so fluffy!
Bake the cake for around 90 minutes or until a toothpick comes out clean. This may vary depending on the size of the pan you used. Cool the cake completely before you remove it from the pan. Peel off the parchment paper. If your cake is slightly uneven, just cut it to even it out. If not, leave it as is and using a serrated knife slice the cake horizontally into 3 pieces (3 layers).
White Chocolate Mousse
Combine cold water and 14 grams (around 8 sheets) gelatin, with enough water to submerge the gelatine. Set aside.
In a medium large sauce pan, bring 500 ml of heavy cream to a boil. Add the white chocolate chips or pieces in a heat proof bowl, and pour 60 ml (1/4th cup) of the hot heavy cream on to the chocolate. Wait for a minute before you begin folding it, and then keep folding until it has completely melted and has a smooth consistency. Set aside.
Whisk together 5 egg yolks and 170 gr sugar for around 2 minutes using a hand or stand mixer. Continue to whisk while you slowly pour in the rest of the heavy cream and whisk until blended. I mean slowly because you don’t want the heat to make scrambled eggs! Pour the mixture back into the sauce pan and cook over medium low heat, stirring back and forth with a rubber spatula for about 3-4 minutes.
It’s time to get the gelatin out of the water, you can either pour it through a cheese cloth or just squish it with your fingers (yes, I’m that delicate), when the gelatin is out, get it in the cream mixture and mix until the gelatin melts.
Using a hand or stand mixer, whisk 450 gr cream cheese until creamy, around 2 minutes. Add the white chocolate ganache and whisk until incorporated. While still whisking, pour in the cooked gelatin cream and 1.5 tbsp of coffee liqueur (I used Tía María). Scrape the sides and bottom of the bowl with a rubber spatula and whisk again. Set aside to cool until the mousse thickens a little.
Dark Chocolate Ganache and Assembly
While the mousse thickens, begin making the dark chocolate ganache. 300 gr of dark chocolate chips (semi sweet), goes into a heat proof bowl. In a small sauce pan heat 250 ml of heavy cream, and then pour it onto the chocolate. Let it rest for a minute before you fold with a rubber spatula. When completely smooth, mix in 1 tbsp of coffee liqueur.
It is time to assemble! Remember I told you about the parchment paper in the round baking spring pan? Yeah, don’t forget it. When your pan is prepared, add in the first layer of ricotta cake. Using a teaspoon, pour coffee on top of it to moisten it (not that it need it, but we love coffee in Tiramisu right). When it is mostly browned of coffee, it’s time to add 1/3 of the chocolate ganache. And then half of the white chocolate mousse. And then a new layer of ricotta cake – coffee – 1/3 chocolate ganache – the rest of the mousse and then a new layer of cake. Moisten this with coffee too, before you add the rest of the chocolate ganache. Cover with a plastic wrap and freeze overnight.
Take the cake out of the freezer and discard of the plastic. Run a sharp knife under hot water and carefully run it along the sides of the cake to release it from the rim. Be very careful when you try to take the bottom of too, maybe you should be two people lifting it from the bottom and to a cake stand.
Whisk together 375-500 ml of heavy cream with 2 tbsp powdered sugar, just until stiff peaks form. Spread on top of the cake and sides, just barely covering it. Discard the rest of the cream (or use it with this delicious rich and decadent hot chocolate). Decorate the sides by using homemade krokan or even nothing. Sift with a fine mesh strainer some cocoa powder on top.
Let the cake defrost for around 6 hours in a refrigerator before serving.
I’m telling you, this Tiramisu Cake is out of this world. Enjoy!
Other delicious desserts:
Chocolate Coffee Cupcakes with Irish Baileys Frosting
Lemon Tea Cake with Cream Cheese Filling
Pumpkin Snickerdoodle Cookies
Please tell me what you thought of this cake, either in the comment section below or tag me @thegingerwithspice on Instagram. And don’t forget to Pin it for later!
#cake#chocolate#coffee#cream cheese#italian#mousse#ricotta#tiramisu#Christmas#Comfort#Pies & Cakes#Recipes#Sweets
0 notes
Text
Paleo Hiyashi Chūka (Cold “Ramen” Salad)
This week’s sweltering summer heat made me crave the chilled Asian noodle salads from my pre-Paleo days, so I decided to create a Paleo Hiyashi Chūka (a.k.a. Cold “Ramen” Salad).
What’s hiyashi chūka, you ask? In short, it’s a refreshing summertime ramen salad—cold noodles served with a vibrant assortment of colorful toppings and seasoned with a chilled tare sauce, a sweet, umami-packed soy sauce flavored with mirin, vinegar, and dashi. Influenced by Chinese and Western cuisines, this 20th-century Japanese invention literally means “chilled Chinese food.” I have fond memories of slurping up bowls of hiyashi chūka while Henry and I ate our way through Kyoto; when we returned to San Francisco, we were determined to seek it out in Japantown.
Or, rather, I was determined to seek it out. Henry just tagged along to humor me.
Sadly, like many Asian dishes, hiyashi chūka doesn’t easily lend itself to being Paleo-ized. News flash: Ramen isn’t exactly a staple of caveman cuisine. I resigned myself to a ramen-free existence…until I saw on Instagram that my pal Kyle Hildebrant was frequenting a ramen joint in Portland that served a grain-free version using spiralized vegetables. Naturally, I had to go check it out myself.
And as usual, Henry tagged along to humor me.
Yes, you can get #glutenfree, spiralized-veggie ramen in Portland! Thanks to a tip from our pal @kylehildebrant, we went to @kayosramenbar for lunch! So, so good! #nomnomeatspdx
A post shared by Michelle Tam (@nomnompaleo) on Jun 27, 2017 at 12:19pm PDT
The spiralized veggie noodles at Kayo’s Ramen Bar were fantastic in steaming broth, but in this hot hot heat, I knew what I really wanted was a bowl of hiyashi chūka. Plus, I had a sneaking suspicion that one of my new sauces from Ready or Not!, our upcoming cookbook, could double as the dipping sauce.
And guess what? It worked!
This veggie-packed, Whole30-friendly version of hiyashi chūka uses spiralized and blanched daikon noodles in place of cold ramen, and my All-Purpose Stir-Fry Sauce replaces the traditional soy-based tare. But just like the original, this chilled “ramen” salad is topped with a rainbow-hued assortment of julienned meat and veggies that you can customize according to your preferences.
If “All-Purpose Stir-Fry Sauce” doesn’t ring a bell, it will soon. This is my go-to sauce for stir-fries, marinades, stews, and much, much more. The recipe’s in the “Get Set!” section of our Ready or Not! cookbook, but I’m spilling the beans here today because EVERYONE needs some in their kitchen arsenal. (Note: The recipe for the sauce below is for ¼ of what I’d normally whip up, so do the math—or buy our cookbook!—to make a pint-size container to keep in the fridge.) Of course, if you’ve preordered our cookbook and downloaded the bonus thank you gifts, you already got the recipe as part of the 50-page preview of the books! (Fill out this form to claim your preorder gifts.)
The whole point of Ready or Not! is to arm you with easy to prepare meals that you can cook whether you’re ready or not—and All-Purpose Stir-Fry Sauce is one of the insanely versatile staples that’ll make cooking a breeze. If our cookbook hadn’t already gone to print months ago, this recipe for hiyashi chūka would be featured smack dab in the “Kinda Ready!” section as a prime example of how to combine pre-made ingredients to transform and elevate your leftovers in minutes.
If you have a bottle of All-Purpose Stir-Fry Sauce on hand and some extra Paleo Char Siu (remember how I told you last week that I’d show you how to repurpose your leftover char siu?), this recipe will take no time at all. Don’t have any char siu sitting in the fridge? No worries—just top your ramen salad with whatever veggies and meat you have lying around. Think of this as a choose-your-own-adventure meal.
Note about daikon: Yes, you need to blanch and chill the spiralized daikon to get the proper noodle texture and remove the radish-y flavor. Trust me: It’s worth the extra step. Too much work and/or can’t find daikon at the grocery store? Substitute raw zucchini instead! No excuses, bub.
Time to break out your spiralizer!
Serves 2
Ingredients:
¼ cup coconut aminos
2 tablespoons orange juice
1 tablespoon fish sauce
1½ teaspoons rice vinegar
½ teaspoon garlic powder
½ teaspoon ginger powder
¼ teaspoon sesame oil
2 large eggs
Diamond Crystal brand kosher salt
1 teaspoon ghee
1 pound daikon
½ pound leftover Paleo Char Siu (or your fave cooked protein), sliced into matchsticks
½ cup cherry tomatoes, cut in quarters
½ English cucumber, cut into matchsticks
1 large carrot, cut into thin matchsticks with a knife or julienne peeler
¼ cup broccoli sprouts
1 scallion, thinly sliced on the diagonal
1 teaspoon toasted sesame seeds
Shredded toasted nori (optional)
Equipment:
Measuring cups
Measuring spoons
Small jar
Cutting board
Chef’s knife
Cast iron griddle or skillet
Silicone spatula
The Inspiralizer or Oxo Spiralizer
Julienne Peeler
Vegetable Peeler
Bowls
Large pot
Colander
Method:
First, shake up a mini jar of All-Purpose Stir-Fry Sauce! In a small jar, combine the coconut aminos, orange juice, fish sauce, rice vinegar, garlic powder, ginger powder, and sesame oil.
Screw on the lid and shake vigorously. Label the jar and store in the fridge for up to two weeks in advance.
When you’re ready to make the hiyashi chūka, fill a large pot with water and bring it to a boil over high heat. While you’re waiting for the water to boil, assemble the rest of the ingredients. Crack the eggs into a bowl and add about a ¼ teaspoon of kosher salt.
Beat it. (Beat it, beat it, beat it, no one wants to be defeated.)
Heat a large cast iron skillet, griddle, or nonstick pan over medium heat. When the pan is hot, add the ghee. Once it’s melted, pour in the whisked eggs, gently tilting the pan so that the egg covers the surface and forms a thin omelet. As soon as the omelet has set, flip it over and cook on the other side for about 30 seconds or until cooked through.
Transfer the omelet to a cutting board and fold it into thirds before thinly slicing cross-wise. Set aside.
In the meantime, grab your daikon. Cut the ends off, and peel off the skin. I like to use fat, straight daikon for spiralizing. Depending on the size of your daikon (and the number of folks you’re serving), you may need only half of a large one.
Spiralize the daikon, and set the daikon “ramen” aside.
Prepare a large bowl of ice water and a colander. (You’ll be boiling the daikon for only a minute or two, so you’ll need to be prepared to drain and chill the noodles quickly.)
When the water in the pot is boiling, add a large pinch of salt. Transfer the daikon noodles to the boiling water and give them a good stir.
Cook the noodles for 1-2 minutes or until soft, but still al dente.
Immediately drain the daikon noodles and transfer them to the ice water bath.
Once the noodles are chilled, fish ’em out and dump them back in the colander to drain completely.
Divide the daikon into two large bowls.
Top with Paleo Char Siu, tomatoes, cucumber, carrots, broccoli sprouts, scallions, sesame seeds, and nori. Or with whatever you have in the fridge!
Make it pretty, okay? We eat with our eyes, too!
Pour on the All-Purpose Stir-Fry Sauce right before serving and adjust the amount to your taste. Mix everything up, and slurp it all down!
Looking for more recipe ideas? Head on over to my Recipe Index. You’ll also find exclusive recipes on my iPhone and iPad app, and in my cookbooks, Nom Nom Paleo: Food for Humans (Andrews McMeel Publishing 2013) and Ready or Not! (Andrews McMeel Publishing 2017)!
PRINTER-FRIENDLY RECIPE CARD
Print
Paleo Hiyashi Chūka (Cold “Ramen” Salad)
Prep 10 mins
Cook 10 mins
Inactive 10 mins
Total 30 mins
Author Michelle Tam
Yield 2 servings
This veggie-packed, Whole30-friendly version of hiyashi chūka uses spiralized and blanched daikon noodles in place of cold ramen, and my All-Purpose Stir-Fry Sauce replaces the traditional soy-based tare. But just like the original, this chilled “ramen” salad is topped with a rainbow-hued assortment of julienned meat and veggies that you can customize according to your preferences.
Ingredients
¼ cup coconut aminos
2 tablespoons orange juice
1 tablespoon fish sauce
1½ teaspoons rice vinegar
½ teaspoon garlic powder
½ teaspoon ginger powder
¼ teaspoon sesame oil
2 large eggs
Diamond Crystal brand kosher salt
1 teaspoon ghee
1 pound daikon
½ pound leftover Paleo Char Siu (or your fave cooked protein), sliced into matchsticks
½ cup cherry tomatoes, cut in quarters
½ English cucumber, cut into matchsticks
1 large carrot, cut into thin matchsticks with a knife or julienne peeler
¼ cup broccoli sprouts
1 scallion, thinly sliced on the diagonal
1 teaspoon toasted sesame seeds
Shredded toasted nori (optional)
Instructions
First, shake up a mini jar of All-Purpose Stir-Fry Sauce! In a small jar, combine the coconut aminos, orange juice, fish sauce, rice vinegar, garlic powder, ginger powder, and sesame oil. Screw on the lid and shake vigorously. Label the jar and store in the fridge for up to two weeks in advance.
When you’re ready to make the hiyashi chūka, fill a large pot with water and bring it to a boil over high heat. While you’re waiting for the water to boil, assemble the rest of the ingredients. Crack the eggs into a bowl and add about a ¼ teaspoon of kosher salt. Beat the eggs well.
Heat a large cast iron skillet, griddle, or nonstick pan over medium heat. When the pan is hot, add the ghee. Once it’s melted, pour in the whisked eggs, gently tilting the pan so that the egg covers the surface and forms a thin omelet. As soon as the omelet has set, flip it over and cook on the other side for about 30 seconds or until cooked through.
Transfer the omelet to a cutting board and fold it into thirds before thinly slicing cross-wise. Set aside.
In the meantime, grab your daikon. Cut the ends off, and peel off the skin. I like to use fat, straight daikon for spiralizing. Depending on the size of your daikon (and the number of folks you’re serving), you may need only half of a large one. Spiralize the daikon, and set the daikon “ramen” aside.
Prepare a large bowl of ice water and a colander. (You’ll be boiling the daikon for only a minute or two, so you’ll need to be prepared to drain and chill the noodles quickly.)
When the water in the pot is boiling, add a large pinch of salt. Transfer the daikon noodles to the boiling water and give them a good stir. Cook the noodles for 1-2 minutes or until soft, but still al dente.
Immediately drain the daikon noodles and transfer them to the ice water bath. Once the noodles are chilled, fish ’em out and dump them back in the colander to drain completely.
Divide the daikon into two large bowls. Top with Paleo Char Siu, tomatoes, cucumber, carrots, broccoli sprouts, scallions, sesame seeds, and nori. Or with whatever you have in the fridge!
Pour on the All-Purpose Stir-Fry Sauce right before serving and adjust the amount to your taste. Mix everything up, and slurp it all down!
Notes
Yes, you need to blanch and chill the spiralized daikon to get the proper noodle texture and remove the radish-y flavor. Trust me: It’s worth the extra step. Too much work and/or can’t find daikon at the grocery store? Substitute raw zucchini instead! No excuses, bub.
Courses Dinner
Cuisine Japanese, Paleo, Gluten-free, Whole30
The post Paleo Hiyashi Chūka (Cold “Ramen” Salad) appeared first on Nom Nom Paleo®.
0 notes
Link
Title Charlotte Cake Recipe with Raspberries Category Cakes, Dessert Preparation Time 2 hours Cook Time 30 mins Yield 12 slices Ingredients 10 oz (2½ cups) frozen raspberries ½ cup granulated sugar Juice from 1 medium lemon (2 Tbsp for mousse + 1 Tbsp for simple syrup below) 1 Tbsp Knox unflavored Gelatin (from 1¼ packets) 3 cups heavy whipping cream 6 Tbsp confectioners (powdered) sugar 4 large eggs, room temperature ⅔ cup granulated sugar ⅔ cup cake flour (make your own with 2 ingredients!) ¼ tsp baking powder (7 oz pkg) Lady Fingers 3-4 Tbsp raspberry preserves or jam 1 cup warm water 1 Tbsp fresh lemon juice 1 Tbsp sugar 1 cup fresh raspberries and mint leaves for garnish Directions In medium sauce pan, combine: 10 oz frozen raspberries and ½ cup sugar. Cook stirring occasionally until jam consistency. Remove from heat and strain through a sieve, pressing on the fruit with a spoon to extract as much raspberry juice as possible (you should get ⅔ cup syrup). Remove from heat and stir in 2 Tbsp lemon juice, then stir in 1 Tbsp gelatin. Pour syrup back into sauce pan and over medium heat, whisk until gelatin is dissolved. Remove from heat and cool to room temp. Line a 9" springform pan with parchment paper. Preheat oven to 350˚F. In the bowl of your mixer with the whisk attachment on high speed, beat 4 eggs for 1 minute. Gradually add ⅔ cup sugar and continue beating on high 7 min until thick and 3 to 4 times in volume. Stir together cake flour and baking powder then sift flour into whipped eggs in 2 additions, folding to incorporate between each addition. Scrape from the bottom to catch any hidden pockets of flour and fold just until incorporated - don't overmix. Bake at 350˚F for 23-25 minutes or until top is golden and springs back when poked lightly. Once it's out of the oven, remove cake from pan by sliding a thin edged spatula around the edges. Transfer to wire rack, peel back parchment and cool to room temp. Then slice cake layers in half. Cover springform walls with plastic wrap. Trim off ½" all around the edges of both cake layers (I used kitchen scissors) and place the first layer into the bottom of your springform pan. Trim about ½" off one end of all lady fingers. Place lady fingers in a tight ring, cut-side-down, around the cake base then brush cake with ⅓ of the simple syrup. Brush backs of lady fingers with ⅓ of syrup as well. Spread 1½ Tbsp raspberry preserves over cake. Set aside. With the whisk attachment, beat 3 cups heavy cream with 6 Tbsp powdered sugar on high speed until thick and spreadable. Remove 1½ cups of whipped cream to a piping bag fitted with a star attachment and refrigerate to use as topping later. Once raspberry syrup is completely at room temp (don't wait way too long or it will thicken and become difficult to blend), fold it into remaining big batch of whipped cream adding ¼ syrup at a time and folding between each addition. This is your mousse. Spread ½ of the mousse over cake layer inside the springform. Top with second cake layer, brush with remaining simple syrup and spread with 1½ Tbsp raspberry preserves. Add remaining mousse. Pipe whipped cream and top with fresh raspberries and mint leaves if using. Cover with plastic wrap and refrigerate until set (3 hours or overnight). To serve, remove springform walls and plastic wrap. My comments URL with MyCookBook-----
0 notes
Text
SALTA & SPICE
It happened over dinner in Agozar! on Manhattan’s Lower East Side. Just like any good Film Noir.
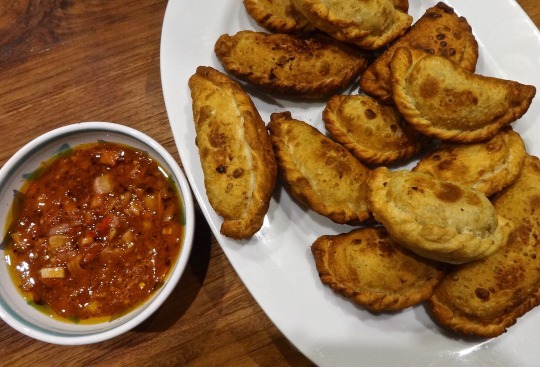
We were out with my Argentine cousin Steffi and her husband and had just tucked into a platter of spicy chicken empanadas, along with an array of other lip-tingling starters. I don’t know what made me say it – two cocktails down with an on-trend jalapeno spike, or the simple human urge to confide – but I blurted: “These empanadas are tastier than the ones I have eaten in Buenos Aires.”
Time did an emergency break stop. Steffi’s habitually sunny face snapped shut, and the atmosphere switched from fiesta to fucked-off faster than you could say ‘Mojito.’ “ I don’t think so,” she whispered curtly, eyes narrowed. Conversation shifted to more neutral ground for the rest of the meal. My comments soon went viral on our family Whatsapp group, and three months later I am still waiting for them to drop the subject.
The moral to this story is: never tell an Argentine that someone else does it better. A few blogs back I may have mentioned that Italian gelato is the best in the world. Fairly safe territory you would think but my husband told me I was taking a big risk putting Argentina in second place. In this instance, I was actually comparing a chicken empanada (not the traditional beef variety) with the Buenos Aires equivalent, and to be fair once any empanada takeaways stray from the original recipe, things can get a little shall we say, bland. In fact, few can do empanada fast food in a country you thought would have nailed it.
What I didn’t realise, so little had I travelled around Argentina, was that I was judging this spicy Cuban delicacy against just one style of empanada. Let’s call it the Pasty of the Porteno. Beef, olives, egg and a smattering of herbs and cumin.
But my perspective broadened when I visited Salta this Autumn. Salta and neighbouring Jujuy are the Northern most provinces of Argentina. The air is thinner there, and the altitude higher. Step outside the city walls, and walk straight onto the set of a spaghetti western. Desert, cactus and dust. A world away from the 1930’s elan of the capital: more grounded, spiritual, visually stunning - and most certainly poorer.

Salta isn’t parrilla country. You are more likely to be offered llama than steak. Not surprising given it’s proximity to Bolivia and Peru, the classic local dishes are tamales and humitas, not morcilla and provoleta. But the biggest difference here is their use of spices. They actually have a spice market in Salta where Buenos Aires society recoils in fear at the mention of a red pepper.
We ate our first Saltena empanadas in Quebrada de Humahuaca, a town of dusty beauty in a dramatic desert setting three and a half thousand feet above sea level. This was day two of our trip, and the night before we had eaten our first ever disappointing Argentine steak. A restaurant where they were disinfecting the glass door as we entered and mopping the floor as we were sitting down. The state of the bread rolls should have had us guessing how it would end. But that was yesterday and today we were full of hope and high on little oxygen.
The steps up to the restaurant had left me bewilderingly short of breath and light headed, thanks to what I was reliably informed later was mild altitude sickness. They served empanadas to start, which were pleasingly spicier than the norm, but nothing to write home about (and only written about here to keep the narrative thread going). This was followed by llama stew (sometimes you just eat stuff for the experience), and then a dessert that tasted better than it looked – cayote jam and goat’s cheese. The cayote plant is native to the region so don’t expect to see it in Sainsbury’s or Walmart any time soon. It tasted pleasant and sweet but the fruit flavour was non-specific.

By day three in the North, we finally started to get our food choices right. First up - and you will gasp at this in the land of the cow on a spit - we found perhaps one of the world’s best vegan rstaurants. The guidebook write up said we should be prepared to wait ages for our food in Chirimoya, but as it turned out, we didn’t wait that long, and it didn’t matter anyway. The atmosphere was like a day spa but with seductive food aromas instead of aromatherapy oils. We whiled away a stress-free couple of hours drinking freshly blended fruit juices and working our way through a platter of Pico lo Macho – their vegan interpretation of the classic Bolivian stew.
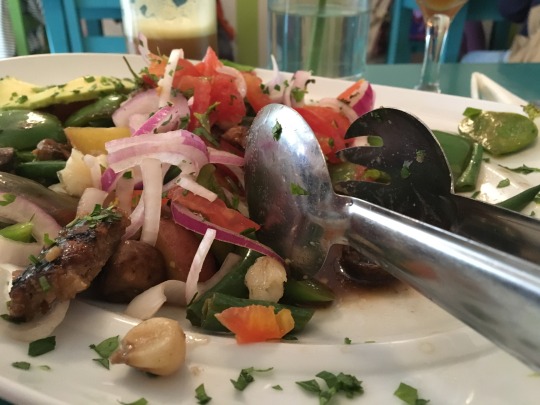
And second and most significant, we ate the best Saltena empanadas, and (I am happy to stake my reputation on it), the best empanadas I have ever tasted. They are served in La Criollita, a restaurant straight out of the 1940s, with caricatures of famous Argentine crooners and comedians on the walls and a proprietor straight out of ‘Allo ‘Allo. The empanadas were hot little parcels of yum and left a pleasing chilli hum on our lips, while the humidas and tamales we were then emboldened to order were simple yet moreish. Ambrosia in a cornhusk.
If you never make it to Salta, you can get a taste of it by trying out my recipe for Saltena Empanadas, and relive the oasis that was Chirimoya with my version of their Pico lo Macho. I liked the idea of the jam and cheese dessert in Humahuaca, so have finished here with a dish that replaces the elusive cayote jam with home made membrillo, (the classic Argentine quince ‘cheese’) and goat’s curd whipped with crème fraiche. As my Auntie Grace would say, if you don’t like it then Hasta Luego!
Saltenas Empanadas

Worth doubling this recipe, (my version of Enrique Zanoni’s recipe from Argentinian Street Food) if you are having a party. Easy to hold in one hand with a glass of wine in the other, though they do benefit from a dip in the accompanying tomato salsa, which could make a small plate necessary. Makes 8-10 empanadas.
Ingredients For the dough:
500g plain flour
2 tsp salt
80-100 ml sunflower oil
For the filling:
1 tblspn sunflower oil
250g rump steak, chopped into very small cubes
1 sliced red onion
2 tsp ground cumin
1 tsp ground coriander
1 tblspn Mexican ancho paste
1 tsp paprika
3 hard boiled eggs, chopped
1 potato, peeled and chopped into small cubes
Grated zest of ½ a lemon
For the tomato Salsa:
3 medium tomatoes
1 onion, finely chopped
1 small red finger chilli, diced
1 clove garlic, crushed
1 tbsp dried chilli flakes
1 tbsp cayenne pepper
60ml extra virgin olive oil
How to make:
Pop the potatoes into some boiling salted water and cook for about 10 minutes. Remove the potato and put to ones side, then add the rump steak to the boiling water and cook for 3 mins. Drain and set aside. Saute the chopped onion in the oil on a low heat until softened and slightly caramelized, around 10 mins, then add the meat, the spices and the potato. Take off the heat, season with sea salt and freshly ground pepper and set aside while you make the dough. If you wish you can cover this and keep it in the fridge for several hours to develop the flavours.

For the dough: Add the sunflower oil and 180g water to the flour and salt in a bowl. Mix until it has come together and then turn out onto a floured surface and knead for about 10 minutes until smooth and elastic (this is not flaky pastry you are making but a robust casing). Wrap in clingfilm or foil and rest for two hours.
While the dough is resting, make the salsa. Grate the tomatoes into a bowl, discarding the skin. Mix in the remaining ingredients and season with sea salt and freshly ground black pepper.
Roll out the dough onto a floured surface and, using a 14cm round pastry cutter, cut the dough into rounds. Spoon a tbpn of the steak and potato mixture into the middle and top with a little boiled egg. Moisten the edges with a little water, then fold into a half moon shape and seal the edges. Then fold the edge of the empanada into a series of little pleats (see photo) to give it the classic decorative edge. Repeat with the remaining empanadas.
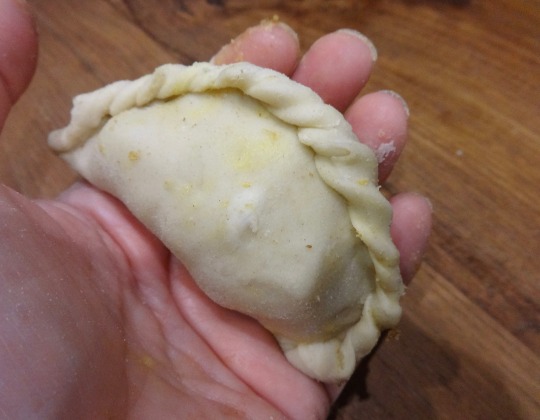
Fill a wok with a litre of sunflower oil and heat to 180C or until a cube of bread turns brown and crisp in the oil. Carefully add a few empanadas at a time to the oil and fry for about 5 minutes, turning if necessary, until they are browned. If they are starting to brown too quickly, turn the heat down a little.
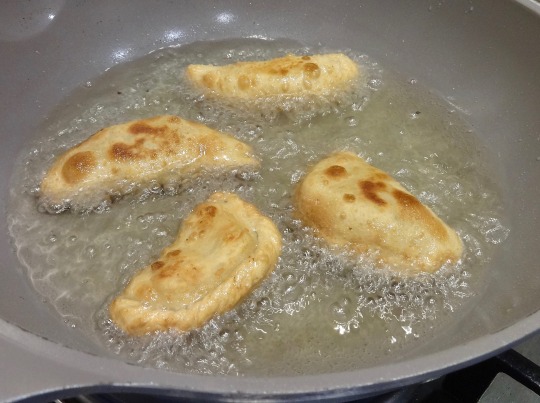
Drain on kitchen paper and serve warm with the salsa for dipping.

Vegan Pico lo Macho

This dish is a simple process of cooking, chopping and layering.
If you stick to the overall rule of mixing cooked, ambient and raw vegetables together, then you can pretty much make up your own combinations here. The real wow factor of this dish are the fried quinoa patties. If you are not vegan, you can substitute the tahini paste for a whisked large egg as a binding agent. Serves 4.
Ingredients
300g padron peppers
500g small new potatoes
1 large red pepper
1 large or 2 mall ripe avocadoes
Juice of 1 lime
1 large red onion,
raspberry vinegar
200g quinoa
tahini paste or 1 whisked egg
4 tomatoes, and 10 cherry tomatoes
250g chestnut mushrooms
25g olive oil
300ml olive or sunflower oil
How to make:
Boil the new potatoes in plenty of water and some sea salt until they hold their shape but you can easily pass a knife through them. Toss in a little olive oil and set aside.
Cook the quinoa according to the instructions on the packet, then cool. Mix with the tahini paste and form into small flattened discs.
Char the red pepper and pardon peppers on a griddle until the skin blackens. Chop up and de-seed the pepper and toss the padron peppers in sea salt.
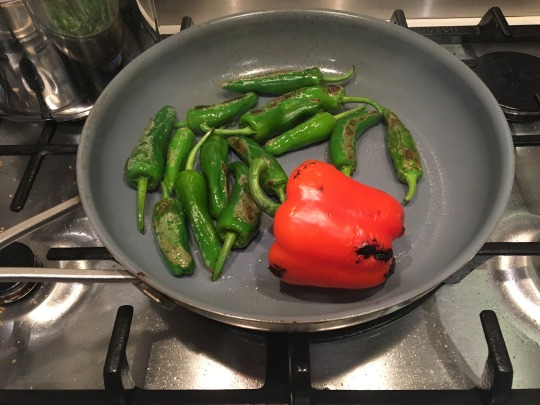
Cut a large red onion into rings and soak in enough raspberry vinegar to cover. Chop the tomatoes. Chop the mushrooms and fry in the olive oil until the juices start to run, then set aside (don’t discard the juice). Chop the avocadoes and toss in the lime juice.
Heat the olive or sunflower oil and fry the quinoa patties on both sides until golden. Drain on kitchen paper.
To assemble: Layer the vegetables, contrasting colours and textures and pouring the mushroom juices all over, on a platter, then dot the quinoa patties all around. If you wish, garnish with chopped parsley and serve immediately.

Membrillo and Whipped Goat’s Curd.
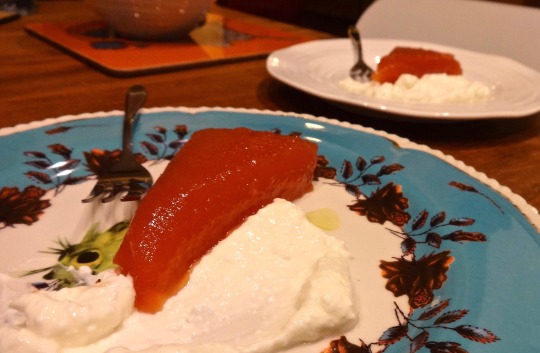
One of my abiding childhood memories was of my Auntie Joan bringing over tins of membrillo when she visited us in London. Quinces are only in season for about a month here – mid October to mid November –but if you can find them, and work with them (they are unsympathetic to peel and chop as this picture shows) then this paste-like jam is easy, if not quick, to make.
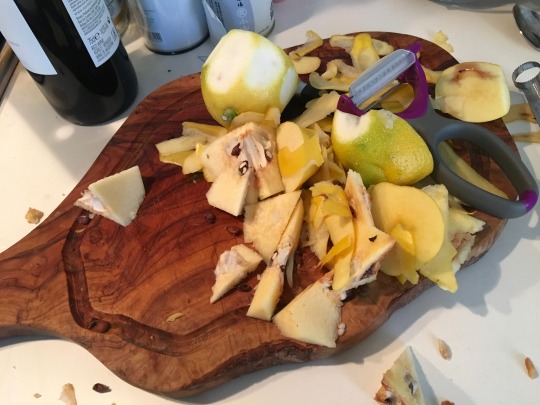
Makes enough for 18-20 slices.
Ingredients:
For the membrillo:
3 Quinces, peeled, cored and cut into large chunks
1 large bay leaf
1 vanilla pod, split
Caster sugar (amount to be determined by quanitity of cooked quince).
To serve 4: 100g goat’s curd (you can buy this at Wholefood Stores or use cream cheese as a substitute); 2 tbpn crème fraiche.
How to make:
For the membrillo. Pop the quince chunks into a saucepan and cover with water. Add the split vanilla pod and the bay leaf. Bring to the boil then cover and simmer for around 40 minutes or until the quinces are soft enough to slide a knife through easily.
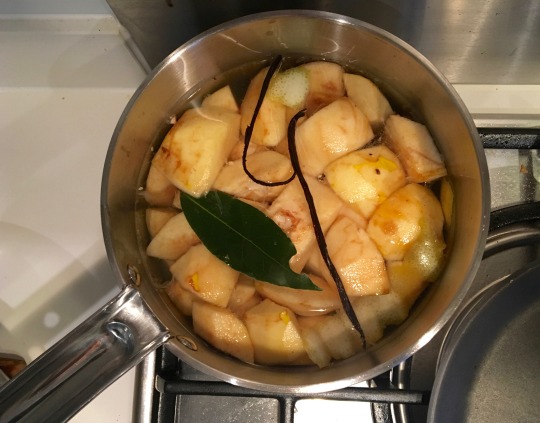
Drain the liquid from the quinces, discard the vanilla pod and bay lead and liquidise in a food processor. Measure the quince puree back into a saucepan (should yield about 3 cups) then add the same quantity of caster sugar as you have quince puree. Cook over a low heat, stirring constantly until the sugar dissolves, then continue to cook, stirring occasionally for about 11/2 hours, until the pale yellow puree has gone a dark pink.
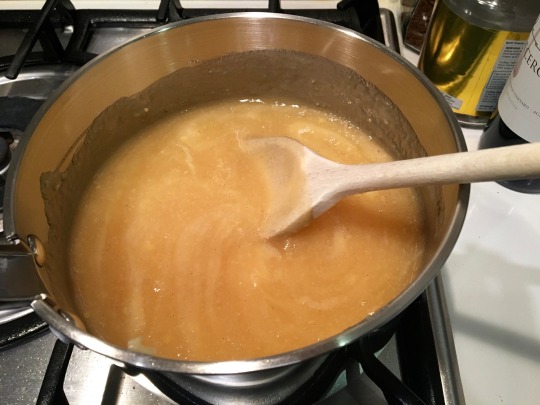

Heat the oven to 100C. Pour the cooked paste into an 8in pie tin which has been greased and lined with baking parchment. Continue to cook in the oven for an hour. Remove from the oven and cool. At this point you can cover and refrigerate if you wish.

To serve: whip the goats curd with the crème fraiche and smooth a generous tsp onto each plate. Add a slice of membrillo and enjoy.
0 notes