#vertexpainted
Explore tagged Tumblr posts
Visit Tumblr Blog
Explore Tumblr blogs with no restrictions, modern design and the best experience.
Last Seen Tumblr Blogs


Fun Fact
Average visit duration of Tumblr.com is 10 mins and 25 secs.
Text
cause of death
vertexpainting
10 notes
·
View notes
Text
3ds Max 2024.1 released
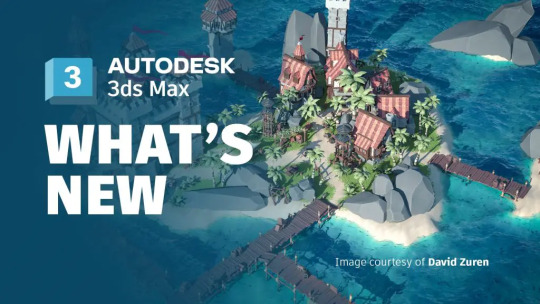
Autodesk has announced the release of 3ds Max 2024.1, introducing several new features and improvements to its existing tools.
The update includes significant enhancements to the Boolean Modifier, with a new caching method offering up to seven times faster loading of Boolean scenes. Additionally, the Boolean Modifier now fully supports smoothing groups, specified normals, and explicit normals that exist on input Boolean operands, effectively processing and including normal data in the result meshes created by the modifier.
The Array Modifier also receives considerable updates, including new Array By Element methods that provide users greater control over the arrangement of elements. Previously, if a source object had multiple elements and Array By Element was enabled, each element was randomly used as a clone. Now, two new Array By Element methods let you control how elements are arranged. A new ‘Variation’ parameter has been added, allowing users to adjust the angle of clones in phyllotactic spirals. Additionally, there are new parameters for the Phyllotaxis Distribution Method, offering more control over randomization.
One of the major user interface improvements in 3ds Max 2024.1 is the ability to create custom defaults through the context menus. This allows users to set user-defined default settings for many spinners, check boxes, radio buttons, text fields, drop-down menus, and colors.
For modelers and animators, there are updates to the Copy and Paste Animation commands, improving the workflow and enabling direct object or modifier parameter operations from the main UI or controllers in the Track View.
The Smart Extrude workflow now includes polygon smoothing and better support for normals, enabling a more polished result.
Several updates to spline modeling have been introduced, aimed at providing a more fluid workflow. There’s also significant performance enhancements to the VertexPaint Modifier, FFD Modifiers, and the Slate Material Editor.
Autodesk has included multiple improvements to the physical camera, color management, and customizable scrollbar sizes. The Autodesk Translation Framework (ATF) importer now supports NX 2212, SolidEdge 2023, and SolidWorks 2023.
Lastly, the release ships with MAXtoA 5.6.2.0 for Arnold 7.2.1.1, introducing an updated AOV manager, automatic Cyrptomatte setup, and the ability to set Crypto Asset tags on objects.
Source:
https://blog.superrendersfarm.com/news/3ds-max-2024-1-released/
0 notes
Video
sketchfab
2 notes
·
View notes
Photo

Year 2 Core Project 1 Asset Design/Hard Surface (Painted) Finally got around to vertex painting my Onigiri. Hoping I can learn how to render vertex paint so I can run this through Arnold! Very happy with how this came out!
1 note
·
View note
Photo


CORE PROJECT l
WEEK l: Maya Refresh/Vertex Painting
♦ This is my low-poly, flat-coloured model I made in Maya using block-modelling and the paint vertex colour tool. I decided to go for something super simple and cereals couldn’t be a better option.
SKETCHFAB LINK: https://sketchfab.com/3d-models/breakfast-c3f30a74aee5442ca61c2c4762547185
2 notes
·
View notes
Photo

weird sculpt + vertex paint . #blendersculpt #vertexpaint #sculpting #b3d https://www.instagram.com/p/B_7cRXJJNAx/?igshid=kpg0w3i4mdvk
0 notes
Video
youtube
Oddish Pokemon 3d sculpt in Tim Burton style done in Blender 3d.
#oddish#oddish pokemon#pokemon#tim burton#tim burton style#blender3d#blender#3d sculpting#3dscul#3dsculpting#vertexpainting#johnnydwicked
3 notes
·
View notes
Photo

AT-AT Walker from hell #ATATWalker #Imperial #walker #blender3d #zbrushcore #vertexpaint http://ift.tt/2uvkqVK
1 note
·
View note
Text
Hot Dog and Fries
https://sketchfab.com/models/de39d8e811c9475db29e6b76b44083fc
0 notes
Text
Evaluation of the process in creating and animating character in 3DS MAX
The main task of this assignment was to create a short animation with the character that we earlier created, that was supposed to be the alter ego of our very first character designed in the first term.
First of all it took me a long time to decide how I wanted my final version of the character to look like. I wasn’t happy with my earliest drafts, so before I started work on my character with the software, I did a lot of different drawings. After that I started to draw the movement of the character. My main inspiration for this character and animation came from Tim Burton’s movies, since I associated with his art a lot. The emphasized eyes, small lips and very pale skin was mostly influenced by my favourite childhood movies. The first personality that comes to my mind, that could be similar to my character is Coraline. Short hair, very slim, tall posture and the square shape of the head is all very comparable, but the personality of my character is completely opposite to that of Coraline.
Later I started my work by creating a poly head in the 3DS MAX software. It took me a long time to remind myself of all the tools, but after some time I managed to form my character’s head. The next step was to create her eyeballs, flat circles around her eyes and her lips. After that I found youtube tutorials with which I managed to shape her hair. At this point most of the work on poly head was finished so I decided to move on to forming her body. From that point I was building boxes and then shaping them by moving vertexes. It would be difficult to create it without the help of my reference drawings that I could see in the background. After forming the body I smoothed over both the head and the body. Then I used vertexpaint from the modify list and coloured her clothing and lips. The next stage presented a lot of problems since I couldn’t attach the body and the head without changing their colours automatically. Later I managed to do the ringing and I could finally start my animation. Since my character has a very characteristic, slim posture and look, I decided to animate something that shows my character’s skills to dance. I did not want her to be a simple ballerina dancer so I decided to add some additional poses. To help myself with creating movements I watched many dance videos on youtube. I was animating with autokey and with every 30 frames I was creating one still movement. I especially struggled a lot when I had to rotate the character. After finishing my animation, I started to work on lighting and creating a room in the background. The final step was to render the animation.
In future I would like to improve a lot of things, but would like to mainly focus on character detail design. I believe that one day I will manage to make my character more realistic with the help of specific tools. I also want to learn more about texturing and to animate in a more efficient way, since, it took me a lot of time. I find it especially important to make animation itself much more smoother. While working on this character I had many issues with making the movements a bit more natural, but at the same time I wanted them to be a little exaggerated. What I find tricky is also creating dresses or longer hair and then animating that since I am not sure how that would react to the movement in each frame. What I also find important is to learn to not to use references with movement process, but to already have this idea in my head, so that I could automatically imagine specific movements. The other important thing that comes to my mind is to learn to collaborate with different characters.
I think that all of these software helped me a lot to improve my skills in computers, graphic design and to create my first animation, which I had never done before in my first year at the University of Greenwich.
Throughout this project I learnt a lot about 3DS MAX and animation. With the help of youtube and moodle tutorials I managed to create my own short animation. I am looking forward to continue my work with this software and also Maya in the future.
0 notes
Photo

Year 2 - Core Project 1 Asset Design/Vertex Painting/Refresher I used Alistair’s model he donated of a car to practice vertex painting for the first time, something really quite simple and suprisingly fun! Though I encountered an issue when trying to render Vertex paint, and online tutorials seemed to of been no help. Will continue to experiment with this with my own models in the next week, and hopefully be able to fully render using Arnold with vertex paint.
0 notes
Photo


CORE PROJECT l
WEEK l: Maya Refresh/Vertex Painting
♦ Alongside the low-poly food model that we had to create, we were asked to create a low-poly model of one character/environment from a 2D animated series. I choose to go with Bertie from Netflix’s animated series Tuca & Bertie. I think my model came out looking a bit silly but that’s fine because I’m practising.
SKETCHFAB LINK: https://sketchfab.com/3d-models/bertie-61dd61c9de1747828a792e9cc093439c
0 notes
Video
tumblr
#dailydoodle #matcap #vertexpaint #zbrushcore #sketchfab #undead #bull http://ift.tt/2u4C3vv
0 notes
Video
tumblr
#dailydoodle #matcap #vertexpaint #sketchfab http://ift.tt/2v0Xf8e
0 notes