#uv_1
Explore tagged Tumblr posts
Visit Tumblr Blog
Explore Tumblr blogs with no restrictions, modern design and the best experience.
Last Seen Tumblr Blogs


Fun Fact
Tumblr.com rank in the US is 25.
Text
Welp. After endless hours of trying to fix this....

Lots of weight painting pain...

Ladies and gentlefucks...
We got em.

#saruin i love you thank you for being so patient with me through all this#i now have a basic understanding of vertex and uv_1 so im super happy with that too#this enables some god awful ideas for more back cc#cc wip#wip#sims 4#jelly rambles
162 notes
·
View notes
Text

trying to make an eyelash but got a 3d eyeliner instead 👁️
78 notes
·
View notes
Text

WHAT DO YOU WANT FROM MEEEE
#simoleon#;-;#i can NOT figure out why its jabbing into the eyeball like that#the uv_1 is fine. the vertex painting is fine. the weights are fine.#i even moved some of the vertices away from the eyeball in blender just in case that was the problem#???
8 notes
·
View notes
Note
Looks like Alpha Release won, I'm excited /pos
hehe >:3
no promises because my health issues seem to just spin the wheel of fortune for each day, but i just gotta finalize the morph replacements on the fem head - i think putting it out as an alpha would be useful at that point so i could gather feedback IRT bugs or morph addition suggestions, so once i have a solid list i can apply it to the rest of the ages and masc sims
#non cc posting#txt#btw did you know that you need a bgeo for both ways of a bidirectional slider. this sucks#i never want anyone to insult mrs uv_1 ever again
4 notes
·
View notes
Text

WIP - Tomarang School Uniform
I am almost done making this thai-inspired school uniform for my sims that live in Tomarang. Just need to fix the missing legs, tweak the texture some more, and fix the tie. Also gonna make a version for masculine sims and children.
#hoping and praying it looks good in game cause i never wanna see a uv_1 again#wip#making cc#ts4 mm simblr#the sims 4#ts4 simblr
9 notes
·
View notes
Text
im going to delete uv_1s from the game
#the weights will be so good then BOOM! uv_1 is ass.#why was it implemented this way why why why sims team i hate you
11 notes
·
View notes
Text

^ me rigging objects for the sims
#ive been troubleshooting an issue im having trying to rig something#and it seems to be unrelated to either the vertex colors or weights or uv_1#so whatt he fuck is causing it!!!!!!!!!!!!#girl help!!!!!!!!!!
5 notes
·
View notes
Text
me 1 day after saying i was gonna release cc lmao
#im still working on it#i just need to adjust uv_1#and i hate doing it#so#procrastination babes procrastination
0 notes
Text
😯🥹
@cinamun and you guys i don't deserve you ❤️
it means so much that you notice these things, bc i spend a criminal amount of time on them 😅
thank you 🙂
No one at all:
Me: @laeska should deadass teach a class because in all my years of simming I HAVE NEVER seen a hair sit so flush on a titty as I have these braids.

I'm just not prepared to shut up about this yet.
#sorry i'm not at home and cannot show you in blender what i did with the braids but it primarily has to do with the right weigts on breast#spine_0 and spine_1#and losing your mind over the unwrap on the uv_1 map to make it move with all the body sliders correctly#that's always such a pain#and i also check the vertex paint to make sure it's all the right shade of green#i still havent figured out the back part though - ie. what you have to do for the hair down the back to make it move correctly w the sliders
962 notes
·
View notes
Text


AIRPOD RIBBON HEADSET
- NEW MESH - 12 SWATCHES- HQ COMPATIBLE - Correct Weights / Correct uv_1 / Vertex Paint Applied / Works with sliders / Images from in game, never rendering
FREE DOWNLOAD
5K notes
·
View notes
Text

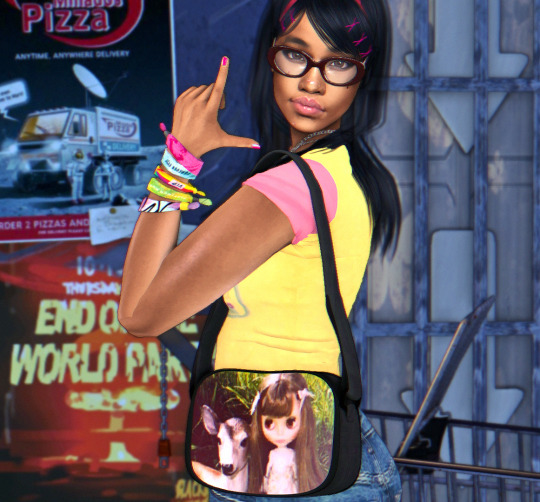
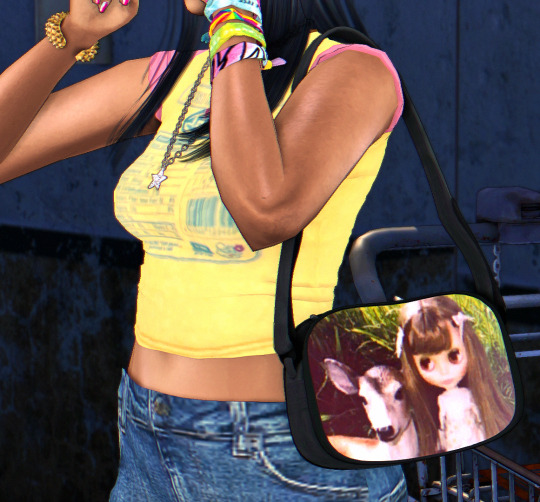

emmie bag ✰✰✰
Wanted another try at making a cutesy bag 💃🏽 There's 3 versions because the uv_1 wouldn't work 🧍🏽♀️ Enjoy! ♥

✰ new mesh ✰ 8 swatches ✰ all LODS ✰ 5k polys ✰ disabled for random ** found in hat section.
✰ Download ✰ (alt) ✰ TOU
#the sims 4#sims 4#ts4#ts4cc#ts4 cc finds#ts4 custom content#sims 4 custom content#s4cc#sims 4 cc#s4 custom content#my cc
529 notes
·
View notes
Text
Looking at all the cool cc wips I have stacked up cause some of them need uv_1s and I haven't figured those out for big tails and wings yet

#i imagine i can figure out some of this through reverse engineering some cc#but its also daunting LMAO#uv_1 is easy until it doesnt work the way you want it to LOL#jelly rambles
18 notes
·
View notes
Text


made some adjustments to this hair that i'm releasing today ~.~
48 notes
·
View notes
Text
incredibly cropped but still nsfw below the cut

^^^ PISSING ME THE FUCK OFF. WHAT *IS* THAT. it LOOKS like a handful of un-weighted vertices, but I've been through my vertex groups like 4 times now and nothing looks out of place.
#i dont think that would be a vertex paint issue. but ill try#its not a uv_1 issue cuz changing that did nothing.#?????#this is why i dont make meshed cc 90% of the time bc its just days and days of trying to figure out shit like this.#simoleon#also i know about the hair issue i see that. im not worried abt that rn
7 notes
·
View notes
Text
STICKY POST: ULTIMATE(ISH) GUIDE(S) TO SIMS 4 CC-MAKING; OR, A COMPREHENSIVE COMPENDIUM OF TUTORIALS, INSTRUCTIONAL MATERIALS, & FELLOW COMPILATIONS OF A LIKEWISE NATURE
In which I list a fuckton of tutorials, guides, and lists of such, each written, curated, and crafted by people far more talented than I.
More will be added as I find them.
---
@teanmoon's CC Guides - Includes tutorials on cloning, uv_1, weights, bump and specular maps, bi-color hair, and a Blender Cheat Sheet. High poly 'creators' have little excuse to churn out high poly, non-optimized garbage when they can lean on bump maps. (I know those can only do so much for more complex meshes, but for objects, texture maps can do SO much heavy-lifting).
@vintagesimstress's CC Guides - Includes tutorials on using Blender to create objects and clothing, especially for people who are just getting started.
@eliavah's uv-1 adjustment tutorial. Haven't tried this myself yet, but after glancing through it, it's something I will surely want to keep bookmarked.
@simlaughlove's CC Tutorials List - Includes many tutorials handily laid out by category on everything from object texturing to CAS morphs.
@thefoxburyinstitute's Nav Page - This blog is nonstop Sims 4 resources for e v e r y t h i n g. READ THIS POST FIRST as a guide on how to actually... nav.
@simsresourcehub's Tags List - What it says on the tin.
Transferring Weights in Blender 3.3.1 - Over at Sims4Studio forums.
@trillyke's List of Tutorials - Good ones!
@sims4tutorials - *GRAND GESTURES*
@katverse's Huge List of Tutorials - Tutorials on eeeverything.
@thatsimslady's Massive List of Tutorials - 31 pages????? Damn.
@kouukie's Sims 4 CAS with Marvelous Designer Tutorial - YouTube video!
@rusticottage's Gifmaking Tutorial - I love Sims gifs tbh.
@cowplant-pizza' Boes' Editing Masterlist - Includes stuff for Reshade, PSDs, PS Actions, and how to use them.
@melonsloth's Deco Sim Tutorial - Using SimRipper
@depthofpixels's Deco Sim Tutorial - Using SimRipper
@azuhrasims' Guide to Posing Sims - Includes how to pose sims, and handy workarounds! Super great for beginners and longtime users.
@radioactivedotcom's Guide to Posing - Includes additional posing resources. NOT for beginners.
@madameriasims4's Add a Flame to Your Basegame Candle - Great for mood lighting and historical gameplay!
@syboubou's Making a Lamp Start to Finish - a video tutorial
MORE BELOW:
Adding Lit DST to Fireplace
New image ref for default overrides
Make an RGB Spec for Objects
Bake a shadow onto your object in Blender
Linking all bedding to a single frame
Cutouts for Doors/Windows/Archways
Making objects see-through/glass
Making lamps light correctly
Give an object transparency (add an alpha)
Make a candle w/ multiple flames
Change LOD viewing distance
696 notes
·
View notes
Text
Eyelashes Glasses Fix
After testing myself. I think the fix for the broken glasses eyelashes is this:
Export Mesh and texture from original file
Start a new package from eyelashes
Import mesh and texture
Set geomatry to simglass.
Save and test
This should fix it for glasses eyelashes, and they will be in the eyelash category.
The glasses category no longer supports uv_1, so that's why its not working. Please share as much as you can! Thanks! @thefoxburyinstitute
Please note, that the eyelashes will still conflict with glasses. As that is a texture issue, and not what this fix is for.
328 notes
·
View notes