#two color bookcloth who am I
Explore tagged Tumblr posts
Text


🤍 When You Were Mine/When We Were Young duology by @sequinhaze 🤍
Typeset and handbound by me for personal use only. This fic can be read for free on ao3. Keep fanfic free ✌🏼
#jegulus#james x regulus#fan fiction#bookbinding#ao3fic#level up#two color bookcloth who am I#tête-bêche
187 notes
·
View notes
Text
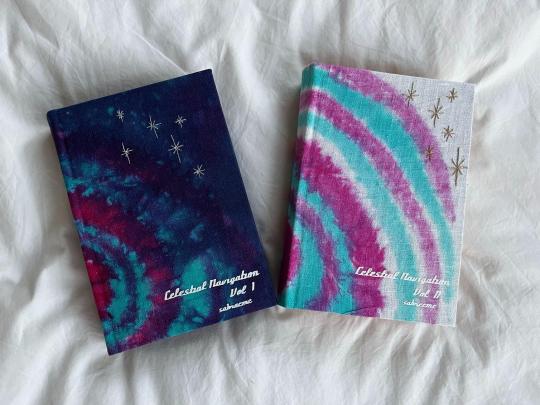
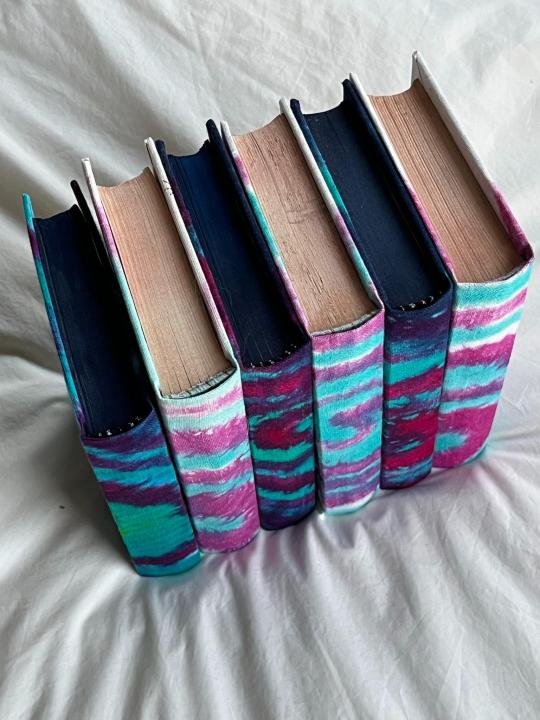
Celestial Navigation by @sabrecmc
18 year old Omega!Tony finds himself Bonded to Captain Steve Rogers. He isn't happy about it until he is.
An absolutely gorgeous story of learning to love yourself, even when you feel like you don't fit in & that you grew up wrong. I'm so happy to have gotten to bind this mammoth work for Sabre & as a gift exchange for @mourningmountainsbindery (who bound me this beautiful copy of Astolat's Let the River Run—JUST LOOK AT THAT COVER!).
Also to anyone who has @ed me lately (looking at u, em @powerful-owl & tacky @tackytigerfic particularly) & I've been derelict in responding, here is WHY.
This has been the longest binding project I've undertaken, both in page count and in time. My original message to Sabre was on March 16th—can't decide if I want to use the laughing or crying emoji here—and the colophon says I made the book in April 2023 (which was when I started typesetting, maybe). I had been randomly perusing dying videos on Youtube in bed on a Saturday morning, as one does, and came across a video showing how to spiral tie-dye. I IMMEDIATELY had a design premonition of the full design for this fic as a two-volume set, planted into my brain wholesale by the binding gods. I learned many new techniques throughout the process (edge painting, edge trimming/sanding, tie-dying/dyepainting, embroidery, typesetting meta from tumblr which copy-pastes with the worst goddamn formatting in the world, kill me now). Overall, alternately extremely painful & wonderful, and I'm extremely proud of this set.
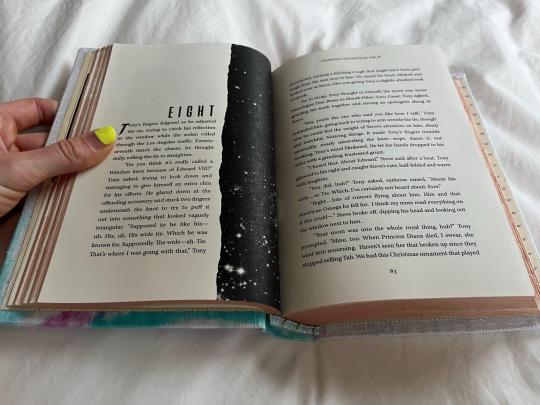
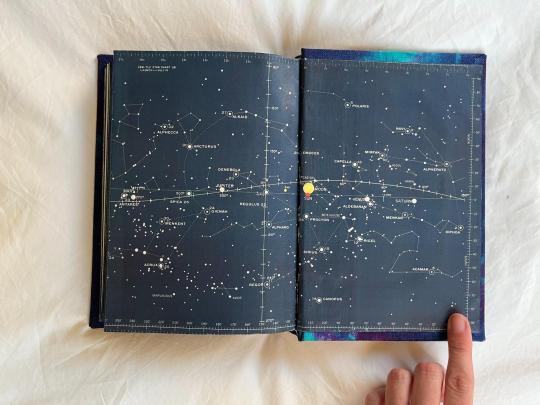
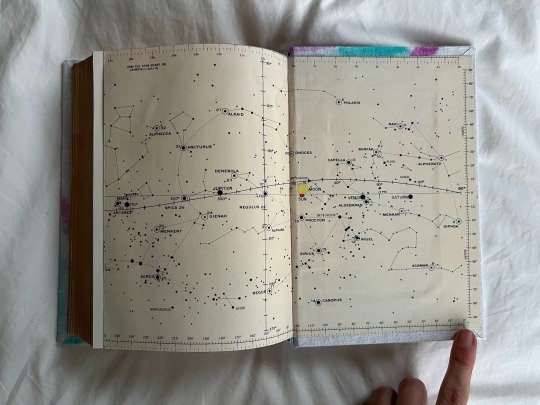
Design-wise, I went whole-hog with the scifi stars theme. Endpapers are recolored versions of the star charts from the Apollo 11 mission:
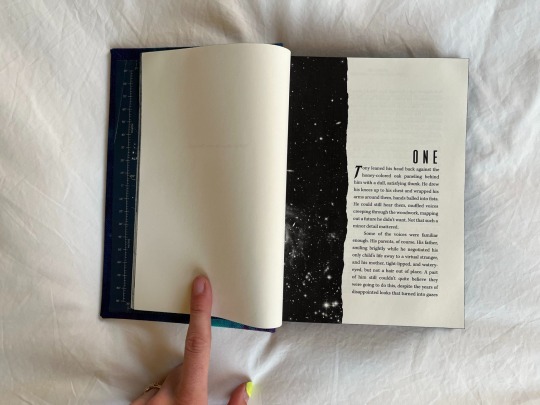
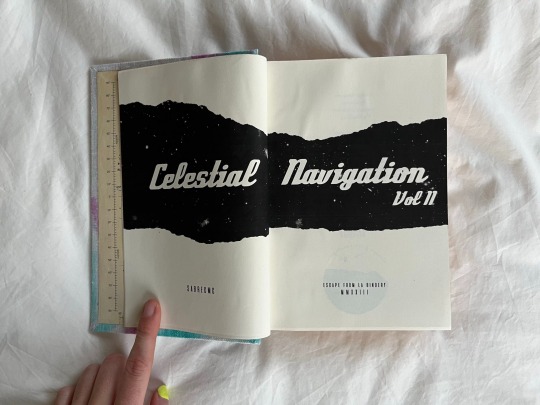
Title page & chapter titles are both rips in the galaxy:
Epigraphs both star-themed:
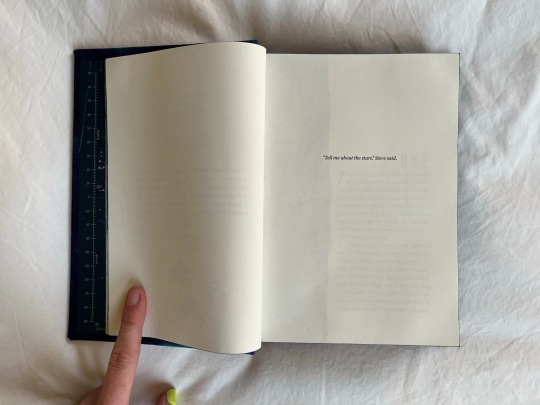
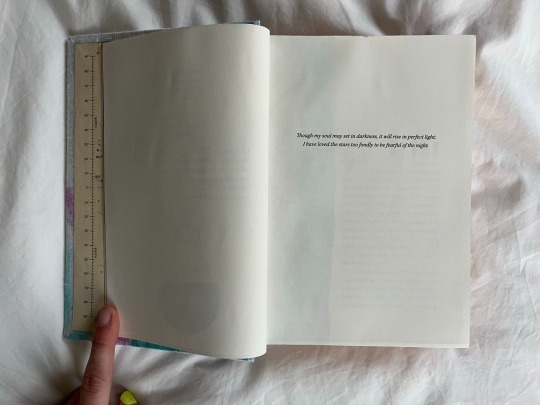
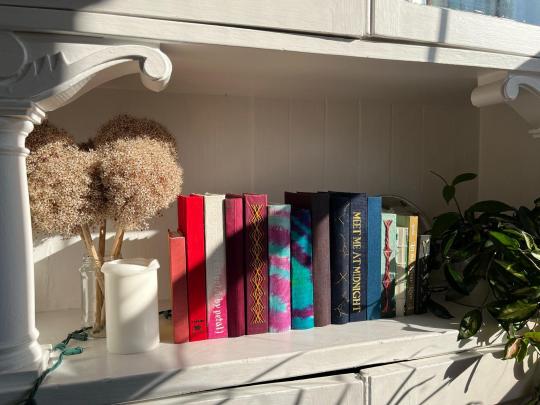
Some more glamor shots because I'm so proud 💕
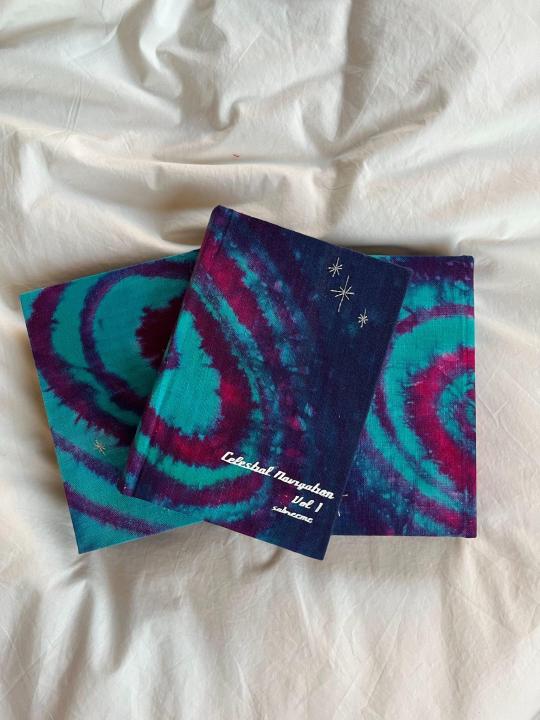
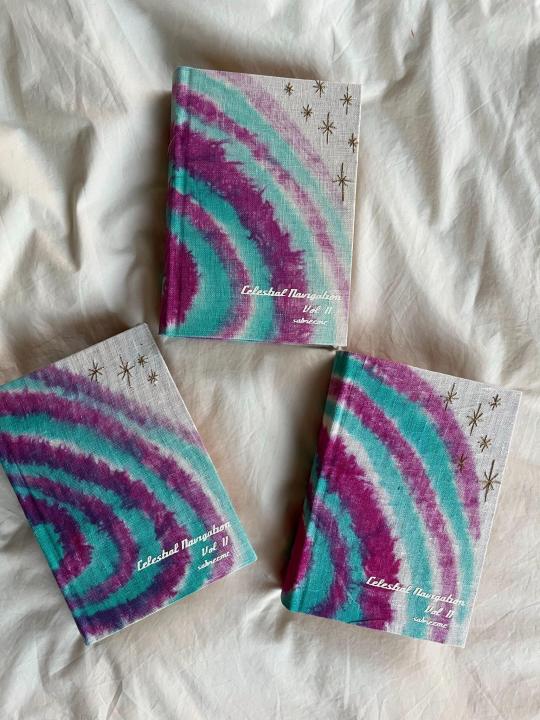
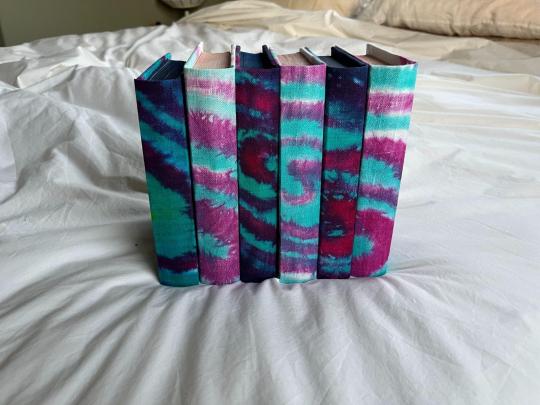
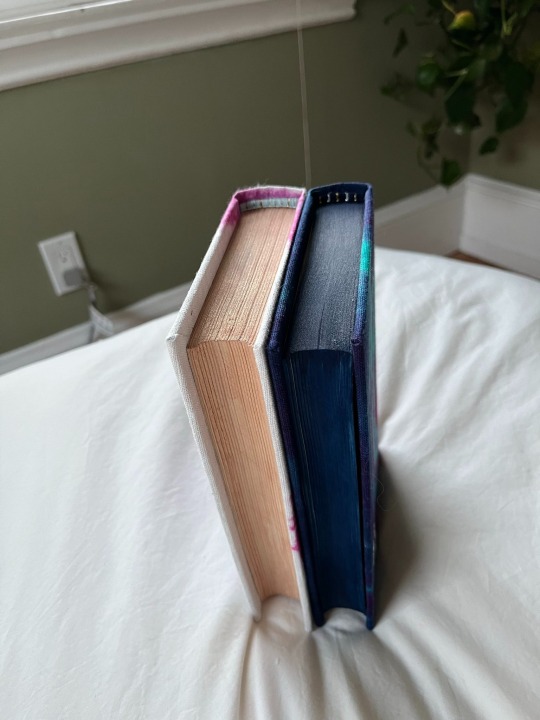
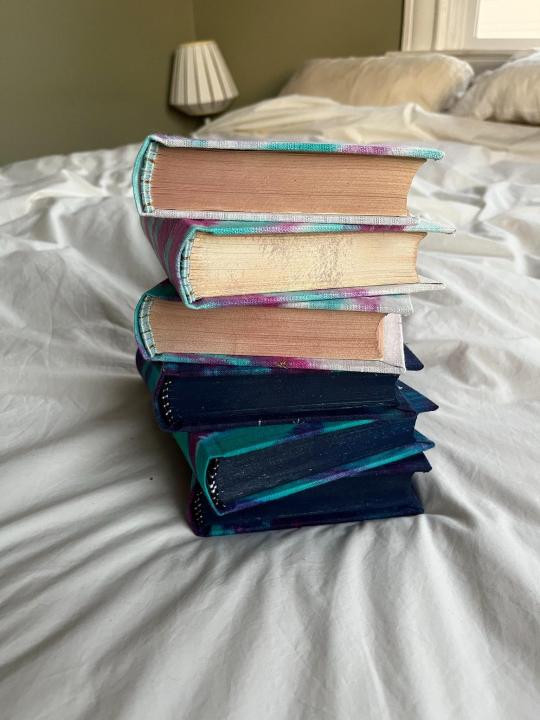
8.6 lbs // 3.8 kgs worth of books (~3000 total pages) 🥰
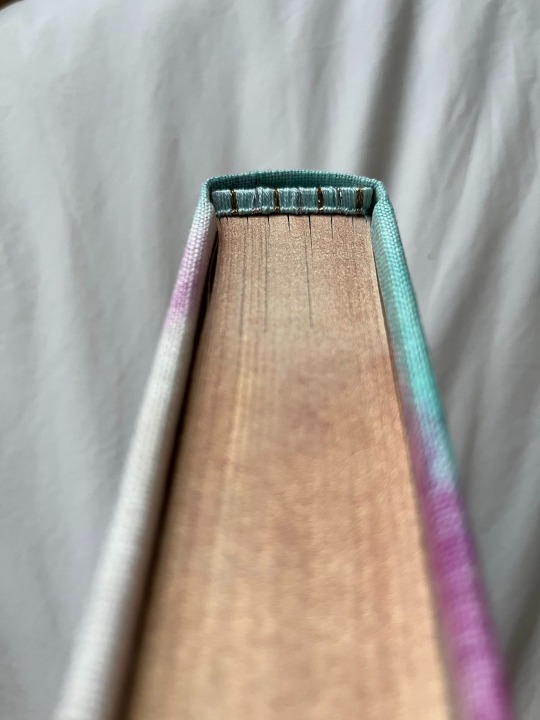
Celestial Navigation is also INCREDIBLY popular, and Sabre has been incredibly generous answering asks on her tumblr + writing additional one-shots in the universe. There is also a veritable volume of fanart. I was so inspired by seeing @robins-egg-bindery copy of ********, with its appendix of fanart & meta, that I promptly copied them.
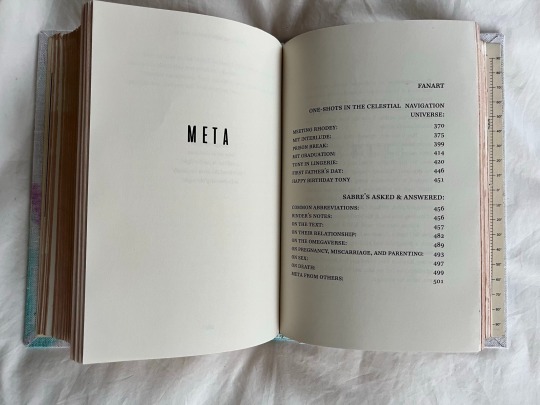
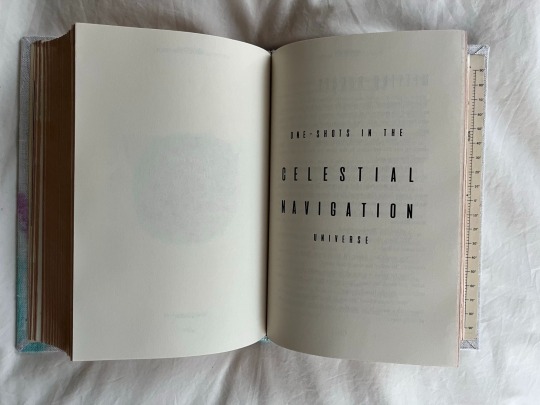
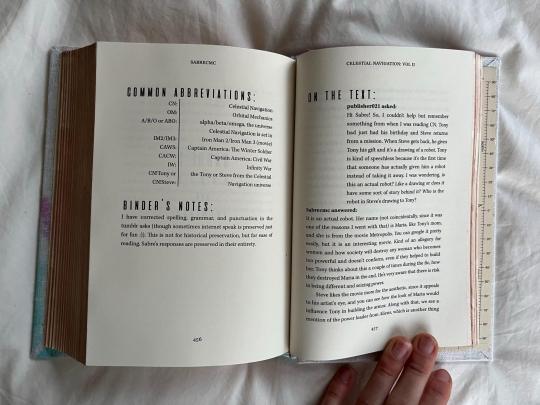
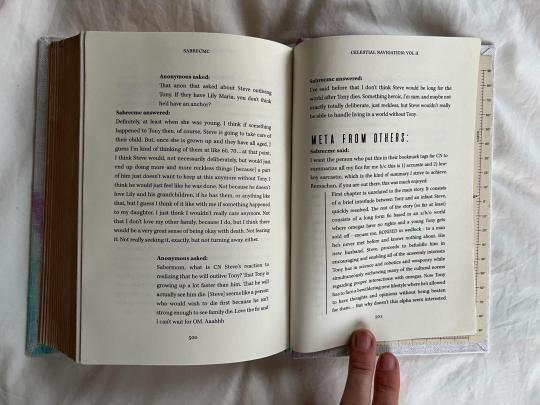
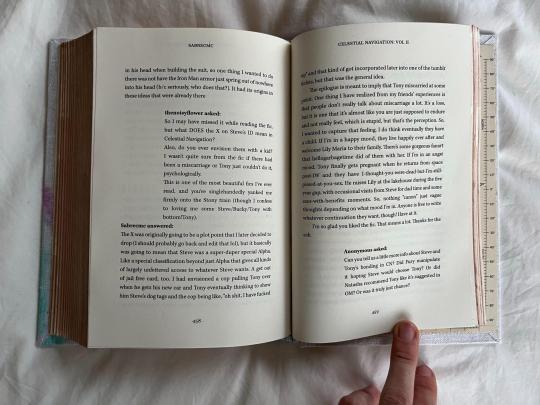
fanart redacted because lots of the artists are no longer active on tumblr but just know i am ECSTATIC about the amount of art in these books
Lastly, I love how @clovenhoofbindery includes their 'Illustrator mess' with their bind posts, as a behind-the-scenes look into the wild process of designing these books. I don't actually have an Illustrator mess for this book (the chapter titles & title page pretty much came in one take), but I do have a DYING MESS. It took me sososo many tries to figure out how to get the dye to look how I imagined in my head. I ended up 'dye painting' instead of tie-dying in the end, but my inbox is always open to chat hand-dying/tie-dying/dyepainting (or what I did differently between any of these attempts). Numbers are the dying attempt.

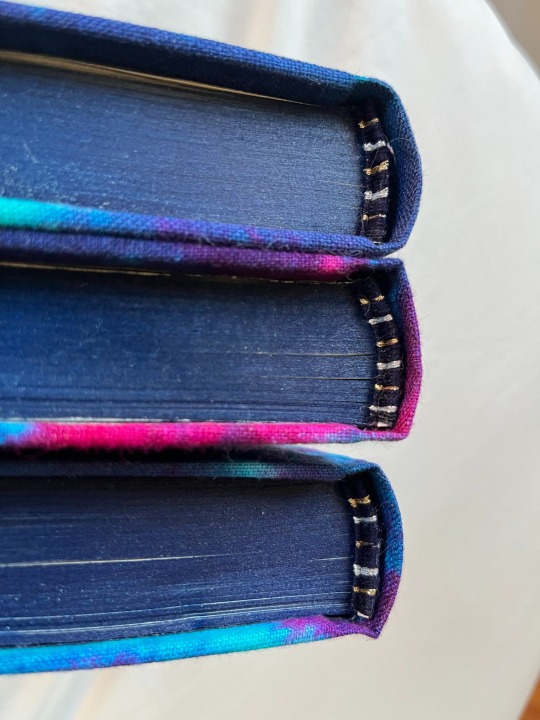
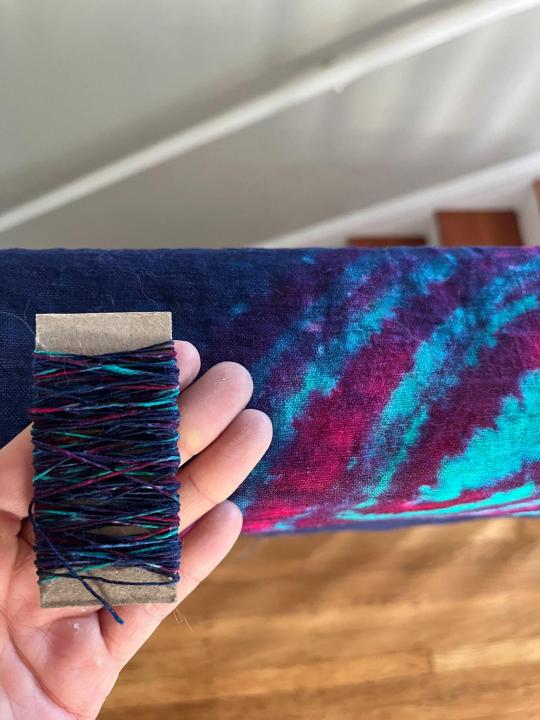
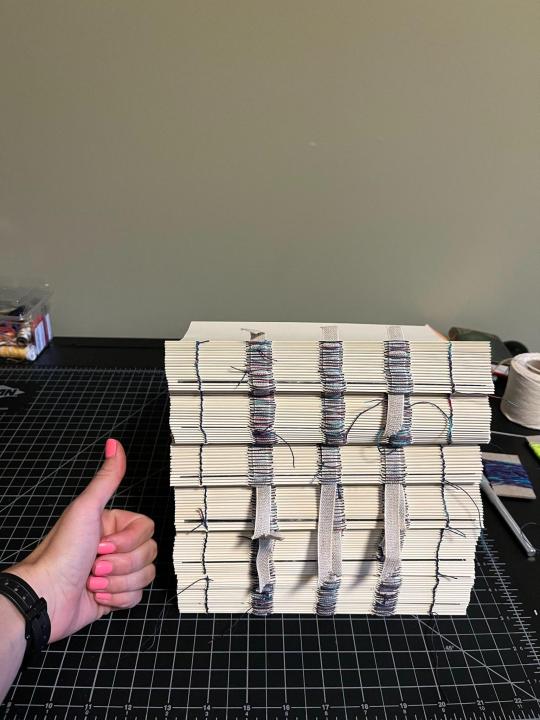
Last process shot: I hand-dyed variegated linen thread to match the colors of the bind, which ends up being incredibly difficult to see on the finished bind, but was super fun while I was sewing!
Materials:
Body font: Kepler
Title font: Compaq 1982
Chapter number font: aliens & cows
Endpapers: recolored versions of the star chart used by Michael Collins during the Apollo 11 mission (archived at The Smithsonian)
Bookcloth: dyed using Dharma Trading Procion Fiber-Reactive Dyes
Title page and chapter headers: designed in Photoshop using the Ultimate Space brush pack by jeffrettalyn on DeviantArt
Metallic embroidery thread: Cosmo Nishikiito thread
I would dye for this embroidery thread. It is LIGHT YEARS better than the classic metallic embroidery thread from DMC: much easier to work with & much more sparkly. Literally so eye-catching; it truly doesn't translate to photos.
Paint for edges: Daniel Smith watercolor tubes in Iridescent Sunstone and Prussian Blue
Note: these are GORGEOUS watercolors. The color is so saturated and strong and beautiful BUT I don't think I'd recommend watercolors for edge painting. They went on very differently depending on the grit of the sandpaper I used for the edges + they sometimes bled into the pages + they had to be set with fixative, which then stuck the pages together.
#blood sweat and TEARS into this bind#and now it is DONE my god#stony#stony fanart#celestial navigation#my fanbinding#posts i actually wrote
136 notes
·
View notes
Note
Hello! As someone who really really wants to attempt bookbinding, could I ask how you started? I am very overwhelmed with the amount of materials and equipment bookbinders use and it is not within my budget to get most of them, which is really discouraging :,)
I would love to know some cheap(er) alternatives to certain materials and which materials, in your opinion, is the most essential and worth splurging money on! I particularly have a lot of issues with using leather because it is WAYY out of both my budget and skill level haha!
Additionally, what are some of the reasources you used to learn how to bookbind? :o
Thank you!!! (It's alright if you don't respond to this! I was just wondering :])
hi, hello!!! im sorry for the late reply!!
to start with--i definitely dont use leather for the same reason!! even imitation leather is expensive, and tbh i like the ability to play around with colors and shapes that working primarily with bookcloth and paper affords me. you can either make your own bookcloth using regular fabric, a binder like HeatNBond, and tissue as long as you have an iron--or you can purchase it from places like amazon, hollander's, or other bookbinding supply companies. leather is ~fancy~ shit.
as for essential tools, that sort of depends on what youre trying to set out to do. western "cased" bindings require more material as a baseline, but glue-free bindings like coptics and japanese stabs require much less! really, as long as you have paper, a needle, thread, and cardboard, you can make a book! here are some of the tools i use, as well as some alternatives:
bonefolder(s) - i have two, a "traditional" one and a square angled one, both real bone. this is something i would consider an essential item, because you will use it for almost everything. you can buy a cheap teflon folder at your local craft store, but really anything you can use to crease your pages and evenly tuck your folds would work. a firm piece of plastic, a thick card--hell, a 6in ruler would work!
ruler(s) - god, i have so many rulers, both imperial and metric, in so many different shapes and materials. the ones i use the most are my 12in/30cm double sided metal ruler and my 3x4in/70x100cm double sided metal square, but as long as you have something you will be set. you can find cheap wooden or plastic rulers at your local dollar store!
weights - this includes freestanding weights and a press. while i do use a press, i also have some bricks from my local hardware store that ive wrapped in craft paper (because cleanliness is essential), a mason jar filled with rocks, and a giant stack of cookbooks. i use all of these for different things, but getting a few bricks would probably be your cheapest option; mine were $0.62 each at lowe's, lol! you dont need a press. anything that will get you even, heavy pressure will work!
waxed thread - you can use any sewing thread you want and wax it yourself by running the wax along the thread! small beeswax blocks are relatively inexpensive and will last quite a while, and regular sewing thread won't break the bank. you can certainly buy pre-waxed thread, but making your own works just as well.
awl - i have two awls and a punch cradle, and genuinely none of these are "essential". straight up just stick a sewing needle in a wine cork, bestie, and youve got yourself an awl. punch cradles are also totally optional; just make a guide with some cardstock so you know where to punch your signatures and youre set.
paper - this is the big rabbit hole, of course. fancy handmade papers can get REAL expensive and dont even get me started on procuring paper with the proper grain direction. HOWEVER, im currently using a mid-tier premium "printer" paper as my fill (though ill be switching to proper stuff when i run out) and you can definitely use regular sheets youd find anywhere with only minor issues. as for decorative paper--anything works! regular scrapbook paper is perfectly fine, and you can buy 12x12 booklets online or at your local craft store for cheap--it seems like theres always some on sale.
bookcloth - mentioned above, but making your own is probably the cheapest way to do it! however--bookcloth is only essential if youre doing a cased-in binding imo. if youre doing coptics/stabs/open sewn/glue-free/etc. bindings, you dont need it.
glue - glues are tricky. traditionally people use a combination of paste and PVA. however, you can use whatever glue you want so long as youre okay with the drawbacks of using high-moisture stuff. gluesticks, craft glue, whatever. you can also make your own paste with flour and water! if youre looking for some of the things id recommend getting the "good" version of, though, i would pick PVA. i buy mine by the half-gallon and its worth it, and i actually prefer it over nori paste (what can i say--im impatient! and paste takes 24 hours to dry).
cutting tools - this is the one absolute thing i would recommend getting: a good boxcutter with replaceable blades and a large cutting mat. this is the essential tool of all time, because while you can use scissors its nearly impossible to get a straight line on anything. i have a workpro w011043a, an xacto xz3601, and three pairs of scissors of various lengths--and my workpro is what i reach for the most. cutting mats can run a little expensive, but i cant stress enough how much easier your life will be with an open blade + cutting mat as your primary cutting setup.
chipboard - i use several different thicknesses of greyboard for my covers and spines, but you can genuinely use whatever cardboard you have on-hand. got an amazon box? that works!
of course, this is by no means a comprehensive list of tools--but these are my go-to tools for every bind! a lot of the fancy stuff like edging, foiling, bookmark-making, etc, is totally optional and opting out of those will significantly reduce your overhead costs. you can also start out with the inexpensive stuff and upgrade as needed! bookbinding is daunting and yes it does have a bit of an initial investment, but there are definitely ways to make it work if youd really like to get into the hobby. you can also look at starter kits on etsy, too! theyll often come with some of the essential tools as well as materials to make your first book, so you can try it out to see if youd like the hobby without going ham.
as for resources to get started, here are some of what ive used!! also not comprehensive because everyone is different, but a great place to start.
hope this helps!!!
29 notes
·
View notes
Note
Can.... can I ask how... do learn bookbinding? .-. It’s like... a distant goal of mine but I am very 🤷🤷🤷🤷 on starting
The good news is that it’s extremely attainable!! So, the easiest entry level tier for bookbinding is stitching together individual signatures (the folded pieces of paper nested together to make sections of a book), and the easiest material is doing that with is just regular printer paper. That was what keyed me into this, my dad was printing little short documents for work and sewing them together so he could have a non-screen version of what he needed to reference. I usually try to work in the range of signatures that use 5-10 sheets of paper (which gives you 20-40 pages as a booklet), though it’s possible to go smaller, especially if you’re working with thicker paper. I haven’t tested the upper end, but that’s where I’m comfortable.
NOW. Before I get into printing, let me take a detour (printing is where things get, like, technologically complex, because it depends on what software and printer you have access to, but that doesn’t have to be connected to the mechanics of Making A Book
SeaLemon’s youtube channel was where I started out! A lot of her videos are about various ways to make smaller notebooks, though her videos on casebinding, kettle stitch, and making bookcloth are most relevant to what I’m doing now. but she also has a LOT of smaller-scale tutorials that are great for pulling together a little notebook of your own, or a sketchpad, things like that.
And the videos are really easy to follow. I don’t reference her anymore for the casebinding work, but I do someday want to go back in there and experiment with more of the stitches for pulling together cute little notebooks. My exposed-spine books and the ones that were covered with a single piece of fabric were done from her tutorials. I want to say that SeaLemon was my primary reference for making my text blocks, while this next channel is a really extensive look into the casebinding part of things.
I appreciate Das Bookbinding a lot, even though it was SUPER overwhelming when I was just starting out, and I wouldn’t have been able to follow anything. But even before I was able to follow along, these videos show a lot of like... the mechanics of making something so polished and complex, even if I’m not able to imitate all the steps myself. I used these videos as a reference for the set of books with the fabric spine + paper cover + fabric corners, for example. I haven’t done a deep dive into this channel, so there may be more accessible videos in there than the ones I dug up, but regardless, it’s an EXCELLENT resource.
And now... printing. This is where it’s hardest to give concrete advice, and I hate telling people they should go give money to huge corporations for their software, or pay huge amounts of money for fancy hardware, but I am also a coward who buckled and paid for word really early, and was fortunate enough to receive a color laser duplex printer as a gift a few years back, so I don’t personally have a good grasp on the most effective free/cheap options out there. So I can only speak to the expensive crap, but I know there are less expensive ways to do this too.
So! The two programs I have used are adobe acrobat and microsoft word. I originally was working out of google docs, where I printed to pdf, opened in acrobat, and printed as booklets. Adobe acrobat has a booklet option in the printing menu, where you can’t select your own signature size, but if you say ‘print as booklet’, and then print twenty pages at a time, you can generate your own ten-sheet signatures. The downside of doing this is that I was not making good use of the space, because the aspect ratios were off, and I had big margins I couldn’t control.
Once I realized that, and also realized that a lot of the files I wanted to print were larger than google docs wanted to handle, I bought a word license. Word also has a way to do booklets, where you can go to page layout, select booklet mode, and then select the number of pages you want in each signature (divide by four to get the number of sheets it will use). I print from word to pdf, which shuffles all my junk around for me to get it in order it needs to print, if that makes sense. It’s difficult to describe, but really not too difficult to do, especially if you have a short story or something to mess around with yourself, so you can print it off, fold the pages, and assemble it in order. Also, page numbers are your friend, even if they’re a pain to wrangle. I’ve had to match up dropped sheets without page numbers before, and I was FULL of regrets.
Now, I know that some people use inkjets, and some people do two-sided printing with one-sided printers, but i also know that other people have made use of other printers they have access to, or have taken books to places like staples or kinkos to use the printers there. I don’t know anything about how difficult or expensive that is, but it’s an option!
Now, one downside of this hobby is that it takes a NUMBER of small items to make it work, but they are typically small, and none of them have been that expensive. First, to assemble, I print off my sheets and fold them in half. And then I use a bone folder to really get those creases sharp. I mark off places to put holes and use an awl to punch them. I sew things up using either embroidery floss for short books (two strands, run over a block of beeswax) or waxed linen thread for long ones, using a curved needle. There are bookmaking ribbons you can use to give spines extra hold, but I haven’t used those. When it’s done, I glue my spine using a glue brush and sandwich my book somehow (I followed a sealemon tutorial to make a book press with two cutting boards, or I bury books under a stack of textbooks).
I have a stash of heavier paper and fabric that are suitable for covers and endpaper, and to convert cloth into bookcloth (another sealemon tutorial), I have iron-on adhesive sheets and tissue paper. Once my book spine is set, I may glue a piece of mull/muslin to it, and/or a piece of ribbon for a bookmark. I cut my covers and spine out of chipboard, using a craft knife, guide ruler, and cutting board, then everything is ready to assemble.
That sounds like a lot, and there are other optional items I didn’t include, but none of these things are that big, or that expensive. I think my cutting board was the most expensive item I purchased. And if you just want to start with booklets, you can absolutely get started with a regular straight needle and thread, and still accomplish plenty. It’s been interesting as a hobby, because I haven’t done many things where the tiers of increasing complexity were so clearly visible, if that makes sense? I took my time trying new techniques, and I’m consistently becoming happier and happier with my efforts, but even back at the beginning when I was aware I barely knew what I was doing, the first time I glued a text block into a case I had made was a WILD feeling, and I still feel like a hell of an amateur (and don’t know enough to gauge how accurate that feeling is asdgsfda), but the earliest steps of learning to bind a book are highly, highly attainable, and I absolutely recommend it.
475 notes
·
View notes
Note
Ahhhh, your self bound books just look really beautiful? All the color choices and the layout just look soooo good together. And that's such a beautiful gift? I have not read primium non nocere, as I haven't watched Charité but if it is worthy of such a tribute I am definitely giving it a shot anyway. I'd also be really interested of your creative process and choices with the binding, if you're willing to talk about that
hi omg! thank you so much <3<3 Primum Non Nocere is a very good story, and I'd say even if you haven't seen the show, give it a shot anyway, if you're interested? I mean, by all means, try the show as well, season 2 is on Netflix w english subs afaik and it's also really, really good (not perfect, but leagues better than the stuff this country usually makes abt the nazi regime). It's a retelling of canon events from a character's perspective who isn't a focal character in the show - there's probably one or two points at which it skips canon events or may seem a little jumpy, but overall, it's more of a companion piece to canon than a classic fanfic. It's very well researched and detailed; it expands on canon in beautiful ways and honestly, fits with it seamlessly; it might as well be an official novelization (although its focuses are a little different than the og)
as for the bookbinding, I'm really flattered you're interested in my process! I'm still very much a beginner, but I'm slowly figuring out something that works for me.
Also, I don't really know what information you're looking for, so I'm just gonna share some things that come to mind. This isn't really a step-by-step how-to but if you're interested in that, I can try to take some pictures next time I make a book and make a better reference post.
Typesetting
I typeset in OpenOffice because that's my office suite of choice & I'm old; I have never used google docs and I don't plan on starting. I download the fic in html, and then just copy/paste the text chapter by chapter; that's easiest for me. As for fonts, I wanted it to look vintage but I definitely didn't want it to have Nazi aesthetics. I went with Baskerville for the main text (which is such a beautiful font, it might become my go-to) (Garamond is what is most commonly used in books I think, but it almost looks too professional for me. I love that Baskerville has this very distinct, vintage feel to it.) and an Art Deco font for the title and chapter headings. Overall I think it looks more 1920's which, considering that the Nazis really hated the Weimar republic, seems fitting. I'm happy with how it turned out and I hope the author is, too :) As for the rest, it's set in 16pt, 120% line spacing and the margins could be a little larger, tbh, but it works and I'm a little stingy with the paper XD
OpenOffice also lets you draw simple graphics directly onto the document which is what I did for the title page and the little ornaments at the beginning of the chapters.
To make signatures, I use Quantum Elephant Bookbinder. It does what it's supposed to, the only thing that doesn't quite work is the flyleaf option, but I can just add that in the og pdf.
Book construction
I print on copying paper, 80gsqm. It's recycling, 55CIE which is really quite grey; I like it, because white is uncomfortable for me to look at. As for grain, I cut my sheets from A3. The grain is also wrong there, so I ended up wasting half the paper. Whatever; I think it's worth it. Having the grain in the right direction (parallel to the spine) makes it feel so much more like an actual book and not just a stack of copying paper stapled together. I honestly believe it's more important than having fancy paper.
After folding, I do not use a model and an ale for punching holes; instead I put all the signatures together in my makeshift press (2 old cutting boards and 2 bar clamps), I draw some guidelines and then I use a fine saw to cut them all at once.
I sew the signatures on tapes for stability; it makes keeping consistent tension easier. I use linen bookbinder's thread (worth it) and cotton tapes from the craft store (they do their job, and linen sewing tapes are hard to source & expensive). I do not have a sewing frame; but what I do is, I tape the tapes to the underside of my cutting mat, place the signature on top (fold aligned with the edge of the mat) and use a weight to keep it in place. It works okay.
After sewing, I round the spine with this method, which works surprisingly well. I do not trim the edges (I know myself well enough to know that it would not end well) & instead tap the short sides & spine to the table to align the signatures as perfectly as possible.
The rest is done as in pretty much any other tutorial. No backing, because I don't have equipment for that. I like to sand down the edges of the cover boards a little, so they're a bit rounded; I think it makes for nicer haptics.
Decorations
I like to make as much of the book myself as possible. There's several reasons for that; first of all, fancy handmarbled or printed paper, headbands, bookmarks etc are expensive. Second, I have a crafting addiction & what's the point of projects like this when you buy everything you could make yourself, right? But thirdly (most importantly) it's simply that my book blocks look pretty shitty (that's, untrimmed and uneven). But that's okay; you gotta embrace the "amateurishly handmade" look & just have to amateurishly handmake everything. Adding just one or two perfect, machine-produced details looks kinda jarring.
Paper decoration - mix water soluble paint and wallpaper paste and go wild (videos are in German, sorry, idk if this is a thing that's really done in the anglophone world? But I think they're pretty easy to follow even if you don't understand the instructions). I like to use this for covers, mainly, I'm also experimenting with decorating endpapers this way. The paste makes the paper really rough and horrible to the touch; as the very last step, I wax the cover (with a beeswax-based furniture polish. Floor wax works as well, it just doesn't smell very nice). Be careful not to get any on the bookcloth, it will cause stains & ruin everything at the last second.
Headbands - I found this tutorial very helpful.
Bookmarks - this gave me so much trouble. Most amateur bookbinders seem to use cotton, polyester or satin ribbons, which is fine, I guess. I don't particularly like either option. At first I thought I could weave my own; that didn't work out, because weaving tiny bands is harder than it looks (& also the resulting ribbon was much too stiff). But! Bookmarks in professionally made books aren't woven at all; they're braided. Seven-stranded braids work pretty well (tutorial is for 5 strands, but 7 strands work the same). As for the headbands, embroidery floss is best imho (silk would, of course, be traditional but come on). Mercerised cotton crochet thread works as well but isn't quite as nice.
this turned out way too long lol. Sorry. Hopefully the answer you were looking for is in there somewhere. Again, thank you and have a lovely evening!
#also feel free to ask if theres anything more youd like to know#<3#hoard of fanfiction#anonymaus#message
6 notes
·
View notes
Text
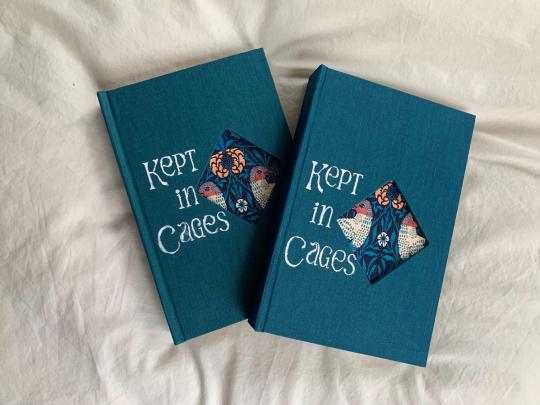
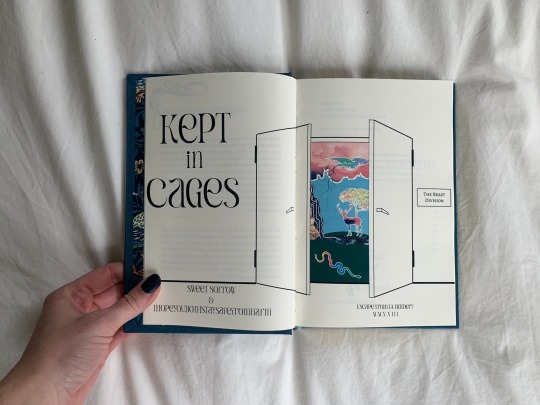

Renegade Binderary 2 of 3: Kept in Cages by @sweet-s0rr0w and @ihopeyoubothstaysafefromharm
Deep in the heart of the Ministry lies the Beast Division: a hidden room where ancient beasts roam, and winged creatures soar, and grumpy giant ferrets eat all your biscuits unless you keep them well hidden. Draco Malfoy would know – he’s been working there for five years now, after all.
Meanwhile, on Level One, ex-Golden Boy Harry Potter is stuck in another interminable policy meeting, completely unaware of the mysterious comings and goings just three floors below. But when a giant snake emergency requires the assistance of a Parselmouth, Harry finds himself thrust, unprepared, into Draco’s weird and wonderful world – and naturally, he can’t keep away…
In this fic, Sweet and Joy wove an incredibly hopeful and gracious journey of healing for both Harry and Draco against a lush backdrop of magical creatures & friends. I am so happy to have bound this fic for Sweet and me. I bound this as a part of Renegade’s Binderary 2023 (where we challenge ourselves to make as many books as we can). I specifically focused on some of my favorite fics published in 2022 that I hadn’t already bound :)
I was quite burnt out of writing & reading fic at the end of H/D Wireless 2022 and so I slept on this fic for months and SHAME ON ME! It took me until December to read it and I was just blown away by the world that Joy and Sweet built together. I had this two-toned blue/green bookcloth, knew I wanted to have a cut-out, found this gorgeous William Morris tapestry, and boom, the design was born. I also want to say that Joy’s gorgeous illustrations & Sweet’s beautiful words were so evocative that designing & typesetting this was a breeze; if you have any doubt, see how @a-gay-old-time (who did such an amazing bind of this here) and I came to very similar design choices independently :)


I also used text from @sitp-recs' rec here and @getawayfox's rec here at the front of the book, which I would love to start doing for all of my binds.


I learned a ton of stuff that is totally boring to a non-fanbinder, but was huge for me: footnotes, full page illustrations, double French-core endbands (still need some refinement, but I am so happy to be able to use more than two colors!), cut-outs!! Some technical challenges of this bind: getting the cut-out exactly in the right spot, using a guillotine for the first time & having some pretty tight margins as a result, painting on Duo bookcloth (the texture makes it really tough!), but I'm still so happy with this bind. I also have to acknowledge @pleasantboatpress who inspired both the headbands and the cut-out with their absolutely gorgeous binds.

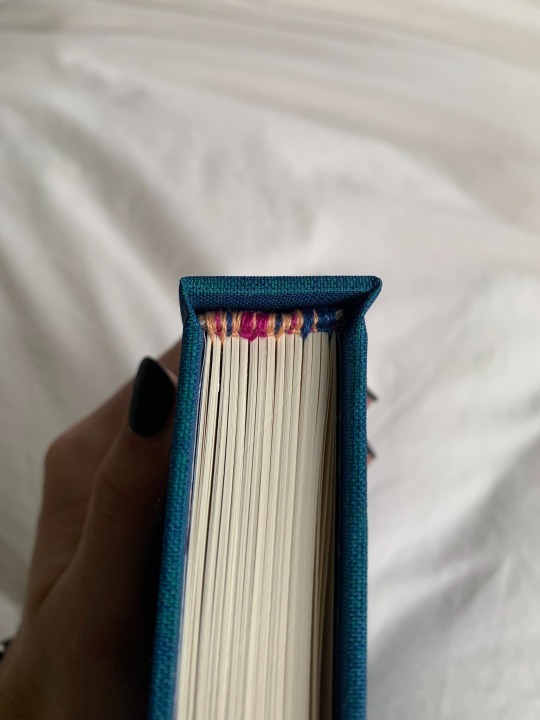
Materials:
Title font: Argaka
Body font: Alegraya
Endpapers: Birds by William Morris (public domain)
Bookcloth: Duo Laguna (sadly no longer being manufactured :()
#sweet and joy are the best duo i could have ever asked for#this fic is so gentle and hopeful 🥺#my fanbinding#renegade binderary 2023#posts i actually wrote#binding post five million of march 💕
206 notes
·
View notes
Text
Binderary 1 of 3: Everything is Relative to You
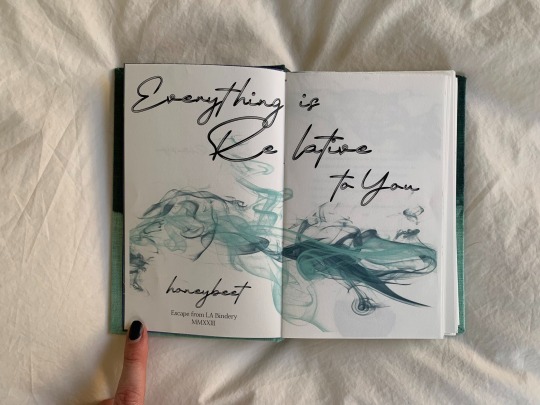
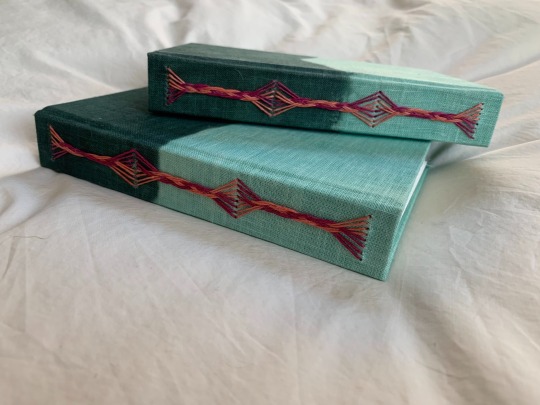
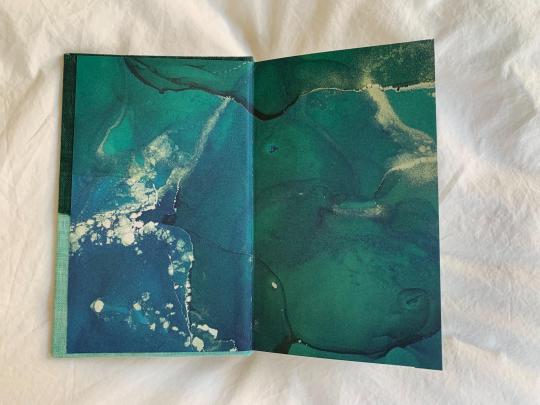
Everything is Relative to You by @thehoneybeet
Potter was supposed to have lived. Draco is certain of this. That Potter would no longer walk the earth was tantamount to the sun moving west to east across the sky. If only he could have stopped this from happening, if he’d have known…
It comes to him as ideas often did: too late.
Or, Harry dreams of his past lives, and Draco is in every one.
This was my favorite fic I have read thus far from H/D Erised 2022 — it’s an incredible non-linear story that keeps defying your expectations and the PROSE omg. I am so happy to have bound a copy for @thehoneybeet and myself. I bound this as a part of Renegade’s Binderary 2023 (where we challenge ourselves to make as many books as we can in a month). I specifically focused on some of my favorite fics published in 2022 that I hadn’t already bound :)
This fic is romantic and melancholy and shows two lives twining, diverging, and then coming back together over and over again, and I really wanted to show all that in my bind. I designed a long stitch pattern with two colors of thread with the colors pulling away, but always coming together again, and dyed the bookcloth to fit that moody vibe of the whole fic. Some vibes I had listed out that I tried to stick with throughout the whole design: dancing apart & coming together; the watery depths; elemental; string theory; the boatman who takes people ‘beyond’; and lonely but hopeful.
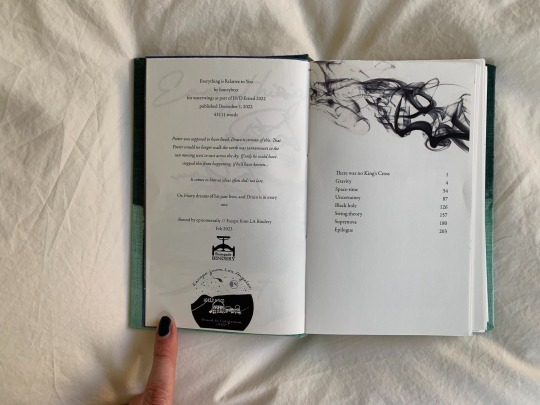
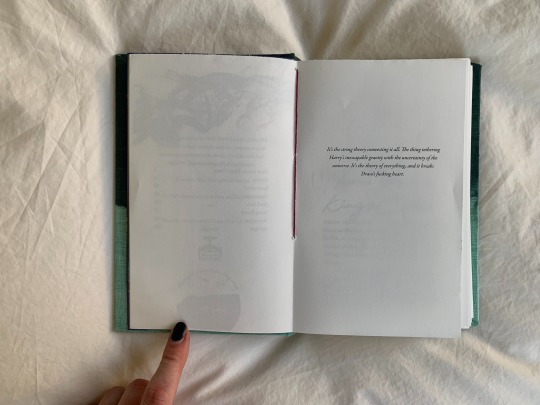
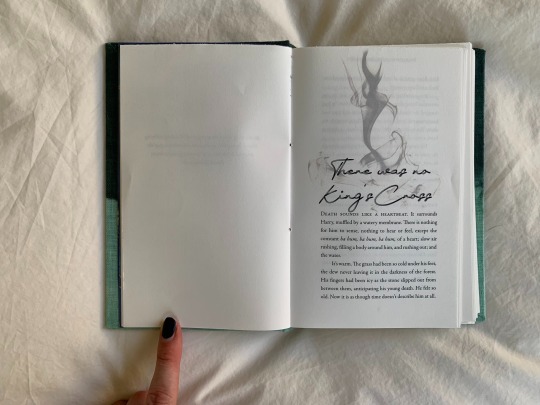
This was my first time doing a quarter-legal binding. I love the size; it fits so nicely in my hand. I’ll absolutely bind more fics in this size. Thank you so much for writing this, honey, and so happy to make you a copy!
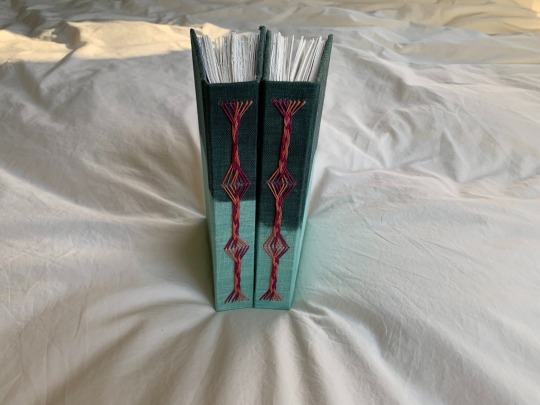

Materials:
Dyes: Dharma Trading Procion dye
Thread: UberArt on Etsy
Body font: Adobe Garamond
Title font: Signature December
Smoke brushes: XResch on DeviantArt
Endpapers: Craft Consortium Ink Drops in Ocean (my beloved)
#honeybeet my beloved 🥺#read this fic to break your heart & put it back together#my fanbinding#binderary2023#ficbinding#fanbinding#posts i actually wrote
174 notes
·
View notes
Text
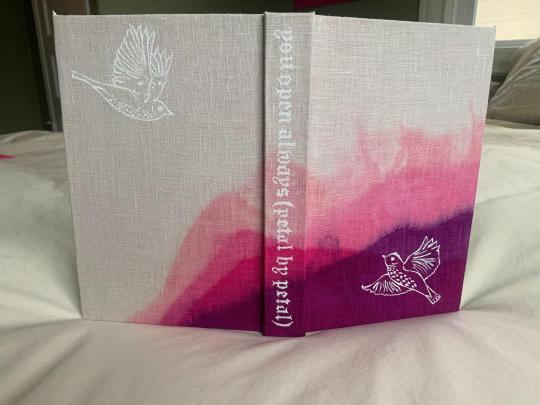
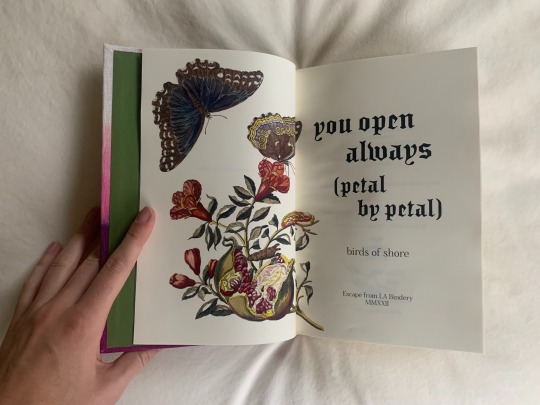
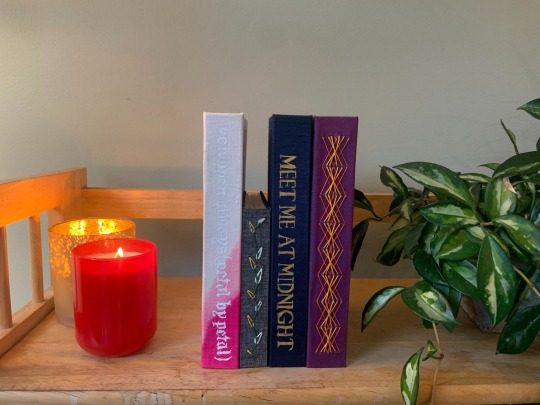
Renegade Winter Exchange 2022, part 2/2: You Open Always (Petal by Petal) by birdsofshore
Harry’s not the kind of person who pays for sex. He really isn’t. Until he is.
Thoughts, details, and description behind the cut. The other book I bound for the exchange is here.
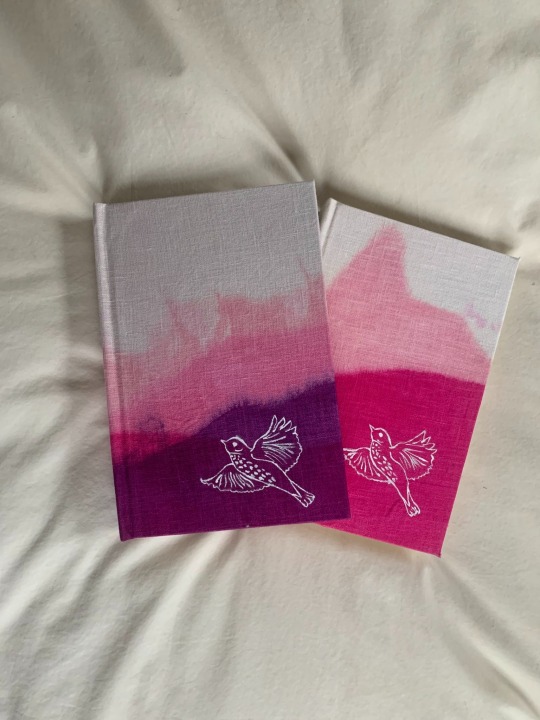
For the first book I bound @queercore-curriculum, I wanted to make a book that fit well on their shelf. For this one, I instead went full maximalism & made something totally different than what they make themselves—that’s part of the thrill of an exchange, I think (though it was a risk & I hope you like it!!!)
You Open Always (Petal by Petal) features an extremely hot sex worker Draco, an extremely thirsty Harry, the hottest sex you’ll ever read probably, one of my favorite depictions of a sly Kreacher, and a Grimmauld Place that really, really wants Harry and Draco to get together. It’s one of my favorite fics of all time & I’m so happy to have a copy on my bookshelf too now. In the design, I wanted to mimic Grimmauld Place throwing courting & marriage, etc items at Harry & Draco, so every chapter header has a different illustration of something I could imagine Grimmauld giving them: two birds, figs, strawberries, grapes, etc & led to me asking my partner things like: do you think of pomegranates as a sexual fruit? (The answer is yes).
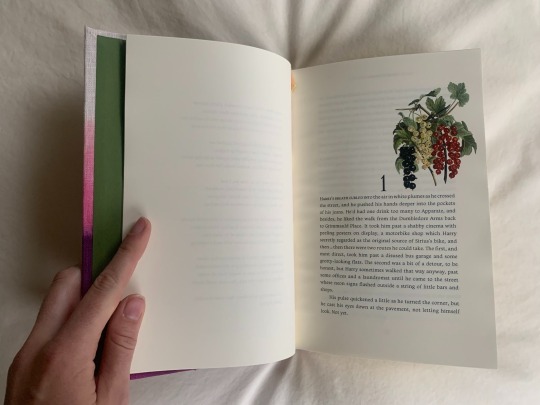
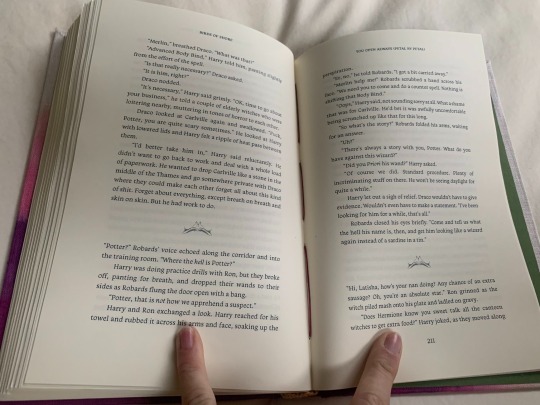
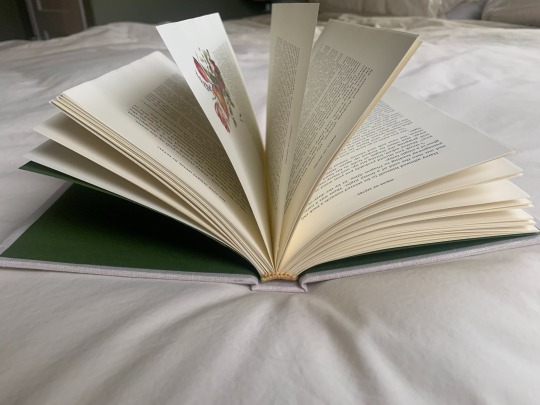
For the bind, I made a flat-back oxford hollow. Also inspired by @queercore-curriculum I hand-dyed linen & painted a pair of thrushes on the front and back cover, as well as painting the title on the spine (note: this is the single thing I am most proud of for this bind—I was so nervous the entire time painting). The headband is a front-bead double-color headband with peach and chartreuse. Hope you like both binds, @queercore-curriculum; it was so fun making them for you! Birds, if you’d ever like an author copy of this bind, let me know & I am happy to make and send one to you :) thank you for sharing this lovely fic with our fandom!


Title font: Sabbath Black
Body text: Monarcha
Ornaments: Penmanship Birds
Half-title & chapter numbers: Foglihten
Interior illustration: Heritage Type Co free illustrations
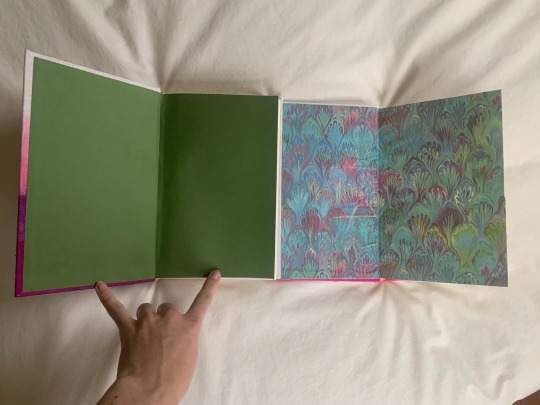
Some notes on process: I always make a ‘test book’ that I keep before sending out a copy to someone else—this is to make sure everything works well & looks good together (which you can see in the photos). The original dye of the linen for the bookcloth turned out a much hotter pink than I intended, so the copy I sent went back in the dying bucket for a more raspberry finish. I also changed endpapers between the test copy & the sent copy. I originally wanted a solid color endpaper because the rest of the book was so maximalist, but didn’t love any of the colors at my local paper store. I do really like the marbled endpaper I chose instead, but it was too thin for a good endpaper & I didn’t want to faff about with creating made endpapers, so I found a solid color I liked at a different art store :)
#my fanbinding#renegade bindery#2022 renegade exchange#birdsofshore#you open always (petal by petal)#maximalist matchmaking grimmauld meet maximalist matchmaking binding#posts i actually wrote
214 notes
·
View notes
Note
I love seeing your book-binding photos, that is such a cool idea to make neat physical copies of fanfic and webnovels! I also want to start doing that now, but I'm not quite sure where to begin tbh
The good news is that it’s a lot easier to get started than it looks! Even a fully casebound book isn’t nearly as difficult as it looks. Every individual step of the process is surprisingly attainable, and imho the biggest barrier to entry is the number of small items you need to gather together to make the whole thing happen. My dad was the one who introduced me to this hobby, by means of just printing out like ten-page pamphlets with material he needed to reference for work, and folding them in half and stitching them together, so it can really be that easy to get going! But in terms of resources, I’ve found videos to be the most, most useful, so let me pull some links up.
So the two main youtube channels I’ve reference have been SeaLemon (more diy oriented, less intimidating, lots of cute videos for shorter notebooks, which can also apply to shorter fics) and DASBookbinding (more oriented towards casebinding books, and honestly, one of the best resources I’ve found period)
Now, before getting into the printing-fics-specifically part, let me take a detour, because the printing is heavily dependent on what specific software/hardware you have access to. So first, just the mechanics!
SeaLemon’s videos are something I recommend a lot to beginners, because most of her projects are pretty bite-sized. She has a video on casebinding that I referenced at first, though now I mostly reference other people. But she does good overviews of the basic steps that are easy to follow, and some of her short projects like the japanese bookbinding or single-section bookbinding are really attainable, and require much less of a craft supply commitment than a full casebinding project. (Once you do reach casebinding, I do recommend her video on converting cloth to bookcloth. there are ““proper”” ways to do it with homemade paste, but like, i live in a carpeted apartment, i only have so much space to work with and so much carpet that doesn’t belong to me to ruin)
Now, I do find DASBookbinding extremely good, if overall more intimidating than SeaLemon, but also his latest pair of videos are about just... making a pamphlet. He’s a great resource for the complicated stuff, but he does cover the basics too, and is just FANTASTIC. I definitely did some short pamphlet-sized stuff early on, to get a grasp on ‘okay, this is how I sew a signature together’ and ‘okay, this is how I sew multiple signatures together’, before going into the bigger, more complex cases. I’m not sure which videos of his to link, because they’re all great and cover a ton of ground, but! As a good transition point, he does have a video on how to print individual paper signatures from a pdf file
So! Printing! Printing and formatting go hand in hand, and I’m not well equipped to speak to the different options out there, because I’m comfortable in Word and am fortunate enough to own a color laser printer. I did start out using google docs and printing to pdf, then printing from adobe acrobat in booklet mode to my printer, but that means the aspect ratios are wrong and my margins are huge, and google docs chokes on large files anyways. I’ve seen people format text for printing in Word, LibreOffice, Adobe InDesign, LaTeX, and I’m positive there are other options. I know some people work from inkjet printers, and some work from single-sided printers and flip pages themselves, while other people make use of access to university printing services or places like staples or kinkos. I’m not properly aware of the range of options out there, so I don’t want to make definitive recommendations, but those are things I’ve seen people doing.
But even if you don’t have formatting software or printing equipment at hand, it’s really surprisingly easy to take blank sheets of paper, fold them in half, and start experimenting with making a notebook. Broadly speaking, I recommend picking a video tutorial you like, watching it and making note of what tools/supplies the person uses, and following the steps on your own. There are... a lot of tools and supplies that go into things, but none of them are that expensive or that hard to find. Other than replacement toner cartridges for my printer, the most expensive thing I’ve bought is a cutting mat. And seriously, I am absolutely in love with this hobby, and recommend it to anyone who’s interested. Even if you never feel like trying something more complicated than a soft-backed pamphlet, there’s something profoundly satisfying about holding a book, whether it’s empty or filled with a story, and thinking I made this.
52 notes
·
View notes