#tumblr formatting made this super blurry so open for proper quality
Explore tagged Tumblr posts
Text
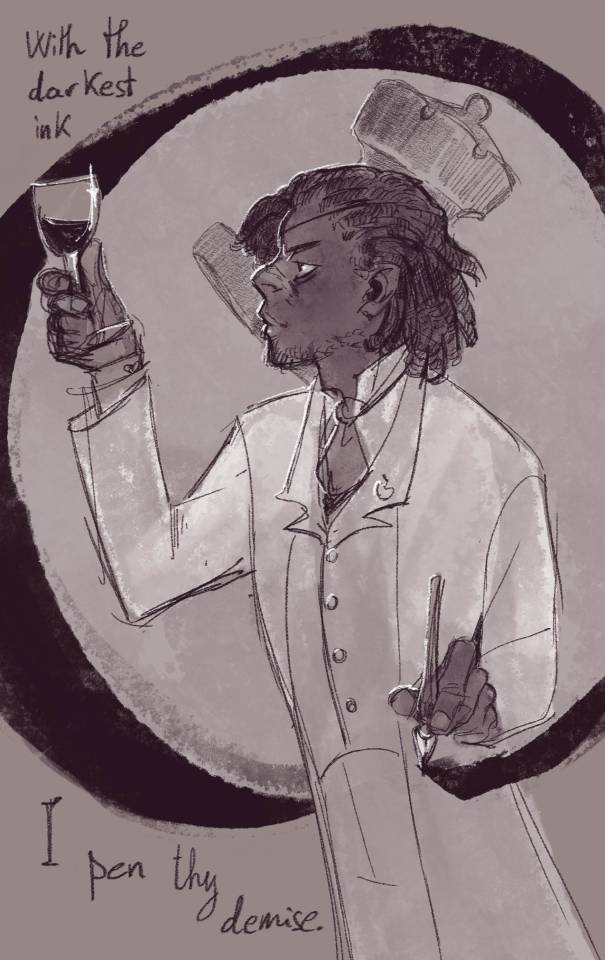
quick sketch of @zeebreezin 's darling August Shaw, to celebrate him Doing A Regicide
#fallen london oc#august shaw#fl community ocs#art#digital art#my art#tumblr formatting made this super blurry so open for proper quality
73 notes
·
View notes
Text
My GIF making process!

I’ve been asked many times for a tutorial, but because I get really detailed, I always get overwhelmed by the idea. But I finally decided to buckle down!
Just so you know: I don’t use PSDs in this, and I don’t import layers to frames or anything like that. I like the hard way—at least in gif making, I believe you get higher quality gifs. Join me as I show you how to make gifs by loading videos directly into the Photoshop timeline and my coloring and sharpening techniques.
Tools used:
Mac OS X (only necessary for the first step, and there are other ways around it with a PC)
Adobe Photoshop
YouTube Purchases (any streaming service will work)
Topics covered:
Obtaining the Source Material
Loading the video file into Photoshop
Prepping, Cropping, and Resizing the Media
Adjustment Layers
Sharpening
Exporting
Obtaining the Source Material
There are a few different methods for obtaining video to work with. Proper YouTube videos are nice, but finding any major motion picture in that format is difficult, if not illegal.
Once I realized I could get really great quality video by doing screen recordings from streaming services, I stopped worrying about finding (and pirating) high resolution video files. So now, I just go to whichever streaming service I need to, pick out the movie or show, find the spot, and record small snippets.
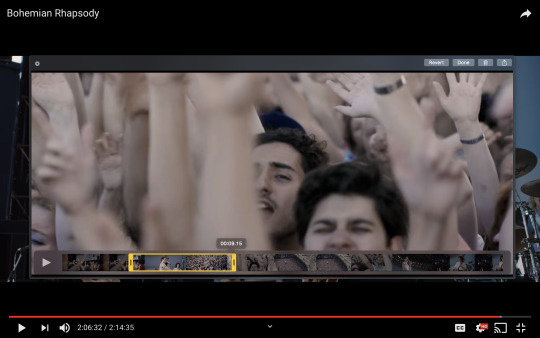
Mac screen recording instructions:
On a Mac, Command+Shift+5 will bring up the screen recording dialogue.
Resize the frame of what you want to record within the browser.
Go to a second or two before, press the “record” button, and then begin playing the video, remembering to keep your cursor out of the recording box.
Use the Space bar to pause your video when you’ve gotten the snippet you need. Stop the screen recording by clicking the ⏹ button that is in your menu bar at the top of the screen.
Important: when the recording appears in the bottom right of your screen, click on it, and then trim the video on either end. This will help your computer convert the video file to the type that can be opened by Photoshop.
Click “done” and it will appear on your desktop, ready to be used!
PC Users: ??? Here’s a Google search I did for you
Loading the video file into Photoshop
Lots of people use this process for making gifs (a great tutorial!). I didn’t even know it existed until last summer, when I’d already been giffing for years. I wish I could still do something like that with these screen recordings, but the files are absolutely HUGE, especially on Macs with double retina displays, which actually increase the dpi by a lot. Making screencaps of them fills up my hard drive, almost immediately—even when I’ve got 20 gigs of free space to work with. So what do we do? We just. Open the file. In Photoshop. Et voila!
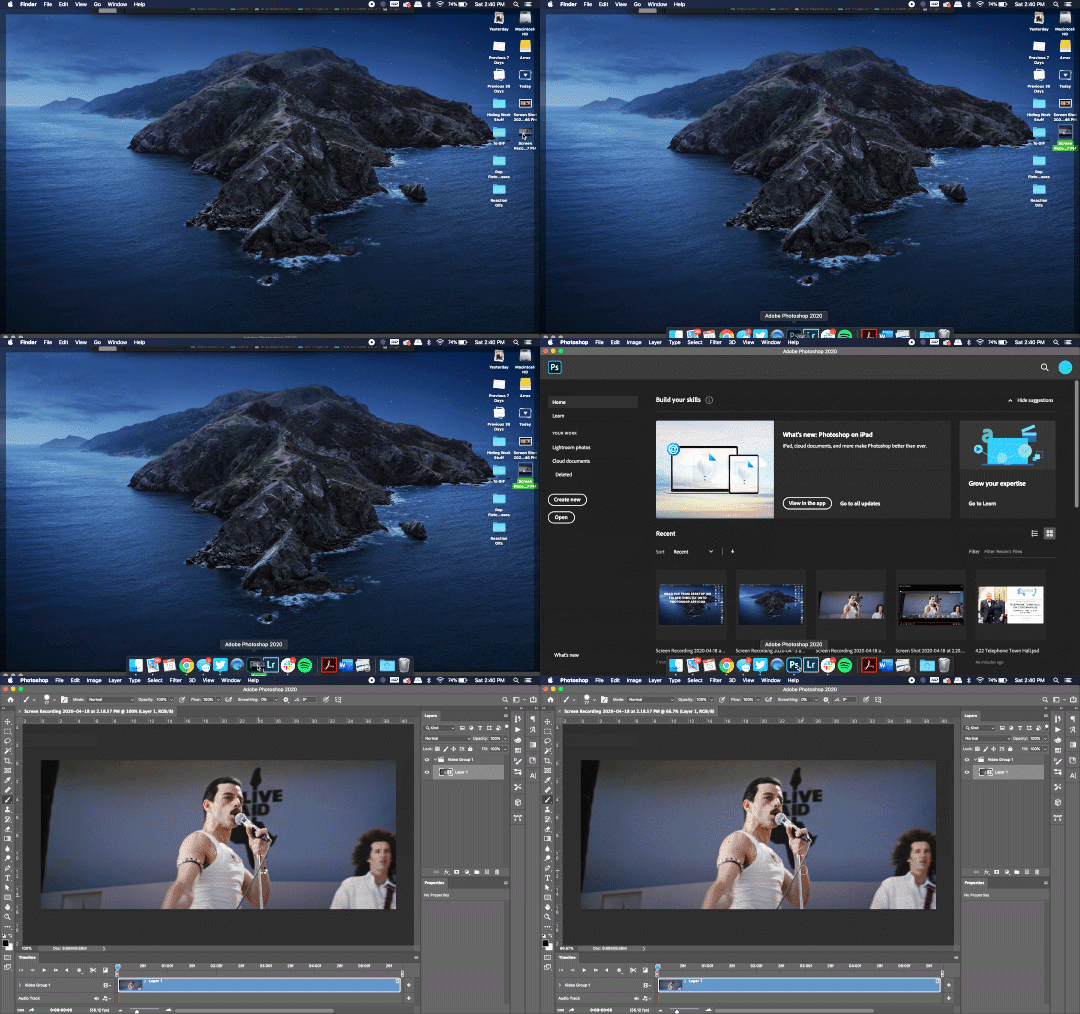
You can do this with any type of video, not just screen recordings.
Prepping, Cropping, and Resizing the Media
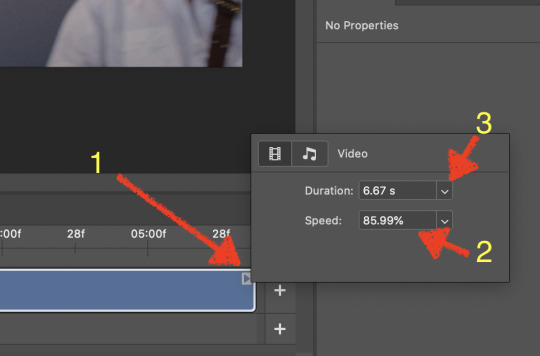
When Photoshop loads your videos up, it makes the video hilariously fast (something about frame conversion). You must slow it down for it to look natural. THIS MUST BE DONE BEFORE YOU RESZE. Your Photoshop timeline window should be at the bottom of the screen. See that little triangle in the top right of the video?
Click on it, and a menu will appear to change speed and duration.
Change the speed first- usually between 80-85% will seem realistic. (I actually went a little faster than I usually would on this at almost 86%—I don’t recommend this)
Press the button next to duration and pull the toggle all the way to the far right (if you don’t do this, full length of the video will be cut off).
Now you’ll want to crop it. Ever since Tumblr upped its GIF size limit, I have been playing around with 7:5 ratios, but let’s go with 3:2 for now. Use the Crop tool, pick out 3:2 in the top left (it may say 2:3, but you can switch that) and then find the most suitable spot in your gif for that. Hit enter on your keyboard.
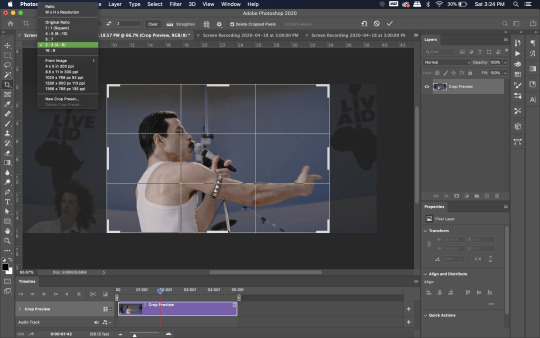
Some things to keep in mind when cropping:
Most videos come in 16:9 ratio (BoRhap is even wider). If it’s a wide shot, you’ll need to do the full 16:9 to not lose anything. Of course, experiment and find what’s right for you!
As you can see above, I moved forward in the timeline and made the crop to a point in the video when the broadest movement was happening.
Certain videos WILL have a black or red bar that may be imperceptible until you’ve already exported the gif. Just crop in a little tighter on top and bottom to avoid them.
Now you’ll need to resize your gif to be the correct size for Tumblr. If you don’t use Tumblr’s exact dimensions, your gifs (as uploaded) will appear blurry or pixellated. We’re doing a full-width gif here, which is 540px. On a Mac, I use Command+Option+I (for “Image Size) to open the resize dialogue. You can also find it under Image->Image size...
Make sure to also have “Resample” checked. Lately I’ve been playing around to see if different options are better. Most GIF makers use “Bicubic Sharper (Reduction)” and they are not wrong to do so. I’ve just been unhappy with it lately, so I have been trying this other setting out, “Bicubic (smooth gradients)”.
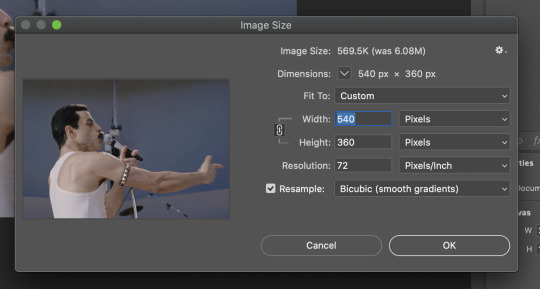
Click OK. A dialogue may come up that asks if you want to convert to a Smart Object. The answer is yes, okay, do it. The only major caveat is that you can’t go back and change the timeline speed. That’s why we did it first. But you can preview the speed now that it’s smaller, and if you don’t like it, use Command+Z (or “Undo”) and go back a couple steps to get the speed you like.
You may find, especially on a Mac screen (and possibly other displays), that at 100% your gif looks too small to be 540px. That is the curse and blessing of working with super-high resolution hardware. Zoom in to 200% and proceed about your business. This is what it will look like on Tumblr.
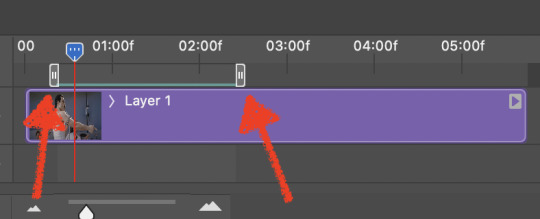
You may find it helpful at this point to begin by defining the beginning and end of your gif by moving around these bumpers. It’s safe to keep gifs under 02:00f in length. Under half of 01:00f will be way too short. (I tend to overshoot in length and then trim the beginning and the end once I see how big the gifs are upon exporting.)
Adjustment Layers
Now the creativity and fun begin!
There are a LOT of ways to get creative here. I’m going to keep it simple, very simple, but I strongly recommend opening up a new adjustment layer of each type and trying to figure out what each does!
You’ll find the adjustment layer menu at the bottom of the Layers window.

Curves
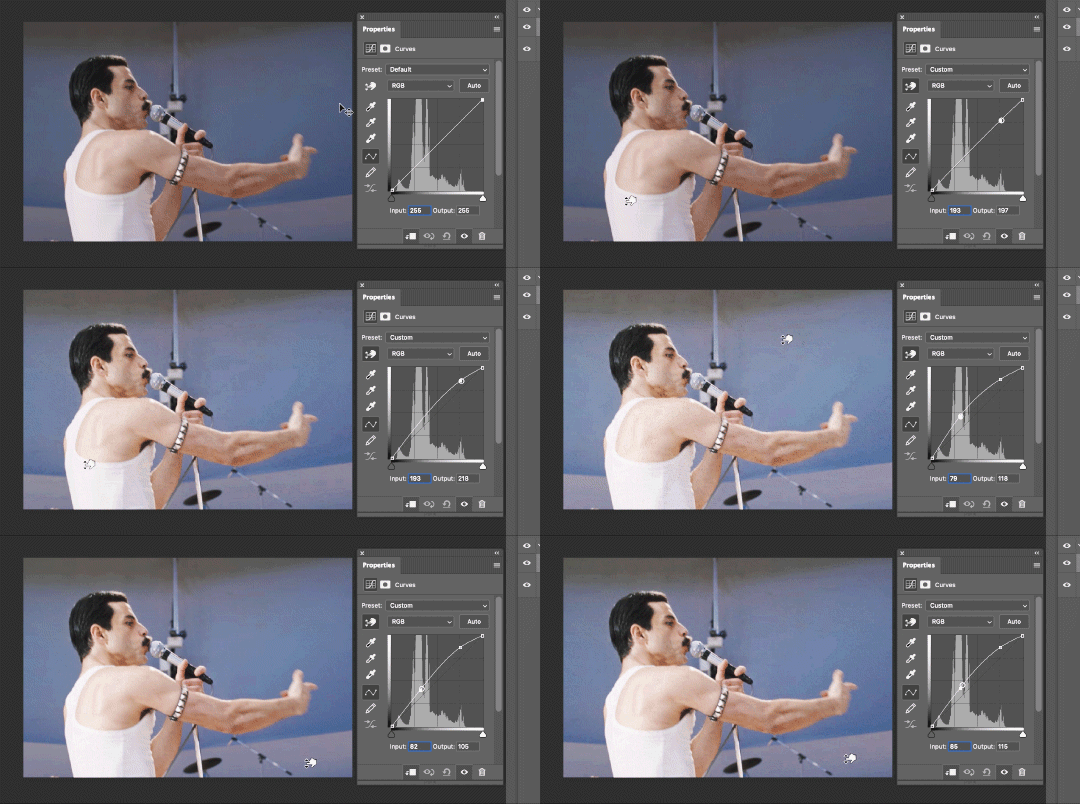
There are a lot of ways to make Curves work for you! It can do the job of Brightness/Contrast, it can do Levels, it can do Color Balance! We’re going to use it mainly to help with brightness here, but also to level out some of the tones. One of the quick tricks you can do is use the droppers on the left side of the Properties window. There are three- one with a white tip, one gray, one black. These can help define what your white tones are (and whether they need to be more of one color or another), and so on with your blacks. Sometimes it works, sometimes it doesn’t; in this case, I think it doesn’t:
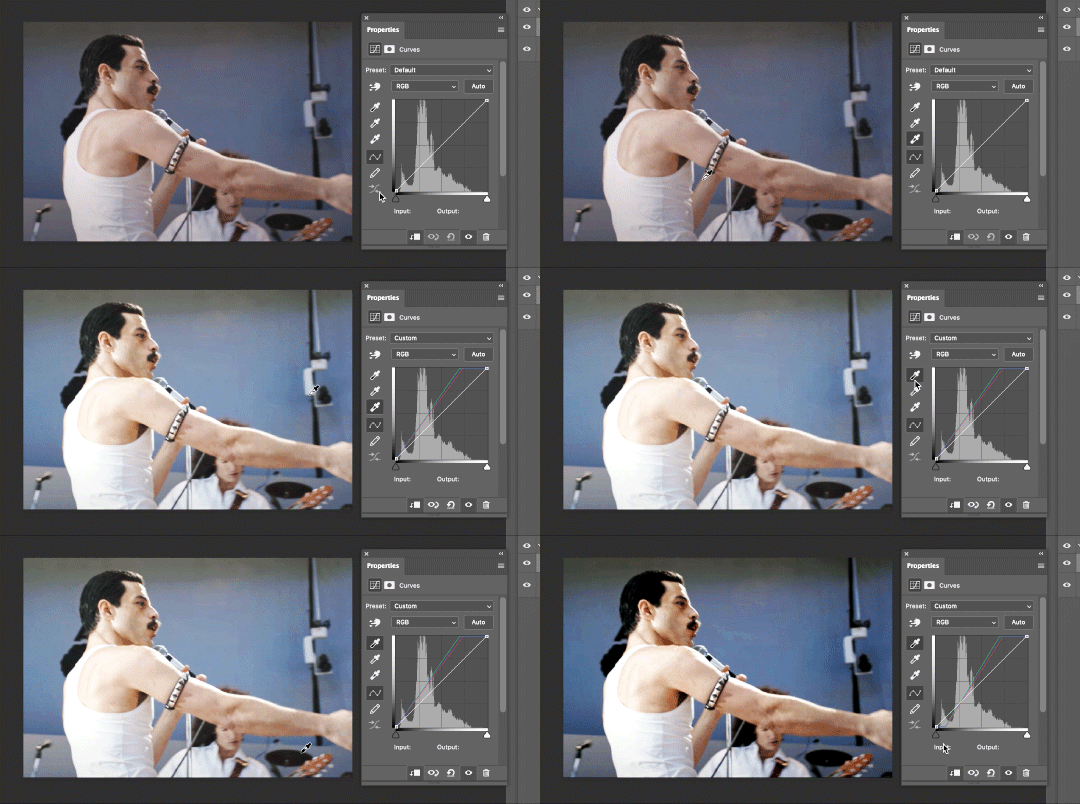
That looks totally blown out and somehow also too dark!
So instead, we’re going to use that little hand with the finger pointing out and some arrows pointing up and down. This lets you define which sections you want to get brighter or darker, and how much. It doesn’t do color correction. In the example below, you can see I dragged up on a white spot and down on a dark spot. Then, I moved points around on the curve itself to refine (which the gif here doesn’t show...).
Vibrance/Saturation x2
Next, I’ve been using @gwil-lee‘s Vibrance/Saturation trick (I know you said you learned it from someone else, but I learned it from you!).
Create a Vibrance Adjustment layer, bump the values up a bunch, and then change its Fill to somewhere between 2-9%. Change the Blend Mode to Color Burn. Then make a copy of that layer keeping everything the same, but make it Color Dodge. I can’t quite define what these do, but it makes it punchier!

Color Balance
Most people are familiar with this. For this gif, I’m going to make the shadows more Cyan/Blue and the highlights more Red/Yellow. Just a few points each.
Exposure
I brought the Exposure up a bit, but not enough for you to need to read about, haha.
Selective Color
Here’s where you make fine adjustments to colors. This particular scene is extremely simple, color-wise, so keep it simple. I’m going to bump up the cyans/blues, take up the black by just a point or two, and maybe bump up the yellows and reds a tiny bit. (And as always, remember, the “opposite” of cyan is red, the opposite of magenta is green, and the opposite of yellow is blue. CMY/RGB!)

I think at this point I’m going to call it with the adjustment layers. You can go absolutely hogwild with more of them! But at this point, I’m ready to start sharpening!
Sharpening
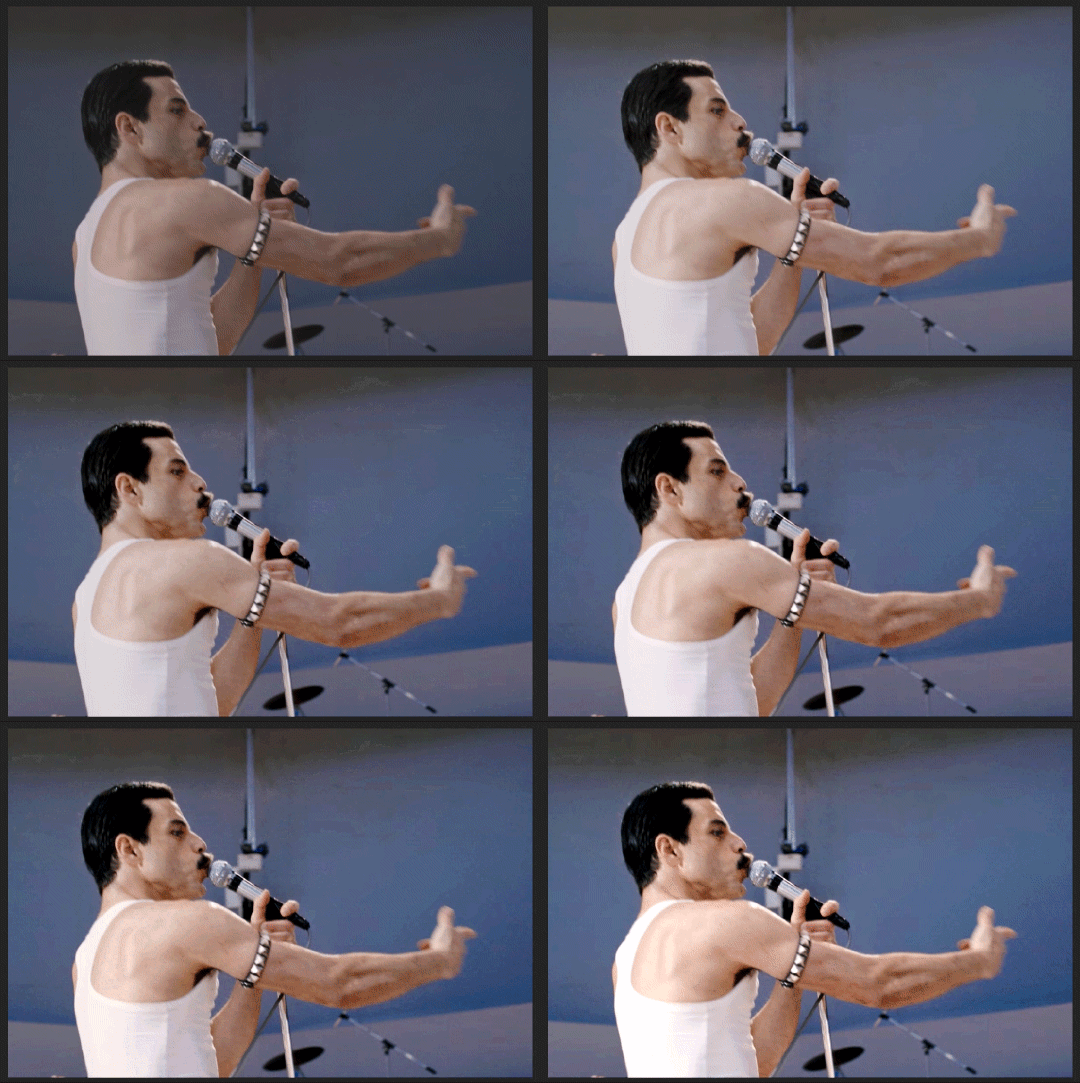
I do three sharpening filters these days. These are all under Filter->Sharpen. Make sure your media layer (default called Layer 1) is selected as we go through this! (Also, this can really take a toll on your processor, so don’t say I didn’t warn you.)
Sharpen- This layer does the basic job
Smart Sharpen (Amount: 10%, Radius: 10, Reduce Noise: 4% Gaussian Blur)- This layer gives texture
Smart Sharpen (Amount: 500, Radius: 0.3, Reduce Noise: 12% Gaussian Blur)- This layer gives refined sharpening and smoothing
Fiddle with these as needed! Let your gif play all the way through- this may go slowly as your processor works on it. Make sure the beginning and end points make sense.
Exporting
After You’re going to have to use File->Export->Save For Web (Legacy)... or use the shortcut of Shift+Option+Command+S. This could take some time for the dialogue to pop up! Be patient.
In my opinion, these are the best gif export settings for crisp edges and no noise:
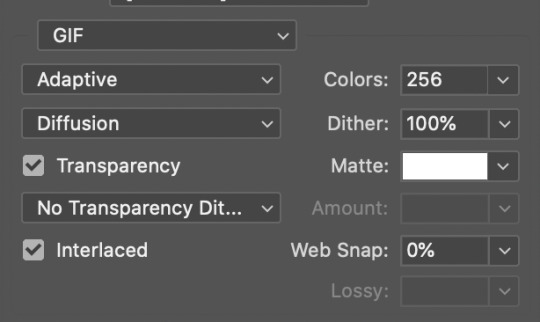
Now you see how big the file is in the bottom left. Tumblr won’t let you upload anything bigger than 10MB and it’s safer to stay under 9MB, in my experience. When your gif is too big, you have a couple options. You can close the dialogue and change the length of your gif.
OR, you can uncheck “Interlaced” and bump up the lossy to 1 or or more. This will create noise. Sometimes, that’s a good thing!
Here’s without lossy:
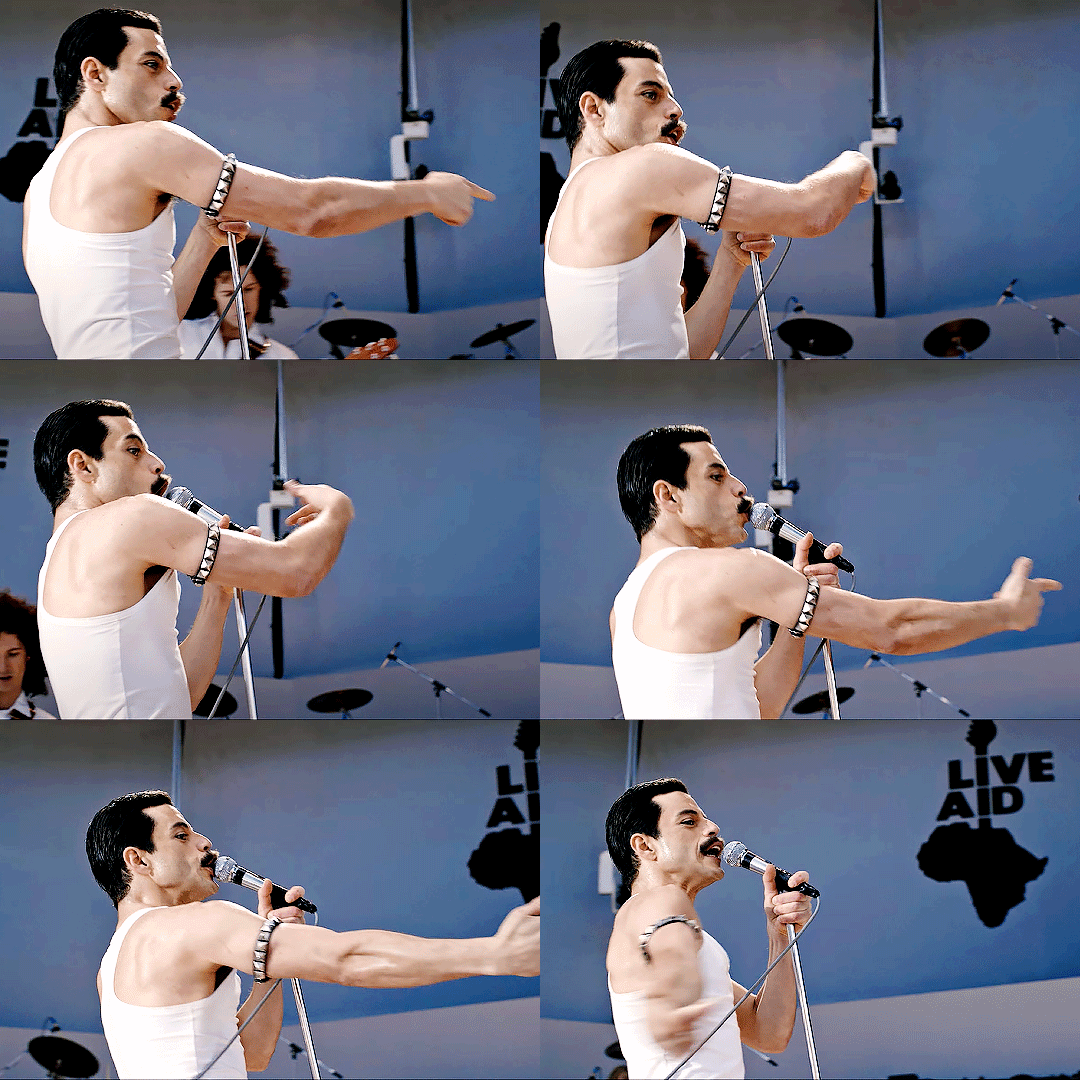
Here’s WITH lossy: (Honestly in a fast moving gif like this, it’s almost imperceptible, but I can see it!)
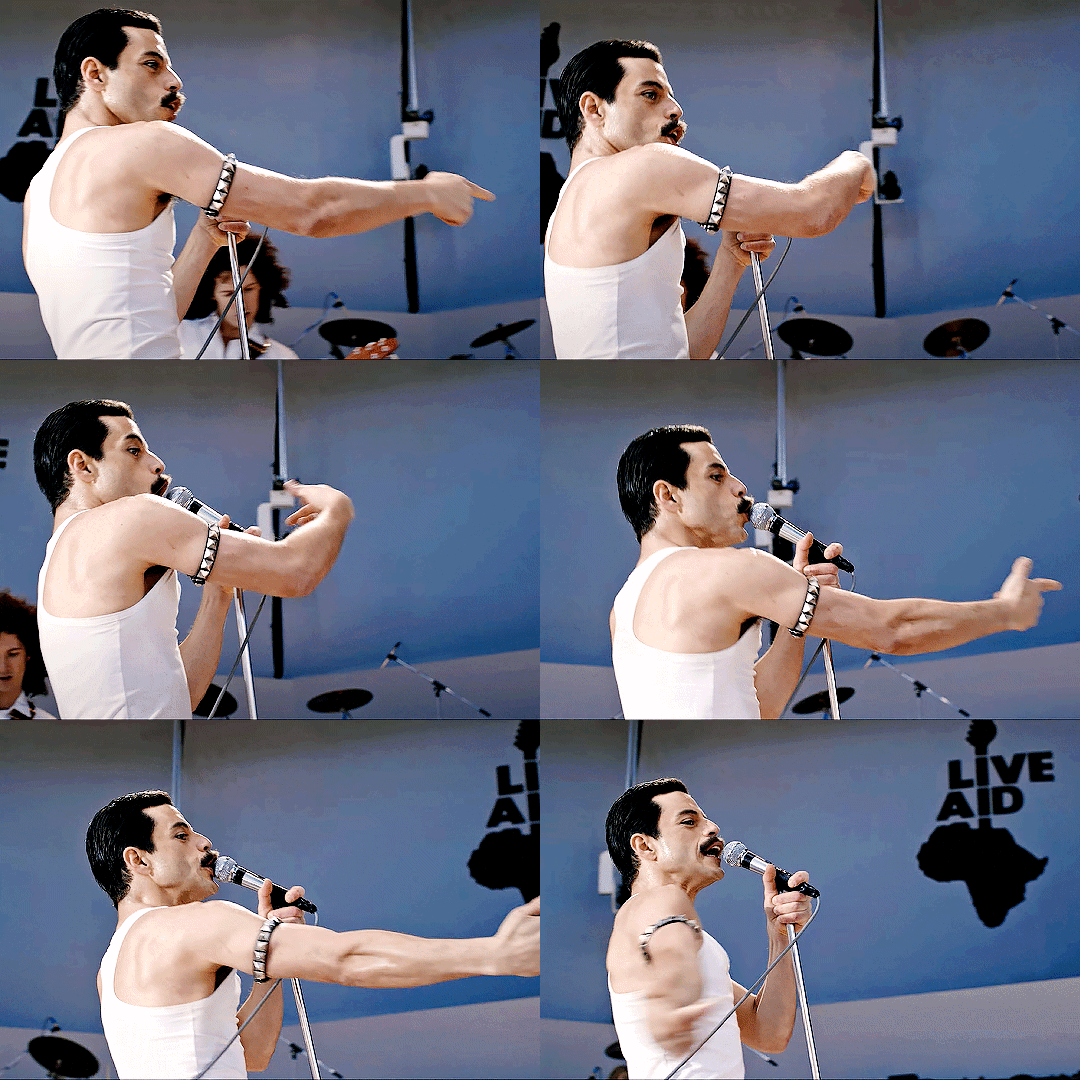
And now that I’ve exported, I can see what there’s a little black line on the bottom! So I’m going to trim that off and call it good! You can see the full gifset here.
Hope you enjoyed! Reblog if you try this out or learned anything. Feel free to reach out with questions any time!
378 notes
·
View notes