#trying out being more creative with bg colours!!!
Explore tagged Tumblr posts
Text


Grace Chasity from Nerdy Prudes Must Die moodboard with siren inspo
requested by: anon, ty for the rq!!
x x x x x x x x x
[divider creds: @anitalenia]
(images not credited were found on Google images)

song to go with it: 'La petit fille de la mer' by Vangelis [translation from French: 'the little mermaid']
Reblogs are appreciated, requests are open!!
#trying out being more creative with bg colours!!!#my moodboards#grace chasity#grace npmd#nerdy prudes must die#npmd#starkid#hatchetfield#moodboard#starkid moodboard#angela giarratana#mermaid#siren#sirencore#siren aesthetic#mermaidcore#sea#ocean#scales
59 notes
·
View notes
Note
hi! i am a ridiculously huge fan of you art. just want to ask about your creative process and what advice you’d give to those trying to find an art style or start out digitally? any tips really on creating digital art! (and lastly, your most recent artwork of the handler blows my goddamn mind, the colours, the style, everything, it’s perfect)
hello! thank u so much thats so sweet! ill answer in parts!
creative process:
i think most times i think some shit up and i save an unhealthy amount of reference pictures, and based on that i try to figure out a cool/harmonious composition. i think the most important part in my process is mapping out the basic shapes / silhouettes, cuz its a “quick” way of knowing if yr design will work, like if it’s visually engaging. it’s gotta work from the silhouette stage. then i pretty much just fill in the details (face, lineart, clothes, BGs, etc).
art style:
art style comes on its own tbh. developing an art style has more to do with experimenting with stylistic and aesthetic choices so dont be afraid to try out different styles and tecnhiques! i cant stress this enough though, style is not as important as hard drawing skills like anatomy, lighting and color theory. id say start with the “boring” stuff and work your way from there! it will make your art exponentially better. master those pillars and then go crazy, go stupid.
digital art tips (ill do my best):
theres’ a lot of hardware out there, ive only ever used Wacom and theyre really good! the simplest wacom tablet is guaranteed to do the trick and last for YEARS on end
try to not break/lose your tablet pen. theyre expensive
if you can, try out different software! tbh i only use photoshop cuz im a pussy and Clip studio scares me BUT please try different programs
WEAR GLASSES. even if you dont regularly need them, get you a pair of screen glasses cuz vision deteriorates quickly (been there done that), protect yr eyes
experiment with layers and blending modes! its really fun and you can achieve some crazy stuff by using them, dont b scared of em (i was)
if your software offers tools like 3D models, or some other stuff that will make drawing easier, USE THEM. it’s not cheating, and it will save you a lot of time and frustration
if your computer can take it, work in 600 dpi resolution at least (just learned this the hard way recently)
when doing personal work draw stuff you ENJOY drawing, pick things you can look at for 6+ hours without getting sick of it
try to practice on the tablet as often as possible, do it regularly, not only to keep growing/improving, but especially to maintain the progress youve made
draw things that scare you. most times its just a mental barrier, youll be fine even if you think its shit the first time. just keep going
progress is not lineal. sometimes youll like the result, sometimes you won’t and that normal and healthy. be prepared for that
when analyzing/critiquing your own work, pretend it’s somebody else’s. youll be more honest with yourself and less destructive
KILL YOUR DARLINGS, dont get attached to drawings. if you dont like something / a sketch is not working, it’s better to ditch it and start over
dont be too hard on yourself, and have fun!!
this ended up being really long! i hope it helps! <3
34 notes
·
View notes
Text
Creator 2018 Tag
General Guidelines - Time to be proud about some of the cool stuff you‘ve done over the past 12 months. Choose a few favourite works you’ve created this past year - fics, art, edits, things, any media whatsoever! - and link them below to reflect on the amazing things you’ve achieved in 2018.
Tag as many creative mates as you want (fan or original!) so we can spread the love and share our awesome works.
asdfghjkl thankyou @andpie for the tag! This my first time being tagged, it made me so happy aaa thankyou so much! I haven’t engaged with the community much o<-< BUT I hope to work on it this year! There’s so much love and lovely people in this community it makes me smile.
Alright! Onto my top 5 for 2018!
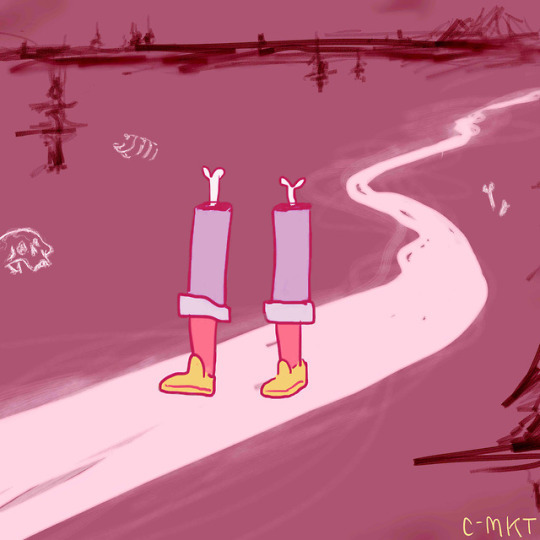
1. Actually finishing a piece
Prior to this piece, I never completed a full artwork (sketch, line, colours, bg etc). I had been stopping at the sketching stage because lineart and colours looked really overwhelming (and it is at first!) but I sucked it up and moved a step forward and even tried experimenting with new techniques. It helped me in breaking my mold and realising okay there’s SO much to learn!
2. Drawing with a story in mind
I usually drew random people standing around doing nothing particular and didn’t have a story or idea in mind(not that there’s anything wrong with that, it just wasn’t my personal approach). Looking back I feel this is why I lacked a drive to draw, because I didn’t know what exactly I was drawing, for who or why I was doing it. When I started thinking of a potential history or story for the subject I was drawing, it no longer became just another individual milling around but a character, alive with thoughts, flaws and emotions.

3. Fail faster
I had heard of the concept of ‘failing faster’ before but had never really initiated it before Inktober. I learnt so much not just about inks, but also flat-laying and video editing and that was because I was forced to create more, allowing me sift out areas I was weak in, ultimately learning and applying that knowledge to the next piece. And in turn, failing didn’t seem so scary anymore.
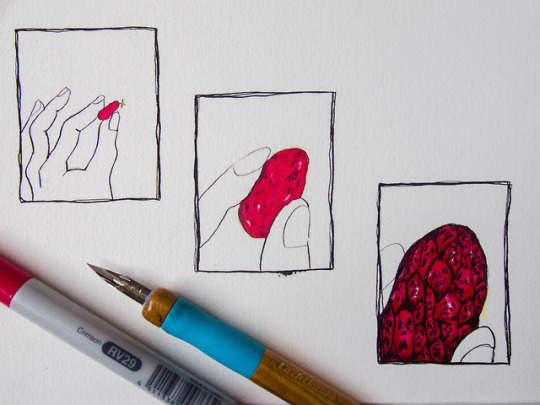
4. HoW Do theY dO it??
This piece was a lot of wandering about, I had no read vision in mind and it sort of just happened. It was also the first time I tried to emulate other artist’s depiction of flesh, thinking to myself ‘I really like how this artist makes their characters look warm and alive, how can I make this effect?’.

5. It takes time but it’s damn fun No doubt my favourite piece of the year. I remember smiling alot during this piece just feeling happy and trying to capture the energy and emotion. Again realising I have lots to learn about anatomy, clothes, lighting etc but it was so fun doing this piece that I would lost track of time. It helped me regain a love for art which I had lost without realising. I hope to continue creating pieces that make not only me feel bubbly and happy, but also others who happen to stumble across it. :))

Aaand that’s a wrap! I’m really happy with how the year turned out, lets keep improving in 2019 ;D I don’t have anyone particular to tag, feel free to have a go if you’d like, it was really insightful and fun to do.
#creator 2018 tag#art#illustration#digitalart#artist on tumblr#2018 review#art review#bill and ted#inktober#oc#draws#illust#fanart#c-mkt#cmkt#c_mktt
8 notes
·
View notes
Text
Mixing Pop Vocals
Reading Time 6-7 Minutes
I - Love - Mixing. Even when working on the production end of a track, my brain tends to make decisions with the mix already in mind. Often, the biggest challenge in the mix stage is getting the vocals to sit in the right place within the music. The sweet spot tends to be crisp sounding but not too thin. Leaving an abundance of lows/mids can create mud but removing too much can make things sound brittle and harsh. For me, it’s all about finding the perfect balance between the highs and lows for each unique vocalist to get the perfect end result. Over the years I’ve tweaked my process a million different ways, and it continues to evolve. The plugins I use specifically will certainly change from time to time but they always serve a similar purpose.
I should mention I always start by mixing the instrumental layers first, and work the vocals into that. As you read on, you will see that I prefer to work in moderate steps using multiple inserts on the same track. I find subtle nipping and tucking along the way leads to a present and rich vocal without sounding over compressed or EQ’d. I like to think of it as a “correct, enhance, correct, enhance” process - but it’s never set in stone!
Step 1 - General Clean Up
I always start by touching up the most obvious issues with multiband compression, this ensures they aren’t further exaggerated as we compress the vocal down the line. Recently I’ve been loving the Waves ‘F6 Floating Band Dynamic EQ’ for this. It’s got a real time spectral analyzer which helps locate trouble spots and can be very surgical if needed. I prefer multiband compression rather than EQ to start as it only reduces the desired frequencies when they cross the threshold set, thus not affecting the vocal everywhere at all times.
Every voice is different but there tends to be three spots I look at first. I’ll sweep through these bands with a sharp Q to find the exact area in need of correction. 150-300hz (this is where chest boom/mud usually swells up), 600hz-1k (controlling mid-range honk can really make a vocal sound more pleasant to the ears especially when the singer belts) and 2.5-7khz (harsh edge and sibilance usually live here). I’ll also roll off around 80hz and below seeing as there is no information we want down there anyways. The width of the Q and amount of reduction will change in every scenario. Trust your ears and compress until things no longer pop out.
Step 2 - Introduce Compression
At this point I’m just looking for transparent, medium speed, soft knee compression to get the party started. I really like Waves ‘Rvox’ for this - it’s quick, easy and affective. I’m usually looking for about 4-6 DB of gain reduction at peak moments to level out the performance without adding any character. Think of it as rounding out the edges and beginning to control dynamics.
Step 3 - Surgical EQ
Now that we’ve done a little tonal clean up and started to fatten the voice up, further subtractive EQ is usually done next. I tend to focus back in on the low mids, carving out trouble spots with a super tight ��Q’ that are still sticking out to much. I’m looking for precision, not character so the stock Avid ‘EQ III’ works great. Sometimes to get a nice, crisp vocal, the best move is to remove the thicker low/mids to make the whole package feel brighter and more present, before reaching to boost the highs. This also frees up sonic space for for the vocals to sit around the bass, synths, drums and other competing frequencies. Depending on the sonics of the over all song, I may also boost 16 khz and above to add a little “air” if the track calls for it.
Step 4 - Compression Part 2
At this stage in the game my goal is to further compress without affecting the transients. I’m still not looking to add any character and slow attack is key. Some of my mixer friends may think I’m crazy for this but my next go-to is Waves ‘Renaissance Axx’. Touted as a guitar compressor, I love it on vocals. Setting the attack as slow as possible, I can further reduce things another 3-6 DB on peaks with almost no audible compression. What really makes this plugin great is that the auto make up gain brings out the quieter moments nicely.
Step 5 - Final Correction
The first 4 steps have lead to a clean, present, compressed vocal without sounding squashed and lifeless. Dynamic yet controlled. This final corrective step will vary with the sonic character of the voice. Depending on the singers timbre you may find it’s a little on the sibilant side (sharp “s” and “t” sounds etc) or it may still feel a little to thick in the low mids. Regardless of the problem I usually reach for Wave ‘C4 multiband compressor’. It works great as a broad stroke tool when de-essing or further controlling low mids.
I should add I rely heavily on volume automation to correct the worst offenders of sibilance. Subtle fader moves can easily fix most of the stand out problems and that way you avoid shaving off to much top end with something like the ‘C4’ or any de-esser for that matter.
Step 6 - Let’s Get Tasty - Compression 3.0
This is when I like to reach for a compressor that will add some warmth and flavour to the mix. My current favourite for this is the UA 1176. World renowned for its tonal characteristics it’s been my favourite addition to my vocal chain as of late. Usually, but not always, with a medium attack and slightly quicker release. Since our peaks have been rounded out and controlled in the first 2 steps of compression, I usually look for about 3 DB of average reduction here. The pre-levelled signal can handle a bit more of this coloured compression seeing as it isn’t peaking nearly as much as a raw vocal would. This allows for a more steady compression sound and the character this compressor brings!
Step 7 - Final Touch - Special EQ
If the compressor was adding salt to the pallet, here’s comes the pepper. I like to treat this last step as broad stroke enhancements. Usually focused on adding that last little bit of top end air and presence. Lately I’ve been loving the UA Pultec EQ for this. Using a nice broad Q, voice depending, I’ll boost the 10, 12 or 16 kHz bands to taste.
Step 8 - Everybody on the (sub) Bus!
For me, the last, but very important step is the bus treatment. I always group my vocals based on parts or sections through their own sub bus. Lead vocals and select harmonies/doubles. BGs grouped by parts, “oohs and ahhhs”, counter melodies, vocal vamps etc. I usually end up with 4/5 sub-groups of vocals being sent to their own aux.
On those busses I look for bus compression to glue together all the vocal layers and affects (reverbs, delays etc. which i didn’t dive into in this post). The UA Neve 33609 was a game changer in this regard. It is nothing short of amazing at doing just that.
Following the compressor I like a channel strip like the SSL 4KE. It’s modelled from input to fader so it adds that certain “je ne sais quois” even if I’m not using the EQ or compressor. That said as the mix grows and evolves, I lean on this strip for further adjustments as required.
The Takeaway
There is absolutely no right or wrong way to go about mixing. The gift and curse of this part of the gig is that it is usually completely subjective, especially in the process one uses. Even as I write this, I’m contemplating new plugins to add to my mix chain. It never ends! Have fun, try new things, trust your ears and come up with as many efficiencies as you can to allow yourself to focus on being creative. Happy mixing!
Links to Equipment and Software Used
Waves F6 Dynamic EQ
Waves Renaissance Vox
Avid EQ III
Waves Renaissance Axx
Waves C4 Multiband Compressor
UAD 1176
UAD Pultec EQ
UAD Neve 33609
UAD SSL 4KE Strip
ABOUT THE AUTHOR:
Brandon Unis is part owner of Cylinder Sound & Film in Toronto and co-producer in the duo Towers. He works as a mixer, engineer, producer and songwriter and has one co-write certified gold in Canada.
DW Performance Series Kit
Check out the DW Performance Series drum sample pack on our store now!
LISTEN TO OUR WORK
RECENT POSTS
CATEGORIES
SEARCH FOR A POST
1 note
·
View note
Text
there was some sort of creative ask meme i had copied the questions out of and it was just sitting on my desktop so i just answered them all for fun / to get rid of it. not much point reading
red: is it hard for you to think up new ideas? list three of your biggest influences.
it’s easy for art. for writing, since I don’t really like to write things unrelated to my stories, and i don’t tend to write random drabble (probably should), so it’s pretty hard. (idk I guess this is just general influences) art: emily hu, gigidigi, bird///arangs. writing: dwj, hazel’s phantasmagoria, idk but I don’t really think about it enough
orange: what do you do when you’re inspired? do you scream eureka, write the idea down in a notebook, what?
i write it down in a text document at which point it gets buried in garbage
yellow: what do you do when you’re stuck in a block? list three sources of inspiration when new ideas are scarce.
i try super hard to finish a complete body (and then almost always end up ok with it), or I try to write SOMETHING (e.g. I wrote some stuff for my write blog, & a scene in fs, since I’m out of ideas for edgar atm). for art, other ppl’s art (my art tag), senshistock, general aesthetic pics – there’s never really a shortage of ideas, it’s more about (anime rival voice) doubting my abilities. for writing god help me
green: how do you flesh out an idea? does it take a long time, do you mull over it for hours, or does it come easily? describe the process!
if I try and focus to work on a solution I tend to get some ideas but the best thing is to literally just mull over it lowkey for a really long time until I get an idea. unfortunately this isn’t always an option. I should brainstorm or smth
blue: depending on your form of art, what are some of your favorite ways to characterize, add detail, design, establish a setting, or otherwise elaborate on the piece? are you fond of world-building, or does that pose a problem for you? (customize this question if you’re an artist or otherwise)
for drawing I like to draw diverse faces and draw lots of setting details (designing bgs & rooms, stuff on tables….). for writing I also really like describing settings, but atmospherically. I like metaphors. I’m definitely a world-building & setting person. I wanna live the dream chaps I wanna to feel like I want to be THERE
indigo: picture of your workspace!
No (MY WEBCAM DOESN’T WORK AND MY SHIT PHONE IS SHIT)
violet: describe your work habits. do you eat? do you need music? are you messy or organized? do you keep a notebook? how long can you work at a time? etc.
music for getting into drawing but otherwise none. I can work for about 2-3 hours OK, but it’s good to take small breaks (I go outside, do a few star jumps for a minute). If I eat it’s only snacks or fruit and some tea. My special documents are pretty organised but my general notekeeping (the aforementioned shitty text document) is a wreck.
silver: what’s the hardest part of a piece for you? (plot, background, etc)
the middle / things beyond concept and characters. For art, colour choice/shading.
gold: the easiest?
lines. there isn’t an easy part of writing
black: what is your least favorite part of the creative process?
the final part of editing where I’m choosing between words/phrases because I’m too much of a perfectionist, it takes forever & it always feels like I’m making the wrong choice. The warmup drawing because it always looks like shit, you gotta ignore how bad it looks but you still gotta look at it my dude
white: your favorite?
anatomy. writing for a long period of time feels pretty good when I’m in a bad mood or feel tired it’s kind of cathartic
rainbow: do you believe in true originality?
no, everything’s a frankenstein’s mishmash of everything else.
brown: what does it take for you to honestly be proud of something?
improvement
pink: what is the most rewarding part of being a writer, artist, etc?
the good feelings it gives when I’m working on smth that’s going well or that makes me proud completing. the feeling of having improved. notes/acknowledgement is nice & all but it’s not too important (i just like to know ppl have seen it) and tbh it’d be nice if smth I made had a genuine effect on ppl or made ppl laugh or smth.
magenta: what drives you the most insANE?
not being able to do work when I want to because of my shit house, family happenings, lack of materials, uni, being extra tired, etc. wanting to do work but trying to do smth else instead and then feeling upset about it.
1 note
·
View note
Text
Graded Unit Workbook
For this year's graded unit I wanted to push myself farther than I had ever gone before and wanted to do fine art fashion, I had thought about it since last years graded unit and knew this is what I wanted to do. My theme was on the psychology of colour and the emotions they invoke.
Orange
For my orange shoot, the emotion that I wanted to convey was courage and my source of inspiration was Benjamin Von Wong’s commercial ad for Huawei.
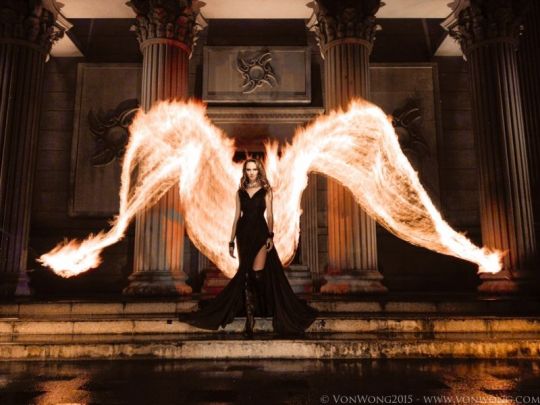
I loved the use of fire in his shot and I wanted to emulate that through my model spinning fire, I have a friend who spins poi so I knew instantly she was perfect for the shot.
I wanted to employ a similar lighting technique to Paolo Roversi to capture the movement of the model and fire while trying to retain as much detail in the face as possible. The lighting set up I used for the shoot was as shown below. The wardrobe consists of a crop top from new look and a 1.5m piece of fabric from mandors as the sarong, I also had to buy the poi and the fuel for the shoot, I experimented with fuel ratios and 1:3 seemed to work the best; 1 part Colemans fuel and 3 parts kerosene.
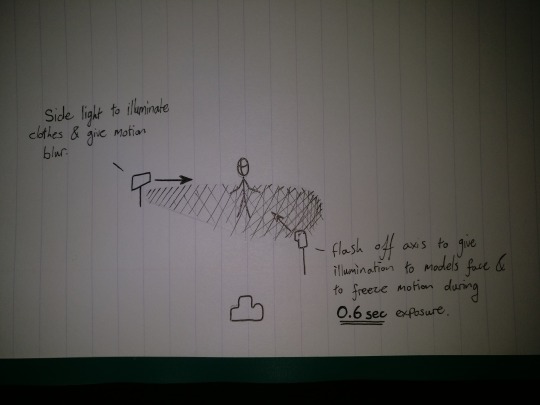
This was the lighting setup I chose to use. shooting at 36mm, f/8.0, iso 200 and at 0.6sec. The LED panel (camera left) was set to full power of the 55k setting and roughly at power 39/49 on the 32k setting as I wanted to give a somewhat warm glow to the send and the model imitating the sunset and since the theme was “orange” it seemed more appropriate to have it this way.
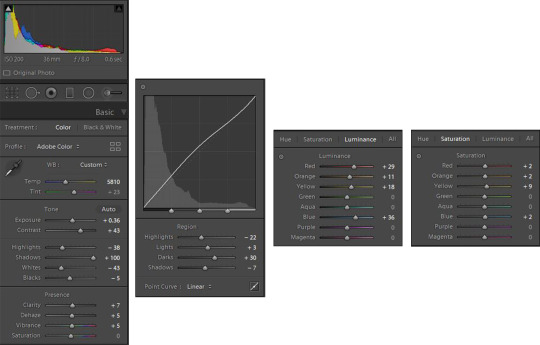
These were the settings I used during the editing process.
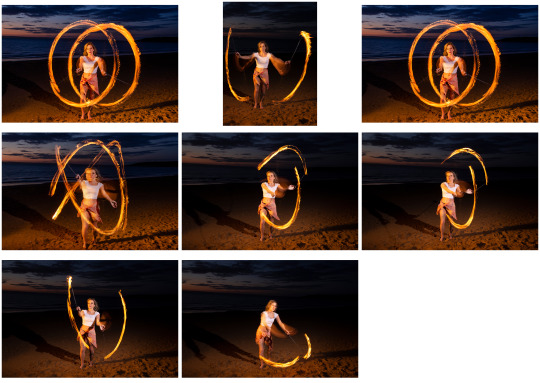
Contact sheet of final images.
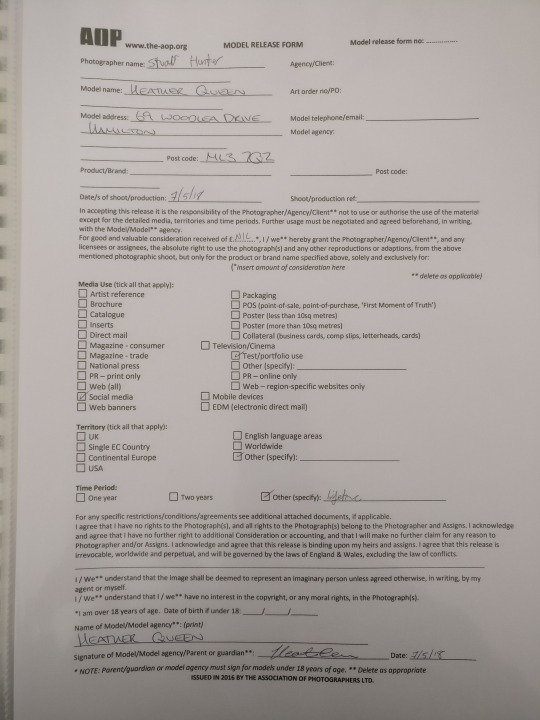
Model release form.
Green
For this shoot I wanted to convey a sense of healing and serenity, the concept behind the shoot was a forest spirit had retreated to a far corner of the forest to heal herself and to show a passage of time via the model being covered in moss and debris to give a slight hint to being there for possibly many seasons. I gained inspiration from these images from Google.
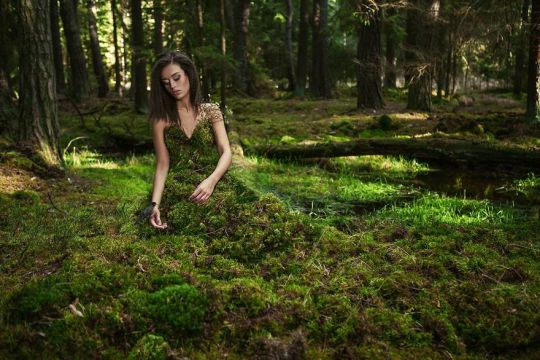
Unknown artist - Google
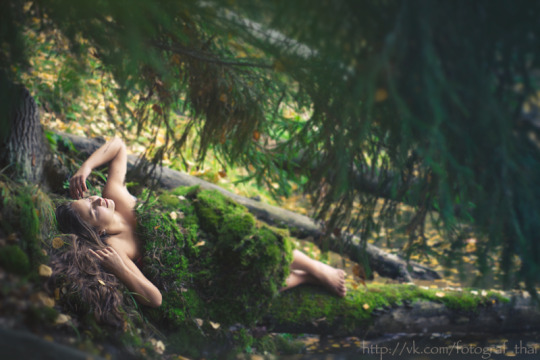
image by Goraakkaya - Deviantart
As for lighting I wanted to shoot at or around sunset to get a night soft orange glow on the model and the rest of the environment, I used 2 LED paneslt o illuminate the background which was in shadow and another one in the foreground to add a warm glwo to the tree and the model, ther was a flash gun on a brolly set off axis to camera left to give some definition to the model and to simulate the approx height of the sun at that time of night which was around 7:40pm - the shoot continued after the sun set and the lighting was only tweaked marginally on occasions when we moved the model.
The wardrobe consisted of a green cocktail dress bought off of Amazon as well as a 5kg bag of sphagnum moss.
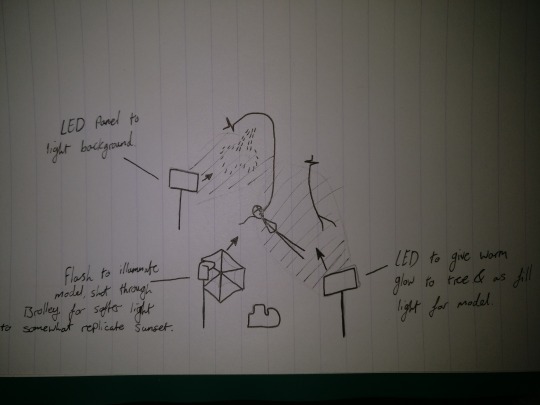
I shot at between 24 and 70mm for the varying shots, settings stayed pretty constant at; iso 250, f/2.8 and 1/40sec which allowed the BG to blur out nicely while also allowing me to use a faster shutter speed as I didn't want to raise my iso much more than that.
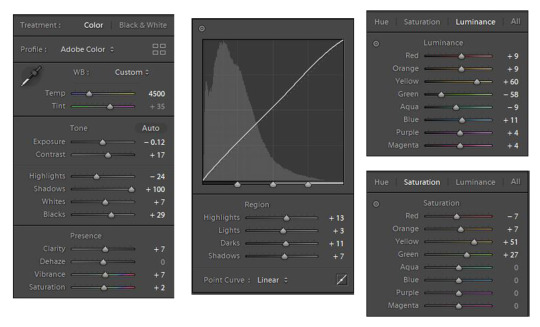
These were The settings I used during the editing process.
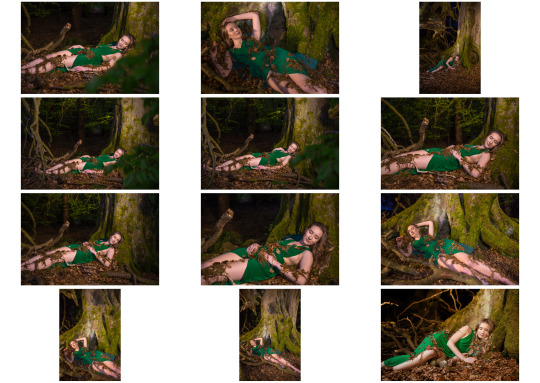
Contact sheet of final images.
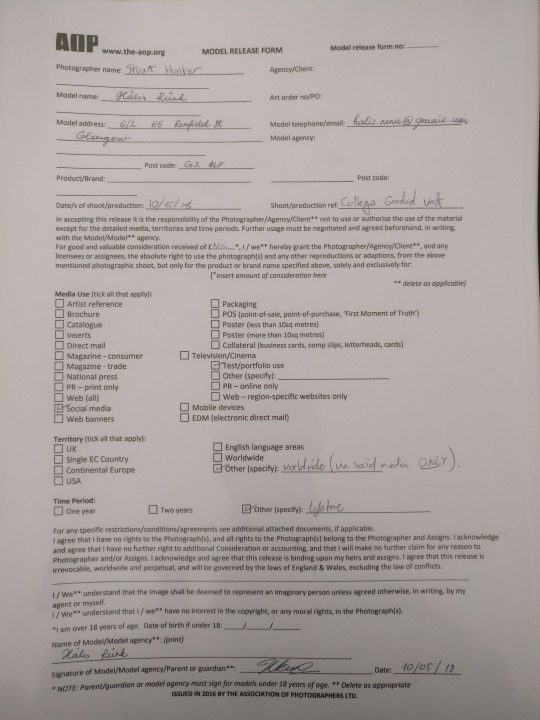
Model Release form.
White
For this shoot, I wanted to convey a sense of innocence and isolation I had the idea of a girl being lost in the thick fog with nothing but a lantern to light her way. There were no images that directly influenced the idea behind this shoot but I suppose I wanted it to be somewhat eery and conceptual like Kyle Thompson’s work.
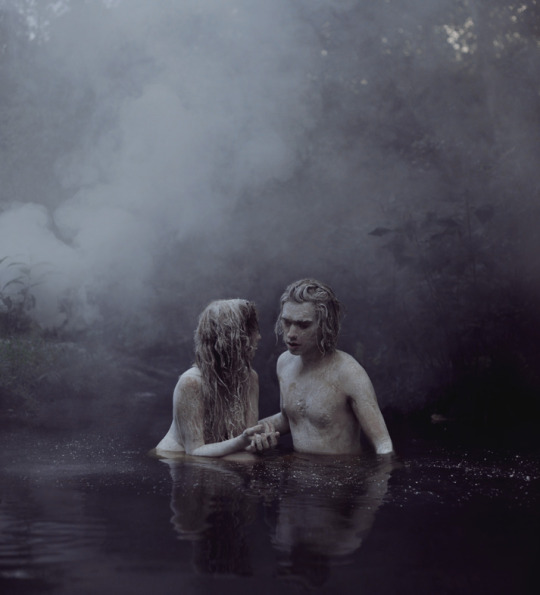
Kyle Thompson - Google
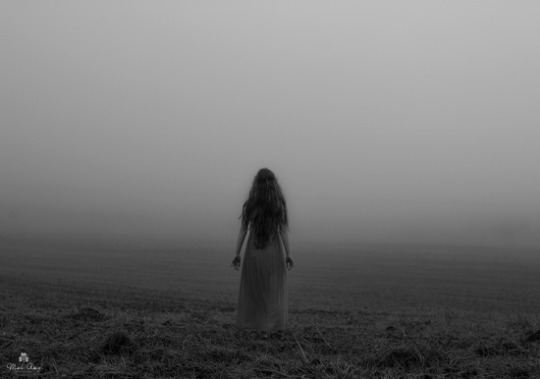
Mel Amy - Google
The lighting that I used for this shoot was 2 flash guns set an uneven distance apart and set to a difference of 1/16th & 1/8th power respective.
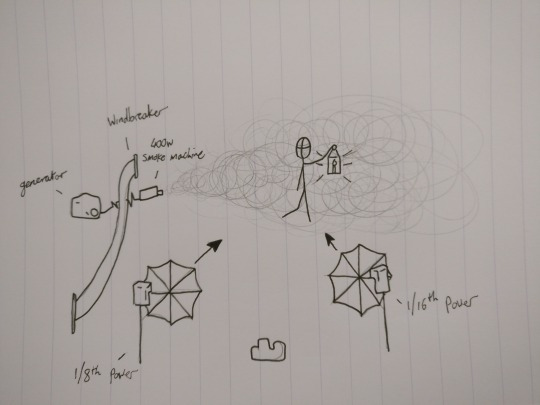
I had a petrol generator on set supplying power to a 400w smoke machine and a windbreaker to try and stop the smoke drifting too much, the 1/8th light was to light the smoke and the model the second light was a fill light as I didn't want the shadows to be crushed.
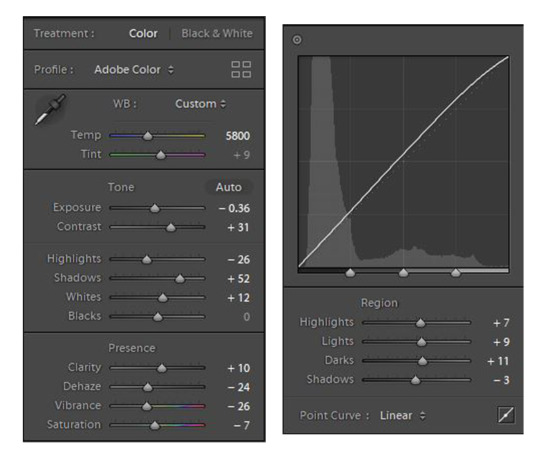
Settings I used during editing.
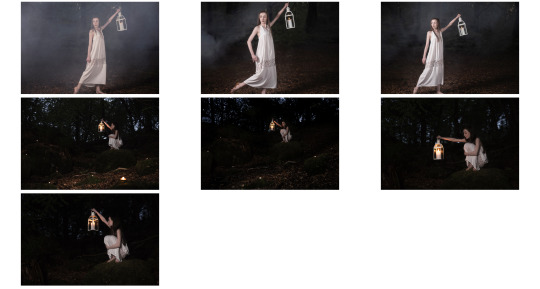
Contact Sheet of final images.
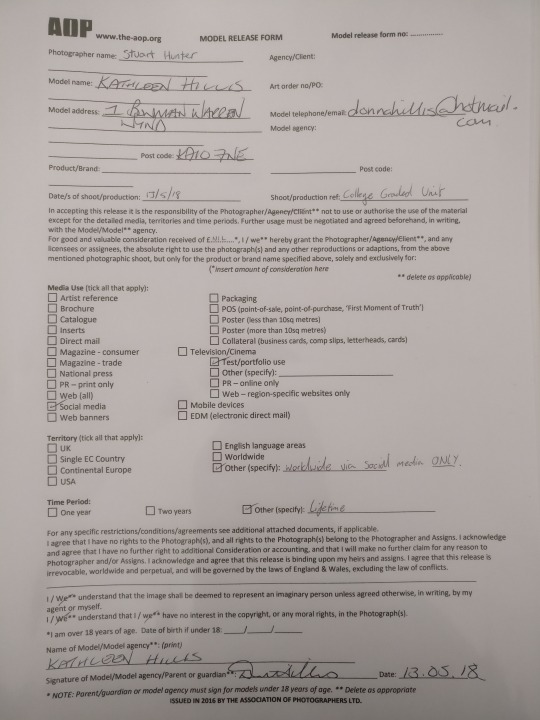
Model Release form signed by parent/legal guardian.
Red
For my final shoot, I Chose the theme red and wanted to convey a sense of fiery passion through whatever poses the model produced. this was the most labour intensive piece as I spent over a week constructing the headpiece for the shoot. while the rest of the shoots were outdoors I wanted this one to be studio based as I had seen some work by Lindsey Adler which I really loved and where I drew the inspiration from.
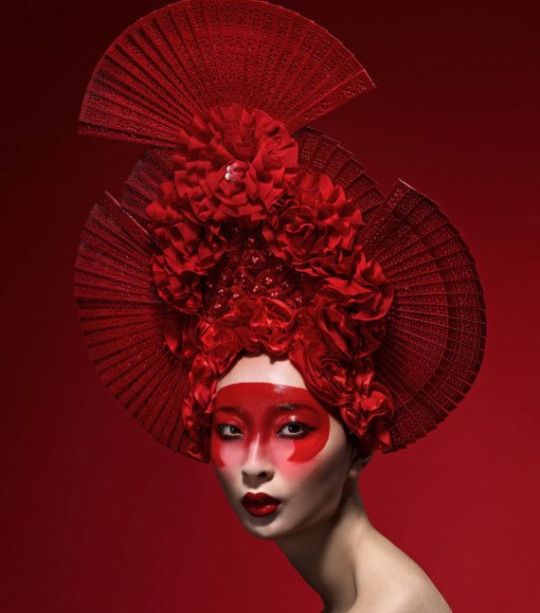
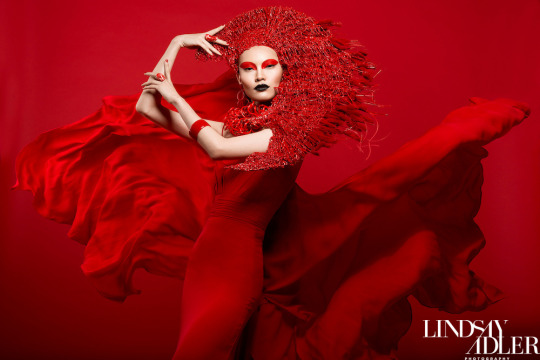
Top & Bottom by Lindsay Adler - Google
The lighting I used was fairly simple but there were a few snags since we didn't have a red BG in the studio I was using so had to get a little creative.
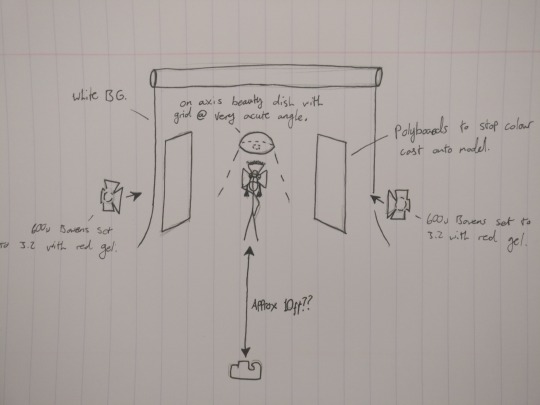
Lighting Diagram. Above
My settings were fairly straightforward, shooting at iso160, 24-70mm @ f/11 and 1/125sec, the reason my iso wasn't at 100 was because I would have had to increase the light on the model which would have washed out the BG even more than it already is, or I would have had to sacrifice DoF or shutter speed as i wanted to capture as much detail as possible considering they headpiece is an integral part of the photo.
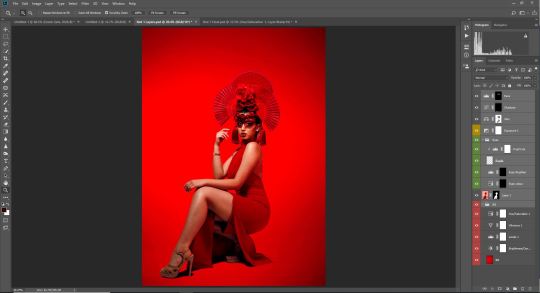
The above image shows the adjustment layers and layer masks used to make this composite (shot the red gelled BG separately in case of any colour washing out when the model was being lit - which evidently happened, and one with the model on “red” BG) most of the adjsutments were colour correcting and messing around with levels and the tone curve to get the level of contrast I was happy with. Next, I done some skin retouching using frequency seperation (duplicate base layer > bottom layer apply gaussian blur > top layer, apply image > layer “bottom image” > Blending “subtract” > opacity 100% >scale 2 >offset 128 >OK). Then on the bottom layer using the lasso tool with a fair sized feather to select areas you want to apply the smoothing to > gaussian blur and pic appropriate scale, when finished Shift+left click both layers > right click > merge layers.
Lastly I done some localised sharpening in the image by; duplicate layer > desaturate top layer > convert to smart object > filter > other >high-pass > radius of around 6-10 for accessories, shoes etc, radius of between 5 and 8 for features such as eyes, lips etc > apply layer mask >Ctrl+Delete (to fill with black) blush in areas you want to sharpen with a soft edge brush with a low flow 4% - 25%. Then after completing the sharpening, I revisited some of the colour correcting and levels adjustments.
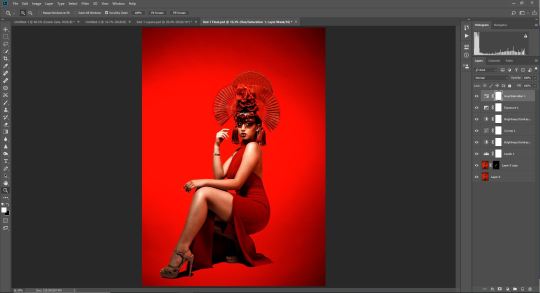
One of the final images ^^^
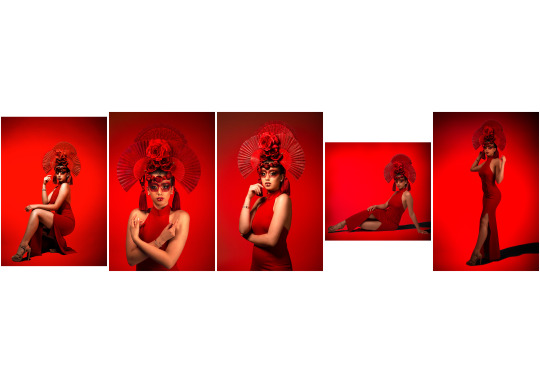
Contact sheet of final 5 images - I pre-selected the photos I wanted to work on in Lightroom before importing them into Photoshop.
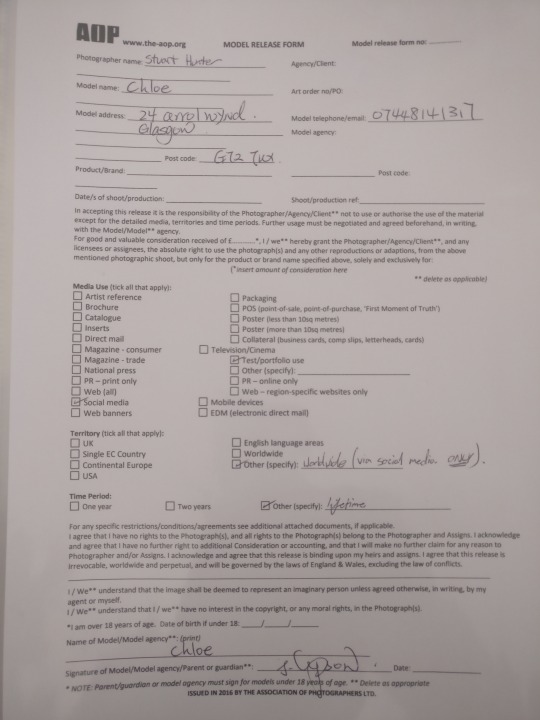
Model release form signed by parent/legal guardian.
0 notes
Text
Reply from practitioner: David Price - 20th April 2018
As a story artist, director, writer and animator, I was wondering what/who was your inspiration to pursue your career? I think it's changed over time, initially it was seeing how my peers were progressing which made me want to push myself to do things I could be proud of. As I got more experience and probably as a result of being mostly in storyboarding, writing grew more of an inspiration. I started writing short stories, small descriptions and playing with words and character traits. This fed into personal projects I always have on the go – so I have a few in development now, - and whilst it's hard to find the time, it's very important to be bringing your own ideas to life, even if it's a slow process to get them realised. As far as external inspiration, there's possibly too many to name, but favourite directors, short films and novels, it could be a photograph or a song – I think if something moves you, you should be able to use it in some way. Not sure if I answered your question there! What did you decide to do after University? I needed a job! I was offered an animation role at A-Productions in Bristol. However when I spent all my money and moved to Bristol, they told me it had been delayed for a few months, and likely won't see the light of day – which turned out to be true. So a week later I'd heard Cartoon Saloon were looking for BG Artists for a TV show (Skunk Fu) – did the test and got offered the job, so had a week to get some money together to get over to Ireland! I was in Bristol just one month, then turned up to what felt like the middle of nowhere, in the fog, not sure what I'd just got myself into. What has been your favourite project that you have worked on? I think the projects I'm working on currently are the most exciting so far, as I'm leading a completely new project in a style I've never done before, but have complete freedom! Unfortunatley I can't talk about the details of it, but otherwise, storyboarding for Shaun the Sheep was an amazing experience, with great crew, and feeling slightly surreal at being in such an amazing studio every day. How do you go about creating storyboards? It depends on the project, sometimes when working freelance I've had to use a particular software like ToonBoom – but usually, I'll thumb the ideas out right on the script/or pencil&paper, work up some main story beats in photoshop, then work around them to get the board complete. I like to use flash as it's quick, and you can create a rough animatic at the same time without much more work. At the moment the clients we have like quite a polished board, so I'll use Photoshop and work into it so it serves as a detailed colour script too. What software do you most often? Mostly Photoshop, after effects, I've never learned any 3D as much as I've wanted/meant to. Mostly I work on 3D projects now and it's given me an even greater appreciation of how great tools such as Maya are. I have dabbled in TVPaint and Toonboom, that's more or less it. What do you like most about animation? Also, did you always want to be apart of the animation industry? I came quite late to animation, went to Uni when I was 27, before that I started as an engineer, then print design, running a print business. Computer programming then multimedia design – so I've tried a few different things before I got to drawing. Now I'm here though, I couldn't think of a better industry to be a part of. There are times when it's hard, frustrating, and you question what you're doing. But persevere, find yourself alongside talented, excited and passionate people, and it's really something I look forward to every day. I love collaboration, and I think you get so much more out of a project when different people are involved creatively. It's important to let go a bit of control and let that happen when you have people you can trust, then pull it back in and utilise what's been added to the idea. For new animators, would it be difficult for them to find work? That depends on a lot of factors. Luck being part of it – but really, if you have a strong portfolio, and a positive, energetic attitude, people looking to hire will be able to imagine you in their team. It's all about selling yourself to a point, but in a good way. I think you have to have a clear goal in terms of your own progression. I think a common mistake is to try and say you are prepared to do anything – that won't get you far. Roles now are more streamlined and specific than ever before, so you have to make sure you're passionate about what you do – and that will show to potential employers. From your experience is the industry a competitive scene? It is, but it's also a supportive, vibrant and friendly one. It can be daunting straight out of university, but it comes back to knowing what you want to do, where you want to be. Then just taking the steps to make sure you're always moving towards your goal.
0 notes