#there's only so much that layers of acrylic paint can do
Text
i pondered whether or not to write tonight but then my HOBBYCRAFT PARCEL ARRIVED so i'm sitting on the floor getting my hands covered in modelling paste like a little arts and crafts gremlin
#the issue with using foamboard for the beehive is the edges#there's only so much that layers of acrylic paint can do#so i'm smoothing each layer out with modelling paste before i glue them together#and then hopefully it'll look cleaner once painted#not the end of the world if i don't get it right#i have eleven months#although i'm also buying fabric to make a bustle this weekend so uhhhhh#craft projects stacking up again#nettle's crafts
3 notes
·
View notes
Photo

I put the october pieces on my redbubble as prints because I think they’re preddy good. happy august are you gonna eat that
#bakuspecial#pokemon#swsh#hi. I am painting my bag#and the sealant turns out to be poison#so its taking! a minute! I'm trying to put as much down in one layer as possible before sealant#because boy oh boy. that sealant is bad. and I also only have one can of it#so yeah. the bg for the thing I wanna do is done I think. I just gotta finish up the (waves hand) the other stuff. yknow the main thing#so! thats my sunday plan. and then hopefully I can finish that up in one go and then seal it in for the last time#and I will not have to breath whatever that is in again. Im suited up btw. I dont have a filtration mask but Im triple med masked up#whenever I use it. and I also wear a long sleeved hoodie jacket#messing around with acrylic and gouache is so fun if not for the consequences#well. thats enough of that. hey if u want a print of these pieces get urself a halloween treat.#my halloween treat this year is hopefully I can hang out with my friends and play funny horror games. itll be so fun#or we all play scrabbles together again and I get my ass handed to me#I know english words sometimes but I am SO bad at counting. I am GARBAGE at understanding the rules of scrabbles.#its so fun to lose at scrabbles tho... I enjoy it :]#I need to sleep now. but I had naan with chicken pumpkin stew today. it was really good. today was great#have a good night guys! hold ur friends hand while walking in the wood okay?
120 notes
·
View notes
Text
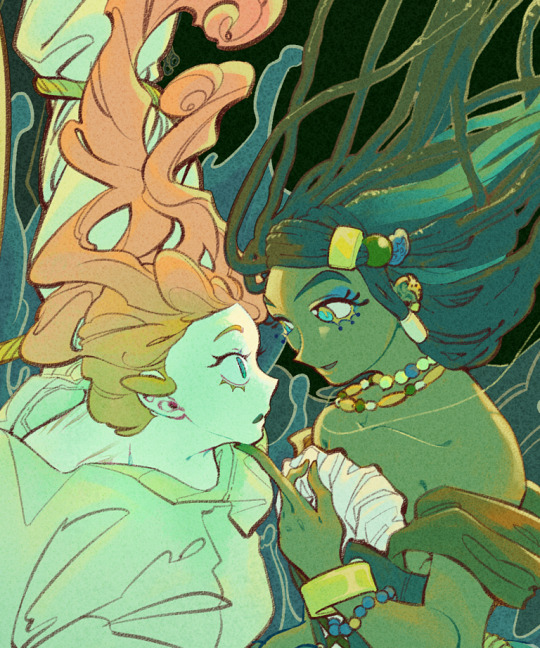
Been thinking about Rafayel and how he shows his love (especially after his newest card trailer).
On the surface, Rafayel seems like he's an open book. He's witty, affectionate, chatty ect ect
But once you dig deeper you realise that he's that way...but only with the person he loves. He's actually quite reserved and doesn't enjoy being the center of attention, even going so far to say his job is a thing of self expression rather than something he actively strives to make money off of.
With the upcoming new 5* card of Rafayel's, I wasn't shocked that we didn't have a kiss or one where he tried to kiss us (and tbh his sweeter form of affection in wanting to cuddle us and snuggle into our neck made my tummy do flips and had me having a near breakdown from how much it made me gooey)
I feel like Rafayel is a yearner to his core, even his interviewer noted as much that he gave an air of 'romance' to him.
The best way I can describe it is; His love is like his profession and his EVOL.
Art takes time, it takes an observant eye and mind. I've grown up with artists my entire life and to make a painting is much more than slapping some acrylics onto a board and calling it a day. It takes tempering, to prepare the board, to build up layers upon the canvas to correct any mistakes without an eraser or undo button.
It's gentle, tending to the whims of the canvas to make a happy compromise of your own.
Onto his EVOL, Rafayel treats a relationship like a firepit. He wants it to have longevity, keeping himself and the fire alight. So instead of chucking a log onto the firepit he nourishes it with kindling, giving it a poke here and here to check on its status while being warmed by the flames.
Rafayel is also horrifically traumatised from previous encounters with love.
Think of it this way;
He was a Prince. Set to be throned as a King and live with his beloved forever.
He set out to find a devout follower to sacrifice their heart to him in turn found himself giving them his own heart and betraying everything because he wouldn't let a pre-destined prophecy rule himself or his beloved.
When he got his love back, in another timeline they were brainwashed and ended up killing him. The absolute agony you must go through, to be maliciously murdered and know that it's by the person you love but not their intention to do so and in your last breath you grant them mercy to die alongside you by singing them to death.
Moving onto Abysswalker Rafayel, the weight of being told you have to kill your love to resurrect your hometown, taking the love of your life on a wondrous journey to know you have to kill them in the end and instead erasing their memories of you permanently to protect them and keep them alive, rewriting a tome for their sake and thus dooming his beloved kingdom and people to be tormented for eternity of his peoples damned screams of death and agony.
Do you ever wonder if he has sat with himself and laminated over this horrifying fall from grace?
Yet he still does it, for them.
After ruminating over this; I wouldn't be as forward as the other LI either.
I think Rafayel is immaculately brave and loyal for even trying again, for still searching for his beloved over years and years.
He has his insecurities, they show when he gets bratty or needy. Quipping at his beloved for not having their sole attention on him, he's meant to be worshipped after all, doted on, praised for having put in so much effort.
Alas, his love doesn't remember, doesn't see the accumulation of sacrifices and things hes done for them.
So he hints, he prods and pokes gently and he starts having them warm up to him again. Braving a tender word here, a lovingly gentle touch there and moving up and forward until he can see that his beloved has fallen in love with him again.
Rafayel is a love that doesn't burn bright, it burns with stability, it burns with loyalty, it burns with truth and gentle care. He would never want to scorch his love.
Rafayel makes accommodations for them, weaving them into his life in any way, if that may be employing them to inviting them on little excursions. Even keeping a watchful eye over them, noticing when they're in need, hurt or just simply making his presence known as a comfortable 'You can come to me'.
He's a gentleman, a romantic...with a little edge (Rafayel audios I'm looking at you, hard)
Anyways, I should not drink copious amounts of caffeine within a short allotment of time. I hope my ramblings have been enjoyable 🤍🪽
#love and deepspace#rafayel#love and deepspace rafayel#rafayel love and deepspace#love & deepspace#rafayel girlie#lads rafayel#mc love and deepspace#mc x rafayel#rafayel x mc
375 notes
·
View notes
Text
CARVING PUMPKINS WITH JJK CHARACTERS


including: satoru gojo, suguru geto, yuuji itadori, megumi fushiguro
contents: nothing but fluff with some crack (?) & two horror movie namedrops
a/n: this is a bit rough cus i just wanted to put something out for the 31st but happy halloween everyone!
☆ . . . satoru loves going above and beyond for any project he subjects himself to, always finding efficient ways to add on little fun or niche details for him to be fully satisfied with the results which is why he opts to choosing a pumpkin that would be considered comically larger than the rest in the patch.
you scold him, going on about how inconvenient it is for not only you two but for the workers as well. he simply scoffs, shutting down your concerns by saying,“the bigger the better, baby!”
embarrassment fuels your body as you watch three of the field patch workers hassle with effort to strap the enormous round pumpkin onto a truck for it to be taken home. you glance over at satoru, seeing nothing but specks of light in his eyes with a beaming smile that shines so bright. you could seriously choke him right now.
miraculously, after getting the pumpkin through the door of his home, the carving starts. he changes his mind about the design at least three times even asking you to pitch in for some expertise. after an hour later, you’d come to the conclusion that there’s no way a creative design could be easily done with such huge material; opting to just do a simple smiling face (much to satoru’s dismay.)
☆ . . . suguru had cleared his schedule beforehand for this day, dressing nanako and mimiko warmly for a cool autumn afternoon with you. the day consists of corn mazes, trying candy apples, buying the girls their halloween costumes, and of course, picking pumpkins to carve later in the evening.
the faint dialogue from the movie coraline plays in the background as laughter fills the joyous air. you and suguru provide assistance to nanako and mimiko with their creation while simultaneously giving them the chance to takeover their craft at anytime.
nanako chooses to do a hello kitty design, whereas mimiko did a standard jack-o-lantern face replacing the triangular eyes with hearts. suguru’s pumpkin on the other hand is etched with beautiful meticulous swirls and stars covered from bottom to top.
after the tiresome evening you both put the girls to bed, kissing them goodnight and tucking them in gently. suguru proceeds to then use four flameless candles to light up the pumpkins and put them on the pouch while you set up a new movie; the conjuring.
☆ . . . yuuji is filled with absolute glee when you agree to carve pumpkins with him. he can’t help but fondly smile to himself watching your bottom lip find solace between your teeth whilst your brows furrowed in concentration as you attempt to push your tool through the thick layers.
somwhere along the line, the slimy guts that once reside in a separate bowl, is playful getting tossed around in a war that not one of you can remember who initiated it.
fits of giggles and attempted hushed footsteps behind pieces of furniture can be heard, with not a single care in the world of the eventual mess that you’ll have to clean up. yuuji doesn’t mind though so long as he can be by your side during it.
the fight calms down, the pumpkins get finished, the mess is cleaned up and the two of you are snuggled up in his bed watching a nightmare on elm street. with him providing you comfort whenever the jumpscares get a bit too frightening.
☆ . . . megumi actually prefers to paint pumpkins rather than carve them. his reasoning being that painting provides him an artistic range that pumpkins ironically don’t, however, that doesn’t stop him from indulging in the activity to spend quality time with you.
sitting opposite from each other with old newspapers spread out on the wooden floors of his dorm room, megumi softly dips his thin paintbrush in the white acrylic paint forming tiny ghosts on the surface.
he steals a couple of glances from you and when your eyes finally met his own, his heart skips a few beats with a small pout on his lips once he feels blush creeping up his face. you turn over the pumpkin you were working on and megumi’s mouth slightly agapes.
it’s a person? or something resembling of a person with spiky hair. megumi groans once he figures out you carved —or at least attempted— a portrait of him. he snickers then reassures you that you tried your best, soon setting aside his painted pumpkin he picks up a new one getting ready to carve you a portrait of yourself.
reblogs & feedback is extremely appreciated !! <3
#gojo x reader#geto x reader#satoru gojo x reader#jujutsu kaisen#gojo x yn#gojo x you#gojo fluff#geto x you#getou suguru#geto suguru x reader#geto x y/n#suguru geto x reader#geto x yn#getou x reader#getou fluff#gojo smut#megumi x reader#megumi fushiguro x reader#jjk megumi#megumi x you#megumi x y/n#megumi fushiguro fluff#yuuji itadori x reader#jjk drabbles#jjk x reader#jujutsu kaisen x reader#jjk headcanons#yuji x reader#jjk scenarios#megumi fluff
358 notes
·
View notes
Note
enemies to lovers with sean? 🫶🫶
I am going to be really honest this was fucking hard. I love enemies to lovers but it is so difficult to really bring out the tension in a short drabble like this.
But still thank you so so much for the req and I hope you like what I did here :)

Canvas of Conflicts
The sun hung low over the Seattle skyline, casting long shadows through the windows of the art department at Blackwell University. Sean Diaz stood in front of a large canvas, his hands stained with a mix of acrylics. He was deep in his zone, creating a piece that blended surrealism with street art—a signature of his evolving style.
Across the room, you sat hunched over your laptop, typing furiously. Your focus was on an in-depth analysis of Baroque art for your Art History presentation. The sharp clacking of keys was the only sound that could rival the scratch of Sean's brush on the canvas.
The class was a melting pot of creative minds, and your professor often encouraged debates. But when it came to you and Sean, these debates often turned into heated arguments.
“Diaz, you can't just slap some paint on a canvas and call it art,” you snapped, glancing up from your screen. “There's no substance, no historical context!”
Sean paused, turning to face you with a smirk. “And you can't just analyze art to death, Y/N. Sometimes it's about feeling, not just thinking.”
The tension between you two was palpable, sparking almost every class. It wasn't just a clash of specializations—it was personal. You both carried an undercurrent of competition that bled into every interaction, whether it was a classroom debate or a chance encounter at a campus party.
One evening, the head of the department, Professor Henderson, called both of you into her office. Her stern expression was enough to make you both fall silent.
“I’m assigning you two to work together on the upcoming art exhibition,” she announced, her tone leaving no room for argument. “Your task is to combine your skills—Sean’s fine art and Y/N’s historical analysis—to create a cohesive presentation. I expect nothing less than excellence.”
The news hit like a bombshell. As you exited her office, you and Sean exchanged a look of mutual disbelief and dread.
“Great,” Sean muttered sarcastically. “Just what I needed.”
“Trust me, the feeling is mutual,” you replied, rolling your eyes.
The next few days were filled with awkward meetings and forced politeness as you brainstormed ideas. It was clear neither of you were thrilled about the partnership. However, as the deadline loomed, the gravity of the task began to sink in.
One late night in the studio, surrounded by sketches and notes, a breakthrough finally came. Sean was experimenting with a new technique, layering colors in a way that seemed chaotic yet intentional. You watched, intrigued despite yourself.
“Try using a bit of chiaroscuro,” you suggested cautiously, stepping closer. “It might help highlight the depth.”
To your surprise, Sean didn’t snap back. Instead, he nodded, adding a darker hue to the canvas. The effect was immediate, adding a new dimension to his work.
“Not bad, Y/N,” he admitted, a hint of admiration in his voice.
You smiled slightly, feeling the ice between you begin to thaw. “Thanks. And I have to admit, your work has a certain raw energy that’s hard to ignore.”
As nights turned into early mornings, the studio became a place of shared ideas and mutual respect. You found yourself laughing at Sean’s jokes, and he began to listen to your critiques without defensiveness. The friction that once defined your interactions gave way to a synergy that neither of you had anticipated.
One night, as you both sat on the floor amidst scattered sketches, Sean handed you a cup of coffee. “You know, I’ve been thinking,” he said, his tone unusually serious. “Maybe we’re not so different after all. We both want to understand art, just in our own ways.”
You nodded, meeting his gaze. “Yeah, I guess we do. And maybe… just maybe, we can learn from each other.”
The final days before the exhibition were a blur of activity. You and Sean worked tirelessly, fine-tuning every detail. The end result was a stunning fusion of artistic expression and historical context, each element enhancing the other.
On the night of the exhibition, as you stood side by side in front of your collaborative masterpiece, the applause from the crowd felt like a distant echo. You turned to Sean, your heart pounding.
“We did it,” you whispered, a smile spreading across your face.
Sean’s eyes softened as he looked at you. “Yeah, we did.”
In that moment, the competitive tension that had defined your relationship melted away, replaced by something warmer, something more profound. As the evening wore on, you found yourselves gravitating closer, the unspoken feelings finally surfacing.
Later, as you walked together under the soft glow of the campus lights, Sean reached for your hand. “You know, Y/N, I’ve grown to really appreciate your perspective. And… well, I’ve grown to appreciate you.”
You squeezed his hand, your heart swelling with affection. “Same here, Sean.”
And as the night enveloped you both, the journey from rivals to partners, and finally to something more, felt like the most beautiful piece of art either of you had ever created.
#life is strange 2#sean diaz#lis2#lis2 sean#lis2 sean diaz#sean diaz x reader#enemies to friends to lovers#enemies to lovers#enemies to friends trope#lis2 headcanons
23 notes
·
View notes
Text
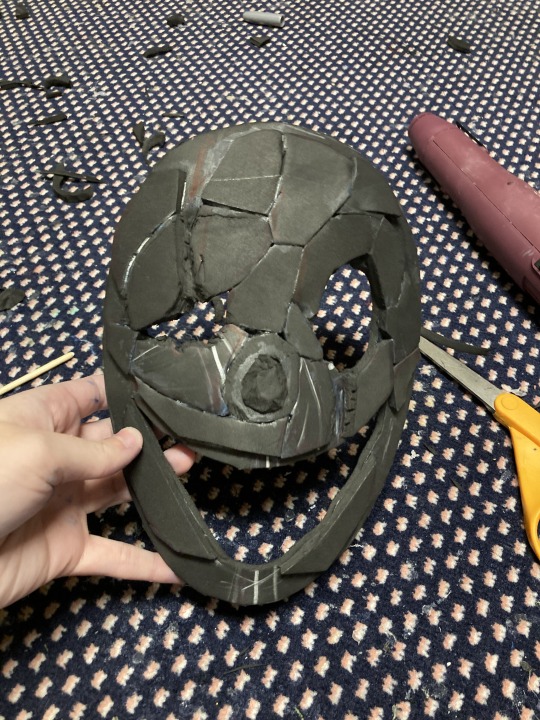
@kanrix too many pictures to put in a reply or anything so i'm just gonna make a post FHLDSKJFHDLSKf this also goes out to anyone else who could benefit from my little gaster cosplay tutorial fhjkghkfg
aight this is the earliest picture i have but basically I cut an oval out of 4mm foam, and used scrap pieces of the same size foam that i just had laying around to do another layer on top for added support and thickness. after that i did my best to roughly mark where my eyes, nose and mouse were and cut the eyes out so that they would line up with my own, and used the markings for the mouth and nose to cut a hole into the inside of the mask for my nose to fit into. the mask has a higher layer of foam only on the very tip of the nose because i had to keep my nose from sticking out or pushing the mask too far off my face lol.
anyway after all of that i used a heat gun to heat the foam (WITHOUT melting it and preferably in a well-ventilated area) on both sides and then held it to my face in position to help it mold better to the shape of my head. it looked like this when i was done (i also cut into the upper layer of foam to make the eye scars)
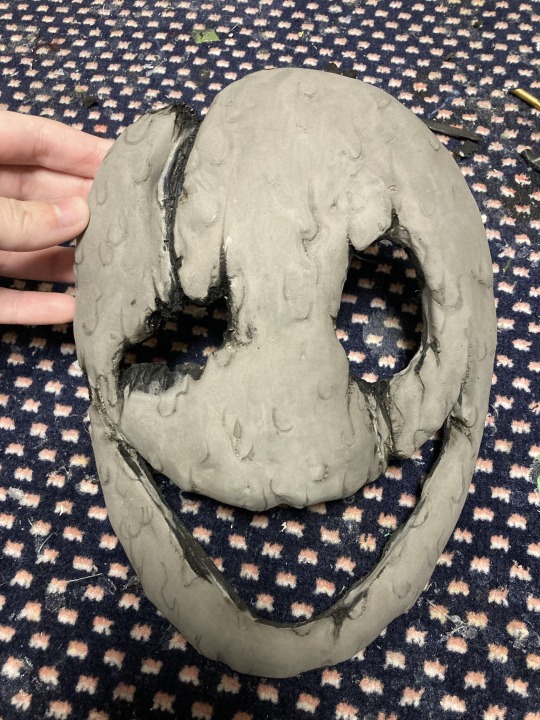
after that I covered the entire thing with this amazing thing called foam-mo, it's basically like foam in a water-based binder that behaves like craft clay. it's easy to work with and SUPER lightweight when it dries and it's absolutely perfect for making organic textures
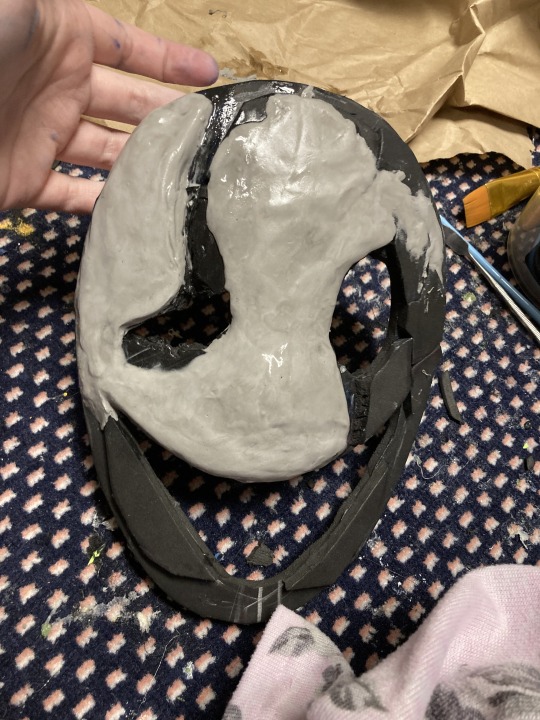
it lost a bit of the dimensionality in the drips after it dried, but I just went over it with another layer where I wanted more texture, and used a dremel tool with a sanding bit to sand down parts that I wanted more depressed.
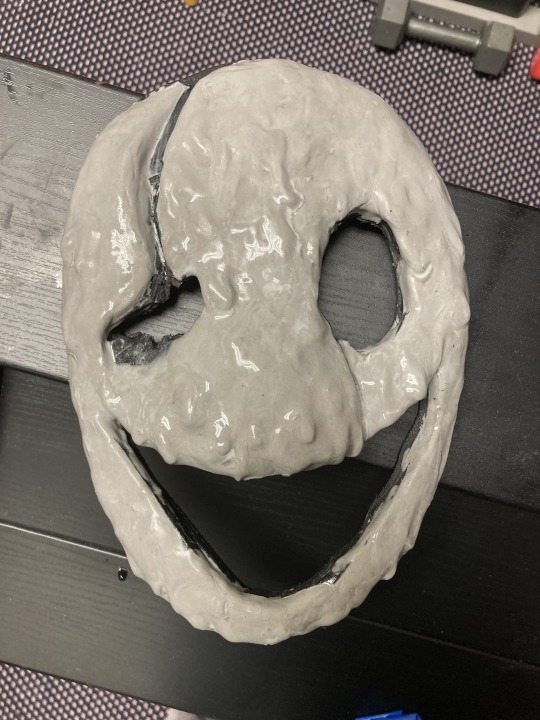
then after that were the first and second paint jobs. this included using an ultra dark carbon nanotube ink in the scars to get them as black as possible (and matte). after the second paint job I used a type of fabric called "speaker cloth" to cover up the eye and mouth holes. I hot glued the speaker cloth down from the inside and then painted over the fabric on both sides with fabric stiffener on the mouth hole ONLY (it can make it harder to see through the eye holes) since the mouth hole is so wide and is most subject to the shape distortion from how the mask was heat-shaped.
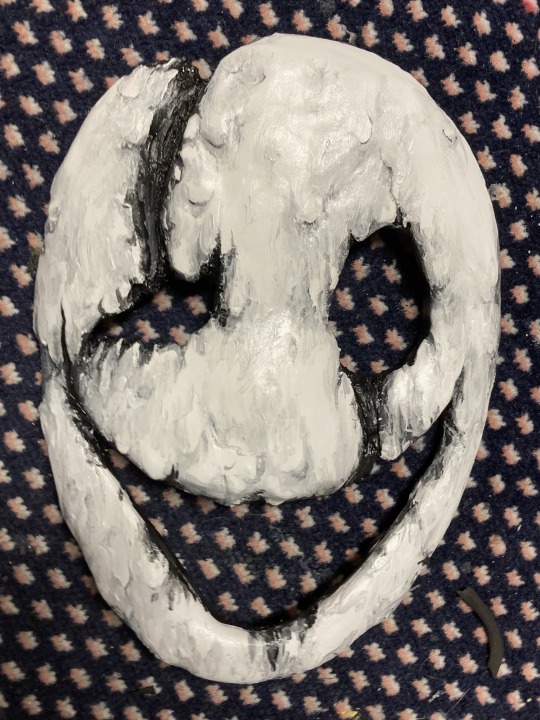

then finally the last paint job which included final shading touchups AND some extra work with white puffy paint, which I used to give the effect of the face dripping down.
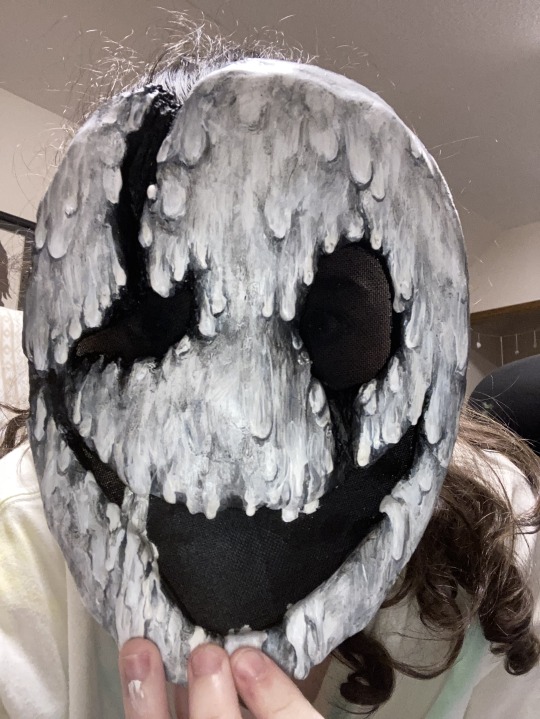
the very last step was adding the pupils as a dot of intense blue glow in the dark paint. it took a few coats to get it thick enough, and then on top of the bead of glow in the dark paint i added a tiny dot of plain white paint to make them pop even more. add a 1/2 inch elastic strap around the back of the mask glued down on the inside and you're done!
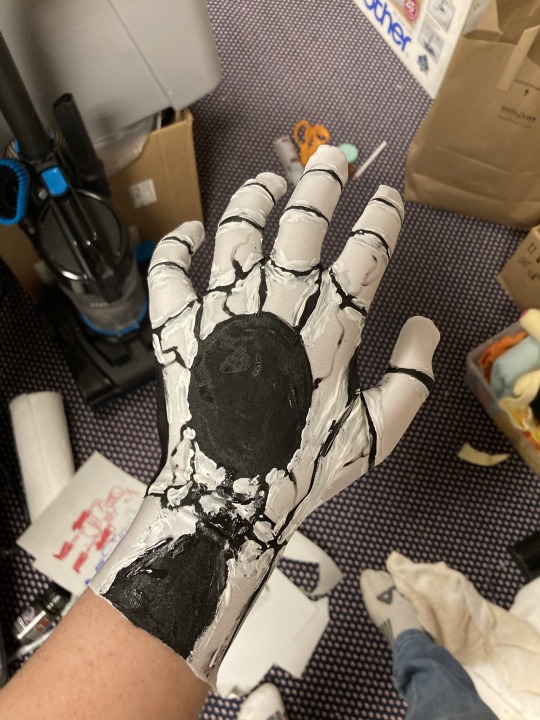
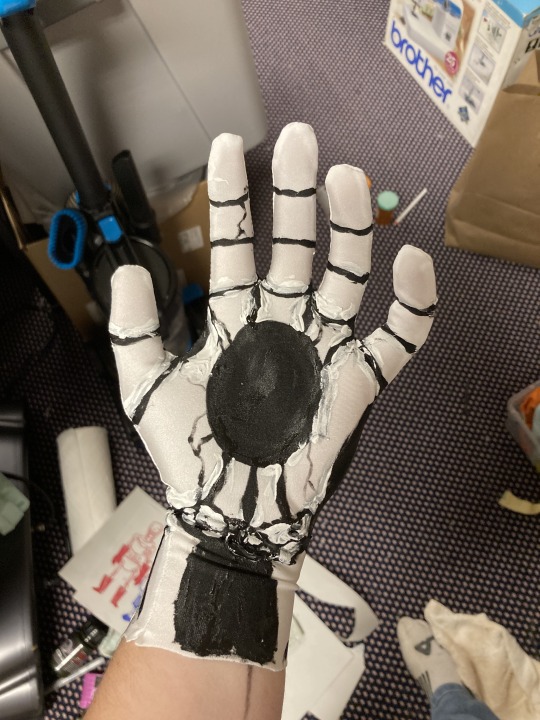
also, here's some pictures of the first glove I painted, if the reference would be helpful. The gloves were sewn using a self-made "hand turkey" pattern from tracing the shape of my hand onto paper. it's not a perfect pattern, but it's serviceable enough for stretchy fabrics. and I did use a stretchy fabric: white moisture-wicking athletic wear fabric, because I was worried my hands would sweat a lot. and I was right! but this choice of fabric makes that much less of a problem. and also makes you feel like your hands are freezing off (being in the void simulator ig)
the painting job was done with just plain black and white acrylics mixed with a fabric paint medium. i traced the finger joints where my fingers actually creased, and just kind of... did my best to make the palm holes match up lmfao
As for the cloak and robe, I did sew those both myself, so I can't point you to a seller. BUT what I CAN do is tell you what patterns and fabrics I used and whether or not it was worth the intense labor of love! (short answer, for the cloak? yes! for the robe? NO.) I'd have to go dig up the patterns though, so let me know if that's of interest to anybody
but yeah, hope this post is informative and potentially helpful!
#mine#my art#art#cosplay#gaster#undertale#deltarune#utdr#w.d. gaster#cosplay tutorial#gaster cosplay#long post
617 notes
·
View notes
Note
i wanna know how you learned how to render, it's so yum 😞💔
thank you!!! I'm glad u like it. I can try my best to explain my process but its very much a 'feel it with my heart' experience. This is gonna be long and incomprehensible but I'm gonna try:


If we're talking about the (above) garth & baby arthur jr pic or the bloody pete pic, I'd say i started to actually render like that in maybe high school art class (they were much worse then ofc because i have years more practice now)? Obviously my process now is different than it was back then, but before I actually started physically painting canvases with acrylics I usually just did line art and color without the blending-painting pizzazz.
Thats actually where I get my weird random interspersed colors in my coloring as well. Acrylics dry super fast and a high school art class is like 45 minutes so I'd have to totally mix a new pallet the next day. Not that I couldn't color match, but its annoying and having variations with colors or just mixing something up to fill in gaps looks neat if you get it right. If it looks bad just paint over it, but its worth it to try.
My process with these is almost exactly like my non painterly rendered ones, just with steps after. Also, you can get away with a lot when not fully rendering, but when i do render PHOTO REFERENCE is to die for. Specifically for the lighting. I can't emphasize this enough. By the time i'm done with a drawing my search history should be like "knees. Knees sitting. Knee anatomy. Harsh light photography. Curly hair. baby. J. C. Leyendecker new year baby" + 8 pictures of u doing whatever pose you're trying to do.
Anyway, the process for me is usually: vague sketch > carve out the lines/neater sketch > flat colors > basic shading/rendering > color adjusting sketch lines (usually from black to dark red) > collapse everything into one layer & get to WORK
I know the 1 layer thing is scary, but thats life. Its easiest to adjust things that way (for me). No need to worry about layers and blending modes cause its all right there. I usually duplicate the layer the drawing is in before I start on something crazy just to reassure myself that if I fuck it up I can go back. So a lot of the time my layers in procreate are progressively more rendered stages of the piece lol.
Now that Im here trying to explain this im blanking on how to actually express it. Lets see. I can run through some general stuff:
For both of those artworks (baby & pete) they're 100% made with HB pencil on procreate (a default brush! I've never downloaded any new brushes cause im lazy). I actually made a brush explanation for someone a few months ago I can put that right here:


hopefully those are readable. sometimes tumblr flops lmk if my writing is illegible
the eraser tool is your BEST FRIEND!!!! The way I get my lines and shapes and whatnot is by making big ass strokes and then erasing until whatever I'm looking for reveals itself. Here's a video of that process from the aquababy pic. Ignore the jerky pauses lol. also there's the reference photo!:
rendering itself is really hard to describe. Basically just throw color at it until it works out. (just tried to add a video but tumblr says only 1 video allowed


I hope this is helpful somehow! Just threw a ton of stuff at you. If you want anything more or the actual video or smth just let me know!
#this is A LOOOT#but there's gotta be something here thats maybe helpful#hope it makes any semblance of sense#asks#chooeychoco#feel free to dm me too for anything else lol#that goes for chooey and anyone reading this. id like to say im chill riiight 😋#and if dming isnt ur thing the ask box is right there#this post my self destruct w that video. hopefully tumblr powers through and can post it#sorry if this is crazy im crazy#*MAY self destruct. Lordy
24 notes
·
View notes
Text
Tired of people going 'all goth fashion is super easy to diy and everyone should do that instead' because like... yes a lot of it is but some very much not. So some thoughts on how much I'd recommend diying various goth fashion stuff as someone who does a lot of it:
Simple jewellery is definitely much better to diy and particularly chains and stuff. I remember going to dangerfield one time and they had a chain with a bat ornament on in for 20 dollars 🤣 ... you can get a bunch of chain from the hardware store pretty cheaply and the exact same bat pendant on it I had got like 20 off etsy for 5 dollars. It usually doesn't take that long and extra tools e.g. pliers are helpful but not necessary - 10/10 absolutely recommend for all goths or other people interested in gothic fashion
Same thing goes for distressed clothing/fishnet shirts there are tons of tutorials for that kind of stuff, and it generally doesn't require that much time, experience or materials 10/10
Minor clothing modifications e.g. some tailoring, adding/removing parts, mending damaged old clothing, changing buttons - this is something that is really useful in everyday life, usually doesn't take that long and is very useful for turning normal clothing into more spooky stuff 9/10
Designs on clothes or patches: if you get some fabric paint, screen printing ink, bleach or even acrylic you can paint designs onto clothing pretty easily. Personally I like dilute screen printing ink as it gives the nicest surface, but it can be a bit of a pain to use as you have to do a lot of layers, and it doesn't colour the fabric intuitively in the way that fabric paint or acrylic do 8/10 - would recommend very strongly to anyone who enjoys art, and recommend trying at least once to people who don't enjoy art as much (you can always make stencils), but it does take a long time and you need some materials. Also, for patches particularly for small bands it can be better to order them from the band to support the artist, but also lots of bands don't have patches or merch or international shipping to some countries makes it not accessible
Embroidery: often looks really good and professional in a way that painted designs don't, takes absolutely ages. 7/10 - would recommend very highly for people who enjoy textile stuff and maybe trying a bit for everyone but yeah if you don't enjoy it it's a pain
Smaller articles of clothing: I've made some waistcoats and shirts and stuff which have been pretty fun and it's really good to be able to do specific designs you wouldn't be able to buy (e.g. my skeleton one) and get stuff to fit right. They were all hand sewn and took a pretty long time (however you can also do it while listening to online classes or whatever), + a bit of time to learn techniques and stuff. Definitely a cheaper than buying them 6.5/10 - do it if you enjoy textile art stuff but will probably be a really painful experience if you don't and you're hand sewing. Also useful if you've got sizing or dimensions that mean you just... can't buy stuff that'll fit which is how I got into sewing
More complex sewing: I've made 2 (well, finished one and 98% of the way through another) long spooky coats and one cape with really complicated edges and embroidery and stuff. Coat 1 was entirely by hand out of not great fabric and took absolutely ages but was definitely vastly cheaper than buying it from the store, and it fit well and everything. With the cape, I got repetitive strain injury in my thumb that still is a bit of a problem 3 years later! With the final coat it was mostly by machine and then touching some stuff up by hand e.g. edges of the lining, making the eyelets and stuff, but it still took ages. Also, something I never see people talking about with diy goth clothing is how hard it is to get the materials - there were only 3 black brocade fabrics available in my city - One was really bad quality and I tried to make a shirt out of it, but it kept falling apart. One was 150 dollars a meter. The one I ended up using was really nice and reasonably priced, but I got the last 2.5 meters of it so it almost wasn't an option. So when people talk about diying clothing being cheaper it can actually not be that much because a clothing business can get fabrics in bulk + unless your city is really big there are probably not many options, so there's also shipping costs if you then need to order fabric. Out of curiosity I compared how much the coat cost in terms of materials to the price of a similar looking coat off dracula clothing which is a pretty well known and apparently quality materials and ethically made goth fashion shop and it came out a bit cheaper but not massively so (not counting shipping...) so 3.5/10 - fun to do if you enjoy textile art as a hobby, not even vaguely a practical alternative to buying a coat
And then there's other stuff like more complicated jewellery making and leather work which idk much about
39 notes
·
View notes
Text
“This supposed to be art?”
headcannon where Bakugou is friends with an art major
he doesn’t know shit abt art
kinda motivational in a weird way
kaws rug DUPE
* * *
Your knees ache from kneeling on the ground for so long. Black sweatpants now littered with blue and green splotches as you add the finishing touches on your art project. The tarp you laid out on the floor of your dorm sticks to the palm of your hand as you steady yourself on the ground to lean forward and paint this giant replica of your head. Your art teacher thought it would be a great idea to make your class recreate their heads into a 3D model using cardboard and glue guns. It’s supposed to be an abstract piece and thank god for that allowance because what you’ve done so far has made the face look unidentifiable. Bullshitting and calling it an abstract creation on critique day is gonna save your ass. And your grade. Dipping your brush into the turquoise paint you were using for 1/4th of the head, your hand slips a bit as a knock on your door breaks through your concentration.
You grumble a gruff “Come in,” voice slightly gravely from not having talked in a couple hours due to your hyper focus. Facing away, you hear your dorm room door click open, the hinges squeaking a bit. Standing with his hand encircling the door knob is Bakugou, broad build taking up majority of the doorway.
“Called your name like fifteen times and you still didn’t respond. Had to make sure you weren’t up here plotting my demise or some shit.” You give an absent minded hum as a reply, all too focused on applying never ending layers of blue paint on cardboard that continues to suck it up like there’s no tomorrow. Thirsty bitch.
Bakugou watches your uninterested form from where he stands and his face slightly twists in confusion as he tries to discreetly peek over your shoulder at what you’re doing. However all he can see is what appears to be a blue mess. The smell of acrylic paint only now registering in his mind and nose. Deciding to be curious, he takes a step forward towards your bent over form, letting the door close behind him. The plastic tarp you laid out crinkles under his socks, earning a grunt of disapproval from you. “Watch your step. If you track paint on my rug man I swear to god-”
“Nobody’s gonna get shit on your fake ass KAWS rug. Calm the fuck down. Just tryna see what’s got you so holed up in here.” He’s directly behind you now, leaning over your shoulder at a better angle to see what you’re working on.
“Art project. It’s due Tuesday so I’m trying to get as much done so I can chill this weekend,” you say, not once looking away from your creation.
“Well what the hell is it supposed to be?” His brows are furrowed together as he tries to make out whatever the hell it is you’re making.
“My head.”
“Your what.”
“My head. It’s supposed to be my head.”
It’s silent for a moment, until it’s not.
“This the most trifling shit I’ve seen in a minute.” You let out a loud and exasperated sigh, looking at him over your shoulder.
“Didn’t your mother ever teach you if you don’t got shit nice to say, keep your mouth shut?” He’s usually always a dick but today was just not the day to test you. The project is frustrating enough as it is.
He shrugs before speaking. “She taught me not to lie.” He chuckles lightly before squatting near the head, almost level to your seat on the ground. “That was a joke if you couldn’t tell.” You cave a little as you both stare at your nearly finished project.
“Well since you love honesty, tell me straight up if this is ass or not.”
“I don’t know shit about this so my opinion wouldn’t really matter much. Just keep doing what you’re doing.”
“But does it even look like art? Like something you’d see in a museum?”
He looks at you with a raised eyebrow. “This supposed to be art?”
“Dawg I literally told you it was an art project for my art class.” Your eyes follow his fleeting form as he stands up and heads for the door.
“Well art or not, just keep going til you get it done. Then you won’t have to look at it anymore if you’re not satisfied with it. Problem solved.”
Your eyes retreat back to the blue mess and you nod. “Makes sense I guess.”
“Majority of the things I say usually do. Oh and the next time I have to call you fifteen times I’m blowing your door down and throwing out your fake ass rug.” And with that, he leaves.
You can’t help but shake your head and let out a soft chuckle before resuming your task. Just get it done.
#bakugou katsuki#bakugou headcanons#bakugou katuski x reader#mha imagines#mha headcanons#mha x reader#bakugou x reader#mha bakugou#drabble#mha drabbles
186 notes
·
View notes
Text


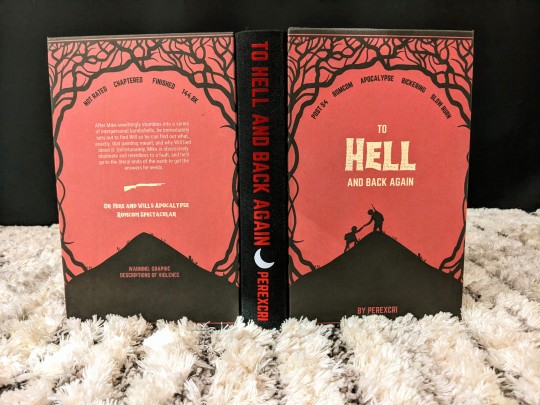
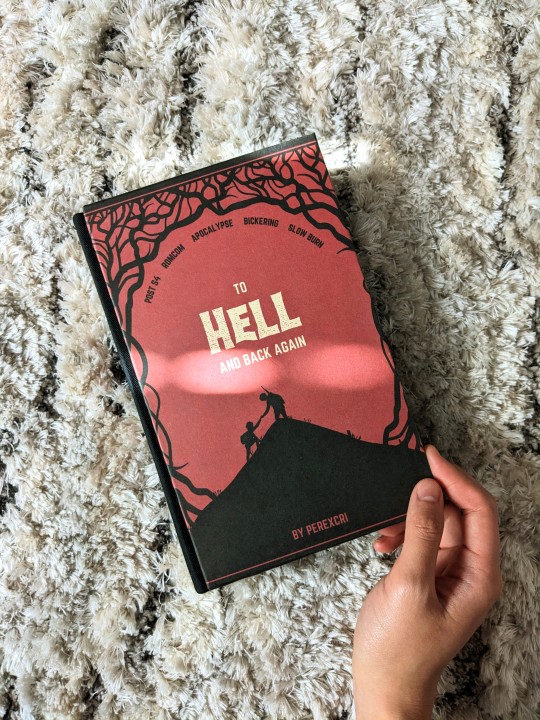
GUESS WHOSE BOOK ARRIVED TODAYYYYYY SO NOW I GET TO POST PICS!!!!
This is To Hell and Back Again, by dear dear @perexcri. Cover design by @byierficrecs (thank you SO much for letting me use your design!). Binding by me!
I'm not in ST fandom, but I had the pleasure of skimming this fic while I was typesetting, and can I just say? I'm rooting for these kids SO hard. I'd go to hell and back again for them--[GUNSHOT]
But in all seriousness, Leah's writing is whip-smart, sincere, and funny as hell. I cannot recommend it enough to anyone who is a fan of these crazy kids. Her ao3 is a veritable treasure trove of excellent byler stories, which you should absolutely check out right now go do it!!!
As usual, process chatter and more pics, under the cut! <3
WORD COUNT: 144k
FONTS:
Title: Hellprint
Heading/Chapter Headings/Spine Titling: Norwester
C4 Summary: Roboto Condensed
Main Body Text: Garamond
COVER MATERIAL: Epson Premium Presentation Paper Matte, printed on my Epson Ecotank (more on that later baha)
HEADBANDS: Trebizond silk thread in the colors Garnet and Black
EDGE PAINTING: Acrylic paint in Crimson and Black
TITLING: Red iron-on foil for the text and white HTV for my maker's mark. Cut by Charlotte, my Cricut!
BINDING:
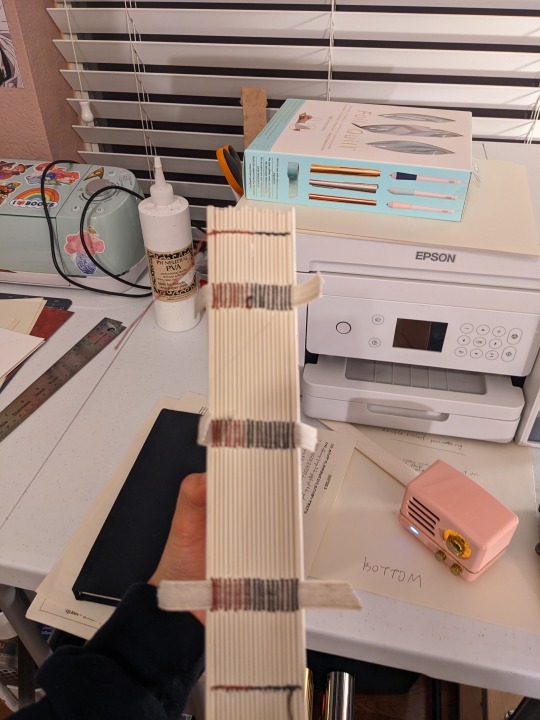
This was my first go at a German Bradel binding! I've seen lots of Renegade folks use this method and am so psyched I got around to trying it myself. I modified DAS's approach a bit and tipped on endpapers instead of sewing them in (there were a lot of new things to learn so I decided to shelve sewn endpapers for the next binding XD). I also only had 2.0 mm bookboard instead of 1.0 mm, so instead of layering two of the same boards like DAS did, I instead used one 2.0 mm board and one very thin piece of cardboard to create the groove for the hinge. The original article that DAS bases his video on actually uses boards of two different sizes too--a "thick" board and a "thin" board--but I still want to experiment with DAS's way of doing it, especially since I think it'll be easier to do cutouts on thinner board.
As far as matching the groove with the hinge, I think I did pretty okay for my first try! One board is definitely better fitting than the other though baha. There's always room for improvement, but hey that's where half the fun is anyway (and also you can't tell after the case-in whew), so I'm not stressed about it :D

COLOR SCHEME:
Nearly all of my design decisions for the color scheme were based off of @byierficrecs's gorgeous cover design! They were so generous in letting me use their cover and answering my questions about fonts, for which I can't thank them enough. And with so many wonderful elements to work with, it was so much fun to tease out the elements I loved from their work!
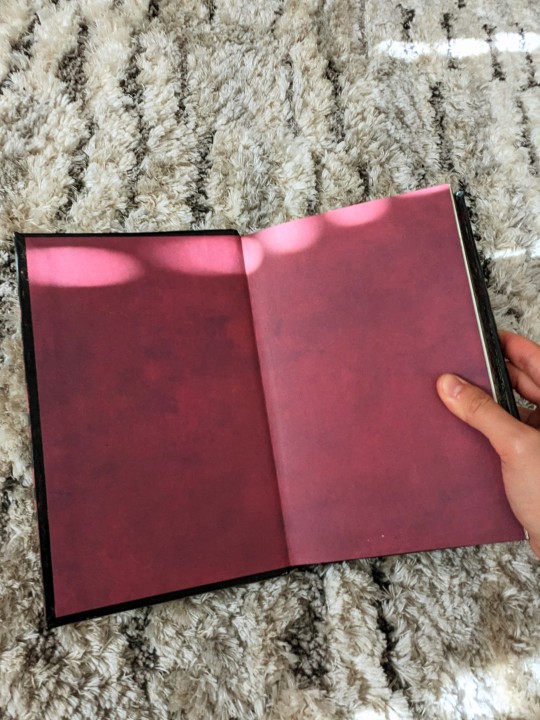
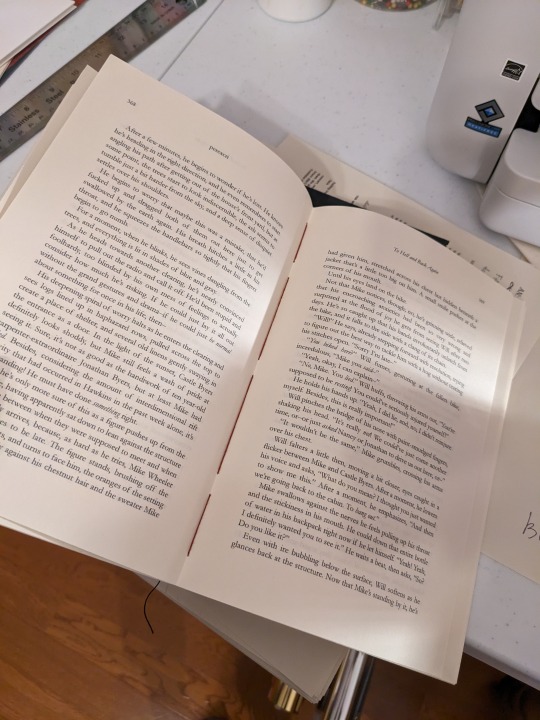
I decided to keep with the theme of red/black, which I also thought was fitting for a ST fic set largely in the Upside Down. Thus, black painted edges with red vines, as a kind of inverted, "upside down" continuation of the cover:
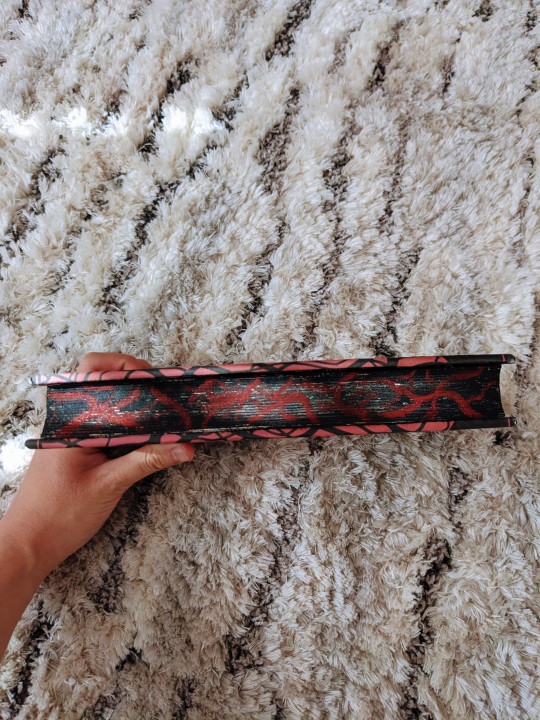

Even the thread I used to sew the signatures is red/black! :3 (please also ignore how the picture of the textblock is not focused on the actual textblock ajsldkfjs it was very late when I took that photo)
COVER PRINTING:
This was my first time printing a cover on my new printer (!!!), and BOY oh boy was it an adventure. Figuring out the dimensions took a second, but not as long as it took me to figure out what settings produced something I was happy with. Behold, all my test prints:
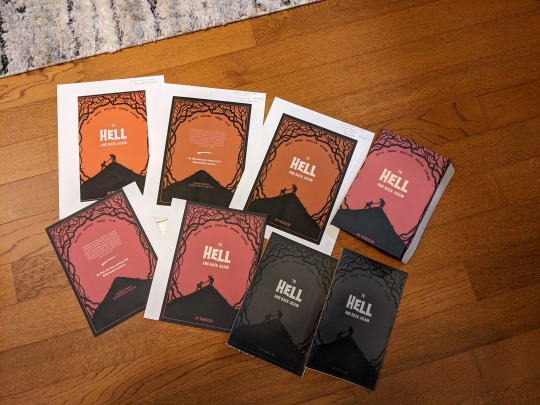
Very long story short, let's just say now I understand why being a prepress color specialist is literally a career you can have in publishing LOL.
Also, for some reason I could only sometimes get the bleed to work? Basically what I ended up doing was painting over the parts where the design didn't quite extend over the turn-ins, using with the same black acrylic paint I used for the edges. You can see this more clearly in the photos I took of the groove, and the endpapers covered the messy bits when I cased in:

THE MAIN INGREDIENT: LOVE
Finally!! The most important part of the process!!! HI LEAH ILY!!!! This fic is special for a lot of personal reasons, but chief among them is LOVE!!!! Your A/N's made me tear up when I first read it, because AH! You read my words of love!!! And went and wrote hundreds of thousands of your own words of love!!! And now I hope I've given that love back once again :3 And on and on we go, ad infinitum, until we are relieved of the curse of literacy and greet whatever comes after all this, thanks be to Todd. But until then, I'm so glad I get to shoot holes out of bagels and scream about radioactive tumblr posts and cry over fake people with you, friend :] Truly, peace and love on FUCKING Planet Earth. We are making it and we will all go together when we--[ANOTHER GUNSHOT]
I'm so excited to see where we're going, and what other stories we have to tell. But for now: EEEEEEEE YOU WROTE A BOOK!!!!!!!
<33333!!!
#Stranger Things#Byler#bookbinding#fanbinding#ficbinding#To Hell and Back Again#perexcri#friend fic!#<333
316 notes
·
View notes
Text
Lethal Company Circuit Bee Hive!
Metrocon was a blast! But we were working on our costumes up to the last second so it is only post-con that we can share what we were doing 😂 As soon as we decided to cosplay Lethal Company, we were coming up with which props to carry. I immediately latched on to the hive. 1) It's adorable 2) it has led to so many hilarious and despairing deaths that I can't help but think of it first. It's a perfect "Do it for the company!" kind of prop.
Behold the Bee hive!
I went full-tilt middle school prop for this thing. I believe paper mache is an underrated prop option. It costs almost nothing, it's sandable (not that I did much of that; what is time?), it's strong, it takes paint great, and you can build onto it easily if you want the outside to be something a little more refined. I have, in the past, fiberglassed and XTC'ed over a paper mache base. Both work. But I didn't do that for this hive.


Instead, I went to party city and bought the cheapest balloon pack I could find. In classic elementary fashion, I paper mached over a balloon (2 layers), then popped the thing so I had a sphere to work from. I did not cover the bottom of the balloon. There's a 6 inch diameter hole at the base so that it sits without rolling and so I can shove stuff inside. Because yeah, I did shove my flashlight in there a couple times. I only have so many hands.
I cut empty paper towel rolls in half and used an x-acto blade to cut slits in them, then hot glued them around the sphere to give it the comb shape from the game. I mached over the rolls, about 3 layers, then did a layer of wood filler and sanded to even things out just a smidge and fill gaps.


All of the paint were acrylics. I used 3 shades of yellow in awkward stripes to mimic the changing, uneven shades from the game. Then black with a tiny brush to make the combs. Absolutely no measuring went into this thing; it's all eyeing and vibing while listening to Adventure Zone 🤣
We bought two strings of bee lights to cover the outside. The battery packs went inside the hive with the switches toward the opening so I can easily switch the strings on and off while holding it normally. The bees were hot glued in place, of course.


And if you saw me between photos at the con, you know I was tossing this hive around and putting it down everywhere, including on top of my helmet. The thing was sturdy and balanced and everything I needed it to be to survive a day at the con.
Thanks to @therepo-man and @quintdophoto (On Insta) for the con photos! Ngl, I think it's the coolest shit when you can see the bees reflected in my helmet visor.
I spent so long balanced on one foot because you gotta grab the hive and book it or you're not doing Lethal Company right, right? 😂
#lethal company#lethal company cosplay#metrocon#metrocon 2024#metrocon2024#cosplay#artists on tumblr#themew
12 notes
·
View notes
Note
seeing you make oil paintings of elim garak has changed something about the way i perceive art, both in what others make but also in what i am capable of making.
it’s probably due to learning mostly euro-centric art history, but i’ve always thought of oil paintings as like the peak of painting ability? like, it’s fancy and it takes a while so i thought that it must be the best (ignoring the fact that my artistic field is mostly in acrylic paints and 3D sculpting and yet i still consider it very good). and i’m still working on disproving this sort of mentality that there are mediums inherently better than others, because it’s incredibly limiting to my creativity to impose a higharchy, and also it feels kind of xenophobic.
i digress a bit. point is, i’ve viewed oil paintings as a medium only deserving of gallery-type realistic portrait stuff, which is very much not what i do. i don’t make the sorts of fancy art rich people would pay for- the type of art i thought oils were for. i make paintings of comic book characters and sculptures of my personal heroes, i make jewelry and clothes and stuffed animals. stuff that i enjoy. which is good!
but still somewhere lurking in my brain was this voice telling me that on some level my works weren’t as meaningful or creative because they were fan works or made from materials i’m not an expert in or because the only people i draw and paint and sculpt are queer and trans, like me. that because my art was self-indulgent, on some level i suppose i thought it lesser.
but then i see your art. and holy shit! you’re work is INCREDIBLE! at first i was excited because, hey, i’m a big star trek fan, and garak is one of my favorite characters. i love coming across fan art of him, and it always manages to strike a chord with me. but then. as i looked at it closer, i realized it was on canvas. as i scrolled down i realize it was oil on canvas.
before, i’d pretty much only seen fanart as sketches on paper or digital drawings. one that is really only meant art-wise for quick sketches or planning of what will become “real” works, and one that doesn’t actually take up any physical space in our world, and is stored away in a little digital file.
but oil on canvas? that’s not meant to be thrown away, it’s meant to be held in gloved hands, as it is precious, and it’s not meant to be hidden away in the “files” on a laptop. no, those hang on the walls of museums or houses, meant to be displayed with pride for all to see.
and with those too colliding thoughts, that of fan works as some lesser form of art but oil paintings being the art of the rich and talented… well i realized that both were wrong. fan works are not in any way shape or form lesser than original works. what makes my layered ink painting of dream of the endless any less important than my painting of the ocean during a storm? nothing! they’re both good works. and on the other side, there is nothing that makes my oil paintings more important than my acrylic paintings or my sculpture or my knitting. it’s all art, lovely art, in the end. and the only thing that really matters is that i enjoy it.
seeing your art has helped me break some (minor) yet harmful thoughts i didn’t really even realize i had. so thank you for that. also your garak art is fucking good, and it really makes me think about what sort of life he would have after ds9. anyways, thank you. that’s what i’ve been meaning to say (that’s what this whole thing is). thanks for changing my vision for the better.
Oh wow!
You know, it is very important and gratifying to know that results of your work make person rearrange their thoughts and views on something. Thank you for your sincerity!
Now back to subject. I personally believe that fan work can be something fine and vice versa something fine can be a fan work. One thing that is very important to remember and remind yourself is that most of fine art that you've mentioned - gallery and most famous works (at least in european tradition) - are, well, derivative. Of Bible, of ancient myths. Yes. All this stuff can be considered maybe not fanart - but it is a subject for discussion - but illustration at least. And it is still fine art. Book illustrations - oh well. Sometimes I want to hang them on the wall, especially old ones. So - why not? Fan work always has a connotation of something derivative, and it certainly is... But just as well as most of the most prominent works. Dixi :D
So that's the matter. Medium of course matters but medium does not always define the subject of art (except for common sense), as you've said. It's just maybe the cost of medium (some watercolor brushes for some reason cost... ehm. Too much :D) that defines its price, but not necessarily.
I like thinking about this issue and discussing it... Plenty room for ideas. Thank you!
#star trek#art#fanart#artwork#my art#fanwork#oil painting#oil on canvas#art mediums#painting#graphics
44 notes
·
View notes
Text
Ive bought myself some metallic acryl colors (because I miss having access to them) and played around a bit.
The first piece was an attempt at kind of practicing layering. I was always a fan of the "dry brush" Texture, when color isnt smooth anymore and instead layers in the papers Texture:

I dont have perfect light, but I suppose you see enough of it.
The next one was me trying to play around with other colors, this time focusing very much on using the lightest colors first, layering up and then using my most expensive paint as of now (the gold) as a Finish, because its way heavier in pigment.

Im not entirely happy with my brush technique but because im so used to big brushes and chaotic strokes, using a smaller one was a bit of a process. Not one that Im against, quite the opposite.
And lastly, I just wanted to do brown again. Ive come to love the browns I own or got gifted, but I didnt wanna do another scratch painting with them, so here are circles:

Just to give you an idea of how much the gold changes the vibe and the warmth:

And now, just so you can realise that I have no money and am only powered by sheer will: Heres my "artstation". Thats the "Ghost Trick" Stream by jelloapocalypse in the Background, wholeheartedly recommend!!
Usually, theres one more light above me but the bulb died on me around an hour ago.

Anyways, good timezone to y'all!
#acrylart#acrylic#acrylpainting#ghost trick#genuinely such a fun game#I wish I could play it#but jelloapocalypse's is absolutely amazing as VAs#please listen to them!!
29 notes
·
View notes
Note
Your LPS customs are soooo amazing!! Like genuinely so inspiring 😭 I wanna get into it but I have no idea how!!
Thank you so much!!! that really means a lot! And I'm really honored to hear I've been inspiring people with my work<3
I can provide some tips on starting the hobby if that helps! this'll be based on my own experience though of course!
I can firstly say that getting into LPS customizing was pretty simple for me, because I already had most of the supplies I use for other projects, and it was only a matter of getting the bases themselves to paint on. Of course I have the LPS I grew up with but I didn't want to ruin those lol. I use those blank bootleg LPS bases they sell on amazon. You can also use authentic LPS but I'd recommend making sure you're not painting over a rare one like a big 5 or Savannah Reed first lol.
A good starting point is to draft out the design you want on paper/digitally to see what kind of custom you want to make. for me I use digital templates and paint over them in my art program. Templesta on DeviantArt has some really good ones!
For paint I use acrylic. Get a teeny tiny paintbrush for detail work along with a couple other sizes as well and those should be all the basic supplies you need to start! You can also get more complex with it and use chalk pastels, water color pencils and glitters too. Get creative! see what supplies you can use to take your customs to the next level. As a tip, make sure to water down your paint and do multiple thin layers. Patience is key because that paint is not gonna want to stick to the base at first. A lot of the actual painting process does come down to practice and a steady hand.
If you want to seal your customs which isn't necessary but gives them a nice finish, I recommend Liquitex high gloss varnish to seal the eyes. There are some good matte varnish sprays out there but I recommend doing your own research on those, as they can be resin based and therefore need a bit of caution and prep to handle. I personally use Mister Super Clear matte spray to seal the base of the custom, and I always spray outside with gloves and a respirator.
And though I have done sculpting I don't consider myself well versed enough to recommend supplies for clay but I've heard Green Stuff and Apoxie sculpt are good clays to use, but be sure to do your own research on those as well.
The monster high doll customization community is a good place to look for material research! A lot of the process of the face-up is pretty similar to painting LPS. That's actually what got me into customizing in the first place; I just watched a bunch of Dollightful, Enchanterium, and Moonlight Jewel's videos and said to myself "Wait a minute, I could do this with LPS!" I also of course recommend watching other LPS customizer's videos to see the process of how they make their customs, and show them some support as well! Pumpkinscustoms Is a really big inspiration for me and HelloStudios, Mr. Crazy Ray and LPSCobalt have really good videos on making customs.
And once again, if you don't wanna dive right in you can just draw them, whether using a template or not to see if you like the process and the design! You can even make a bunch of designs digitally and once you feel ready to tackle a real custom, start there!
ahaha I didn't know I'd be writing a whole-ass Essay but I hope all this helps!! Thank you for enjoying my work!
#zemi's ramblings#ask zemi#lps customs#lpsblr#lpscommunity#doll customization#advice tag#rotten-g0blin
32 notes
·
View notes
Text

Rainbow Divination
Rainbowmancy is not only the act of magic, but, much like in witchcraft, divination is also a part of it. (If you want it to be, anyway, you can do whatever you want forever!) Here are some different techniques for using rainbows in divination.
Reading Rainbows: When there is an actual rainbow in the sky, you could read the signs to divine. Look at the rainbow and consider the place on the horizon, depth of colour, full arc or just partial, beginning and end, etc.
Existing Decks: There are many decks available through either the creators or your local witchy/bookstore that have rainbow themes and symbolism. Some examples: Prism Oracle, Secret Language of Colour (I recommend!), Spectrowhirl Tarot, SoulSpace Oracle, Queer Tarot, Holographic RWS, Sacred Creators Oracle, Rainbow Tarot, Tarot at the End of the Rainbow.
Stone Scrying: What is says on the tin, scrying in rainbow stones, or if you have a quartz crystal, they sometimes can have rainbow inclusions which work really well.
Water Scrying: Take a glass or white bowl or cup and fill it with water. Add a few drops of coloured ink. Alcohol ink, writing ink, or acrylic inks work just fine. Look at how it flows, what patterns it makes, what symbols do you see? For meanings you could make your own dictionary, which I recommend, or use a tasseomancy (tealeaf reading) guide to get you started.
Rainbow Scyphomancy: This technique was generously shared with me by Nova. Scyphomancy means divination with a cup or goblet. With rainbow scyphomancy the white cup is first filled with water and then emptied. Drops of food colouring are added, and the cup is turned over three times, each one in a different direction, lastly the cup is swirled three times. The colours will spread over the white surface, which can then be read much in the same way as tasseomancy.
Paint Chips: These come in every shade and colour, so would be great for making your own deck. Write keywords or draw symbols on them the meanings of which match the colours.
Pendulum: A pendulum in one of the rainbow crystals for example. Or nowadays you have rainbow pendulums made from different crystals, either fused together, or beads stacked on top of each other (often called "chakra pendulum". We'll get into chakra's in the next bit). A small galaxy jar on a chain, or a small bottle filled with coloured sand, sugar, salt, or resin, will also make a great pendulum.
Crystal Casting Oracle: An osteomancy method using rainbow cystals, or crystals in each colour of the rainbow. Before I mentioned that my favourite combination is garnet, carnelian, citrine, aventurine, turquoise, sodalite, and amethyst. I use tumbled stones of these to cast on divination grids or mats. Much like charm casting. Each stone has their own meaning depending on where they land.
Encaustic Art: This is an art technique where coloured beeswax is heated on a small painting iron and then pressed to wood, or a special shiny paper. Artists can use this to create beautiful and intricate paintings, often of landscapes. This same technique, however, can also be used for divination. By intuitively adding colours and moving the painting iron, a layered painting can be made. The wax will pool, swirl, and leave open spots, making an interesting painting which you can see symbols, figures, and natural features, which can then be interpreted.
[Part of a Rainbowmancy series, masterpost here]
13 notes
·
View notes
Text
I always loved unicorns as a child. Recently picked up a series I had started when I was still unicorn-obsessed, which it turns out was completed sometime after I grew up. In indulging my inner child I've been reading it, it rekindled my love of unicorns, reminding me of an imaginary friend I had long since abandoned.
Made a fuss over sifting through every listing for a unicorn figure I could find. Became frustrated because, while I love rainbow unicorns too, my Diamond was just plain and simple white. Just your classic unicorn.
No matter. I have at least one friend who has done toy modifications who could probably give me a start on how to prime and repaint one. So I hunted instead for one with the right shape.

I found this. Honestly, Schleich seems to have the best variety in toy unicorns that I can find at the moment.
So I check in with my friend. Don't need to strip the paint, she says. Just use a primer, as on this material it's a safer bet. Unfortunately this means I also am going to have to paint over the glitter, which is going to leave a weird texture behind, but we make do with the resources and skillset we have. I've read that some people, braver than I, will carefully use acetone - very carefully as it will in fact mess up the toy underneath if you aren't careful. But I decided to go the safe route.
At least 3 layers of gesso to cover the mark on the flank. Only one or two to cover the mane and tail because I wanted the shading to shine through.
I didn't even need the other white, aside from using it to mix a light gray for the hooves (all of it up to now is Liquitex - color added with their small mixing set). The horn looked wrong plain white so I mixed up a very pale yellow to go on it.
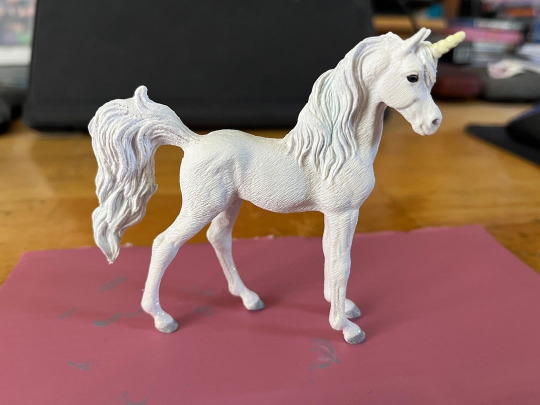
Much better. And if you don't look too closely you don't notice the glitter texture too much. (Except on the legs where I opted not to paint over them - the gesso matched her base layer so well I decided to save myself some agony.)
But after a few hours I started eyeing one of my other paints. It was made for leather but maybe... just maybe...
I looked it up.
Acrylic based. So it would in fact go just fine over the other layers. It was a bit of a fuss to put on as it's thin and watery and has... well... flecks in it. But you can't see those in bright light. And in the dark...

Welcome home, Diamond. It's been a while.
16 notes
·
View notes
Last Seen Blogs

irrecords-blog
IR RECORDS

stjoseph231-blog
St Joseph Hospital

gabingy
Gabingy

jenniqlo
JenniQlo

irreconcila8lr-blog
FEAR AND LOATHING