#that one came in a pink box from a different etsy shop
Explore tagged Tumblr posts
Text

may or may not have bought some new wolfstar themed jewelry i am officially wolfstar trash again how did this happen after so many years of abstinence lol please send help
#wolfstar#okay but this is a REAL THROWBACK#i remember making posts abt wolfstar jewelry back in the day lol#and i just missed it#like#i think in 2014/2015 i wore my moon and star earrings CONSTANTLY LOL#but now i always wear the same piercing hoops#so i needed RINGS#and i just LOVE it so much that the rose quartz one arrived in a moon and star bag????#like it wasn't even the moon and sun/star ring that came in the bag#that one came in a pink box from a different etsy shop#but yeah#in conclusion#I AM ONCE AGAIN WOLFSTAR TRASH#i entirely blame long covid and my not so great mental health for becomimg wolfstar trash again after so many years#but tbh i should've known it was bound to happen again at some point#oh and in case any one is wondering#lol as if any one is reading this hahah but anyways#the two crystal rings are specifically because of one fic called#staying strangers#it's beautiful#i feel like text talk and a:tb walked back in 2015#so that staying strangers could RUN#ok tag ramblings over lol idk if i should even post this#but posting my wolfstar jewelry feels so 2014-on-brand for me#so i feel like i kinda have to#even though i don't get most of the fandom anymore#ok tag ramblings over#like what would even be my tumblr brand if not random unhinged vaguely wolfstar themed posts with incredibly long tag ramblings
18 notes
·
View notes
Text


Etsy Store Here l Ko-Fi l Commission Info I Instagram I Zine
Part 1 Here! / Part 2 Here! / <This is Part 3!>
A/N: I'm on a HP writing roll also that picture of Oliver Phelps is too cute. Drop those requests and Oh, and if you are in the market for some cute pro-Weasley shirts, check out my 'Weasley Suprmeacy' shirt here!
- George whistles a cheery tune as he walks down the street
- All around him are couples madly in love, gazing upon everything with rose tinted glasses
- And for once
- George is one of them now too
- No more watching Ron and Hermione giggle over some inside joke like a couple of schoolgirls
- Or watch Fred and Angelina Johnson make eyes at each other from across the room while all he could do was wonder what he had to do to get someone like that
- Because now he has you
- And he never has to spend Valentine’s Day alone again
- He’s so caught up in the joy of having someone, and his pride in not being one of those morons who wait until the last minute to make a reservation, that he doesn’t notice the line wrapped around your store
- He doesn’t notice until he walks inside and sees the chaotic state
- “Ainsley will you pass the ribbon?”
- “Henry get the customer will ya?”
- “Boss we’re out of the red roses!”
- “Get some red food coloring and put it in the water of the white roses!”
- So he probably won’t be needing those reservations
- “Oh George,” you notice him standing at the door after several long minutes of him watching you frantically move around the shop trying to fill orders
- You stand in front of apologizing profusely
- “I’m sorry I know we’ve had tonight planned out for so long-“
- “I didn’t think we would be so busy-“
- You usually do appointment only for Valentine’s but... your bills came in a little higher this month and your landlord is talking about a rent increase
- And so you kind of need this money
- Still, you thought you would be able to manage, but you seriously underestimated how many people would require your services last minute
- George listens to your carefully, only speaking after you say you're final: “I’m so sorry, I promise I’ll make it up to you”
- He nods and you think that will be that
- And then he glances at your apron, a finger gently picking at one of the straps that sit on your shoulder
- “Have you got an extra one of these?”
- And so that’s how George spends his Valentine’s Day
- In a bright pink apron collecting muggle money and placating customers at your store
- And it’s not how he quite pictured it- but he’s got the biggest smile on his face because he’s with you
- Watching you scamper around is oddly cute too
- Besides helping here isn’t all the difference then working at his shop
- He just can’t use magic
- “Oh I thought we were out of red roses?” You say when he brings you a dozen roses from the backroom
- “I found a few hidden behind some pink ones” he lies
- Well, he can’t blatantly use magic
- It’s 10:17 when you flip the shop sign over, bidding your employees a happy Valentine’s Day
- You don’t bother finding a chair, sitting on the ground, and letting out a relieved sigh
- Finally, it’s over
- George settles on the floor next to you, sporting a similar expression
- You laugh
- “I’m guessing this falls into your top ten worst Valentine’s days”
- Now it’s George that laughs
- “Not even close, I think the worst one was when I was at school, all of us single lads passed around a box of Bertie Botts”
- “What’s Bertie Botts?” You ask
- Oh bullocks, is that not a muggle thing too?
- “They’re like jelly beans, but there are a few gag flavors thrown in like rotten egg and freshly mown grass”
- “That sounds like a very teenage thing to do,” you say with a laugh
- Oh good looks like you bought it
- “Second worst then,” you say and shakes his head with a grin
- “It was actually really fun,” his smile softens when he looks at you, your eyes meet his.
- “It’s always really fun when you’re around.”
- And from any other man, you would think they were empty words.
- But George’s warm eyes and that soft expression he has as he gazes at you with nothing but adoration tells you it’s all completely genuine
- And you fidget, clearing your throat
- “Well the least I can do is treat you to a meal”
- “Want to beg the restaurant to take us even though we’re-“ he looks at his watch “3 hours late?”
- “Not quite,” you say laughing
- You tip the pizza boy in flowers, who seems ecstatic with the bouquet in his hands
- “My significant others going to love these thank you!”
- You practically crawl up to the rooftop of your shop where George has already set up a makeshift table with your bare minimum patio furniture, lit candles at the center
- “I’ll have to apologize, I didn’t bring a bottle of wine so all I have is this”
- George holds up a silver flask
- You don’t hesitate to take a swig from it when he offers
- You cough almost immediately
- “What was in that?” You’ve never had anything like it
- It almost tasted like fire
- “Fi- I mean, cinnamon whisky,” George says and you offer him a small smile
- “Well bring a bottle next time, I like it”
- You grin, eating pizza side by side while watching the city lights
- George has to keep himself from grinning
- Best Valentine’s Day ever
#harry potter imagine#harry potter#George Weasley#george weasley x reader#fred and george weasley imagine#george weasley imagine#george weasley headcanon#George Weasley fanfiction#George Weasley x Muggle reader#george and fred weasley#harry potter headcanon#harry potter hogwarts mystery#charlie weasley x reader#charlie weasley x jacob's sibling#george weasley#harry potter x reader#charlie weasley
259 notes
·
View notes
Text
Nail Tech Talk : Top Tips For Setting Up In An Unconventional Space
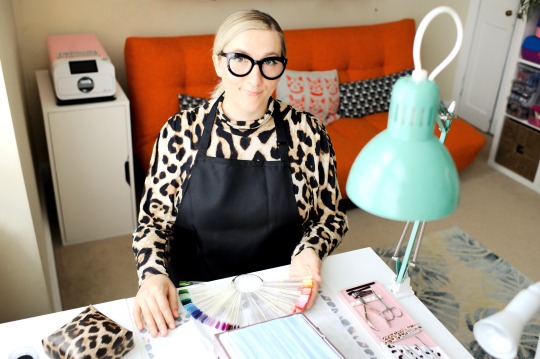
Setting up can be a little daunting when you first start out, but it doesn’t take long to start building your collection & creating a space that you're happy with. When I started to set up my treatment room, I began by creating a mood board to figure out the aesthetics & practicality of the room. I love to use Pinterest to get my visual ideas out and have mood boards for things like Storage Ideas, Pedicure Set Up and design inspo.
Once you’ve figured out the style you're after you can start to figure out how to make it come to life. Everything takes time and you’ll find sometimes it’s not until you’ve actively worked in a space that you can truly see what you need to change & adjust to make the space really work best for you. It's a work in progress that grows with you as you develop new skills. Don't feel that everything has to be done at once.

My Treatment Room aesthetic is kitsch, plant adorned & bright. I try to keep things fun, but tidy and cozy for clients. I’m not a "normal salon space", but that’s one of the reasons my clients like to come to me. I don’t try to make the room do something it can’t do, I just work with what I can.
Storage
Storage is really important, especially as it can actually save you time if you keep yourself well organized. I really love easy access storage so that I can grab things quickly and not waste time looking around for products.
Nail Polish/ Gel Polish Storage
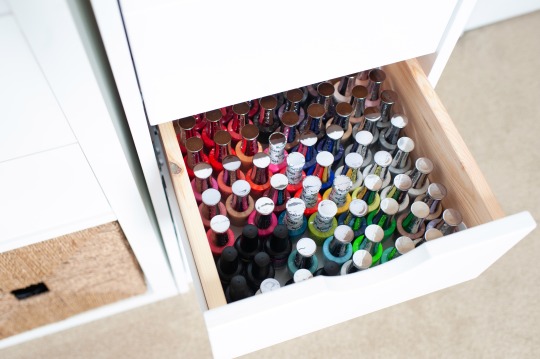
I originally started out with both the long and short Ikea Alex drawers. These are great if you are just starting out and don't have too much product as they provide a lot of storage space, but if you are like me and tend to have a lot of product (I do makeup as well as nails), I’d recommend going for better quality drawers with more side supports than Ikea. My Alex drawers lasted about 3 years before I had to replace them with a similar Tallboy Style Drawer which I found on sale at La Redoute. My advice would be to spend a little extra on furniture if you can so that you don't have to replace it in future.
Ikea Picture Shelves are also a great way to display polish/gel colours on your walls, but they will need dusting regularly which is why I prefer to use the tallboy style drawers. I tend to use the Picture Shelves to create a "gallery wall" where I display framed art and photos, but these would be great for displaying certifications and awards as well.
Glitter/Diamonte/Dried Flower Storage


I invested some time decanting all my glitters, diamantés and dried nail art flowers into clear acrylic lidded jars which sit in clear boxes (labelled on the bottom) so I can showcase colours more easily to clients rather than rummaging through boxes. Clear Acrylic storage is great as you can see when things are running low and need topping up. I tend to separate these into colour sections keeping like colours together. Ebay, Amazon, Hobby Craft & Muji are great for finding these kind of clear acrylic storage solutions.
Wire Storage
I keep wires under control with a wire tidy box also from Ikea to reduce tripping hazards and keep the room looking tidy. As I do a lot of filming in the room, I do have quite a few different wires for various things, anything that doesn't fit into the Ikea Wire Tidy, when not in use, gets stored in Ikea Rattan/Wicker Storage Boxes and slotted away in my Ikea Kallax. I label the different plugs with a Dymo Label Machine so I don't get things confused.
How To Display Your Nail Art Professionally
I love nail art and have a lot of nail tips left over from content creating and old Pop Up Nail Bar menus. I was looking for a way to showcase these to clients and discovered a really cool Nail Art Display Box on Ebay which looks very professional. You can change the display every season or theme each clear pull out frame to your liking. With so many ideas and options available this is a great way to break it down visually for customers. Here is a break down on how to start yours (links to where to find it are in the description box) :
https://youtu.be/F5Yzousncqg
Pedicure Set Up
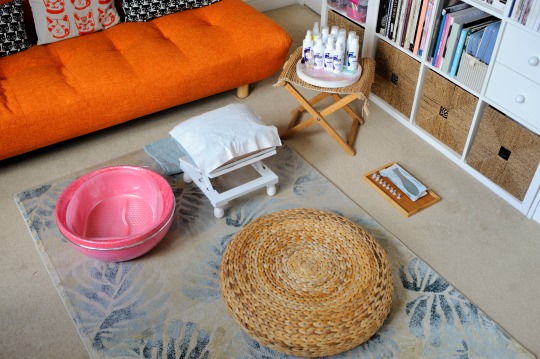
I recently started offering pedicures again and needed to create a cozy pedicure space that could easily be put away when not in use. As I don’t have laminate flooring, I had a custom size floor matte made to protect my rug and carpet area from splashes and mess by https://www.floormats.co.uk . When not in use, this slots away under a sofa and easily pulls out when I need it again. It's also easy to wipe down and keep disinfected.
Instead of using a storage trolly to display Pedicure Products (as my room is carpeted which wouldn’t be practical), I keep my bottles and sprays on trays on top of a wooden stool. I have 2 different trays which I alternate with the two systems I use, Footlogix & Famous Names Releaf. * Nail techs use my discount code TABBY10 for 10% off these brands and more on the Louella Belle site.
I purchased my concrete pink/white tray to display my Footlogix products from Etsy Seller JustSoDesignbyRachel (https://etsy.me/37c1csl ) who had to adapt when first lockdown hit & set up a shop selling hand made beautiful concrete items. Where I can, I love to shop with and support smaller businesses & fellow nail artists.
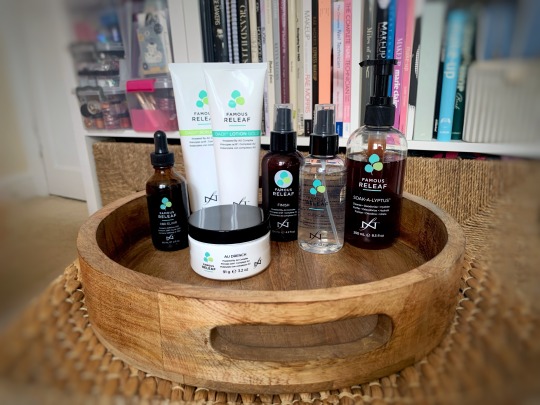
To display my Famous Names Releaf I went for a more rustic looking tray from Dunelm which suits the natural ethos of the system : https://www.dunelm.com/product/wooden-tray-craftland-1000167605?defaultSkuId=30696657
For a leg rest/foot rest, I use a foldable stool from Amazon with customised vinyl material that can be disinfected. I found out about the stool from a fellow nail tech on the Footlogix Facebook Group ! The vinyl I reupholstered the stool with came from Etsy Shop HomeTexStudio (https://etsy.me/2JJlRsb). The height is just right for my set up, not for everyone I’m sure , but for the space I work with it’s perfect. Here’s a video of the DIY stool transformation :
https://www.instagram.com/tv/CHGFgx6D6EY/?utm_medium=copy_link
I use Belava Pedi Bowls with recyclable disposable liners for my pedicures as I love glitter & they really go with my room's aesthetic! I think customers also feel much better knowing each time they visit they get a fresh pedi liner. The Belava Glitter bowls do come with a disinfectable insert, but I prefer to use the disposables as I feel it reassures customers that my hygiene standards go above and beyond, especially in these times.
I use an IKEA rattan stool to sit on when doing pedicures and my clients sit on a large sofa chair which allows them to really relax and decompress. After each client, I disinfected the soft furnishing with Sursol Fabric Disinfecting Spray as removing all soft furnishings was not an option for me.
Retail Items

As my set up has less surface space than a traditional salon space, I show off the products I retail on my shorter Ikea Alex Drawers & Ikea Kallax shelves. I try to keep displays and clutter to a minimum as every surface gets wiped down and disinfected before/after each client. In keeping with the aesthetics of my room, I display my products in small wooden boxes and clear acrylic shelves.
The Work Table
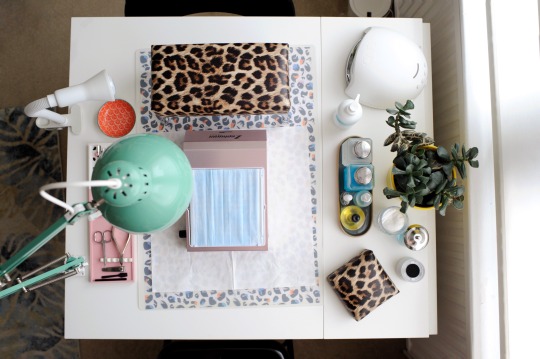
My work table is the area of my room that gets the most use. I use it as a work space for not just my nail clients, but also to film and create nail tutorials and content. Unlike many techs, my work table is a little wider than usual which is not for everyone, but works well for me. I have the Ikea Nordan Gateleg Table which has 6 storage drawers down the middle and two sides which can fold down. I use the Clear Ikea Skvallra Desk Protector to keep it free of any accidents and spills. To add a little personality to the space I alternate Paperchase Wrapping Paper which I find very fun and colourful under the Desk Protector, these make great backdrops for nail art photos as well. To get the best out of my nail art photos I use the Ikea Tertial Lamp with a Day Light bulb which I find works well as a work lamp and for photography purposes.
I keep my tools tidy with a custom made Jesmonite tray which I had commissioned by a fellow nail tech ( @bylaurajayne_jesmonitedesigns). It matches my room aesthetic and keeps things nice and tidy when I'm working. I tend to sterilize my tools in my Enbio Auto Clave and then place them on my tray ready for use! If you haven't seen her trays do check them out ! They are the perfect size for nail techs as she makes both rectangle long trays and smaller square trays so there is plenty of room for everything. I think displaying nail tools on the work table like this also gives the tools a bit of respect and helps you to look after them, after all they are probably your most used items and I think it's nice to look after them well so it's just fitting to display them proudly and with a bit of care and thought!

I recently purchased a new hand rest from @gb.wrist.rests. This has been a real game changer as it definitely improves the posture for both myself and my clients when working. Previous to this I had been using an Ikea Wooden laptop holder, which worked well for a couple of years, but over time the disinfectant began to wear down the varnish and I felt it was time to invest in something better. It was also great to support another fellow nail tech who started the GB Wrist Rests business up with her partner during lockdown.
Dust Control
To control dust, I have the Zephyros Dust Collection from Tafs. I find this works really well for keeping the space tidy and protecting mine and my clients lungs. I tend to work more with soak off systems and don't currently e-file so this works well for me. I would recommend getting a more powerful Air Purifier for busier salons working more regularly with enhancements.
Sterilisation

In the corner of my room I store my Enbio S Auto Clave which is used to sterilize tools after they have been washed, then disinfected. I store this on an Ikea Alex Cupboard which doubles up as a storage space for all my cleaning products and spare nail files etc. The Auto Claves are not cheap, but one of the best investments in my Treatment Room. I think customers feel more reassured and I certainly feel better using one. Nail techs can use my code TABBY to get money off their purchases at https://www.enbio.com/uk/

My greatest advice for anyone new to the industry or just starting to set up would be take it a bit at a time. We all have to work within budgets and as you gain clients and get busier you will be able to afford to work your way up towards a space that suits you. I spent many years working as a mobile freelancer before building up a client base that comes to me. It's also worth noting that your own health and client health is so important. Consider the comfort of both of you when creating your space - make sure you are looking after skin and lungs. Protect your hands with gloves when you work to avoid over exposure and make sure you protecting your lungs from dust particles, but most of all have fun creating a space that suits you!
#nail tech#treatment room#decor#storage#north london#nails#nail art#nail art display#sterilization#clean#treatment room decor#nail artist#london nails#london nail trends#london beauty#tumblr beauty#tumblr nails#tumblr beauty spotlight#beauty spotlight#beauty news#nail storage#nail polish storage#nail glitter storage#art#pedicure#manicure#london manicure#london pedicure#london nail tech#nail tech talk
22 notes
·
View notes
Note
You worked at joanns? 😍 dream job
In all fairness, a large part (and I do mean a LARGE part) of why I enjoyed working at Joanns were the managers.
The store manager was a guy named Richard, one of maybe two or three men who worked there total, and this man was practically a saint as far as retail goes.
This was a man who would, with no hesitation, get on the floor to help customers, or hop on the registers to check customers' purchases out, or pop on to the cutting counter to cut fabric. He remembered the names of regulars, would chat and smile while getting shit done, and was the type of guy to speak slowly and softly when we had shitstains explode at us measly peons for not giving them the full cost of an item back in a return (ex $200) when they used a coupon to purchase an item to begin with and only paid a portion of the cost (ex. $150). No joke, this actually happened to me on Black Friday with a man who stood at about 6 foot with a crewcut and a snarl (the military Karen, if you would)
Richard, of course, stood at about 6 foot 5 inches, and reminded me of a ginger grizzly bear in some ways. Very few customers continued to be assholes when they asked to speak to the manager and Richard came over, smiling wide. He encouraged us to chat with the customers while we worked the cutting counter - it was a good way to learn about what they were making, encouraged general conversation and lent itself to a better environment for everyone, worker and customer alike, so we weren't just awkwardly standing in silence the whole time.
The assistant store manager (aka his second in command - we had two other assistant managers, but she wielded more power than both of them) was Farrah, and she was basically Cool Wine Aunt, but with weed. She was open about smoking it (but not in a pressure-the-underlings kind of way, but more of a 'yeah, it calms me down' kind of way) but never on the clock, and was just really chill in general. She was also a 'jump on the registers' type of manager, and on occasion would take the closing staff out to get a drink from the texmex place next to us in the shopping center, and cover one for each of us - particularly during the Holiday Clusterfuck of October, November, and December (their Frozen Kahlua Mudlslide was my alcoholic drink of choice - they also had these spicy chicken strips that were amazing with it, but I digress).
Both of them were amazing people who would support and back us up without hesitation (if they weren't dealing with corporate or stock trucks coming in), and both routinely worked 15 to 20 hours UNPAID overtime during the Holiday Clusterfuck so that we the underlings could get more hours without Corporate jumping up our ass about going over budget.
They were also refreshingly upfront in our monthly meetings about profits and meeting them, as well as why company policy was the way it was, and how to work within the boundaries so we got more hours. One of my favorite moments was when they said the fabric sales essentially covered their own cost (production and delivery); the rest of the cheap crap in the store was what covered our paycheck and electricity, so hawk it as much as you can if you want extra in the bank (paraphrasing here, but that's not that far off what they actually said tbh).
With some Karen-y exceptions, the customers were honestly pretty chill. There were two women from a nearby church who bought well over 200 yards of cut fleece to make no-sew fleece blankets for children and the poor in December (it took forever to do, but they were so cheerful about it and told some funny anecdotes in between, kept the counter clear as soon as they were cut, etc. Took them three carts to haul everything to the register XD).
There was the slew of quilters making everything from baby blankets to anniversary gifts to quilts for their grandkids attending the local university that they could wear to football games in the colder weather, while still showing team pride. They always bought quarters and eighths and the end of the bolt for half price, digging thru our remnants bin for something they might have missed they could get for half price. They always talked about what they were working on, and spoke in great detail on their kids or cousins or niblings or grandkids. I saw so many pictures on phones, in wallets, and they loved them to absolute pieces.
There were cosplayers making their first costume to comicon, halloween goers trying their hand at making their own outfits, and a few furries making custom suits for order or just updating their own personal outfit. There were the usual school and church Christmas plays that needed costumes, and folks making custom table runners and place settings for family holiday meals.
One notable young man bought out 30+ yards of our 65" inch wide bolt felt for JEWELRY projects he was making as a part of his business and as a part of his art program (you can major in art with a concentration in jewelry making, and he was using it for that). He didn't leave a card, but the pictures he showed us were STUNNING.
We had a few elderly mothers come in with their daughters, to pick out fabrics so they could make their own wedding dresses, or quinceanera outfits, or veils; they showed us the patterns they had, or the pictures they were basing the designs off of, and all of them were STUNNING. (One came back in with the finished dress in the bag, this intricately beaded poofy dress that had to have taken days, hot pink and shiny).
We had local restaurant owners pop in for re-upholstery projects and curtains and vinyl; same with teachers and deck dads and furniture restoration workers that would gush about the design, what they had planned. Some would bicker with their spouses on the pattern, but it felt good-natured on the whole.
We had some elderly men come in to peer over our sewing machines - "How much it run for? My wife's birthday is coming up and her old machine's about done, and I want to surprise her. She had a Singer, but she hates the electronic screens on some of these newer ones, they hurt her eyes." - and moms coming in to sew some custom bed sheets for their kids - "My son really likes the new My Little Pony show, but he's a little shy about it. Do you think the blue's okay? Only he like yellow more, but they don't have any back there and he doesn't MIND blue really but - Actually scratch that, how wide is the fabric? My pattern says it needs to be at LEAST 22 inches wide, does it say on the box?" - and people coming up with some WILD craft ideas that were always a delight to hear them gush about - "So this MAY seem crazy, but I can turn these plastic pumpkin trick-or-treat pails into SNOWMEN heads with felt like this. We fill them with treats for the kids since we don't have a fireplace and they like it fine, but someone said I should sell these on Etsy and people really like them! But I've run out of pumpkins, and you have NO idea how happy I am that you guys still have some left."
The group we had to work with was also pretty crafty; a few were chronic call-outs, some a bit lazy, some perpetually done-with-this-nonsense, but we were mostly on the same page on shift, and all of us were crafty as heck. The employee discount was a blessing AND a curse, lemme tell you.
Stock was the best part, for me. Hours before the store opened at 9 AM, we would rip open the boxes and stuff everything onto the shelves, organizing anything the closing shift missed the night before along the way, updating new stickers or shuffling pegs over for new product arrangement, etc. We could listen to music or podcasts as we worked, and I ended up impressing some of them bc of how fast I tore through everything some mornings (the music definitely helped out there).
I was actually about to be promoted to assistant manager after 6 months, but then I got my job with the university, and they had federal health benefits AND dental, so... yeah, no contest there. Richard actually laughed when I told him I'd been hired at the university and was giving my two week notice, since it meant he didn't have to do the slew of paperwork that accompanied new assistant manager hires. He congratulated me on the job, especially the health benefits - he said that was a perk worth leaving any job here for. I nearly cried with relief that he wasn't mad.
He and Farrah chipped in and got me a small music box that plays Man of La Mancha's Dream the Impossible Dream on my last day. It still sits on my desk at work.
It was honestly my favorite retail job out of the bunch I've suffered through. Surprising at first, since I initially received a rejection email bare HOURS after my interview with Farrah, but about a month later (as I trawled endlessly through interview after interview, desperate for anything those first few months ), I got a call back from them asking if I was still interested (which I was, bc hey a job!). They remembered me specifically bc I had missed my bus to the interview, called ahead to let them know I would be late, then walked the whole way there in the rain to get there. (It was only about a mile and a half away, so not a terrible journey, but flooding is an issue in our flat-ass city; I looked like a drenched afghan hound holding a useless umbrella, so enjoy that imagery).
They were particularly impressed by the calling-ahead part.
Unfortunately, both of them ended up moving on to different paths over the year after I left - apparently they had been friends with benefits (? I say hesitantly, since I ran into one of my coworkers at an art show later on and she spilled the beans there - she was a bit flighty in nature though, and got caught up in gossip a LOT, so who knows. Lovely brocade custom projects though), and his ex girlfriend had called corporate on them and got both fired.
I think Farrah came back some time later, but the damage was done after that - the new manager came in and operated SOLELY to corporate policy. A LOT went to pieces in terms of store cleanliness, order, and general camaraderie after that - the new fabric counter folks look and sound dead inside, and barely interact with customers (not even a 'whatcha making' in passing, which is kind of sad - the stories I got helped to pass the time, and kept me from using up all of my Set Conversation Phrases for customers that actually WOULD leave us standing in silence). Corporate also stopped some of the smaller store policies that made our job easier and gave the customers a little something extra (the 'end-of-the-bolt' discount - if, after the customer orders say, 2 yards of fabric on the bolt, and there's say, a half yard "remnant" left on the bolt, we can sell them the remnant for half-price. A LOT of quilters LOVED this, and we did too, since it saved us from filling out the remnant tag and printing a sticker later on).
Just goes to show how important good management is in a business; especially when it can kick a store previously part of the top 50 stores in the NATION (while being a medium store at that - smaller place, NOT Hobby Lobby size like the Large stores) to something much less pleasant. I could be rose-goggling the situation thought - retail is still retail, no matter how nice some aspects are - but it still sticks with me as to how good he experience was even taking into account that it WAS minimum wage retail.
Food for thought, lads, food for thought.
#plush gets personal#joanns#joann fabrics#employment#retail hell#or well#not so much hell for this one#retail... purgatory? yeah that'll work
7 notes
·
View notes
Text
Witchy Haul pt.2
Here’s a part 2 of things I have bought and have yet to use 🤦♀️ I know it’s so bad to do that and it feels like I’m hoarding things but I’m tryinggggg😭
So technically this is part 2,3&4 cuz I bought lots of things and forgot to post a haul. Also I had a package get lost in the mail that I’m super sad about because it had crystals. I just tell myself I didn’t need those crystals yet because it makes me sad to dwell on my loss 😭😭
That being said without further ado here’s the haullll.

Books
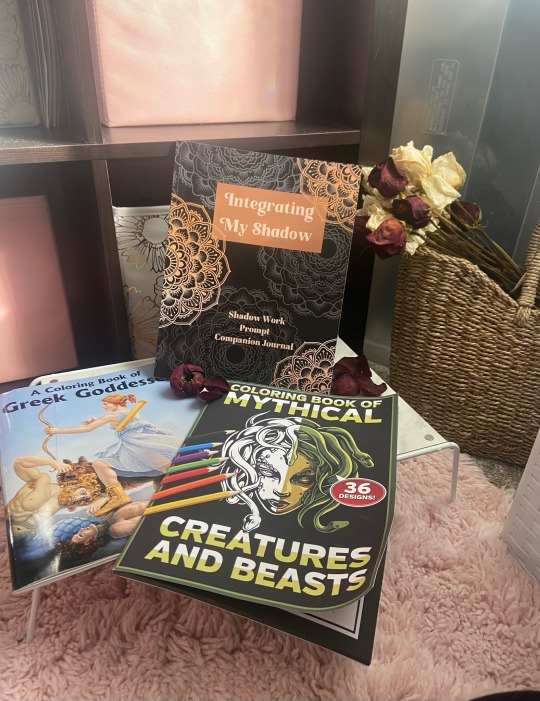
For starters boookkksss. I LOVE books!! So I got a shadow work prompts book and 2 coloring books! I was having a hard time doing shadow work so I bought a prompt book to ease my way into it. I would have liked it to be more deep but it’s ok for starting off, most of the prompts don’t resonate with me (which is ok) but they might for you so if you’re having trouble with shadow work I suggest this book. The 2 coloring book I got to unwind but still honor my deity and learn moreee.
Cards
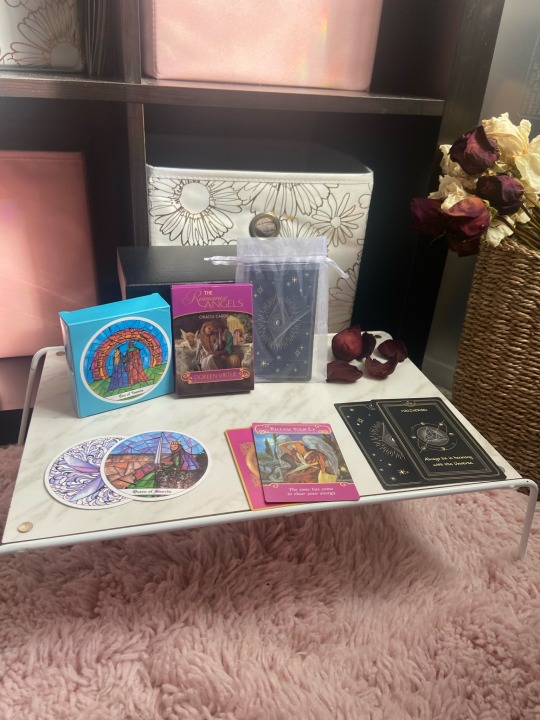
At this point Is it a surprise that I got cardssss…… no, not it’s not. So honestly I got the first two decks for my birthday as a present from my aunt. I haven’t used them yet but they have been cleansed so I’m just waiting for a good timeee. The last deck I got from Etsy…..the energy radiating from them is incredible. They’re so beautiful I love themmm so much. They have gold detailing and are so thick but easy to hold and use. I’m thinking of buying the matching tarot deck but it’s pretty pricey so maybe I’ll save for them since it’s not a need but a want.
Miscellaneous
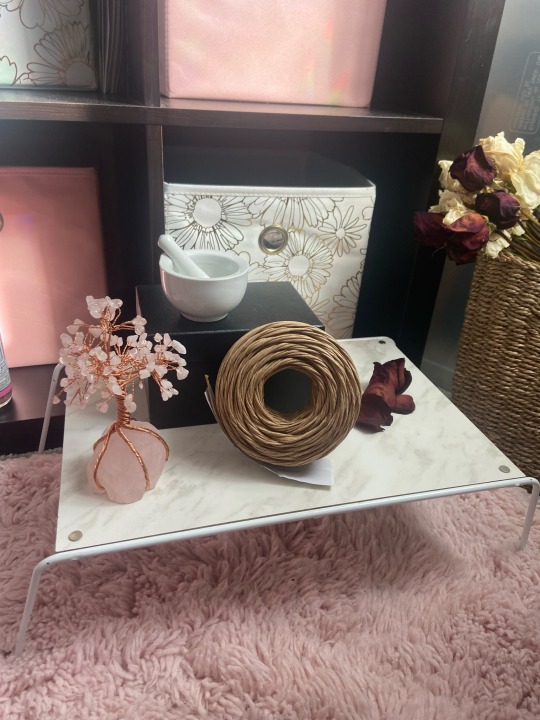
So 2 of these were gifts one isn’t pictured. The rose quartz trees was a gift I blessed it under the light of the pink moon but I still don’t know what to do with it. Right now it’s on display but I don’t know what it’s for…..it’s pretty tho❤️ I also got a box on incense hehe. I got the string because I was tired of constantly throwing away those plastic ribbons after drying flowers. So this string is paper and easily compostable. The mortar and pestle I got for a candle I’m work shopping it’s super cute and just the right size for my room.
Candles
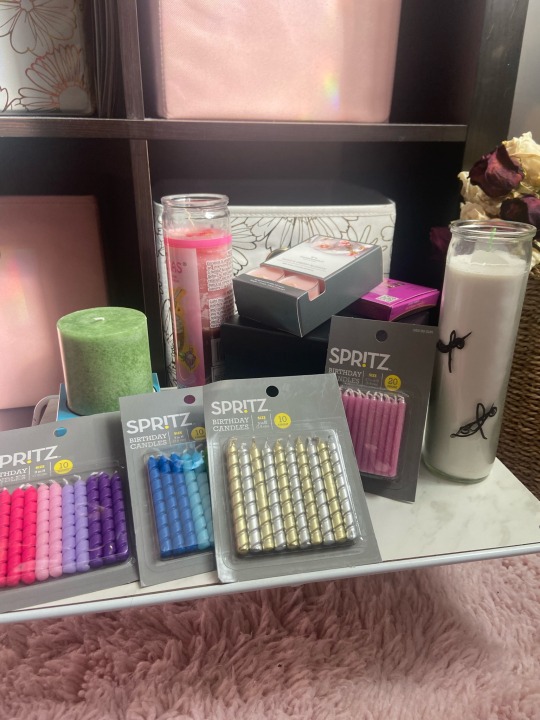
I got soooo many candles. Starting front to back I got birthday candles to use for separation rituals and glamor spells. The green candle is for a money candle that I’m working on….. I’ll definitely post a “tutorial” on how I did it (tutorial in quotes cuz I’m definitely not qualified to be making tutorials but more of a “am I doing this correctly??” Type thing) The small pink tea lights for ritual baths. The 7 day white candle is a candle I made with my protection Sigil and blessed under the light of a full moon. The pink one was also blesses under the light of the pink moon. I originally bought it to use a a deity candle but more and more I’ve been called to make a deity candle so I’m thinking of doing that instead and using this candle or it’s intended purpose of family happiness.
Dishes
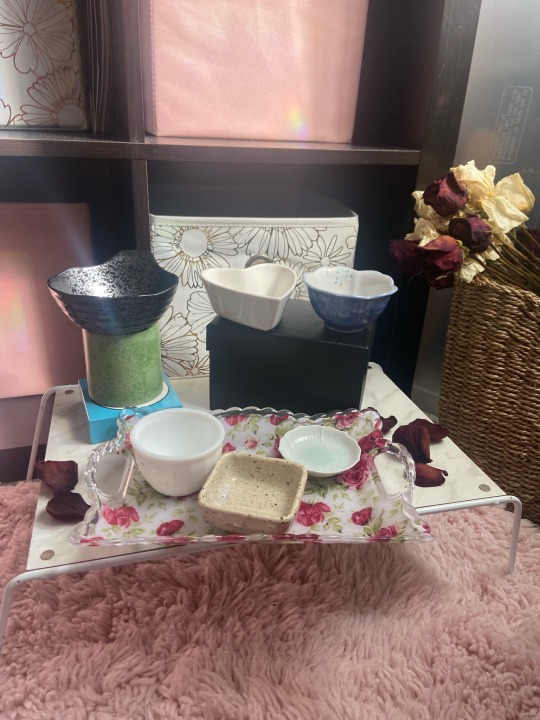
I bought most of these to use a offering trays. The bigger black one I got to use a cauldron it’s ceramic so I can’t do spell in it but it’s prefect for buying Sigils (also I live in an apartment so it’s not the best idea for me to be burning things anyways) the rose tray is currently being used as decor but I got it for the money candle hahah if I ever get to it 🙂
Crystals
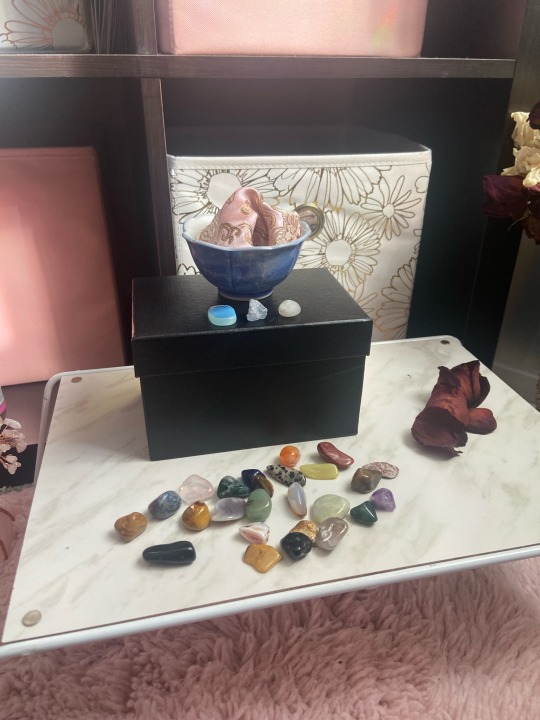
I saved the most exciting for lasttt. I reordered some crystals and actually got them this time😭😭 this is a mixed bag I got so I don’t know the names of the crystals😭 they’re cute thooo….. the crystals on the black box are from a different trip I still don’t know the names thoook😭😭

These are the crystals that came with names and info on the crystals which I thought was supper cooool!!!
The end!
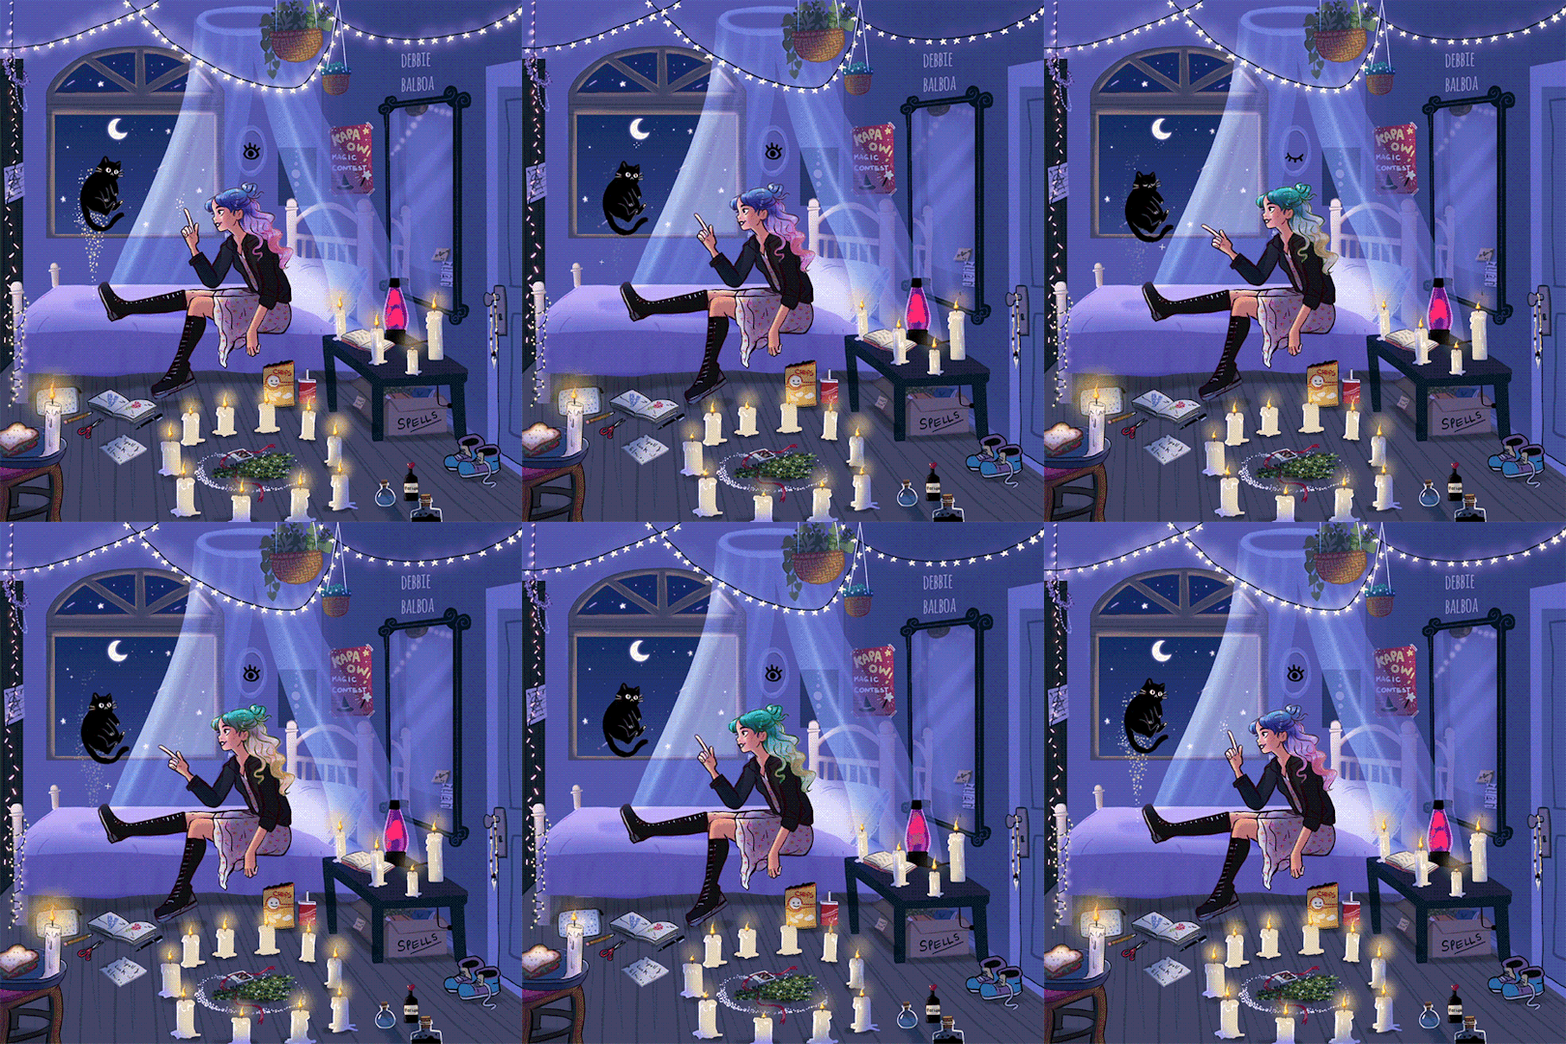
In very me fashion I forgot to take a picture of all the things in the same frame🤦♀️ so I guess a gif will do for now😭 anyways I hoped y’all liked it and hopefully I will actually use all these things😭😭😭
1 note
·
View note
Photo


Ordering the Top Cat Tails Surprise Kitten Set
Although it’s a mystery set, there are a few options for customization. I thought this was very cool because buying mystery items always comes with the risk of wasted money on a product that doesn’t fit you. The customization this product offers helps to minimize, if not completely eradicate, that risk. The downside is that I am so indecisive!
For a few extra dollars, you can add a tail tip. I love tipped tails!
You also have two different ear styles to choose from. There is no information showing or describing the difference between Ear Style A and Ear Style B, but from looking at other products I found that Style B is fluffier. I decided to go with A even though I usually prefer longer fur because it looked more realistic to me in the images.
You can choose from Natural, Pastel, and Bright styles. Again, there is no picture or description to show the difference between the three styles, but I feel this one is pretty self explanatory. The shop does have two fur charts if you’d like to check out their collection. One chart shows their Realistic Faux Fur and the other shows off their Pastels and Bright options. Note that the mystery set will come in long pile luxury fur, regardless of your style selection, according to the product description. I chose the Pastel style.
Purchasers are encouraged to let the shop know if there are colors you do NOT want your set to include within the purchase comment. I was a little bratty and offered a list of my favorite colors, because it’s easier for me to describe things I like versus things I don’t.
You can choose black or silver for your headband color in the purchase comment. If you do not specify, they will choose for you. I let mine be a surprise.
There are additional add ons you can request, including a princess chain, tail squeaker, bows, and studs. Some have a product listing that you purchase in addition to the product, while others require you to ask them directly in the purchase comment. It is not clear if those cost extra, but I tend to assume so. I did not request any add ons with my purchase.
Other features this product advertises include:
Rubber ends on the metal headbands, to prevent the headband from digging in. I’m always skeptical of this, so we’ll see how well it works!
Tails are lightly stuffed, for extra movement.
Discreet packaging. Items are in a waterproof bag, inside a box.
Product will be tracked and require a signature, for added security and peace of mind.
Let’s go! I am super stoked!
Shipping
The product is labeled as ready to ship in 1 to 2 weeks from the UK. The charge was $18.30, which I was not thrilled about. I don’t blame the seller for that though. International shipping is always rough.
My product shipped exactly on the 2 week mark. I received it 9 days later, which was earlier than I expected! Though tracking and signing were advertised, the “Track Package” button that usually pops up on my Etsy orders never appeared, and I was not required to sign. Still, I was very pleased by the quick arrival!
Unboxing
Okay. I should have done a video of this, but I was too excited. The package arrived in a plain box labeled for customs as “costume accessories”. There was a tracking label, so I assume tracking information could have been provided if I had contacted the seller directly, but it honestly wasn’t that important to me.
Inside the box was perfect! The ears and tail were inside of a pastel pink plastic bag, and then each was further wrapped in clear plastic with little white polka dots. It looked very professional! The bottom of the box was lined in orange tissue paper. In addition to my items, the box contained my order receipt, a business card, a magnet business card, a small thank you card with a handwritten message, some stickers, a notice of various product warnings (small parts, keep away from fire, etc), and a mini goody bag with candy, a few hair accessories, and some other tiny shiny things.
Some of their adorable graphics were stretched or squashed, so they could potentially benefit from working with a graphic designer, but overall I was impressed and delighted by the product packaging.
The Product
The set I received is pastel purple and blue and I freaking love it. It’s perfect!
The ears are wired onto a silver metal headband with removal rubber tips. The tips keep the metal from digging in, but the headband itself is on the small side and may cause discomfort long term if you’re sensitive to that (I am). The ears can be bent and posed and they are able to slide up and down on the headband. Despite this, they stay firmly in place. They do not feel loose or fragile. There are a few stitching imperfections and rough areas, but they aren’t easily noticed, especially when you’re wearing them. They look fantastic, and are easily my new favorite ears.
The tail is a little stiffer than I was expecting based on the description, but the fur is incredibly soft and luxurious. I’m pretty sure it’s the softest tail I own. It came with a sewn in loop and matching blue ribbon as well as a large safety pin. The loop is not elastic, so I can’t fit it onto the belt I usually wear, but that’s okay. I can tie it on with the ribbon (and make a big dramatic bow!), or loop it onto my other belt. The safety pin has a red end, so I probably won’t use it, but I like that it came with the option. The transition between the purple fur and the blue tip is flawless.
Ultimately, the set looks and feels great. It arrived quickly and was packaged well. The items were everything I was led to expect from the product page, and I have a new favorite kitten set! Thanks a bunch, Top Cat Tails!
To get one of your products reviewed on our site, click here.
The full image set is available exclusively at AyliKatt.Com.
6 notes
·
View notes
Text
How Padlocks Work
Learn about the standard iron padlock to understand the main parts, how they work and also how to bypass the mechanical security features to pick the lock.
With thanks to Squarespace for sponsoring this article. Go to Squarespace.com for a free trial and when you’re ready to launch, go to http://squarespace.com/engineeringmin… and add code “ENGINEERINGMINDSET” at checkout to save 10% off your first purchase of a website or domain.
Padlocks come in many shapes colours and sizes. They have been around for hundreds of years, ranging in complexity of design by different people and civilisations depending on the technology and manufacturing processes they had available. With the industrial revolution came the mass-produced padlock which eventually settled on a pin tumbler design. Called so because inside are some pins and a barrel which rotates or tumbles over.
These are strong mechanical locks which are easy to mass produce and we find them used for everything from keeping our bikes where we left them to symbolising the everlasting love between two people on a bridge, and then throwing the key away to ensure it can’t be undone. But these types of locks, especially the cheap ones, can be unlocked without a key if you know the correct method and once we understand how the lock works we’ll learn how to pick the lock.
When we look at a padlock the most noticeable feature is the U-shaped shackle at the top. In the unlocked position, one end of the shackle pops out of the main body allowing this component to rotate freely. On the inside surface of the shackle we will find two notches. These form part of the lock mechanism and we’ll see that part shortly.
To lock the brass padlock we simply align the end of the shackle with the hole in the lock body and push these together. You’ll feel the internal locking mechanism engage and click into place, the shackle will now be unable to leave the body of the lock. To unlock the padlock we need to insert the correct key into the key hole at the bottom of the lock body, and rotate the key until it releases the shackle.
When the key is turned, the plug will rotate. The plug has a number of holes in the top, within each hole there is a small metal cylinder known as a key pin. Each key pin is a different height, and this will correspond to the profile of the key.
When a key is inserted into the lock, the key pins will follow the profile of the key and move up and down until the key is fully inserted. Once fully inserted, if the correct key has been used, then the top of each key pin will align with the shear line. The driver pins will have been pushed up and will now fully sit within the housing while the key pins sits fully within the plug. This means the plug is now able to rotate. If the wrong key is inserted then the pins will not align and the plug will be unable to rotate.
The key is inserted into the plug. The different sized key pins rest inside a number of holes inside the plug and will move up and down to follow the profile of the key. If the correct key is inserted then the top of the key pins will align with the top of the plug. This pushes the driver pins out of the plug holes and into their respective chamber. The springs ensure the driver pins will be forced into the holes if the wrong key, or if no key, is inserted.
With all the pins cleared, the key can rotate the plug. At the end of the plug is a cam which also rotates with the plug. This connects with the arms of the two latches. The latches are pushed outwards by a spring, this pushes the arm against the cam but also pushes the latch into a notch on the shackle preventing the lock from opening without the key. With the correct key inserted the plug is free to rotate, this rotates the cam which pulls the latches inwards against the spring, releasing the shackle. A spring within the shackle chamber pushes the arm outward releasing the lock.
Nowadays, there are many gifts you can give your loved ones. Often, you wonder what to give that special someone to let them feel that you love them forever. Perhaps a love padlock engraved with a message would work.
Engraved padlocks are the new trend and are available for you online on Amazon, or you can visit your local gift shop. Love locks are excellent symbols of commitment to a lover, a friend, family, e.t.c. They are a perfect way to express to someone what they mean to you.
Traditionally, people hang the padlocks on bridges, but you may have other creative ideas. However, some lovelocks do not come with keys. They symbolize locking your love forever. Here are a few engraved padlocks you can consider.
Let us begin,
40mm Personalized Engraved Love Lock
The solid brass 40mm engraved disc padlock is a beautiful design with a permanent message engraved in bold letters. You can see the writings under most lighting conditions.
It comes with an attractive, black gift box, whose price is overall. It is easily customizable according to your tastes and preference. The gift box also has engravings of your liking, and the letters come with a unique design. You can also look for ones on Amazon with the message you want or place an order with the exact specifications you need. You can also visit your nearby gift shop and select or order one from the manufacturer.
The engraved love lock has a shiny brass color on the top area and a golden color on the bold writings. It comes with a pair of functional keys which resemble the tri-circle padlock design. The 40mm engraved love lock is an ideal gift for father’s day, mother’s day, birthday parties, wedding anniversaries, valentines, e.t.c.
Long Shackle lovelock Double Shaped Heart
It comes in many exciting colors such as pink, red, blue, purple, e.t.c. The long shackle would be a lovely present for someone who loves colorful items. You can also order the color you like with the message of your liking engraved on it. There is a gift box available which you can also personalize with a message.
The long shackle engraved padlock does not have a key, so on one end, it has a small colored rubber or plastic seal for decoration. The large latch is ideal for hanging on a bridge with your loved ones.
It is an excellent gift for colorful occasions such as weddings, Valentine’s day, birthdays, e.t.c. It has a heart-shaped design that captures the essence of love once you set your eyes on it. You can order it online on Amazon or any gift shop outlet available to you.
Bird pink 4 Digit Combination Love Lock
It has a unique and stunning combination of colors. It can get personalized with paintings of your choice to make it more customizable. The material of the love lock is alloy steel and stainless steel that makes it high security. The four-digit combination makes up for the keys, for you can unlock it automatically using the password you set.
It is ideal for locking gym lockers, luggage, sheds, gates, e.t.c. You can personalize it by engraving it with a message to a friend, family, or spouse. You can make a few clicks online and order it from Amazon or visit your nearby gift shop to get a customizable one.
Engraved love lock Necklace
Engraved Padlocks come in a variety of designs ranging from chokers to necklaces and chains. The pendant can be heart-shaped, square, rectangle, or any personalized shape you want. Gifting a love lock necklace engraved with a message is a thoughtful idea. You can also hang it on bridges if you prefer memorable romantic moments.
An engraved golden heart necklace might be just the thing your spouse needs if he/she likes fancy necklaces. You can purchase them on Amazon or your local jewelry or gift shop.
Heart Engraved PadLock and Key Set
These charming engraved heart lock engraved laminated padlock will melt your heart once you set your eyes on them. They have the most romantic message engraved on them. You can easily customize them with the type of message you want. In most cases, the message will either be just what you wanted to convey or will be beyond your expectations. They also come in the most endearing colors, light pink, shiny grey, silver, gold, e.t.c.
The product is a perfect wedding and couple gift since it comes with a wedding card box. These pretty love locks are available on Amazon, or you can check them out at your nearby gift shop.
Iron Antique Vintage Engraved Love Lock
The Iron Antique Vintage Engraved padlock is also called the “love rock”. It’s common among couples, sweethearts, love birds who usually lock it on a bridge, tree, gate, and other placements to symbolize their love.
The interest in love padlocks has spiked since the turn of the century as more people look for different ways to express their love to each other. The vintage love lock features a customized engravement on individual pieces. Some versions have rustic textures to highlight how long both individuals have been together.
You can buy the Iron Antique Vintage Engraved Padlock as a gift to your special friend through online platforms such as Etsy. The engraving gives a personal touch to the item added to the lock includes two skeleton keys (one for each partner).
Silver-Tone Heart- Shaped Love Lock
The silver Tone Heart Shaped love lock gestures a love-shaped design coupled with a personalized engraving on its surface. You can opt for a name, quote, verse, etc. The product also comes with a key for unlocking.
The engraved weatherproof padlock comes in a dominant silver-white color, sleek design measuring between 1.75” by 1.40” by 4.0” in height. You can also purchase the product enclosed in a gift box and a bow ribbon for a more personalized touch. The Silver Tone Heart Shaped love lock is suited for gifts, birthday presents, and on special occasions.
Vintage Copper Engraved Padlocks
Copper love locks have existed for a long time. These love locks come off as extremely durable, safe, and highly customizable. You can purchase the products from online stores such as Amazon and eBay or at antique stores. It becomes even more meaningful when you gift it to your spouse, loved one, or friend.
Vintage copper gives off a rustic look that seems to transcend the realms of time. It has an old-school feeling and might feature other unique properties such as the shape of the keys and the overall aesthetics of the engraved padlock.
Bottom Line:
Engraved padlocks are unique locks in every aspect. In contrast to standard versions, they provide a special message and give off a personalized feel to the product.
Engraved padlocks are perfect gifts for occasions such as graduations, valentine’s day, birthdays, engagements, wedding ceremonies, marriage anniversaries, etc. I am sure you will agree with me that before adopting extravagant decisions, such as locking up stuff with them, a gift like an engraved padlock from someone would be something you would treasure.
0 notes
Text
MedicalMyanne’s Best of 2017: A Comprehensive Gift Guide
I am a huge fan of practical gifts. If an item can be used daily, while still reminding you of your beloved, I consider it the perfect present. Below are my Christmas/Holiday gift ideas for any student in your life, ranging from $1.75 to under $100 for 2017.
Stocking Stuffers:
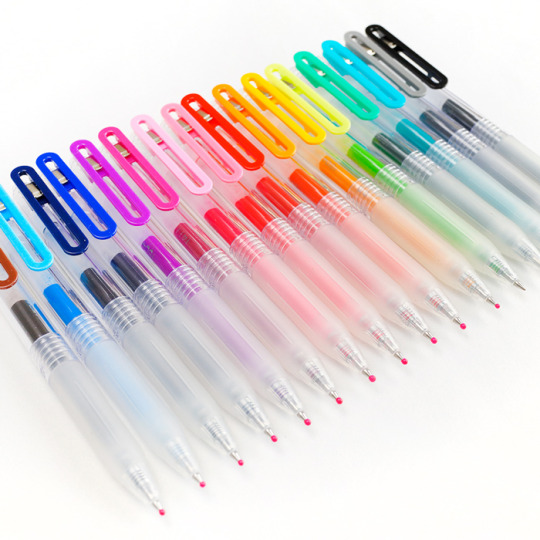
1. MUJI Polycarbonate Pens - $1.75
We get it -- med students study. Make it more bearable by gifting the student in your life a decent pen they won’t lose within hours. These MUJI polycarbonate pens write like a dream. They are retractable, write smoothly, and come in 6 different ink colors (black, teal, magenta, true blue, red, and orange). These don’t tend to leak like the original MUJI capped pens (as much as I like these as well), and are great for white coat pockets, college students, and even Grandma, who loves to pen you a letter every now & then.
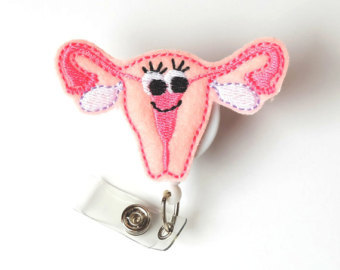
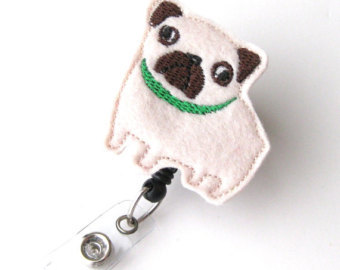
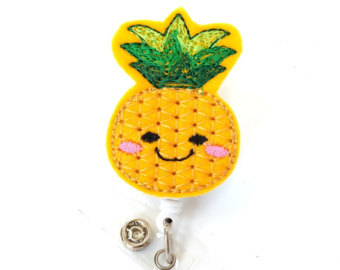
2. BadgeBlooms Badge Reel - $6
Melissa is a nurse-turned-entrepreneur based in Chicago, IL. Her Etsy shop is stocked full of badge reels for every medical professional in your life. My personal favorite are her felt badges -- created into human organs, cute animals, and the most adorable inanimate objects (think - tacos, pineapples, cupcakes!). I own 2 of these myself & they are of great quality. At under $10, these would be great stocking stuffers or for several nurses on your floor while on a student budget. BadgeBloom’s huge selection gives you a chance to make it personal (everyone has a favorite animal or organ), and a badge reel is practical in its every day use. Your recipient will be reminded of you every time he/she puts on his/her badge.
3. Glossier Balm Dot Coms (lip salve) - $12
Makeup is universal, but chapped lips shouldn’t be. As a chronic lip picker while studying, the Mint BDC has been my holy grail. Balm Dot Coms come in 6 different scents (Original/Unscented, Rose, Mint, Coconut, Cherry Birthday Cake). I have always found gifting makeup to be an extremely personal preference, but lip balm is something that gives more leeway. Mint is my personal favorite (think Burt’s Bee’s classic lip balm, but way less waxy), and I’ve gifted them to a couple of friends already. Boys -- this would be a great idea so your girl doesn’t have to exchange a foundation 3 shades too light at a Sephora 30 mins away. You can get 20% off your entire Glossier purchase using my affiliate link here. Balm Dot Coms also come in a trio -- you’ll get any 3 flavors for $30, saving yourself a cool $6. You can spend that on a Burrito Bowl all for you, and cover 3 stocking stuffers for your 3 besties this holiday season.

4. The gift of giving back - Starbucks/Tiff’s Treats Gift Card - $20
Give for others to give -- literally. I have always been a huge fan of “just because” gifts, and with friends all fighting their own battles in grad school, I like to give a little pick-me-up to someone to brighten their day. Give a gift card to Starbucks or a food-delivery company -- not for your recipient, but so they can treat someone, too.
Recently, I’ve started placing Starbucks “To-Go” mobile orders in various locations, based on my recipient’s current location (must be within 100 miles, I believe). All your recipient has to do is pop in & pick it up -- and it’s already pre-paid by you.

If you are based in Texas, Tiff’s Treats is a cookie delivery company who delivers freshly baked cookies right to your loved one’s doorstep. I think I’ve placed over 20 orders for birthdays, as thank yous, and just a little “thinking of you” surprise. They’ve recently amped up their packaging, and you can even write a personalized note to your recipient for free. The delivery comes wrapped in a bow, and comes baked fresh & piping hot (they call your recipient to confirm their delivery prior to baking!). Give a gift card to your beloved to encourage them to treat someone special in their life, too.

Mid-Range:
5. SLMD Daytime Acne Lotion or Clarifying Treatment - $30/each
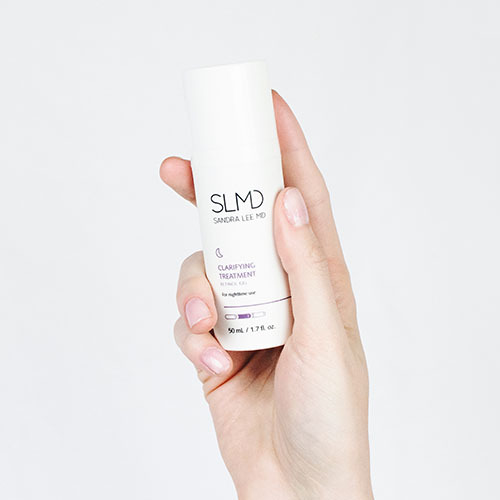
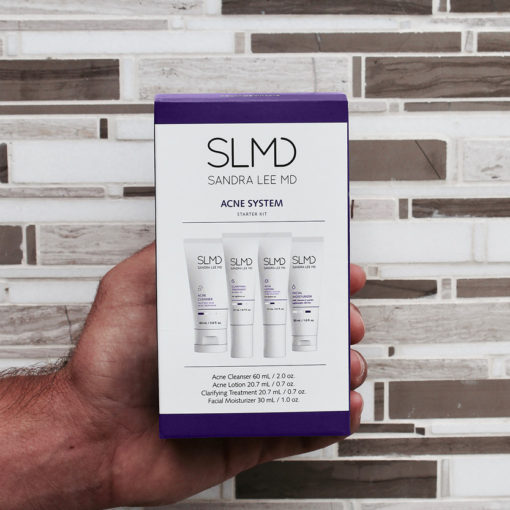
Dr. Pimple Popper, need I say more? I’ve battled with my skin nearly all of my life, and have been loving the SLMD line. The Daytime Acne Lotion is 2.5% benzoyl peroxide, which kills acne-causing bacteria, and the Clarifying Treatment contains retinol, a Vitamin A derivative shown to reduce blackheads, fine lines, and even wrinkles. I was first introduced to these when I started the SLMD 30-Day Acne System (also a great gift idea @ $45). I loved both these items so much, when I finished the trial as well as my normal prescribed topicals, I purchased full sizes of the Acne Lotion & Clarifying Treatment to keep my stress-induced acne at bay.
6. White Coat Clipboard - $25-31
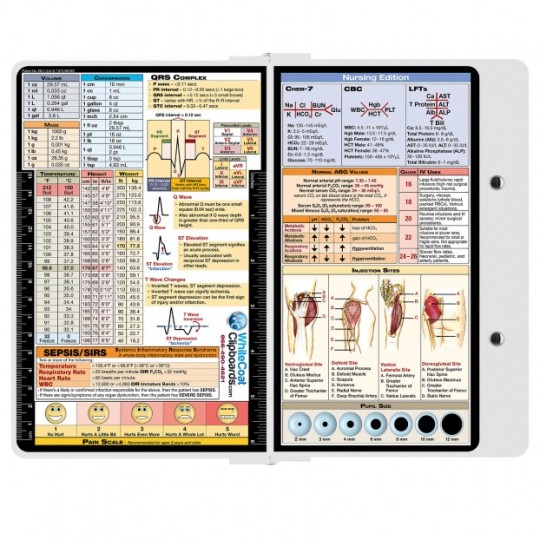
Move over PSLs & UGG boots -- it’s time for the real basic grad school essential. Sleek enough to fit into a white coat pocket, practical enough to have high-yield lab values & fit a whole stack of paper, white coat clipboards are the way to go. I have one as a hand-me-down from an upper-level and was recently given a brand new gorgeous teal one from my med school Big! They come in tons of colors (pink, purple, black, etc.). Be sure to differentiate the medical vs. nursing versions based on the future life-saver you’re giving it to.
White Coat Clipboards are made of metal, and it folds with well-built hinges. These would also be great for high school students just starting to volunteer at hospitals, pre-meds beginning their shadowing experiences, or even physicians who’ve been in the game for a while. Its convenience & durability lasts several years, and can withstand the test of time, as well as the years dedicated to your craft.
7. A Freshly subscription - $45
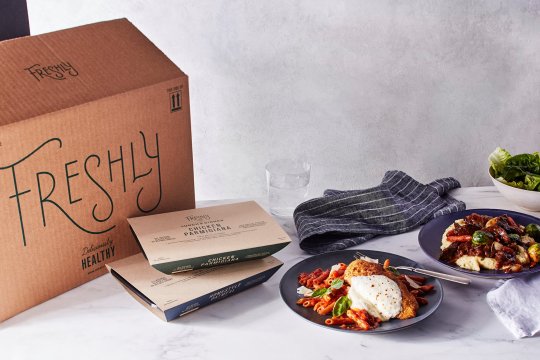
Meal delivery right to your front doorstep. Not even a box of ingredients you’ll have to wash, cut, and prepare. Straight up food -- chef-prepared, packaged with care, and all you have to do is heat it up. Freshly came in so clutch during block exam weeks for me, I ordered an additional week after that and thought I lost all knowledge of how to cook after the 7 days in heaven ended. Not to mention -- their customer service is amazing. They’ll personally call you to confirm food allergies, remind you of your delivery date several hours before, and have your box filled with ice packs to keep your food fresh if you’re working late. Though “surprise” & trial boxes like FabFitFun & Sephora Play!, etc. are absolutely adorable, the greatest gift, in my opinion, is the gift of convenience & not having to wash dishes (hahah). This would be perfect for truly anyone -- a best friend, boyfriend, or a struggling classmate -- nose-deep in finals, recovering from post-call, or “just because” on a lazy week.
You can use code med639 to save $20 off your first 6 meals. I receive no commission nor compensation from this code.
BOUJEE:
8. NurseMates Anni-Lo Shoes - $76.95
These are the cutest shoes known to man. Anni-Los scream comfort with its orthotic shape & adorable mix between the Sperrys & Keds aesthetic. I have these in white & wear them literally every day. I love them so much, I actually ordered a second pair in the same size & color just in case these wear out. These run true size (I wear size 7 normally in shoes, and have these in size 7). Annie-Los can be worn with scrubs or even out in daily life, and even have a little platform that elongate & flatter your legs if you have shorter ones like me.
9. FIGS scrubs - $86
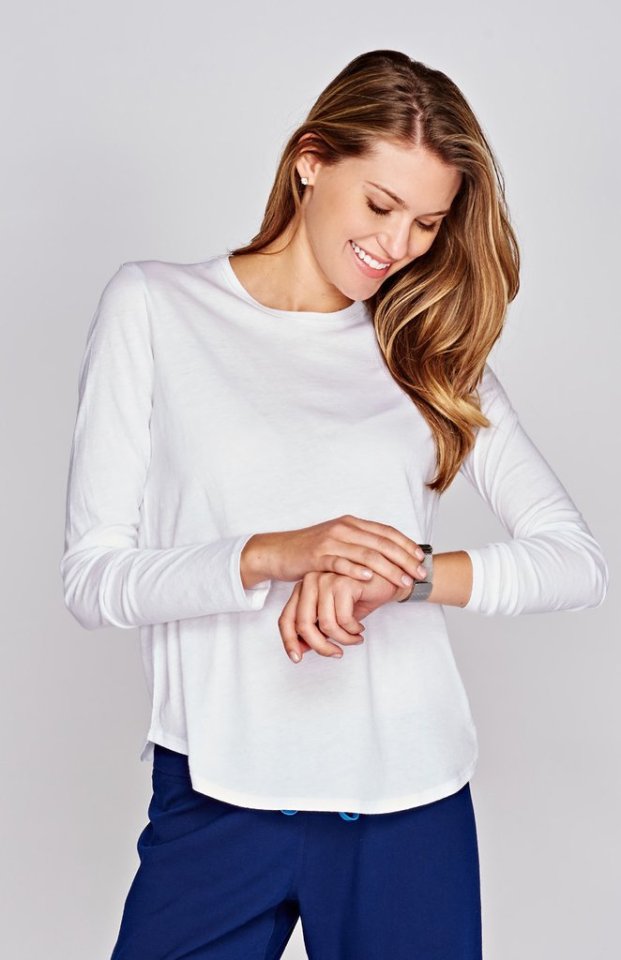
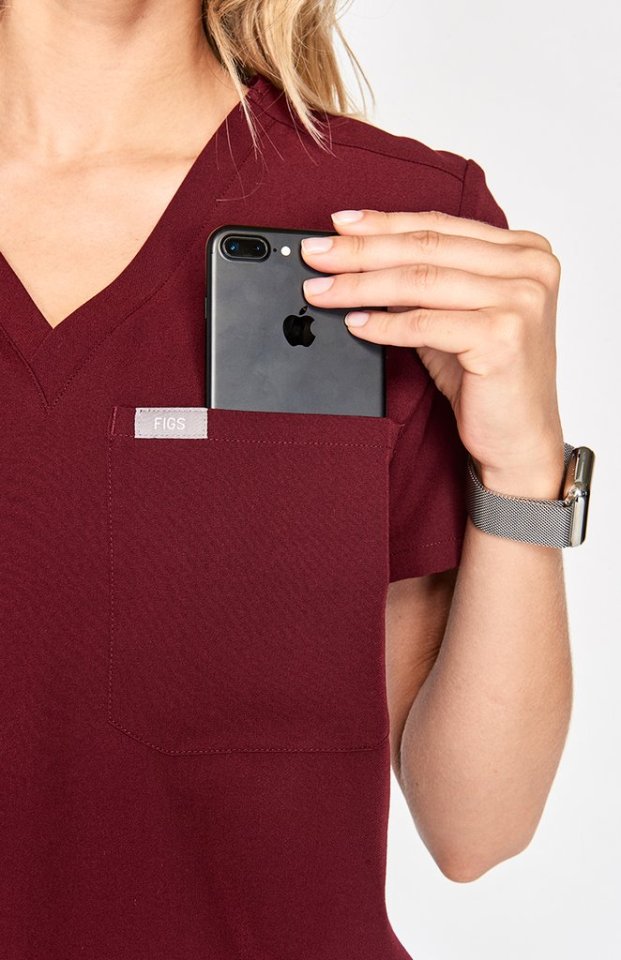
Yes. The hype is very, very real. FIGS are the most flattering scrubs in the game. It boasts a draped & tapered fit, luxe fabric, and an admirable mission to boot (buy one pair, they give a pair to a health professional in need). These are by far the most flattering scrubs I own, their customer service team is a dream to work with, and they really do believe in the concept of altruism (read about their work for Hurricane Harvey here). I am rather petite (5′3″) and a ride-or-die top-tucker. My picks are the Catarina top ($38, chest pocket for optimal tucking) & the Kade Cargo Pants ($48). They recently released a bunch of new colors (burgundy, dark harbor, white) & lots of other “lifestyle” wear. I’ve always been a fan of their lifestyle vest (comes with lots of secret pockets, which I believe is discontinued) and their long-sleeve underscrub (also the most flattering long-sleeves I wear in autumn).
You can use my code MyanneFIGS for 15% off your entire FIGS purchase. I receive no commission nor compensation from this code. FYI - right now, FIGS is offering complimentary, custom embroidering on all orders to celebrate the holiday season. Be sure to take advantage of this!
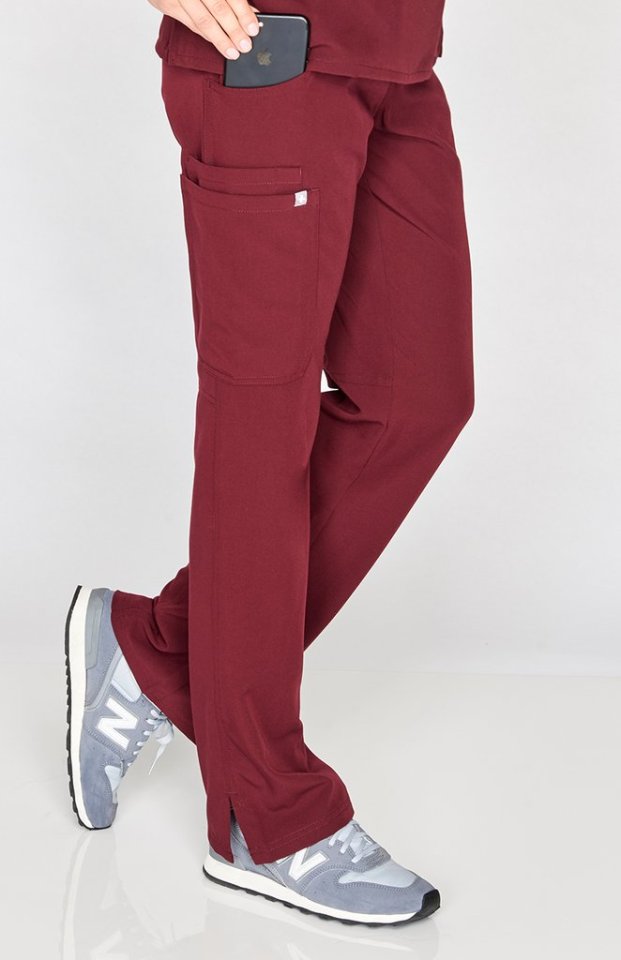

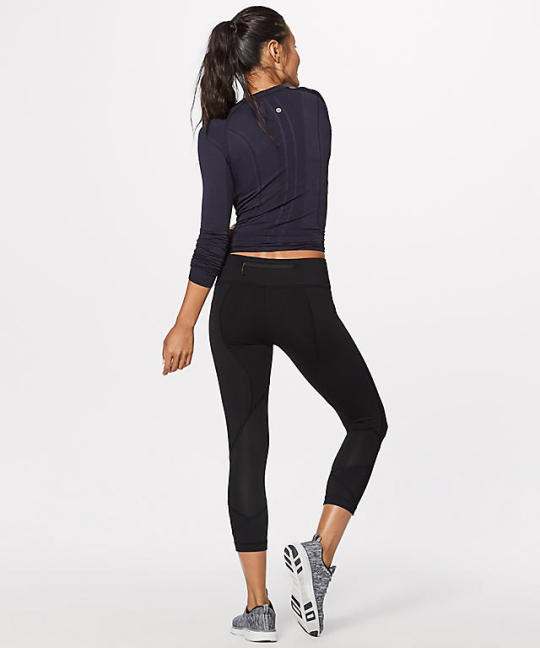
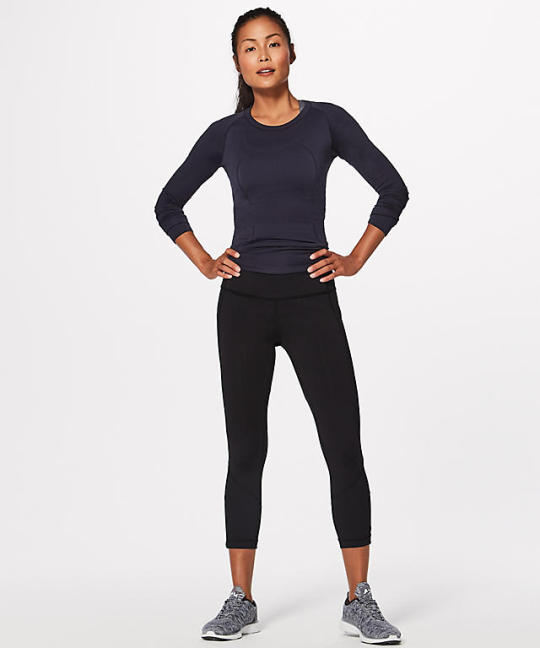
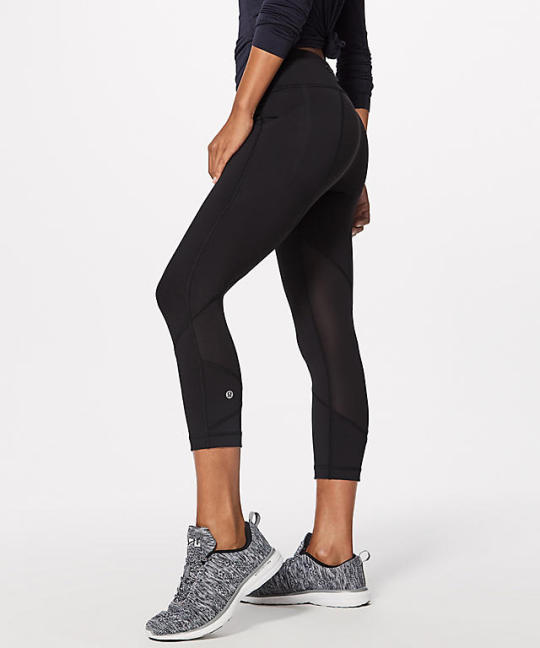
10. A freaking good pair of yoga pants - Lululemon Pace Rival Crops - $88
I found Pace Rivals completely by accident -- on a Lululemon clearance rack that was a size too big for me in Canada. These soon & very quickly became my favorite pants. Their length is extremely flattering, and the material is very durable (I feel like I don’t have to baby them as much as Aligns, which are luxuriously butter soft and also a favorite), but still breathable. Because they are a bit looser, I can hide them underneath a white coat and have it low-key kinda-sorta pass as business pants (#teamlazy). I consider Pace Rivals to be truly worth the price you pay for the usage you will get out of them. My picks are a pair in the color black for a professional monochrome look.
4 notes
·
View notes
Text
Yennefer of Vengerberg

A while back I created a google form asking about which boxes I should do for 2017. One answer that stood out was a person requesting that I do a Yennefer box based off of the character from the Witcher Series. It was the only suggestion for a specific character, I was intrigued and started reading up on her. Since I'd never played the games, I was a bit hesitant, but the idea stuck with me for a while, and never really came unstuck.
After learning about her, I decided that I really liked Yen and was willing to give it a go. The worst that could happen would be that I failed and gave up, so I said hey, why not?
I started out with physical things about Yennefer. Dark clothes, hair, makeup. Her necklace, her eyes, and apparently, her perfume (lilac and gooseberries?). I went with a mix of silver and gold seals because I feel like there are 2 ways she's presented both in the books, the games, and in fandom - cold, hard, and a little unfeeling, and then soft, motherly, and loving. Really, I liked her because she really showed the broad range of human emotion that authors tend to gloss over. She's different at different times in her life, and around different people - but that's what makes her so relatable to me.

Yennefer was born on Beltane, and I used a lot of the day's symbolism in her potions. Blooming flowers, roses, and jasmine, rosemary and lilac (!) for plants. Garnet, rose quartz and beryl (aquamarine) for stones. A red rose, for love, jasmine for sensuality, garnet for inner beauty and strength. I added hibiscus for passion, red tiger's eye for survival and vitality + enhancing integrity of oneself. I figured it was a good one for Yen, considering her story and how she used her magic.
In the bigger potion, there's also mugwort, black salt, and thorns. Mugwort is associated with women, the moon, and fertility. It's also associated with protecting from harm/evil, along with black salt as a protection from evil magic or intent. In this big bottle, I wanted to focus on the Yennefer that's willing to set aside her life in search of a goal, and willing to do whatever she has to do in order to protect people she loves.
The pink potion represents her as a mother to Ciri. Even though she can't have a child of her own, I feel like she's really able to channel the motherly love she feels into Ciri and have someone to watch over and protect; in this potion there's rose quartz chips, pink salt, and cascarilla powder.
The tallest potion represents her as a witch. Lilacs for her perfume, lavender and amethyst for her mystery, onyx for divination, and goldenrod to help move on from emotional trauma. I wanted this one to be about her transition from a girl to a woman, and with that, to a powerful sorceress who can let go of the past while still recognizing that it helped shape her future.

As far as big stones go, I picked a chunky smoky citrine for personal power, an obsidian and moonstone for protection, rose quartz for love (both of self and others) and clear quartz, along with the aquamarine I mentioned earlier. I also included one of my favorite quotes from Yennefer, "No price is too high to pay for the privilege of owning yourself." She's definitely my kind of lady.
Here is another shot of the box:

That’s about it for Yennefer! Thanks for reading!
Yennefer is available in my etsy shop HERE. If you have any questions about her, please message me on tumblr or Etsy.
Also, a reminder to please support me on Patreon for lots of cool BTS videos and info. My Patreon is HERE.
12 notes
·
View notes
Link
Welcome! Come on in and take a look around! My daughter Eleanor, 10-years-old and an absolute delight, wanted a room makeover. She and I worked together to update her room from little kid to tween, and it will carry her right through the teen years with way more style than I ever had when I was growing up.
Thank you to Linda at Calling it Home for organizing the One Room Challenge and inviting me to participate again! Six weeks goes by so quickly (especially when you have a somewhat indecisive kid and a major color scheme change midway through), but it’s always the most fun and a really good kick to get a room totally redone.
Pinky/purple/lilac/lavender/orchid/thistle. What do you call this color? I call it a color I never would have chosen myself, but one that my daughter wanted and that I have come to love. If you know me, you know I love pink, but I prefer it less saturated and on the peachy side. It may seem funny, but this particular color is a little outside of my comfort zone!
The room had white walls and wood trim when we moved in. We painted it dark blue when Eleanor was four (she chose the color then, too), but six years later is a long time in kid years, and she was ready for a change.
From Sherwin-Williams Loyal Blue to Benjamin Moore Magic Potion with Barberry painted trim.
How pretty is that Rifle Paper Co. for Loloi Rosa rug? It was the first piece we decided on for the room and it set the tone for everything to come. It works beautifully with the mix of bedding you’ll see throughout the photos. The jersey-knit sheets are Eleanor’s favorite because not only does she like the lilac pattern, they feel like a soft t-shirt. All of the bedding is from Garnet Hill, and it can mix and match together in different ways to give E some options.
I had planned on making an upholstered headboard but instead found a secondhand Serena & Lily Pondicherry headboard to reupholster. Or more accurately, slipcover. It turns out we really liked the fabric it came with, so a slipcover will allow us to switch it up and keep the original patterned fabric safe and sound for future use. Slight problem: I’m not an experienced seamstress. It’s going to take me some time to learn how to do the slipcover, so I draped the fabric over top as best I could to give you an idea of what it will look like with the different bedding combinations. Which version do you like best?
Obviously the bed in a bedroom, especially when it takes up as much space in the room as it does here, has a huge impact on the entire look. The tone on tone look quiets the design and is in line with my original intent for the room. E prefers the slipcover option too — every big decision in the room was made together.
The slipcover will be made from Fabricut Devon wool fabric in Orchid with Lotus piping. Curves and piping on a huge upholstered piece for someone with the cheapest base model sewing machine from a decade ago. Ambitious! I’ll figure it out.
I recovered a small ottoman with Inner Circle fabric to give E a place to perch besides her bed. I also figured out how to make functional Roman shades!
I’ve wanted to use this Edie Stroheim fabric for years. It looks amazing in E’s windows, and I love that red/orange Spice color against the walls and trim. And friends, I see that some of you have doubted this particular fabric choice perhaps more than anything else in the room. I get where you’re coming from! It works because the wood tones in the dresser and floor are very orange, and the red in the rug has a lot of warmth to it (rather than being a primary bright). Also, take into account the sun streaming through the linen, and it all just works. I adore it.
I stole my favorite decorative pillow from the guest room because it looked so dang good with the bedding, but most of the time E will probably have the other one in here (with the horse print). She says this one is too bumpy for her. It’s almost like kids don’t realize that sometimes the pretty pillows you put on the bed are just for show and they aren’t always the most functional thing but we buy them and put them there only to take them off each night and put them back in the morning, but I digress.
The nightstand is from Target, and I used one of the original Art Deco handles from her dresser on it to tie the two together. A nightstand with both a drawer and a shelf is always optimal, and E’s radio is tucked underneath so she can listen with (or often without) headphones in bed. The BB8 is her alarm clock.
Opposite the bed is the entrance to the room, and Eleanor’s closet. Most of her toys are on shelves in the closet, but I rehung the circular shelf that was in the room before for E to display some of her favorite things.
Books, books, books on a low Parsons bookcase. She’s a voracious reader! (Takes after her mom and dad. *dusts shoulders off*) We had to pare the books down quite a bit to get them to fit, but she had a lot that she had outgrown so those got passed down to her little brothers and it worked out.
The details in Eleanor’s room will no doubt change over time. That’s what will let this room grow and change with her as she moves on from her tween years. Will she always love decorating with horses and cute animals? Maybe, but that’s for her to keep or change as she decides.
We kept the art that was in the room before, just shuffled it around some. The hanging bird was from Land of Nod years ago, the cats are a vintage tea towel hung with dowels, and the “just be cool” banner was a favor from when I took a video editing workshop that DesignLoveFest taught.
The silhouette art is actually a quilt! It used to hang in our living room ages ago, before Eleanor was even born. It was a made by an Etsy seller, long out of business (Dream of Stars), and I stretched it over canvas stretcher bars.
The antique Art Deco dresser was a Facebook Marketplace find. That and the Pondicherry headboard are probably two of my best FB Marketplace finds ever! E is a lucky girl.
The bed itself is from Tuft & Needle. E went from a twin size to a full (that was important to her — I think it makes her feel more grown up), so she needed a new mattress. It’s sitting on a box foundation and metal base that has supports to attach the headboard. The bed is so comfortable, it’s been a tempting distraction to me while working on her room all these weeks! Like, maybe a quick nap might be in order? Zzzzzzz.
Her room glows beautifully at night. The Crystorama Truax Pendant in the center of the room is oversized (16″ diameter, which is larger than the globes I have in our much larger double parlor), but it provides a dramatic sense of scale. There are three candelabra bulbs inside, so it’s bright without being harsh.
Flanking the headboard are a pair of POP Wall Sconces from Blueprint Lighting. They look like eyeballs and I love them! A happy bit of happenstance is that the headboard I found had curves that perfectly mirror the circles of the sconces. I hung colorful tassels from World Market to zhush them up a bit but if they look too little kid for E as she gets older, she can take them off and they’ll look cleaner and more modern.
I wasn’t sure about also including a task light on the nightstand. E says she can read by the sconces, but the task light is far brighter and I thought she may like it. It’s the same light she had before (from Target a few years ago).
The bookshelf got a pair of small resin lamps lamps from Target which were very cute and super affordable at $20 each. They came in pink and black versions too, but the green looked prettiest. The pink gourd lamp that used to be on the dresser before got moved over to the dresser. It was yet another lamp from Target (I think they’re always a great source for cute, inexpensive lighting for the kids’ rooms).
Thank you for following along as this room came together. It has been one of the most fun makeovers I’ve done because it was a true collaboration between me and my daughter. I hope you’ve enjoyed seeing it come together as much as we have!
I’ll work to get all of the sources listed on the Shop Our House page and will also add them below!
Pondicherry Headboard, Serena & Lily
Warwick Wood & Rattan Side Table, Target (Threshold)
POP Wall Sconces, Blueprint Lighting
Truax Pendant, Brian Patrick Flynn for Crystorama
Rosa Rug (Black), Rifle Paper Co. for Loloi
Resin Green Accent Lamp, Target (Project 62)
Follow along with the One Room Challenge participants!
• At Charlotte’s House • Design Addict Mom • Erika Ward Interiors • Erin Kestenbaum • Girl & Grey • Gray Malin • Hommeboys • I Spy DIY • Jewel Marlowe • The Learner Observer • Making it Lovely • Nicole White Designs • Old Brand New • Oscar Bravo Home • Place of My Taste • The Rath Project • Room for Tuesday • SG Style • Undecorated Home • Veronica Solomon • Media BH&G • TM by ORC
My One Room Challenge Sponsors
Thank you to the following sponsors for generously providing product. • Blueprint Lighting • Crystorama • Fabricut • Garnet Hill • Loloi • Tuft & Needle
My One Room Challenge Posts
Follow along from the beginning! • Week 1: My Daughter’s Room • Week 2: The Design Plan • Week 3: Adding Interest • Week 4: A Disagreement • Week 5: A Lucky Find
And check out my previous One Room Challenges! • Spring ’16: Our Bedroom and Den • Fall ’16: Front and Back Entry, Stairs, and Hallways • Fall ’17: My Home Office
© 2019, published by Making it Lovely as One Room Challenge: Week 6 (My Daughter’s Room Reveal!) | 2 comments | This post may contains affiliate links; I will be compensated if you make a purchase after clicking on my links.
The post One Room Challenge: Week 6 (My Daughter’s Room Reveal!) appeared first on Making it Lovely.
0 notes
Text
*post contains affiliate links which means NAT receives a small commission for each sale made
Postbox from Postmark’d Studio is a monthly stationery subscription box. Each package comes with a themed assortment of cards from different letterpress’s all over the world. In addition you’ll receive all the postage necessary to send your cards as well as an artsy doodad. Subscriptions are $25 monthly. Use code CS50 and our link to receive 50% OFF your first package in a 3 month subscription and get a FREE gift! NAT received this package at no cost for review purposes.
Subscription Box Unboxing
youtube
Subscription Box Review
The first glimpse inside the Postbox from Postmark’d Studio for August. I love that there is always a handwritten note with each box.
Everything that I received in my August, “Sweet Notes” themed package. This is such a colorful, fun assortment! I always wonder how they are going to top the month before but every month they manage to do it!
So what is all this stuff?
#gallery-0-4 { margin: auto; } #gallery-0-4 .gallery-item { float: left; margin-top: 10px; text-align: center; width: 50%; } #gallery-0-4 img { border: 2px solid #cfcfcf; } #gallery-0-4 .gallery-caption { margin-left: 0; } /* see gallery_shortcode() in wp-includes/media.php */
The box insert. The front lists each of the items that we received in this box and the reverse tells you about an interview on the Postmark’d Studio Blog with one of the owners of a letterpress included in this box!
Also in each box is a hand written note card as well as that large postcard.
Vintage Postage
Each package from Postmark’d Studio also comes with sufficient postage to mail all your new cards. For the past six months or so they’ve included vintage postage which adds a really fun element to the art of mailing a letter.
Because these are in several different and varying amounts they do show you groupings of stamps to give you ways to make it to 55 cents.
Candy
What would be better in a “Sweet Notes” themed box than a couple pieces of candy. In this package I got some Skittles, Starburst (two pinks in that pack WINNING) and a roll of Smarties which I smartly passed on to my children (see what I did there?)
Marvy Le Pens
$7.14
The first item in our package is this four pack of brightly colored Marvy Le Pens. In purple, pink, orange and blue these fine tip pens will be great to fill in all your new blank inside cards. These pens have a water based dye that is acid free as well as non-toxic. I love pens like these because they just seem to add a bit of flair to anything you are writing and because pens in my home disappear so quickly the more the merrier.
Mona’s Lollipop Postcard
$2.50
This is honestly one of my favorite items that was included in this box. I think I’m going to frame it and add it to the wall that goes up my staircase. There’s something really cool about taking fine art and giving it a modern (and hilariously real) flair. I thoroughly enjoyed browsing the Altered Thrift Store Etsy shop.
Artist Jason Jones is a muralist and started this art of taking thrift store paintings and turning them into silly, fun upcycles was completely by accident and I’m loving it!
Pop! Card
$4.38
The first proper card in our box for August is this pop art inspired card from Santoro London. The textured polka dots on the card coordinate perfectly with the dots on the envelope that’s include with it. This is the second time this fun and creative company has been featured in the Postbox from Postmark’d Studio.
Santoro London started in 1983 and now ships to over 60 countries and has won over 50 international design awards.
Congrats Card
$5
The next card in my package is probably my favorite card in this month’s box. I love the artistry and the whimsical handwriting. And although the colors don’t immediately make us think candy this card definitely fits into this month’s theme. This card would be great to send to a friend who could use a little pick me up.
People I’ve Loved (I LOVE this name) is an Oakland, CA brand that is headed by Carissa Potter. This is the first time I’ve seen them in a Postbox.
Sweetest Birthday Card
$5
Next up we have the most brightly colored card that I think has EVER been included int he Postbox from Postmark’d Studio. This birthday card would be great for a young lady (my daughters birthday is literally days away). It’s also great for anyone that has a sweet tooth – I had fun recognizing each of the candies on this card!
Lucky Horse Press is Located in Basking Ridge, New Jersey and is the creative inspiration of Michele Lee. They’ve been featured in the Postbox from Postmark’d Studio several times.
Pinata Card
$5
The final card in this month’s assortment is from Quick Brown Fox and is the cutest message. Great to give to a child or loved one and there’s absolutely no denying the sentiment with this one is sweet! I have a few other great cards from Quick Brown Fox as well.. I love the colors that they use, there’s something so fun and vintage about them!
The Quick Brown Fox is located in Brooklyn New York and was the subject of the article posted on the Postmark’d Studio’s website.
So in summary
Presentation: Each package from Postmark’d Studio is excellently packaged and everything arrives to us perfectly each month
Quality: Each of the items in this selection is made with love. Everything from the illustrations to the card stock these cards scream high quality! I think Postmark’d Studio does an excellent job of seeking out the best independent letterpress’s and including them in their boxes!
Curation: This month’s Sweet Notes theme was executed excellently. The theme came together nicely while the items didn’t feel even remotely redundant, I received many cards for many occasions and I can’t wait to get writing!
Box Economy: For the price of this box ($25) we received $27 in products (not including the postage or the candy) so as you can see you are getting a great deal!
Subscribe to Postbox from Postmark’d Studio
Postbox from Postmark’d Studio Subscription Box Review + Unboxing + Coupon | August 2019 *post contains affiliate links which means NAT receives a small commission for each sale made Postbox from Postmark'd Studio…
#postbox review#stationery subscription boxes#subscription box blog#subscription box review#subscription box reviews#subscription box unboxing#subscription boxes
0 notes
Text
Gift Inspiration for the Jewelry Lovers in Your Life
Sometimes it’s so hard to find a gift for someone that doesn’t fit the typical “Mom”, “Dad”, “Spouse”, “Coworker”, etc mold. Instead, try this series of listed gifts for all those nerds, foodies, d-i-y-ers, and many more. Also, I’ve listed them from cheapest to most expensive, for your shopping convenience. Enjoy!
10 Gifts for the one who loves jewelry:

Recycled Skateboard Ring w/ Hemp Necklace
For someone who loves being active and the outdoors, but also for the one who loves taking something old and making it something new. This recycled skateboard ring can be worn on a sized-to-order hemp necklace, as the ring itself, or used as a keyring.
$13.00
Find it on Etsy.

Cinnamon Roll Christmas Ring Candle
These candles have become very popular, but they never get old. Even better, Diamon Candles has Christmas scents. This gift is just as much about the experience as the material present, which is my favorite thing about a gift. For those that enjoy candles past Dec 25th, they do come in many other scents.
$24.95
Find it on DiamonCandles.com

Sterling Silver Roman Numeral Band Ring
This ring is decorated with various roman rumerals set in two solid bands of silver. It’s the perfect ring for a man or a woman, especially one that enjoys a touch of nerd. The ring comes with a jewelry box holder.
$24.97
Find it on NordstromRack.com

Coordinate Necklace
I bought a silver one of these a while back and I have worn it everyday, continually, since. I put the longitude and latitude for my home town on it. It came quickly and has survived salt water, river water, and pool water. It comes in three finishes and can be personalized with any location. Size-to-order chain included.
$25.51
Find it on Etsy (Also comes in a vertical hang, here)

Big wooden magic jewelry puzzle box with hidden key secret opening
This one isn’t just for the jewlery lover, but also for the puzzle lover. This magic box opens after a specific combination of movements that eventually reveal the keyhole. Let the recipient try to figure it out, but don’t worry, instructions on how to open it are on the Etsy page.
$34.06
Find it on Etsy

Coin Wrap
A little bohemian, a little Greenwich Village. This wrap is simple yet cool. It’s an obvious bracelet choice, but it could also go as an arm wrap, ankle wrap, choker, or even around the outside of the thigh if you’re on that Coachella vibe. Flat beads are strung by gold-colored brass wire for easy bend and flex.
$48.00
Find it on AlexandAni.com (Also available in Slate Grey)

Crystal Ring Holder
Ceramic crystal formation ring holders with 22k gold accents. I love this option because it comes in so many colors, everything from pink to black, and with personalization options. Each one is hand made and unique. They even come with a gift box.
$76.00
Find it on Etsy.

GEM-WATER BOTTLE
This is another crossover for not just the ones who like sparkly things, but also the ones who like to shine from within. These water bottles come with nearly twenty different gems to choose from. Each one has a specific benefit attached to the precious stone that infuses your water. It also feels like a collector piece that you’ll keep on your desk so people will ask what it is.
$78.00-$330.00
Find it on gem-water.com

Ahimsa In Sterling Ring
Another personalized option that has a special twist to it. Ahisma means “to do no harm”; what better phrase is there to wear with you all the time. The ring is hand-forged and hand-hammered, each one unique.
$104
Find it on custommade.com

Equestrian Knight Cufflinks
Imported, 100% brass horse cufflinks by Burberry that are the perfect accent to any Christmas suit. Burberry also has a few geometric links and the traditional gingham design.
$190.00
Find it on burberry.com
I hope you get a few ideas for that special jewelry lover in your life. More lists to come.
Lost in dictation,
Jess
0 notes
Text
For the Love of Little Broken Things: A Chicago Hairstylist Emerges Stronger After Fire
By David Himmel
“love breaks my bones and I laugh.” —Charles Bukowski, Fingernails; Nostrils; Shoelaces
Cassie Krepel had worked at plenty of different salons. In Chicago and Nashville and in different corners of Los Angeles cutting California locks. None of these were the type of place where she wanted to style, cut and color hair, so, she opened her own. Something different. Something welcoming. Something for the neighborhood and its creative freaks and weirdoes and straight-laced downtown nine-to-fivers and suburban empty nesters. Something that wasn’t limiting in possibility. She called it Little Broken Things.
Doors opened on Aug. 16, 2017. Right away, business was great. The art gallery concept was a success and word was spreading quickly. The neighborhood was responding. Eight weeks later, it all went up in smoke.
While the neighborhood slept through the pre-dawn autumn hours, the EyeVac used to vacuum up the clippings had gone haywire. The electrical fire quietly smoldered, heating up the split-level salon on the edge of Bucktown. The smoke grew darker, thicker, hotter. The walls, artifacts, appliances and Krepel’s dreams, future, chef-d’oeuvre melted — distorted into grotesque evidence of loss charred black.
Krepel had just returned from a weekend getaway in Nashville. It was meant to be an easy Monday to kick back and recover from the trip to Music City; coffee, read a book, listen to her boyfriend’s band, End It All — whatever people do on a day off, because no self-respecting hairstylist works on Mondays. Her phone rang at 8 a.m.
She and her boyfriend rushed over to Little Broken Things. Fire trucks lined Western Avenue. The large street-facing windows had been smashed out sending glass shards to litter the sidewalk. Her heart sank. Her stomach seized. Her face went numb. She squeezed past the firefighters and looky-loos. The remains inside were hardly recognizable. Dirt from plants knocked over turned to mud in the puddles left by the firehoses. Her hand-picked antiques and furniture and oriental rug were caked in soot and destruction. The large Chicago flag hanging from the wall in the waiting area stained with black smoke.
Little Broken Things was made to create beauty, cultivate artistry and convoke friends. But now, mere weeks after its ribbon-cutting, it was a taped-off crime scene. Do Not Enter. The investigation was underfoot.
Krepel had opened her business fast and furiously. It wasn’t easy. And as she stood among the soaked and smoked-out wreckage, she knew that she had to put it all back together again. What she didn’t know was how and how hard things were about to get.
Finding a place
Cassie Krepel never wanted to work in a salon. Not the kind most of us are used to, anyway. The ones that feel sterile, bleached out and void of personality. The kind where you’re made to feel lucky just to sit in their chair. Or the ones that are out of the box plastered with corporate-approved pictures of power-pop punk bands on the walls. The kind of salon where you’re greeted with arrogance and indifference, where your name isn’t remembered once it’s written down in the reservation system. She never wanted to work in places like that but she had because that’s what so many salons are.
“I was always the odd one out,” Krepel, 32, says. It didn’t matter where she went throughout the 12 years she’s been styling hair — the smug joints in the hipster ’hoods, the Hot Topic-like facsimile salons on any particular corner — she never quite fit in. But she was good at what she did. She built a clientele, which may well be the hardest part of being a hairstylist especially if you’re a rolling stone searching for the place you can comfortably brandish your shears.
In 2013, having grown tired of salon life, Krepel moved to Los Angeles to pursue her other dream of designing film sets. A friend of hers was connected to someone who was connected, and Krepel secured an internship working on a horror film. Hollywood internships being what they are, she spent most of her time doing grunt work, which did not require creativity, but did require a thick skin for getting dumped on by the set design director. If she was going to make it in the movies, it was going to be a long, hard road with next to no financial security along the way.
L.A.’s saving grace was romance. While still living in Logan Square, Krepel had reconnected with an old friend from high school, a guy she dated for a month their senior year: Eddie Hamel. He was earning his degree in audio engineering in San Diego so they did the distance thing for four months before they both moved into an apartment in East Hollywood. While Krepel toiled on set, Hamel made the commute by train to San Diego every school day. It wasn’t ideal but it was something — they had each other.
The set design grind continued to disappoint. She’d finally had enough when her boss sprung a last-minute demand to work a gig, refusing to let Krepel skip it or be late because of a prior commitment to drive Hamel to work. Bills needed to be paid and her dignity had taken enough of a lashing. She left the Hollywood backlot for a Floyd’s Barbershop in Venice. The horror film she was interning on… it was never released. Not even straight to video.
Happier at the chair, Krepel remained an unsatisfied seeker. “I think a lot of hairstylists have this moment when they say, ‘I don’t know if I want to do this anymore.’ But then, what else do you do? And I was like, I’m going to fucking open my own business.”
After two-and-a-half years and five different salons, she returned home to Chicago and took a job at a chair at Twisted Scissors in Logan Square. She foraged for money, re-animated and built on her Chicago clientele, and when a space opened up at 2137 N. Western Avenue, Krepel didn’t hesitate. She signed the lease on July 1. Six weeks later, Little Broken Things was open.
Into the blackness
The first days after the fire were a blur. Krepel was on auto-pilot — survival mode. She posted the temporary closing on social media; updated the website; called clients on the schedule and emailed the rest. She met with fire inspectors, insurance adjusters and lawyers. Afternoons were spent on hold or leaving voicemails with the adjuster. It was a slog. Insurance companies rarely pay out a policy holder with glee, especially if that policy is only 10 weeks old. Was something suspect? Had Krepel sabotaged her own salon for the money? Of course not. But Krepel was a young women, just 31, with pink hair and tattoos. They all looked at her like, Who is this little girl?
“I was so afraid of saying the wrong thing,” Krepel says. “I felt like no one was on my side, I had no one I could confide in professionally — I didn’t know anyone whose business had burned down.”
She worried about the big things like rebuilding her salon, and the little things like, could she take things out of the salon, was any of it salvageable… Is it all ruined? She knew how to run a salon but this, this was all new and she was alone — adrift rudderless in a sea of firehose water and burned, broken things. One of the stylists who worked there suggested to Krepel that she change the name of the salon to Little Burned Things.
The name of her salon was inspired by the Charles Bukowski poem, Fingernails; Nostrils; Shoelaces. “I was always going to call it Broken Bones — it’s all about resilience. We’ve all had broken bones and survived,” she says. “But as I got closer to opening it, Little Broken Things had a better ring to it.” That name was a repurposing of her Etsy shop where she had been making jewelry and unique trinkets out of broken stuff like watch parts. She was creating little things out of little broken things. And now, here she was, having to create yet another thing out broken things — her broken dreams.
Bukowski’s words and her own resilience got her only so far. Krepel is a doer. She needs constant momentum, true progress to feel anything even remotely like peace. So when the rebuilding’s momentum stopped, she found herself lost again. She sought out a therapist to help keep her from going mad.
“I knew I was repressing my feelings so that I didn’t have a total breakdown. It was important for me to stay level through this thing. But I didn’t want to just breeze past all of this. I wanted to experience my emotions and process them. I wanted this loss to resonate and always remember why I kept going.
“Day after day of having little to no control is my worst fear. I felt like I was drowning, like there was no point in getting out of bed. It came in waves… One rush of momentum when construction started — progress! Then, the next wave… no one does any work and I can’t get the insurance adjuster to call me back.”
Back to beauty
It took her a month-and-a-half to open Little Broken Things the first time around. Coming back from the fire took 11 months. She spent those 11 months trying to stay even keeled, afloat and fighting with insurance adjuster answering machines. She rented a chair in Lakeview. The kind of place she describes as politely as she can as “basically a big space with cubicles and plumbing… It’s where hairdressers go to die.”
But Krepel didn’t die. Her salon may have burned out, but she never did.
✶
It’s a hot Thursday morning in September. Dana Jerman and I are visiting with Krepel at Little Broken Things. She’s not open for business just yet. In two days, she’s hosting a grand re-opening. There will be food and booze, and I can bring my kid. She’s got a little baby fever. We’re not sure of Hamel’s feelings on that fever. As we chat, it’s difficult to imagine Krepel frustrated with her chosen profession or furiously hindered by the past 11 months of slow progress. She’s cool, measured, funny and hopeful. It’s the kind of attitude that comes only after understanding the darker, uglier side of life’s moments.
“By the time I open these doors, it’s going to be such a relief to me,” Krepel says. Normally, when you open the doors that’s when the work starts. But for me… it’s like now I can fucking relax. Because I know how to do this in here.”
It’s not fair to call Little Broken Things a salon. Yeah, salon things happen here but it’s more of an arthouse. Artists, musicians, jewelers, literary junkies are all on display. “I want artists who you might not see otherwise. I want to highlight people who are just playing with art. When you get a bunch of weirdoes together, cool things happen.”
Cool things are happening. As we talk, alternative music from the ’90s plays on the speakers. Most of the songs I had forgotten I liked. Paintings (for sale and several sold) by David J. Paha hang from long wires on one wall. The Chicago flag is now framed, hung back I place but with all of its smoke damage untouched and on poetic display. Framed photos from the fire line a corner. One eerie image has Hamel standing among the destruction, his long jet black hair hanging over his face. Protecting his eyes from seeing the horror? Advertising that he needs a haircut? Or just a man still standing among the rubble, a show of resilience.
Krepel has a thing for strong, sometimes scary men with artistry and brilliance in their veins. Hamel, for one is a musician, audio engineer and owner of Scripts Records who while kind, dabbles in art’s heavier forms. Hunter S. Thompson’s and Terry Gilliam’s Fear & Loathing in Las Vegas is the theme of the bathroom. It’s bat country in there. Answering nature’s call in this bathroom makes you feel like you’ve ingested “two bags of grass, 75 pellets of mescaline, five sheets of high-powered blotter acid, a saltshaker half-full of cocaine, a whole galaxy of multi-colored uppers, downers, screamers, laughers... Also, a quart of tequila, a quart of rum, a case of beer, a pint of raw ether, and two dozen amyls.” It’s amazing. On the back wall, a large mural of Bukowski’s anguished grin oversees the chairs and art and metal band patches and vintage typewriters (as if there’s any other kind) and earrings made of little broken things. It tells us to “Find what you love and let it kill you.” Taken literally, it’s terrible advice, but the three of us standing at the front desk chatting away all fully understand the sentiment. Just about anyone can. Certainly Krepel’s clientele gets it. Because they get her.
That’s why we’re here, that’s why Little Broken Things exists. It is as much Krepel’s soul put into practice as it is a place to get a cut, color, piece of art or good conversation.
What’s missing is an EyeVac. “Never again,” Krepel says. She got a little too fancy the first time around. Now and forever more, she says it’s a dustpan all the way. And she says that the gods spoke to her during the 11 months of rebuilding. Slow down. Why are you hurrying such a big thing? Learn more. “Patience is something I struggle with,” she says. “I think that was a big part of it. The fire took everything away. I had to sit and think about my life. I’m braver now. I know a lot more. I’m not so meek about speaking up.”
Little Broken Things opened again on Sept. 25. It’s even more the kind of place Krepel wanted it to be than it was before. It’s even more her sanctuary. And more importantly, it can be a sanctum for any of us. A place to be made beautiful on the outside with the ability to beautify our innards by consuming the art and music and that unavoidable sense of strength and resilience.
“Being a hairstylist, you create change,” Krepel says. “It’s immediate gratification. The idea is to make someone look and feel their best. Your hands are moving, you’re standing, your brain is working to formulate and mold your shape. You’re talking and being social, courteous, conscientious, monitoring your client’s comfort levels. Firing on all cylinders. There’s no time to think about anything else but the person and project you are currently submerged in. I love being a hairstylist, but this fire has given me a chance to step away from behind the chair and learn the way the gears move.”
We’re all rebuilding. We all want to be beautiful. We’re all seeking gratification. Krepel went through the fire and emerged to give us a place that is as much ours as it is hers. A place where we can feel beautiful, where we can feel gratified, because when we feel good, we don’t want to burn the whole fucking thing down. She’s given Chicago a place that proves the most beautiful things often come from the things that were the most broken.
Little Broken Things 2137 N. Western Ave. 773-799-8828 littlebrokenthingschicago.com Tuesday–Thursday 12–8 p.m. Friday–Saturday 10 a.m.–6 p.m. Services Book online
✶
New Art Exhibition Premiere: Featuring Will McEvilly — “Down Faithful” Friday, November 2, 2018 6–9 p.m. @ Little Broken Things
McEvilly’s art will be for sale, as will copies of The Many Splendored (Scripts Records), the latest release from his modular synth/drone project, Holy Family.
If you are interested in consignment sales or sharing your work in an exhibition/performance, please email a brief proposal and links to your work at [email protected].
#Little Broken Things#Cassie Krepel#Chicago Salon#Hair Salon#Wicker Park/Bucktown Hair Salon#Bucktown Hair Salon#Wicker Park Hair Salon#Charles Bukowski#David J. Paha
0 notes
Text
How To Create A TV Gallery Wall
Some say gallery walls are trending out in favor of larger scale art. Maybe. It makes sense that gallery walls on every wall (especially the ones with a ton of tiny frames) might feel a little less “new and fresh” these days. But I’d argue that a collection of frames hung together on the wall feels pretty classic if you stop and think about it. Watch Home Alone. They totally have a gallery wall going up their formal staircase in the foyer where Kevin sleds and hurls paint cans. But one spot I love for a gallery wall these days is actually around a TV. Why? Well, that big black box isn’t exactly gorgeous.
It’s often this hulking dark thing on an otherwise bare wall, so why not break things up and add a few other rectangular things to deemphasize it. It’s not like the TV disappears when you add a gallery – but at least you have a few other (prettier) spots to rest your eyes. And you can always turn on Planet Earth, since that makes any TV look like art in a nanosecond.
We first blogged about adding a frame gallery around our living room television, oh, FOUR AND A HALF YEARS AGO (evidence: here – also how funny is the “What Does the Fox Say?” reference – ah, 2013). Things have evolved A LOT in that room since then (hello paint!) and the gallery got a few tweaks (some new art there, some frame switches there) but it has pretty much stood the test of time. And since I get a bunch of questions every time we show a smidge of it on social media, this post is for everyone asking about framing arrangements, what to frame, how to hang them, and where we get our art. So let’s dive in, Planet Earth Style. I’ll be the whale if you’re that big school of tiny reflective fish.
Dealing With The TV
First, if you listened to last week’s podcast you heard that we got a new TV (the old and very faithful one now lives at the beach house, reunited with our old couch and it feels so good). We also decided to mount our new TV on the wall and used one of those in-wall power cord systems to hide the wire. That whole process only takes an hour or so and is SO WORTH IT. We’ve got an entire post dedicated to creating a cord-free TV wall if you’re interested in a step-by-step tutorial on that. That post also shows you how to hide a cable box if you have one. And if you’re looking to cut the cord, here’s how we did that.
But it’s not absolutely necessary to mount your TV to create a good-looking frame gallery around it. As you can see in the old photo below, we had ours resting on the media cabinet for years. But mounting it has definitely made the room feel more spacious and less cluttered. Also, we are BIG FANS of secondhand dressers as TV cabinets – this one is from a thrift store and we have a similar one in our bonus room from Craigslist.
Getting Your Frame Arrangement Right
Ok, now onto actually hanging your frames around the TV. There are a few methods you can use…
1. The Floor Method
Grab whatever frames you have on hand and want to use (or pick up new ones that you love) and lay them out on the floor, with a gap on the floor in the shape of your TV (measure it to get the correct amount of space). Then just move them around on the floor to see what layout you like. That’s how we created this very frame wall in our original post… back when our living room was overwhelmingly, mind-numbingly brown.
2. The Paper Method
This one is really easy too, and if you are worried you won’t like things once they’re up on the wall, it’s the one to try. Because it helps you visualize things right on the wall before you actually hang the frames. How? Use newspaper, brown paper bags, or even printer paper (taped together if you need to make a larger piece of paper) and cut them to the size of each frame you want to hang. Then you just tape them up on the wall using masking or painter’s tape, and move them around until you like the arrangement and are ready to put the actual frames up in place of the paper templates. You can see that method in use here in our last house where we created a frame gallery in the hallway. Less busy paper would be easier on the ol’ eyeballs, but you get the idea.
3. The Sheet Method
This is kind of a combo move of the two above. SHAROOOKEN! You arrange your frames on the floor, but on top of a large sheet of paper (like brown craft paper, red rosin paper, or even wrapping paper if that’s all you have). Once you reach the arrangement you like, trace each frame onto the paper – even marking the spot where each one hangs on the back – creating an oversized template that you can transfer right onto your wall. It’s best on small to medium sized frame groupings (like this one we hung in our last house) because you’re somewhat limited by the size of your paper roll, but this would totally work on either side of the TV (you’d make two in that case).
4. The Figure-It-Out-As-You-Go Method
You also can be a rebel and JUST HANG STUFF ON THE WALLS! I wouldn’t recommend going totally rogue and just making holes willy-nilly (although I’ve done that and spackling takes like three minutes so it’s not the biggest deal if you end up there). But if you break things down into sections it’ll help you stay on track. For example: start by getting the centering and spacing of the frames above your TV to your liking first. Then that’ll help guide the height and spacing of the frames to the left of the TV. Once those are set, you can match them on the right side.
How To Tie Frame Groupings Together
“Should I use all the same frames?” “Is there’s some sort of formula for mixing them?” “Should all of the art be black & white or all the same type of thing (all sketches, all photos, all paintings?)” Questions like this abound. So I’ll try to explain what works for us and why we typically end up there – although this is definitely one of those “we’ve seen it done so many different ways, there are probably a million ways to skin this cat” kind of things. Personally, we started with all white frames in here, and I slowly found myself craving a little more variety, so over time if I found nice light wood frames (like the two over the TV) or some pretty thin gold ones (like the five of those you see below) I slowly brought those in to mix things up.
But despite having different frames up there, these are three factors that help tie the arrangement together:
Mats! See how most of the frames above have white mats? That ties them together and helps your eye take them all in as one big “family”
Color palette! It might not be what you notice right away, but a lot of the art has similar tones – there’s a lot of green, blue, and pink. And again lots of white in the art and the mats too. Even the objects on the wall (the antlers and the faux turtle shell) are white, so nothing is too jarring and it all looks related, yet not super cloned and repetitive.
Spacing! A lot of times this is the thing that makes a wall feel off. If the frames are hung too far apart, they read more like a smattering of islands, too far away from each other to be viewed as a grouping. The ideal spacing for me is usually 2-3″ (any closer and they can feel clumped and crowded). Also remember to treat the TV like just another frame and try to mimic the same spacing around it. This can be tricky because the TV sits off the wall a bit and that depth can change the spacing depending on your vantage point. I try to step back and view things from the couch across the room, since that’s where everyone will be viewing it most frequently.
What Should I Frame?
Since our arrangement is a mix of frame types and sizes, we wanted the items that we framed to be a bit of a mix as well. Had this been a more gridded frame gallery using identical frames – like this one we did above the couch in our last house or down our old hallway – we probably would’ve kept the art more consistent too. But to give you a sense of the random mix we’ve hung here, I added some numbers to the next two photos so you can see we have up there, where we got things, and why we love ’em.
1. Family photos (one of me with our daughter and a similar shot with our son around the same age – the mat didn’t come with that frame, it came from another frame and I switched it out)
2. White faux antlers (these were black and I painted them white years ago, but now they sell them in white all the time – here are some similar ones and this set of three is awesome too)
3. Another family photo (this is one of our favorite wedding pics because it looks like we’re standing in a bush)
4. A little algae/anemone thing I painted (this one is cut off, as is the middle one above the TV, but you can see it if you scroll up to the photo before it. I just wanted something in those colors and did it quickly to throw it up “just for now” and it has been there for years – ha!)
5. A postcard from a local art exhibit (I loved the colors and the artist, so why not frame the postcard?!)
6. Photo of a succulent (this is a photo we took while shooting our second book – love the soothing colors and all that white space – here’s a link to it in our Society6 shop)
7. Original painting (this is one of my favorite Etsy artists who sells tiny original paintings & prints and I LOVE THEM!)
8. A book page (yup, this is from one of my favorite photography books by Gray Malin, who shoots beaches from above)
9. Another succulent photo we took and got printed (here’s the link to it on our Society6 shop)
10. A faux turtle shell by Nate Berkus for Target (this was from his very first collection there, memories) – here’s something similar
11. More family photos (on this side it’s John with our daughter and our son in basically the same exact pose – I switched a mat from a different frame into this one)
12. Another original painting (from the same woman on Etsy who did the one on the other side – so in love with her stuff)
13. Map with pins where we’ve gone (got the map on eBay, took out the glass of the frame and backed it with cork so the pins would stick) – here are some similar maps
14. Another postcard (from the very same art exhibit – gives the wall balance and it’s more of those blue/pink tones that reoccur, so it ties things together)
I talked more about my process for finding frameable “art” recently on Instagram too (on one of our trips to the beach house) so check out the video below for more examples of how we fill our frames without breaking the bank:
Also! Frame PSA! The gold frames you saw in that video are my very favorite, and they don’t hail from a fancy and expensive frame store – they’re from Target! They come with the mats, are extremely pretty, and come in a bunch of sizes (I have all three of these sizes all over our house and the beach house). And the artist from Etsy that I shouted out in that last video is Emily Jeffords, who recently got picked up by Minted! Love her stuff so much.
As for how we hang them, here’s a quick video that I made for InstaStories a little while ago (sometimes videos help more than a static pic):
So there it is, a full succulent-riddled detail-riddled rundown of our TV frame wall. If you’re still feeling like you don’t know where to start or how to approach this, my loving encouragement would be: JUST START! You can see from the video above that holes in the walls behind frames don’t even get seen! So if you hang something too low and have to move it up, it IS NO BIG DEAL. Even if you have to spackle a few holes, that is as easy as spreading butter on bread, and you know you can do that. I believe in you. May your walls be happy and your holes be hidden behind frames like mine, ha!
Oh and if you have a lower TV/media cabinet situation and are left with a big bare spot on the wall above it all, here’s what we did to fill that space in our last house. So easy and so cheap! And for more framing/art ideas, we have a whole archive full of ’em, so have at it!
*This post contains affiliate links*
The post How To Create A TV Gallery Wall appeared first on Young House Love.
How To Create A TV Gallery Wall published first on https://landscapingmates.blogspot.com
0 notes
Photo

How To Create A TV Gallery Wall http://ift.tt/2F8TWOI
Some say gallery walls are trending out in favor of larger scale art. Maybe. It makes sense that gallery walls on every wall (especially the ones with a ton of tiny frames) might feel a little less “new and fresh” these days. But I’d argue that a collection of frames hung together on the wall feels pretty classic if you stop and think about it. Watch Home Alone. They totally have a gallery wall going up their formal staircase in the foyer where Kevin sleds and hurls paint cans. But one spot I love for a gallery wall these days is actually around a TV. Why? Well, that big black box isn’t exactly gorgeous.
It’s often this hulking dark thing on an otherwise bare wall, so why not break things up and add a few other rectangular things to deemphasize it. It’s not like the TV disappears when you add a gallery – but at least you have a few other (prettier) spots to rest your eyes. And you can always turn on Planet Earth, since that makes any TV look like art in a nanosecond.
We first blogged about adding a frame gallery around our living room television, oh, FOUR AND A HALF YEARS AGO (evidence: here – also how funny is the “What Does the Fox Say?” reference – ah, 2013). Things have evolved A LOT in that room since then (hello paint!) and the gallery got a few tweaks (some new art there, some frame switches there) but it has pretty much stood the test of time. And since I get a bunch of questions every time we show a smidge of it on social media, this post is for everyone asking about framing arrangements, what to frame, how to hang them, and where we get our art. So let’s dive in, Planet Earth Style. I’ll be the whale if you’re that big school of tiny reflective fish.
Dealing With The TV
First, if you listened to last week’s podcast you heard that we got a new TV (the old and very faithful one now lives at the beach house, reunited with our old couch and it feels so good). We also decided to mount our new TV on the wall and used one of those in-wall power cord systems to hide the wire. That whole process only takes an hour or so and is SO WORTH IT. We’ve got an entire post dedicated to creating a cord-free TV wall if you’re interested in a step-by-step tutorial on that. That post also shows you how to hide a cable box if you have one. And if you’re looking to cut the cord, here’s how we did that.
But it’s not absolutely necessary to mount your TV to create a good-looking frame gallery around it. As you can see in the old photo below, we had ours resting on the media cabinet for years. But mounting it has definitely made the room feel more spacious and less cluttered. Also, we are BIG FANS of secondhand dressers as TV cabinets – this one is from a thrift store and we have a similar one in our bonus room from Craigslist.
Getting Your Frame Arrangement Right
Ok, now onto actually hanging your frames around the TV. There are a few methods you can use…
1. The Floor Method
Grab whatever frames you have on hand and want to use (or pick up new ones that you love) and lay them out on the floor, with a gap on the floor in the shape of your TV (measure it to get the correct amount of space). Then just move them around on the floor to see what layout you like. That’s how we created this very frame wall in our original post… back when our living room was overwhelmingly, mind-numbingly brown.
2. The Paper Method
This one is really easy too, and if you are worried you won’t like things once they’re up on the wall, it’s the one to try. Because it helps you visualize things right on the wall before you actually hang the frames. How? Use newspaper, brown paper bags, or even printer paper (taped together if you need to make a larger piece of paper) and cut them to the size of each frame you want to hang. Then you just tape them up on the wall using masking or painter’s tape, and move them around until you like the arrangement and are ready to put the actual frames up in place of the paper templates. You can see that method in use here in our last house where we created a frame gallery in the hallway. Less busy paper would be easier on the ol’ eyeballs, but you get the idea.
3. The Sheet Method
This is kind of a combo move of the two above. SHAROOOKEN! You arrange your frames on the floor, but on top of a large sheet of paper (like brown craft paper, red rosin paper, or even wrapping paper if that’s all you have). Once you reach the arrangement you like, trace each frame onto the paper – even marking the spot where each one hangs on the back – creating an oversized template that you can transfer right onto your wall. It’s best on small to medium sized frame groupings (like this one we hung in our last house) because you’re somewhat limited by the size of your paper roll, but this would totally work on either side of the TV (you’d make two in that case).
4. The Figure-It-Out-As-You-Go Method
You also can be a rebel and JUST HANG STUFF ON THE WALLS! I wouldn’t recommend going totally rogue and just making holes willy-nilly (although I’ve done that and spackling takes like three minutes so it’s not the biggest deal if you end up there). But if you break things down into sections it’ll help you stay on track. For example: start by getting the centering and spacing of the frames above your TV to your liking first. Then that’ll help guide the height and spacing of the frames to the left of the TV. Once those are set, you can match them on the right side.
How To Tie Frame Groupings Together
“Should I use all the same frames?” “Is there’s some sort of formula for mixing them?” “Should all of the art be black & white or all the same type of thing (all sketches, all photos, all paintings?)” Questions like this abound. So I’ll try to explain what works for us and why we typically end up there – although this is definitely one of those “we’ve seen it done so many different ways, there are probably a million ways to skin this cat” kind of things. Personally, we started with all white frames in here, and I slowly found myself craving a little more variety, so over time if I found nice light wood frames (like the two over the TV) or some pretty thin gold ones (like the five of those you see below) I slowly brought those in to mix things up.
But despite having different frames up there, these are three factors that help tie the arrangement together:
Mats! See how most of the frames above have white mats? That ties them together and helps your eye take them all in as one big “family”
Color palette! It might not be what you notice right away, but a lot of the art has similar tones – there’s a lot of green, blue, and pink. And again lots of white in the art and the mats too. Even the objects on the wall (the antlers and the faux turtle shell) are white, so nothing is too jarring and it all looks related, yet not super cloned and repetitive.
Spacing! A lot of times this is the thing that makes a wall feel off. If the frames are hung too far apart, they read more like a smattering of islands, too far away from each other to be viewed as a grouping. The ideal spacing for me is usually 2-3″ (any closer and they can feel clumped and crowded). Also remember to treat the TV like just another frame and try to mimic the same spacing around it. This can be tricky because the TV sits off the wall a bit and that depth can change the spacing depending on your vantage point. I try to step back and view things from the couch across the room, since that’s where everyone will be viewing it most frequently.
What Should I Frame?
Since our arrangement is a mix of frame types and sizes, we wanted the items that we framed to be a bit of a mix as well. Had this been a more gridded frame gallery using identical frames – like this one we did above the couch in our last house or down our old hallway – we probably would’ve kept the art more consistent too. But to give you a sense of the random mix we’ve hung here, I added some numbers to the next two photos so you can see we have up there, where we got things, and why we love ’em.
1. Family photos (one of me with our daughter and a similar shot with our son around the same age – the mat didn’t come with that frame, it came from another frame and I switched it out)
2. White faux antlers (these were black and I painted them white years ago, but now they sell them in white all the time – here are some similar ones and this set of three is awesome too)
3. Another family photo (this is one of our favorite wedding pics because it looks like we’re standing in a bush)
4. A little algae/anemone thing I painted (this one is cut off, as is the middle one above the TV, but you can see it if you scroll up to the photo before it. I just wanted something in those colors and did it quickly to throw it up “just for now” and it has been there for years – ha!)
5. A postcard from a local art exhibit (I loved the colors and the artist, so why not frame the postcard?!)
6. Photo of a succulent (this is a photo we took while shooting our second book – love the soothing colors and all that white space – here’s a link to it in our Society6 shop)
7. Original painting (this is one of my favorite Etsy artists who sells tiny original paintings & prints and I LOVE THEM!)
8. A book page (yup, this is from one of my favorite photography books by Gray Malin, who shoots beaches from above)
9. Another succulent photo we took and got printed (here’s the link to it on our Society6 shop)
10. A faux turtle shell by Nate Berkus for Target (this was from his very first collection there, memories) – here’s something similar
11. More family photos (on this side it’s John with our daughter and our son in basically the same exact pose – I switched a mat from a different frame into this one)
12. Another original painting (from the same woman on Etsy who did the one on the other side – so in love with her stuff)
13. Map with pins where we’ve gone (got the map on eBay, took out the glass of the frame and backed it with cork so the pins would stick) – here are some similar maps
14. Another postcard (from the very same art exhibit – gives the wall balance and it’s more of those blue/pink tones that reoccur, so it ties things together)
I talked more about my process for finding frameable “art” recently on Instagram too (on one of our trips to the beach house) so check out the video below for more examples of how we fill our frames without breaking the bank:
Also! Frame PSA! The gold frames you saw in that video are my very favorite, and they don’t hail from a fancy and expensive frame store – they’re from Target! They come with the mats, are extremely pretty, and come in a bunch of sizes (I have all three of these sizes all over our house and the beach house). And the artist from Etsy that I shouted out in that last video is Emily Jeffords, who recently got picked up by Minted! Love her stuff so much.
As for how we hang them, here’s a quick video that I made for InstaStories a little while ago (sometimes videos help more than a static pic):
So there it is, a full succulent-riddled detail-riddled rundown of our TV frame wall. If you’re still feeling like you don’t know where to start or how to approach this, my loving encouragement would be: JUST START! You can see from the video above that holes in the walls behind frames don’t even get seen! So if you hang something too low and have to move it up, it IS NO BIG DEAL. Even if you have to spackle a few holes, that is as easy as spreading butter on bread, and you know you can do that. I believe in you. May your walls be happy and your holes be hidden behind frames like mine, ha!
Oh and if you have a lower TV/media cabinet situation and are left with a big bare spot on the wall above it all, here’s what we did to fill that space in our last house. So easy and so cheap! And for more framing/art ideas, we have a whole archive full of ’em, so have at it!
*This post contains affiliate links*
The post How To Create A TV Gallery Wall appeared first on Young House Love.
0 notes