#system properties windows 7 shortcut
Text
Recovering lost files on a Windows system that were not actually deleted but became inaccessible due to wrong cues or system errors can often be remedied through several methods. Here are the steps to try and recover your files:
### 1. **Check Recycle Bin**
- Even if files are not showing up where you expect, they may have been moved to the Recycle Bin.
- **Steps**: Open the Recycle Bin, search for your file, and if found, right-click and choose **Restore**.
### 2. **Use File History or Previous Versions**
- Windows has a built-in feature that allows you to recover previous versions of files if File History or System Restore points are enabled.
- **Steps**:
1. **Right-click** on the folder where the file was originally located.
2. Select **Properties** and navigate to the **Previous Versions** tab.
3. If available, you will see earlier versions of the folder or file. Select one, and click **Restore**.
- You can also access **File History** by typing it into the Start Menu and browsing your files if the feature was turned on previously.
### 3. **Search for the File**
- Sometimes files are misplaced or moved by accident.
- **Steps**:
1. Open **File Explorer** and use the **Search Bar** in the top-right corner.
2. Type the name or part of the name of the file.
3. If you know the file extension (e.g., `.docx`, `.jpg`), include it in the search to narrow the results.
### 4. **Check Hidden Files and Folders**
- Files could be hidden due to system settings.
- **Steps**:
1. Open **File Explorer**.
2. Click the **View** tab at the top.
3. Check the box for **Hidden items**.
4. Check if your missing files are now visible.
### 5. **Check the Temp Folder**
- Some files may have been saved temporarily in the system's temporary folder.
- **Steps**:
1. Press `Win + R` to open the **Run** dialog box.
2. Type `%temp%` and press Enter.
3. Search for your file in the temp folder, especially if it was recently worked on.
### 6. **Run a Disk Check**
- File system errors or disk corruption may cause files to disappear. Running a disk check may restore access.
- **Steps**:
1. Open **Command Prompt** as an administrator (search "cmd" in Start, right-click, and choose "Run as administrator").
2. Type `chkdsk /f` and press Enter.
3. If the drive is in use, you’ll be asked if you want to schedule a scan at the next restart. Type `Y` and press Enter.
### 7. **Recover Using Data Recovery Software**
- If the file was lost due to a glitch, software bug, or wrong system cue, data recovery software might help.
- Popular tools include:
- **Recuva**: A free tool for recovering lost files.
- **EaseUS Data Recovery Wizard**: A more advanced tool for complex recovery.
- **Disk Drill**: Another tool with a user-friendly interface.
- **Steps**:
1. Download and install one of these recovery tools.
2. Select the drive or folder where the file was located and run the scan.
3. Review the scan results and recover the file(s) you need.
### 8. **System Restore**
- If the files were lost after installing a program or a system update, restoring your system to a previous point might bring them back.
- **Steps**:
1. Open the **Start Menu** and search for **Create a restore point**.
2. In the System Properties window, click **System Restore**.
3. Choose a restore point from before the files went missing and follow the prompts to restore the system.
### 9. **Look in OneDrive or Cloud Backup**
- If you're using cloud services like **OneDrive**, **Google Drive**, or **Dropbox**, the file may have been synced there.
- **Steps**:
1. Log into your cloud storage account.
2. Search for the file.
3. If found, download or restore it.
### 10. **Check Recent Documents**
- If the file was recently opened, you may find a quick shortcut to it.
- **Steps**:
1. Open the application you were using to work on the file (e.g., Word, Excel).
2. Check the **Recent Documents** list in the app to see if you can open the file from there.
### Conclusion
Files can become inaccessible due to various system issues, but by following these methods—checking the Recycle Bin, using File History, searching hidden files, or using recovery software—you stand a good chance of recovering them. Always make sure to back up your important files regularly to avoid loss in the future.
0 notes
Text
The Ultimate Guide to Windows 10 Keyboard Shortcuts
Windows 10 is packed with useful features, but nothing boosts productivity like mastering keyboard shortcuts. These shortcuts save time and make navigating your system a breeze. In this guide, we’ll explore the most essential Windows 10 keyboard shortcuts and some lesser-known ones that can significantly enhance your workflow.

Table of Contents
Introduction
Basic Keyboard Shortcuts
Copy, Cut, Paste
Undo, Redo
Select All
Windows Key Shortcuts
Basic Windows Key Functions
Advanced Windows Key Shortcuts
File Explorer Shortcuts
Navigation
File Management
Virtual Desktops Shortcuts
Creating and Managing Virtual Desktops
Switching Between Virtual Desktops
Command Prompt Shortcuts
Basic Commands
Advanced Commands
Accessibility Shortcuts
Magnifier
Narrator
High Contrast
Browser Shortcuts
Microsoft Edge
General Browser Shortcuts
Customizing Keyboard Shortcuts
Conclusion
1. Introduction
Keyboard shortcuts are a crucial part of using Windows 10 efficiently. By reducing reliance on the mouse, you can perform tasks more quickly and keep your workflow uninterrupted. This guide covers essential shortcuts and dives into more specialized ones, providing a comprehensive resource for users at all levels.
2. Basic Keyboard Shortcuts
Copy, Cut, Paste
Ctrl + C: Copy selected item
Ctrl + X: Cut selected item
Ctrl + V: Paste copied/cut item
Undo, Redo
Ctrl + Z: Undo an action
Ctrl + Y: Redo an action
Select All
Ctrl + A: Select all items in a document or window
3. Windows Key Shortcuts
Basic Windows Key Functions
Windows + D: Show or hide the desktop
Windows + E: Open File Explorer
Windows + L: Lock your PC
Advanced Windows Key Shortcuts
Windows + Tab: Open Task View
Windows + I: Open Settings
Windows + S: Open Search
Windows + X: Open Quick Link menu
4. File Explorer Shortcuts
Navigation
Alt + D: Select the address bar
Ctrl + F or F3: Search in File Explorer
Ctrl + N: Open a new window
File Management
Ctrl + Shift + N: Create a new folder
Alt + Enter: Open properties for the selected item
F2: Rename selected item
5. Virtual Desktops Shortcuts
Creating and Managing Virtual Desktops
Windows + Ctrl + D: Create a new virtual desktop
Windows + Ctrl + F4: Close the current virtual desktop
Switching Between Virtual Desktops
Windows + Ctrl + Left/Right Arrow: Switch between virtual desktops
6. Command Prompt Shortcuts
Basic Commands
Ctrl + C: Copy selected text
Ctrl + V: Paste text
Advanced Commands
Ctrl + Shift + Plus (+): Zoom in
Ctrl + Shift + Minus (-): Zoom out
7. Accessibility Shortcuts
Magnifier
Windows + Plus (+): Open Magnifier and zoom in
Windows + Minus (-): Zoom out
Narrator
Windows + Ctrl + Enter: Turn Narrator on or off
High Contrast
Left Alt + Left Shift + Print Screen: Turn high contrast on or off
8. Browser Shortcuts
Microsoft Edge
Ctrl + T: Open a new tab
Ctrl + W: Close the current tab
Ctrl + Shift + T: Reopen the last closed tab
General Browser Shortcuts
Ctrl + L: Highlight the URL
Ctrl + Tab: Switch to the next tab
Ctrl + Shift + Delete: Open the clear browsing data options
9. Customizing Keyboard Shortcuts
Windows 10 allows customization of certain keyboard shortcuts to better suit your workflow. To customize, you can use third-party tools like AutoHotkey, which provide extensive options for creating and managing your own shortcuts.
10. Conclusion
Mastering Windows 10 keyboard shortcuts can dramatically increase your productivity and streamline your tasks. Whether you are a beginner or a seasoned user, incorporating these shortcuts into your daily routine will save you time and effort. Keep this guide handy as a reference and start practicing these shortcuts today.
External Authoritative Sources
Microsoft Support: Keyboard shortcuts in Windows
How-To Geek: The Ultimate Guide to Windows 10 Keyboard Shortcuts
Lifewire: Essential Windows 10 Keyboard Shortcuts
By incorporating these detailed steps and tips, you can take full advantage of Windows 10 keyboard shortcuts, making your computing experience faster and more efficient.
#1.#Windows10#2.#KeyboardShortcuts#3.#WindowsShortcuts#4.#ProductivityTips#5.#WindowsTips#6.#TechTips#7.#ComputerShortcuts#8.#WindowsGuide#9.#VirtualDesktops#10.#FileExplorer#11.#AccessibilityShortcuts#12.#CommandPrompt#13.#MicrosoftEdge#14.#BrowserShortcuts#15.#TechHacks
0 notes
Text
Troubleshooting Guide: Sage 50 Won't Open After the Update

Sage 50 is a robust accounting software trusted by many businesses for managing their finances efficiently. However, encountering issues like the software not opening after an update can be frustrating and disruptive to your workflow. In this blog post, we'll explore some common reasons why Sage 50 may fail to open after an update and provide troubleshooting steps to resolve the issue Sage 50 Wont Open after the Update.
1. Check System Requirements:
Before delving into troubleshooting, ensure that your system meets the minimum requirements for running Sage 50. Make sure your computer has sufficient disk space, RAM, and processor speed to support the software. Also, verify that you are using a compatible operating system version.
2. Restart Your Computer:
Sometimes, a simple restart can fix software glitches and errors. Close all applications, restart your computer, and then try opening Sage 50 again to see if the issue persists.
3. Verify Internet Connection:
Sage 50 may require an active internet connection, especially after an update, to validate the license or perform other tasks. Check your internet connection and ensure that it is stable. If you're using a firewall or antivirus software, make sure it's not blocking Sage 50 from accessing the internet.
4. Run as Administrator:
Try running Sage 50 as an administrator to see if it resolves the issue. Right-click on the Sage 50 shortcut or executable file and select "Run as administrator" from the context menu. This grants the software elevated privileges and may help bypass any permission-related issues.
5. Disable Compatibility Mode:
If Sage 50 is set to run in compatibility mode for an older version of Windows, it may encounter compatibility issues with the latest updates. Right-click on the Sage 50 shortcut, go to Properties, navigate to the Compatibility tab, and uncheck the box that says "Run this program in compatibility mode for." Click Apply and then OK to save the changes.
6. Repair Sage 50 Installation:
Corrupted installation files can prevent Sage 50 from opening properly. To repair the installation, navigate to the Control Panel, go to Programs > Programs and Features, find Sage 50 in the list of installed programs, right-click on it, and select Repair. Follow the on-screen instructions to complete the repair process.
7. Reinstall Sage 50:
If none of the above steps resolve the issue, consider reinstalling Sage 50. Uninstall the software from your computer, download the latest version from the official Sage website, and reinstall it. Be sure to backup your company data before uninstalling to prevent any data loss.
Conclusion:
Encountering issues with Sage 50 not opening after an update can be frustrating, but with the right troubleshooting steps, you can resolve the issue and get back to managing your finances seamlessly. By following the tips outlined in this guide, you can diagnose the problem and implement the necessary fixes to ensure Sage 50 runs smoothly on your system.
0 notes
Text
Unlocking the Potential: AutoCAD Drawing Opening in Different Windows
Introduction
In the realm of computer-aided design (CAD), AutoCAD stands tall as a versatile and indispensable tool. One of its lesser-known yet highly impactful features is the ability to open drawings in different windows. In this article, we'll dive deep into this capability, revealing how it can revolutionize your CAD workflow. Whether you're a seasoned pro or just starting with AutoCAD, this guide is your key to unlocking its potential.

1. Benefits of Opening Drawings in Different Windows
AutoCAD's multi-window feature is a game-changer, offering several advantages:
Improved Productivity: Opening multiple drawings simultaneously streamlines your work, enhancing your efficiency.
Better Organization: Keep related drawings together and easily switch between them for smoother project management.
Enhanced Collaboration: Collaborate seamlessly by comparing, copying, and referencing between different drawings.
Reduced Errors: Minimize the risk of unintended changes by working on separate windows.
2. Getting Started with Multi-Window Mode
Now, let's explore how to utilize this feature effectively:
Accessing Multi-Window Mode: To start, launch AutoCAD and open a drawing. Then, go to the "View" tab and select "New Window."
Navigating Between Windows: Learn the keyboard shortcuts to switch between open windows swiftly.
Managing Multiple Files: Discover tips for managing multiple drawings efficiently.
3. Customizing Your Workspace
Tailor your AutoCAD experience with these steps:
Arranging Windows: Learn how to position and size multiple windows for your convenience.
Customizing Toolbars: Adapt your toolbars and panels to suit your multi-window workflow.
Saving Window Layouts: Save your preferred window arrangements for quick access in future projects.

4. Leveraging LSI Keywords
While discussing these topics, we'll also integrate LSI keywords naturally into the content to enhance SEO without disrupting readability.
5. Challenges and Solutions
Despite its advantages, working with multiple windows can present challenges. We'll address common issues and provide practical solutions:
Performance Optimization: Tips to ensure smooth operation even with multiple windows.
File Compatibility: Handling drawings with different versions and formats.
Resource Management: Efficiently manage system resources to prevent crashes.
6. Exploring Advanced Features
Beyond the basics, AutoCAD offers advanced features that take multi-window drawing to the next level:
Sheet Set Manager: Efficiently manage multiple sheets and layouts in separate windows.
Viewports: Create and manipulate viewports in different windows for enhanced project visualization.
External References (Xrefs): Learn how to use Xrefs across multiple drawings while working in separate windows.
Layer Management: Effectively manage layers and properties across multiple drawings simultaneously.
7. Integrating AutoCAD with Other Software
AutoCAD's versatility extends to integration with other software tools:
AutoCAD and Microsoft Office: Discover how to embed AutoCAD drawings into Word, Excel, or PowerPoint for presentations and documentation.
AutoCAD and 3D Software: Explore how AutoCAD plays well with 3D modeling software, facilitating seamless transitions between 2D and 3D designs.
AutoCAD and PDF Editing Tools: Learn how to edit PDFs created from AutoCAD drawings in external PDF editing software while keeping drawings open in AutoCAD.
8. Expert Tips and Tricks
Unlock the potential of multi-window drawing with these expert tips:
Dual Monitors: Consider using dual monitors for an even more efficient workspace.
AutoCAD Workspaces: Create custom workspaces tailored to your multi-window needs.
Scripting and Macros: Automate repetitive tasks across multiple drawings with scripts and macros.
External Scripts: Integrate external scripts and programming languages for extended functionality.

9. Boosting Efficiency with Plugins and Add-ons
Enhance your AutoCAD experience with third-party plugins and add-ons designed to streamline multi-window drawing. Explore options for optimizing your workflow further.
10. FAQs (Frequently Asked Questions)
How can I open multiple drawings in AutoCAD?
To open multiple drawings, simply follow these steps:
Launch AutoCAD.
Open an existing drawing.
Go to the "View" tab.
Select "New Window."
Can I work on different drawings simultaneously in AutoCAD?
Absolutely! AutoCAD's multi-window mode allows you to work on multiple drawings at once, improving productivity and organization.
Is multi-window mode available in all AutoCAD versions?
Yes, multi-window mode is a standard feature in most AutoCAD versions, ensuring compatibility for a wide range of users.
Can I customize my multi-window workspace?
Certainly. You can arrange, size, and customize your windows to create the ideal workspace that suits your needs.
How do I switch between open windows in AutoCAD?
You can switch between open windows using keyboard shortcuts like Ctrl+Tab or Ctrl+F6, making navigation a breeze.
What are the benefits of opening drawings in different windows?
Opening drawings in different windows enhance productivity, organization, collaboration, and error reduction in your CAD projects.
Conclusion
In conclusion, mastering AutoCAD's multi-window feature can be a game-changer in your CAD journey. This article has equipped you with the knowledge to leverage this feature effectively, boosting your productivity and organization. So, why wait? Dive into the world of AutoCAD drawing opening in different windows and experience a smoother, more efficient workflow.
0 notes
Text
Wondershare Filmora Crack: The Risks and Consequences of Illegal Software Downloads
filmora crack download is one of the most pleasant and intuitive video editors for Windows 11, 10, 8, 7. The functionality of the editor opens up unlimited possibilities for processing videos of different quality, format and extension.
In today's digital age, video editing has become an essential tool for content creators, businesses, and individuals alike. Wondershare Filmora is one of the popular video editing software options available, known for its user-friendly interface and a wide range of features. However, some individuals are tempted to seek shortcuts by downloading cracked versions of the software for free from websites like "https://crack-filmora.com/." In this article, we'll discuss the dangers and consequences associated with downloading and using cracked software.
The Temptation of Filmora Crack
Wondershare Filmora is a paid software, and obtaining it legally requires purchasing a valid license. However, some people are enticed by the prospect of getting the software for free through cracked versions. These cracked versions are essentially illegal copies of the software that have had their security measures tampered with to bypass activation processes.
The Risks of Using Cracked Software
Legal Consequences: The use of cracked software is illegal and constitutes copyright infringement. If caught, you could face severe legal consequences, including fines and even imprisonment. Companies like Wondershare are vigilant in protecting their intellectual property rights, and they actively pursue legal action against those who use their software without a valid license.
Security Concerns: Cracked software often comes from untrustworthy sources, making it a breeding ground for malware, viruses, and other malicious software. By downloading and installing cracked software, you expose your computer to significant security risks. These risks can compromise your personal data and lead to system instability.
No Access to Updates and Support: When you use a genuine, licensed copy of Wondershare Filmora, you benefit from regular updates and access to customer support. Cracked versions, on the other hand, do not offer these perks. Outdated software may lack crucial features, bug fixes, and security patches, making your editing experience subpar.
Unreliable Performance: Cracked software is notorious for being unreliable. It can crash unexpectedly, freeze, or behave erratically, causing frustration and wasted time. This can be particularly detrimental if you're working on important video projects.
Ethical Considerations: Using cracked software not only harms the developers who put in countless hours of work but also goes against the principles of fair play and ethical conduct. Supporting software developers by purchasing licenses ensures that they can continue to improve and develop their products.
Legal Alternatives
Rather than resorting to cracked software, there are legal and affordable alternatives to obtain Wondershare Filmora:
Free Trial: Wondershare offers a free trial of Filmora, allowing users to explore its features for a limited time. This trial period is a legitimate way to evaluate the software before making a purchase.
Purchase a License: Invest in a legitimate license for Filmora. It may involve a one-time payment or a subscription model, depending on your needs and budget. This approach ensures you have access to all features, updates, and customer support.
Student and Educational Discounts: If you are a student or educator, you may be eligible for special discounts on software licenses. Check Wondershare's official website for such offers.
Conclusion
While the temptation to download a cracked version of Wondershare Filmora may be alluring, it's crucial to consider the potential risks and consequences. Illegally downloading and using software not only exposes you to legal troubles but also puts your computer's security and your data at risk. To ensure a reliable and ethical video editing experience, it's always best to obtain software through legal means. Invest in a genuine license, take advantage of free trials, or explore available discounts – these are the right paths to access the fantastic world of video editing with Filmora without compromising your integrity or security.
1 note
·
View note
Text
K dcan cable driver windows 10


There are apps on the Play Store as well that can check the OTG status of your phone and do basic diagnostics.Ī simple test is to use the OTG adaptor and plug the flash drive into your device. Do a quick google of your device model and see what the general info says. Many are, but not all.ĭon't count on the device being new to mean its compatible. Here are a few things to check first before contacting us. Common belief is this has to do with the model year which is incorrect, its actually has to do with the chassis model. Commercial use and distribution of the contents of the website is prohibited without express written consent of the author.The LED cycles when plugged in, and will only light up again during active data transfer. Continue from Step 4 of the guide.Ĭopyright © 2018 OBD Innovations. It will automatically detect and install the correct drivers for your computer. On the disc, open the FTDI Drivers folder and run the installer. Troubleshooting: If Windows did not recognize the cable or could not find the correct drivers, which is sometimes the case for Windows 7 64-bit or Windows 8/10 systems, then you need to install the correct FTDI drivers for your operating system. After using INPA to test the connection from your car and interface, you can proceed to using the other BMW tools in this package. If the INPA software detects your vehicle successfully, you will see 2 SOLID Black dots next to "Battery" and "Ignition" headings. Now start the INPA software from your Desktop shortcut. Connecting the BMW K-CAN D-CAN Cable to your vehicle: Plug the interface into your car's OBDII port and turn on the ignition. This means you have successfully installed the Drivers and configured the port.Ħ. Navigate to the Device Manager, Ports (COM & LPT) and you should see "USB Serial Port (COM1)". Unplug the USB cable and plug it back into the same port. Test if the Port has been configured correctly.

If you get a warning that COM1 is being used by another device, click YES and continue to exit out of both windowsĥ. Go to the "Port Settings" tab, then click " Advanced."
Right click on "USB Serial Port (COM X)" and click on "Properties".
We will need to change this to COM 1 in order for it to function properly.
o X = the default COM port Windows assigned for the cable.
Expand the Ports (COM & LPT) in device manager and look for "USB Serial Port (COM X)".
Click on "System" (If System isn't shown, see the top right of the control panel and change the view to Large Icons).
Go to the "Control Panel" (Start > Control Panel).
Now we need to make sure the cable is using the right port number on your PC If Windows did not recognize the cable or could not find the correct drivers, see the Troubleshooting section below.Ĥ. Now plug it in your USB port and Windows should recognize it and begin installing it. During the installation, the drivers for the cable were installed. The only thing needed to do is to configure your BMW K-CAN D-CAN USB Cable. Now back to the software installation wizard box, click Finish.ģ. Click Next and accept the license agreement to complete the installation of the FTDI Drivers.

The Device Driver Installation Wizard will pop up. Windows may prompt you for permission to proceed. Towards the end of the installation, the FTDI drivers will automatically install. Allow several minutes for the installation to complete. Click Next, Next and Install to proceed with the installation.Ģ. Place the disc in your computer and view the contents of the disc or if Software was downloaded, navigate to the downloaded Software folder. BMW Coding Tool v2.5.0 (alternative to NCS Dummy or updating DATEN files).NCS Expert 4.0.1 (Only Menus and Buttons in English).INPA 5.06 (Only Script Files in English).Basic/Intermediate experience with navigating Windows and installing software/drivers.1 Available USB Port (We recommend using the same USB port each time).OBD Innovations® BMW K + D-CAN USB Cable.
0 notes
Text
Oceanhorn 2 pc download


You need to extract downloaded x360ce ZIP file to folder with your game executable file. In the example picture they are located in Binaries / Retail subfolder. 20 Nintendo eShop Gift Card Digital Code (Software Download) Xuan Yuan Sword 7 review for Xbox One, PS4 Call Of Duty: Vanguard review for PC, PS5, Xbox. Now you need to find the folder with Oceanhorn 2: Knights of the Lost Realm executable. Navigate to “Local files” tab and press “Browse local files.” button.Ĥ. Here's a mod to unlock and target 60fps in Oceanhorn 2 Knights of the Lost Realm Resolution is tweaked for a dynamic 720p in docked and dynamic 540p in handheld. If you choose the Steam variant, right click the game name and select “Properties”.ģ. You can easily do this by looking into game shortcut settings or finding the game in your Steam library list. Now we have to find the installation folder of your game. SET SAIL AND EMBARK ON AN EPIC JOURNEY Grow from a boy to a legend. x360ce 64-bit Download – for 64-bit gamesĢ. Download Oceanhorn and enjoy it on your iPhone, iPad, and iPod touch.x360ce 32-bit Download – for 32-bit games.If you don’t know the version of your game or download wrong one accidentally, you will be notified later and have a chance to use another version. Oceanhorn 2: First gameplay video and screenshots Since many of you cant make it to the Nordic Game conference in Malmö, Sweden we decided to capture a video of our demo The video is unedited footage that is captured on an actual iPhone 7 Plus. Can I Run it Test your specs and rate your gaming PC. You have to select 32 or 64 bit version (same as the version of Oceanhorn 2: Knights of the Lost Realm you use). Check the Oceanhorn: Monster of Uncharted Seas system requirements. The first step is to download x360ce zip file from official site. Emulator allows your controller (joystick, wheel, gamepad, etc.) to operate as the most common device, recognized by most of the games without any additional settings and workarounds.ġ. This method also works with any game – just do the same easy steps, no special skills needed to make any controller work as an Xbox 360 gamepad. In this tutorial you will find steps to make x360ce work with Oceanhorn 2: Knights of the Lost Realm. Since many of you cant make it to the Nordic Game conference in Malm, Sweden we decided to capture a video of our demo The video is unedited footage that. Download Oceanhorn app for windows PC Laptop / Desktop or Mac Laptop 2021. Not only can you effectively play games that cover the entire history of PC games on modern machines, you can also get games at incredibly low prices. Collect powerful items, wield the Caster Gun, solve the mysterious puzzles of the ancients, and discover all that Arcadia and its neighboring kingdoms have to offer! Accept the challenge and become a true hero.How to use x360ce emulator with Oceanhorn 2: Knights of the Lost Realm on PC Oceanhorn 2 pc download PC games has never been in a better place than it is today. Contextual commands will allow you to direct these allies into battle, or have them help you with the solution of the game's most clever puzzles! FIGHT, SOLVE, EXPLOREīigger, better, and packed with new features – Oceanhorn 2 is not only one of the best-looking adventure games out there, but it also builds a unique experience on the shoulder of classic video games. Trin, the granddaughter of Arcadia's leader Archimedes, and Gen, a mysterious robot wielding an old samurai weapon, will join forces with you, and fight at your side against Mesmeroth's Dark Army. You will not be taking this journey alone. Will our hero be able to unite the Owrus, Gillfolk, and men in a fight for the fate of the world? THIS TIME YOU'RE NOT ALONE A young Knight faces an impossible challenge, as Warlock Mesmeroth has returned with a formidable Dark Army. Oceanhorn 2: Knights of the Lost Realm, set a thousand years before the events of the first chapter, takes you on a magical journey across the vast world of Gaia, brimming with mythology and lore. Oceanhorn 2: Knights of the Lost Realm is an open-world action-adventure video game developed by Finnish studio Cornfox & Bros.
0 notes
Text
Download hitman blood money crack file

#DOWNLOAD HITMAN BLOOD MONEY CRACK FILE FOR FREE#
#DOWNLOAD HITMAN BLOOD MONEY CRACK FILE HOW TO#
#DOWNLOAD HITMAN BLOOD MONEY CRACK FILE INSTALL#
#DOWNLOAD HITMAN BLOOD MONEY CRACK FILE WINDOWS 7#
Processor : Intel Core 2 Duo at 1.
#DOWNLOAD HITMAN BLOOD MONEY CRACK FILE WINDOWS 7#
Operating System : Microsoft Windows XP / Windows Vista / Windows 7 Here are some sistem requirements for this game: To fix that E0001 Error go to this link, it should help you:
#DOWNLOAD HITMAN BLOOD MONEY CRACK FILE HOW TO#
This is a tutorial on how to download fifa 2011 full.ģ.
#DOWNLOAD HITMAN BLOOD MONEY CRACK FILE FOR FREE#
(If they ask you for password, insert "boxxers").Ĥ.Then follow the instruction listed in the text file (must read).ĭownload Fifa 11 for free by this given link Make sure you put both file in the a folder.ģ.Right-Click on the file "activision.7z.001". You first extract with WinRAR the 6 part that you download.Ģ.After that, you will receive 2 files "activision.7z.001" and "activision.7z.002". I DO NOT claim any ownership of the music used.īefore starting downloading, make sure the you installed 7-zip and WinRAR. Then follow the instruction listed in the text file (must read)Ĭall Of Duty - World At War by Activision. The battle for heaven and earth continues as the Atlantis enter the playing field.Ģ. The expansion pack includes a new single-player campaign, scores of new mythological units, the ability to promote units to heroes, and, of course, the opportunity to harness the awesome powers of the Titans. The lost civilization of Atlantis returns in Age of Mythology: The Titans. The Age of Mythology: Gold Edition includes the award winning Age of Mythology and Age of Mythology: The Titans Expansion Pack.įrom Ensemble Studios™, the creators of Age of Empires® and The Age of Kings®, comes Age of Mythology, a revolutionary game that transports players to a time when heroes did battle with legendary monsters and the gods intervened in the affairs of mortal men. Recommended peripheral: Microsoft Mouse or compatible pointing device Network: 56.6 Kbps or better modem for online play Sound: Sound card, speakers or headphones required for audio
#DOWNLOAD HITMAN BLOOD MONEY CRACK FILE INSTALL#
Titans CD Key:CVF7C-QB3KY-GQW23-4DPF6-JDTVGģ.Extract the files to your computer(anywhere)Ĥ.Open it with PowerISO/Daemon Tools or any virtual drive program that lets u mount to your Virtual Driveħ.Once its done Install the crack (search google)Ĩ.If u have a shortcut on desktop right click select properties,then click find target,Then Extract the crack to the folder you installed.ĬPU: PC with 450 MHz equivalent or higher processor A sequel has recently been confirmed that it is in the works by Eidos Interactive.Download Age of Mythology: The Titans Expansion R eloaded from given linkĬD Key:H4B4D-27RJV-6JGTK-HCV87-XRY78(Age of mythology) Plus stay updated on special programming and upcoming guests. Hitman blood money crack file ap cm archives page 4 of 4 surveys tube. With the ultimate edition bethesda softworks offers. The game marks 47's arrival into the United States of America, and also differs from the original three in that several contracts are carried out in civilian areas, as opposed to the "covert ops" settings of Codename 47, Silent Assassin, and Contractsmissions. Get a daily roundup of the must see moments and hitman blood money crack file download commentary from your favorite fox news shows. If you are playing Hitman 2 make sure to use a silencer when using the gun to make sure that you don’t draw a lot of attention. Most people are looking to have some good time when playing Hitman 2. The tone of Blood Money, in complete contrast with the dark and depressing mood of the previous game, is operatic and often veers into the larger-than-life, recalling elements of the 'world-traveler' grandeur of Hitman 2: Silent Assassin. There are a lot of games out there in the stealth genre but none of them is as popular as Hitman 2. The wheelchair-using ex-director recounts how his agency tracked 47 over a two-year period. The story follows the life of professional hitman, Agent 47, as narrated in cutscenes by a former director of the FBI to a journalist who is interviewing him at his home. A Mobile Phone version under the same name was also released but with drastically different gameplay, graphics and overall style. for the PlayStation 2, Xbox and Xbox 360 video game consoles and PC. It is the fourth entry in the Hitman game seriesand was released on in Europe and on May 30 in the United States. Is a stealth game developed by IO Interactive, published by Eidos Interactive and directed by Rasmus Højengaard.
0 notes
Text
Microsoft remote desktop connection client for mac os x

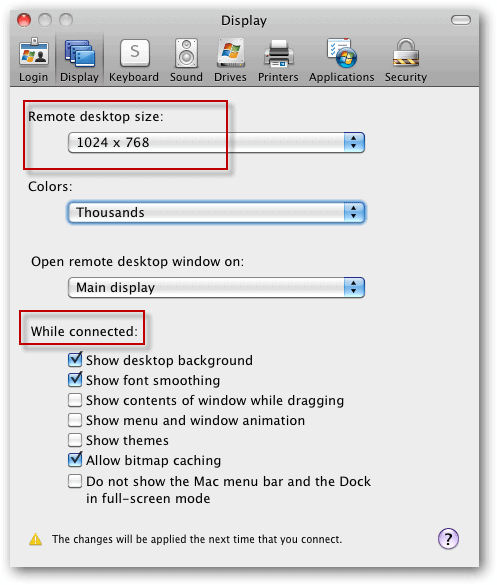
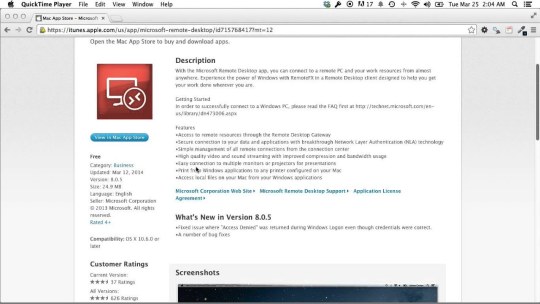
Please contact one of your responsible Windows group administrators. The remote Windows system must be configured to accept remote connections from your user account. Hey, while we are on the subject of Mac/Windows integration, what “pain points” do you have in your environment? I am more than happy to write on particular subjects, specific issues you are experiencing, etc.To access a Windows system from your Mac, we use the Microsoft Remote Desktop Client.ĭownload the Microsoft Remote Desktop client from the Mac App Store. I hope that you found this article useful. Today we learned a couple of different methods for establishing a remote administration session with a Windows-based computer from Mac OS X. Remote Windows Server 2008 session from Mac OS X Conclusion ^ Once you have the software installed, click RDC > Preferences to set preferences, and thereafter use RDC exactly as you would use the Windows version.
Download the Microsoft Remote Desktop Connection Client for Mac 2.1.1.
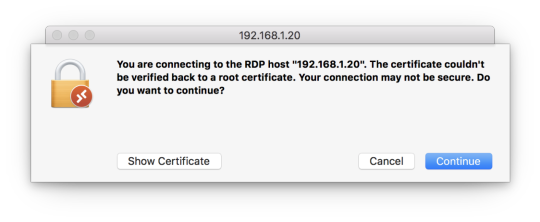
The good news here is that Microsoft actually makes their Remote Desktop Connection client available for the Mac: This process is shown in the following screen shot:Ī Windows command prompt from a Mac OS X computer Remote Desktop Access ^Īs far as I am personally concerned, Microsoft’s Remote Desktop Protocol (RDP) is more secure, efficient, and robust than the Remote Frame Buffer (RFB) protocol that is used with Virtual Network Computing (VNC) technology. MAC>ssh we accept the Windows host’s private key and authenticate, we are in business. Thus, we can simply fire up a Terminal session and type our SSH command string.įor instance, to connect to a Windows SSH server at 192.168.1.108 as a user named administrator, we can send the following command:
Remember that Mac OS X includes native support for SSH. If we need to open a Windows Server 2008 or Windows 7 command prompt from a Mac OS X computer, we don’t need to worry about WinRM or all that jazz. Keep this in mind when you are configuring firewall exceptions. NOTE: By default, SSH operates on TCP port 22, and RDP operates on TCP port 3389. Note that FreeSSHd includes secure FTP and Tunneling options as well. In this example, we are enabling the 4Sysopslab domain administrator account to connect to the server by using SSH. The User properties dialog box is shown in the next figure. This is shown in the following screenshot.Īfter you’ve installed FreeSSHd and ensured that the service is running in the Windows Service Control Manager, our next (and final) configuration task is to create an SSH user. Instead, right-click the FreeSSHd system tray icon and select Settings… from the shortcut menu. One point of confusion: after installation you might want to double-click the FreeSSHd desktop icon to open the administration panel. In this exercise I downloaded and installed FreeSSHd.
OpenSSH for Windows (quite tricky to configure).
At any rate, we have some choices in the matter for free SSH server/client packages for Windows: Microsoft includes no built-in support for SSH, unfortunately. Please see the Microsoft documentation if you want more background on Network Level Authentication. Enabling RDP remote connections in Windows Server 2008
0 notes
Text
Rdp from mac to windows server 2012 r2

Rdp from mac to windows server 2012 r2 for free#
Rdp from mac to windows server 2012 r2 for mac#
Rdp from mac to windows server 2012 r2 mac os x#
Rdp from mac to windows server 2012 r2 software#
Rdp from mac to windows server 2012 r2 windows 8.1#
You can use a Microsoft Remote Desktop client to connect to a remote PC and your work resources from almost anywhere using just about any device.Īfter some research I thought that Windows 2012 has another level of protection allowed by default when we enable remote desktop, which can be Network Degree Authentication (NLA). Applies to: Windows 10, Windows 8.1, Windows Server 2019, Windows Server 2016, Windows Server 2012 R2. Dynamic resolution updates (Win 8.1/2012 R2+). Built-in SSH tunneling for RDP and VNC connections RDP features.
Rdp from mac to windows server 2012 r2 for mac#
Server 2012 Remote Desktop Configuration Remote Desktop Connection For Mac Reauthentication prompt to Mac pc RDP client The just thing various from usual I had been doing, has been that nowadays I had been using my Mac OS Back button with its Microsoft Remote Desktop.
Rdp from mac to windows server 2012 r2 windows 8.1#
Hey, while we are on the subject of Mac/Windows integration, what “pain points” do you have in your environment? I am more than happy to write on particular subjects, specific issues you are experiencing, etc.General OS Updates 3154184 Explorer.exe crashes repeatedly when you try to log on to a remote desktop in Windows 8.1 or Windows Server 2012 R2 3146978 RDS redirected resources showing degraded performance in Windows 8.1 or Windows Server 2012 R2 3146627 Network drives aren't mapped correctly from DFS namespace in Windows Server 2012 R2-based RDS server. I hope that you found this article useful. Today we learned a couple of different methods for establishing a remote administration session with a Windows-based computer from Mac OS X.
Rdp from mac to windows server 2012 r2 mac os x#
Remote Windows Server 2008 session from Mac OS X Conclusion ^
Rdp from mac to windows server 2012 r2 software#
Once you have the software installed, click RDC > Preferences to set preferences, and thereafter use RDC exactly as you would use the Windows version. Download the Microsoft Remote Desktop Connection Client for Mac 2.1.1.The good news here is that Microsoft actually makes their Remote Desktop Connection client available for the Mac: This process is shown in the following screen shot:Ī Windows command prompt from a Mac OS X computer Remote Desktop Access ^Īs far as I am personally concerned, Microsoft’s Remote Desktop Protocol (RDP) is more secure, efficient, and robust than the Remote Frame Buffer (RFB) protocol that is used with Virtual Network Computing (VNC) technology. MAC>ssh we accept the Windows host’s private key and authenticate, we are in business. Thus, we can simply fire up a Terminal session and type our SSH command string.įor instance, to connect to a Windows SSH server at 192.168.1.108 as a user named administrator, we can send the following command: Remember that Mac OS X includes native support for SSH. If we need to open a Windows Server 2008 or Windows 7 command prompt from a Mac OS X computer, we don’t need to worry about WinRM or all that jazz. Keep this in mind when you are configuring firewall exceptions. NOTE: By default, SSH operates on TCP port 22, and RDP operates on TCP port 3389. Note that FreeSSHd includes secure FTP and Tunneling options as well. In this example, we are enabling the 4Sysopslab domain administrator account to connect to the server by using SSH. The User properties dialog box is shown in the next figure. This is shown in the following screenshot.Īfter you’ve installed FreeSSHd and ensured that the service is running in the Windows Service Control Manager, our next (and final) configuration task is to create an SSH user. Instead, right-click the FreeSSHd system tray icon and select Settings… from the shortcut menu. One point of confusion: after installation you might want to double-click the FreeSSHd desktop icon to open the administration panel. In this exercise I downloaded and installed FreeSSHd. OpenSSH for Windows (quite tricky to configure).
Rdp from mac to windows server 2012 r2 for free#
At any rate, we have some choices in the matter for free SSH server/client packages for Windows: Microsoft includes no built-in support for SSH, unfortunately. Please see the Microsoft documentation if you want more background on Network Level Authentication. Enabling RDP remote connections in Windows Server 2008
0 notes
Text
Ram pressure computer pc

#RAM PRESSURE COMPUTER PC HOW TO#
Start by clicking on the Apple icon in the top-left corner of your Mac’s display. If you own a MacBook, the RAM is soldered onto the motherboard and isn’t user accessible. But, unlike most Windows machines, it’s nearly impossible to upgrade the RAM in Apple computers. It’s much easier to see how much RAM is in your Mac.
#RAM PRESSURE COMPUTER PC HOW TO#
RELATED: What Does a PC's BIOS Do, and When Should I Use It? How to Check How Much RAM You Have on Mac In the System section, under System type, you can view the register that your computer uses. In the System section, next to Installed memory (RAM), you can view the amount of RAM your computer has. Just boot it up, use the keyboard shortcut to enter its BIOS or UEFI firmware (it’s different on each PC), and look for information about the system’s memory or RAM. Open the System menu by clicking the Start button, right-clicking Computer, and then clicking Properties on the options list. This is particularly helpful if you’re using a PC without a working operating system. This information is generally displayed in your system’s UEFI firmware or BIOS, too. If you build your own PC, your RAM may not run at its advertised timing until you tweak the timings. RELATED: How Does RAM Speed and Timing Affect My PC's Performance? Download and install CPU-Z, launch it, and click the “Memory” tab to see this information. To see more specific information about your RAM timings on any version of Windows, we recommend CPU-Z. You can also quickly open this by opening your Start menu, right-clicking “Computer,” and selecting “Properties.” Look to the right of “Installed Memory” under System. Instead, you can see your total amount of RAM on the Control Panel > System and Security > System page. The Task Manager doesn’t offer this useful information on Windows 7.
0 notes
Text
Microsoft remote desktop for mac old version

#Microsoft remote desktop for mac old version how to#
#Microsoft remote desktop for mac old version full#
#Microsoft remote desktop for mac old version pro#
#Microsoft remote desktop for mac old version password#
Next, you’ll need to input the PC name (the one you wrote down from earlier), or the IP address so your Mac knows where to find your PC. For example, you could call it “John’s work computer,” or “Jennifer’s PC.” This is simply what you want to call the connection and it has no real bearing on the connection itself. The first thing you’ll need to input is the connection name. You’ll be prompted to fill in quite a few fields. Head back to your Mac and click the “New” button at the top left of the Microsoft Remote Desktop screen.
#Microsoft remote desktop for mac old version how to#
Enabling a Windows 7 computer is a little different, but you can find out how to do that here.
#Microsoft remote desktop for mac old version full#
Click on “Computer name, domain, and workgroup settings” to find the full PC name and write it down. While still in “System,” it’s a good time to go ahead and get your full PC name if you don’t already have it, as you’ll need it to set up the connection.
#Microsoft remote desktop for mac old version pro#
SEE: Software usage policy (Tech Pro Research) Turn off hibernation and sleep settings for the target PC, as you won’t be able to access it remotely if it falls asleep. Now, search for “System” and click it when it appears. Next, you’ll need to select the users who will be able to be accessed through the remote desktop connection. Under the “System Properties” box you should see “Remote Desktop” and the button labeled “Allow remote connections to this computer” should be selected.
#Microsoft remote desktop for mac old version password#
You may need an administrator password to complete this step. For a Windows 8 machine, the fastest way to get this done is to search for “Allow remote access to your computer” and click on that when it comes up. Top TechRepublic Academy training courses and software offerings of 2022īest project management software and tools 2022Īt this point you’ll need to enable remote access on your target PC. Gartner identifies 25 emerging technologies in its 2022 hype cycle Right click (control + click) on the icon, mouse over “Options,” and click “Keep in Dock.” This will keep you from having to look for the icon every time you need to use it. If you think you’ll be frequently using this remote desktop connection, now would be a good time to set it in your dock. Or, you can use the searchlight feature by clicking the looking glass at the top right of your home screen, or by using the shortcut Command + Space Bar, and searching for “Microsoft Remote Desktop.” Opening the app should look like this: Next, open the application by clicking through the grey “Launchpad” icon and clicking on the Remote Desktop app icon. This app is free, so no price will be listed. To begin the download, click the blue “Get” button. Once you’ve accessed the Mac App Store, use the search bar at the top right of the screen to search for “Microsoft Remote Desktop.” The first search result should be what you’re looking for. Or, you can download it from our sister site here. Click the blue “App Store” icon in your dock. In order to get started with Microsoft Remote Desktop, you must begin by downloading it from the Mac App Store. Note: If you want to access Microsoft Remote Desktop on a newer Mac running macOS Sierra, check out this article instead. Available now through the Mac App store, it allows users to remotely connect to a Windows desktop to access local files, applications, and network resources. SEE: How to work from home: IT pro’s guidebook to telecommuting and remote work (TechRepublic Premium)įor Mac users, the stalwart tool has been the Microsoft Remote Desktop connection. However, a gap still exists for some and requires a bridge to move between computing environments. Today’s technology has come a long way in closing the divide between Windows and Mac applications, especially in the enterprise.
0 notes
Text
Pdf viewer mac commands tricks

#Pdf viewer mac commands tricks pdf#
#Pdf viewer mac commands tricks install#
#Pdf viewer mac commands tricks plus#
#Pdf viewer mac commands tricks pdf#
Many people these days prefer using PDF files because many on-line documents and books now come in form PDF files. Supports configurable keyboard shortcuts and many others.Also supports fullscreen and presentation views.Supports scale, rotate and fit functions.Supports outline, properties and thumbnail panes.It also supports other document formats as well, includin PS and DjVu.īelow is a list of its features and components: Qpdfview is a tabbed document viewer for Linux that uses Poppler for PDF support. Importantly, it can also handle pdf encoded with Chinese GBK well.Written modularly to support additional features.
#Pdf viewer mac commands tricks plus#
Supports PDF 1.7 with transparency, encryption, hyperlinks, annotations, searching plus many more.
Supports a highly quality anti-aliased graphics renderer.
It is highly-extensible because of its modular nature.Ī handful of its notable features include: Mupdf is a free, small, lightweight, fast and complete PDF and XPS viewer.
#Pdf viewer mac commands tricks install#
To install Gnu GV PDF viewer in Linux, type: $ sudo apt-get install gv Suggested Read: 9 Best File Comparison and Difference (Diff) Tools for Linux It also has old an graphical user interface. Theisen, which was originally developed by Johannes Plass. It is a improved derivation of Ghostview developed by Timothy O. It is an old PDF and Postscript document viewer that works on an X display by providing a graphical user interface for the Ghostscript interpreter. To install XPDF Viewer, use following command: $ sudo apt-get install xpdf It has an old interface, therefore user who care so much about nice graphics may not enjoy using it so much. It additionally includes a text extractor, PDF-to-PostScript converter and many other utilities. It is an old and open source PDF viewer for the X windows system that is supported on Linux and other Unix like operating systems. To install PDF.js in Linux systems, follow the below instructions: $ git clone git:///mozilla/pdf.js.gitĪnd then you can open Visit Homepage: 5. It is also an open source, community driven project that is supported by Mozilla labs. It is a general-purpose web based PDF viewer built with HTML5. To install Foxit Reader on Linux systems, follow below instructions: $ cd /tmp Add/verify digital signatures and many more.Support for scanning documents into PDF.It is features-rich with features including: Suggested Read: 10 Best Markdown Editors for Linux The latest version as of this writing is Foxit reader 7 which offers some security features that protect against vulnerabilities. It is a cross platform, small and fast secure PDF reader. To install Evince PDF reader in Linux, use: $ sudo apt-get install evince It supports document formats such as PDF, PDF, Postscript, tiff, XPS, djvu, dvi, plus many more. It is a lightweight document viewer which comes as the default on Gnome desktop environment. To install Okular PDF reader in Linux, use apt or yum to get it as shown: $ sudo apt-get install okular
0 notes
Text
Network radar similar windows

#Network radar similar windows driver
#Network radar similar windows full
#Network radar similar windows android
#Network radar similar windows mac
#Network radar similar windows mac
Added /ConnectAP command-line option, which allows you to connect to the desired access point, by specifying network name (SSID) and MAC address (BSSID),.
If you have multiple access points with the same name (Wifi Extenders), you can choose a specific AP to connect.
This option allows you to connect your access point from the window of WifiInfoView.
Added 'Connect Selected Access Point' option.
There are 2 types of shortcut you can create - 'Connect Access Point By BSSID' and 'Connect Access Point By Name'.
Added option to create a shortcut on your desktop that connects to the desired access point.
#Network radar similar windows full
cfg file from the current directory if full path is not specified.
Fixed the /cfg command-line option to load the.
Be aware that the calculation of 'Maximum Speed' is still not supported for 802.11ax
Added support for detecting 802.11ax networks.
Added support for WPA3 detection (Security column).
You can now use wildcards in the BSSID/SSID filter ('Advanced Options' window).
The properties window now has multiple pages if there is no enough space to display all properties in one page.
The properties window is now resizable.
Updated to work properly in high DPI mode.
Also, if you hold down the shift key while choosing the sort menu item, you'll get a secondary sorting. Like the column header click sorting, if you click again the same sorting menu item, it'll switch between ascending and descending order.
Added option to change the sorting column from the menu (View -> Sort By).
If you have SSID with non-English characters and it's not displayed properly then you should change this option. The default encoding is now set to UTF-8.
Added 'SSID Encoding' option - ANSI or UTF-8.
Fixed some high DPI mode issues (Status Bar, 'Choose Columns' Window).
Updated the internal MAC addresses file.
Added 'Mark MAC Groups' (Under the View menu), which allows you to mark wireless networks with different colors according to the 'MAC Group' value.
When you see 2 or more wireless networks with the same number in this column, it means that they are probably generated by the same device.
Added 'MAC Group' column, which detects wireless networks with similar MAC address.
Fixed the 'Mark Connected Access Point' option to override the 'Mark MAC Groups' option.
Fixed the default columns size in high DPI mode.
In order to watch 5GHz wireless networks, you have to use a wireless network adapter that supports 5 GHz channels.ĭownload links are on the bottom of this page.
If you don't have a compatible wireless adapter and driver, "cannot find wireless adapter" error will be displayed.
#Network radar similar windows driver
Wireless network adapter and wireless card driver that works with the built-in wireless support of Windows Vista/.
If you want to get wireless networks information on Windows XP, you can use the WirelessNetView utility. Windows XP is not supported because this tool is based on new Wi-Fi API that doesn't exist on Windows XP.
Operating System: This utility works on Windows Vista, Windows 7, Windows 8, Windows Server 2008, Windows 10, and Windows 11.īoth 32-bit and 圆4 systems are supported.
WifiInfoView also has a summary mode, which displays a summary of all detected wireless networks, grouped byĬhannel number, company that manufactured the router, PHY type, or the maximum speed. Received from this device, in hexadecimal format. When you select a wireless network in the upper pane of this tool, the lower pane displays the Wi-Fi information elements Router Model and Router Name (Only for routers that provides this information), and more. Network Name (SSID), MAC Address, PHY Type (802.11g or 802.11n), RSSI, Signal Quality, Frequency, Channel Number, Maximum Speed, Company Name, WifiInfoView scans the wireless networks in your area and displays extensive information about them, including:
NK2Edit - Edit, merge and fix the AutoComplete files (.NK2) of Microsoft Outlook.
#Network radar similar windows android
Wifi Collector - Collect wireless networks information and their location on Android device.WifiHistoryView - Displays history of connections to wireless networks on your computer.
0 notes
Last Seen Blogs

memoryboxparty
Memory Box

menarna
♥️Carmen🦇

alesky85
aleskyfit

primeprotein
Untitled

spider-farmer
Isopod Farmer