#some boxes are different but photoshop crashed and idk ;;
Explore tagged Tumblr posts
Photo

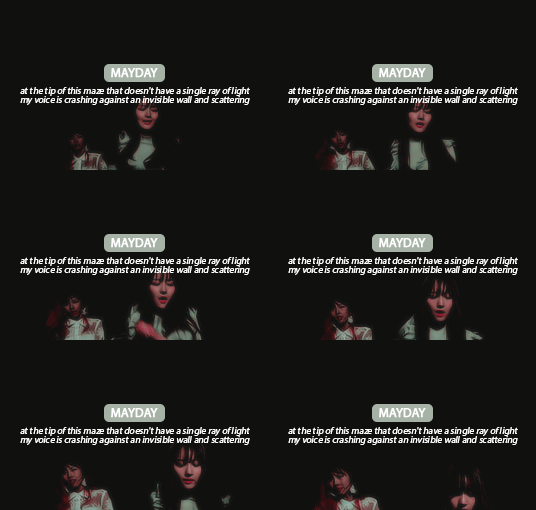
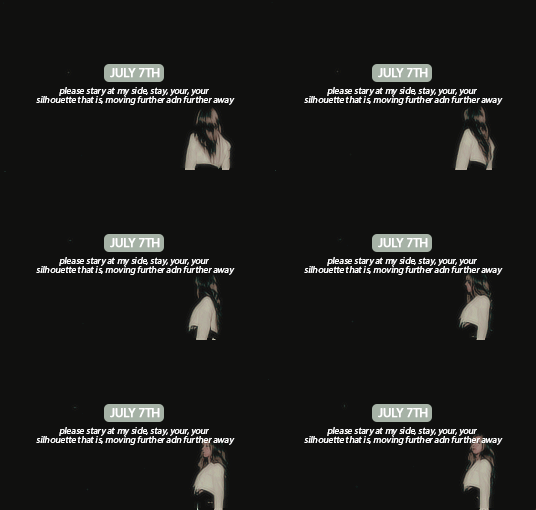
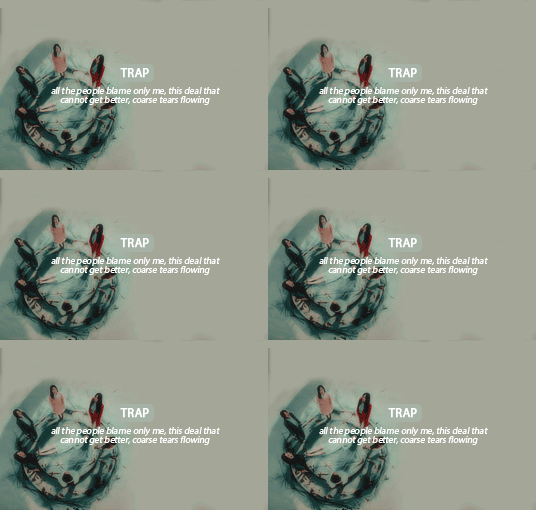

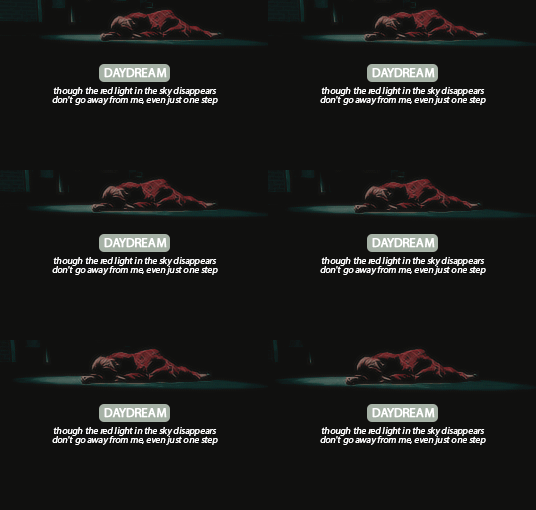


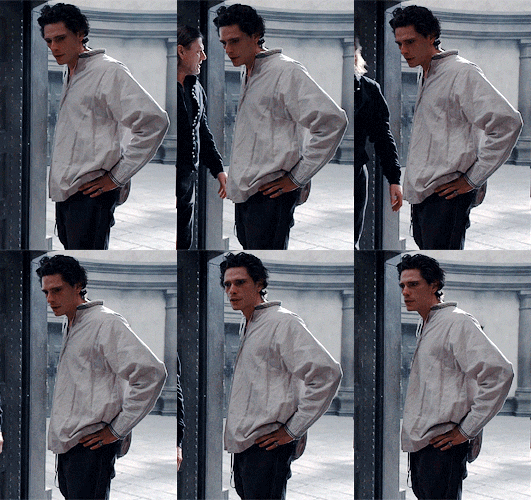
Dreamcatcher Gif Battle vs @sowjiu
Round 6: Favorite b-sides
#dreamcatcher#hfdcedit#femaleidolsedit#femadolsedit#beautyidolsedit#ot7gifs#gifs#sowjiu vs suadong#insp: 7nsomnia! (lin#*link to her gifset on the first gif!)#ihatenotbeingabletoaddlinksonthecaption;;#some boxes are different but photoshop crashed and idk ;;
240 notes
·
View notes
Text
basic gif tutorial (photoshop cs5)
today i’ll be showing you how to make this gif!

note: i will not be covering coloring in this tutorial because i personally tend to use psds that other tumblr users have created and shared (this psd pack is by far my favorite, i use it for 90% of my gifs - just remember to check the uploader’s terms of use before downloading psds for your own use to make sure it’s okay!) rather than doing my own coloring. if you want to make a really nice looking gifset you MUST add coloring to it - i would never upload this gif completely uncolored like this, i only left it out in this instance because it’s not part of the tutorial.
there are loads of great coloring tutorials out there by people who are better at it than i am, but the rest of the gifmaking process is shown below! i might have overexplained some stuff, so hopefully if you’ve never made a gif in your life, this tutorial will be just as helpful to you as to an experienced gifmaker who’s just curious about some of the settings i use
now, first thing’s first: you need a high quality video clip to gif from. the higher quality the video, the higher quality the gif. you can make do with lower res videos if you absolutely have to (god knows i do when i’m giffing matteo martari in obscure italian tv shows that are only available as shitty streams for people outside italy lmao), but try to find an hd version if at all possible.
some people torrent or download full episodes of shows in high quality, but personally, i find the easiest method is to use the xbox windows app to record my computer screen while i’m playing a video on netflix, youtube, etc. (i’m not familiar with macs, so mac users, you’ll have to poke around on your own to see if there’s a similar screen recording program available for you). this way i can just get the brief little clip that i want to gif rather than having to save an entire episode on my computer and take up space.
you’ve got your clip (the one i’m using in this tutorial was recorded from netflix) so on to business! some people use a screencapping method to gif, but i have never done that and i don’t know how it works, so i’m just going to walk you through the method i’ve always used. i don’t know if it’s more or less efficient than the screencapping method, but it works great for me.
make sure to save your work as you’re going because photoshop can crash OFTEN (esp if you have a lower powered laptop) and there’s nothing more frustrating than getting to the final step of a gif and losing all your work because photoshop crashed and you hadn’t been saving as you went along.
1. open photoshop (i’m using version cs5 in this tutorial, so if you have a different version, some steps might be slightly different idk). go to file -> import -> video frames to layers.

2. browse through your computer to find the video clip you want to gif from. click on it and hit “load.” you will be brought to this screen:
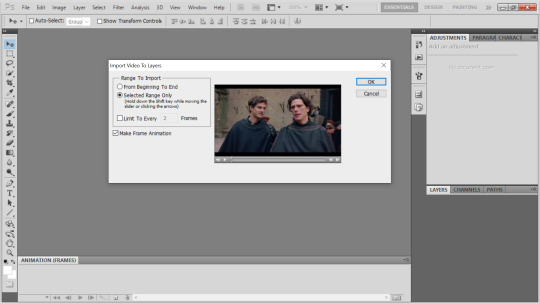
in the “range to import” box, make sure to select “selected range only” rather than “from beginning to end.” this will allow you to just highlight a specific portion of the clip to turn into a gif. do NOT click the “limit to every [x] frames” box, this will auto delete one frame per whatever number of frames and it will make your gif look choppy rather than nice and smooth.
3. find the specific part of the clip you want to turn into a gif. while holding down the shift key, click the arrows in the bottom right until you’ve reached the end of what you want to gif (the little dark portion to the left of the video cursor is the selected part that will become a gif). then click OK

4. now we have our gif! it’s not pictured here, but do make sure to delete extra frames on the beginning and end if you overshot the portion you meant to select in the previous step. i can’t tell you how many times i’ve seen gifs where the shot right before or after the intended shot flashes up just for one frame at the beginning or end of the gif because the gifmaker forgot to make sure they didn’t have extraneous frames in there.
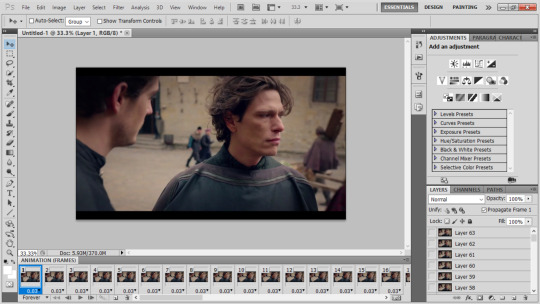
5. this next part is, i think, an extra step that people who gif using the screencap method don’t have to deal with, but it’s really just a minor little hassle so don’t worry. it’s not always the case, but depending on the video you’re using for the gif, there may be duplicate frames in there. i’m going to make a gif of my gif tutorial to show you what i mean:

you see how every few frames, the gif stops moving because there’s two or three frames in a row that are all the same? you MUST delete these duplicate frames or else your gif will have weird laggy spots. so yeah, you have to click through every single frame to delete the extras. it’s a pain, but once you get the hang of it you can go really fast through it and it only takes a minute or two.
6. now you’ve got your frames all set, so the next thing to do is cropping. select this tool:

with this tool selected, click and drag to select the part you want to keep. everything outside the box will be cropped out. even if your video doesn’t have black bars at the top, i always trim a little bit off all 4 sides just to be safe.

now go to image -> crop, and voila! the part outside the box will now be gone
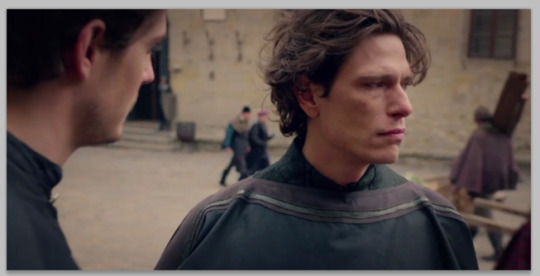
7. next up is resizing. here i’ll tell you my typical gif dimensions and show examples from other sets i’ve made. the way it works on tumblr is that gifs MUST be a certain width or else they’ll look blurry, but height you can play around with (as long as the height is consistent for all the gifs - if you have 2 gifs next to each other and one is 200px in height and the other is only 150, tumblr will try to autosize them to be the same height and it’ll make the gifs look all wonky or cropped)
large gif to go across the whole post: MUST be 540px in width, height doesn’t matter. i use a wide variety of heights for 1 gif across sets depending on how many are in the set, if i want more square or more narrow gifs, etc, so just play around and decide what you like best (pictured: 540x325)

2 gifs across: MUST be 268px in width. again, height doesn’t matter, but i’ll tell you the heights i usually use. for 4-gif sets (2 by 2) i usually make the height 325, 300, or occasionally 280 depending on whether i want the gifs longer rectangles or closer to squares (pictured: 268x325)

for 6-gif sets (2 by 3) i do 200px height, for 8-gif sets (2 by 4) i do 180px height, and for 10-gif sets (2 by 5) i do 160px height (pictured: 268x180 from an 8-gif set)

but again, these are just my personal preferences so feel free to mess around on your own! just remember that width must ALWAYS be 268, no flexibility there
3 gifs across: MUST be 177 or 178px in width. technically, tumblr’s dimensions make it so that in a 3 across set, the left and right gifs should be 177px in width while the middle gif should be 178 - i really doubt 1 pixel makes that much of a different in quality, but i usually follow this rule just to be safe. i don’t often make 3 across gifsets, so i don’t have any standard heights that i use. this gif here is 177x250 and is from a 9-gif (3 by 3) set
right now i’m going to make my tutorial gif 268x180 just because those are the dimensions i find myself using most often. go to image -> image size (or ctrl + alt + i). in the dialogue box, type in one of your new dimensions - i have to do the 180 height for this one because if i make it 268 width, the height will be too small
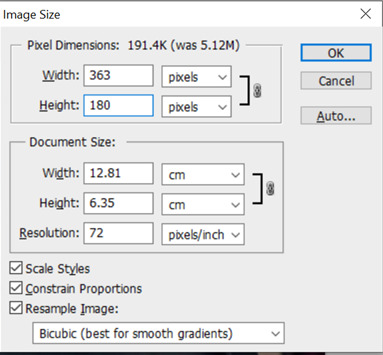
i never touch the settings at the bottom here so idk what they are, but make sure “constrain proportions” is checked off because otherwise, only one of the dimensions will change in size and the gif will get all stretched and wonky-looking
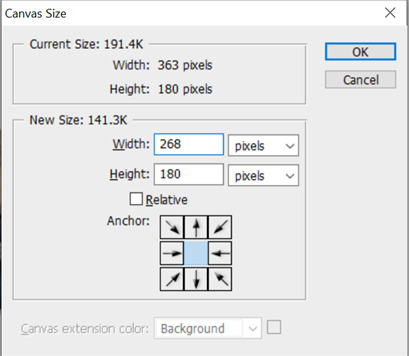
8. crop again! as you can see above, the new width of my gif is 363px, but i want it to be 268. go to image -> canvas size (ctrl + alt + c). change the unit to pixels and type in the new value for whichever dimension you want to crop (i’m cropping the width, but if you resized the width in the previous step and the height is too big, that’s what you have to crop here)
9. now that our frames and dimensions are all correct, we’re on to the final steps. first, change the gif speed. select all the frames, click on the little arrow next to the frame speed on any frame, and this little menu will come up. select “other” and type in 0.05 or 0.06, whichever you prefer. typically i do 0.06 as i find 0.05 slightly too fast, but i’ve seen other tutorials where the person said they think 0.05 is better, so it’s really up to personal preference.

10. convert to timeline animation (this little button in the bottom right of the frames bar)

11. select all the layers on the far right panel, then do layer -> smart objects -> convert to smart object. now all the frames will be condensed into one layer, which makes coloring and sharpening easier. you MUST convert to timeline animation before converting your layers to smart objects, otherwise it won’t work

once the layers are all one smart object, it’s also easier to reposition the gif - i’m going to click right on the canvas and drag the layer so francesco is more centered, and because it’s all one smart object, this will automatically move every other frame of the gif as well (unlike in frame animation when moving one layer only affects that one frame)

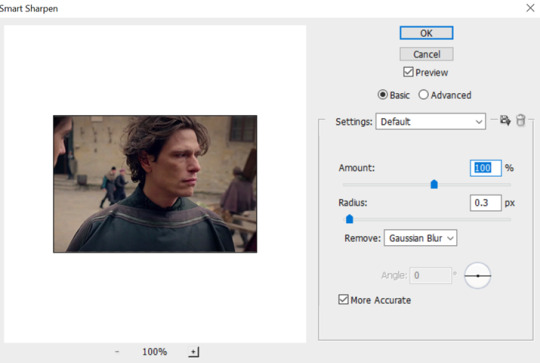
12. now we’re going to sharpen it. filter -> sharpen -> smart sharpen. these are the smart sharpen settings i use. some people go fancy by oversharpening, then adding a layer of blur and making the blur layer 50% opacity or so, and there are plenty of tutorials for that out there if you want to try it, but i prefer to keep it simple and you can’t go wrong with these smart sharpen settings:
13. at this point you want to add all your coloring layers, but like i said, i’m not doing coloring in this tutorial, so we’ll skip that step. if you have a psd you want to use for coloring, add it now, or play around with coloring layers on your own. if you’re putting text/captions on your gif, you want to do it now too. (i’d be happy to make a separate captions tutorial if anyone wants one, but i'll leave it out of this one so we can stick to the giffing basics)
14. save the gif. go to file -> save for web and devices (alt + ctrl + shift + s). these are the settings i use:

watch out for 3 things:
1) make sure to change looping options in the bottom right from “once” to “forever”
2) the file size (circled in blue). tumblr’s max file size is 3MB update 2020: tumblr max is 10MB. if a gif is 3MB 10 MB or more, it won’t move when you post it on tumblr. we’re in luck here because this is a small gif with relatively few frames, so we’re well under the limit. if you’re over the limit, don’t panic! there are several ways you can fix it which i’ll explain in a second
3) play around with lossy (circled in red). this is also a way you can decrease the file size. the higher the lossy, the smaller the file size. i vaguely remember seeing a tutorial throw around a range of 2-20 for lossy and if you go outside that it starts looking bad - my go to is 10, i don’t know why, but it’s just a habit by now and i like how it looks. however, for big 540px width gifts, my go to is 16 because those gifs will obviously have much bigger file sizes than small gifs. fiddling around with lossy is a great trick to decrease file size without having to delete too many frames, but it can only get you so far and if your gif is seriously over the 3MB limit, you’re gonna have to delete frames
update 2020: because of tumblr altering some formatting and the way gifs display on the site, adding lossy now makes gifs look too blurry. so these days i always do 0 lossy on my gifs! if the filesize is too big, the only way to make it smaller without sacrificing quality is to delete frames.
15. this brings us to the last step. go to file -> open and select your new gif wherever you’ve saved it. you’ll see that it’s now in frame animation again. this is good because a) it allows you to easily delete frames if you need to decrease the size and b) when saving from timeline animation, photoshop automatically slows the gif down, so you’ll have to open the final gif and readjust the frame speed.
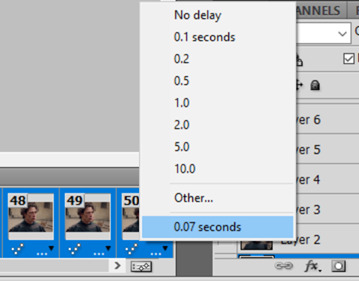
you remember we originally set the gif to go at 0.06 seconds, but now here it is at 0.07, which will look too slow. so just click “other” and type 0.06 seconds, save the gif with the exact same settings, overwrite the old version of the gif, and voila! you’re good to go!

i hope this tutorial was helpful, feel free to shoot me an ask if there’s any step of the process you want more clarification on!
#gif tutorial#photoshop tutorial#photoshop#tutorial#i know this looks like a lot of steps but that's just bc i really overexplained stuff lmao#and once you've gotten the hang of the process it goes really fast!#for me the longest part of the process is a) just deciding what shots to include in my gifset in the first place and b) coloring#the actual creation of one gif rarely takes me more than 10 mins
115 notes
·
View notes