#silicone ice cube tray molds
Text
0 notes
Text
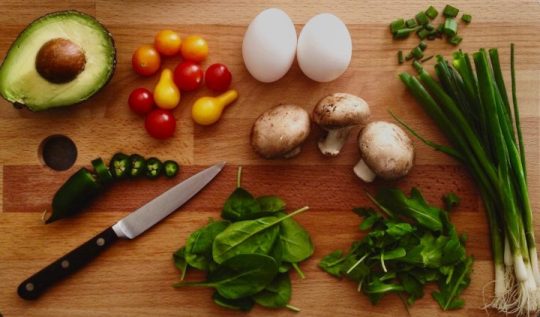
Homemade Rose-Infused Shower Steamers


Ingredients
1 cup baking soda
½ cup citric acid
¼ cup cornstarch
¼ cup Epsom salt
2 tablespoons coconut oil (melted)
2 tablespoons water
1 tablespoon rose water (optional, for extra rose scent)
1 tablespoon dried rose petals
5–10 drops essential oil (rose, lavender, or your preferred scent)
A few drops of pink or red food colouring (optional)
Instructions
Prepare the Molds:
Lightly grease silicone molds or ice cube trays with a bit of coconut oil.
Mix Dry Ingredients:
In a large bowl, whisk together the baking soda, citric acid, cornstarch, and Epsom salt.
Combine Wet Ingredients:
In a separate bowl, mix the melted coconut oil, water, rose water (if using), and essential oil. If you’re using food coloring, add a few drops to this mixture.
Blend Ingredients:
Gradually add the wet ingredients to the dry mixture, a little at a time, while continuously stirring. The mixture should be slightly damp and hold together when pressed. If it’s too dry, add a tiny bit more water.
Add Rose Petals:
Gently fold in the dried rose petals, ensuring they’re evenly distributed throughout the mixture.
Press into Molds:
Pack the mixture tightly into your molds, pressing firmly to ensure they hold their shape. If needed, use the back of a spoon or your fingers to press it down well.
Dry the Steamers:
Let the steamers dry in the molds for at least 24 hours. Once they are completely dry and hard, gently pop them out of the molds.
Store and Use:
Store your shower steamers in an airtight container. To use, place one on the floor of your shower away from direct water flow. As it dissolves, it will release a lovely aroma and essential oils, enhancing your shower experience.
Enjoy the soothing aroma and calming effects of your rose-infused shower steamers, turning your shower into a spa-like retreat!
#diy#homemade#shower steamers#diy shower steamers#rose#craft#crafts#recipe#mindful living#wild flowers
109 notes
·
View notes
Text


#which item poll#hearts#cute#cats#polls#poll game#random polls#poll blog#ice trays#home accessories#kitchen accessories#amazon
40 notes
·
View notes
Text
So I tried to make a couple picky pads... didn't go as planned.
A picky pad is a fidget that you can pick things out of or just pick at in general its good for people who have dermatillomania(me), trichotillomania, anxiety, ADHD etc.
All three I made without silicone BECUASE I DON"T HAVE FRICKING SILICONE MIX LAYING AROUND :(
Fabric Picky Pad
Take two squares of fabric and stitch them together
Leave a hole where you can put things in
I put beads, yarn, googly eyes, and confetti in mine.
Sew it up!
I give this one a 3/5 because the pony beads do give a nice picky feel but not the euphoria of taking something out/off. The googly eyes make a nice noise and the yarn it a nice plushy feel. Plus searching for the bits of confetti can help anxiety.
Hot glue picky pad
Get a silicone mold thingy(I used a ice cube tray and the top to the ice cube tray)
Sprinkle some beads or confetti(non paper) on the bottom
Fill layer with hot glue
Sprinkle some more
Repeat as necessary!
Wait to dry.
Give this 1/5. Once it dries its super hard. The pony beads get stuck the confetti is easier to get out but its still hard. There is euphoria when you pick it out but I get frustrated and give up.
Elmers glue picky pad
Same instructions as the hot glue!
0/5. Hasn't dried yet :( I'm thinking it'll take about 24 hours.
#picky pad#dermatillomania#arts and crafts#crafting#fidgets#anxitey#glue#no silicone#skin picking#adhd#trichotillomania
6 notes
·
View notes
Note
Building Brick Candy Robot Mold Chocolate Mold Set Silicone Building Block Mold Ice Cube Trays for Making Melted Chocolate Fondant Jelly Dome Mousse(6 Pcs) https://a.co/d/70duhwf
lego mans AND bricks

OH MY GOD
...brb.
#CPRambles#lego!!!#you have just made my dreams come true#LEGO ICE HERE WE COME#i need to ask my friends to lend me their prime account#LOL HOLY SHIT
12 notes
·
View notes
Link
Check out this listing I just added to my Poshmark closet: New Set of Two Football Shaped Ice Cube Molds - Hard Plastic.
0 notes
Text

These vegan keto chocolate chip fat bombs are a delicious and satisfying treat, perfect for those following a low-carb lifestyle. They're rich in healthy fats and low in net carbs, making them a great snack or dessert option.
Ingredients: 1 cup coconut butter. 1/4 cup coconut oil. 1/4 cup unsweetened cocoa powder. 1/4 cup powdered erythritol. 1 teaspoon vanilla extract. 1/2 cup dairy-free chocolate chips.
Instructions: In a microwave-safe bowl, melt the coconut butter and coconut oil together until smooth. Stir in the cocoa powder, powdered erythritol, and vanilla extract until well combined. Fold in the dairy-free chocolate chips. Pour the mixture into silicone molds or an ice cube tray. Place in the freezer for about 30 minutes, or until firm. Once firm, remove from molds and store in an airtight container in the refrigerator.
Nick
0 notes
Text

These herb and garlic infused olive oil pods are a versatile and flavorful addition to any dish. They add a burst of freshness and depth to salads, pastas, roasted vegetables, and more. Plus, they're easy to make and convenient to have on hand whenever you need a quick flavor boost.
Ingredients: 1 cup extra virgin olive oil. 4 cloves garlic, minced. 2 tablespoons fresh rosemary, chopped. 2 tablespoons fresh thyme, chopped. 2 tablespoons fresh parsley, chopped. 1 teaspoon red pepper flakes optional.
Instructions: In a small saucepan, heat the olive oil over low heat. Add the minced garlic and cook for 2-3 minutes until fragrant, stirring occasionally. Stir in the chopped rosemary, thyme, parsley, and red pepper flakes if using. Continue to cook for another 2-3 minutes, allowing the herbs to infuse into the oil. Remove from heat and let cool for 5-10 minutes. Carefully pour the infused oil into silicone ice cube trays or small silicone molds. Place in the freezer and freeze until solid, about 2-3 hours. Once frozen, remove the herb and garlic infused olive oil pods from the molds and transfer to an airtight container or resealable bag. Store in the freezer until ready to use.
Prep Time: 10 minutes
Cook Time: 10 minutes
Laurel C
0 notes
Text
What Are Shower Steamers?
Bath Salt shower steamers are specially crafted tablets designed to transform your daily shower into an aromatic and therapeutic experience. When placed in your shower, these steamers release essential oils and fragrances that envelop you in a soothing or invigorating mist, making your shower feel like a mini spa session. Unlike bath bombs, which are designed for soaking in the tub, shower steamers work with the steam and water from your shower, offering a quick and convenient way to enjoy the benefits of aromatherapy.
Benefits of Using Bath Salt Shower Steamers
Aromatherapy: Infused with pure essential oils, our shower steamers offer targeted aromatherapy benefits, helping to relax, energize, or relieve sinus congestion.
Convenience: Perfect for those who don’t have time for a long bath but still want to indulge in self-care.
Versatility: Whether you’re starting your day with an energizing boost or winding down with calming scents, our steamers cater to your specific needs.
How They Differ from Bath Bombs
Bath bombs are designed for immersion in bathwater, creating a colorful and fragrant soak. Shower steamers, however, are activated by water and steam in the shower. They don’t dissolve in a tub but instead fizz on the shower floor, releasing their scents directly into the steam. This makes them perfect for shower lovers who want the benefits of bath bombs without the need for a bath.
Types of Bath Salt Shower Steamers
Our Bath Salt shower steamers come in a variety of formulations, each designed to address specific needs:
Relaxation Steamers
Infused with soothing essential oils like lavender and chamomile, our relaxation steamers help to calm the mind and body, making them perfect for evening showers.
Energizing Steamers
Start your day with a burst of energy by using our energizing steamers, featuring invigorating scents such as citrus, peppermint, and eucalyptus.
Sinus-Relief Steamers
Combat congestion and breathe easier with our sinus-relief steamers, which contain powerful essential oils like eucalyptus, peppermint, and tea tree.
Aromatherapy Steamers
Tailored to enhance your emotional well-being, our aromatherapy steamers include blends like rosemary for mental clarity, ylang-ylang for mood enhancement, and geranium for balance.
How to Use Bath Salt Shower Steamers
To maximize the benefits of your Bath Salt shower steamers, follow these simple steps:
Safety Precautions
Always check the ingredients for potential allergens, especially if you have sensitive skin. Avoid using steamers with harsh chemicals or artificial fragrances. Consult a healthcare provider if you’re pregnant or breastfeeding before using steamers with certain essential oils.
Duration of Use
Our shower steamers are designed to last the entire duration of your shower, typically dissolving over 5-10 minutes. For longer showers, consider using two steamers.
Ideal Water Temperature
Use warm to hot water to create enough steam to disperse the essential oils throughout your shower, enhancing the aromatherapy experience.
Proper Placement in the Shower
Place the steamer on the shower floor, but away from direct water flow. This will allow it to dissolve slowly, releasing its fragrance over time.
DIY Shower Steamer Recipes
If you’re feeling creative, you can make your own shower steamers at home. Here’s a basic guide:
Basic Recipe Ingredients
1 cup baking soda
1/2 cup citric acid
1/2 cup cornstarch
Water in a spray bottle
20-30 drops of your chosen essential oils
Customization Ideas
Personalize your steamers by adding dried herbs, flower petals, or natural colorants. You can also adjust the strength of the scent by varying the amount of essential oils used.
Storage Tips
Store your homemade steamers in an airtight container to prevent them from absorbing moisture. Keep them in a cool, dry place away from direct sunlight.
Mold Options
Use silicone molds in fun shapes or even ice cube trays to create custom steamers that fit your style.
Essential Oil Combinations
Experiment with combinations like lavender and eucalyptus for relaxation, or lemon and peppermint for an energizing shower experience.
Best Practices for Maximum Enjoyment
To fully enjoy your Bath Salt shower steamers, incorporate these best practices:
Incorporating into Your Self-Care Routine
Make shower steamers a part of your daily self-care ritual by choosing scents that match your mood or the time of day.
Creating a Spa-Like Atmosphere
Enhance your shower experience by dimming the lights, playing soft music, and using a plush bathrobe to create a relaxing, spa-like environment.
Pairing Steamers with Complementary Products
For an even more luxurious experience, pair your steamers with our Bath Salt body scrubs, lotions, or facial masks that complement the steamer’s scent profile.
Buying Guide: Choosing Quality Shower Steamers
When selecting shower steamers, consider these factors to ensure you get the best product:
Price Range and Value Considerations
Our Bath Salt shower steamers offer a range of options from affordable to premium, ensuring there’s something for every budget without compromising on quality.
Popular Brands and Reviews
Look for brands like Bath Salt that are known for using natural ingredients and have positive customer reviews. Our steamers are crafted with care and loved by many for their potency and effectiveness.
Red Flags to Avoid
Avoid steamers with artificial fragrances, synthetic dyes, or harsh chemicals. These can irritate the skin and diminish the benefits of aromatherapy.
Ingredients to Look For
Choose steamers made with natural essential oils, baking soda, citric acid, and other gentle ingredients. Look for added benefits like menthol crystals or organic herbs that can enhance the steamer’s effects.
With Bath Salt shower steamers, you can elevate your daily shower into a rejuvenating and aromatic experience, perfect for any time of day. Whether you’re looking to relax, invigorate, or simply indulge in some self-care, our steamers are a simple yet effective way to bring a little luxury into your routine.
0 notes
Text
How Long Does It Take for an Ice Cube to Freeze Completely?
When you place a tray of water in your freezer, you might wonder, "how long does ice cube take to freeze?" The answer depends on several factors, including the temperature of your freezer, the size of the ice cubes, and the amount of water. Let’s break down the process to give you a clearer idea.

The Freezing Process
When you put a tray of water in the freezer, the freezing process begins. Water starts to solidify at 32°F (0°C). However, the time it takes for water to turn into ice depends on various conditions:
Freezer Temperature: Most home freezers are set at 0°F (-18°C). At this temperature, water in an ice cube tray typically takes about 3 to 4 hours to freeze completely. If your freezer is colder, it might freeze faster; if it's warmer, it will take longer.
Ice Cube Size: The size of the ice cube plays a significant role in the freezing time. Smaller ice cubes or crushed ice will freeze faster than larger ones. For standard ice cube trays, it usually takes around 3 to 4 hours, but larger molds can take up to 6 hours or more.
Water Amount: The more water you have, the longer it will take to freeze. If you are making ice cubes in a very large tray, expect a longer freezing time compared to a standard ice cube tray.
Factors Influencing Freezing Time
Freezer Load: If your freezer is packed with items, the circulation of cold air might be reduced, which can increase the time it takes for ice cubes to freeze. Ensure your freezer is not overcrowded for optimal freezing conditions.
Initial Water Temperature: Water that is already cold will freeze faster than water at room temperature. Using chilled water can slightly reduce freezing time.
Type of Ice Cube Tray: Silicone ice cube trays or those made from materials that conduct heat well might speed up the freezing process compared to traditional plastic trays.
How to Speed Up Freezing?
If you need ice cubes quickly, here are a few tips:
Use Cold Water: Start with water that is already cold or chilled.
Check Freezer Settings: Make sure your freezer is set to the correct temperature for efficient freezing.
Opt for Smaller Ice Cubes: Use smaller trays or molds for faster results.
Ensure Proper Air Circulation: Avoid overloading your freezer to maintain good air circulation.
Conclusion
In summary, how long does ice cube take to freeze generally depends on your freezer’s temperature, the size of the ice cubes, and the amount of water used. For standard ice cube trays and typical freezer settings, you can expect the ice cubes to freeze in about 3 to 4 hours. By understanding these factors and adjusting accordingly, you can make sure your ice cubes are ready whenever you need them! Read More
0 notes
Link
Price: (as of – Details) Product Description Weight: 200g Material: Silicone Design: Silicone - ...
0 notes
Text
Elevate Your Cocktail Game with Silicone Ice Cube Molds
alright, let's talk ice because apparently, it's a big deal in drinks and I had NO idea until recently. So silicone ice cube molds? They're pretty much a game changer if you're into making your drinks look and taste just right. Ever had a cocktail where the ice melted too fast and it just kinda diluted everything? Yeah, not fun. Turns out, the size and shape of the ice actually matter a lot more than I thought. Silicone molds are cool because they let you pop out the ice super easy (no more twisting and turning and almost breaking the tray), and they come in all sorts of shapes and sizes. So you can get really creative with it. Now, for something like an Old Fashioned, you’d want a big sphere or square because it melts slower, keeping your drink strong and not watered down. Plus, they look super classy. If you’re feeling adventurous, you can even add stuff like fruit or herbs into the ice for an extra pop of flavor and color as it melts. And get this, they're not just for water. Tried making coffee ice cubes yet? Game changer for iced coffee. It's kinda wild how something as simple as changing up the ice can make such a big difference. Definitely gonna experiment more with this.
0 notes
Text
Transform Your Body with These Delicious Keto Recipes!
Looking to embark on a journey to transform your body? Look no further than the enticing world of keto! With its emphasis on low carb, high fat consumption, the ketogenic diet plan has become a go-to for many looking to shed pounds and improve overall health. But embarking on a keto lifestyle doesn't mean sacrificing flavor or variety. Here are some mouthwatering keto recipes to kickstart your journey to a healthier you!
Certainly! Here's a brief description of how to cook each of the mentioned keto recipes:
1. Creamy Cauliflower Soup: Start by sautéing onions and garlic in olive oil until softened. Add chopped cauliflower and vegetable broth, then simmer until the cauliflower is tender. Blend the mixture until smooth, then stir in heavy cream and season with salt and pepper to taste.
2. Zucchini Noodles with Pesto: Spiralize zucchini into noodles and set aside. In a food processor, combine fresh basil, garlic, pine nuts, Parmesan cheese, and olive oil to make the pesto. Sauté the zucchini noodles in a skillet until tender, then toss with the pesto until evenly coated.
3. Bacon-Wrapped Asparagus: Preheat the oven to 400°F (200°C). Wrap bundles of asparagus spears with bacon slices and place on a baking sheet. Bake for 15-20 minutes or until the bacon is crispy and the asparagus is tender.
4. Avocado Egg Salad: Hard boil eggs, then chop and mix with mashed avocado, mayonnaise, mustard, and lemon juice. Season with salt and pepper to taste, then serve on a bed of lettuce or low carb wraps.
5. Keto Cheesecake Bites: Combine almond flour, cream cheese, sweetener, and vanilla extract in a bowl until smooth. Press the mixture into a baking dish and refrigerate until firm. Cut into bite-sized pieces and serve chilled.
6. Grilled Salmon with Lemon Butter: Season salmon fillets with salt, pepper, and olive oil. Grill over medium heat for 4-5 minutes per side, or until cooked through. In a small saucepan, melt butter and stir in lemon juice and minced garlic. Drizzle the lemon butter sauce over the grilled salmon before serving.
7. Crispy Parmesan Brussels Sprouts: Toss halved Brussels sprouts with olive oil, salt, and pepper, then spread them out on a baking sheet. Sprinkle with grated Parmesan cheese and bake at 400°F (200°C) for 20-25 minutes, or until crispy and golden brown.
8. Keto Fat Bombs: Melt coconut oil and mix with nut butter, chopped nuts, seeds, and sweetener. Pour the mixture into silicone molds or an ice cube tray and freeze until set. Enjoy as a quick and easy snack whenever you need a boost of energy.
Whether you're new to the ketogenic lifestyle or a seasoned pro, these delicious recipes are sure to satisfy your cravings while keeping you on track with your keto weight loss goals. So why wait? Start your keto journey today and reap the benefits of a low carb, high fat diet. Your body will thank you!
We offer a $500 guarantee if someone doesn't hit their weight loss goal.
#ketolife#ketorecipes#ketomealideas#ketojourney#ketofitness#ketocommunity#healthyfats#ketodiettips#ketoinspiration#Hashtags#LowCarbLiving#KetoRecipes#LCHF#KetoInspiration#KetoJourney#KetoMealIdeas#KetoSuccess#KetoDietTips#KetoFriendly#KetoTransformation#KetoResults
1 note
·
View note
Link
Check out this listing I just added to my Poshmark closet: Disney Baymax Small Silicone Tray.
0 notes
Link
Check out this listing I just added to my Poshmark closet: New 2PK - 26 Cavities Alphabet Letters Silicone Ice Molds.
0 notes
Last Seen Blogs

nanotech-terminator
Billy Hope

emetoniche
Didn't Quite Make It

alex-coleman
Alex Coleman

nanostims
just keep stimming!

diktyofm-blog
Diktyo Fm 91.5