#settings: hasselblad xpan camera
Explore tagged Tumblr posts
Text
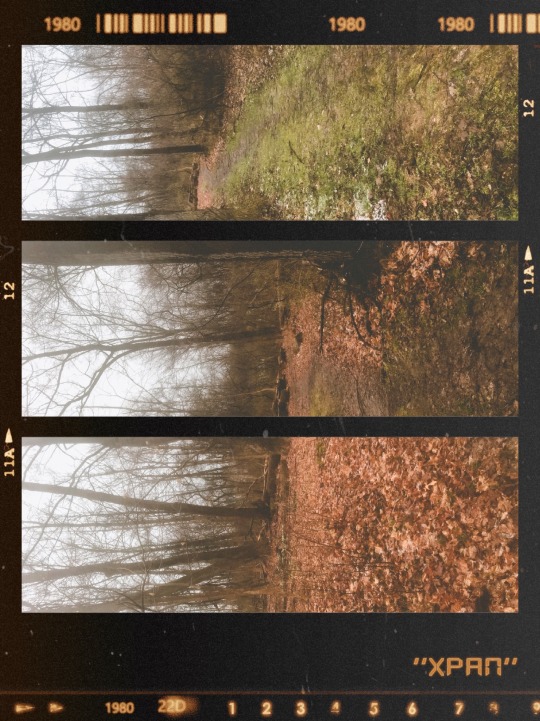
#the tangerinedream#myphotography#photography#nature#woods#trees#winter#atmospheric#settings: hasselblad xpan camera
25 notes
·
View notes
Photo
Epochal Territories Shoot (B-Roll) - 19/12/2020
During the main shooting for Epochal Territories, I shot some what I would call B-Roll photographs along side the main work. Mainly, this was because I found myself with a Hasselblad XPan II which was kindly given to me by one of the kind Tech Dems in the ERC, on one condition: It was broken. The XPan is a unique 35mm rangefinder because it doesn’t just shoot the normal 3:2, 36x24mm sized photograph we’re used to, but it can also shoot a 2:1, 65x24mm panoramic frame. This is great, when the way to access that works. The XPan is paired with the 45mm F4 and in this shoot, I used Ilford HP5+ which I developed in stock ID-11 for 7.5 minutes and scanned with my Canoscan 9000F MKii at 2400DPi. The film was metered and developed at 400 asa, with the lens stopped down to F8-F11 and kept in aperture priority for convenience whilst I made sure the format dial didn’t move...
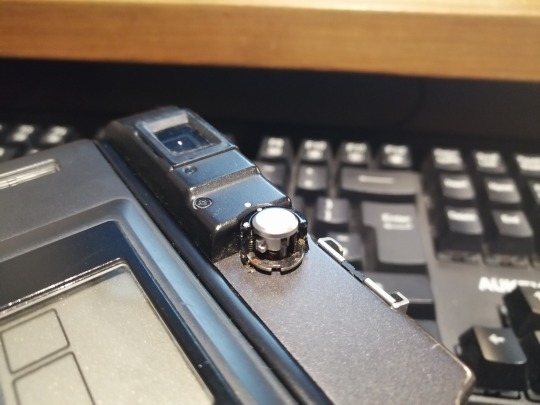
Above is the dial to switch it from normal to panoramic. I knew about this, as the Tech Dem told me that it either didn’t work or was extremely fickle. As you can see, it is missing a great deal of it’s casing and only worked if it was in a specific position, and if not, a flashing P would appear on the frame display instead of a solid P. But, despite it being broken, I managed to get it to work for the most part by turning it whilst wearing gloves...because it was cold. The XPan was with me for a couple of laps around Colerne on a bitterly cold December afternoon.
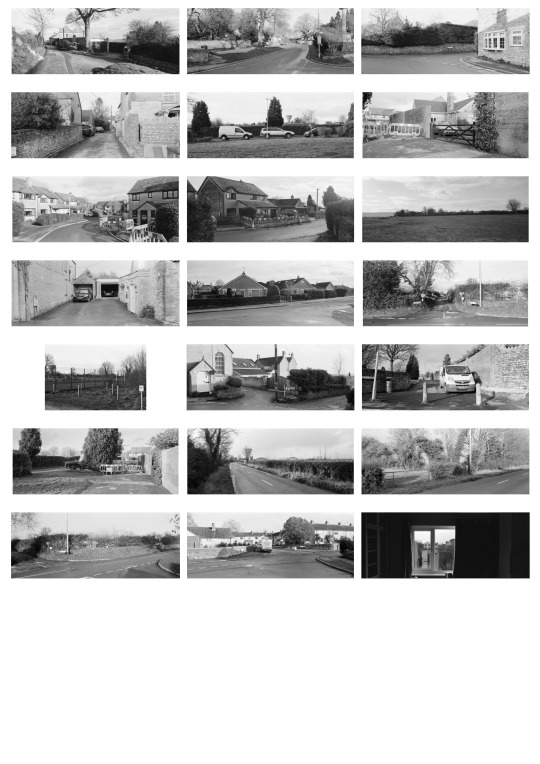
*The above contact sheet is in reverse order because how the XPan is loaded, as it winds out the entire roll first before shooting, just so when the roll is finished, it is already in the canister.*
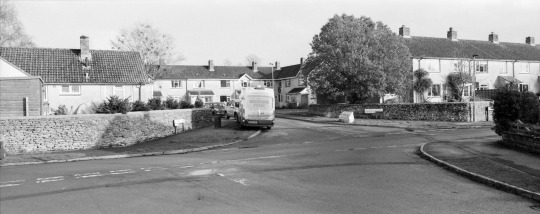
The letterbox style of the XPan’s panoramic mode is incredibly cinematic, and works rather well with - obviously - straight horizontal lines. What I wanted from this ‘shoot’ was something different from the normal photographs taken on the Mamiya 7ii. During the time, I wasn’t really sure why I was shooting Ilford HP5+ through an XPan when all of this project was shot with the aforementioned. But, now I realise it can be used as B-Roll for the up-and-coming book for Epochal Territories, which is in the very early stages of development. I envisage these or similar images being used as background for text or other artworks. I am thinking in terms of using these images with similar text to what I have been writing on my shoots, but a longer and potentially less coherent sporadic amount of words and thoughts, almost capturing the catatonic nature of the zeitgeist.
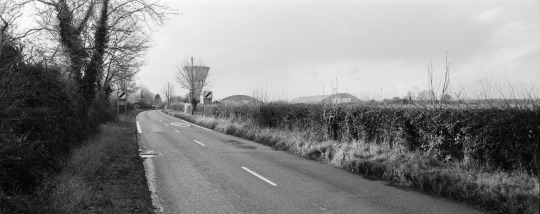
The amount of space you can fill in the frame is amazing. What you are getting - technically - is a medium format 35mm camera, as it is larger than full frame. With this, you get the benefit of the 135 format’s portability but the photograph real estate of 120, all packaged in a lovely metallic camera manufactured by Fujifilm, made under license by Hasselblad.
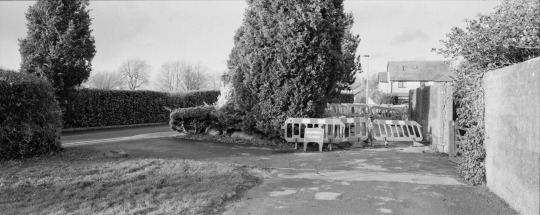
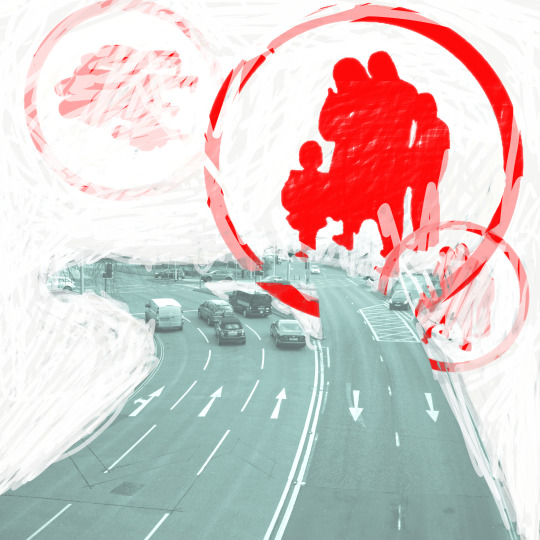
I feel that these images would suit being used as ephemera within the book, mixed together with text or altered themselves just like my previous work for PHOT103 (above). I would like to return to this work, with the possibility that it could make an appearance within this body of work. I found the way of erasing the clutter instead of deleting creates panic and a sense of unease, which is what my work is about. There could be a way where I utilised these photographs (or take others) and combine that style as well as text. Perhaps the text doesn’t need to be discernible?
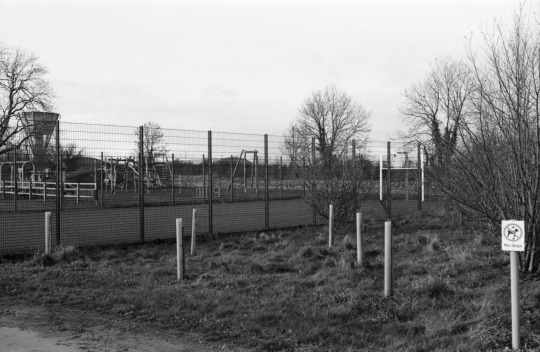
Even the standard 3:2 photographs from the XPan are great. This was actually an accident as the P wasn’t working so I had to take it normally, but I think I prefer it that was due to the mass of vertical lines.
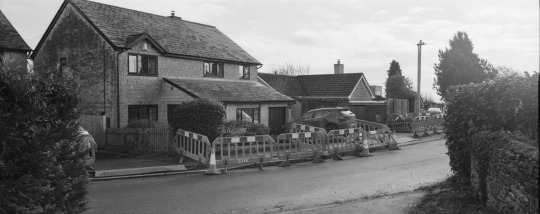
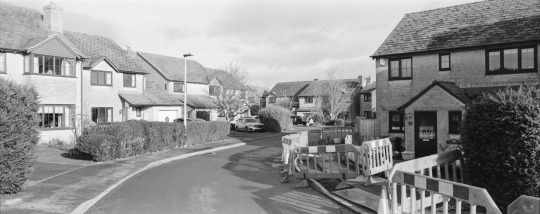
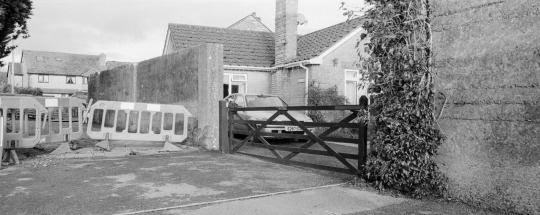
I mostly enjoyed this part of Colerne by The Rec because of these barricades, closing off parts of the pavement and houses. It felt odd walking around and having to conform to these barricades because work was happening despite nobody actually being there.
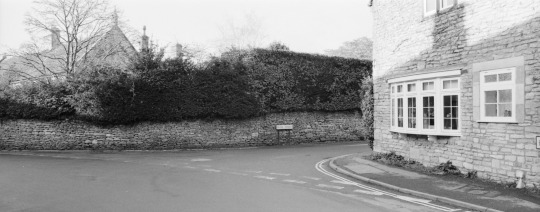
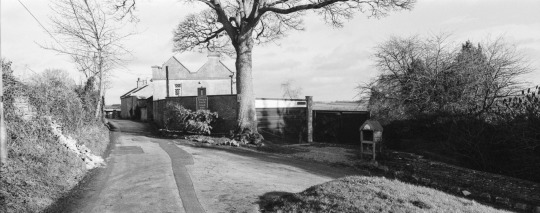
Despite these coming from a different camera setup, I still get the same feelings of unease and malaise that I get with the images from the M7ii. Perhaps it is the desolate nature of the village or the depersonalised landscapes. I also feel that the panoramic nature of the photographs lends itself to this feeling because it is not a natural way for us to ingest an image. We are used to having a certain set of aspect ratios, with this one relating more to cinema than anything. They could be stills from foley video recordings, with just the ambient noise of wind, distant cars or conversations coming from behind hedgerows.
A coda. I plan on working with the images and incorporating them into the book in one way or another. I shall try to create various artworks with them and see if they work together, whilst keeping to the monochromatic theme of the project. I plan on the book having no colour either, with monochromatic covers and text, furthering the feeling of bleakness and seeing the world in a different light. This will need to be worked upon in the coming weeks as well as planning the pace and style of the book. I still have a lot of locations I would like to visit, which certainly depends on how the lockdown works out in time.
1 note
·
View note
Text
Film Fridays: Photographing Tokyo streets with a Hasselblad XPan panorama camera
Film Fridays: Photographing Tokyo streets with a Hasselblad XPan panorama camera
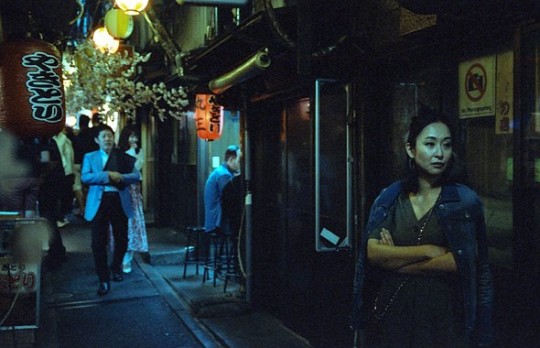
Published Jan 29, 2021 | dpreview staff This image is a crop from one of Mike’s XPan panoramic shots from Tokyo, Japan. Photo: Mike Amos/ PhotoBaseCamp.com In this week’s Film Friday, photographer Mike Amos sets out for Tokyo, Japan with Hasselblad’s unique panorama XPan camera in his hand and a wide variety of film in his bag. His purpose? To document the streets of a city his loves,…
View On WordPress
0 notes
Text
Film Fridays: Photographing Tokyo streets with a Hasselblad XPan panorama camera
Film Fridays: Photographing Tokyo streets with a Hasselblad XPan panorama camera
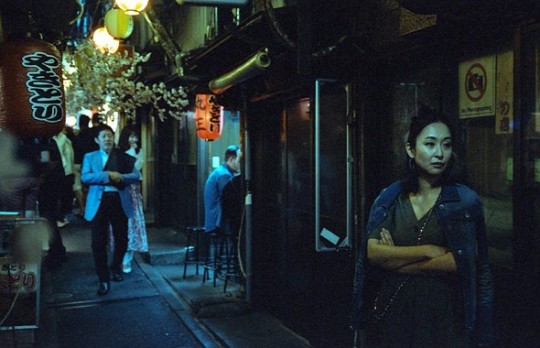
This image is a crop from one of Mike’s XPan panoramic shots from Tokyo, Japan. Photo: Mike Amos/ PhotoBaseCamp.com In this week’s Film Friday, photographer Mike Amos sets out for Tokyo, Japan with Hasselblad’s unique panorama XPan camera in his hand and a wide variety of film in his bag. His purpose? To document the streets of a city his loves, reconnect with an old friend, and honor his…
View On WordPress
0 notes
Photo
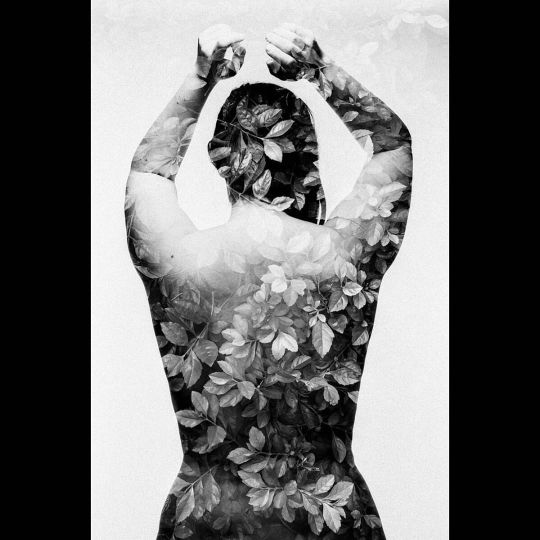
*Lush Back* Fuji TX2 + Rollei RPX 25 Model: Amélie ⠀⠀⠀⠀⠀⠀⠀⠀⠀ I really like this photo of Amélie's back... but it was not at all what I was going for, due to my own stupidity. I was very keen to try RPX25 in this project, it's a film with virtually no grain and with studio lights I thought that the low sensitivity would not be an issue. It turns out it was, kind of, in that blowing the background became a challenge with the lights maxed out. But that's not where my stupidity came in. When I shoot the textures they are shot at -1 stop. In order to do that I enter the ISO manually at double the nominal value. On the XPAN though, once you're entered ISO manually it doesn't reset to Auto once the roll is finished (which would be intelligent, really...) Since the last texture I shot was a Pan F the camera was manually set to ISO 100. And I only noticed on the 5th roll because the 1st roll I shot was Rollei 100... Anyway, most of the other rolls were in the 100-160 ISO range so it wasn't so bad. But this RPX 25 was shot 2 stops underexposed instead of nominal and the texture was shot at only 1 stop underexposed as I normally do. This is what the texture is so present in the bottom of the frame where the light drops of. To be honest I'm surprised that the top of the portrait came out so well. And thank god RPX25 is virtually grainless: the result is a happy accident! ⠀⠀⠀⠀⠀⠀⠀⠀⠀ #filmphotomag #shootfilmmag #filmfeed #lonelyanalog #filmismorefun #thefilmcommunity #filmwave #back2thebase #deathb4digital #FilmShootersCollective #analogfeatures #argentiquesamere ⠀⠀⠀⠀⠀⠀⠀⠀⠀ #multipleexposure #doubleexposure #doubleexposures #doubleexpomagazine #doubleexposurefilm #2xfilm ⠀⠀⠀⠀⠀⠀⠀⠀⠀ #xpan #hasselblad #hasselbladxpan #rollei #rolleirpx25 ⠀⠀⠀⠀⠀⠀⠀⠀⠀ #igblackandwhite #blackandwhiteportraits #instablackandwhite #blackandwhitefilm #blackandwhitefilmphotography #bnw_zone https://www.instagram.com/p/B-eRkl6n1BS/?igshid=1vvcf1ne8l8su
#filmphotomag#shootfilmmag#filmfeed#lonelyanalog#filmismorefun#thefilmcommunity#filmwave#back2thebase#deathb4digital#filmshooterscollective#analogfeatures#argentiquesamere#multipleexposure#doubleexposure#doubleexposures#doubleexpomagazine#doubleexposurefilm#2xfilm#xpan#hasselblad#hasselbladxpan#rollei#rolleirpx25#igblackandwhite#blackandwhiteportraits#instablackandwhite#blackandwhitefilm#blackandwhitefilmphotography#bnw_zone
0 notes
Photo
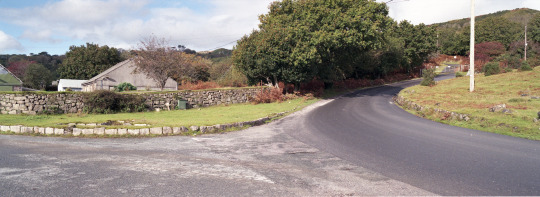
PHOT301 - The Calm Before the Storm
Third year has officially began! Hurrah! The final hurdle of the degree has brought itself to the precipice, looking down into the abyss which is ever getting closer and closer with every passing day. PHOT301 is the calm before the storm of the FMP, and eventually exhibiting at the Free Range Exhibition, situated in London in Summer 2020 - this is a long way-a-way as well as bearing down rather quickly.
PHOT301 is the research and development of the FMP, and there certainly has been some ideas gathered for this project. PHOT202 was the realisation that I really wanted to do this project, but I was already rather deep into that project, so I couldn't do it. It was also met with scathing feedback, which in retrospect was acceptable as I wasn't proud of that project, as it was badly shot, organised and featured no contextual practice which my work features rather heavily. I wish to improve on that, as I know I can do better, in terms of photography and contextual studies - I played with fire and got burned.
The project in question, is about the documentation of cars the escaped the 2009 Scrappage Scheme set by the then Labour Government after the 2008 Economic Crisis to recoup money, drive up new car sales and scrap perfectly working (yet environmentally defunct) vehicles. That entire period of time is interesting to me, I had just become a teenager and it was a time when I was become more awake to politics and how money works.
The summer is a long period of time where one thinks; "I will have plenty of time to research, shoot and get a lot of work done!". For me, this never really happened. I had the best intentions to get work done and be able to jump the gun - but then I remembered how much Summer just doesn't do it for me in the photographic sense: The sun is always too harsh, and by the time it's nice, I have already had my dinner and I want to relax. There is also the pretence that sunny summer weather captures joy, happiness and glee...which my project doesn't entirely irradiate. By the time late August/early September arrives, I realise that nothing has really been done. I did manage to do one...one shoot over the summer regarding this as of yet, unnamed project.
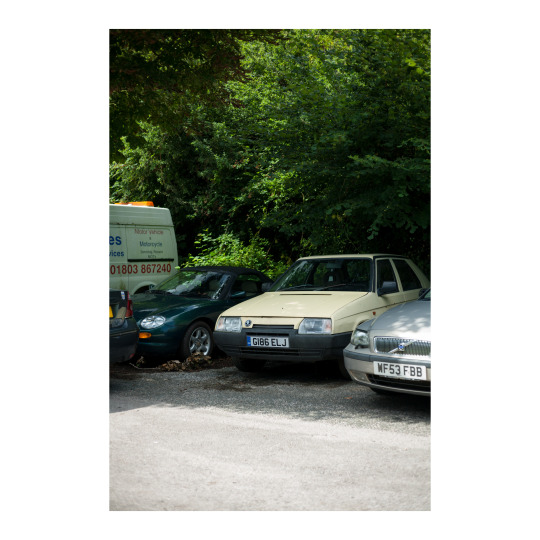
19/8/2019 - Canon 5D - 50mm F1.8 STM w/ Hoya CPL
Above, is one of the images taken over the summer period - this deserves its own post to explain what the motive behind the images are, as well as the contact sheet. The initial shoot was shot digitally with my trusty Canon 5D, and my nifty fifty: the almighty 50mm F1.8 STM. The entire premise was wondering around the South Hams suburbia and finding cars that fit the brief of pre-2009 and seemingly intriguing.
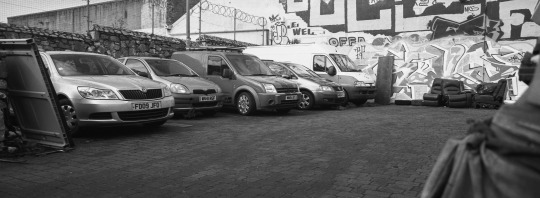
9/10/2019 - Hasselblad XPan ii - 45mm F4 - Ilford HP5+
Once third year had commenced, I wanted to try something new, fresh, rejuvenating. The Hasselblad XPan is a camera I have lusted over, for many years, mainly due to it's ability to shoot in-camera panoramic images measuring at 65mm x 24mm, instead of the standard 36mm x 24mm (which it can also shoot). I walked around the Union Street area and shot an entire roll within 30 minutes, as that area has some interesting subjects.
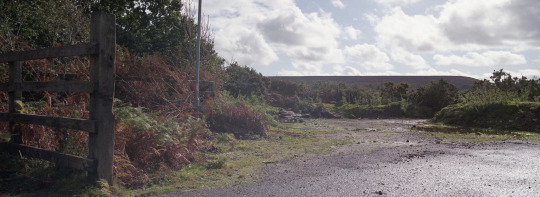
15/10/2019 - Hasselblad XPan ii - 45mm F4 - Agfa Vista 200
I shot a second roll before I had to return the XPan, this time with a faithful roll of Poundland's Agfa Vista 200, may it rest in peace. This wasn't entirely related to the Scrappage project, it was more of just shooting for the sake of shooting whilst out with a drive with Jamie on Dartmoor.
Where is this project headed? I plan on researching more into the time of the economic crisis to get some perspective on what happened, and how it lead to the government creating such a scheme, as well as the implications that the scheme had created. I also need to figure out how exactly I am going to shoot for this project. Whilst I am inherently film based, there are plenty of options for me to use - everything from standard 35mm to large format (which can be excluded immediately as I like to walk around and not limit myself to that extent). I shall most likely, stick to 35mm and 120 formats, as it's what I am comfortable using, and I don't necessarily want to experiment too much and waste time doing so. It's just a case of working towards the FMP goal and creating a project robust enough to be coherent and cohesive body of work.
0 notes
Text
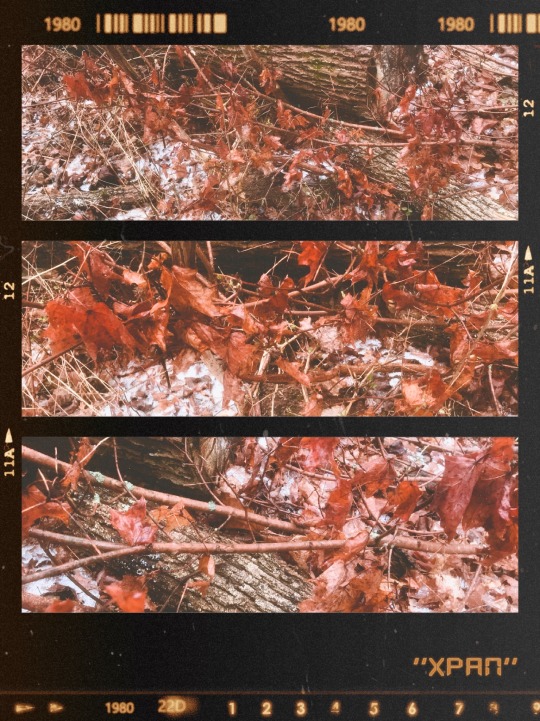
#the tangerinedream#myphotography#photography#nature#woods#winter#snow#frost#leaves#foliage#atmospheric#settings: hasselblad xpan camera
14 notes
·
View notes
Text
About two weeks ago, I came across this post on Twitter:
pervadere #FunkyAF #SummerFilmParty [Sprocket Rocket, Cinestill 50D] pic.twitter.com/ye68ObcRRD
— kim (@kimmiechem2) June 20, 2017
I liked the photo and left a comment, and Kim replied:
Definitely recommend the Sprocket Rocket to panos lovers. Cheap & cheerful. Definitely is a light hog, however. 🙃
— kim (@kimmiechem2) June 22, 2017
About an hour of research, an hour of hunting for a good price, a debit card number, and 4 days later, I was unboxing yet another toy…
The day before the Sprocket Rocket arrived, Hamish Gill posted an interesting article about his Hasselblad X-pan and why he sold it after only 5 rolls (well, 5 rolls and 18 months).
He bought the X-pan because he thought “…it had the potential to provide me with a unique perspective, that it might challenge my framing, enable me to shoot frames that felt cinematic, and even give me a sense of medium format photography…” but then never shot with it. At $75, my investment in the Sprocket Rocket is not so high, and if I don’t end up using it much, I’m not out much. Plus, while I think the Sprocket Rocket has the potential to provide a unique perspective, challenge my framing, and encourage cinematic feel in my images, I bought it for the fun as much as anything, so I’m not sure I can lose, or, not in the same way as Hamish did with his X-pan.
I was particularly interested in Gill’s general comments around panoramic photography—in particular the “landscape trap”—and I tried (and will try) to keep it in mind when playing with the Sprocket Rocket.
And with that, the mail carrier arrived, and I got to unboxing…
Now, I really don’t need another camera, but the Sprocket Rocket is one of the most interesting-looking and different cameras I’ve seen in awhile.
Lomography took inspiration from (or ripped off) an old bakelite camera from the late 1930s and early 1940s, made in Chicago, and marketed under about 20 different names, and this gave the camera a fun and funky sort of Art Deco feel that I really love.
With a groovy design in hand, Lomography modified the insides in several ways ways. Where those old cameras had a 50mm fixed lens and produced 4x3cm negatives on 127 film, the Sprocket Rocket has a 30mm lens and captures 36 x 72mm (or 24x72mm) panoramic negatives on 35mm film.
Now, I’ve seen and been intrigued by the cameras like the Hasselblad XPan and Fuji TX-1 and TX-2, and medium format 6x17cm cameras like the the Fuji GX617, Linhof Technorama 617, and other, less famous (and less expensive) panoramic cameras, but couldn’t ever see needing that format, especially for the price.
But at $75, I couldn’t really resist the Sprocket Rocket.
Now, comparing the Sprocket Rocket, another hunk of plastic from Lomography, with precision engineered marvels like the Fuji cameras that I’ve never used may sound silly, but bear with me…
A 90mm lens on a 617 format camera produces negatives that cover about a 90° area of view. The 30mm lens for the Hasselblads and Fujis cover 94°. But the Sprocket Rocket gives 103° of coverage, and produces negatives 8mm wider (and 10mm taller) than the fancy ‘blads and Fujis.
Sure, it’s all plastic and only has one shutter speed (or two, if you count Bulb) and 2 rather limited apertures, but still.
#gallery-0-19 { margin: auto; } #gallery-0-19 .gallery-item { float: left; margin-top: 10px; text-align: center; width: 50%; } #gallery-0-19 img { border: 2px solid #cfcfcf; } #gallery-0-19 .gallery-caption { margin-left: 0; } /* see gallery_shortcode() in wp-includes/media.php */
Speaking of apertures, Lomography claims the cloudy setting is f/10.8 and the sunny setting is f/16, but virtually eveyone (including Kim, above) claims the camera is light hungry, and the User Manual is explicit. From the section titled “How to Achieve Correct Settings:”
These settings have been designed for using 400 ISO film speed.
Also, under “Trouble Shooting:”
Q: I only got a few images on my roll, and most of them are very dark. A: Most probably you have been underexposing your images or even using slow speed 100 ISO film. Try out a 800 ISO film which is more light sensitive and be sure to use the B shutter in shade and indoor to get more light on the film. A flash will also brighten up any pictures (sic.), day or night!
Now, with a fixed shutter speed of 1/100th and an aperture of f/16, the Sunny 16 rule would indicate proper exposure with ISO 100 film. If you need 400 speed film in bright daylight, then the shutter speed must be faster than 1/100th, or the aperture smaller than f/16, or I don’t understand the Sunny 16 rule.
Jamie Zucek ran some tests on Provia 400: Sprocket Rocket vs. Nikon F100 with 20mm lens. He guessed the apertures to be more like f/16 and f/22.
Not wanting to “waste” any film, I threw caution (and manufacturer suggestions) to the wind and bulk loaded a couple of rolls of Konica Pro 160. I figured late June in North Texas would give plenty of bright, sunny days, and even f/22 at 1/100th should be decent enough on ISO 160 film.
And I was right, mostly.
I started out shooting sprockets, as the camera was designed for. I shot in bulb mode a good bit, trying to err on the side of overexposure, rather than under, and it almost worked.
A selfy, handheld for 10 seconds on the Cloudy setting, turned out surprisingly well.
#gallery-0-20 { margin: auto; } #gallery-0-20 .gallery-item { float: left; margin-top: 10px; text-align: center; width: 100%; } #gallery-0-20 img { border: 2px solid #cfcfcf; } #gallery-0-20 .gallery-caption { margin-left: 0; } /* see gallery_shortcode() in wp-includes/media.php */
But, in general, the Sprocket Rocket really is surprisingly light hungry. Here, for example, are two shots, taken back to back about 1 in the after noon on a very bright day, the first on cloudy, the second on sunny. There are clouds visible, but the sun was out and almost directly overhead. It was bright out, and hot.
#gallery-0-21 { margin: auto; } #gallery-0-21 .gallery-item { float: left; margin-top: 10px; text-align: center; width: 50%; } #gallery-0-21 img { border: 2px solid #cfcfcf; } #gallery-0-21 .gallery-caption { margin-left: 0; } /* see gallery_shortcode() in wp-includes/media.php */
You can see a bit of flare in the center of the frame. The sun was well out of frame, but still high above. I guess flare is to be expected from a plastic lens, but it’s a pleasant-enough flare, and only popped up in these two frames. (The wild colors in the cloudy shot probably came from bulk loading: the first frames on almost every bulk roll I load are fogged, I think because I’m rolling into old canisters, maybe they’re no longer light tight, or maybe the loading does something to the felt? No idea, but it happens on every roll: I lose about 10″ of film to red fog.)
Even with these, though, underexposure continued unabated… These two, for example, were shot in what I considered broad daylight on, but were somewhat underexposed. Sure, I was in shade, but the sun was blasting the scene. The first was shot about 2pm, and the sun wasn’t overhead, but hadn’t disappeared behind nearby skyscrapers yet; the second was later in the day, maybe 3:30 or 4, and partially blocked by my neighbor’s house, but why is the sky a stop or two under?
This one, shot under evening window light, was way underexposed at 2 seconds on the cloudy setting. I still like it, but it’s really a shame: my darling, adorable wife had some great henna tattoos on her darling, adorable hands for Eid, and I didn’t get this roll developed in time to realize how far off it was.
(The red line and creases in the above two came from some issues I had with humidity in the dark bag while loading: I think they add some interest that wouldn’t be there otherwise.
With a little massage after scanning, I did get some acceptable shots, all on the cloudy setting, if my notes can be believed. They’re still off, but closer.
#gallery-0-22 { margin: auto; } #gallery-0-22 .gallery-item { float: left; margin-top: 10px; text-align: center; width: 50%; } #gallery-0-22 img { border: 2px solid #cfcfcf; } #gallery-0-22 .gallery-caption { margin-left: 0; } /* see gallery_shortcode() in wp-includes/media.php */
I was pleasantly surprised by the long exposure I took to finish off the roll on my drive into work one morning. I think this was handheld for about 15 seconds.
I really wish I could hold cameras steady in the car at 75mph… Alas.
After that first roll, I inserted the mask, and shot another roll sprocket-less. I won’t bore you with too many of the details, but I like the sprocket-less shots. Pure pano, with no distraction or hipster stuff. I like the extra height from the sprockets, though, and it might be worth trying some unperforated film, if I can find some in 400 speed.
I had some underexposure issues with these too, and learned my lesson about “slow” film in the Sprocket Rocket. (I shot a roll Labeauratoire [kromiəm] 500 at the 4th of July parade that came out a bit better, and God willing I’ll share some shots from that next week.)
So, the Sprocket Rocket.
For $75, it makes a great gateway to the world of Panoramic photography. The plastic lens is surprisingly sharp, for a plastic lens, and the camera is, indeed, cheap and cheerful. I had loads of fun with it, and look forward to putting many more rolls through it.
There is some bad to the camera, as fun as it is. It distorts horribly, but if you know how to work it, you can manage. I haven’t gotten there yet, but I can imagine ways to work with it. It’s imperative to keep the camera level, though, or to keep any horizontal or vertical lines near the middle of the frame.
In the same vein, vertical panoramas are really hard to pull off. They’re just too tall, and the distortion is, again, atrocious.
#gallery-0-24 { margin: auto; } #gallery-0-24 .gallery-item { float: left; margin-top: 10px; text-align: center; width: 50%; } #gallery-0-24 img { border: 2px solid #cfcfcf; } #gallery-0-24 .gallery-caption { margin-left: 0; } /* see gallery_shortcode() in wp-includes/media.php */
Portraits could be interesting, and I can imagine some interesting results with some slow, fine grained film (and high-powered, wide angle strobes). Maybe something like Robert Longo’s Men in the Cities series… I need to write that down.
And one last issue that I haven’t run into yet comes from the frame counter thing.
On the left side, looking down from the top, between the rewind knob and the flash shoe, there are two circular depressions with little holes in. The one nearest the flash shoe displays the frame numbers; the one near the rewind knob shows a little white dot when you’ve wound far enough for a new frame. This dot is tiny and goes by really quickly, so you must pay close attention when winding.
But those are all just minor complaints: for what it is, primarily a means to shoot sprockets and super-wide angle panoramas, the Sprocket Rocket is great, and it’s cheap enough and as well built as a plastic camera can be. It’s also surprisingly fun and easy to use.
[yasr_multiset setid=2]
Overall, I give the Sprocket Rocket a solid 4
[yasr_overall_rating]
You can pick up brand new ones in a variety of fun colors for $90 direct from Lomography, or brave the wilds of eBay and the internets for used or grey market versions. Lomo was out of stock of the black one when I was shopping, but a nice Chinese firm shipped me one for $75, and if you’re patient, you can probably find one cheaper.
If you want to try out panoramic photography or shoot sprockets, there’s really not a better way, imo… There may be sharper or more optically well-corrected options, but none go as wide, as cheaply as the Sprocket Rocket.
Enter the Sprocket Rocket About two weeks ago, I came across this post on Twitter: pervadere #FunkyAF #SummerFilmParty pic.twitter.com/ye68ObcRRD — kim (@kimmiechem2) …
1 note
·
View note
Text
Firesky, East Coast Australia
‘As the sun set behind me, I looked to the east. I like to look away from the obvious. Especially when I’m shown utterly awesome light moods.’
Shot on Fuji Velvia film with a Hasselblad Xpan camera.
Museum quality, archival print
on cotton rag paper
Click image for full screen view
more about the prints, framing
and free shipping.
Selected images are also available through
Saatchi Art and Redbubble
Cloudscape Photography
by Paul Foley
0 notes
Photo
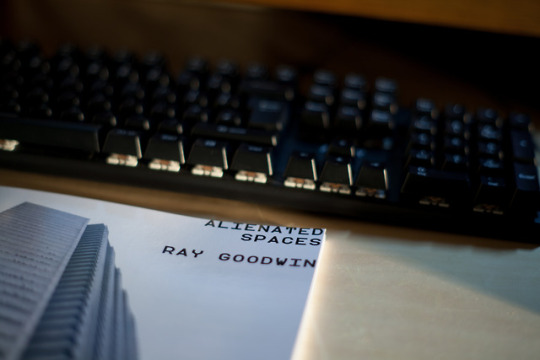
PHOT201 Weird & Wonderful ‘Alienated Spaces’ - Evaluation
The time has come again to close off another project with an evaluation of said project. In this evaluation, I shall detail how it was started, how it progressed, what went well, what didn’t go so well, what could of been improved, how it could of been improved and thoughts about the project as a whole. The evaluation will also cover technical aspects, shoots, research and anything else covered in the project.
Alienated Spaces began as an amalgamation of past work and a project to do over the summer period of 2018. It was highly influenced by Guy Debord’s Society of the Spectacle, and Mark Fisher’s Capitalist Realism - Is There No Alternative?. Alienated Spaces was heavily guided by a majority of contextual information about the society that we live in, and the feelings of alienation within said society, as well as my own personal alienation to society and the people it creates. I wanted to convey this feeling of alienation and estrangement of living in a capitalist society by taking photographs of the mundane banality of the everyday. These scenes/spaces are often overlooked areas of towns and cities which usually don’t garner a secondary glance. This managed to sustain my creative endeavours until I started college again in October 2018. This is where Alienated Spaces was implemented to Weird & Wonderful, and made to fit the brief. I was adamant to work on this project, as I already had a body of work behind it - this meant that I had to make the project fit the brief but finding out how Weird & Wonderful fit amongst a project mainly propped up by alienated thoughts about a western capitalist societal system and dehumanised urban spaces. I managed to fit in the ‘weird’ as my own weltanschauung; or at least interpreted that way. The ‘wonderful’ was harder to fit. My interpretation with that was the wonderful nature of societies expected values of people within the society: having a nice car, a nice job and being spectrally subjugated by the system.
Once the project was implemented into PHOT201, there was some experimentation within the early stages. I originally wanted to create a cinematic aesthetic to my photographs. And, for this I used a modified medium format folding camera, that was able to shoot 35mm film in a similar letterbox aspect ratio to a Hasselblad Xpan - creating a 2:1 (or similar) image that replicated the cinematic letterbox images of motion pictures. This however, was fraught with issues. Firstly, the construction of the modifications on the camera caused light to bounce around inside of the camera, causing light to hit the film where it wasn’t meant to hit. Secondly, I had a large issue of my developer at home deciding to be defunkt. Originally, this was thought of a fixer issue, so I had bought some fresh fixer, thought it was the fixer’s issue and thrown that away. However, I made another fresh batch and the same issue arose. So the developer was the main culprit for a number of rolls being destroyed. I moved away from that and decided to challenge myself and shoot my images using a medium format camera that utilised the 6x6 format. I have never been a massive fan of shooting 6x6, as I have always found square images awkward to compose and shoot with. I managed to come across and purchase a Mamiya 6 IV for a decent price. This was certainly a turning point for Alienated Spaces, as it granted me an affordable way to shoot medium format for a project that I was initially excited for shooting. I also chose to shoot Fujifilm Pro 400H, as the coolness managed to fit the visual aesthetic of Alienated Spaces, and that I have never been keen on Kodak Portra 400’s overly warm tones. I can appreciate a good Portra shot, but it’s just never worked for me. After shooting a roll or two through the Mamiya, I realised that it was a winning combination for me. I was able to shoot extremely high quality negatives at a relatively small cost. I also felt that shooting 35mm and digitally just didn’t fit what I was doing. I initially shot early on in the project with my Canon 5D, but it somehow didn’t feel right to shoot the project digitally. So I decided that this project should be totally analogue based, as this would pressure me to think about the shots I was taking and make me realise that each photograph actually costs me money and time. This would eventually work in my favour, and grant me with a selection of images that I feel represent my project as a whole (although some 35mm film was shot at the end of the project).
The main portion of the shooting actually went rather smoothly, apart from two or three underexposed frames. Of course, the early portion of the project was haunted by failure and a lack of success, but I am thankful that these were the only failures and that they were fairly early on in the project. However, the shoots utilising the Mamiya were certainly the most fruitful in terms of images. I have gained a lot of images within my repertoire, and also gained some knowledge into composing 6x6 and shooting medium format as a whole. I would certainly use the Mamiya 6 again for future projects, despite its idiosyncratic operation. The Mamiya is rather fiddly and awkward to use, but when one gets used to how it works, it becomes second nature. I was surprised by the Mamiya’s optical performance, seeing as it was made during the time Japan was still occupied by allied forces. And, I was also surprised by Fujifilm Pro 400H’s tonality and exposure latitude. This gave me a lot of room to overexpose where it was needed, so I could gather some shadow detail whilst maintaining details in the highlights. I always made sure to overexpose by at least a stop or two from what the meter was reading, just to be on the safer side of exposing the film properly.
The main piece of research for this project was the work of Tom Westbury. I have been a fan of his work for a while, and the way he renders space is certainly something that I look up to, and wish to create. Westbury manages to render the banal and mundane non-spaces into an aesthetically pleasing and intriguing set of images. But, Mark Wilson was also a key piece of influence early on in the project. I was inspired by his work with The Last Stand, and especially by his talk/tutorial. I was also inspired by Anthony Haughey’s Settlements. Haughey managed to document a pertinent political/economical issue that certainly relates to capitalist greed, whilst in turn creating a photographic body of work that relates to Alienated Spaces’ inherent dehumanised ethos. All of these photographic artists are relevant to my craft in one way or another. Westbury features the aesthetic qualities, Haughey features aesthetic fulfillment/contextual ideology and Wilson features aesthetic and professionalism based fulfillment.
The book is the finale of PHOT201. I originally intended to create a zine with a graphic design inspired cover. I have always had an affinity for a certain graphic design style that is often used in poster design and architectural books/magazines. However, I felt that the zine aesthetic and graphic design didn’t fit the ethos of my project whatsoever. I didn’t feel as if the handmade creation of the zine fitted with my project, as I feel that it’s more intune with more artistic and homebrew projects. Due to this, I felt that using the services of a third party publisher would of been a better option - plus I would get a professional looking photo book instead of a badly made zine, which would certainly look amatuer on my behalf. For this, I used the services of Bob Books to create my book. We did have a representative from Bob Books explaining their services to us, and I liked their professional print quality and competitive prices. I also liked that I am able to fully publish the book with Bob Books and sell what I have created through them. To create the book, I used their Designer software. This was an incredibly easy and intuitive way to create a book. At first, I was rather reluctant and daunted with the task of actually putting a semi-coherent book together. But, thankfully the software was easy to use, and once I had thought how the narrative would of translated onto paper, it wasn’t a bad a expected. Once the book had been ordered and delivered, I was able to hold the actual product in my hands. Whilst there were a few issues with that are out of my control, for the most part, the book was a resounding success. The print quality was outstanding, the paper stock has a nice tactility. The book also took around 9 days from ordering to arriving on my door, which is certainly a respectable amount of time to print and ship a 28x21cm 30 page photo book. I knew that it would take over a week to get the book in my hands, so managing my time was imperative. Thankfully, I was able to keep my work at a steady pace across the majority of the project, apart from when it came to the Christmas break. After I had finishing shooting (and shooting slightly differently in London), I had lost my interest in the project entirely. When I ordered the book, the interest dropped to a low and I didn’t entirely care about the project anymore. I felt that the book had been ordered and everything had been shot, so my intrigue within the project disappeared.
What could I of done better with this project, and how could I improved upon it? Firstly, I would of read much more into the contextual side of my project. Whist the main portion of this project was contextually based, I would of liked to of delved deeper into the depths of capitalism, and alienation within a modern society. The two main influences of Debord and Fisher are certainly cornerstones of my work, but I feel that some more reading wouldn’t of gone amiss. Perhaps some further reading into Karl Marx or Fisher’s views on Neoliberalism could of been fruitful for this project? I would of also of liked to shoot much more medium format film, and explored the more architectural side of the work (see the last two shoots). This project was born out of a mix of projects and at a time when I wasn’t in the best of mindsets. The project was spawned from my own mental state of being depressed and alienated within my contemporaries, and I no longer feel this anymore. So, for a long time I have been shooting for a project and trying to convey a feeling of which I don’t totally feel anymore. Towards the end of the project, I realised that I enjoyed shooting architecture more than the non-spaces I had been documenting for a couple of months. Whilst I would like to continue on with this project, I feel that it should be renewed or worked upon if I am going to use it as a base for PHOT202. I could potentially do this by focusing more on the architecture of the space, and/or explore the interiors of said architecture. But, I am not sure at this moment in time if the continuation of Alienated Spaces will continue as that - the theory can stay the same, but I feel that level of being alienated just doesn’t fit me or my work anymore. Meaning, I can still create work that underlies the basic premise of capitalism being estranging and inescapable, but not implement my own feelings of being alienated within my contemporaries. I feel that reading more into the capitalist system (re-reading George Monbiot’s Captive State could be in order) could offer me a new perspective on my worldview and my work as a whole. This would ultimately give me a wider perspective to view the world with and in turn improve what I can create - without a decent understanding of the theory, how can one’s work stand out from the crowd and be exemplary, instead of a half baked execution of a photographic body of work with very little theory to back up the ethos?
In reality, I have become alienated from a body of work that is solely based around personal alienation, purely on the basis that I no longer feel alienated within a societal system which is inherently alienating to its occupants. Whilst I do enjoy what I have created, I feel that the driving force in the work has been lost as I have progressed through time; despite it being a relatively short space of time from August 2018 to January 2019. This is mainly due to changing how I view the world around me and a massive improvement with my mental wellbeing/mental health. But the main epiphany came when I was in London, taking more architecture inspired imagery and realising that it fitted me more than alienating malaise ridden non-spaces.
PHOT201 was a real learning curve for me. It started out as a personal project, that was eventually forced into the mould of the brief. The beginning of the module was fraught with technical chemical related issues that forced me to rethink what I had to do, and how I had to do it. Without failure, one isn’t able to progress with their work and make ample improvements upon it. Thanks to the early failures, I was able to work around them and create a body of work that I am proud to call my own. I was then able to experiment and improve my skills with medium format film, shoot a film stock that I have never experience and shoot a camera that I have never experienced. Those failures made me explore past my comfort zone and use a format which is usually rather alien to me, and create some work from it of which I rather enjoy. Whilst I did enjoy shooting these non-spaces, I felt it hard to convey a feeling which I no longer felt within the work. I do like documenting these areas of non-space, but it’s difficult to phone-in an ethos into a body of work that isn’t totally felt within the documenter. This project shall continue, but it shall take a different turn from alienation within a capitalist society, and most likely be related to the architecture of the capitalist society. I feel as if I am jumping the gun slightly and planning a project before one finishes, but I feel it’s necessary to place a basic underpinnings of something before fully committing to it’s ideology. Just like all of the previous projects undertaken before hand, Alienated Spaces will just serve as future inspiration for projects that haven’t happened yet, and just another project under my name.
0 notes
Text
5 Tips for Shooting Fashion Behind the Scenes
One of my favorite environments for photojournalism is the world of fashion, which I fell into almost accidentally when I first started out as a photographer. It has been one of the most interesting, rewarding experiences both artistically and personally, and I would like to share some thoughts on working in that scene.
I shot my first London Fashion Week in 2016, not long after graduating from university with a degree in Advertising. I researched and contacted the PR companies directly with my portfolio, as well as some notes on my intended coverage. At the time I never considered that there might be something to see other than the presentations and catwalks, but I was wrong.
At the first show I ever worked at, presented by Marta Jakubowski, I found that although I was having a great time securing editorial images of the actual presentation I was finding it far more interesting to shoot the moments between models changing positions or the designer altering the scene – these were far more dynamic and told more of a story than the simple posed portraits.
The “moneymaking” editorial shots were fairly easy and non-time consuming as everything including the lighting is already set up when you arrive. It’s just a matter of covering the room methodically to capture every model and every detail in the collection before most photographers are “done” and move to the next show. However, I wanted to come away with more than just editorial work and began to negotiate access to backstage at the events I was attending in the hopes of a better collection of storytelling images.
Since 2016 I’ve shot at over forty fashion shows, covering backstage on around half. I have a few series in the works from these, which I’ll hopefully run as books and in gallery spaces. Over that time my workflow has evolved, and there are a few tips I’d like to share with anyone interested in shooting in similar environments.
When you get backstage there are a number of factors that can limit the quality of images you come away with, most pressing of which is time. You’ll have maybe an hour if you’re lucky between arriving and the show starting, and unless you’re only there for the backstage images you’ll need to be heading out directly to get a good spot if it’s a catwalk, or to queue if it’s a presentation space. This means that your images will be limited, and every shot counts.
1. Look at Faces, not the Fashion
The best storytelling moments can be seen in people’s faces, and I think this is true in most forms of photojournalism. Photographing in a room full of the highest class of models wearing some of the most stylish or outlandish designs can be very distracting. It can be tempting to go for “easy” shots, not too dissimilar to editorial images you’d likely be duplicating later on during the show itself.
By watching peoples faces you can pre-empt these moments and take advantage of the unique moments and expressions occurring in this informal setting to capture some genuine interactions – laughter, stress, the frantic movement of the make-up team and the designers.
2. Know Your Lenses
Backstage environments are often very cramped, and it helps to carry the smallest gear possible. This will mean having less of a physical footprint, making it easier and faster to navigate the room. It will also mean fewer lens changes and more time spent concentrating on the scene than worrying about gear.
I prefer to use a 50mm but will also use a 90mm to really isolate my subjects.
However, I know many other photographers who will use anything from 24mm to 35mm in order to photograph a bit more of the context. I’ve even worked next to photographers shooting with large fisheye type lenses paired with creative flashes and gels, and even prisms for special effects.
It really is a matter of personal preference, and I do urge you to experiment with different options. When it comes to taking it seriously however you must put that experimentation to practice and use lenses you have a deep literacy with.
3. Situational Awareness
Backstage, especially during early prep, is one of the most hectic and crowded environments I have ever worked in, and that includes riots and protests. Maintaining situational awareness while working is always important, but even more so in such enclosed spaces. Trip hazards like wires, makeup stands, and other people will be prevalent. It’s also good to keep out of the line of view of fellow photographers, to be mindful that they have just as much right to be there as you.
It can also be good to keep track of who is good to be shot and who may be busy or unready for the camera. Some models may be waiting for things on their face to dry or for a fitting to be completed and so they may be unable to react to the camera.
4. Use a UV Filter
This is a slightly more technical tip, but still very useful for keeping your gear safe and ready to shoot. The air backstage is often full of chemicals, all kinds of hairspray, perfumes, and other substances. Keeping the front of your lens covered with a clear element makes it easy to quickly clean and keeps the actual front element free from anything that may corrode the coatings or glass.
I usually keep a UV filter on my lenses as a transparent lens cap so I never have to fumble with anything and risk losing a shot.
5. Respect Everyone
Although this tip applies to basically every genre I think the stakes can be much higher in a fashion environment. As a photographer, there is an implicit threat that a “bad” photograph could show someone in a poor light, which could affect a models career.
You are there by invitation, in someone else’s workspace, and usually one of the least important people in the grand scheme of the preparation going on. Mutual respect can go a long way to helping everyone around you feel comfortable with your role and leads to people being more likely to help you by giving you space or being patient while you frame an image.
Recently I’ve made more of an effort to help people feel more at ease with my presence, and it’s really paid off in my images. Usually, when I arrive I’ll go around to the models and introduce myself with a smile, tell them I’ll be floating around taking photos, and that they can feel free to wave me away if they don’t want one taken at that time. By identifying myself, I become part of the scenery rather than just being the abstract idea of a photographer moving around the room.
I think that because the event does not end at the BTS – there is the actual show afterward – having these interactions early on means that it becomes easier to apply a storytelling approach to the editorial images as well. Interacting with the models in a showroom means you can nail images with more expression, and more precise poses than the other photographers in the room.
One of the best things about shooting this kind of environment is that there are so many different styles and approaches that can be used by different documentarians. I’ve seen videographers, podcasters recording audio, and even painters rendering these backstage scenes. Just because I approach things a certain way doesn’t mean that I won’t continue to explore different methodology to improve the way my images communicate.
My recent BTS projects have all involved the use of my Hasselblad XPan and Ilford black and white film, which has given me some really unique results. I’ve even shot BTS for my own editorial shoots, including for the Toni & Guy Academy, which I found fun – switching between BTS and editorial as and when models were finished with the stylist.
I look forward to seeing how my work continues to develop in this field and to sharing my future work with you! Thanks for taking the time to read my thoughts on shooting BTS for fashion events!
About the author: Simon King is a London based photographer and photojournalist, currently working on a number of long-term documentary and street photography projects. The opinions expressed in this article are solely those of the author. You can follow his work on Instagram. Simon also teaches a short course in Street Photography at UAL, which can be read about here.
from Photography News https://petapixel.com/2018/12/27/5-tips-for-shooting-fashion-behind-the-scenes/
0 notes
Note
https://at.tumblr.com/ahalal-uralma/710512675038396416/502xbztd958p
What app did you do this with?
Old Roll. 🖤
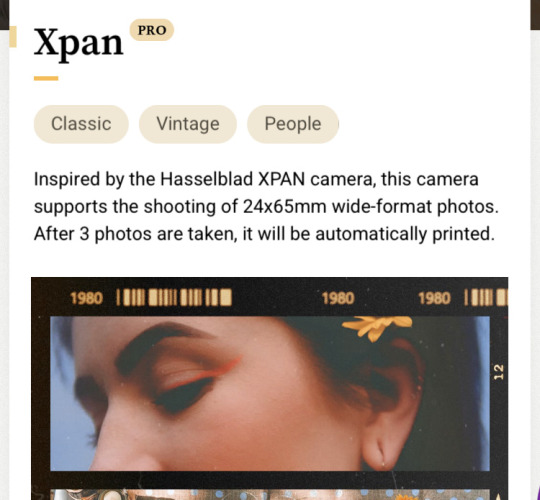
They create settings that emulate different cameras. It is handy for hobby photography when I don’t feel like carrying along my Lumix fZ80 (professional camera) or old Kodak.
That’s a quick screenshot. It’s really helpful and gives you basic info about each camera so you can decide what you wish to practice with and in the event you might want to pursue research into the real camera, you have an idea about it. Keep in mind it’ll be nothing like using a proper Hasselblad Xpan camera, but I think it does decent for what it is.
1 note
·
View note
Photo
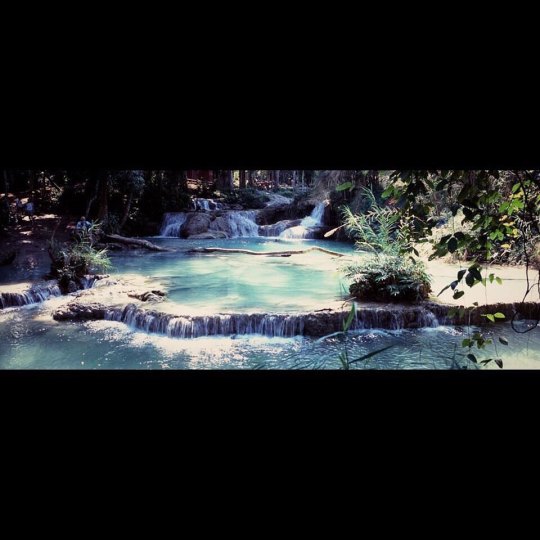
*The Lower Pool* Fuji TX2 + Fuji Velvia 100 With the film camera of course, I did not have stabilization, and I didn't have time and inclination to set up a tripod. So it was handheld, but on this shot, I think, the wide vista works well. Of course, there are tourists in the shot, but who am I to begrudge tourists? I am one myself... ⠀⠀⠀⠀⠀⠀⠀⠀⠀ #laos #luangprabang #kuangsi #waterfall ⠀⠀⠀⠀⠀⠀⠀⠀⠀ #filmphotomag #shootfilmmag #filmfeed #filmwave #lonelyanalog #thefilmcommunity #filmwave #back2thebase #subjectivelyobjective #deathb4digital ⠀⠀⠀⠀⠀⠀⠀⠀⠀ #hasselbladxpan #hasselblad #xpan #fujivelvia100 #slide #film⠀⠀⠀⠀⠀⠀⠀⠀⠀ ⠀⠀⠀⠀⠀⠀⠀⠀⠀ #destinationearth #natgeovisual #houseoftones #agameoftones #igshotz #theworldshotz #exploretocreate #moodygrams #travelingram #traveler (à Kuang Si Falls) https://www.instagram.com/p/B7I-l7OFAym/?igshid=zi5wbisinqd5
#laos#luangprabang#kuangsi#waterfall#filmphotomag#shootfilmmag#filmfeed#filmwave#lonelyanalog#thefilmcommunity#back2thebase#subjectivelyobjective#deathb4digital#hasselbladxpan#hasselblad#xpan#fujivelvia100#slide#film#destinationearth#natgeovisual#houseoftones#agameoftones#igshotz#theworldshotz#exploretocreate#moodygrams#travelingram#traveler
0 notes
Text
PHOT201 - Weird & Wonderful - Initial Ideas
I have already mentioned my previous ideas for this project. I plan on using my personal project ‘Alienated Spaces’ as the main influence for this brief (I shall shorten it to A.S to save space). A.S initially started with last years work, mainly PHOT102′s ‘Small Worlds & City Limits’ and as well as BAIS300′s ‘And’. PHOT102 set me on a path of documenting Brutalist architecture, with the hidden theme of the small worlds that reside within the documented buildings, but later expanded on the small world of the shared architectural styling of post-war Plymouth and The Soviet Union.
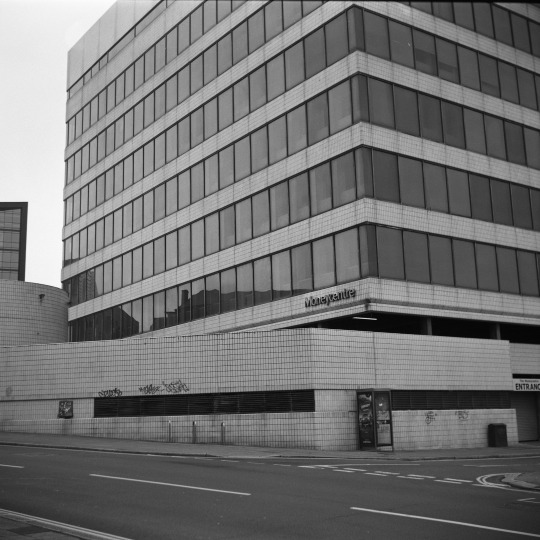
Small Worlds and City Limits - March 2018
BAIS300 was the real start of A.S. I used moving image and soundscapes to convey a message of estrangement and confusion in the modern world. Both of these projects were linked to one or another, and I would say that they both helped each other out a bit.
When the time came for the summer, I created this project to have something to do over the summer, but some commitments came up that I couldn’t ignore so not as much work on A.S was done as I originally planned - but life has a way of doing it’s thing. The new term finally started and A.S has been on the back burner for a potential project for my second year.
How can ‘Weird and Wonderful’ be interpreted into my feelings of alienation and estrangement, my feelings of capitalism’s grip on the world, and the realisation that there is no way out of it? The ‘weird’ could be interpreted on my world view as I feel that not many of my contemporaries share the same way of thinking: IE somewhat depressing an malaise ridden. One of the reasons for my personal estrangement; its’ purely because of my world view, yet it seems people are oblivious or ignorant to what’s happening and how the world works now. In a social media fuelled society where advertisements bombard one with what to buy next, being totally mediated by constructed imagery and the mass media keeping one informed on useless headlines. It may seem pessimistic to some, and even totally irrational, but that’s my train of thought. In the layman: my work is really about a sense of a lack of belonging.
The ‘wonderful’ could mean anything: the realisation that all is temporary, the subject matter wonderfully presented in the frame, the car sitting on the drive gleaming away. It’s hard to push in ‘wonderful’ into my work, as even I know that it can’t exactly fit in (a bit like myself).
The brief leaves a lot to be interpreted by the photographer - which can be a blessing or a curse. While it’s good that there is so much to be interpreted, some may find it hard to find ideas purely because it’s such a broad spectrum. I feel that A.S is a good fit for this project, but it will need some fettling to become a more polished project.
My first thoughts for PHOT201 is to make my work more ‘cinematic’. What makes a cinematic image? My interpretation of ‘cinematic’ is a filmic image, well lit, composed, framed and the subject matter causing no distraction. Everything fits into place and creates a wonderful, and sometimes weird image that compels the viewer. I also feel that an easy way to get the ‘cinematic look is the wide aspect ratio. 4:3 was used for many years as the standard aspect ratio for television and motion pictures up until the 1990′s/2000′s, but 16:9 was slowly implemented and replaced 4:3 as the standard. Motion pictures often use the ‘anamorphic’ format; which creates an extremely wide image.
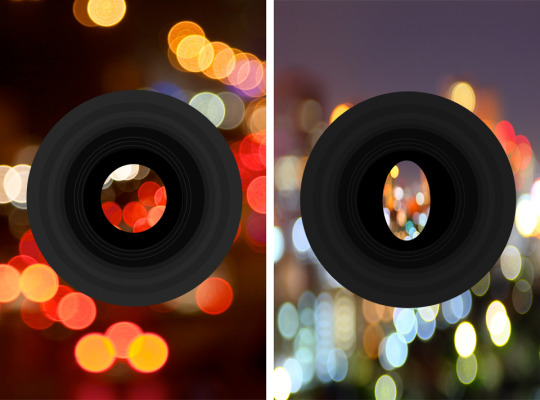
The lens’ elements are shaped in an oval, compared to a regular spherical lens, causing a ‘squeeze’ on the image and as well as the bokeh forming the same shape as the elements. These kind of lenses are used for motion pictures and high budget television shows. The wide aspect ratio used (for me) is a ticket straight to cinematic imagery. This can be replicated in photography also. Camera’s such as the Hasselblad XPan can shoot a negative sized at 65x24mm to create a ‘panoramic’ image. XPans are rare and expensive, so it can be done on the cheap with a medium format camera and a pair of 35mm adapters. I am yet to try this out with my medium format Zeiss Ikon - but I might experiment with it for this project and see how it works.
I plan on re-watching Godfery Reggio’s ‘Koyaanisqatsi‘. The film (accompanied by a score by Philip Glass) is a feature length film about humanity growing apart and away from nature. The title is also a Hopi word for ‘life out of balance’. I have seen it many times, and I plan on re-watching it to see how the scenes are composed and used in the cinematography sense. There are also some Harry Callahan images that I looked over last year which I also plan on researching more in depth.
This project is coming together, but will take some time for it to get to it’s gestalt. In the time being: I shall look at cinematic imagery, more contextual content and how one’s work can be implemented further within this project.
Bibliography
B&H Explora. (2018). Anamorphic Lenses: The Key to Widescreen Cinematic Imagery. [online] Available at: https://www.bhphotovideo.com/explora/video/features/anamorphic-lenses-key-widescreen-cinematic-imagery [Accessed 6 Oct. 2018].
0 notes