#scumbling technique
Explore tagged Tumblr posts
Text
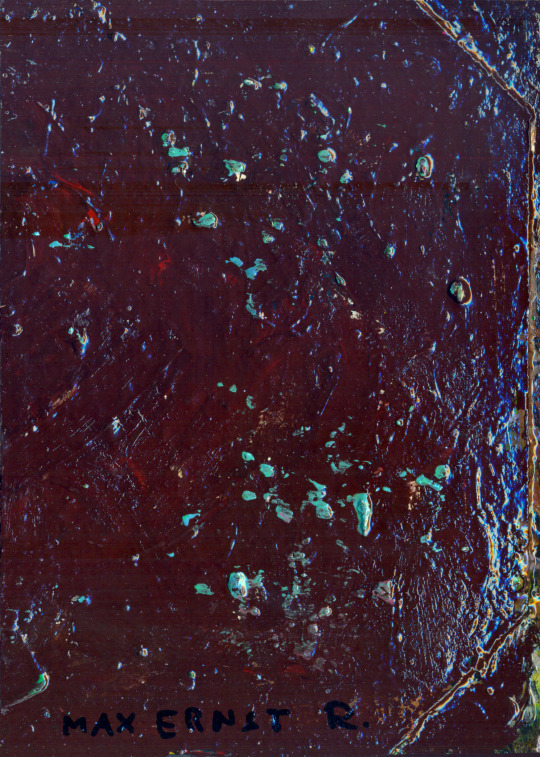
Staatschef, sanft im Matschbad voll mit Regenwürmern und Maden landend (Head of State, Landing Gently in the Mud Bath Full of Earthworms and Maggots), 1944 by Max Ernst
#oil and acrylic painting#1944#Max Ernst#mud bath#non existing art#fake artist#Recklinghausen#scumbling technique
7 notes
·
View notes
Text
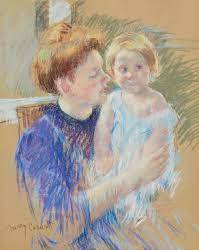
Pastels: Mastering their Use
Pastels have been a beloved medium for artists for centuries, offering a unique blend of vibrant color and delicate texture. In this comprehensive guide, we delve deep into the world of pastels, exploring their history, types, techniques, and how to master their use for stunning artworks. Today, we begin a series about the different types of art mediums available today for you to experiment…
View On WordPress
#Artwork protection#Base layer#Blending colors#Brush blending#Directional feathering#Feathering strokes#Final fixative#Finger blending#Layering technique#Mastering pastels#Middle layer#Overlaying colors#Pastel artistry#Pastel hues#Pastel textures#Scumbling method#Soft pastel techniques#Top layer#Tortillon blending#Workable fixative
0 notes
Text
Writing Notes: Watercolour Techniques
1. Scraping and Scumbling
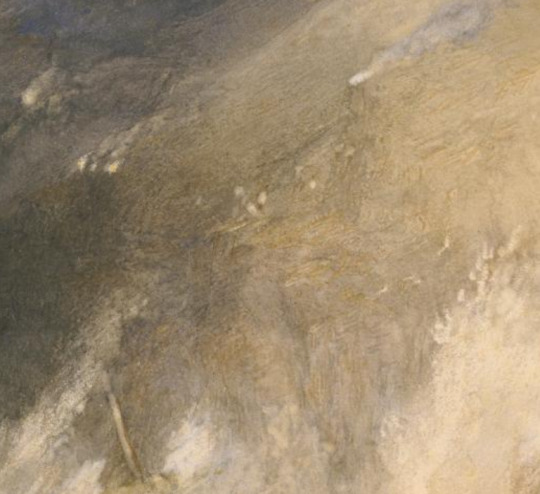
Scraping is a technique artists use that involves using a knife or thumbnail to scrape away dried pigment and expose the paper below.
The artist J.M.W. Turner created the bright white highlights on the waves using this technique in his painting Longships Lighthouse, Lands End.
Scumbling is a technique that artists use to build a textured, layered surface that creates depth.
It involves applying paint in a rapid figure-eight or circular manner to the colors below.
He used his thumb nail to scratch at the surface of the watercolor paper to remove the darker color.
When using this technique, it is important to work while the paper is damp or wet.
2. Layering
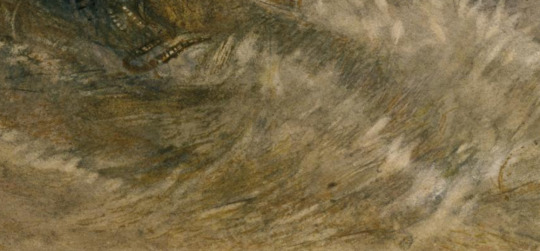
Layering the paint in thin translucent watercolor washes creates depth and sense of movement.
J.M.W. Turner later added the warm earth colors to define the waves and added opaque areas of white gouache to create the bright highlights on the waves.
3. Blotting and Wet on Wet
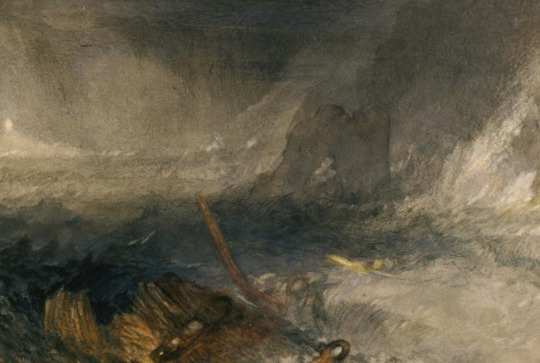
Blotting involves removing wet pigment with a sponge or a rag.
In this painting, artist J.M.W. Turner used blotting to create the flickering illumination from a distant lighthouse at the middle left.
Wet on Wet involves wetting the paper before applying color with a brush.
Turner used wet-on-wet technique to create the atmospheric effects on the left-hand side of the watercolor.
THE FULL PAINTING:
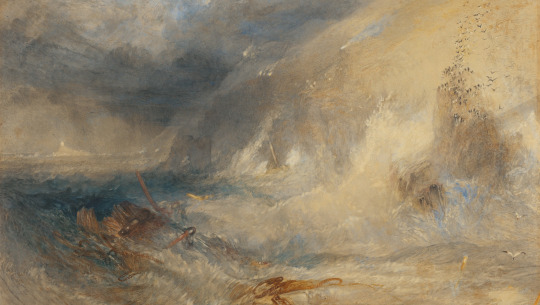
Writing Notes & References
#writing notes#art#watercolor#painting#writeblr#writers on tumblr#writing prompt#poets on tumblr#poetry#spilled ink#literature#dark academia#light academia#lit#creative writing#studyblr#writing reference#art reference#art resources#writing resources#terminology
102 notes
·
View notes
Text
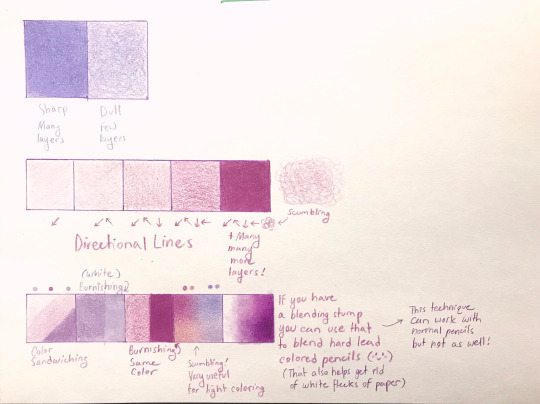
Colored Pencil Tips:
These are things I do when working with colored pencils ^^ ) I hope it is useful.
- I try to keep my pencils as sharp as I can when I am working. I am shrimping right next to an electric pencil sharpener. If it gets a little dull I can easily sharpen them. The duller the pencil lead gets, the more paper texture will be picked up by your pencils! It all depends on how much texture you want in your piece, a little or a lot, it's up to you ⛦◜▿◝ )
- I Try to keep as light of a hand as possible when I build up my color layers. I used to fall into this pit trap a lot when I was younger, I would put too much pressure into my layering, burnish* too early and then try to add more color. It would make my blending work streaky due to the excess wax. If you struggle with pressing too firmly, hold the pencil closer to the end and color with the side of the pencil tip rather than using the point!
- Coloring via scumbling (drawing little circles) or coloring in multiple directions ontop of one another. (almost Like crosshatching) can help your layers of color be more uniform to the eye.
- Experiment with many light layers of different colors to add depth. The fun thing about colored pencils is that going slowly gives you some wiggle room.
- Color mixing; I like sandwiching my colors together to make them more uniform with each other. Starting with your base color, I put another light color on top, then put another layer of the original base. To tone down the newest color placed on the paper
*Burnishing is when you apply more pressure over top of your work to get rid of the little white flecks of paper. This can be done with a burnishing tool (colorless wax) or another colored pencil (I like to use white, but that will lighten your color and desature them!)
- Burnishing is not necessary. There are other ways you can do this, I have seen a lot of folks online who use solvents to blend their colors instead. I have not used solvents so I cannot speak on that unfortunately.
- Burnishing can be hard on your hands, So I really do recommend working slowly to build up as much color as you can, sometimes I skip the burnishing step altogether.
-I really enjoy using hard lead pencils and a blending stump / tortillion to smudge the colors and fill up the white of the paper! You can use normal colored pencils but I haven’t found that technique to work as well with those! But find what works for you and I hope you have fun!
12 notes
·
View notes
Text
broken color activity

Broken Color is a painting technique where colors are applied in a way that they are not fully blended together on the canvas, allowing individual strokes or dabs of different colors to remain visible. This method creates a vibrant surface full of movement and energy.
Why Use Broken Color:
Visual Vibrancy: The juxtaposition of colors makes the painting more luminous and lively.
Texture and Depth: It adds a tactile quality and a sense of depth.
Expressiveness: It allows artists to evoke mood and light more dynamically.
Optical Mixing: Your eyes blend the colors, creating a more natural or shimmering effect than mechanical blending.
Ways to Use Broken Color:
Short Brush Strokes: Apply quick dabs or strokes of different colors next to each other.
Layering Without Blending: Layer colors while keeping each stroke visible.
Scumbling: Lightly drag a dry brush with a small amount of paint across the surface to allow underlying colors to peek through.
Pointillism: Use dots of pure color side by side (e.g., Seurat’s technique).
Palette Knife: Apply patches of different colors using a knife to avoid blending.
2 notes
·
View notes
Text
Broken Color Activity

Definition:
Broken colour is when an artist puts different colors next to each other without blending them. Your eye mixes the colors when you look at the painting, making it feel more alive and colorful.
Ways to Use Broken Colour:
Scumbling (with a dry brush)
Lightly brush a color on top of another so that the bottom color still shows through.
Layering see-through colors
Paint thin, transparent layers so the colors underneath can still be seen.
Short strokes of different colors
Paint small marks or strokes side by side with different colors instead of mixing them together.
Pointillism (dots!)
Use tiny dots of different colors close together—your eyes mix them when you look from far away.
Why use broken colour?
It makes your painting look bright, interesting, and full of energy.
It’s a way to mix colors with your eyes, not with your brush.
Overall:
I found this exercise to be very fun. I love how we were able to go crazy and not having to stay strictly in between the lines and not be afraid to get messy! As well as being able to try out different techniques and finding out own ideas to place onto each box.
3 notes
·
View notes
Text
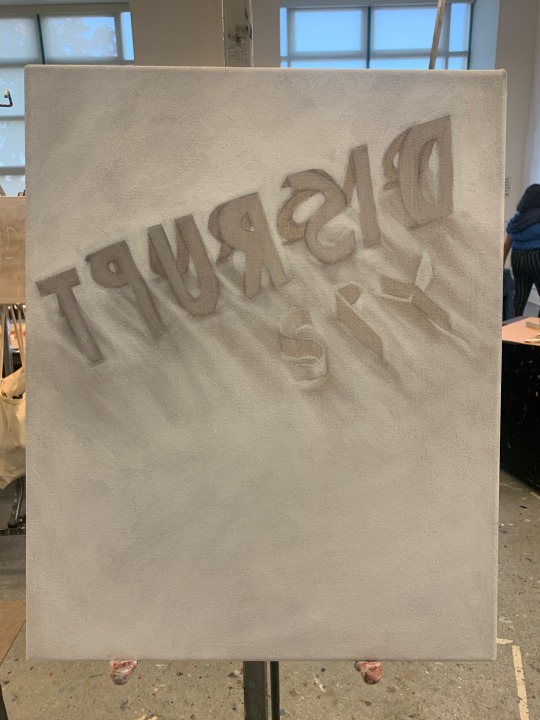
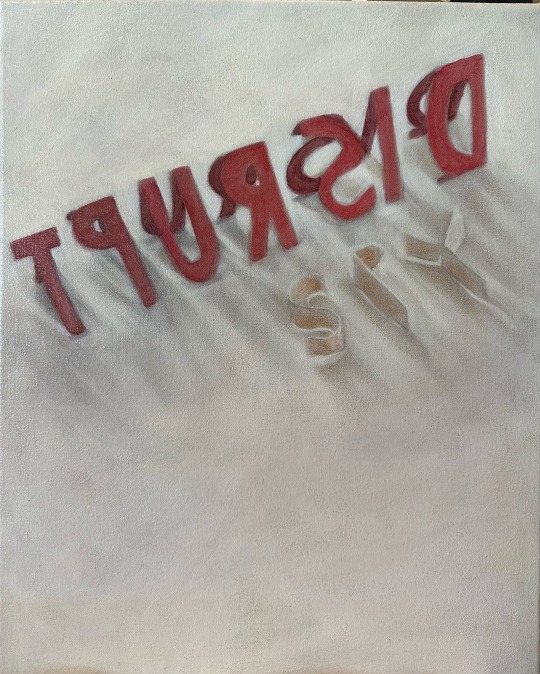
I really enjoyed the scumbling technique we learned in class for this painting- It really helped me look at light and shadow in a different perspective. I’m not used to painting using only white to create highlights in the piece. It took me some time to get used to working color into the piece by layer - I’m so used to mixing the color and then applying it straight from mixing. Towards the last few layers of the painting, I applied paint mostly opaquely. Much less medium was needed.
2 notes
·
View notes
Text
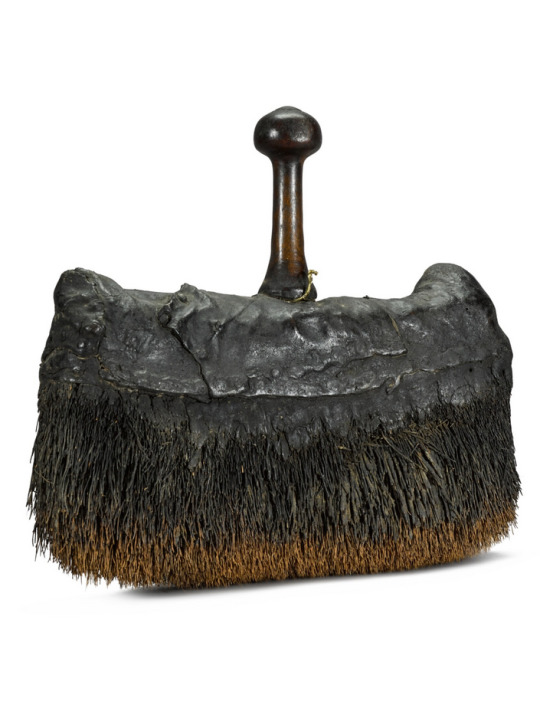
A large beech, leather and coir scumbling brush, late 19th/early 20th century
Scumbling in art refers to a painting technique that involves applying a thin layer of paint with a dry brush and a loose hand over an existing layer. The idea is to allow parts of the already existing paint below to remain exposed.
In most cases, scumbling is used over dried paint, but you can also use it over wet paint. You just need to be careful with the colors blending together if you are scumbling over wet paint.
Sotheby's
7 notes
·
View notes
Text
I had a great group painting session with Tommy, and Gabby we applied the Impasto technique to the above work. In which we used a medium to mix with acrylic, to give more texture to our work; allowing for a more 3D look.
Impasto: Impasto is a technique where paint is applied in thick, textured layers, creating a three-dimensional effect. The brushstrokes are often visible, adding a sense of depth and physicality to the painting.
Fat over Lean: This is a principle in oil painting where each successive layer of paint should have more oil content than the previous one. "Fat" refers to a higher oil content, and "lean" refers to less oil. This technique helps prevent cracking in the paint layers as the painting dries.
Wet in Wet: As previously explained, wet-in-wet is a painting technique where wet paint is applied onto a wet surface, allowing colors to blend and create soft transitions.
Alla Prima: Also known as "direct painting," alla prima is a painting technique where the artwork is completed in one sitting. Artists work wet paint into wet paint without waiting for the layers to dry.
Imprimatura: Imprimatura is an initial layer of thin, transparent paint applied to a canvas before the main layers of paint. It provides a toned base, influencing the overall color harmony of the painting.
Underpainting: An underpainting is an initial layer of paint that serves as a base for subsequent layers. It helps establish the overall composition, values, and sometimes the color scheme of the final painting.
Scumble: Scumbling involves applying a thin, translucent layer of paint over a dry layer. This technique is often used to modify colors, create atmospheric effects, or add a hazy quality to a painting.
Plein Air: Plein air refers to painting outdoors, directly from the subject in its natural environment. Artists capture the effects of natural light and atmosphere on their subject.
Scraffito: Scraffito is a technique where a top layer of paint is scratched or scraped away to reveal the layer underneath. This can create textured and intricate designs.
Dry Brush: Dry brushing involves using a brush with very little paint on it. This technique creates a scratchy, textured effect as the brush skips over the surface, capturing the raised areas.
@richtw28 @gabbyshakk @annas2024painitng1class
6 notes
·
View notes
Text
Movement
Hello you effervescent eggs!
It's the start of Semester 2 with the new brief with the word
★ Movement ★
This Semester our work is interdisciplinary where we work in three disciplines throughout the 7 weeks we have. the 3 disciplines I have chosen to do include:
Animation
Graphic Design
Painting
the first week we had was dedicated to research and forming ideas. I must admit, I struggled doing said thing as I wasn't feeling super inspired by the word movement. I did a brainstorm to try and map out my thoughts.
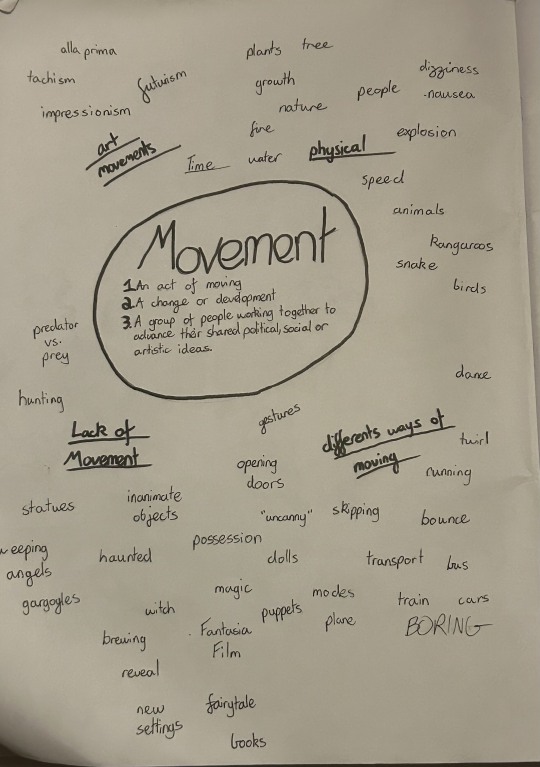
I didn't form a concrete idea from this but liked the idea of creating movement in inanimate objects.
I then researched movement in art and searched for ways it can be expressed through a more practical means.
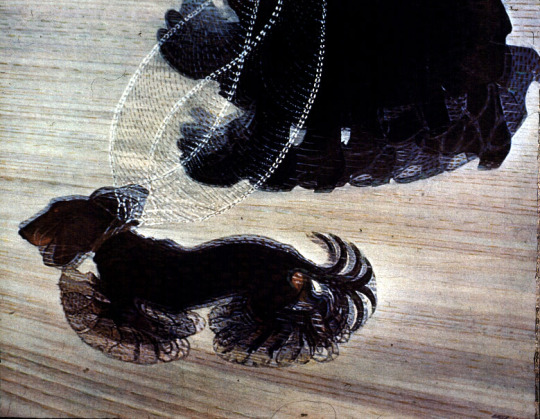
The first piece by Giacomo Balla is title 'Dynamism of a Dog on a Leash.' it's a futuristic oil painting done in 1912. The repetition of line in the dog and person creates movement and is reminiscent of cartoons in their framework all laid out in their animation. I found that engaging and the movement to be not only obvious but exaggerated especially in the leash.
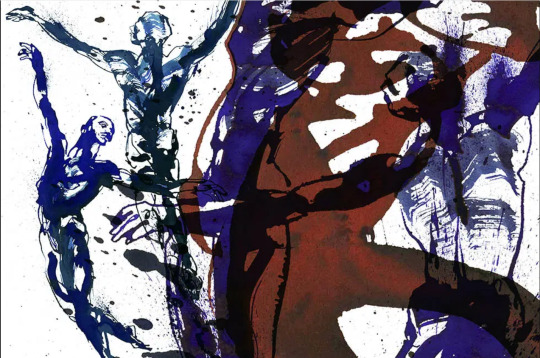
I did want to do some gesture drawing in this project to an extent and looked at artists including George Meyer Wiel. He is a costume designer for dancers, plays and operas and an artist who is able to produce exciting movement in their gestures.
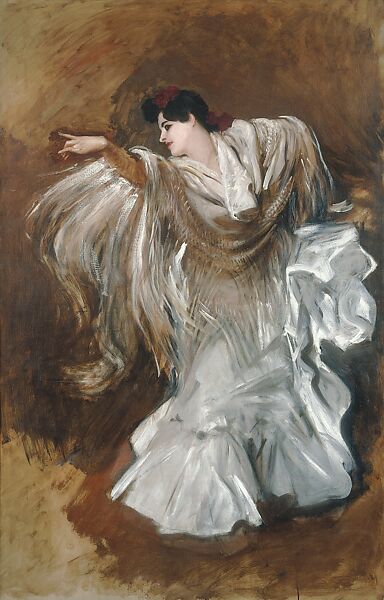
I also looked at John Singer Sargent's 'La Carmecita Dancing' (1890) which was an unfinished painting due to the difficulty in conveying the energetic dance. I still really like this piece and gesture of the model with their dress exploring movement in the way it moves along with them. it's dramatic and loose with it's brush strokes in parts of the clothing that moves the most with her.
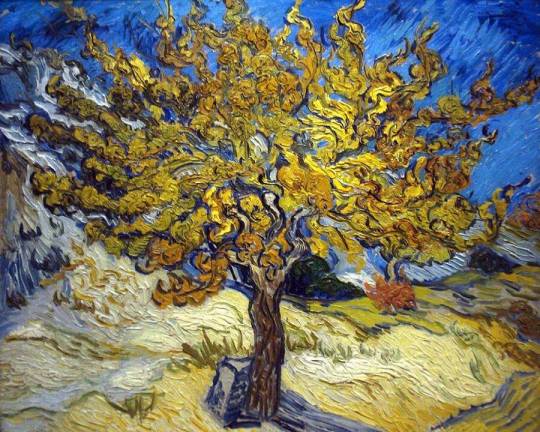
This brought me to look at different ways texture, brush/line work can be used to create movement which had me looking at works from impressionism and post impressionism movements. I looked at Vincent Van Gogh's 'The Mulberry Tree in Autumn' (1889). The use of short brushstrokes and thick paint forms a sense of whimsical movement which I quite enjoy.
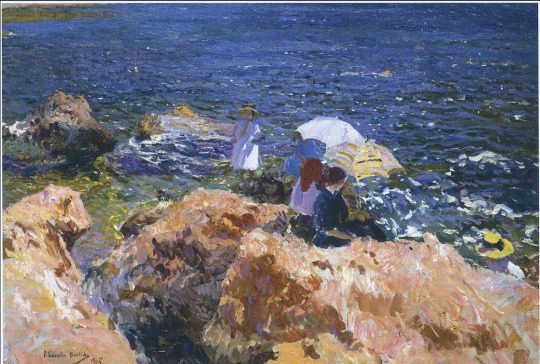
I also loved the brush work in Joaquín Sorolla's 'On the rocks at Javea' (1905). the short thick painted strokes create an almost water ripple effect where the painting has an illusory movement in it, emphasized by the presence of water in the piece. I like the use of these brush strokes in a more realistic composition as opposed to Van Gogh's work.
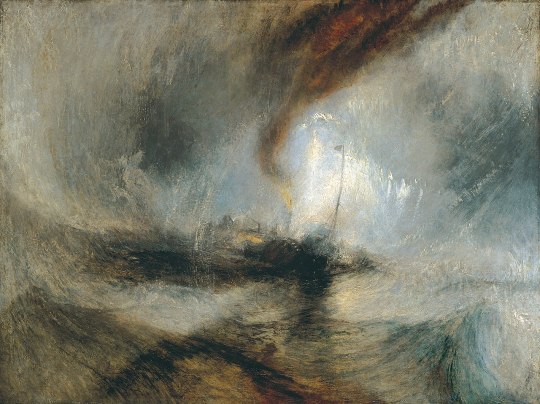
I also discovered the technique of scumbling through J. M. W. Turner's Snow Storm (1842). Scumbling is where a thin layer of opaque or semi-opaque colour is applied usually in a scrubbing motion onto a dry surface to create texture. It's often used with brighter opaque colours to brighten darker areas. This effect can be seen in the way Turner illustrated fog in his piece.
The last piece I looked at was 'Dynamism of a Cyclist' (1913) by italian futurist Umberto Boccioni. This piece explores speed through line and shape as the head of a motorcycle speeds through what seems like time and space through the explosive use of colour and non descript background. It's playful but intense and I like that.
Even through all this research I didn't really have a solid idea to launch my project from for the next week, so I was a little concerned.
2 notes
·
View notes
Text
The Art of Color Layering: How Artists Build Depth in Color Artwork
Colors fill our heart and our world - everything looks dull without a speck of color. It is so powerful that even insects can catch the color signals.
In the world of art, artists have experimented with color to the extent of exposing their intricacies, hidden depth and symbolism. Depth is something related to color artistry, created through perspective or dimension it emerges in the layers. Artists have relied on the subtle power of color layering for painting a mellow sunset to emotionally bold abstract art, to give their color artwork life, meaning, and a visual story. It feels like peeling the layers one hue at a time.
Are you fascinated by the depth of color layering, or excited to know more about it? In any color painting, layers create a depth that adds meaning and message.
In this blog, we’ll look into the fascinating realm of art in color, unpack some secrets behind depth-building and the magic that happens when those color pigments merge together.

If you want to level up your color art for any themed online color competition like the ones hosted by TERAVARNA art gallery, hang on here.
What Is Color Layering?
Color layering is done by applying multiple layers of color. It is often done by transparent, translucent, or semi-opaque washes to build texture, tone, and depth.
Layering is not just mixing colors – it creates a certain movement, and harmony within the composition and decides on the depth of the foreground and background of the artwork. With a new layer, a new meaning gets added to the surface, shifting the emotional tone of the composition, attracting the viewers’ attention, and adding richness that flat-looking surfaces can’t replicate.
In oil paintings, the technique of glazing is widely-used, but with the newest mediums like acrylic, digital media and mixed media forms, the popularity of layering is fast gaining ground.
Modern color artists now used this technique across various mediums to let the color speak through the blending, without overpowering the other. It’s a co-ordination and co-existence of different hues painting one single story!
Why Depth Matters in Color Art
Layering is significant in color art to create a sense of an illusion of light filtering through surfaces, when done masterfully. It captures the sudden change in movement and mood, creating an atmosphere that can’t be achieved with just solid coats of color.
If we think of some masterpieces like the ‘Starry Night’ by Vincent Van Gogh’s with a swirl of colors, or Rothko’s luminous fields, we feel the pulsating energy with which each color merges with another over time. We don’t just look at the color, we look into it, as if mesmerized.
In a nutshell, depth creates connection, so the more nuanced the color transitions, the more your art invites engaging gazes!
Know the Techniques for Effective Color Layering
No matter if you’re just getting started with working with colors, or you are a pro looking to enter a color contest, you need to master these techniques to give artwork a major edge.
We have a handful of useful techniques sorted for you that form the backbone of any great color painting. Take a look at -
1. Glazing
This is a classic oil painting technique where thin, transparent layers of color are applied on top of one another. The new layer works to modify the tone of the layer beneath it, creating a radiant effect.
2. Scumbling
Technique that is used to allow the base layer peek through. One needs to drag a dry brush lightly with opaque or semi-opaque color over a surface. Great for adding illusion & texture.
3. Wet-on-Wet
This is a common watercolor technique now used in digital painting too; the method blends color while they’re still wet, to produce transitions that look natural & soft.
4. Layering with Purpose
First, decide on the base layer as a dominant layer, with a warm or cool hue. Then set the upper layer colors as complementary or contrasting tones as an intentional layer buildup. This creates unique harmony.
5. Knowledge of Color Transparency
For layering, it is very crucial to know which pigments are transparent, semi-opaque, or opaque. Transparent colors will help you create glowing overlays, while opaque ones will block the colors underneath.
Understand the Psychological Play of Color Layers
Layering is not only to please the eyes, but to use as a psychological trick! Artists create layers for certain colors to stir sudden jerks or responses, like a cool blue beneath a hot red. This interplay of hues is very important in color artistry, where the viewer’s emotional response is often shaped more by shades, tones, than by form.
To portray calmness, use cooler layers, while create warmer Use cooler layers to evoke calm or melancholy, while warmer tones layered on top can show an urgency. This push-&-pull theory in color art makes it so appealing!
What is Color Layering in Digital Art
Digital color artwork follows the same psychology but using different tools like programs like Procreate and Photoshop to show the literal layers or stackings. It becomes convenient for digital artists to experiment with blend modes, opacities, and brush types to replicate traditional layering techniques.
Thus, new frontiers in digital art in color are achieved. Artists now can build intricate palettes making it ideal for artists entering international color art competitions by renowned art platforms like TERAVARNA, or showcasing work online.
Why Color Layering Shines in Color Contests
No matter if you apply for a juried color contest or a local showcase, layered artworks attract more pairs of eyes. Because layering suggests time, skill, patience, and an intentional use of color theory. It shows how the artist intends to achieve the final harmony – it becomes a winning combination for a color artist.
Layer: Repeat: Speak Your Art!
Color layering is a dialogue between shades. For anyone exploring the vibrancy of color painting, will find the art of layering a must-have tool to tell the best stories. Because, in color artistry, the best stories are never told in just one coat – but in subtle layers!
0 notes
Text
3RD JUNE tues
Character points and tips from video the characters colours could be based off their past or designery shapes for a robe or scarf.
the scenery should be different completel to show their not connected lost from their belonging. or they could blend in completely with the background of poster. draw lines shape with pen then hit b then return then delete to create to draw. Our task was to do a character of a detective raven can be amphomorphic. .
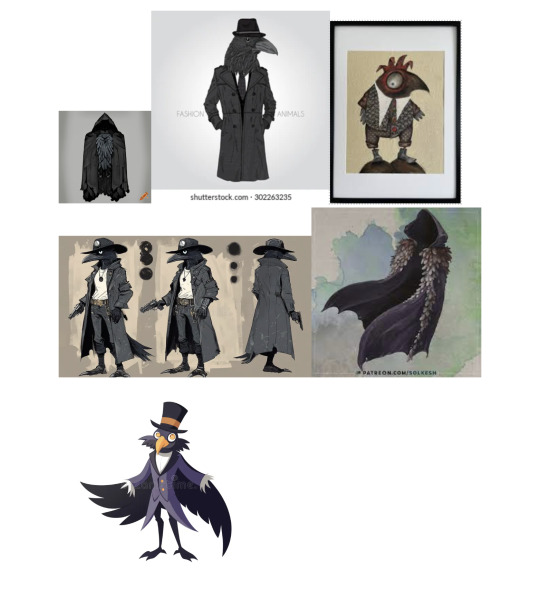
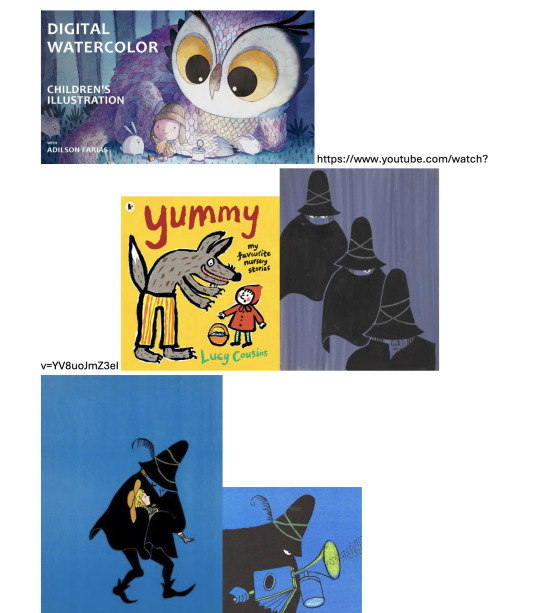
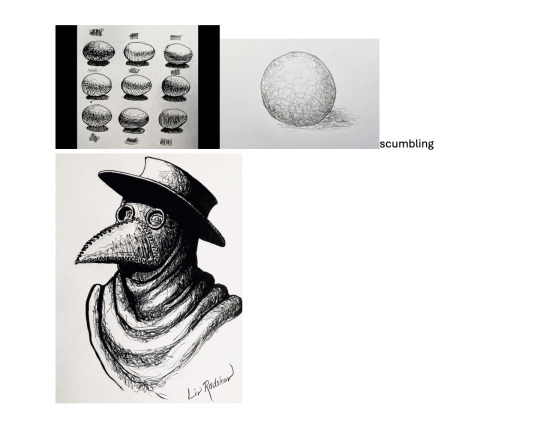
The last picture of this thing i still dont know of has kind of scumbling effect and looks like a raven in the sence.
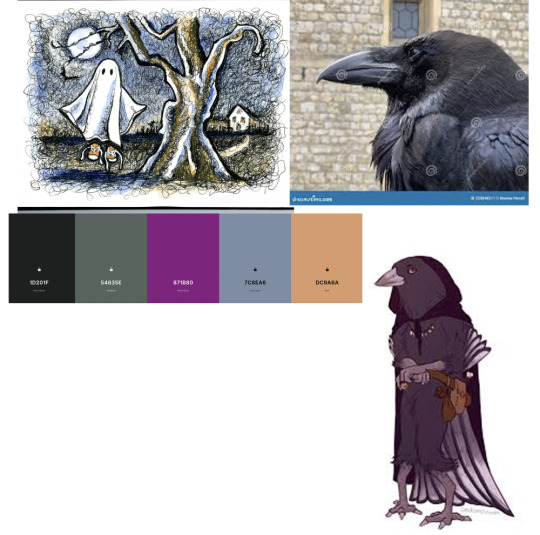
The final moodboard where i attempt to get the beak correct and found a scumbling colour picture and this helped me suggest the blue colour of the dusty blue and yellow from in the painting. to the 5 colour pallet. group descisions.
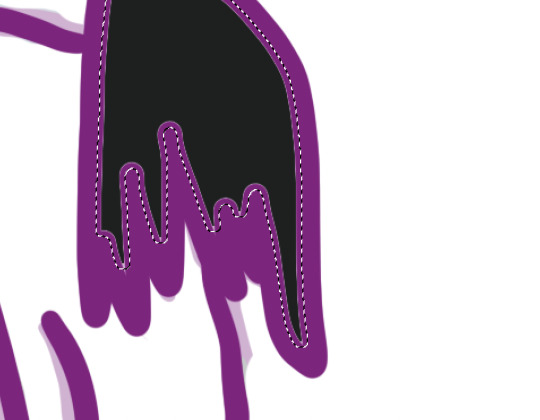
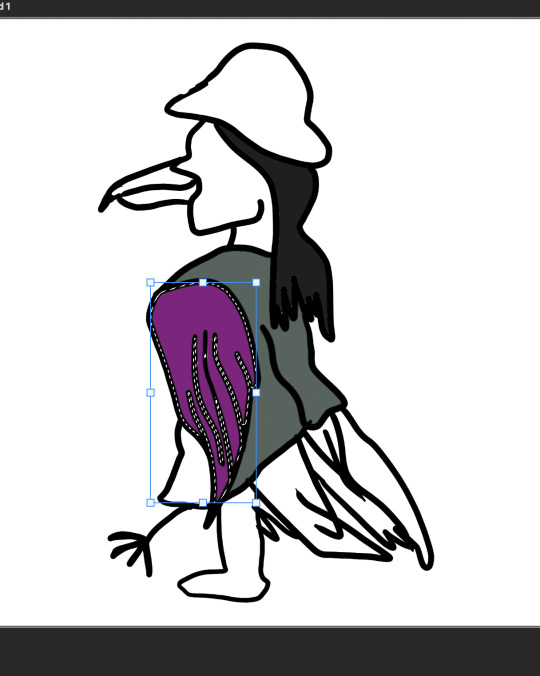
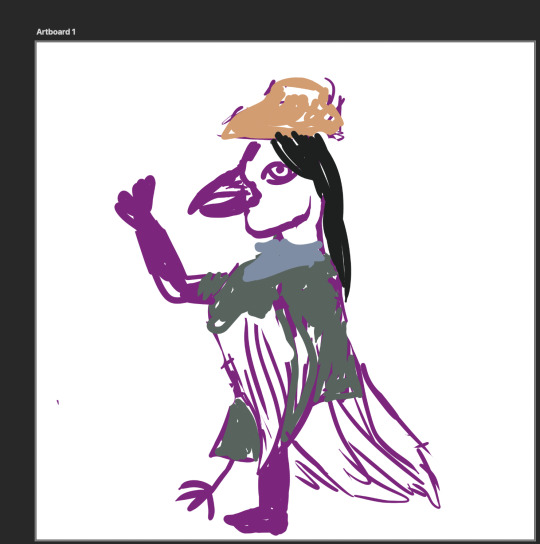
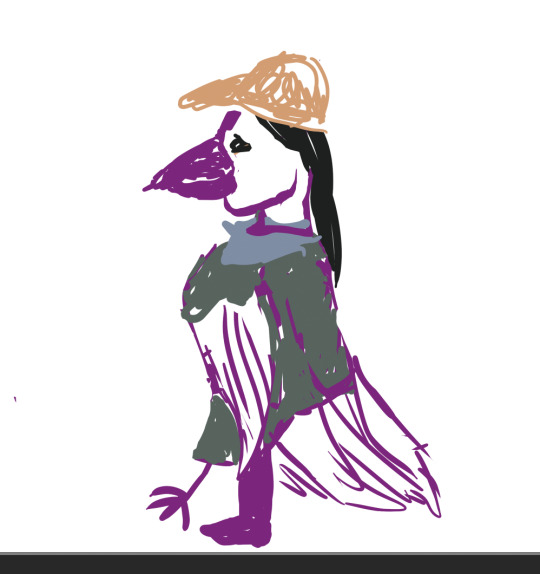
the bird i thought could be waving on side with real hand oposite to real foot . istarted the feather tail the way the oourplle raven example was then i winged it lol.
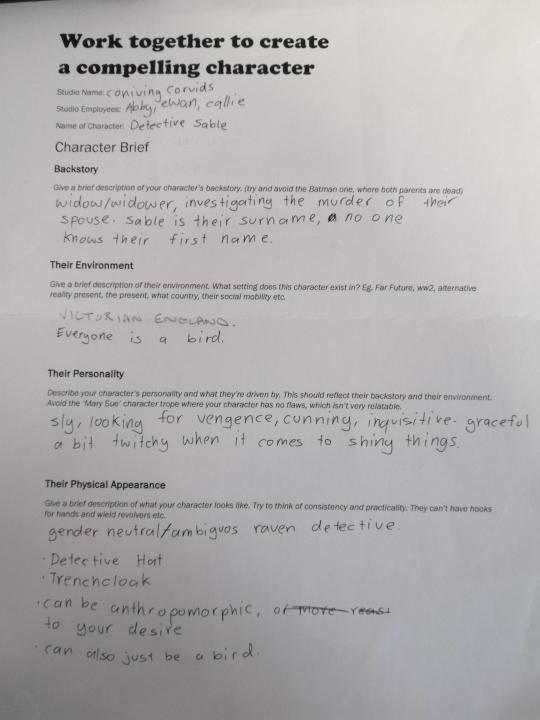
started drawing and profesionalizing the sketch before create line yool on top like 3rd image. moodboard i loved a boook once of the tecnique that i found apon again which is the scumbling amazing technique that i couldnt find colour wise. The first image looks far to pelican like. Changed outline colour as black rather than purple which i did. the layer of sketch 3rd image i changed to outline.
0 notes
Note
thoughts on scumbling (shading technique)?
it's pretty neat!! admittedly i had to look it up, but i do love a good use of shapes
0 notes
Text
Silver Scrubber Synthetic Brushes – Perfect for Bold Textures & Controlled Blending.
Elevate your painting technique with Silver Scrubber Synthetic Brushes, designed for artists who love bold textures, controlled blending, and effortless scumbling. These durable synthetic brushes feature stiff, resilient bristles that can withstand heavy pressure, making them ideal for scrubbing, lifting, and creating unique textures in acrylic, watercolor, and oil painting.
Unlike traditional brushes, Silver Scrubber Synthetic Brushes maintain their shape even with aggressive use, allowing for precise control while softening edges, blending colors, or removing excess paint. The high-quality synthetic fibers ensure long-lasting performance and are easy to clean, making them a must-have for artists who enjoy layering and textural effects.
Read More.......https://www.quora.com/What-are-synthetic-brushes-made-of/answer/William-James-1933?prompt_topic_bio=1
0 notes
Text
The Art and Science of Oil Paint: A Timeless Medium

Oil paint, with its rich texture and many vibrant hues, has been a beloved medium for artists for centuries. From the Renaissance masters to contemporary painters, oil paint offers unparalleled versatility and depth, making it a timeless choice for creating masterpieces. This essay will explore the history, composition, techniques, and enduring appeal of oil paint in the world of art. Warning in advance..i will use sarcasm in places.
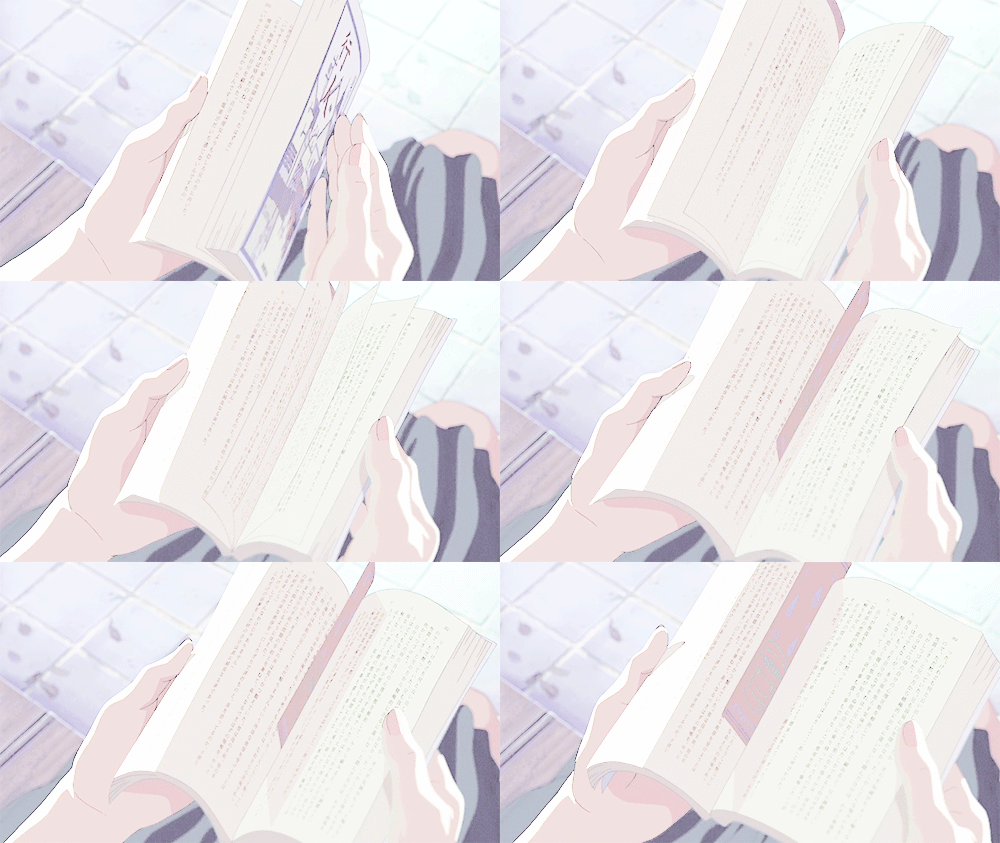
The origins of oil paint can be traced back to the 7th century, with early examples found in Afghanistan. However, it was during the Renaissance in the 15th century that oil painting truly flourished. Artists like Jan van Eyck and Leonardo da Vinci mastered the use of oil paint, revolutionizing the art world with their detailed and lifelike works. The slow drying time of oil paint allowed artists to blend colors seamlessly and build up layers, creating depth and realism that were previously unattainable. Also made me throw out everything I knew about painting IN GENERAL!
Oil paint is composed of pigments suspended in a slower than snails drying oil, usually linseed oil. The pigments provide color, while the oil acts as a binder, holding the pigment particles together and allowing them to adhere to the painting surface. Different oils, such as walnut or poppy seed oil, can be used to alter the drying time and consistency of the paint. Thinners like turpentine or mineral spirits can be added to modify the paint's viscosity and transparency, offering artists a range of textures and effects.
Oil painting techniques have evolved over centuries and threw everything i knew out the bloody window.
Imprimatura and Underpainting: An initial layer of paint applied to the canvas, often in a neutral color, to establish the tonal foundation of the painting.
Glazing: Applying thin, transparent layers of paint over a dry layer to create depth and luminosity.
Scumbling: Using a dry brush to apply a thin, opaque layer of paint over a dry layer, creating a broken color effect.
Alla Prima: Also known as "wet-on-wet," this technique involves applying wet paint directly onto wet layers, allowing for spontaneous and expressive brushwork. Also it sounded like a ballet thing when i read about this.
Advantages of Oil Paint Oil paint offers several advantages that have contributed to its enduring popularity:
Versatility: The ability to manipulate oil paint in various ways, from thicc impasto to delicate glazes, allows artists to explore a wide range of styles and techniques.
Color Depth: The richness and intensity of oil paint colors are unmatched, providing artists with the means to create vibrant and lifelike images.
Durability: Once dry, oil paint forms a robust and flexible film that can withstand the test of time. Many oil paintings from centuries past remain in excellent condition today.
Blending Capabilities: The slow drying time of oil paint enables artists to blend colors seamlessly, achieving smooth transitions and intricate details.
Challenges and Considerations Despite its many advantages, oil painting also presents some challenges:
Drying Time: The extended drying time can be both a blessing and a curse, requiring patience and careful planning. This is gonna drive me insane.
Health and Safety: Some pigments and solvents used in oil painting can be toxic. Proper ventilation and protective gear are essential to ensure a safe working environment. Why is this paint SO EXTRA!
Cost: High-quality oil paints and materials can be expensive, posing a financial challenge for some artists.
Conclusion Oil paint remains a cherished medium in the art world, celebrated for its versatility, richness, and enduring beauty. From its historical roots to modern-day practices, oil painting continues to inspire and challenge artists, pushing the boundaries of creativity and expression. Whether capturing the delicate play of light on a subject's face or the grandeur of a sweeping landscape, oil paint offers a timeless means of transforming vision into reality.
1 note
·
View note
Text
Acrylic Tonal Underpainting Pt.2
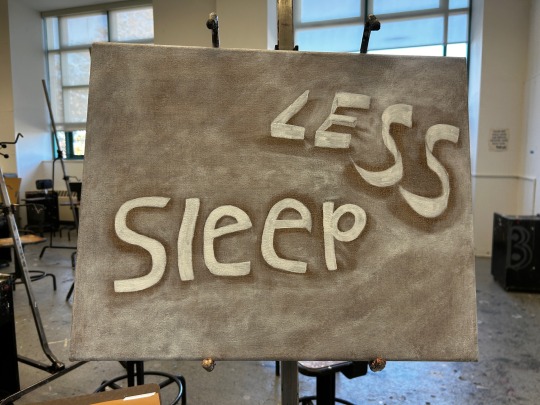
Sooo this is a more updated version. I love the “LESS” Letters on the right and working from still life I feel like I was able to imitate the shadows but they don’t look right. And I look back at the still life and it’s like nope it’s there. I used the scumbling technique where with a dry brush I’d add a bit of paint and with circular motions I’d add the technique. However, at times the background would match the color of the letters too much and that can’t be right because my background is darker than my letters. And so, I’d wipe it off. But it’s fine. Maybe now that we had off on Wednesday, I can take some extra time to work on it again with a new pair of 👁️👁️.
Either way I think it’s okay because this is a beginners painting class and we are here to try new things out of our comfort zone! Remember everything is a learning experience and we need to give ourselves some grace every now and again. 🤗
1 note
·
View note