#scheldt estuary
Explore tagged Tumblr posts
Text
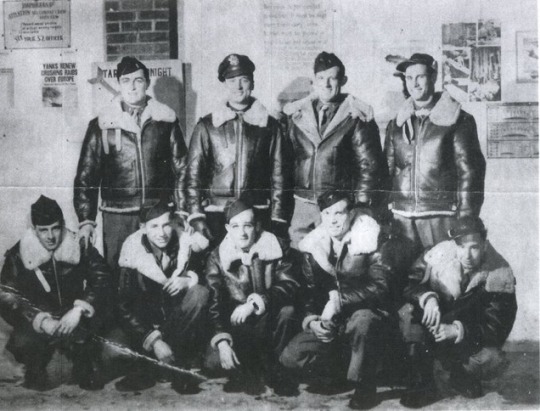
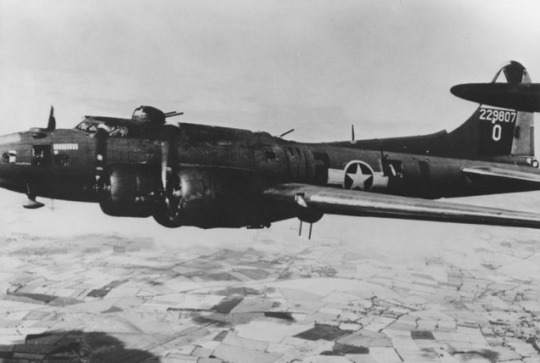
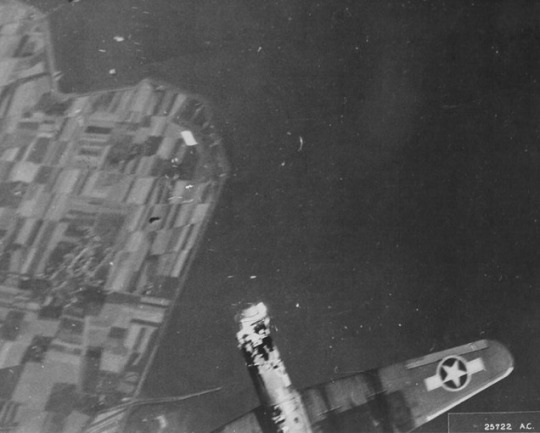
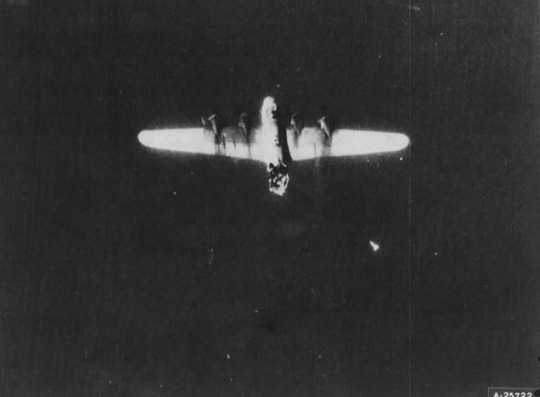
19th August, 1943. B-17 ‘Lady Liberty’ of the 305th Bomb Group, on a mission to Gilze-Rijen airfield, took a direct flak hit over the Scheldt estuary and broke in half aft of the radio room. Incredibly, pilot Lt Ralph Miller and tail gunner S/Sgt Emil Radosevich were able to bale out successfully and were taken prisoner, but the other eight crewmen were killed.
Pictured:
1) 9 of the ten crewmen of ‘Lady Liberty’. Back row, left to right : Lt. John Meade, Co-pilot; Lt. Ralph Miller, Pilot; Lt. Donald McGowan, Navigator; Lt. Joseph McGinley, Bombardier. Front Row Left to right: S/Sgt. Al Miller, Ball turret gunner; T/Sgt. Bynum Crabtree, Engineer / Gunner; S/Sgt. Edgar Lott, Waist Gunner; S/Sgt. Emil Radosevich, Tail Gunner; S/Sgt. Fulton Horn, Radio Operator.
📷 American Air Museum UPL 34912
2) Photograph of ‘Lady Liberty’, originally captioned as having been taken seconds before the B-17 was hit. It has, however, been suggested that it was actually taken as the Bomb Group was assembling over England before heading to the target. Several crew members can clearly be seen in the aircraft.
📷 American Air Museum FRE 1141
3/4) Images taken immediately after the aircraft was hit by flak, as it begins its plunge towards the water below.
📷 b17flyingfortress.de
@JamieMctrusty via X
10 notes
·
View notes
Text
New Research Reveals Hidden Threats to Europe’s Agriculture and Water Sustainability

A groundbreaking doctoral study at Vrije Universiteit Brussel (VUB) has uncovered how heavy metals in fertilizers and hormone-disrupting substances like estrogens in waterways pose serious risks to agricultural soils and aquatic ecosystems across Europe.
Key insights:
🔹Fertilizers are a major source of heavy metals in soils. Using the innovative S920-Diffusive Gradients in Thin Films (DGT) technique, researchers measured the bioavailable fraction of metals—the portion plants can absorb—crucial for food safety and sustainable farming.
🔹Among fertilizers studied—phosphate fertilizers, sewage sludge, and animal manure—animal manure was found to be the safest option, limiting metal contamination and reducing risks to soil health.
🔹Environmental factors such as soil pH, redox potential, and dissolved organic carbon strongly influence metal mobility and uptake by plants, highlighting the complexity of managing soil pollution.
🔹In aquatic systems like the Scheldt estuary, estrogenic compounds from domestic wastewater disrupt the endocrine systems of aquatic life and pose potential human health risks. Encouragingly, estrogen levels have declined over 40 years thanks to improved wastewater treatment and EU policies like the Water Framework Directive.
🔹Despite progress, emerging chemicals and changing industrial discharges require ongoing monitoring and updated regulations to protect ecosystems and food safety.
Why this matters:
Protecting soil and water quality is essential for healthy food production, biodiversity, and human well-being. This research highlights how smarter fertilizer choices and strong environmental policies can safeguard Europe’s agricultural sustainability and water resources for future generations.
What steps do you think are most important to reduce soil and water pollution in your community?
#Sustainability #Agriculture #WaterQuality #FoodSafety #EnvironmentalScience #CircularEconomy #EURegulations
0 notes
Text
Check out the 5 top places to visit in Belgium
Belgium is quite a small country but a diverse region which is situated in the central part of Europe. It offers a great range of cultural, historical and natural attractions. Right from the relaxing countryside to the lively cities and grand architectural buildings to stunning coastlines, Belgium is a perfect destination which suits all kinds of travelers. Hence you can expect a lot of activities like hiking in the valleys or mountains, eating delicious cuisines with your hearts out, exploring the historical places like an archaeologist and many more. So what are you waiting for? Get your Belgium Visa now to experience the fantastic country. Now let's begin to detail some of the best places to visit in Belgium.
Unique places to visit in Belgium
Bruges
The most happening place in Belgium is Bruges. It is one of the best places to visit in Belgium. It attracts a lot of tourists for its charming beauty which is filled with canals, palaces and mountains. Right at the bank of River Reie, the settlement of Bruges starts. It flows forward and then connects the waterways of the Zwin estuary and the North Sea. Now, the best part of the attraction about this place is the delicious hot chocolate tasting. No matter what your age, you will absolutely relish its taste.
Bruges is also famous for its medieval Flanders. They have the Grote Markt, Gothic Belfries, which are considered a Unesco heritage site, a masterpiece of the Basilica. Then there are gondolas, which offer perfect nightlife for couples, along with the hall in the main square of the Bruges.
The area is filled with chocolate shops. You can even explore the entire city by going on a boat ride which gives a tour for half an hour.
Brussels
Brussels is the capital city of Belgium and this place should be absolutely included in your list of best places to visit in Belgium. It is located at the heart of Belgium and combined with both the French and Flemish Community. You will find a lot of medieval-era relics in this city. Did you know that apart from being the capital of Belgium, Brussels is also the de facto capital of the European Union?
There is a famous place called the La Grand Place, which is preserving the guild halls of the old medieval buildings. Then we have excellent Irish pubs and fascinating cafes on the rooftop of La Grand-Place with the fantastic comic tour in the Herge Museum. The well-known artist behind the Tintin comics engaged people of every age group in the whole world with its comic strips. You also get the royal delicacies of Belgium in this place.
Ghent
Ghent is popularly known as a charming historical city which is located in the Northwest of Belgium. Once you visit this place, explore the 13th-century Gothic fortress and the medieval century's canalside. Then there is the famous fortress of medieval times known as the Gravensteen, which is also called the Castle of the Counts. You can go on top to have the perfect sightseeing of the entire city in 360 degrees. Many tourists visit this place due to historical reasons considering it one of the best places to visit in Belgium.
It just doesn't end here. There is St Bavo's Cathedral, which has one of the best European treasured paintings titled "The Adoration of the Mystic Lamb".There is a famous Friday and Saturday market which happens in the historic centre in Vrijdagmarkt, which should also be explored in your leisure time.
Antwerp
Antwerp is absolutely one of the best places to visit in Belgium. It is the second largest city after Brussels in Belgium. The city is located on the Scheldt River, which connects to the North Sea in the Westerschelde estuary. Did you know that Antwerp is also known as the Diamond City and is considered the wealthiest city in the Scandinavian region? This is because it trades in diamonds which are more than 85 percent of rough and 50 percent of uncut diamonds. The best diamond districts of Antwerp are The Diamond Club, The Beurs Voor Diamanthandel, The Antwepsche Diamantkring and the Vrije Diamanthandel which are even great for sightseeing.
Apart from that, Antwerp is also famous for mouth-watering traditional food dishes, which will be absolutely fantastic when you are on a family vacation.
Ardennes
If you are looking for some natural beauty and attractions, then Ardennes is your place which is another best places to visit in Belgium. This place starts from the city of Namur and is spread across the valleys of the river Meuse, which further follows the plateau down the Fens, ending at the edge of the German Eifel Mountains. It is a top-class place for hiking, trekking, trailing, camping and biking. You will find a lot of hills, caves, and ridges to explore and if you are lucky, you might even get to see the spotting of the lynx, wild boar and deer.
There are even a few more attractions available which include the Rock-clad fortress of Chateau de Bouillon, Mardi Gras Festivities, Labyrinth of Barvoux and Han-sur Lasse.
Get some professional assistance on how to book a Belgium Visa Appointment in London
So you are ready to experience the best places to visit in Belgium. In order to do that, you will have to get a Belgium Visa from UK first. If you are traveling to this country for the first time, being a UK resident, you might need some professional assistance to prepare your documents for Belgium Visa application. We provide complete and clear guidance on obtaining a Belgian Visa from the UK and manage the immediate Visa appointment from start to finish for a nominal service charge.
All you have to do is visit our website, fill out the Belgium Visa UK form with all your details, and complete the online payment to reserve our express appointment slot at the Visa Center. Then one of our advisors from the team will get back to you.
Conclusion
Hence, whatever your interest is, the place and activity are always there for you in Belgium. Just remember that each season provides a different view of the country. From our experience, the months of April, May, and June, as well as September and October are the best times to visit Belgium. So pack your bags and get ready to discover the best things to do in Belgium, which though it is a small country, will indeed give an ample amount of unforgettable experiences.
1 note
·
View note
Text
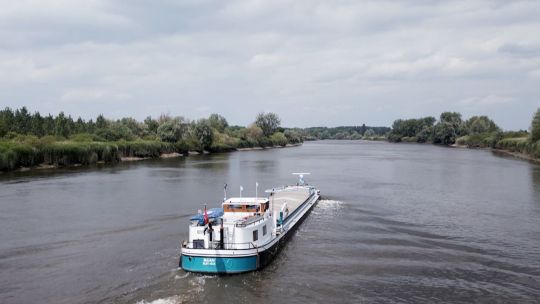
How Flanders is harnessing nature to prevent deadly floods
The Scheldt Estuary in Flanders has long been on the flooding frontline. Its low-lying landscape and open connection to the sea make it highly vulnerable to storm surges. When the sea level rises abnormally due to strong winds and low atmospheric pressure, this weather phenomenon can lead to significant flooding during high tide. “When there is a high tide in combination with a storm on the sea,…
View On WordPress
0 notes
Text
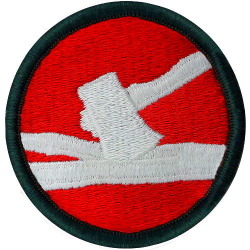
7-AD – Withdrawal Behind the 82-A/B Lines December 1944
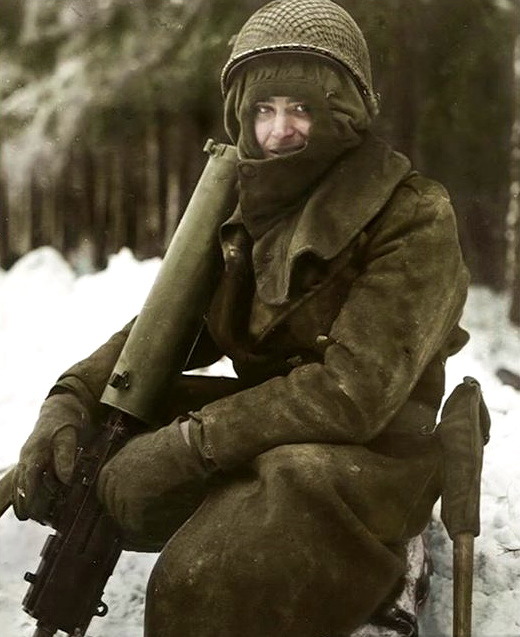
Document Source: (AAR) After Action Report (December 1944), Headquarters 7th Armored Division, December 1, 1944, – December 31, 1944, St-Vith & Vicinity, Belgium, Col John L. Ryan Jr, GSC, Chief of Staff
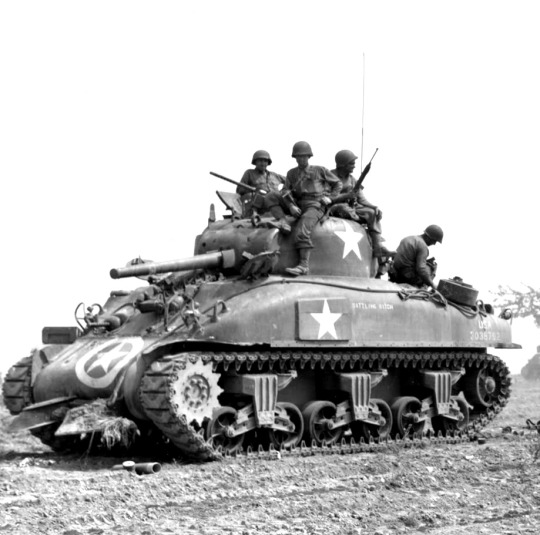
FOREWORD
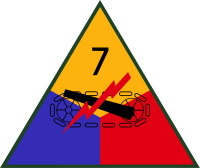
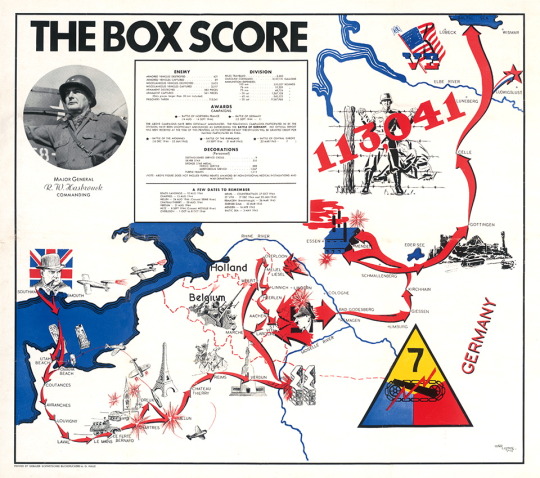
The 7th Armored Division was activated on March 1, 1942, reorganized on September 20, 1943, and sent to the United Kingdom in June 1944. The division landed in Omaha Beach and Utah Beach, on August 13/14, 1944, and was assigned to the US 3-A. The 7-AD drove through Nogent-le-Rotrou in an attack on Chartres which fell on August 18. From Chartres, the Division advanced to liberate Dreux, then Melun where the division crossed the Seine River on August 24. The 7-AD then pushed on to bypass Reims, liberated Château-Thierry and Verdun, August 31, halted briefly for refueling until September 6, when it drove toward the Moselle River and made a crossing near Dornot. This crossing had to be withdrawn in the face of the heavy fortifications around Metz.


The 7-AD then made attempts to cross again the Moselle River northwest of Metz but the deep river valley was not suitable terrain for an armored attack. Elements of the division assisted the 5th Infantry Division in expanding a bridgehead east of Arnaville, south of Metz, and on September 15, the main part of the division crossed the Moselle. The 7-AD was repulsed in its attacks across the Seille River at and near Sillegny, part of an attack in conjunction with the 5-ID that was also repulsed further north. On September 25, the 7-AD was transferred to the US 9-A and began the march
to the Netherlands where they were needed to protect the right (east) flank of the corridor opened by Operation Market Garden. They were to operate in southeastern Holland so that British and Canadian forces and the US 104th Infantry Division could clear the Germans from the Scheldt Estuary in the southwest Netherlands and open the shipping lanes to the critical port of Antwerp, to allow Allied ships to bring supplies from Britain.
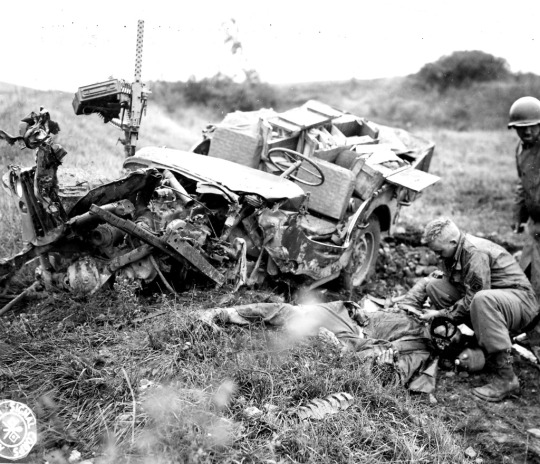
In September 1944, the 7-AD launched an attack from the north on the town of Overloon, against significant German defenses. The attacks progressed slowly and finally settled into a series of counter-attacks reminiscent of World War I trench warfare. On October 8, the 7-AD was relieved from the attack on Overloon by the British 11-AD and moved south of Overloon to the Deurne – Weert area. Here they were attached to the British 2-A and ordered to make demonstration attacks to the east, in order to divert enemy forces from the Overloon and Venlo areas, where British troops pressed the attack. This plan succeeded, and the British were finally able to liberate Overloon. On October 27, the main part of the 7-AD was in essentially defensive positions along the line Nederweert (and south) – Meijel – Liesel, with the demonstration force still in the attack across the Deurne Canal to the east. The Germans launched a two-division offensive centered on Meijel, catching the thinly stretched US 87-CRS (Cavalry Recon Squadron) by surprise. However, the response by the 7-AD and by the British VIII Corps to which the division was attached, stopped the German attack on the third day and from October 31 to November 8, gradually drove the enemy out of the terrain that they had taken. During this operation, at midnight on the night of October 31 – November 1, Gen Robert D. Hasbrouck replaced Gen Lindsay Silvester as Commanding General of the division. On November 8, the 7-AD was again transferred back to the US 9-A and moved south to rest areas in the eastern vicinity of Maastricht. Following an inflow of many replacements, they began extensive training and reorganization, since so many original men had been lost in France and Holland that a significant part of the division was now men who had never trained together. At the end of November, the division straddled the Dutch-German Border with one combat command in Germany (in the area of Ubach–Palenberg, north of Aachen) and two in the Netherlands. Elements of the division were attached to the US 84th Infantry Division for operations in early December in the area of Linnich, Germany, on the banks of the Roer River.
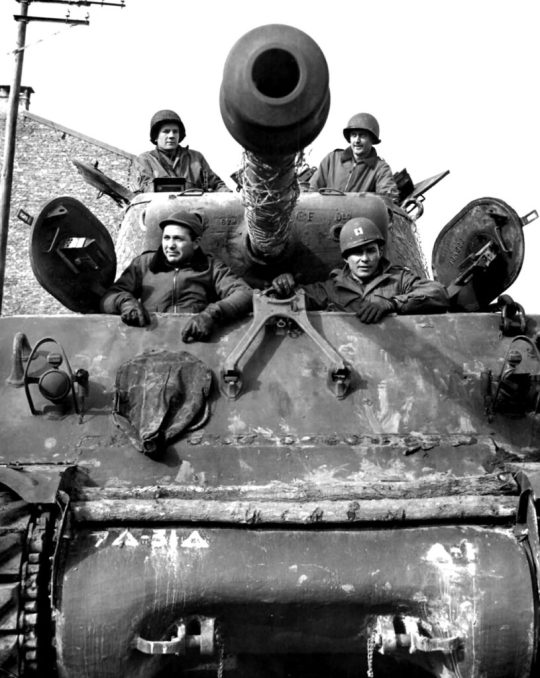
DECEMBER 1, 1944 On December 1, the division order of battle was as follows: CCA – 48th Armored Infantry Battalion – Able Co, 33rd Armored Engineer Battalion – Dog Co, 87th Cavalry Recon Squadron Mecz CCB – 23rd Armored Infantry Battalion – 31st Tank Battalion – Baker Co, 33rd Armored Infantry Battalion – Baker Co, 87th Cavalry Recon Squadron Mecz – Dog Co, 203rd AAA Battalion – Charlie Co, 814th Tank Destroyer Battalion – 1st Plat, Baker Co, 814th Tank Destroyer Battalion – 1st Plat, Recon, 814th Tank Destroyer Battalion CCR – 38th Armored Infantry Battalion – Baker Co, 40th Tank Battalion – Charlie Co, 33rd Armored Engineer Battalion – Ordnance Detachment – Medical Detachment Division Troops – 203rd AAA Battalion (-) – 814th Tank Destroyer Battalion (-) – 33rd Armored Engineer Battalion (-) – 87th Cavalry Recon Squadron Mecz Division Trains – 129th Ordnance Maintenance Company (-) – 77th Armored Medical Battalion (-) – 446th Quartermaster Truck Company (-) – 3967th Quartermaster Troop Transport Company (-) – Baker Co, 203rd AAA Battalion Division Artillery was under XIII Corps control and consisted of: – 434th Armored Field Artillery Battalion – 440th Armored Field Artillery Battalion – 489th Armored Field Artillery Battalion – Able Co and Charlie Co, 203rd Antiaircraft Artillery Battalion Attached to the division were the: – 814th Tank Destroyer Battalion – 203rd Antiaircraft Artillery Battalion – 446th Quartermaster Trucking Company – 3967th Quartermaster Troop Transport Company Detached from the division were the: – 17th Tank Battalion (attached to the 102-ID) – 40th Tank Battalion (-) Baker & Dog Cos (attached to the 84-ID)


(CCR/7-AD), commanded by Col John L. Ryan Jr, was in the vicinity of Ubach, Germany, on December 1, 1944. The only divisional unit in action under division command was Baker Co 40th Tank Battalion which was supporting the 84th Infantry Division's operations in the vicinity
of Lindern. Able Co 40-TB was holding Lindern with elements of the 84-ID. Baker Co 40-TB was sent in to reinforce it. Due to enemy artillery concentrations on the supply route, supplies were brought to the two companies by means of the Blue Ball Express, an innovation using the light tanks of Dog Co 40-TB to bring up trailer loads of rations and ammunition under the cover of darkness.


(CCB/7-AD) under the command of Col Bruce C. Clarke, was alerted to move east of the Wurm River, Germany, to assemble at Gereonsweiller. The mission was to attack southeast from Lindern and to seize Linnich by passing through the 84-ID and 102-ID. The 814-TDB was to support the attack. However, due to the progress of the infantry divisions, it was not necessary

to commit CCB. (CCA/7-AD) under Col Dwight A. Rosenbaum, located in the vicinity of Heerlen, Holland, was undergoing a training and maintenance program pending operations to the east.
DECEMBER 2, 1944


The Division Tactical Headquarters was established at Rimburg, Holland. CCB 7-AD moved east of the Wurm River. This placed two combat commands east of that river, prepared for immediate operations to the east, northeast, or north. At 0115, the elements of the 40-TB which had been attached to the US 84-ID were relieved from such attachment. Baker 40-TB was then attached to the US 84-ID. While prepared to repel any enemy counter-attacks, the division units continued with training and maintenance programs.
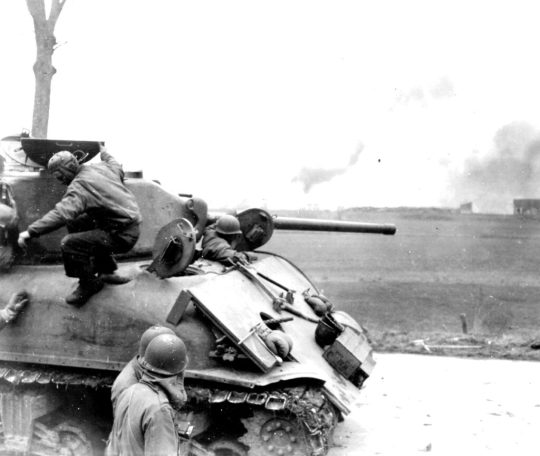
DECEMBER 3, 1944


At 1200, the 17-TB was relieved from attachment to the US 102-ID and returned to CCR 7-AD control. Proposed operations to the east were dependent upon the destruction of the enemy-held Roer River Dams, south of Düren. The enemy was capable of countering an Allied offensive in this area by flooding the Roer River Valley. This would result in either destruction of the troops in the flooded region or the cutting off of our supply lines. To eliminate this threat, Allied air forces made


several attempts to destroy the dam by bombing. The first attempt was made on December 3. While training and maintenance continued for the division as a whole, various divisional units were in action while under attachment to other commands. Baker Co 40-TB was attached to the US 84-ID from December 2, 1944, at 2230 to December 6, 1944, at 1600. Charlie Co 38-AIB

was also under attachment to the US 84-ID from December 3, 1944, at 2100 to December 6, 1944, at 1800. The 48-AIB was attached to the US 102-ID from December 5, 1944, at 1400 to December 9, 1944, at 2400 and the 17-TB was attached to the US 84-ID from December 9, 1944, at 1400 until December 16, 1944, at 2000.
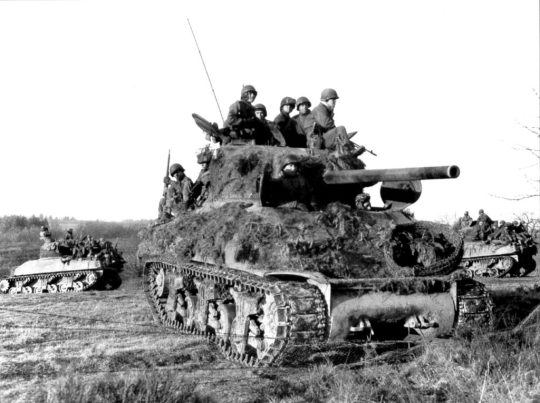
During the period, detailed plans were made for seizing the town of Brachelen. The town was defended by the German 694.Infantry-Regiment, the 695.Infantry-Regiment and the 696.Infantry-Regiment from the 340.Infantry-Division. The attack was dependent upon the destruction of the Roer River Dams which would isolate the town. When one of the dams was broken it would take from 4 to 5 1/2 hours for the crest of the flood to reach Brachelen, and as the dam could not be bombed before 1000, the attack was to be launched the day after the destruction of the dam. CCB 7-AD was assigned the job of taking Brachelen. The plan of attack was outlined in Operations Instructions on December 11, at 0900, known as plan Dagger. CCA 7-AD was to move east of the Wurm River after CCB’s attack. Both combat commands were constituted as follows: CCA – 40th Tank Battalion – 48th Armored Infantry Battalion – Able Co, 33rd Armored Engineer Battalion – Dog Co, 87th Cavalry Rcn Squadron (Mecz) – Able Co, 814th Tank Destroyer Battalion – 1st Co, Recon, 814th Tank Destroyer Battalion – Detachment, 77th Armored Medical Battalion CCB – 23rd Armored Infantry Battalion – 31st Tank Battalion – 38th Armored Infantry Battalion – Baker Co, 33rd Armored Engineer Battalion – Baker Co, 87th Cavalry Recon Squadron (Mecz) – Charlie Co, 814th Tank Destroyer Battalion – 1st Plat, Baker Co, 814th Tank Destroyer Battalion – Detachment, 129th Ordnance Battalion – Dog Co, 203rd Antiaircraft Artillery Battalion – Detachment, 77th Armored Medical Battalion CCR – 1 Squadron Recon, 814th Tank Destroyer Battalion – Charlie Co, 33rd Armored Engineer Battalion
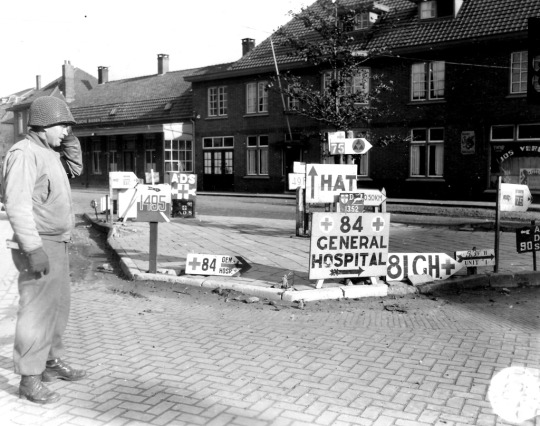
DECEMBER 10 Today, Col Bruce C. Clarke, Commanding CCB 7-AD, was promoted to brigadier general. At 1000, CCB 7-AD was placed in the Corps reserve. DECEMBER 11 At 1500, CCB was released from the Corps Reserve and replaced by CCA 7-AD. DECEMBER 13 Division Main Headquarters moved from Robroek to Heerlen, Holland, while the rest of the division continued training and maintenance, pending the destruction of the Roer River dam and the beginning of the operations Dagger. DECEMBER 16

Read the full article
#104thInfantryDivision#23rdArmoredInfantryBattalion#3-A(US)#38thArmoredInfantryBattalion#40thTankBattalion#422ndInfantryRegiment#423rdInfantryRegiment#424thInfantryRegiment#48thArmoredInfantryBattalion#5thInfantryDivision#7thArmoredDivision#811thTankDestroyerBattalion#814thTankDestroyerBattalion#84thInfantryDivision#87thCavalryReconSquadron#Aachen#Antwerp#Arnaville#Aywaille#Bastogne#Beho#Born#Bovigny#Braunlauf#BritishForces#CanadianForces#CCB-7-AD#Chartres#ChateauThierry(France)#Cherain
0 notes
Text
Market Garden was designed by Monty to (should it have succeeded) give himself priority in supplies and strategy on the western front. However it was poorly conceived being entirely reliant on everything going right, which was compounded by incompetent British leadership on the ground and the failure to seize the Scheldt estuary beforehand. The failure of Marker Garden resulted in Monty being essentially sidelined for the rest of the war.
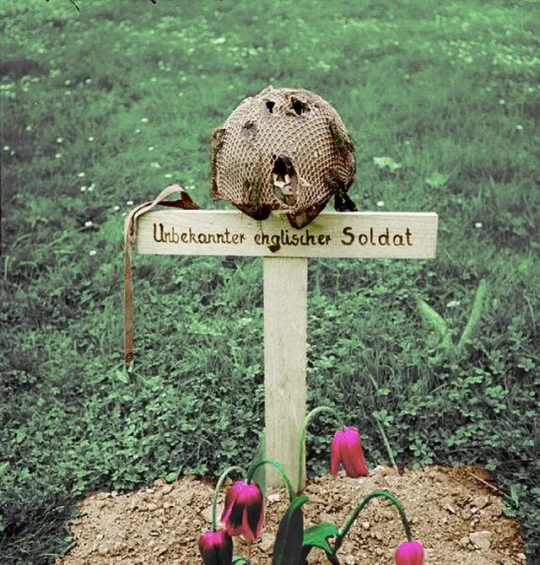
Final resting place for a member of 1st Airborne Division near Arnhem Bridge, Netherlands. Sept 1944
17 notes
·
View notes
Text
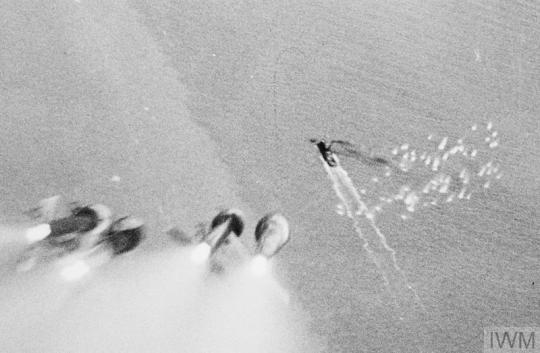
Salve de roquettes RP-3 lancée depuis un Hawker Typhoon sur un remorqueur dans l'estuaire de l'Escaut – Bataille de l'Escaut – Bataille du Benelux – Septembre 1944
Photographe : Royal Air Force official photographer
©Imperial War Museums - C 4641
Les roquettes du Hawker Typhoon était efficaces contre les chars, les navires, les emplacements de canons, les bâtiments et les voies ferrées. Dans ce cas, les éclaboussures d'obus des quatre canons de 20 mm de l'avion aident le pilote à corriger sa visée avant de déclencher une salve de RP.
#WWII#bataille du Benelux#bataille de l'Escaut#battle of the Scheldt#royal air force#RAF#roquettes#RP-3#estuaire de l'Escaut#escaut#scheldt estuary#09/1944#1944
4 notes
·
View notes
Photo
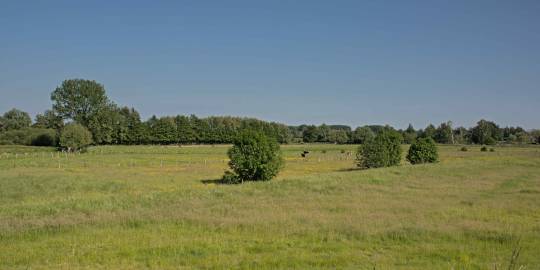
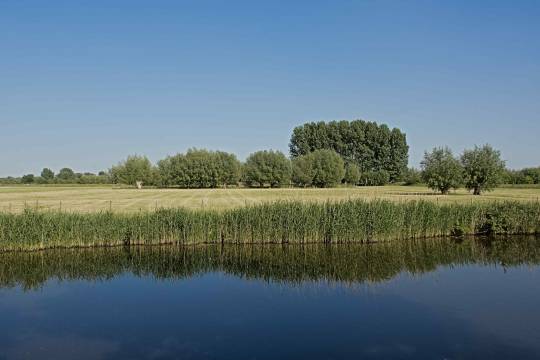

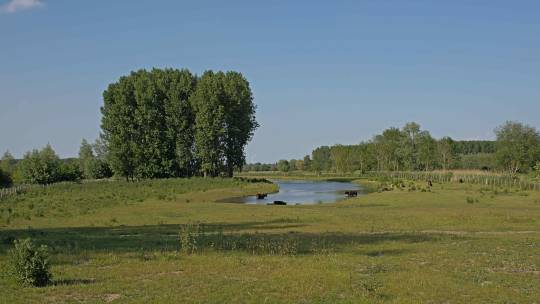
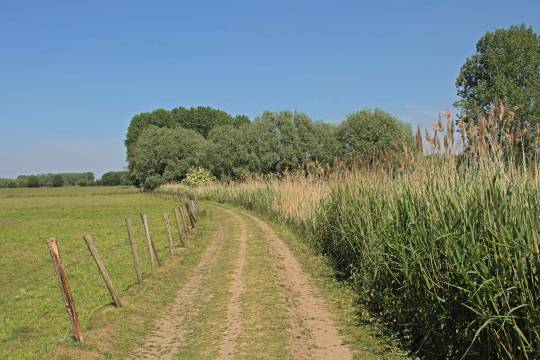





Kalkense meersen nature reserve, Flanders, Belgium
#kalkense meersen#landscape#photography#flanders#belgium#marshland#wetlands#countryside#nature#schellebelle#scheldt estuary#spring#springtime#hiking adventures#wanderlust#places wordt visiting#original photography#original photographers#photographers on tumblr#lensblr
37 notes
·
View notes
Photo
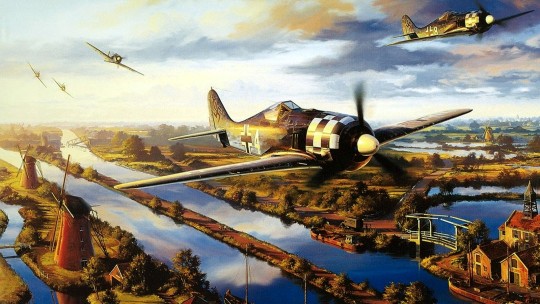
1943 08 17 Day of the Fighters - Nicolas Trudgian
The pilots of I Gruppe JG-1 were up early on August 17th 1943. It was high summer, and even as the first streaks of light appeared in the sky to the east, four pilots got airborne out of Deelan, Holland, and headed for the coast. It was the first routine reconnaissance of the morning. By 0730 German listening services were picking up signals indicating large formations of enemy aircraft assembling to the west of Great Yarmouth, south east England. By 0800 it was clear to the German interceptor fighter groups stationed in Holland that this was going to be no ordinary day. Shortly after 0930 the first wave of a force of some 375 B-17s and B-24s, heavily escorted by fighters, started crossing the Dutch coast south of the Scheldt estuary, their destination Schweinfurt and Regensburg. They were shadowed by the German fighters of 1, 2 and 3 Gruppe along thei entire route over Europe. When the Allied fighter escort turned back at the limit of their range, the Luftwaffe fighters made their attack. It was the start of a day of incessant aerial combat which raged all the wway across Holland, Belgium and Germany, and all the way back to the coast again as the Americans returned to England. It was one of the longest air-to-air battles of the war and became known by the Luftwaffe pilots as the day of the fighters.
20 notes
·
View notes
Text
Monty’s Men: The British Army and the Liberation of Europe by John Buckley
I don’t think you can review a book largely about Field Marshal Bernard Law Montgomery - the clue is in the name - without first stating your opinion on the man himself. Perhaps no other general of the Second World War is so polarising - British opinions tend to vary from praise to biting criticism, whereas American opinions run the range from biting criticism to believing that he was significantly worse than Hitler. My opinion is that, while he was deeply flawed, he was for the most part a supremely competent commander, and that he generally got less men killed than most of his counterparts. It must be remembered, too, that he was commanding an army that was nearing the limit of its potential manpower - he couldn’t afford to expend men in the same way that the Soviets or the Americans could. His chief problem, of course, was his vanity, his unerring ability to place his foot directly in his mouth, and his total inability to work well in a coalition. Basically, there’s certainly a lot to criticise, but calling him ‘tHe WoRsT gEnErAl Of WoRlD WaR tWo’ is having a bit of a laugh.
Much of the Monty bashing, Buckley posits, has been shifted onto the British Army itself, which has been cast as a plodding, unimaginative and incompetent force since 1945 by the likes of, in order, Liddell Hart, ex-German General, Cornelius Ryan and Max Hastings, Hollywood, and video games. This is true to an extent, especially in Liddell Hart’s case as he was trying to prove that his prewar ideas would have won the war. Yet I feel like these charges are generally levelled against the Allies as a whole, largely due to the continuing fetish for the forces of Nazi Germany. Still, there’s enough there in the popular imagination for Buckley to counter, and he does a pretty effective job.
Buckley puts postwar criticism of the British Army into context, particularly in Normandy. There, the British and Canadians faced the lion’s share of German armour, while still evolving their doctrines for cooperation between infantry and armour, and while dealing with ground that heavily suited the defence. As the campaign progressed, the British Second Army improved, while the concentration of German forces eventually allowed the Americans to start the breakout in Operation Cobra. The British then managed to advance from the Seine to the Dutch border with a speed quite at odds with the idea that they were a plodding morass, and proved quite capable of handling the Germans while reducing their pocket on the Waal in the autumn of 1944. They proved the capability of their combined arms operations in the Reichwald and while crossing the Rhine. The Second Army, it seems, proved especially proficient in the set-piece battle. The importance of the infantry, rather than simply blasting through Europe with artillery, was made clear by their casualties - 70% of total British losses in Northwest Europe, which eventually necessitated the breaking up of units to keep others going.
Buckley is not without criticisms, however, and none of them seem particularly unfair. Market Garden is rightly derided as a frankly poor plan, as was the failure to start clearing the Scheldt Estuary early, which led to a campaign that was longer and bloodier than it needed to be. Goodwood was a bit messy, and Montgomery absolutely should not have told Eisenhower it was going to be a breakthrough operation. (It wasn’t. He knew it wasn’t. It still baffles me that he told Ike it was.) At times, he says, Montgomery’s forces could be operationally inflexible, which might have lost opportunities to exploit successes on the battlefield. The British didn’t really have a standard doctrine at the start of the Normandy campaign and had to learn a lot of things on the fly, particularly as a lot of what worked in the desert and Italy didn’t translate well to Western Europe. Ultimately, however, these were comparatively minor flaws, especially when compared to the state of the Germans opposite by 1944.
I do have one criticism of this book, and that’s in the title - ‘Monty’s Men.’ It’s somewhat tempered by the subtitle, but if someone just saw ‘Monty’s Men’ on its own, they’d quite reasonably assume that it would cover the British and the Canadians. It doesn’t - this is mostly just about the British, which the activities of the First Canadian Army covered from the perspective of the attached British corps (of which there was usually at least one.) Apart from Crerar and Simonds, there aren’t really any Canadian protagonists here. Keep that in mind if you were hoping for a broader history of the 21st Army Group. On a lesser note, there does seem to be a slight bias towards the 11th Armoured Division, but that’s more about my very specific opinions about British armoured divisions, and I don’t think his opinions about the 11th (vs the Guards and the 7th) are too egregious or unwarranted.
Overall, I enjoyed my time with Monty’s Men. I don’t know if it’ll change anyone’s mind on Monty - most people with an interest in the subject have probably made up their minds by now - but even if you hate him, it’s worth a look just to see how the British Army fought in Europe.
4 notes
·
View notes
Text
For @aphrarepairweek2021 Day 4, a little engbel.
[IMPORTANT EDIT] This ficlet is inspired by -- really a re-imagining of -- the final scene from this fic called "Fight Like a Girl." I did not know I was even influenced by that work when I wrote this, but I have since realized a lot of the themes/ideas I used here came from it. Obviously I highly recommend reading the original fic, since it made such an impression on me I unknowingly was still thinking about it several years after I read it!
Prompt: Historical
1944
He brings her shoes, shoes and a dress as red as blood. A dress for all those who have fallen, a dress blooming like a carnation in the ruins of her city. There are no nylons, but she takes his green sergeants tunic and wears it draped over her shoulders like a queen’s furs. She has waited years for this day and a little cold will not stop her.
So they set off through streets strewn with rubble; good, an excuse to cling to his arm. For once, England has no protests. He helps her over every block of concrete, every cracked sidewalk, dressed in nothing but a short sleeve shirt and his trousers. He would have offered his vice admirals coat instead and perhaps they would have been served faster at the little cafe they squeezed into, but she did not want to be an officer’s wife. No, she wanted to be another pretty little thing on an English soldier-boy’s arm, wanted to wear her beret crooked and the Union Jack like an afterthought. Wanted to feel as fragile as her people, like a strong wind could carry her away.
She wanted to be mortal, if only for a day.
And when night fell and they stood together at the harbour, looking across the dark water at his home, she finally turned her head into his shoulder and cried.
———
Notes
On September 4th, 1944, the British Army liberated Antwerp. The city had been devastated by V-2 bombings. Tens of thousands more would still die after this day in the battle to claim the Scheldt estuary, and in the final push to the Rhine.
30 notes
·
View notes
Text
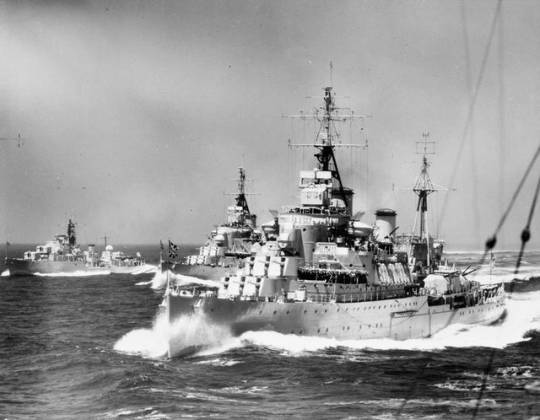
HMS Gambia, a Fiji class light cruiser. My Dad served aboard her during WW2 before she was transferred to the Royal New Zealand navy. From what I have read from his papers, he went onto serve at various bases concerned with training of landing craft crews and beach control parties prior to D Day on 6th June 1944. Whether he took part in D Day I don't know as he rarely spoke of his wartime service. I do know that he received two campaign medals. The 1939-1945 Star for which Royal Navy personnel had to complete 6 months service afloat in active operational areas and the France and Germany Star awarded for operational service in France, Belgium, the Netherlands and Germany between 6th June 1944 and 8th May 1945 and for Navy personnel, had to be in direct support of land operations in those countries. So he probably did take part in D Day and probably the landings in the Scheldt Estuary during the liberation of Antwerp as well.
2 notes
·
View notes
Text
A Bridge Too Far: Operation Market Garden 75 years on
In May 1945 it was the Russians who hoisted their flag over the ruins of the Reichstag building in Berlin. In this way World War Two, in Europe, was signalled as being effectively over. However, the troops who captured Berlin could easily have been British or American, if events around a small town in Holland had turned out differently.
Operation Market Garden, launched in September 1944, was an unsuccessful Allied offensive mainly, fought in the Netherlands. It was the largest airborne operation in history up to that time.
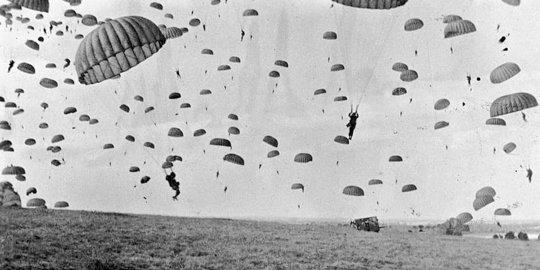
The operation was a daring one and it was the brainchild of the British General Bernard Montgomery. This operation was even the subject of the 1977 star studded movie A Bridge Too Far directed by Richard Attenborough. Montgomery intended the airborne offensive to allow the allies to break into the German heartland and to end the war, quickly. However, this was not the case, the allied offensive was to prove to be a costly failure and may have even delayed their victory in Europe.
Why did this operation fail? Was it Montgomery's over-optimistic planning, poor strategy, poor leadership, German resistance or the terrain?
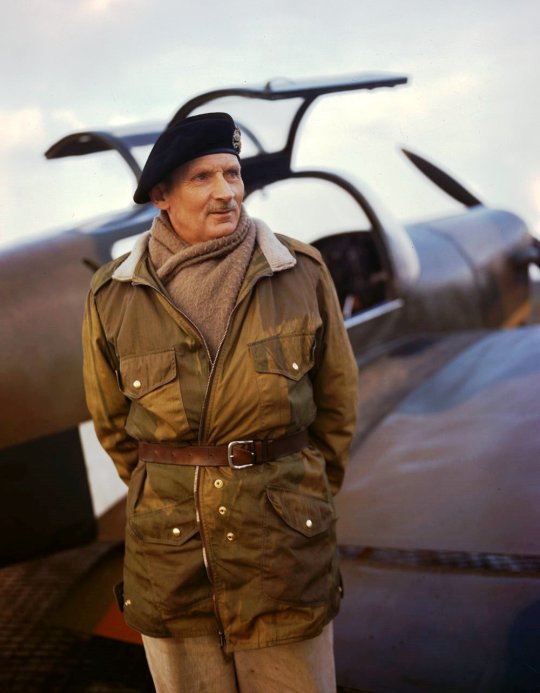
Background
The Allies had landed in Normandy on the 6th of June 1944. After establishing several beach heads in Normandy, the Allies managed to push forward into the Normandy countryside. The Germans initially managed to slow the Allies advance, however, a brilliant piece of Allied strategy, resulted in the encirclement of a large part of the German army, in the Falaise Pocket.
The combined Anglo-American divisions inflicted huge losses on the Germans. The German army was forced into a headlong retreat. Paris was soon retaken by the Allies. The German army was practically forced out of France and retreated towards Alsace-Lorraine and Belgium. It seemed to many that the Allies were on the verge of invading German and some even spoke optimistically of ending the war by Christmas.
However, in truth, the Allied successes had brought its own problems. The Allies supply lines were overstretched and this was slowing down the Americans and British in particular, the shortage of oil meant that Patton’s armored divisions had to halt their advance. This was to prove crucial and it allowed the Germans to regroup in the west, when it appeared that they would disintegrate, leading to the end of the war.
Reasons for Market Garden
By the Autumn of 1944, it was apparent to the Allied High Command that the Germans had managed to retrieve the situation and would offer stiff resistance to any future offensive. In August 1944, a British assault failed to take the deep water port of Antwerp and had allowed some 80,000 German troops from Scheldt Estuary.
This became known as the ‘Great Mistake’ and was perhaps one of the biggest in the entire war. The Allied high command was reluctant to attack the Germans from eastern France, as the German government had constructed a massive line of defenses, consisting of fortresses, to protect their western border, this was known as the Siegfried Line. The British and the Americans had to go through the Low Countries to invade Germany and end the war.
The Allies believed that they would need an innovative plan to break the German frontline in the Low Countries and in Alsace-Lorraine. General Eisenhower and other leaders turned their attention to the Low Countries. It offered them ports which could be used to re-supply the Allied divisions, who still were reliant on the Normandy ports for their supplies.
The more forward thinking of the allied strategists became concerned about the Rhine. This river would form a formidable natural barrier to any Allied advance but if they liberated the Low Countries it would allow them to cross the Rhine and then to cross into Northern Germany and then onto Berlin.
The American and the British governments became increasingly eager to end the War in Europe and they wanted to turn their attention to the Pacific War. Then the western allies believed that they were in a race to Berlin with the Soviet Army and they did not want the Red Army to capture all Germany and to turn it into a client state of Moscow.
Montgomery's Strategy
The allies needed to break the Germans resistance and cross the Rhine in the Low Countries. General Bernard Montgomery, the hero of the British victory at EL Alamein, proposed a daring plan. Field Marshal Montgomery’s goal, as recounted in his memoirs was to invade Germany by securing the bridges over the Lower Rhine in the Netherlands.
This idea had several advantages such as by-passing the Siegfried Line. Montgomery wanted an airborne assault in the Netherlands to secure key bridges over the Lower Rhine. This would allow the Allies to enter into the Northern German plains, where there were no natural barriers, to their advance to Berlin.
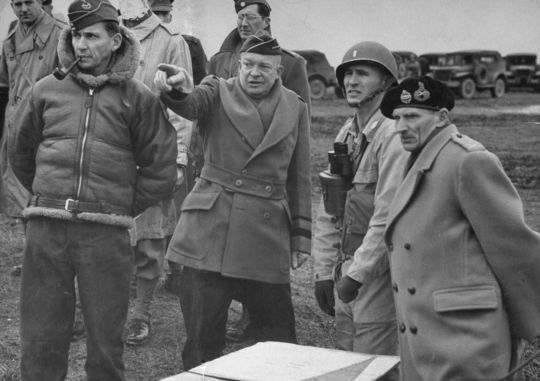
Montgomery’s plan was initially more ambitious and it was rejected by General Eisenhower. Angered by Eisenhower's reluctance, Montgomery flew to Brussels that afternoon to meet him. Montgomery requested that Eisenhower's Chief Administrative Officer leave the meeting, while insisting that his own should remain. He then tore a file of Eisenhower's messages to shreds in front of him, argued for a concentrated northern thrust, and demanding priority in supplies. So fierce and unrestrained was Montgomery's language that Eisenhower suddenly reached out, patted Montgomery's knee and told him, "Steady, Monty! You can't talk to me like that. I'm your boss."
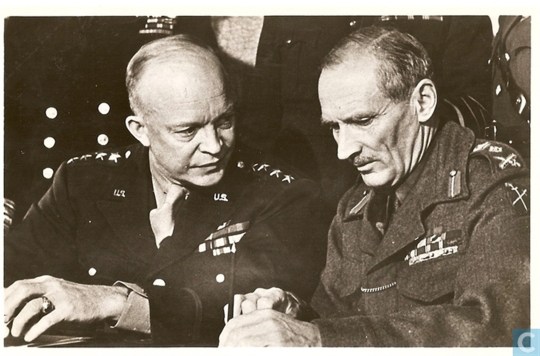
Eisenhower stated his belief that advance on a broad front would soon provoke German forces to collapse. He told Montgomery why a "single thrust" toward Berlin was not going to be accepted.
“What you're proposing is this – if I give you all the supplies you want, you could go straight to Berlin – right straight (500 miles) to Berlin? Monty, you're nuts. You can't do it. What the hell[?] ... If you try a long column like that in a single thrust you'd have to throw off division after division to protect your flanks from attack.”
Nevertheless, Eisenhower consented to Operation Market Garden after Montgomery scaled back his plans in response to Eisenhower’s criticism.
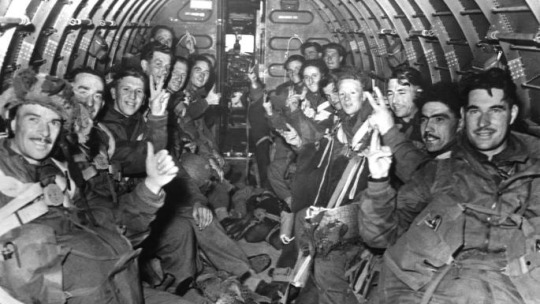
Montgomery proposed the following:
Airborne units would be dropped behind the German lines to secure the bridges over the Meuse and the two tributaries of the Rhine. The airborne units would hold the bridges until the British ground forces arrived. Montgomery believed that not only would this airborne operation succeed in securing bridges over the Rhine, but result in the retreat of German Divisions into Germany.
The Allied High Command agreed to the plan. Montgomery staked his reputation on the strategy and was backed by Churchill. The offensive was to be called Market Garden.
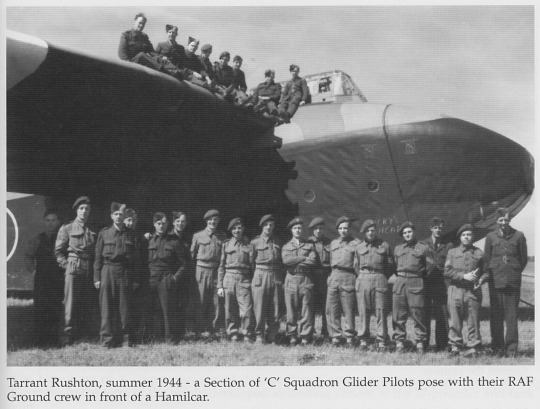
The 'Market' part of the operation involved the airborne aspect of the operation. The operation would involve four airborne divisions. The paratroopers would land in the area by gliders or they would parachute into the target zones.
Market Garden was to be executed by 41.628 English, American and Polish airborne troop and they would also be supplied with some light artillery. There were American, British and Polish units involved in the massive airdrops.
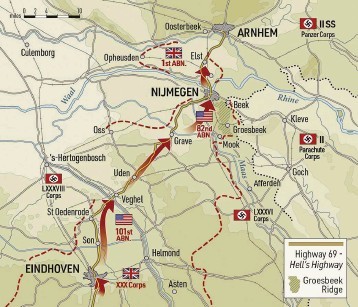
The ‘Garden’ part of the plan would involve several British Armored Divisions moving into the Netherlands to link up with the paratroopers and to defend the bridges from any German counterattack.
According to Montgomery, for the strategy to have worked it was dependent on two things, the quick capture of all the bridges by the Allies and the ground forces linking with the paratroopers, within days.
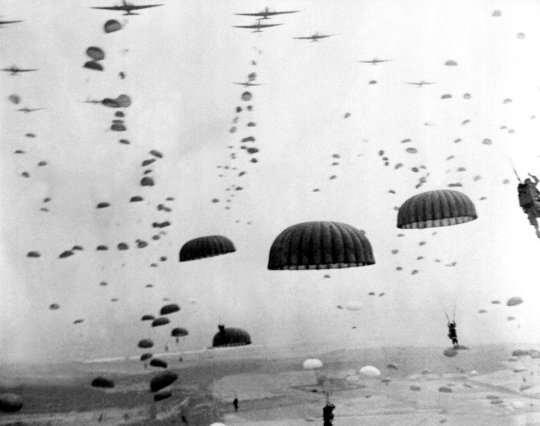
The Battle
Operation Market Garden began on the 17th of September 1944. It was a coordinated action by American, British a Polish Airborne and mainly British forces. The operation began with heavy air raids, in order to weaken any resistance. The paratroopers began landing at 13.00hrs around targets in the Netherlands, chiefly Eindhoven, Arnhem and Nijmegen. The paratroopers had the advantage of surprise and they achieved their objectives. The Germans had been taken completely by surprise.
The initial phase of the operation was a total success. It had been feared that the Germans would blow up the bridges and this would mean that the plan would have to be aborted. The rapid capture of the bridges meant that the ground forces would be able to reach the landing zones, and support the paratroopers.
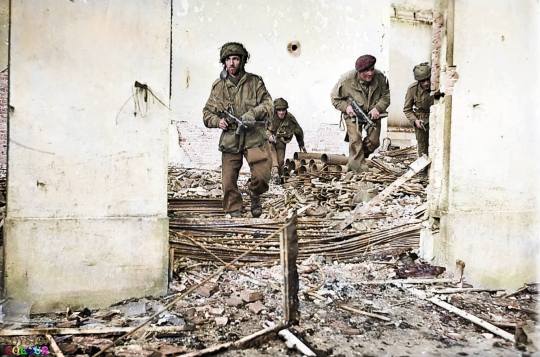
The British ground forces fought their way to Nijmegen and captured the city, after some fierce fighting. One after another the bridges were captured by the British Ground forces. The operation appeared to be going to plan despite heavier than anticipated German resistance.
The most important bridge was Arnhem, this was the most strategically significant bridge and it had to be seized by the ground forces if Market Garden was to succeed in its objectives. The British paratroopers had captured the bridge but they soon came under fierce attack from units of the crack 9th and 10th SS Panzer Divisions. The SS had armor and tanks and they pounded the British paratroopers mercilessly.
The British paratroopers soon found themselves surrounded as the SS had encircled them. The lightly armed British soldiers fought bravely, but they could not hold out for long. An elite British unit, the Irish Guards, was fighting its way forward to help the airborne troops.
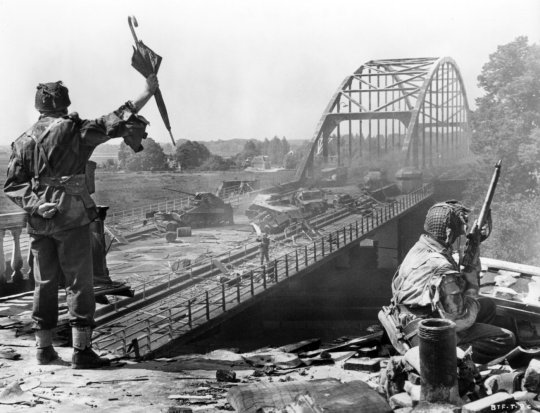
However, because of the terrain, they had to fight their way up to Arnhem on a single road and they were constantly attacked. This road came to be known as the Highway to Hell. The tanks of the Guards could not leave the narrow road as the ground was very marshy and much of it was bogland. As the Irish Guards made their way to Arnhem they were easily picked off by the Germans, who attacked them from the cover of woodland.
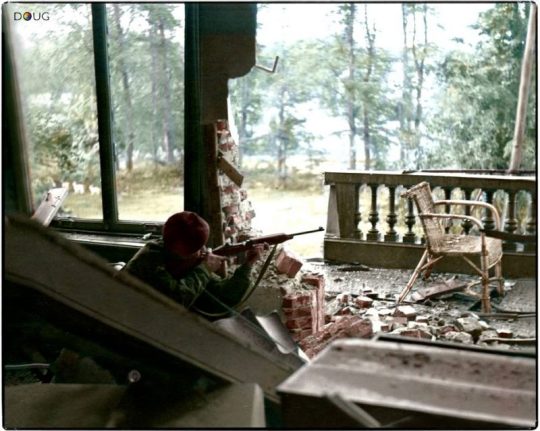
Eventually, such was the ferocity of the German resistance that the British came to a halt. The paratroopers at Arnhem were isolated and cut-off and were forced to surrender. Operation Market Garden had achieved all of its objectives, except the most important one, the capture of the Bridge at Arnhem.
Montgomery’s Optimistic Planning
Even before the start of the operation, many feared that Montgomery’s plan was too optimistic. The commander of the Polish airborne unit declared that the plan was flawed but went with it anyway.
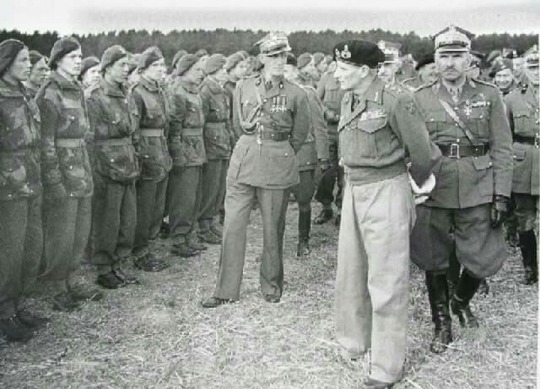
No one really knows who on Montgomery’s senior staff actually famously stated that the prime objective of the offensive the Arnhem Bridge was ‘a bridge too far.’ Whoever said it, he meant that Montgomery’s aims were simply too ambitious and that he was asking too much of his men.

Montgomery also assumed that the paratroop unit could retain their landing zones and the bridges for a given period of time. Paratroops were only lightly armed and without support from ground troops and tanks they could not hold out for long.
Lt-General Sir Frederick ‘Boy’ Browning - considered to be the father of the British Airborne forces and who comanded the 1st Airborne Corps - was wrong to believe that his airborne troops could resist assault from ground troops supported by armour for several days and did nothing to question Monty’s assumptions but reinforce them.
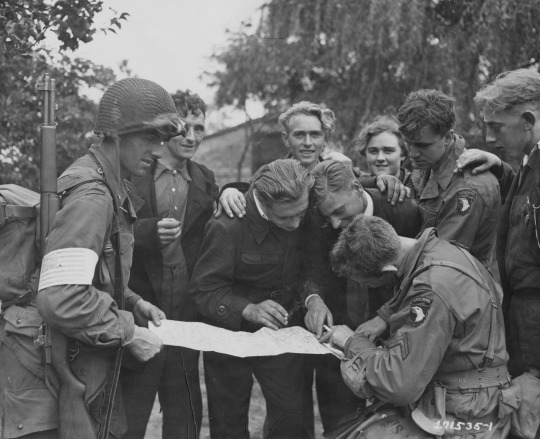
Crucially Montgomery and most of his senior staff failed to understand the terrain that he expected his men to fight in. The roads in the Netherlands were narrow and that the ground around them was unsuitable for armour. This was a fundamental error - Montgomery had simply assumed that his tanks could make their way rapidly to the landing zones, by using only the roads.
During the battle, the roads became death traps for many British units and they soon became clogged with burned-out tanks and vehicles and this critically delayed the ground forces coming to the support of the paratroopers in Arnhem, in particular. Perhaps the biggest failing of the Montgomery plan was that it assumed that the Germans had been decisively beaten and that any counter-attack that they could launch in the area would be limited.
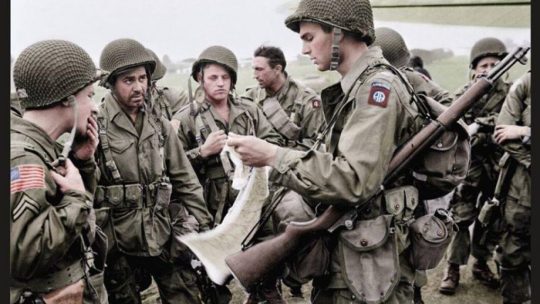
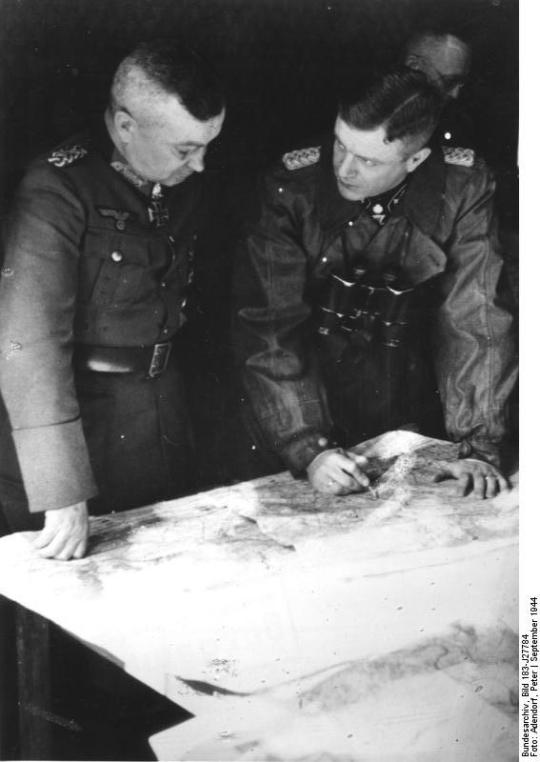
German Counter-attack
General Walter Model with SS-Brigadeführer Heinz Harmel The Germans had been driven back some two hundred miles in a matter of weeks. The British and the Americans dominated the skies and constantly harassed the Germans. Here the bravery and courage of the allied forces - 82nd and the 101st Airborne forces comes to mind as well as the Irish Guards.
The roads had become very unsafe for the Germans and they had also come under attack from the local resistance movements. The Germans had lost some 90,000 killed or wounded during the summer of 1944 and a further 200,000 had been taken prisoner or missing in action.
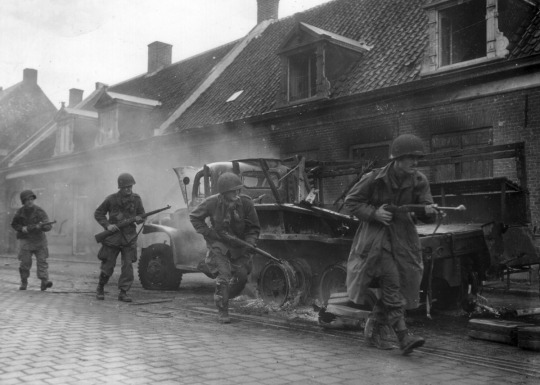
However, after the failure of the British army to encircle the German army in the Scheldt Estuary, allowed the Germans time to regroup in the Netherlands. The German front had begun to stabilise. They were also ably led by the very experienced General Walter Model. He also received some reinforcements in the form of the remaining units of the 9th and 10th SS Panzer Divisions.
Unfortunately, for the Allies, especially the British, the SS units were positioned in Arnhem. This was not merely bad luck, but due to good German intelligence.
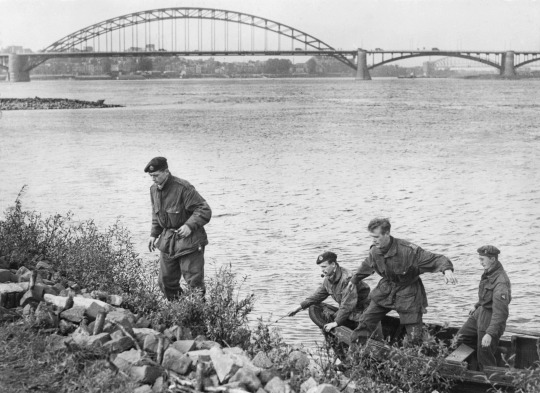
Intelligence Failure
The Germans had anticipated that there would be an offensive launched with the objective of seizing Arnhem, Wesel, and Nijmegen. A senior intelligence officer argued that the British and the American would use airborne troops. However, he did not predict where the assault would be. Nevertheless, German intelligence was able to provide the High Command with the information they needed to prepare for any planned Allied attack. The German General Model heeded his intelligence officers and this was to prove decisive.
The British had excellent intelligence. They had reliable information on the movements of the Germans, from the Dutch Resistance and they could also employ aerial reconnaissance planes to obtain photographic intelligence. One reconnaissance mission was able to provide images that seemed to show German forces in the Arnhem area. This was confirmed by information from the local resistance. This was compelling proof that the Germans had significant forces and that any air assault on the region, would be a great risk.
It was Lt.Gen Frederick Browning who downplayed evidence brought to him by his intelligence officer, Major Brian Urquhart, that the 9th SS Panzer Division Hohenstaufen and the 10th SS Panzer Division Frundsberg were in the Arnhem area, but was not as confident as he led his subordinates to believe.
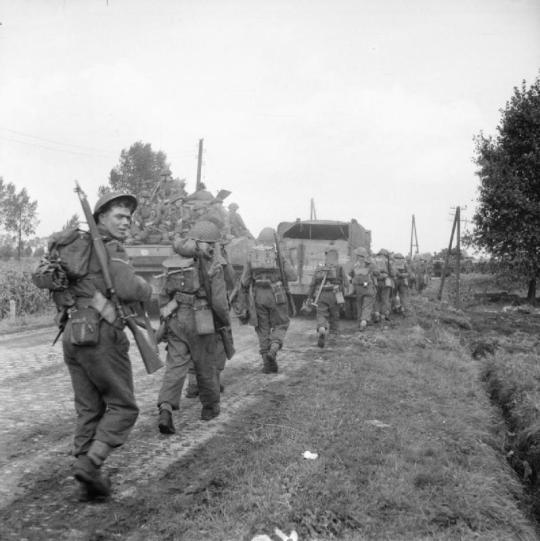
According to Major-General Urquhart, GOC of the British 1st Airborne Division, when informed that his airborne troops would have to hold the bridge for two days, Browning responded that they could hold it for four, but later claimed to Urquhart that he had added: "But I think we might be going a bridge too far."
When Major Brian Urquhart tried to report this up the chain of command to Montgomery, he was not believed. When Major Urquhart tried to persuade Browning and Montgomery that there was a large build-up of German forces near Arnhem, he was relieved of his command and rumours spread that he had a nervous breakdown. Montgomery’s refusal to heed intelligence was to result in a near disaster for the British. It appears that the he and his senior generals refused to countenance anything that contradicted Monty’s own views as he was utterly convinced of the brilliance of his plans for Market Garden and his own infallibility.
Consequences of Market Garden
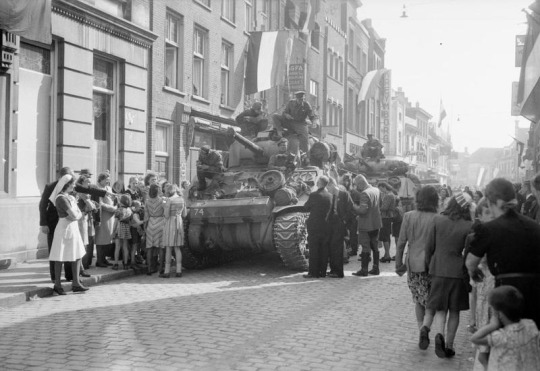
The operation was not a total failure as it did lead to the liberation of large areas of southern Netherlands and gained hold of several strategic bridges. However, it failed to secure the key bridge at Arnhem, that would have allowed the Allies to cross the Rhine.
Quite simply, the failure at Arnhem meant that any planned invasion of Germany had to be delayed.
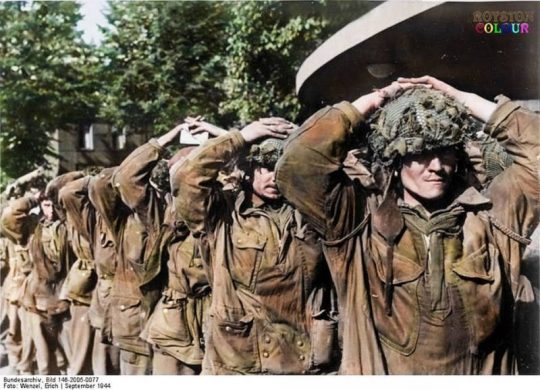
The Germans, although they had lost ground, were able to establish a strong defensive line. In total, the Allies had suffered some 15,000 casualties and had many thousands more taken prisoner. The Germans had also lost equipment and vehicles that they could ill-afford to use.
An unintended consequence of the offensive was a serious famine in the Netherlands. The Dutch railways stopped during the battle, to stop German reinforcements from getting to the front line. In revenge, the Germans forbade the transportation of food, by train and in the following winter there were serious food shortages throughout the Netherland’s and close to 20,000 died of starvation or malnutrition.
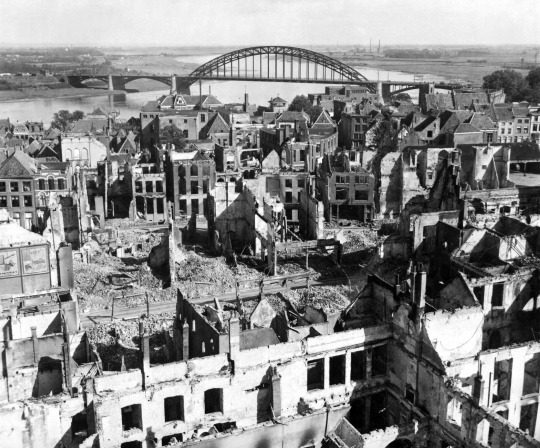
Conclusion: so near and yet so far
Operation Market Garden was a tactical defeat for the Allies, as it failed to achieve all its objectives. It failed to secure the key bridge at Arnhem and this meant that they were halted at the Rhine. This probably delayed the eventual Allied victory in western Europe.
The operation failed because of a failure in planning, intelligence, and a lack of understanding of the nature of the terrain.
While every previous major Allied operation had taken months if not years of meticulous planning, Market Garden was proposed in haste to try to take advantage of what appeared to be the German army retreating in disarray.
And the biggest blunder was landing 1st Airborne up to 13km away from the bridge, as paratroopers work best when they land right on top of their target, taking the defenders by surprise.
There was also a mistaken belief that the Germans had been all put defeated. Market Garden was moreover fundamentally flawed as it mistakenly believed that airborne forces could resist heavily armed troops for an extended period.
While not exclusively to blame, many of these failures were a result of Montgomery and his over-optimistic ideas and his arrogance. The failure of Operation Market Garden was largely the result of the poor leadership and tactics of General Montgomery. Monty admitted his mistake – the only time a senior Allied commander acknowledged a failure – but still claimed the operation was “90% successful”.
No one can say for sure who coined the phrase “a bridge too far” but it would have been more accurate to say Operation Market Garden was “too far from the bridge”.
#operation market garden#market gaden#world war two#war#military history#history#montgomery#britain#america#europe#germany#netherlands#army#airborne
36 notes
·
View notes
Photo

Gerard ter Borch (b.1617 - d.1681), 'Portrait of a Man, Reading a Document', oil on canvas, c.1675, Dutch, currently in the collection of the Museo Nacional Thyssen Bornemisza, Madrid, Spain.
The provenance of this canvas is known from the early 19th century, when it may have been owned by the Amsterdam dealer Cornelis Sebille Ross. Before it entered the Thyssen-Bornemisza collection it was with various galleries including that of Daniel Katz in Dieren between 1934 and 1938, and that of H. E. ten Cate in Oldenzaal in 1929, where it is recorded in 1929 and again after World War II. The painting was acquired for the Collection from the Cramer gallery in The Hague in 1969. In the present canvas, which was published by Hofstede de Groot in 1912, Ter Borch locates the sitter, dressed informally in a manner appropriate to the setting, in a private room of a house. There are various pentimenti in the background that are now visible to the naked eye due to the natural wear of the pictorial materials, which have lost their opacity and become more transparent over time. It can be seen that the bed was initially on the left in the position now occupied by the half-open door. This modification now appears as a shadow on the wall in which we can also see the original position of the decorative finial of the bed. As Gaskell noted, this original arrangement is used in the 1660s in compositions such as the one in the National Gallery, London, of a woman playing an instrument accompanied by two men, and a watercolour in the Rijksprentenkabinet in Amsterdam which is a work by Gesina ter Borch that reproduces a canvas by the artist. Also comparable is the portrait of a man dated 1668 in the Kunsthaus, Zurich. In that work the sitter is located in a simple interior with a half-open doorway on the left in a room only decorated with a textile on the end wall. As in the present work, the ceiling of the Zurich painting has wooden beams. In the 1670s Ter Borch continued to use plain backgrounds in his portraits, generally locating an object close to the sitter. The identity of this sitter is unknown, although in 1934 and 1935 when it was included in two exhibitions it apparently had an inscription (now lost) on the reverse identifying him as the Burgomaster of Dordrecht, G. Beverningh. By establishing the approximate date of the canvas Gudlaugsson offered a clue as to the sitter’s identity, which Gaskell in turn related to the objects included in the setting. The atlas on the table, open at a map of the Low Countries and possibly showing the Scheldt estuary and the city of Antwerp, and the printed document that the sitter is holding have been related to the moment when French troops invaded the United Provinces. In addition, this young man is dressed in the manner of the patrician class in Amsterdam where Ter Borch was documented at this time. The date and the objects in the painting led Gaskell to suggest that this sitter may have played a part in events taking place at the time. - Mar Borobia (x)
#gerard ter borch#unknown sitter#known artist#oil on canvas#1670s#dutch#museo nacional thyssen bornemisza
13 notes
·
View notes
Photo
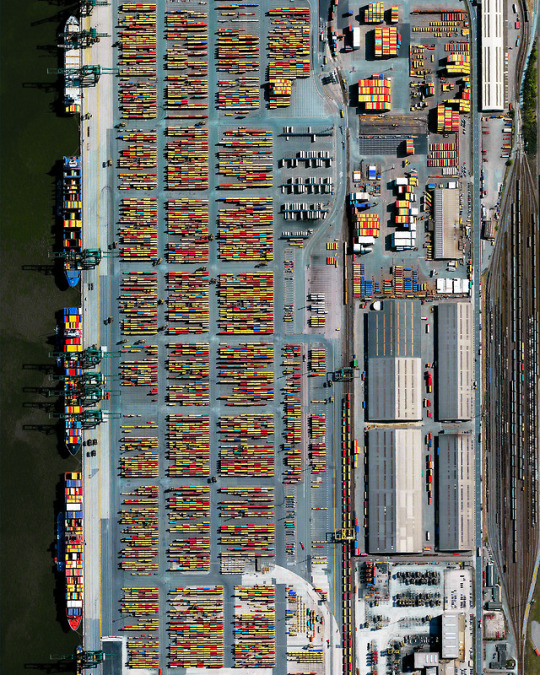
The Port of Antwerp in Flanders, Belgium, is the second-largest seaport in Europe. Its inland location on a tidal estuary of the Scheldt River gives it an advantage over other North Sea ports, allowing its docks to connect to rail, road, river and canal transit systems. In 2018, nearly 14,600 seagoing vessels called at the Port of Antwerp with a combined transshipment of 235.2 million tonnes.
Instagram: https://bit.ly/2ENfbIH
51°16'12.0"N, 4°20'12.0"E
Source imagery: DigitalGlobe
209 notes
·
View notes
Text
Day Sixteen: Journey’s End
[Illustrated Version: https://aroundtheworldinsearchofcokev.blogspot.com/2019/07/day-sixteen-journeys-end.html]
Today we went to the bridge at Arnhem, to the Airborne Museum at Oosterbeek at to the cemetary at Oosterbeek. We then spent the afternoon in Arnhem. I’ve decided to focus on the history today, as it explains much of what I want to say better than a blow-by-blow account.
---
The British 1st Airborne Division dropped on Oosterbeek on the morning of 17 September 1944 - about five miles from their objective of Arnhem. The RAF had feared possible anti-aircraft guns around the Rhine Bridge, and refused to drop any closer.
Shortly after landing, General Roy Urquhart, having made his headquarters in a hotel recently evacuated by Generalfeldmarschall Walter Model, left to reconnoiter the area. By evening, he had not returned, and a dispute had broken out over who was to be in command while he was gone. He'd designated Brigadier Lathbury, but he was not the ranking officer. 1st Airborne command fell into paralysis.
In the mean time, a hodge-podge of the 2nd and 3rd Battalions of the Parachute Regiment had reached the bridge and dug in. They were under the command of Lieutenant-Colonel John Frost, who expected to have to hold the bridge for three days until XXX Corps arrived.
By the next day, he'd recieved no reinforcements from either Oosterbeek or the south. A reconnaissance column of the 9th SS Panzer, commanded by Victor Graebner, charged the bridge that morning but was without support and destroyed - Graebner was killed. But more and more of the SS were mobilising and moving in. The sitaithon became worse and worse.
Eventually, Urquhart returned to Oosterbeek - he had had to hide to evade German patrols. An attempt was made to relieve Frost, but by now the Germans had reached Arnhem in force. It was repulsed. The paratroopers on the bridge were doomed.
The Paras fought on until the end, and Arnhem was heavily damaged. At last, on the early morning of the 21st, Frost surrendered. At about five in the morning, a final radio transmission reported ‘out of ammunition; god save the King.’ The last hope of ending the war in 1944 died with them.
With Arnhem retaken, the SS scented blood. They began to push on the Oosterbeek pocket. John Barskeyfield, now a sergeant, manned an anti-tank gun and knocked out several tanks - it was enough to win the Victoria Cross. It was not enough to save his life. He died on the 20th of September, aged 21.
By now, XXX Corps had finally reached the southern bank of the Rhine, and the Polish had secured Driel. Horrocks advised an attempt to relieve the 1st Airborne to be performed by the Poles - Sosabowski, now commanding them, refused. He had never believed in Market Garden, and now perceived an attempt to sacrifice them in a doomed charge in boats in darkness over the Rhine. Correspondingly, XXX Corps sent some of its infantry - all it achieved was to trap even more men on the wrong side of the river - but Sosabowski’s refusal to send his brigade in made him an easy scapegoat for the ultimate failure of Market Garden, and he lost his command.
At last, the Allies bowed to the inevitable. Operation Berlin saw infantry of XXX Corps rowing over the Rhine to relieve their comrades in the 1st Airborne - or what remained of them. Of a division of around ten thousand men, only two thousand made it back over the river - another two thousand were killed, and the rest taken prisoner. Urquhart’s division had been effectively destroyed for no material gain.
For his part, Montgomery was content to claim that the operation was ninety percent successful. Nobody else saw it in such optimistic terms. Sosabowksi and Ramsey’s concerns were vindicated, and the Canadians began the bitter task of clearing the Scheldt Estuary. Monty’s reputation among the Americans, never great to begin with, never really recovered. American historians have savaged him (and often by extension, the British Army) ever since.
Market Garden was perhaps the nadir of Anglo-American cooperation. To the Americans, the British soldier was slow, unintelligent and at worst, dishonest, relying on Americans to do the bleeding for him. To the British, the American GI was unprofessional, impetuous, overly gung-ho and more than a little pompous. These stereotypes have persisted in the works of many historians to this day.
Yet the fact remains that all of the troops deployed in the battle performed to the best standard they could. Time and time again, they were let down by high command - particularly Browning and Gavin. They had been given a plan that was optimistic, rushed and made no account for the existence of opposition. Given what was asked, that they managed to be ‘ninety percent successful’ is itself astounding.
The Germans enacted a terrible revenge on the Dutch, who had supported the Allies every step of the way. The civilian population of Arnhem was forcibly removed, and nearly all food production, already meagre, was directed away from the Netherlands. Let this be clear; this was not wartime shortage, but a deliberate policy of punishment by Adolf Hitler, who had given up the last of his pretence of civility in an insane attempt to bring Europe down in flames with him. The Hunger Winter killed twenty thousand. This was not famine. It was murder.
Today the Netherlands are rebuilt. The road from Neerpelt to Arnhem can be driven in about two hours, three at most. The area has never forgotten Market Garden, and the road is pockmarked with memorials and museums to those September days. None of these are more stark then the rows of white headstones in graveyards along the way.
Over a thousand men still lie in Oosterbeek. Each grave is the same at a glance, with only the names and inscriptions distinguishing them in death. Many have epitaphs from family - wives, brothers, sisters and parents. Most are in their twenties. Many are eighteen or nineteen. Lieutenants barely out of college commanded men at thirty or even older.
Historians, particularly military historians, like the word ‘only.’ When compared to the titanic battles on the Eastern Front, onlythirty thousand were killed, wounded or captured. Yet every single person who died meant something to somebody. They were somebody’s son, somebody’s daughter, somebody’s girlfriend, boyfriend, wife, husband, father or mother. They worked for somebody. They had friends and enemies. They lived and breathed and loved and lost. For some the end came instantly, for others only days.
Perhaps the most famous of the war poets was Wilfred Owen, who died on the 4th of November 1918, just a week before the war ended. One of his most famous works was Anthem for Doomed Youth- written for the men in the trenches of the First World War, but I feel is still fitting for the men dropped into Arnhem in 1944;
What passing-bells for these who die as cattle?
Only the monstrous anger of the guns.
Only the stuttering rifles' rapid rattle
Can patter out their hasty orisons.
No mockeries now for them; no prayers nor bells;
Nor any voice of mourning save the choirs,—
The shrill, demented choirs of wailing shells;
And bugles calling for them from sad shires.
What candles may be held to speed them all?
Not in the hands of boys, but in their eyes
Shall shine the holy glimmers of goodbyes.
The pallor of girls' brows shall be their pall;
Their flowers the tenderness of patient minds,
And each slow dusk a drawing-down of blinds.
1 note
·
View note