#rock space wifi extender manual
Explore tagged Tumblr posts
Visit Tumblr Blog
Explore Tumblr blogs with no restrictions, modern design and the best experience.
Last Seen Tumblr Blogs


Fun Fact
Tumblr’s reach among the 26-to-35-year-olds in the US is 11%.
Text
Rockspace Extender General Guide

Rockspace Extender General Guide
Network dead zones are always a headache for those using a wireless connection. The best solution for this problem is to use a Wireless Extender. It's harder to pick a good Extender from the whole lineup with the value for money as well. One of the best manufacturers who create the best Wireless Extender is Rockspace. Each consumer can pick Extender from a huge lineup in various price sectors. Re rock space local wifi extender boost your signals and make your workplace no dead zone area.
Rockspace local wifi extender works at single 2.4 GHz and the most famous model from Rockspace Extender is AC1200 which supports dual-band too. These Wireless Extenders are very easy to setup device. Rockspace Extender can set up with the single press via WPS and also setup via online through their official setup page http://re.rockspace.local. or 192.168.0.254. We can go through a detailed step by step process in the following sections
Features On Rockspace Extender
* High Signal boost.
* Full signal coverage
* Easy setup via WPS and Web UI
* Almost compatible with all devices.
* Smart signal indicator helps to find the perfect spot easily.
* Most models support dual-band which is future proof.
* Some models support Access Point Mode.
Things inside the Box
* Rockspace Wireless Extender
* Power cable and adaptor
* Quick Guide / Manual
* Warranty Card
Important Extender Models from Rockspace
Rockspace Extenders comprises of various single-band and dual-band Extenders in 2.4GHz and 5GHz. Most important model from Rockspace is AC-1200 Dual Band Repeater. AC750 is another model within a more budget section. Different models come with different features as well. All models include single press WPS setup but your router should also support WPS connection. Rockspace AC-1200 also works in triple mode; it can work as an Access point as well. The important part of Extenders is to proper positioning of Wireless Extenders. The position must be midpoint from the router as well as a dead zone to get maximum coverage and maximum performance. Some models come with a smart signal indicator as well. This shows the signal level graphically which is easier to find the perfect spot.
Rockspace Extender Setup
As we mentioned before, there are two ways to set up your Rockspace Extender. You can set up with the single press via WPS and you can set up in online through re.rockspace.local. or 192.168.0.254.
We can briefly go through each setup in the following steps.
Rockspace Extender Setup with Web UI
To set up your Extender via Web UI, you need a web browser installed. We prefer Google Chrome and Mozilla Firefox. There is a specific website as well to do this setup, Connect to http://re.rockspace.local or 192.168.0.254. from the connected device.
1. Power your Rock space Extender.
2. Connect your device Wi-Fi device to rockspace_EXT WiFi network.
3. Open any above-mentioned web browser from the connected device.
4. Open the above-mentioned link from the device via a web browser.
6. Select the WiFi Network.
7. Enter your Wi-Fi Password from the connected device.
8. Reposition your Wireless Extender to any better spot.
9. Start Enjoying your Extended Network connection.
Rockspace Extender Setup with WPS
Rockspace Extender also comprises of another easy method. In this method, the only requirement is the ability of your router for WPS. For all those devices which don't support WPS can use the above method. We can go through this method steps now.
1. Power your Extender through an AC outlet.
2. After turning ON, Press WPS button on your router.
Note: If there's no WPS button, go for the above method.
3. Now press WPS button on your Rockspace Wireless Extender
4. Reposition your Rockspace Extender which prescribed in the description.
5. Connect your device as your comfort.
6. Start Enjoying your Network connection.
Rock space Extender setup as Access Point
Rockspace Extender can be used as an Access Point instead of working as an Extender. We can go through step by step process for Access Point setup now. re.rockspace.local login is needed in the official Website.
1. Power your Rockspace repeater via Electrical outlet.
2. Connect your Rock space Extender to your Router using any compatible Ethernet cable.
3. Now follow the steps as mentioned above.
4. Open any web browser and open Rockspace Extender Webpage via websites mentioned in the Web browser.
5. In the website, change the connection mode as Access Point and start using your Rockspace Extender as Access Point.
FAQ
There are lots of doubts regarding Rockspace Extender. We can go through some questions now.
1. Important Question is my rock space wifi extender not working.
A. If you go through the above steps correctly, there will be no problem. If there is no power in your Extender, then you can demand a replace or repair from the manufacturer.
2. After Extending, do we need new SSID and password?
A. No, you can use the same SSID and password of your Wi-Fi router.
3. Which connections Rockspace Extenders work?
A. Almost all models work in WPA, WPA2.
4. What do the colours from the device represent?
A. Blue colour indicates a good connection, Red colour indicates poor connection and no colour indicate No connection at all.
5. Rock space Extender support dual-band or single band?
A. Rock space Extender supports the single band in some models and dual-band in some other models. Most famous AC 1200 supports dual-band.
6. Is there a mobile application for rockspace Extender?
A. No, but there is a website for remote managing the Extender and set up process as well.
As a whole, Rock space Extenders is the best option for anyone looking for a good Wireless Extenders in any price point. It comes with good enough features and also budget-friendly as well. Rock space works hard to make you worth every penny External antennas help to give the best coverage available in the market. Even though there is no stand-alone mobile application for Rockspace, Website is good enough to forget that negative. The Best Wireless Extender or the best value for money Wireless Extender from Rockspace is definitely the Rockspace Wireless dual-band Extender AC-1200.
Read more… https://re-rockspace-local.com/
#Rockspace_ext setup#re.rockspace.local#Rockspace RSD0607 extender setup#rockspace firmware upgrade#how to set up rockspace wifi extender#Rockspace RSD0608 extender setup#rockspace wifi extender setup#rock space wifi extender manual#re rockspace local setup#rock space extender setup
0 notes
Text
How To Connect Rockspace Wifi Extender Setup?
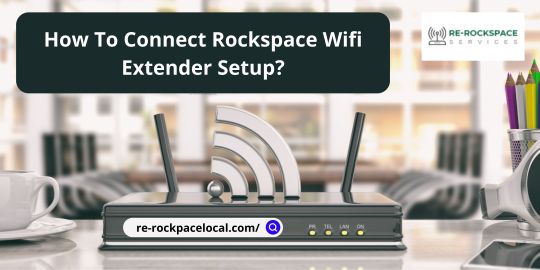
Rockspace wifi extenders are the most convenient and quick solution to increase the range of your existing Wifi.
To connect your rockspace wifi range exetnder to your phone or laptop, follow these steps:
Before connecting, switch off your mobile network.
Then, connect the WIFI extender to an electrical outlet.
Wait until the indication remains solid on.
Open WIFI on your Android, iPhone, or PC now.
To connect, select ROCKSPACE WIFI EXTENDER.
After a successful connection, open the web page and enter re.rockspace.local to configure the WIFI extender's password.
Locate the existing WIFI network that you want to expand, and then type on the existing WIFI network.
Finally, it has been linked.
You can now relocate it to a location where the networks are poor (dead zone area) or where you want to expand your network.
Default Login for Rockspace Wifi Range Extender
Before proceeding with the extender device configuration, you must have the login credentials for your ROCKSPACE booster device in order to conveniently access settings and control it swiftly. In addition, the default Login IP address, username, and password are printed on the ROCKSPACE Sticker, and a simple user manual is supplied with the box.
The default login URL is re.rockspace.local, and the IP address is 192.168.10.1**.**
Default username: NA
ROCKSPACE password- For the first time you log in, you must create a new password.
When you have everything ready to set up a range extender device, it is time to move on to the next stages.
Open your WEB BROWSER and navigate to re.rockspace.local or 192.16810.1, then wait for the login screen to load. During the initial configuration of the range extender, you must now generate a new login password. So enter a strong login password and then click the next button.
Final Words
These were the steps to assist you set up and log in to the Rockspace wifi Extender dashboard. If you are having trouble logging in, you may contact our customer service, we will assist you with your problem.
Visit: https://re-rockpacelocal.com/rock-space-wifi-extender-setup/
#rock space wifi extender#rockspace wifi extender setup#rock space wifi extender setup#re.rockspace.local#re rockspace.local#rockspace login#http://re.rockspace.local#rockspace wifi extender#http //re.rockspace.local
1 note
·
View note
Text
re.rockspace.local | Router setup | rockspace Extender setup instructions
The rockspace wifi extender ac1200 Article for Re-rockspace-local.com
All around Wi-Fi support by Rockspace Extender at professional colleges.
A professional degree college would always come around the top of the list of institutions that would require an around the clock and premises internet support. This facility allows students studying in the institution better access to information, better learning and incorporates futurism. This facility though comes at a huge price. Due to a large number of classrooms present in the college and about 40 students in each class, it wouldn’t sound affordable to go around and set up a Wi-Fi router in each class. That would increase expenditure a whole lot more. This is where Wi-Fi extenders come in. A mere single wireless router put up in the hallway along with extenders places in individual close by classes would suffice around four classes and thereby cut down a lot of costs. The number of extenders to be placed in each classroom would depend on the number of students present in each class as well as the number of simultaneous connections supported by the extender. The best and most minimalistic product fit for this scenario would be the rockspace wifi extender.
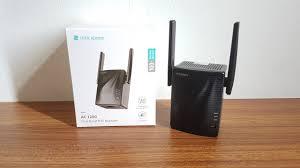
This extender has the most stable signal boosts with a totaling speed of 1145 Mbps divided between the two 2.4 GHz and 5 GHz channels. It has an automatic switch that helps it switch from and to channels whenever you are near to or far away from the point to guarantee the best coverage and optimum speeds wherever in the range you may be. It has full 360-degree coverage and covers an area of about a bit more than 1200 square feet which would be a lot more than a single classroom. All you would be required to do to set it up would be to either use an ethernet cable to connect it to a device and then go ahead and set it up using the website UI or you could also use the WPS button present on both the router and the extender at the same time to set them up automatically. You could always refer to the rockspace wifi extender manual for any questions or troubleshooting procedures. If you ever faced a problem you will be able to reset the extender back to factory settings and reprogram it to set it up with the same or other router spots on your college premises. The device is also highly compatible with a compatibility range spreading across about 98 percent of wireless router products available in the market. This makes them worry about the compatibility a thing of the past. The LED present on the device does a great job in finding the best place to set up your device as the blue light shows good connection while the red and black ones show the presence of a weak connection or am the absence of connection respectively. It can also support up to 20 simultaneous connections which means it would only require about 2 of these in a class of 40.
Rockspace wifi extender review
There is a reason why the rock space wifi extender is on the fourth position on the Amazon best selling extenders list. It is affordable, compact and quite plainly and best buy for uses such as the professional college scenario mentioned earlier. It has quite an outgoing noticeable design and provides uninterrupted connections by switching back and forth from channels to give you the best speeds. It also only weighs about 6.1 ounces which makes it really light. It is also a plug and play device that makes it void of the problems related to wired extenders which require adapters and wires among other things. An easy setup and management system makes It more appealing. Sitting at its spot, connected to the main router it will provide you with the best connection that wouldn’t have experienced with the main router itself. A good buy for a professional college or any other educational institution looking to fortify their infrastructure with the addition of internet support without increasing the expenditure to the point of no return. It is also quite the device for casual uses at homes and offices and small business spaces. An overall satisfying Wireless network extender that deserves a shot.
0 notes
Text
Step to Know How to Connect Rockspace Wifi Extender
The wifi repeater is necessary for all persons who wish to connect freely to the Internet at home. Today there is a broad range of models with dissimilar shapes and functions. The judgment of the right device can be tricky, especially if you don’t know much about it yet. Here is a comparison of the best models and some tips for choosing the right one.
What is a wifi repeater?
The wifi repeater, also called wifi amplifier, is an accessory that increases the signal of a wireless connection. Indeed, this one repeats around him the wifi exposure of the Internet box or the router in order to extend and get better the network.It usually takes the form of a small box and plugs it into a wall outlet. All long-distance wifi repeaters work in much the same way. Throughput, range, ease of use, and functionality can differ from one model to another. Below you can read about How to install rockspace wifi extender.
How to Install Rockspace Wifi Extender
Once placed in an intermediate position between the router and the devices, it is time to configure it. A secure connection must be established between the router and the WiFi extender, so that the data going to the Internet interchanges.
The easiest way to do this is through WPS (WiFi Protect Setup). Routers have a WPS button (usually on the back) that allows other devices to connect to them without having to enter the password. We press the WPS button on the router, and then the WPS button on the WiFi extender (sometimes called the Range Extender, or another name), and the devices will communicate with each other. The extender will begin to amplify the signal, and you can already detect it with your mobile, tablet, etc.
The implementation is child’s play when you have a repeater with WPS option and a WPS compatible router. Besides, the vast majority of repeaters have a WPS button, while this is not the case for all boxes ( freeboxes in particular are not always provided with this).
Here is step by step How to install rockspace wifi extender.
With the WPS button it only takes a minute to do everything:
· Place the repeater on an outlet and turn it on;
· Press the WPS button on the repeater;
· Press the WPS button on the box;
· Surf online!
So follow the rockspace wifi extender setup instructions and make the installation easy for you.
If your modem or repeater does not have WPS, then it will be necessary to go through a web interface or an application. In this case, you must go to your ISP’s support site (Orange, Free, etc.) and follow their personalized advice if want to know How to install rockspace wifi extender.
Read more...
#Rockspace_ext setup#re.rockspace.local#Rockspace RSD0607 extender setup#how to set up rockspace wifi extender#rockspace wifi extender setup#rockspace firmware upgrade#Rockspace RSD0608 extender setup#how to connect rock space wifi extender#rock space extender setup#rockspace wifi range extender setup#rock space wifi extender manual
0 notes
Text
Re-Rockspace-local wifi extender setup
For larger areas where wireless transmission is required, re-rockspace-local wifi extender acts as a repeater to boost the signal and prevents it from dead zone area. Basically, re-rock-space-local wifi extender works at 2.4G band thereby providing full signal coverage with transmission speed of 300 Mbps. Also, AC1200 wifi range extender is available that works at dual band and boost your home network by increasing the range and speed of wifi signal. To setup the connection with router, one has to just press the WPS button and within few seconds the connection to extend the signal will be established. Similarly, a reset button is provided on the device by which the wifi extender can be restored to default settings. The reset button has to be pressed until the indicator turns red.

#rockspace repeater setup#rock space wifi extender manual#rock space ac1200 wifi range extender#rock space ac1200#rockspace ac1200 setup#how to connect rock space wifi extender#rockspace wifi extender setup instructions#rockspace wifi range extender setup
0 notes