#remodeling kitchen
Explore tagged Tumblr posts
Visit Tumblr Blog
Explore Tumblr blogs with no restrictions, modern design and the best experience.
Last Seen Tumblr Blogs


Fun Fact
Tumblr Inc. has $15.1M in annual revenue.
Text
Stephanie: "Did you get it?"
Tim, scoffing: "Of course I did. *unwraps the vase from bubble wrap* It's the exact same, one of the three original vases made."
Stephanie: "Wait. The old one had a nick, right there on the shoulder. *uses a Batarang to recreate it* There."
Tim, setting it down carefully and smiling: "Perfect. I think we just got away with it."
Jason, reading on the couch: "He'll know."
Stephanie: "How? You'd have to--"
Alfred: "Is there anything you guys want for dinner?"
Tim and Stephanie, immediately: "No."
Alfred, frowning slightly: "Very well." He walked over, both Tim and Stephanie trying to play it cool as the butler adjusted the vase on the table.
Jason looked up from his book.
Alfred: "I'll remind you again, Master Timothy that skateboards are not permitted inside the house."
Jason cackled at the expression that Tim and Stephanie made.
--------------------------------------------------------------------
Bruce: "How did you know? Technically speaking, it's the same vase."
Alfred: "I have a contact at the auction house where you bought the second one years ago."
Bruce, clearing his throat: "Yeah, Jason accidentally kicked a ball into it."
Alfred, raising an eyebrow: "He threw a Batarang at it because you wanted to make him more comfortable."
Bruce:
Alfred: "I do wish you'd all stop adding that nick back."
#A long one#might be funnier to consider these guys breaking something bigger#like burning down part of the kitchen and hastily getting it remodelled before Alfred notices#I'm bored#not a texpost not a mini fic#but a secret third option called testing my followers' patience#batposting#batfamily#tim drake#stephanie brown#jason todd#alfred pennyworth#bruce wayne#batman
4K notes
·
View notes
Text
Shop thousands of amazing quality tiles, wall cladding, kitchen tapware and more Indoor and Outdoor products at great value prices with huge stock levels online. Check out our kitchen and bathroom products, including basins, mirrors, and outlets available in various sizes and designs. Visit Now!
0 notes
Text

I ALSO LOVE THE SMELL OF 🌹'S......
#guys in socks#smelly socks#male socks#dirty socks#gay socks#sock sniffing#sweaty socks#white socks#youtube#socks and flip flops#retro#vintage#kitchen remodeling#work socks#guys in briefs#guy barefoot
80 notes
·
View notes
Text

I see what they were going for, but it lost something in the translation. (They're wondering why it's not selling.)
62 notes
·
View notes
Text
do u kno what ned’s first mistake was. it was leaving catelyn in winterfell. he should have brought HER south with him.
#they remind me of my grandparents. my grandpa was always saying he’d do shit but he was slow to start.#one day my grandma got fed up and took a sledgehammer to one of the walls in the kitchen and said ‘we’re remodeling’#and u kno what he did a damn good job. but if she never put a hole in the wall he never would have done it.#ned needs catelyn to take a sledgehammer to it first.#getting on my soap box
80 notes
·
View notes
Text

husband & wife were flipped this house on location (living in a caravan.) whatever works right?
via countrystylemag@IG
130 notes
·
View notes
Text
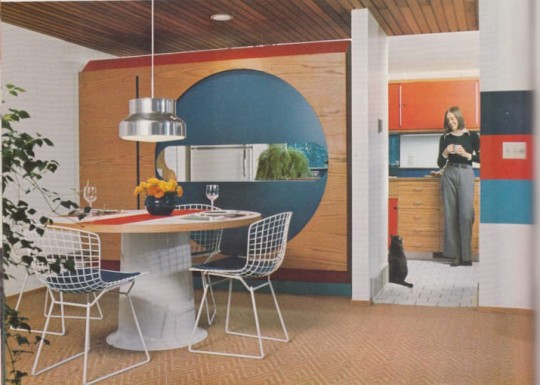
Dining area pictured in Planning & Remodeling Kitchens edited by Maureen Williams Zimmerman (Lane Publishing Co., 1976).
#modernism#interior#interior design#Planning & Remodeling Kitchens#Maureen Williams Zimmerman#USA#1976
161 notes
·
View notes
Text
decorating my house in sdv is the most stressful thing I can think of tbh
#stardew valley#sdv#im midway thru winter year 6 on this save and ive only just finished the dining room and kitchen this year#its such a big house every time i walk into a new room im like and now what???#places down a bookshelf places down a bookshelf places down a bookshelf places down a booksh#my spouse at some point probably: when did we move into a library??#spending more time scrolling pinterest for inspo than i do actually remodeling#running back to Robin like haha just kidding i actually have too much house now so if you could just take that expansion back thatd be grea#i used to have a save on the mobile version that was year 12 and i hadnt even organized the farm let alone start decorating the house#but that file got deleted :(#oh well. my year 6 is a 100% save so its okay#okay im done
21 notes
·
View notes
Text
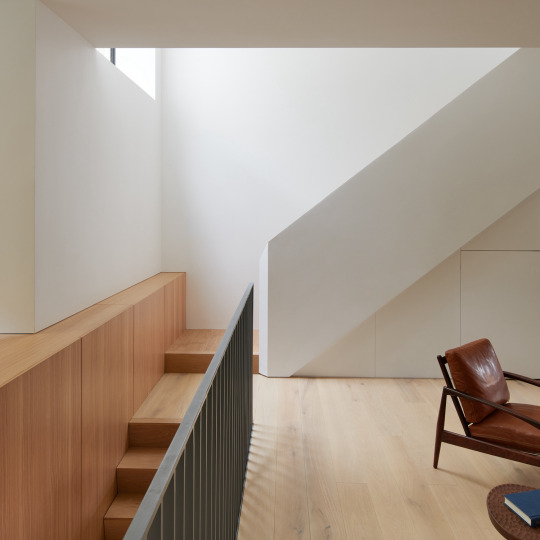
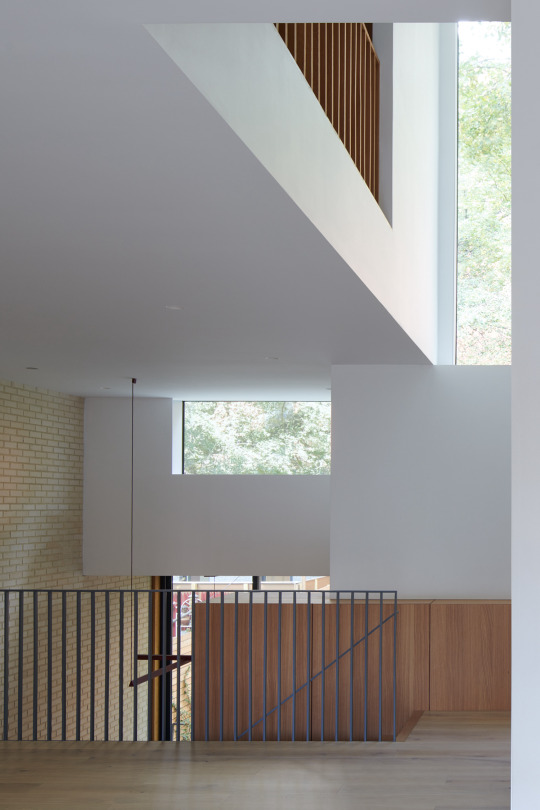


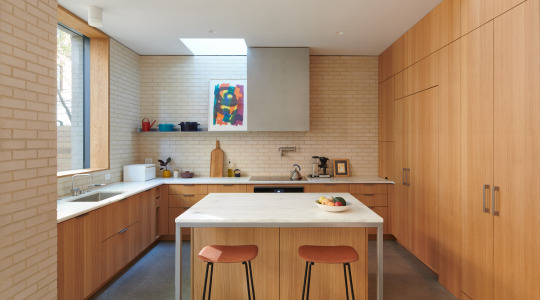
z house ~ light and air | photos © kevin kunstadt
#architecture#remodeling#interiors#kitchens#skylights#rangehood#lightwells#dining#railings#paneling#pantry#brick
165 notes
·
View notes
Text
archway stencils
i keep forgetting to post about this. I did my archway stencils this past week!

[image description: looking through an orange archway, stenciled with turquoise stars in an alternating pattern, to see the deep teal wall stenciled with larger gold stars I did earlier]
progress shots and discussion under cut!

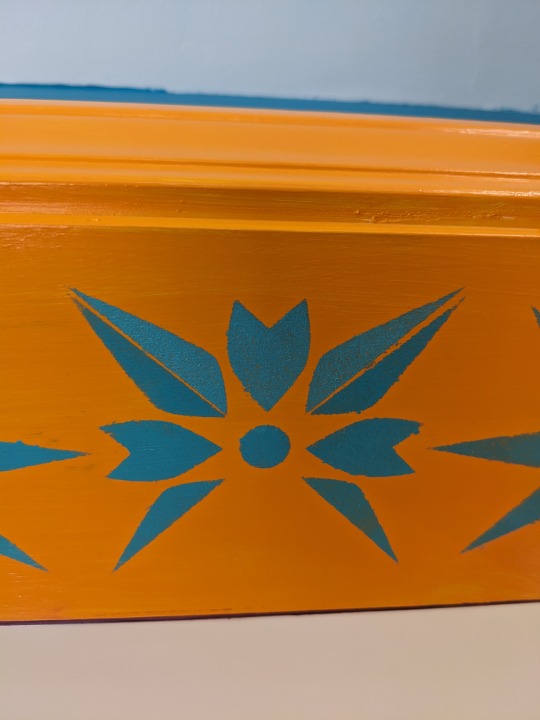
[image: the stencil, with a central eight-pointed star, and then the partial alternating star in the corners; the stencil is mounted diagonally so that the main star is centered on the archway trim, and there's a corner above and below]
I futzed around a little and this was the direction that worked. I'd thought about just doing that central element and repeating it freehand, but this was easier to line up..... but then to finish it, i would have to do TWO additional passes with the stencil, one on each side.

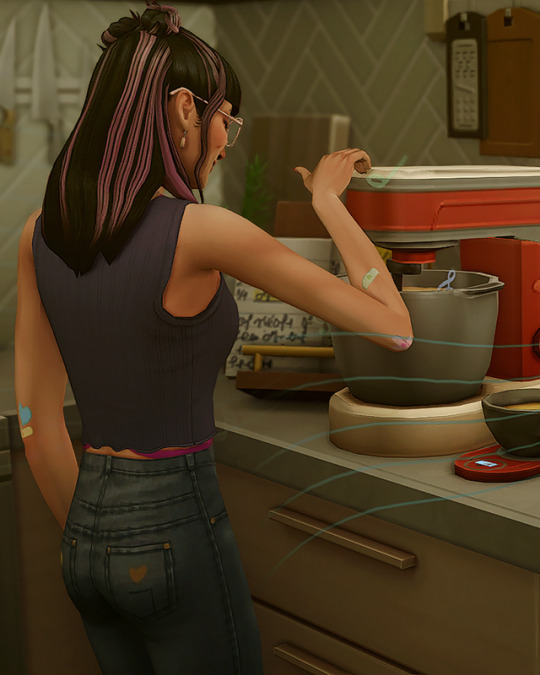
[image description: the archway in the background with the central element alternating with just the middle of the second element, as left behind by one pass of the stencil; I'm going to have to go back and fill in the sides of the second element. But in the foreground, I am holding my cat, because she insisted.]
I had Help. she wanted me to do this instead of paint. The whole time. She was incredibly persistent.

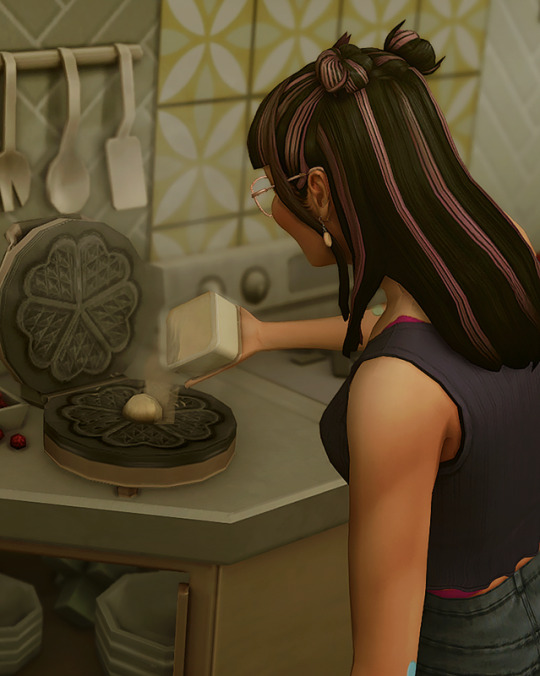
[image: the archway with one of my secondary passes complete, and the stencil stuck on diagonally showing how I have to separately fill in the left and right of each of the edge elements.]
I had experimented with just plopping the central element over this corner thing, and using that to fill in all the rest at once, but you see how the central element has long diamond-shaped "petals", but the other one has the shorter inward-pointing "petals" in the middle, and then longer petals on the sides? Yeah the longer petals are not shaped like the central element's, even though they look similar-- they are wider throughout. So to blend them with the half-petal deposited by the first pass of the stencil, it looks wonky as hell. And it does look better having a fully different element for every other star, instead of a blended sort-of-weird half-different one. So the long hard way it is; I went all the way down doing the left half then went to the other doorway and did the left half and then came back and did the right half, in totally separate passes, because you can see you have to tape the stencil down over the existing element, and if it were at all damp you're ripping paint off when you do that.
This stencil company does make specific border stencils for some of their designs, and I sort of thought this one was intended for that kind of use, but clearly it's not. I mean it worked fine so I'm not actually annoyed, but I did have to think about it a lot.
Some process notes: I did not use specialty stencil creme for this, I used my sample pot of a slightly lighter shade of the paint I used for the walls. it was semi-gloss because that's what they had for sample pots, and that worked out fine. I put it into the same plastic half-a-cannoli-box tray as before, and used the smaller stencil brush, and I did not really have to add drops of water, as the paint was less thick, but I had almost zero problem with bleeding-- all my problems were that I had to overlap the stencil while still damp and would sometimes get paint on the back of the stencil that then smudged onto bits I didn't want paint on. Paint also built up on the stencil really horribly because I was using it more intensively-- doing the whole wall it was kind of spread out over the huge stencil, but this was a single element. Being able to see through the stencil helped in positioning, so what I eventually wound up doing was that I would position the stencil, tape it down, wipe it clean with a rag, adjust the position, use it, move it to the next location, wipe it clean with a rag, repeat.
It was so hard to get the second element lined up-- you see how the "petal" is done in two pieces? well it never quite lined up and there was always a gap-- that eventually I pulled a plastic milk jug out of the recycling, traced the stencil on it, and cut out a stencil that was *just* a full copy of that half-petal mirrored so I could see if the stencil wasn't going to line up cleanly, I could just focus on lining up one of the petals, and leave the other blank and come back and add it with the standalone whole-petal homemade stencil. Good thing I'm a dab hand with an exacto.
[image description: a star stencil 3/4 complete, but the diagonal petals have gaps in the middle of them] Here's a problem example, and I was getting this on about half of them.

[image description: a piece of flat white plastic, an exacto knife, a cutting board, and a stencil element cut out of the white plastic.]
So instead I would rotate the stencil so one of the petals was good, and leave the other one off entirely to come back and do later.

[image description: looking from the living room through the stenciled archway to the kitchen, and this face of the archway is painted purple, and the wall is repainted to a consistent sunny yellow.]
I know that the most hinged thing to do would have been to just do all the trim orange, and then the wall yellow, and let it be, but I could not resist being fussy and doing the living-room-facing trim back in the living-room-trim purple color. I fortunately was able to find the original pots of paint from when we painted the living room, and it was still good!!!! (mixed in august of '07! amazing) so I repainted the living room wall where it was primer-white after the reconstruction. Looks pretty seamless now! But I have one more light switch faceplate to paint, it looks like. Hmmmmm what color.
The last thing I have left to do is the corner above the front door, where this newly-repainted yellow wall intersects with the wall above the front door that I decided should be kitchen-teal.
I could just do the corner as a flat normal transition. But I want to try to do something fancy, some kind of like pixel-dissolve or like, the stencil bits sticking into the other color, or something.
For now I've painted a cereal box and stuck it up there and I am going to put stenciled attempts on cardboard up there to see what they look like before I commit.

[image description: the corner above the front door of the house. the wall below is the kitchen wall and is teal. the wall above the archway is yellow because it's the living room. the wall above the door is not fully painted but is mostly kitchen teal. the corner is a cardboard cereal box painted yellow on one side and teal on the other, cut to fit.] it is an awkward junction! The most hinged thing would be to keep it simple-- would have been to just do all the trim orange and then the upper wall yellow and just make sure the corner was sharp and clean.
But I'm not that hinged, so I might as well do something that calls attention to it, LOL.
57 notes
·
View notes
Text


Get more ideas: www.pinchofdecoration.com
#home decor#home design#home & lifestyle#interior design#interiors#home decoartion#kitchen decor#kitchen design#kitchen cabinets#kitchen appliances#kitchen makeover#kitchen renovation#kitchen inspiration#kitchen interior design#kitchen organization#kitchen style#kitchen ideas#decorations#decoration#decor#kitchen aesthetic#kitchen#kitchen fun#kitchen goals#kitchen hacks#kitchen remodel#kitchen redesign#kitchen trends#kitchen tips#kitchen upgrades
32 notes
·
View notes
Text

Stay cozy.
@soft-homestyle
#soft homestyle#interior decorating#interior#interior design#interiors#home#home & lifestyle#home decor#home design#decorating#decor#neutrals#neutral#bathroom#kitchen#cozy#cozy aesthetic#amber lewis#amber lewis design#amber interior design#cottage#cottagecore#cottage aesthetic#bathroom remodeling#bathroom accessories#bathroom renovation#bathroom design#interior decor
11 notes
·
View notes
Text
Cooking up some new content for this week...
#the zhaoverse#julia zhao#THE most boring outtakes imaginable#and this kitchen simply DOES NOT SPARK JOY#i wish i'd remodeled it when helena was off at college :/#but i promise things are coming!!!
71 notes
·
View notes
Text

PUT YOUR FUCKIN HARD COCK ON THIS SMELLY FOOT!!!!
#guys in socks#smelly socks#male socks#dirty socks#gay socks#sock sniffing#sweaty socks#white socks#youtube#socks and flip flops#cash app#cash master#nasty sock#hot and sexy#sexy male white sock#retro aesthetic#kitchen remodeling#vintage#mens fashion
28 notes
·
View notes
Text


Wild choice of counters and backsplash in a remodeled home in West Palm Beach, FL. What were they thinking?
https://www.zillow.com/homedetails/355-Maddock-St-West-Palm-Beach-FL-33405/46942693_zpid/
119 notes
·
View notes


