#remember Roy in the tie dye shirt?
Explore tagged Tumblr posts
Visit Tumblr Blog
Explore Tumblr blogs with no restrictions, modern design and the best experience.
Last Seen Tumblr Blogs


Fun Fact
Tumblr was the first site to host the blog for President Barack Obama in 2011.
Text
Currently seeking a new tv series to lose my mind over on a weekly basis. I've downloaded severance but the stars won't align for me to watch it and I can't tell anybody on the firefighter show apart (is there more than one? I'm very happy for you guys with whatever you're getting, go firetrucks or whatever. Going by the sheer number of fics and gifsets I'm seeing you're all having a lovely time and I wish you all the best with whoever and himever's epic gay longing)
But I desperately need something to geek out over to fill the Ted Lasso/Hannibal vibes of weekly hour of entertainment that rewrites my central nervous system (do you remember the Hannibal days tumblr? Do you remember the gifsets and the theories and the costume analysis and the shit posting? My god the Abigail's dad's posts used to fill my timeline for weeks). I need James Lance running down corridors while I personally give thanks to whoever created Rebecca's wardrobe
#I'm already doing a Hannibal rewatch#I'll take anything#Nordic noir?#cdramas?#i desperately miss us all raving about ted lasso sneapk peaks together#remember Roy in the tie dye shirt?#i NEED a new hyperfixation to pull my brain out if the sludge#and deadloch season 2 is still too far away#severance#911 show#i think it's called?#the only thing ive got at the moment is apothecary diaries and it's not enough
24 notes
·
View notes
Photo


Guys, Gals, and Queer Pals.
I proudly present to you, Project Noah. A THREE YEAR PROJECT examining how to dye a ball of yarn in multiple different colors. I wanna talk about two seperate ways to dye a yarn ball with several different colors and the pros and cons of each. I also want to talk to you about growth.
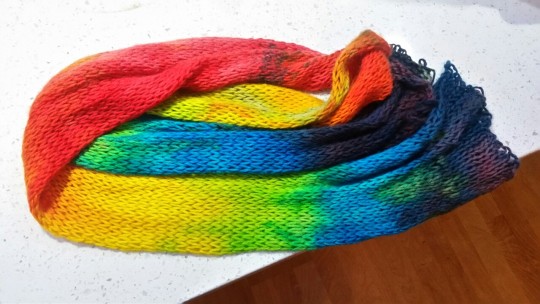
Three years ago, in 2016, I had this giant ambition to dye the rainbow for my “Matthew Shepard” scarf. I was so inspired by the message of that pattern, and how closely I feel tied to the LGBT+ community that I simply had to pull out all the stops. I had never dyed before, I had never approached a fisherman construction, nor have I ever tried editing a pattern to fit my tastes. When I finished it, I felt like I could DO ANYTHING. It had all worked out great- all of it except my approach to dyeing yarn.
It has taken me several years, not only to get to a place where dyeing yarn was financially feasible, but also to learn techniques and learn from my mistakes. I was so DETERMINED to get a rainbow that flowed from one color into the next almost seamlessly. I want to share with you what I’ve learned- and how it feels to see growth in such a real way,
Three years ago, I thought, that if you put the colors of the rainbow ROY G. BIV in some mason yarns, and divide your yarn equally amount those colors you’d get BAM a rainbow. I used food coloring at the time and nearly obliterated my family’s stock of red food coloring for red velvet cake. I had that vision in my head and I KNEW I could do it– my first result was, severely disappointing. I thought that the colors would magically meld, because I left yarn to dangle in between the yarns- thinking capillary action would bring each color into the next and create that gradient I was looking for. I was wrong. Hopefully. Excited! But wrong.
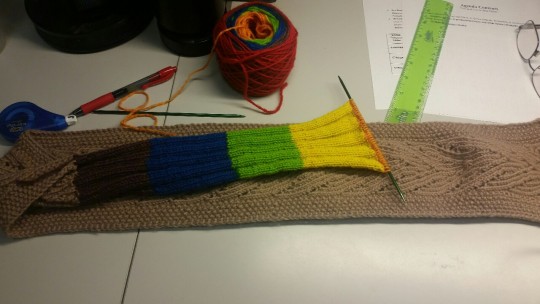
Let me tell you my great surprise when I learned that I had accidentally created self striping yarn WHILE I was trying to knit my Matthew Shepard scarf. It was terrifying, hoping maybe it would work as I got farther and farther away from the point I could safely frog it without losing some really hard lace motifs. I was feeling like a failure when I found that last little bit of yarn. It was hanging across ALL of the pots and picked up that gradient EXACTLY I had envisioned it. THERE WAS HOPE.
So, I tried again. This time I did some research! I found out about sock blanks! SO. Usually it was knit up using a knitting machine (the same kind of toy one that always dropped stitches and started my knitting journey, needless to say at the time it was out of the question) I didn’t have a good one at the time. SO I decided to take out some size 17 circular needles and knit the things MYSELF. YA’LL IT TOOK ME THREE WEEKS. So after finishing, I promptly got some squirt bottles I used for tie dyeing shirts and proceeded to DYE MY SEAMLESS COLORED DREAM. I thought- if it’s in a skein, and I shove a bunch of different colors in each other. MAGIC would happen. AND ID FINALLY BE ABLE TO GET MY RAINBOW. It didn’t quite work out. IT WORKED. Most definitely, but it wasn’t seamless- beautiful, and well enough for my scarf but when I look of that picture of it drying in my shower, I cringe just a little bit. I remember being so EXCITED for that yarn, and getting shot down when I wanted to show it off. So discouraged that it took me another three years to even think of attempting it again.
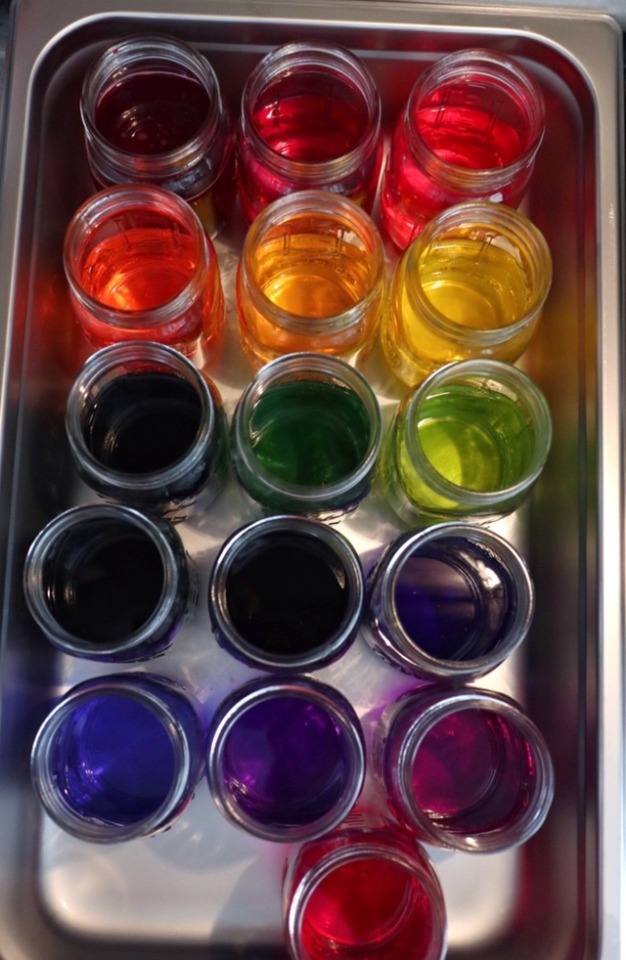
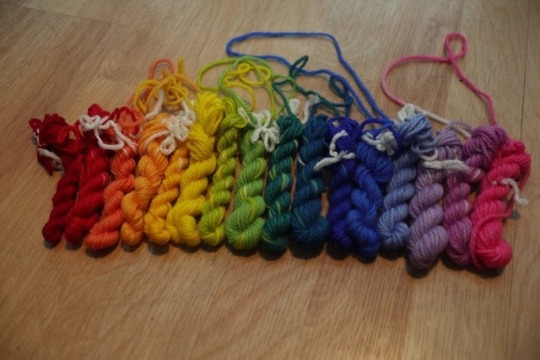
Fast forward to today. I have math on my side now. I had finally been able to work out dye concentrations, and the depth of shade I was looking for- and after ensuing mistakes, trials, and experiments. I ended up with 16 mason jars and a whole ton of colors. Once everything was out of the dye pot. I was SO PROUD of the shades that came out. I got teals, I got coral, I got chartreuse! AND IT STILL FEEL LIKE I could go further!
Let me share with you some of my notes on this. I knew, I would start with my primary colors. Red, Yellow, Blue. I needed a stand in for “Ultra Violet” And I know that the pride flat ops for pink, so pink it was. From there, I had to figure out how I could fully saturate a skein of yarn, but ALSO have the dye solutions light enough so that one color doesn’t fully over take the other.
Yellow was a .0375% stock solution as they are quite strong Pink was the same concentration. Blue was a .05% stock solution. Red was the same as blue.
From there I figured out how deep I wanted to get the lighter colors first. Yellow, and Pink. Once I got myself a fade set I was happy with, I went ahead and started adding reds or blues, depending on their position with an inverse relationship. As one color gets strong, the other color gets weaker.
What I love most about this technique is that you can be extremely accurate and replicate your color way quite easily. If you find a color you absolutely love, you have notes on it to do it again for either a full skein or more mini skeins. It can be expanded- as long as the ratios are the same.
My frustration with this technique is this. IT DOESN’T FLOW. You’ll gave to get REALLY granular- and maybe do a dozen stages of a gradient to replicate that seamless gradient. I would be really happy to do this for maybe two colors and their transitions- but for a whole rainbow. This will take me more time.
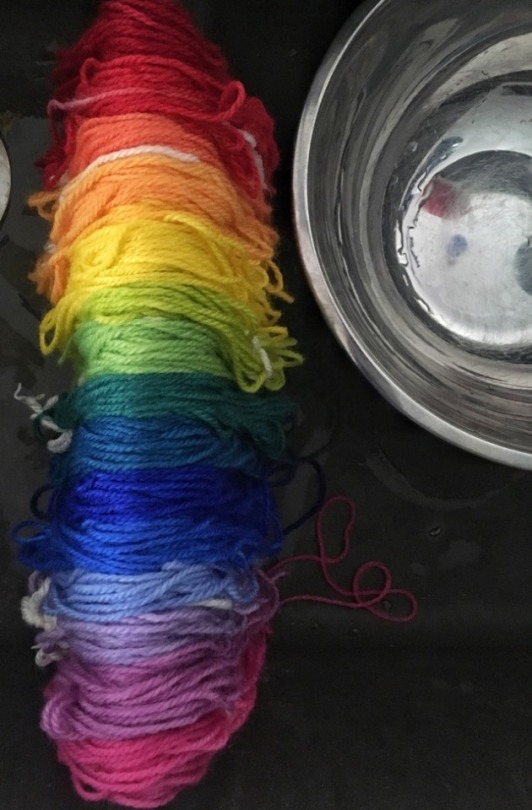
NEXT. WAS THE SOCK BLANK.
I used my same stock solutions- one because I made a ton, but two I wanted to try and keep the same relationships between colors if I could. If done right, dyeing a sock blank is endlessly satisfying. For me, it’s very much a messy organic process where your hands get blue, and your whole surroundings become a canvas for colorful chaos. It was a blast. Having my hands on the skeins, squeeze one color into another and pouring the colors on a blank skein made me feel like an alchemist. I didn’t put a lot of thoughts into how big my swatches of color were going to be- and I probably should have been more precise. Nevertheless, I find myself preferring to dye this way if I were just dyeing for me. You may not get exactly what you want- but the joy is i the process. And you can more easily get that kind of “FLOW” into the next color because you’re literally pouring one over another.
There are a lot of difficulties with this method. One, you have to watch your work surface. Getting bits of stray colors on the skein is really easy. sometimes it’s even inevitable. Your sock blank may not be completely perfect. It usually isn’t easily replicated so knitting double can be really helpful– sock blanks are notorious for their little pockets of resist created by the interlocking knit stitches so if your dye strikes too fast, you’ll get variegated yarn instead of solid or tonal. Because of that, I like to dye without heat and then steam set. That brings more complications though. Watch how saturated you get your yarn with liquid. I say this because, I thought once I had dyed the perfect blue gradient. Before it was time for me to heat set the yarn. It flowed so wonderfully into the next. I couldn’t stop looking at it. I covered it in plastic wrap giant mistake because plastic doesn’t breathe. SO. If you have too much liquid in your skein of yarn. Guess what. its going to pool on the bottom side of the yarn while it steams. Your hard work could get erased in the last stage- and it can be disheartening. Take my advice get a big roll of butcher paper. You can find it cheap at wholesale culinary stores or the internet and it works like a dream.
DID I GET EXACTLY WHAT I WANT?
er. Yes, and no.
I am so proud of this work, and I’m so excited to see how I’m going get these skeins knitted up. I can’t help but wonder. How much better can I do this three years from now?
PLEASE KEEP CRAFTING. KEEP CREATING. EVERY HICCUP IS A LESSON YOU CAN USE TO GET STRONGER. YOU ARE ALWAYS GROWING.
280 notes
·
View notes