#proj-2023-00
Explore tagged Tumblr posts
Text
Crazy Idea for Repurposing Talanah's Hand Armor Pieces
In my last post, I combed through every detail of Talanah's outfit to figure out what specialty fabrics and material will be needed. Afterwards, I started counting the number of individual pieces that used a particular material and organizing them into a spreadsheet. When I got to the turquoise leather pieces on her hands, I thought to myself, "That's going to be annoying to climb with."
Or would it?
Soon after I was struck by a crazy idea that just might work. See, grabbing onto a rock isn't the only way to climb up a wall. There's also something called crack climbing, which involves jamming your hand into a narrow opening in the wall, balling up your fingers in until it's really stuck in there, and then using that friction to pull yourself up. You can do this technique bare handed, but there are also special gloves that'll protect your skin. So, I propose turning her hand armor into crack climbing gloves.
Exhibit A
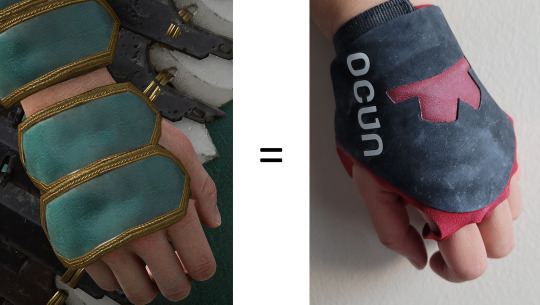
I will have to modify the hand armor to be a little more than just two leather wraps and I don't think using the faux leather would be a good idea to use; it's too thick and the rocks will make quick work of it.
Below are my design ideas and thought processes.
Breaking Down the Design of a Crack Climbing Glove
There are 3 main pieces to a climbing glove:
The rubber: this is the part of the gloves that makes contact with the rock. It provides extra friction and makes it so your hand doesn't slip.
The suede: this part of the glove is the common ground that all the pieces attach to. It's also nicer to have the suede be in contact with your hand instead of the rubber (which would get really slippery once you start sweating).
The strap: this part of the glove makes everything a snug fit, which is exactly how your glove should feel. The glove should feel like another layer of skin.
There is a 4th piece, a layer of padding along the knuckles, but that's more for comfort than functionality. I like comfort though, so it'd be nice to include some padding.

Sourcing Materials
I still want the general look to be similar. There will be the two wraps and the gold embroidery, but I will have to add the finger loops, remove the palm straps (I don't like the feel of something in my palm while crack climbing), and only use the wrist strap.
For a while I struggled with sourcing materials for converting this into a proper climbing glove, namely the rubber. Apparently, there's a rubber shortage. Rubber sheets are only sold to resolers/cobblers and wholesalers, and I don't feel like confronting my phone anxiety to contact these companies just for a cosplay. Additionally, climbing rubber predominantly comes in black, and I'm not going to sacrifice that much inaccuracy to the cosplay.
I thought about ditching the rubber and making suede only gloves, but that has its own set of issues.
First, the rocks are going to eat through that suede fast. I could use multiple layers of suede, but the fact of the matter is that they're not going to last very long, and you know - that kind of defeats the purpose of this exercise. I want to make a durable cosplay dammit!
Second, the rubber has another purpose, it also prevents the suede from stretching out too much. Using only suede would mean the gloves stretch very easily once you start climbing in them, and without any reinforcement the gloves will get loose not snug. Which starts to become a safety hazard. You do not want to fall because of a faulty glove!
Third, I'm vain and I don't think it'll look as nice. I'm allowed to think that.
I did find non-climbing rubber sheets out there that were white, and I could just dye them the color I need. But I kept getting dragged back into trying to find white climbing rubber to dye instead. I was stuck in a cycle of thinking I had to use climbing rubber. Eventually, I thought to myself, "If people can climb barehanded or with tape, which I have done before, then having literally anything else will be just as good. Climbing rubber > shoe rubber > suede > tape > bare hands. It'll be good enough."
Perfect is the enemy of good.
And so, I spent a long time searching for white rubber shoe soles that were around 1mm thick. Anything thicker than that and it starts to get difficult to close your fist while climbing. After a lot of sketchy websites, I finally found a listing on Amazon of all places. It comes with 3 sheets on 3 colors: black, khaki, and white for $15.99. I don't need the other sheets, but this was the only listing I found that was thin enough, white, and didn't have a company's branding imprinted onto the rubber.
Finally, thank goodness the fabric dye was easy enough to find and in approximately the right color! Having 3 sheets of the rubber will be nice as well. I can experiment with the dye until I get a color I'm happy with. Gosh I hope this works.
Redesigning the Cosplay into Functional Gloves
With the materials sorted out, let's figure out a design that's accurate to the cosplay and functional to climb with. Using my climbing gloves as a template, I traced over the suede areas and played around with the placement of the armor pieces until it lined up nicely.

I really like the velcro wrap around, so I decided to keep that part of the design. I'll have to make sure I keep a section between the suede and the rubber open so I can attach the velcro underneath the rubber. As for the opening where the velcro strap attaches to the suede, I'll definitely have to reinforce that opening with some embroidery. My climbing gloves have a layer of rubber in that area, but since I'm not going to do that, the embroidery will have to suffice. It'll be like a buttonhole!
The end product should look something along the lines of this:
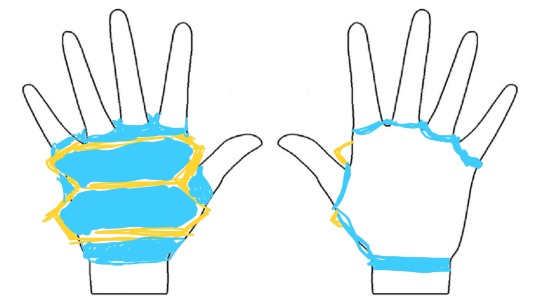
I'll use some contact cement in addition to the adhesive that already comes with the rubber just to be safe, but otherwise this should be a safe design for climbing.
Can't wait to make it and test it out!
#cosplay#horizon zero dawn#horizon forbidden west#talanah khane padish#climbing#took me forever to find 1mm shoe sole rubber#proj-2023-00#proj-design
37 notes
·
View notes
Text
Selecting Materials for Talanah Cosplay
Between the two cosplays I'll be working on this year, the materials in Talanah's outfit are - unconventional. Aloy's Shield-Weaver outfit is pretty straightforward: there's lots of leather bits, some leather fringe, some rope every now and then, a quilted chest piece, and the armor pieces which will be 3D printed. All in neutral/common colors. Nothing out of the ordinary. Besides the lights, but I'll save that for another post.
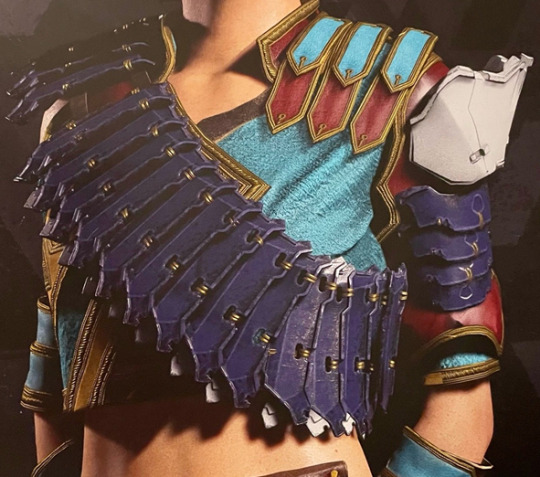
Talanah on the other hand, has a little bit more texture going on. And a lot more color. The 3D pieces for the armor and how they'll be assembled seems straightforward enough, but the fabric for the rest of the cosplay isn't. The main textures I've pulled are categorized in the following:
Lightweight, textured fabric with some type of iridescent/shimmery threads
Leather pieces and straps in various shapes/sizes
Burlap fabric that is embroidered with gold thread


The colors identified for this cosplay are:
Burgundy: used in Texture 1 and Texture 2
Turquoise: used in Texture 1 and Texture 2
Gold: used in Texture 1 and Texture 3
Now, if I wasn't planning on actually climbing in this cosplay, sourcing materials wouldn't be an issue. But because I am going to climb, I can't get anything that would tear easily or catch on the rocks. Therefore, the sourced material needs to meet the following requirements in order of most to least importance:
Durability: needs to survive the wear and tear of climbing
Color: needs to match the colors in the cosplay
Shimmer: for materials that require it, needs to have some reflectivity
Texture: for materials that require it, needs to have some depth
I have ordered sample swatches of the materials that I think meet as many of these requirements as possible. I'll be making another post of the final selection as well as links to those materials.
The remainder of this post is a record of my research as well as my reasonings for selecting particular materials to get sample swatches.
Material 1: Lightweight, textured, and shimmery
Despite working at a custom costume shop, I'm not all that familiar with all the different types of fabrics out there. We mostly dealt with lycra and sequins (stuff that's easy to dance in and is shiny), so I had to consult Google for some guidance. This website was a wonderful resource!
The silk hammered/crushed satin I've found are absolutely perfect for the look of the cosplay:
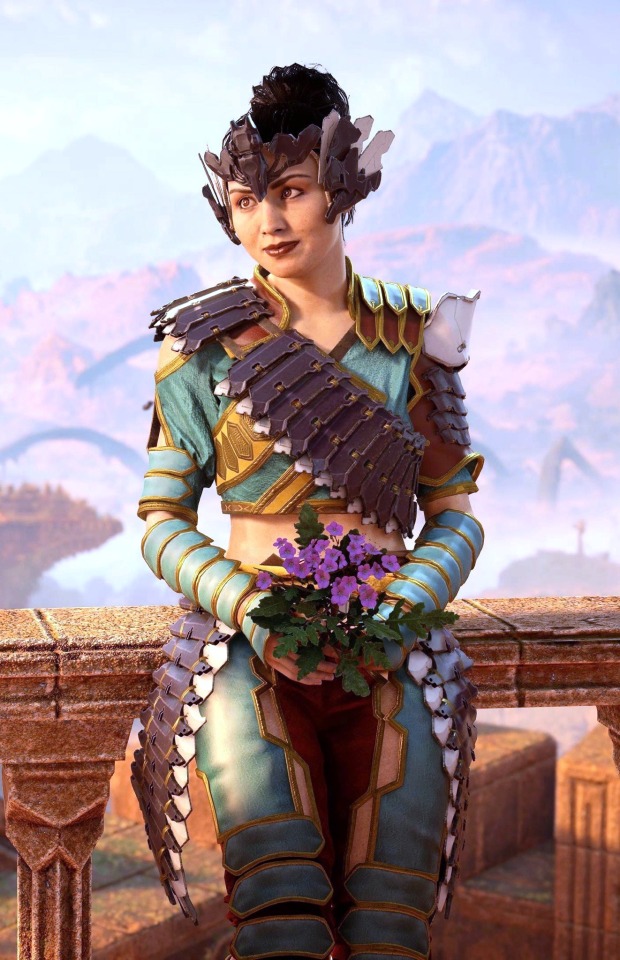

However, they all fail the first criteria: durability. Despite how great they would look for the cosplay, it would only function as a show piece and would tear so hard if I attempted climbing in them. (Also, the fabric is like $85-$135 per yard, so perhaps it isn't that great of a loss)
The runner ups for each color are below:
Burgundy
What I'm aiming vs what I've found:
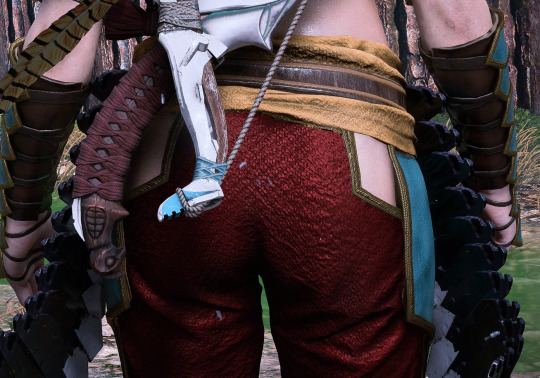
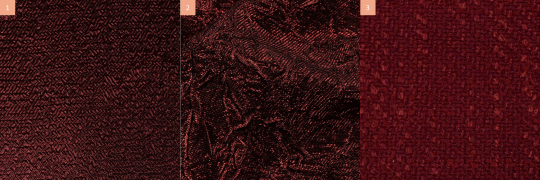
A metallic wavy brocade on polyester/lurex that would be quite durable and looks to have excellent shimmer and texture. The color seems to be a little darker than what I need, but that will be determined once the sample swatch arrives. $49.99/yd
A metallic crinkled brocade on lurex/polyester that would also be quite durable, looks to have great shimmer, and the color match is decent. The texture pattern is a bit small, but the crinkle might make up for it. $39.99/yd
A polyester/cotton tweed weave with loops for texture that is an excellent color match. However, the loops may catch on rocks, and the weave pattern doesn't seem to shine. $19.80/yd
Turquoise
What I'm aiming vs what I've found:
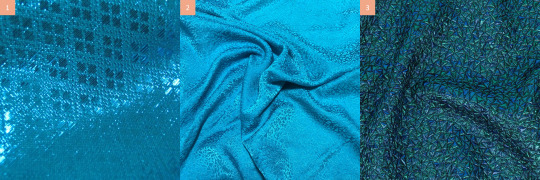
A metallic brocade on Thai silk that is a little too blue and wouldn't be super durable, but the shimmer and texture are spot on. I thought it would be really cool if this cosplay used Thai silk since Talanah seems to be of Asian descent, but I'm not sure if it's the best match overall. $5.99/yd
A silk jacquard with fantastic shimmer and texture, but also a little too blue and might not be very durable. $36.61/yd
A metallic brocade on polyester/lurex that would be very durable but fails on color for being too green. Shimmer is there but texture is very distracting. $44.99/yd
Gold
What I'm aiming vs what I've found:

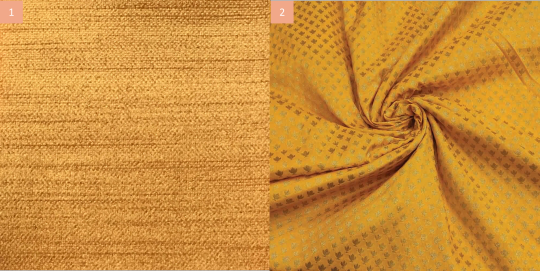
A metallic velvet on cotton/rayon with wonderful color, shine, and durability. There is no texture, but since it's the sash and is mostly covered up anyway, I'm okay with it. Additionally, having the sash textured may detract from the textures from the other two colors. $35.99/yd
A silk brocade with Indian floral zari motifs that is a great color match, texture, and shine. It may not be so durable, but again, since a lot of the sash is covered, it may not contact rock very often. $5.95/meter
Fabrics that made the final cut for swatch samples:
Burgundy: I've ordered swatches for 1 and 2. The fabrics seem to have excellent color, texture, and shine. Since they both have smooth finishes, it should be durable enough to climb in.
Turquoise: I wasn't actually too happy with anything I've found, so I ended up getting a swatch from the group of perfect-looking fabrics. My reasoning is that I think the shirt is fairly protected by the burlap sash, embroidery, chest sling, AND leather pieces. The chances of the silk contacting rock are quite low and I'd be happy to splurge a bit on the fabric. $85/yd
Gold: Since I only found 2 decent fabrics, I ended up getting swatches of both. Depending on how all the fabrics look together, I'll decide on which fits the overall look better.
Material 2: Leather Pieces and Straps
No, I'm not going to purchase real leather (I'm already going to drop $85 on a single yard of fabric). The next best thing is using faux leather or making my own out of suedecloth and foam per this wonderful tutorial here:
I'm aware that many cosplayers can do some amazing stuff with EVA foam and paint, but I don't like painting and sitting at my computer comparing colors online is a lot easier. At this point, I'll need to match the color of the swatches I purchased. I'm doing my best to match things by the images the seller took, but I'll do a final comparison of everything once all the swatches arrive.
Burgundy
Faux leather (F) and suede-cloth (S) options:
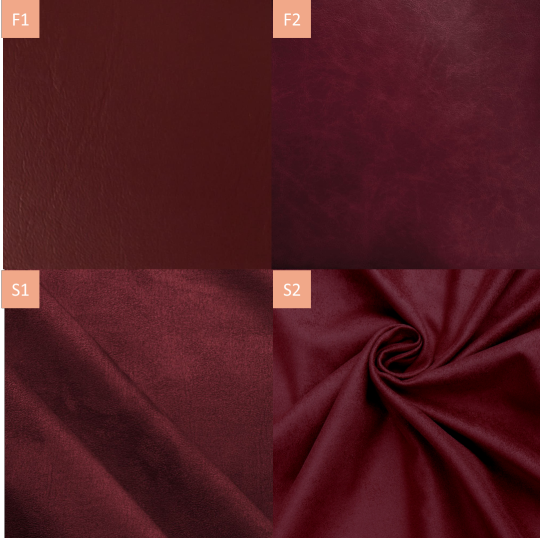
F1: a little too brown, but very close. Great texture. $17.99/yd
F2: a little too purple, but it's serviceable. $45.37 for 6 yds
S1: perfect color. $11.25/yd
S2: too red. Only sold by the bolt.
Turquoise
Faux leather (F) and suede-cloth (S) options:
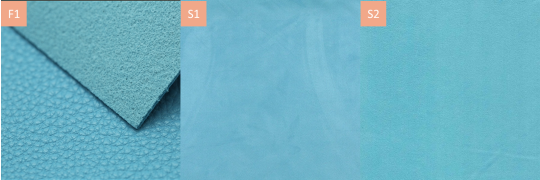
F1: great color and perfect texture! $4.40 for a 9"x12" sheet
S1: color is spot on. $52.61/yd
S2: a tad bit on the green side. $21.99/yd
Deciding on whether to go with faux leather vs suede-cloth comes down to cost and time savings, as well as determining what the cosplay calls for. Purchasing 1 yard of the burgundy faux leather and maybe 4 sheets of the turquoise faux leather comes out to ~$36; whereas getting 1yd x 2yd, 4mm craft foam to glue to the suede-cloth is already $39.
In terms of time savings, there are only 3 leather pieces that are required in burgundy and 25 leather pieces (+2 for the pants) that are required in turquoise. I'd much rather cut the pieces and call it a day - instead of gluing down suede to foam and then cutting them out. Since there aren't any ridiculously large pieces that are required to be all in one piece, it makes sense to just go with the faux leather.
Material 3: Burlap and Gold Thread Embroidery
Thankfully burlap is a really easy material to find in the right color to match the gold sash ($15.98/yd):

As for the rope trim that is on nearly every single article of clothing, a quick measurement on the 3D model of the character revealed that there is ~0.25" space for them and there are 3 distinct trims.
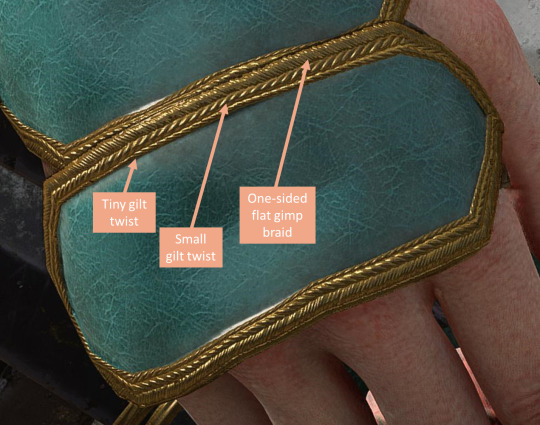
The trim that just looks like a bunch of individual threads sort of exists, but only as something called a flat gimp or soutache braid (which means there's a second row running against it). I'm not going to bother with ensuring the braids are completely perfect, so I'll say that having 3 separate trims is good enough.
To achieve the 0.25" width, I'll use the following trims and some gold embroidery thread to attach it to all the pieces:
0.7mm gilt twist rope trim
3 mm gilt twist rope trim
3 mm braided rope trim
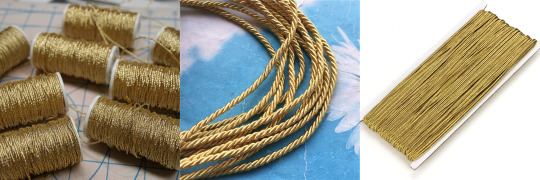
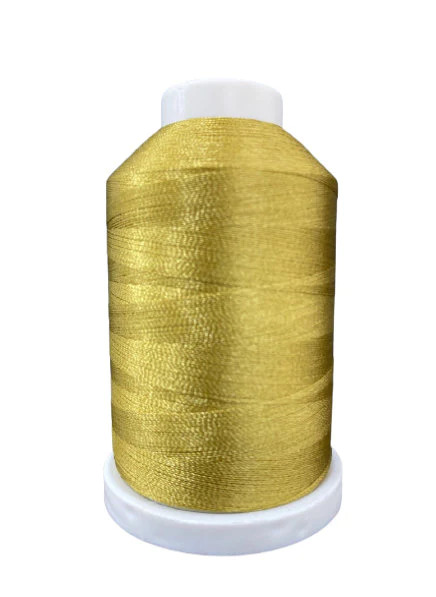
Technically I could run a very thin zig-zag stitch on the edges of the pieces with the embroidery thread, but that sounds like a nightmare to the machine (and by extension to me), so I'd say that's all the materials I'll need for this section!
Final Remarks
There are a couple more items that will be required for the cosplay such as: brown faux leather for the forearm and calf bracers, armor straps, and the headdress strap; filament and resin to print the armor pieces; some type of gold wire to connect the armor pieces; clasps; elastic; the usual basic sewing supplies. However, since those items are easily attainable, I didn't want to cover them here.
It was definitely a process to do the research for the specific materials, but it'll be well worth it in the end product!
Total projected cost of materials including materials not covered in this post: ~$400
#cosplay#horizon zero dawn#horizon forbidden west#talanah khane padish#carja blazon master#this is going to be a lot of money#thanks engineering job for funding my hobbies#proj-2023-00#proj-research
16 notes
·
View notes
Text
Going Over the Details of the Cosplay
While I wait for the sample swatches to arrive, it's time to comb through the models to figure out how all of these materials will come together.
Aloy's Shield-Weaver outfit is simple in design; there's just a lot of layers. I've marked up a render of her with my notes.
As for Talanah's... very little of her outfit makes sense to me. There are many questionable and impractical details that left me scratching my head. Then again, the game designers aren't prioritizing practicality when they're creating. They just want to make something look as cool as possible.
Makes it especially challenging for the cosplayer though.
First, let's talk about her shirt. The asymmetry is awesome, but a nightmare! In essence, I've rationalized the design to be an off the shoulder, wrap shirt that is attached to a stiff leather collar.

Key Points of Weirdness:
On the front of the shirt, left-side, there is a leather trim that does not continue all the way through to the back. At some point it switches to the gold embroidery trim. This transition is hidden by the shoulder straps, so I'll also take advantage of that.
The leather neck collar seems to be under the shirt, but then peeks out on the front right-side! Additionally, it seems to be supporting the shirt up on that side.
Originally, I thought the sleeve flaps protruding out from the arm was a render problem when I reviewed the in-game screenshots. Then once I reviewed the 3D model, I realized that no, they really did just have some flaps sticking straight out through the sleeve.
How are the shoulder straps attached? How are the cuff armor straps attached?? How is the arm piece attached??? In-game they just all magically float there in place.
Next, the pants. WTF are the pants???

Looking at the cutouts, one might say, "Oh, there's just mesh fabric there."
And then you zoom in and NO - NO IT'S JUST BARE SKIN.
Talanah has to wear a thong. Or she goes commando. There's no other way to have cutouts that high on pants and you don't see any underwear. However, aside from that, there's the stability of the pants. You cannot have two separate pieces of fabric connected by 3 tiny points of contact and expect it to smoothly follow the contours of your leg. Especially when moving?
I was pretty confused on this aspect of the cosplay until I remembered that this thing exists:

These are anti-chafing pantlets from the 1930s. My idea would be to modify this pattern for the burgundy fabric of the pants, and then attach the turquoise leather sides onto the elastic. Tack down at key points so the world doesn't see your yahoos, and the pants should be able to shift while moving without pulling and making weird creases.

I might have enough time before the sample swatches arrive to do a mockup of this design. Then I'll be able to get a feel of feasibility and how much fabric I'll need to accomplish this.
#cosplay#horizon zero dawn#horizon forbidden west#aloy#talanah khane padish#shield weaver amor#why are her pants so weird#proj-2023-00#proj-design
17 notes
·
View notes
Text
I've gone down a rabbit hole...
Currently, I've been trying to figure out how to work with the sample swatch of turquoise faux leather. It is a thin layer of vinyl that is backed with some white foam. Definitely not something I'd want to be visible.

It also has zero ability to keep a shape. I've been experimenting with inserting a piece of 20-gauge copper wire I have laying around from when I dabbled in wire wrapping. It's been really finicky, and I'd need a really thin seam allowance so that the seam doesn't show past the gold embroidery (I mean, don't even get me started on how that would go!)
I've tried different ways of folding the faux leather to hide that backing AND cover the wire, but I haven't found a way that doesn't make this little puckered corner:


Honestly, kind of a nightmare and not quite the finish I want to have, especially for those sharp corners on all the armor pieces. I thought to myself, "Okay, what if I just sew it down really tightly? That should work right?"
But my sewing machine is a very basic one I got from a sale at Costco for $200. It was not happy with sewing this stuff together. Fine. Hand sewing it is. I want clean, even stitches, so I did some light research on leatherworking and the general process for stitching with it. I learned about overstitcher wheels (first image) and awls (second image). The overstitcher (or spacing) wheels make even marks where the stitching should go and the stitching awl punches holes through the leather.


Fun Fact: apparently leather awls are different than conventional ones. Awls for leather work have a diamond point that'll cut through the leather instead of pushing through. That way there isn't a puckered back!
A company called Tandy Leather was mentioned often in leatherworking forums, so of course I visited their website.
$199 purchase required for free shipping though. 😠 Thankfully, there is a local shop not too far from where I work! So, I paid them a visit and this is where the rabbit hole begins...

First off, I was completely overwhelmed. I didn't realize that they had a really decent selection of dyed leather! Pretty pricey for my needs though, and I definitely do not need an entire hide of cow for this project. But one of the employees was really helpful and even directed me to some more affordable options that is the right size that I needed! He also told me about how to dye leather and all the different options available to get the finish I want.
And he got me. Hook, line, and sinker.
But let's do a cost and time analysis to show that this might actually be the best option for this cosplay.
Cost Analysis
Faux Leather: total of $95
$33: 1yd turquoise faux leather
$29: 1yd burgundy faux leather
$29: goddamn shipping
$ 4: 8yds copper 20-gauge wire
Real Leather: total of $57
$40: 2 veg-tan belly cuts (approximately 3-5 sqft each)
$ 7: 4oz bottle of burgundy leather dye
$ 10: leather finishing (this is to keep the dye locked in)
According to my spreadsheet, I really only need ~5 sqft of leather for ALL the armor pieces, and I could get away with only purchasing one belly cut that's on the larger side for some extra savings.

I didn't include a bottle of turquoise leather dye since I already have a bottle of turquoise Rit Dye ($5) for the rubber I'll be using in the crack climbing gloves. If the Rit Dye doesn't work out, I wouldn't cry over getting another bottle. I also didn't include sponges (used to apply the dye) or a buffing towel (to polish the leather) because I can just steal my sister's makeup sponges and I have plenty of microfiber towels.
The tools did cost a bit, BUT that's because I did get the medium-range quality tools that had interchangeable parts since I'm planning on adding leatherworking to my list of hobbies anyway.
For example, the overstitcher came as set with the handle and 4 different wheels for $20 and the awl also came as a set with the handle, 2 awl blades, a scratch blade, and a lacing blade for $30. There are definitely beginner-grade options that are $10 and $7 respectively. I also purchased a stitching groover for $17, but there are cheaper options around $10.
If we put together the materials and cheaper tools for working with leather, that comes out to be the same price as just the materials for the faux leather (~$85-95). However, it results in a higher quality cosplay and some tools that can be used for other projects.
Time and Effort Analysis

Overall, working with the leather is going to take a lot of time (which I have a lot of, for now...), but it'll look SO good and it's cheaper! Who would have thought?
I'm definitely eating my words that I said last month...
"No, I'm not going to purchase real leather..."
-- Me, an ignorant idiot, Jan 29th
#cosplay#horizon zero dawn#horizon forbidden west#talanah khane padish#leather#i shouldn't have dismissed leather so early#i have so many useless sample swatches of faux leather laying around now#could i make a cat scratcher out of the swatches?#would the cat even like it?#proj-2023-00#proj-research
9 notes
·
View notes
Text
Experimenting with Dyeing Leather and Rubber
Since this is my first cosplay, like ever, I don't know what I'm doing. Therefore, I fucked around and found out a lot of the do's and don'ts of working with leather, dyeing leather, and dyeing rubber. I also started taking leathercrafting classes at Tandy Leather (shoutout for their free 3-session, 3-hour long classes) and gained some great knowledge on how to care for leather and your tools. I'll share some of the essential processes and techniques I've learned from them after I finish those classes.
Otherwise, here are the results of my first attempts at dyeing leather and rubber! All of these experiments (with the exception of A6) were done using Rit's All-Purpose Dye in Aquamarine. A bottle is about $5 at Joann's.
I wanted to nail down the turquoise portion of Talanah's outfit early because 1) it's a large portion, at least visually, of the cosplay, and 2) I figure it's going to take the longest to dye due to it's vibrancy. The burgundy can be slapped on and it'll look great.
Overall, the results are pretty sad, but this was a very insightful exercise.

Below is a detailed breakdown of what I did for each piece and an explanation of what worked and what didn't.
A: Leather Dyeing Experiments
Early on, I found that the color of the veg tanned leather was too dark in order to support a vibrant turquoise dye. Any attempts at dyeing the leather as-is created a dark teal color instead. As such, all of the experiments discussed in this post were performed on a sanded piece of leather. Here you can see the difference in color between an unsanded and sanded piece of leather.

I wasn't too attentive with the sanding and also learned that leaving any bits of brown showed up prominently in the final dye.
Hot Soak
A1 and A2 was created by boiling 1.5L of water with 3 teaspoons of Rit Dye. A1 was dipped and left in the pot of boiling water for approximately 30 seconds, which promptly crisped the heck out of the leather strips. Hot water bad for leather! I suppose your own skin wouldn't react too being dunked in hot water. A2 was dipped in the boiling water 3 times for 10 second increments.
Results: very dried out pieces of leather that are hard to the touch with poor color.
Direct Application of Dye Solution
A3 and A4 was created by allowing the hot soak to cool down and using a sponge to apply/rub in the solution into the leather. The leather strips were heavily saturated with the solution, laid out to dry for a couple hours, and then the process was repeated two more times. A3 had a thin application of Tan Kote, which was allowed to dry, and then was buffed with a microfiber cloth.

Results: A3 was about the same shade as A4, but adding the layer of Tan Kote seemed to have removed some color. This could also indicate that the dye solution did not penetrate the leather deeply enough. A4 is an okay color, but it is not nearly as vibrant or consistent as I need it to be. There is some streaking that can be seen from passes of the sponge.
Direct Application of Slightly Diluted Dye
Seeing that applying the dye solution as instructed by the manufacturer resulted in a color that was far too light, I opted for a cold solution of one part water to one part dye. This was applied to A5, allowed to dry, and then repeated one more time. Why I chose a one-to-one part solution is because a 100% dye application resulted in a deep blue color nowhere near turquoise.
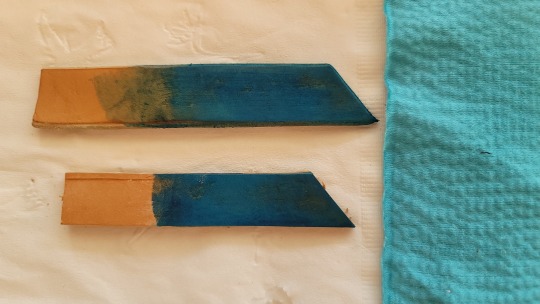
Results: A5 is getting close. It's not as light as the previous process and definitely not as dark as the straight dye. However, it's still not where I want it to be.
Acrylic Paint
Frustrated by the lack of at least one color match, I decided to mess around with acrylic just for the sake of my motivation for this cosplay. Because of the 1000 hobbies I have, I used some tubes of acrylic I had lying around and mixed 4 parts white, two parts blue, and one part green with a splash of yellow for that extra bit of brightness. I painted a thin layer of it on a piece that is now A6 and was so happy with it that I painted two more with it (and to use all of the paint).
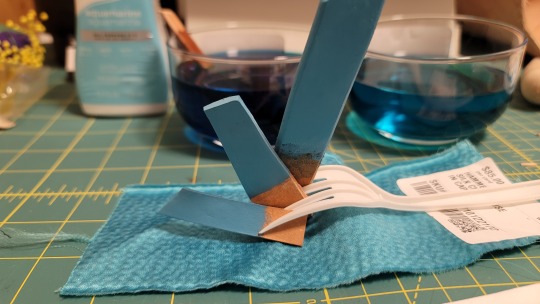
Do you like my very professional drying fixture? Just goes to show that you don't need fancy shit to make good stuff. Anyway...
Results: the acrylic matched so well! But I won't be using it for the cosplay because acrylic flakes like crazy. Bending the samples cracked the acrylic immediately and I know it'll get destroyed just from being within 5 feet of a rock.
However, getting A6 to match so well made A5 look like it matched just as well. At least compared to A3 (before Tan Kote finish) and A4.
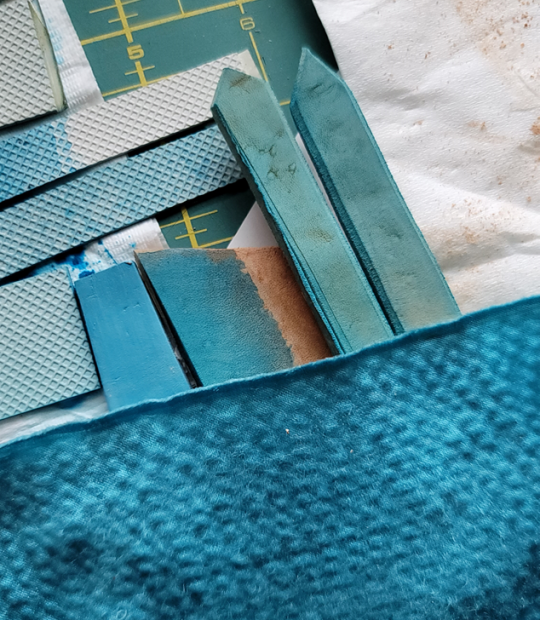
Therefore, this made me research about other ways to lighten leather before applying the dye. The slight tint in A5 should theoretically go away if I can find a way to make the leather nearly white. Sanding is only going to take me so far. I'm in the middle of those experiments now and I hope it works out.
B: Rubber Dyeing Experiments
Rubber is an unforgiving material to dye. I knew going into this that it was going to be a difficult and long process to get the dye to penetrate the rubber. I also was struggling with the leather at the same time, so there are some aggressive experiments I did just to get some semblance of dye on the rubber.
Hot Soak
B1 was created at the same time as A1 and A2, but I left it in the solution for nearly two hours because I started browsing through Reddit and forgot about it.
Results: splotchy and uneven dye. Not pretty whatsoever.
Cold Soak
B2 was created by dropping a sample into the solution while it was still hot and allowed it to soak as it cooled. The sample was left in the solution for about 12 hours.
B3, B4, and B5 were dropped in after the solution cooled. B3 was removed after 12 hours, B4 was removed after 24 hours, and B5 was removed after 48 hours.
Results: trash. Basically nothing happened to B3 and B2, B4, and B5 had progressively better color, but it was still practically white. Of course, I could leave the pieces in there for more time, but after 2 days of waiting it gets kind of ridiculous! Especially for such poor results.
Direct Application of Dye
At this point, I was like, "Fuck it" and poured the dye straight out of the bottle onto a sample which is B6. I let that soak cold for about a day, rinsed it in water which washed a lot of the color away, got mad, used a sponge to really scrub dye into the rubber and the little pockets, and let that sit for another day.
When the dye isn't diluted, apparently it evaporates until there are these little blue crystals leftover. I proceeded to scrub those crystals into the rubber as well and wow, would you look at that, the color is pretty close to A6! The picture isn't a great representation of the true color, but it's actually on par with A6.
Results: Looks great! I'll need to work on not angrily scrubbing the dye in so that the results are a bit more even, but the color is acceptable.
Conclusion
Overall, I'm pretty sure I've found the method for dyeing the rubber. I'll need to replicate the process a few times to hone it down and make sure I can get consistent results, but it's a straightforward process thankfully. As for the leather, I'm in the middle of trying one last method for whitening the leather, and then I'll test out the cold soak and direct application of diluted dye on them.
#cosplay#horizon zero dawn#horizon forbidden west#talanah khane padish#leather#dyeing#this has been testing my patience#why do i have to be a perfectionist#proj-2023-00#proj-process
10 notes
·
View notes
Text
Gathering HZD/HFW References
With Aloy being the main character, there are a ton of screenshots out there for the Shield-Weaver armor set. Heck, there's even a $1K figurine of Aloy in said armor:
https://www.prime1studio.com/hzd-aloy-shield-weaver-armor-set-upmhzd-01ex.html
Therefore, I am not too worried about getting enough reference photos. On the other hand, there aren't many reference pictures of Talanah out there, so I've gone ahead and took a ton of screenshots. Looking at them now I've realized that I didn't take enough to make 3D models off of them, but I found a workaround for that (covered in the next section).
The most important information I gathered from these screenshots are the textures, embroidery patterns, and colors. This will help inform me about which material should be used for each component of the cosplay.


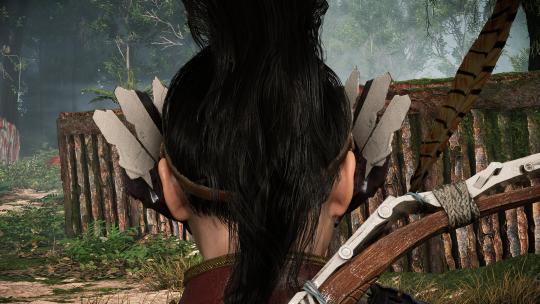
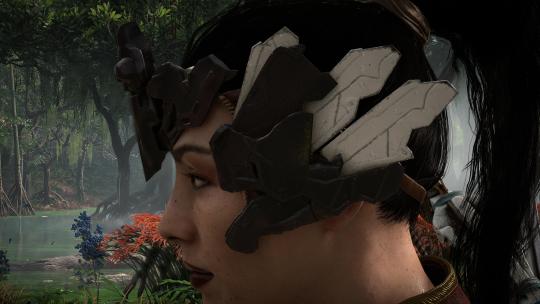
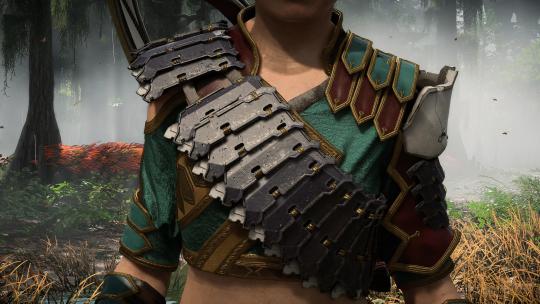

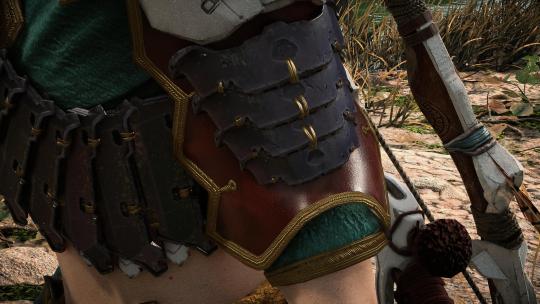
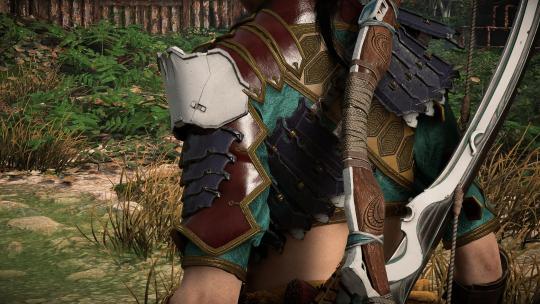


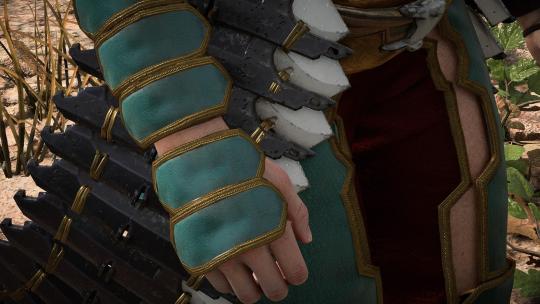
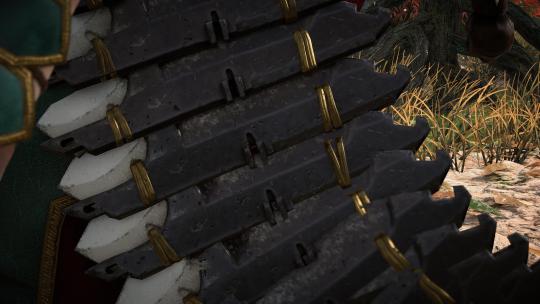

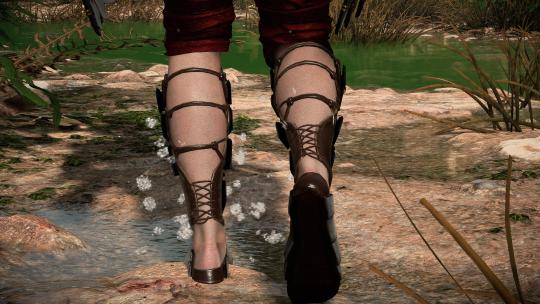
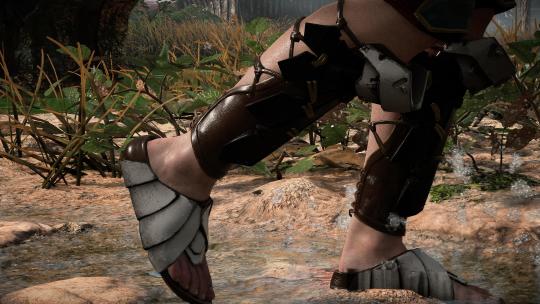
Now, even if I was able to take perfect screenshots to do some 3D modeling off of them, the unfortunate part is that so many details are obscured by other pieces. For example, the armor sling across the chest is blocking what the shirt looks like.
Finding In-Game Models
Throughout my intense Google searches, I stumbled upon this page:
Which, upon close inspection, I realized that this person took the time to extract the in-game models from the game and uploaded them for general use. Massive jackpot for me since that would dramatically decrease the amount of CAD'ing I'd have to do from scratch.
I did look through their page to see if they would have happened to upload Talanah's model, but alas, since she is not a main character, there was no model. I told myself to be glad that I don't have to do CAD'ing for both cosplays, but I was still a little disappointed and resigned myself to weeks of CAD'ing from scratch.
Until...
"The Carja Blazon Master Outfit is just Talanah's body model with Aloy's head attached on..."
Wait - wat?
I went back to Crazy31139's Deviant Art page and searched for the Carja Blazon Master outfit, which they did have! And when I looked through the files I found this:
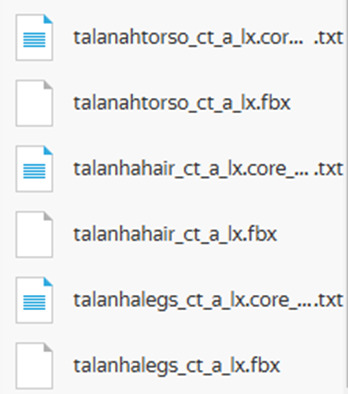
Lo' and behold, Guerrilla really did use Talanah's body model and slapped Aloy's head on. Makes sense, since it reduces the amount of modeling you'd have to do. Looks weird in-game, but it's SAVING MY ASS RIGHT NOW.
Now, after importing the models into Blender,
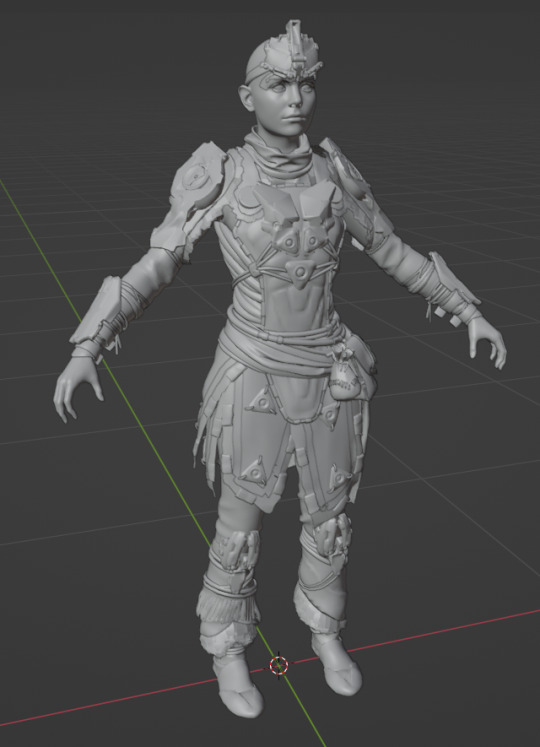

I realized that Talanah's leg (skirt?) armor isn't included since the Carja Blazon Master is ever so slightly modified from Talanah's full outfit. Meaning I'll have to do the leg armor CAD'ing from scratch.
Can't win them all I guess.
#cosplay#horizon zero dawn#horizon forbidden west#aloy#talanah khane padish#shield weaver amor#carja blazon master#proj-2023-00#proj-research
9 notes
·
View notes
Text
The Dawn of a Cosplay Blog
Well, it's about time I stop telling friends about wanting to work on a cosplay and actually work on it. I've been wanting to start doing cosplay ever since I worked as a seamstress at a custom dance costume shop, but I never made the time to do it.
What was the push to make this decision? A Halloween weekend trip to Joshua Tree where I touched real rocks and dressed up as a pirate with friends.
We had so much fun that we wanted to make this an annual tradition and that got me thinking. What would be a cool costume to wear while climbing next year?
Que Horizon Zero Dawn / Horizon Forbidden West and this dynamic duo:
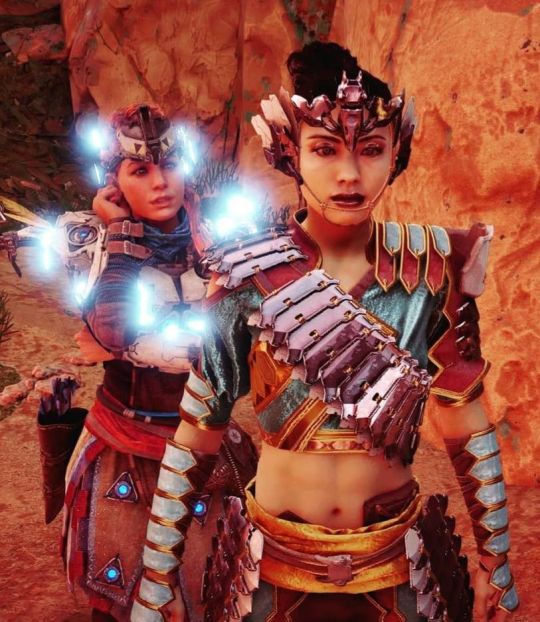
There are multiple factors that lead me to choosing this to cosplay:
1) I love the game
2) I like to climb and there's climbing in the game
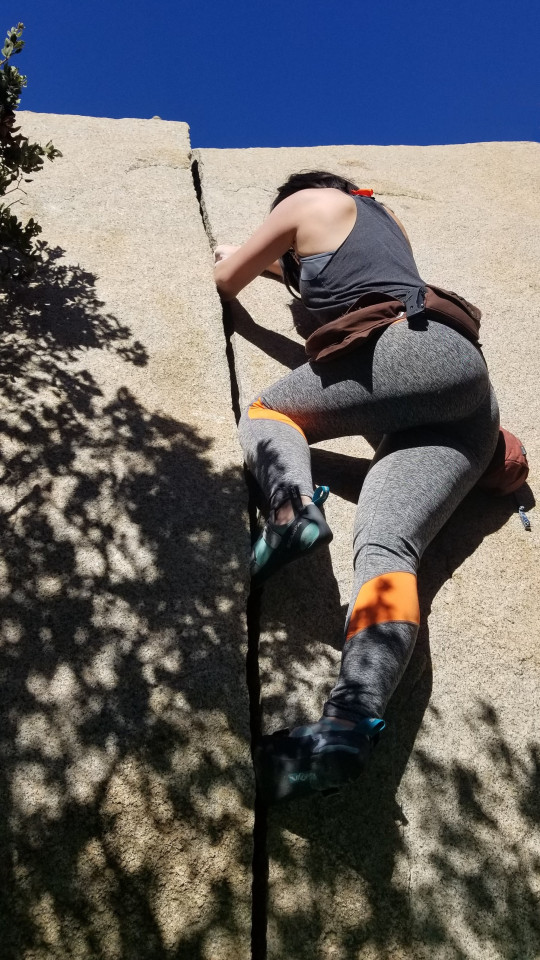
3) I also enjoy archery, and what do you know, there's archery in the game too
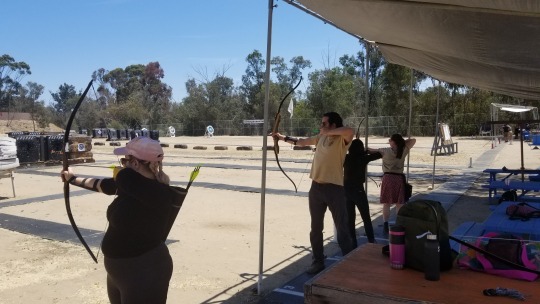
4) Talanah is the perfect fit for me to cosplay and I have a friend (who also plays the game, climbs, shoots, and is willing to have this costume imposed on her) who is perfect for Aloy
Perfect fits all around <3
Now, I am a classically trained engineer (meaning I had to grind through 4 years of university and now I'm working in the engineering field), so not only do the costumes have to be built as accurately to the in-game models as possible, they have to be functional. I have every intention of tweaking, ruggedizing, and stress testing the costumes to withstand climbing as well as being comfortable enough to actually climb in.
I'll be working on these costumes throughout 2023 until Halloween where we'll have an awesome photoshoot of these characters climbing! I've always wanted to see cosplayers doing the things their characters would be doing in-game, but that's a big ask. So I'm going to be the change I want to see in the world.
I'm starting this blog to journal/document my entire process of this project from start to finish, as well as share what I've learned to the cosplay community. I believe that anyone can do cosplay and sharing resources only helps us all make bigger and badder things.
#cosplay#horizon zero dawn#horizon forbidden west#aloy#talanah khane padish#shield weaver amor#carja blazon master#aloy x talanah#proj-2023-00#proj-init
9 notes
·
View notes
Text
Color Match & Durability Results
The sample swatches for Talanah's cosplay have all arrived! I also took the swatches to the climbing gym and rubbed them on some rocks to test their durability. Thankfully, no one asked me what I was doing.
In conclusion,
The burgundy brocades were thinner than expected and I'm going to hold off purchasing the fabric in search of something more durable
The turquoise hammered silk did not shred as easily as I thought it would. This gives me confidence that with the burlap and embroidery reinforcements, it'll survive climbing
The turquoise faux leather is perfect in color and durability
The burlap fabric is also perfect in color and durability
The gold velvet for the sash is disappointing. I will be holding off purchasing that fabric in search of something better
Below are the detailed results of the color match analysis and durability testing:
Color Match Results
Burgundy - Wave Brocade

This one is a little misleading. At certain angles, the color looks just like the listing photo, but in direct light it looks redder than burgundy. Otherwise, I'm happy with the color with respect to the cosplay.
Burgundy - Crinkle Brocade

I think this is the same fabric as the wave brocade, but it's been processed differently to make the crinkle pattern instead of the wave pattern. It is a consistent color at all angles though, so it is redder than the listing photo.
A huge difference between the wave and crinkle is the sheerness. The wave is practically see-through while the crinkle has a thicker interfacing which helps it block more light.

Turquoise - Hammered Silk

It ended up being a tad bit bluer than the listing photo, but it's still gorgeous. I can definitely move forward with using this fabric for the shirt with respect to the color.
Turquoise - Faux Leather

This made me wonder if I received the correct sample swatch... It's way bluer than I expected. However, since the hammered silk came out to be bluer, the two actually work well together.

I also bought a swatch of suede to compare to the faux leather. But since the faux leather is so nice (it's thick and holds its shape well), I'm going to go for all faux leather to make the armor pieces. I went with a different, cheaper suede for the climbing gloves.
Gold - Burlap


Honestly, just spot on. It's perfect. Because it's a loose weave, I will be backing it with a similar colored cotton fabric I have left over from prior projects.
Gold - Velvet


I wasn't too happy with this one. It is a tad bit too orange and the most unfortunate part is that it gets worse at different angles.
You can see it in the second picture: on the left side the velvet matches the burlap decently, but on the right side (where I've rotated the velvet 180) that it's way too orange. I'll hold off on sourcing the fabric for the sash since it's not a piece that requires a lot of work anyway. If push comes to shove, I'll use the same fabric I'm using to back the burlap.

Durability Results
My process for durability / stress testing was going up to a wall with more natural features and rubbing the hell out of the swatches. Like, grabbing either side of the swatch and really grinding it into the wall. I also crumpled and scrubbed the swatches in as well.
I would have liked to continue testing until the swatches were destroyed, so I could get a feel of how long the cosplay could last for, but it was a bit busy at the gym and I didn't want anyone to ask me what the hell I was doing.
Burgundy - Wave Brocade

Yeah, this isn't going to work out. On top of being so sheer and thin, the metallic weave got messed up immediately. I don't have high hopes for survivability for real climbing.
Burgundy - Crinkle Brocade

I'd actually say that the crinkle did better than the wave. There is a small tear and some of the metallic weave did get worn down/shifted, but it held up decently well. I may still put selecting a fabric on hold for a bit, but this one will be the top choice if I don't find any better alternatives.
Turquoise - Hammered Silk

I am actually so pleasantly surprised by how well this fabric held up. I was expecting full tears, like rock just shredding through this stuff, but all it did was get a little fuzzy where I was rubbing it on the rock! You can see a comparison of the surface of the fabric where it was rubbed and where it wasn't.
I still won't consider this type of fabric for the burgundy pants, since it would go through significantly more stress, but I have some peace of mind that the shirt won't be destroyed if I bump into a rock.
Turquoise - Faux Leather

This performed as I expected it to. I did think about using this instead of the rubber for the climbing gloves, but I don't like the discolored scuff marks, so I'll continue with the dyed rubber as planned.
The velvet and the burlap swatches aren't worth reporting here with pictures. They barely had any damage done to them.
#cosplay#horizon zero dawn#horizon forbidden west#aloy#talanah khane padish#fabric#proj-2023-00#proj-test
3 notes
·
View notes
Text
Color Match Results (Part 2)
After the undesirable results from the last set of sample swatches, the next round has all arrived and I'm happy to report some more favorable fabrics. <3
In conclusion,
The burgundy velvet is a gorgeous color, has great texture, and is extremely durable. It also drapes quite nicely. I will be using this fabric for the cosplay
The burgundy faux leather is a perfect match! However, since I ended up going down the real leather route, this won't be necessary anymore. But it's still a great choice for anyone wanting to replicate this cosplay and does not want to use real leather
The turquoise suede is simply perfect. Nothing more to add
The gold brocade is so perfect, I could literally cry. It's thick and durable, a wonderful color, and the shimmer and pattern on it is fantastic. An extra bonus is that the fabric is Kinran, a Japanese style of brocade which gives that extra little splash of Asian-ness to the cosplay
The 15mm weave, 3mm soutache braid, and 0.7mm gilt twists all look wonderful and are close enough in color to each other. The 3mm gilt twist is a bit too yellow and doesn't go well with the other cords. I'll be looking for an alternative
Below are my detailed notes for choosing the final fabrics as well as some pictures of everything all together!
Burgundy Velvets
In my last post, I really liked the color of the wave and crinkle burgundy brocades and I wanted the velvets to match that color. I got 2 swatches because I couldn't tell which shade of red would be best. And boy - am I sure glad I did.

It isn't very clear in the image, but as I was looking at the bottom velvet (rosewood), it just looked brown in my eyes. And even though it was a much closer color to the crinkle brocade, I just wasn't really sold on it. However, the upper velvet (ruby) was a little too red for my liking. I consulted a friend, and she told me to take it outside and the difference was pretty shocking!

The rosewood was now this blown out mess of a pinkish-red. Honestly, it just reminds me of ground beef. The resemblance is uncanny and I'm not about to wear ground beef pants.

However, the ruby velvet deepened in color with the sunlight, and although it isn't quite 'burgundy' it's a really beautiful red and I think it looks great with the turquoise.
Burgundy Faux Leather

I think it's hilarious how well the faux leather matches the velvet. Like, if I had this swatch before ever visiting the leather store, I may have just gone ahead and bought it. The foam backing is even red with a very thin white mesh on the back, so it doesn't even have the same issue as the turquoise faux leather.
It does still have the puckering issue though, and eventually the vinyl will crack and peel off. Not the kind of durability I need to make it through climbing in full sun!
Turquoise Suede

Fun fact, I purposely bought a darker shade of turquoise, so that it wouldn't blend in with the leather pieces. I wanted to keep the shape of the hand armor distinct, meaning I don't want the suede to break the outline. I was happy the color matched so well with the faux leather, but also not happy that it matched so well. However, since I'm dyeing the rubber myself, I'll just have to make sure the color is as light/bright as the satin.
Gold Brocade


The first thing I want to say is that these photos don't do this fabric justice. It is so beautiful. It shimmers in the sunlight and it truly is an elegant shade of gold. It matches quite well with the burlap, and it's a thick, durable fabric.
I mentioned in my research post that I thought it would be a nice touch to use a fabric sash of Asian origin to honor Talanah's ethnicity. This brocade is a special type of Japanese brocade called 'Kinran', which was traditionally used as an important part of Kakejiku (hanging scrolls). It's long been used solely for that purpose now due to its beauty and popularity as a textile on it's own, which works out for this cosplay!
The Gold Cords
3 of the 4 trims/cords were really wonderful shades of what I'll call a dusty gold and they glittered in the sunlight, giving off a really exquisite feel. I did not want the gold to be the same color as the burlap or the sash. I wanted the trim/cord to be visually distinct. If I'm shelling out this much money for these materials, I want them visible dammit!
Thankfully, the 3mm twist is a relatively common cord, so it won't be difficult to purchase one that isn't such a bright yellow.
All Together Now!

I'm pretty much done with selecting materials! I'll make a procurement post with links to the final fabrics/materials once I figure out how much of each fabric I'll need.
#cosplay#horizon zero dawn#horizon forbidden west#talanah khane padish#fabric#proj-2023-00#proj-test
1 note
·
View note