#pita pan sizzled
Explore tagged Tumblr posts
Visit Tumblr Blog
Explore Tumblr blogs with no restrictions, modern design and the best experience.
Last Seen Tumblr Blogs


Fun Fact
Hackers stole 65M passwords from Tumblr in 2013.
Text
Banana (Kazuha x Reader)

It was just an afternoon, like any other, with the winds blowing a soothing tune from the outside. The room warmed from the invited sun. A piece of ham plops into the sizzling pan accompanied by another. With a spatula in one hand, Kazuha’s thoughts drift elsewhere.
His brows furrows and the grip on the spatula tightens. The heat coming from the pan did not compare to the rage building inside him. He mindlessly flips the two hams over and takes a deep breath. Maintaining a cool mind. Nonetheless, if any of his suspicions were true he would—
The kettle's loud angry scream drowns out the sizzling, piercing the air and dragging him back to the present.
With calm efficiency, Kazuha extinguished the flames beneath both the pan and kettle. His hands moved swiftly, setting the ham onto a porcelain plate, and with practiced ease, he arranged sweets, slices of cheese, and a newly made sandwich upon a wooden tray.
The kettle, now silenced and subdued, was lifted with care as he prepared a matcha latte— a drink he'd acquired upon returning to Inazuma, after his seafaring ventures with Beidou. The merchant had assured him of its efficacy in alleviating menstrual pains, mentioning some properties that relaxed the body’s inner muscles—though the specifics of her words now eluded him.
Kazuha makes way to your bedroom with the wooden tray in his hands. With the door left ajar, he deftly pushed it wider using his hip, making no disturbance as he entered.
There you lay, just as he had left you, curled tightly within the folds of the blanket, resembling a pita pocket in your snug repose.
“Y/N.”
You turn to him, with your head barely popping out of the thick fabric. The corner of your lips immediately turn into a big smile as you squeal. Cries from your insides all momentarily gone as you sit up and excitedly pat the empty side of the bed.
All because of Kazuha.
…
Mostly because of the food.
Your boyfriend chuckles at your childish actions. You eyed at the wooden tray as you felt the bed embrace his weight. The chocolates are your first pick, their allure too great to resist.
Kazuha’s gaze lingered upon the small bruises marring your skin, visible despite your radiant expression as you took a bite of the chocolate. Lips still curled upwards while chewing.
“Is it to your liking?”
“Very.”
His eyes drop on the tray, noticing the ripples of the matcha. “Here, try this one too, I heard it helps with the cramps?”.
You grab the chawan cup from his hands, nodding at his warning that it's still hot. The matcha warms your insides, offering a comfort that the hot compress upon your stomach had yet failed to provide.
Kazuha swallowed, his eyes darkening with concern.
“Y/N…”
“Hm?” you innocently hummed, peering at him over the rim of the cup, your hands still wrapped around its comforting warmth.
“Is someone bullying you?”
Your doed eyes turn into confusion.
“Look, if someone ever tries to harm you, you know you can always come to me. I'll burn them with hot iron, slice —”
You chuckle at him, breaking his solemn tone, his turn now to be confused. His brow furrowed deeper, unsure why you found mirth in his protective offer.
Still, you laughed—though his sincerity rang clear, though his words held no jest.
“Kazuha, no one is harming me.” you managed through your chuckles. “Whatever makes you think that?” you say as you place down the cup
“Your bruises.” he says, soft and stern altogether.
“Ah… that.” you stare at the bruise painting your skin and laughed all the more. Shaking your head, you turned away for a moment, stifling the giggles that still bubbled within you. Finding his protective nature both endearing and amusing
“Sorry, sorry.. it's just.. pfft…” you said between breaths as you look back at him.
“I promise no one is harming me. I mean that genuinely. It's just that… I bruise very easily whenever I'm on my period.”
Kazuha’s brows furrow even more into confusion.
“I'm serious!... Every woman’s symptoms differ—some feel nothing at all, while others faint from the pain. Bruising easily isn’t common, but it does happen.” you replied earnestly, though your smile never faltered.
“I see.”
The lines of confusion on his brow smooths into understanding. He rested his chin upon his hand, the familiar calm returning to his features.
“Mhm!” you exclaim happily with the misunderstanding out of the way.
He looks back at you and smiles, his hands now reaching for a piece of chocolate.
“For you to bruise easily like that, you're practically like a banana.” he chuckingly teased.
“A what!?”
Kazuha grins, carefully shoving the chocolate into your opened lips as he mouths,
“A banana"
#kazuha#kazuha genshin impact#genshin impact#fluff#fluff/comfort#kazuha x reader#kazuha x you#kazuha x y/n#genshin impact x you#genshin impact x reader#genshin impact fanfics#genshin x y/n
75 notes
·
View notes
Text

green beans, except not makes two servings Ingredients
Beans * 8 oz dried beans, cooked & liquid reserved, or 2 cans of beans, rinsed; split into 'most of it' and 'about a half cup of beans'
Pita Croutons * 2 pitas * 1 tbsp olive oil * 1 tbsp za'atar * 1/2 tsp salt or so
Herb Puree * reserved beans from above * 1 bunch cilantro, bottoms cut off, about 30g * 1 bunch flat parsley, bottoms cut off, about 30-45g * feel free to add a bit of olive oil
Green(i) Tahini * fuck, i don't know. i made this a few days ago and had leftovers * 60g ish tahini * more cilantro and parsley, around 30 g or so * about a half lemon of juice
Optional - Chili Oil * 1-2 tbsp olive oil * 1-2 tsp chile flakes
Unusual Tools * food processor
Procedure
Oven at 400f, convection on if you have that option.
Beans: Put all the beans, aside from the reserved half cup, into a pot. If you cooked them from dry, include enough of their cooking liquid to cover; if you used canned, add water to cover. Turn on the heat and let it simmer and soften while everything else happens, about 15 minutes. Add salt to taste.
Pita Croutons: Rip the pitas in half, then rip into little croutons. Toss ripped pita in a bowl with olive oil, za'atar, salt, pepper until mostly evenly coated, then spread them out on a baking sheet. Cook for 8-10 minutes with convection, 10-12 without convection.
mine are burnt because i did like 11 minutes with convection. so don't do that.
Herb Puree: Put the reserved half cup of beans, the cilantro, and parsley into food processor. Puree, adding enough water that it loosens up a bit. Add salt to taste, but go light; you could also add some olive oil and it'd be great. Put it aside in a bowl and halfassedly clean the food processor.
Green Tahini: Put tahini, herbs, lemon juice in the food processor. Puree, adding enough water that it loosens up. Add salt & more lemon juice to taste. It's easier to pour it onto the food if you put this one in a bowl, too.
the real pro move would be putting it in a squeeze bottle but we all have lives to live and i hate cleaning them
Chile Oil: In a small pan or pot, heat up the oil for a minute; add in the chile flakes (they should quietly but audibly sizzle), stir, turn off the heat.
Back to the Beans/Plating: The water should be largely cooked off at this point, and the beans soft; some may have exploded. Turn off the heat. Mix in the herb puree, check the flavor -- salt? lemon? some black pepper?
Divide the beans into bowls (or into bowl/storage), then put half the tahini on each; try (or not) to be fancy. If you made chile oil, drizzle that on now. Cover up any ugly globs of tahini with pita croutons, and put the rest of the croutons on the side.
#i wish i had a cute food tag#uncleftish beanholding#you could do a pesto paletteswap on it: basil instead of cilantro and some pine nuts or walnuts instead of tahini#and. not pita croutons in that case.
9 notes
·
View notes
Text
200+ Creative Restaurant Name Ideas for Your Culinary Venture

Selecting the ideal name for your restaurant is a pivotal branding decision that can significantly impact your business's success. However, brainstorming restaurant names can pose a challenge. That's where we come in!
Why Choose a Memorable Restaurant Name?
Your restaurant's name is often the first impression potential customers have of your establishment. It's a key component of your brand identity and plays a crucial role in attracting diners. A captivating and memorable restaurant name can set you apart from the competition, pique curiosity, and draw customers in.
On the flip side, a lackluster or uninspired name may fail to capture attention and could deter potential patrons. Investing time and effort into crafting a creative and original restaurant name can pay off in dividends by generating interest and enticing customers to give your establishment a try.
In essence, a well-chosen restaurant name can make a significant difference in your business's success.
How to Choose a Unique Restaurant Name
If you're wondering how to come up with a standout restaurant name, here are some tips to guide you:
Define Your Restaurant's Identity: Consider your restaurant's mission, vision, values, and cuisine style to inform your name choice.
Get Creative: Utilize a restaurant name generator or brainstorm with friends and family to spark inspiration.
Seek Community Input: Solicit restaurant name suggestions from your local community or target demographic for diverse perspectives.
Incorporate Location: Highlighting your restaurant's geographic location in the name can add a personal touch and attract local patrons.
Restaurant Name Ideas to Ignite Your Imagination
Cool Restaurant Names
Pulse Plates
SpiceCraft
Urban Bites
Frosted Flame Grill
Quantum Quisine
Eclipse Eats
Byte Bistro
Neon Nosh
Zenith Zest
Tasteful Trails
Ethereal Eateries
Bistro Bliss
IceBox Eats
Midnight Morsel
Polar Palate
Fusion Fare
Vibe Vine
MetroMunch
Nomad Nosh
Bite Boulevard
Creative and Funny Restaurant Names
Punderful Plates
Fork in the Road Diner
The Cheeky Chef
Haute Dog Diner
Lord of the Fries
Not Your Grandpa’s Grill
Vincent Van Doughnut
Wok This Way
Grillin' & Chillin' Cafe
The Taco Trap
Poultry in Motion
Eat’s Funny
Nosh Pit
Wok and Roll
Grub’s Up!
Munch a Bunch
Lettuce Eat
Bread Pitt
The Dish Dash
The Funky Fork
Cultural References
Tap into pop culture with these clever restaurant names:
Happy Grillmore
Lord of the Fried
Café Jack
Planet of the Crepes
The Codfather
Custard's Last Stand
16 Handles
Tequila Mockingbird
Of Rice & Men
The Hot and the Furious
Field of Dreams
Earth, Wind, and Flour
Lord of the Wings
Eat Pray Love
Frying Nemo
Grillenium Falcon
Pita Pan
The Notorious P.I.G.
Planet of Grapes
Men At Work
Puns
Inject humor into your restaurant name with these playful puns:
21 & Cup
Let's Ketchup
The Brewseum
9021PHO
Cheesy Does It
Franktuary
Lettuce Eat
Nacho Daddy
Egglectic Cafe
Sun of a Bun
Basic Knead Pizza
Moon Wok
Sea you soon
Burgatory
Unphogettable
Dairy Godmother
Meat U There
Eats Meets West
Award Wieners
Jamaica Mi Krazy
Rhyming and Alliterative Names
Make your restaurant name memorable with rhymes and alliteration:
ZestZing Kitchen
MunchMate Diner
SavorySpot
Pig 'n' Pancake
Late Night Dine Right
Chops and Hops
Pies & Thighs
Backyard Bowls
Mellow Mushroom
Wicked Wok
Slice of Spice
Pie In The Sky
Yummy in the Tummy
ChowChampion Café
YumYard
Savory Symphony
TasteTrove Eatery
PalatePalooza
CrispCrave Café
Morsel Muse
Seafood Restaurant Name Ideas
For seafood lovers, consider these catchy names:
Seaside Sizzle
Tide & Table Seafood House
Seabreeze Bistro
Salt & Scale Seafood Kitchen
The Nautical Noshery
Fin & Flounder Feast
Deep Dive Dining
Siren's Suppers
Mariner's Menu
Oceanic Ovation
Pescatarian Palace
Seafarer's Supper Club
Neptune's Noshing
Aquatic Appetite
Oyster Oasis
Coral Café
Blue Bay Bites
Tidal Tastes
Coral Cove Cuisine
Anchors Away Eatery
Bakery Names
Indulge your sweet tooth with these bakery name ideas:
CinnaMan’s Café
The Uprising Craft Bakery
Frosty Favorites
Bunnie Cakes
Sans Gluten Bakery
Mad batter bakers
George’s Ginger Emporium
A Dash of Sweet Bakery
Crumbl Cookies
Mindy’s Muffins
Prairie Boy Bread
Butter Galore
Flour Child Bakery & Café
Bakeology Café & Bakery
Pizza Restaurant Names
Satisfy your pizza cravings with these mouthwatering names:
Crust Culture
Mamma Mia's Pizzeria
Dough Daze Pizzeria
Pizza Pantheon
The Saucy Slice
Crispy Crust Cafe
Pizza Planet
Dough Divinity
Pie Panorama
Pizza Picasso
The Rustic Crust
Pinnacle Pizzeria
A Pizza Napoletana
The Sassy Slice
Pomo
Escape to Italy Pizzeria
Brick Fire Tavern
Cheese Please Pizza
Cindy’s Cucina
La Leggenda Pizzeria
Fast Food Restaurant Name Ideas
For quick and tasty bites, consider these fast food restaurant names:
QuickBite Express
Speedy Eats
Rapid Munchies
FastFuel Diner
The Crystal Table
The Mountain Chef
ZoomZest Fast Food
QuickCrave Cafe
SnapSnack Shack
The Central Garden
The Glass Duke
The Pink Faire
0 notes
Text


I preordered some of the GS4 plushes from Ebten when they went up, and they arrived yesterday! They’re so cute and tiny; I’m very happy!
15 notes
·
View notes
Text
thinking a lot about food (as I always am) on this fine april 1st, here's my runaway smash favorite from last year's farmshare box
Greens fritters (c/ o jubilee farm)
Toss them in a pita or wrap with hummus, more greens, hot sauce, tzatziki, something pickled (maybe those radishes!), roll it up and enjoy!
A bunch of greens, about 1/2 lb, the mustard mix or arugula is perfect here! But you could also do kale or chard or collards, just removed the tough stems first.
3 tablespoons olive oil or grapeseed oil
1 small onion, diced fine
Salt, to taste
2 cloves garlic, chopped
½ cup cilantro or parsley, chopped fine
1 tsp cumin
1 cup panko (or other) breadcrumbs
1/4 cup crumbled feta
1 or 2 eggs
Oil for frying
Pulse greens in a food processor or finely chop with a knife-they should be small but not puréed or mushy. Set aside. Heat a large skillet over medium-low heat and add the oil, onion, and salt. Cook, stirring occasionally, until soft and lightly browned, about 10 minutes. Add the garlic, cilantro or parsley, and cumin. Stir for 30 seconds. Add greens to pan and sauté for a minute or two, until they have wilted. Turn the mixture into a large bowl. Let cool for five minutes, then add the breadcrumbs and feta. Mix well, then taste for seasoning. Add more salt if necessary- this is your chance to get the seasoning right while the mixture is egg-free. Crack one egg into the bowl and mix with your hands to incorporate. Squeeze a small ball of the mixture. If it holds together, begin portioning out the remaining mixture into small balls. If it doesn't hold together, add another egg. I usually find one egg to be enough. Heat oil in a skillet over medium-high heat. Add balls to pan-they should sizzle when they hit the oil- then turn heat down to medium or medium-low. Cook until golden, about 2 minutes. Use a fork to flip the balls to the other side and cook for another 2 minutes or so. Serve immediately or at room temperature.
(additional hot tip: serve with kewpie deep roasted sesame dressing!!)
23 notes
·
View notes
Text


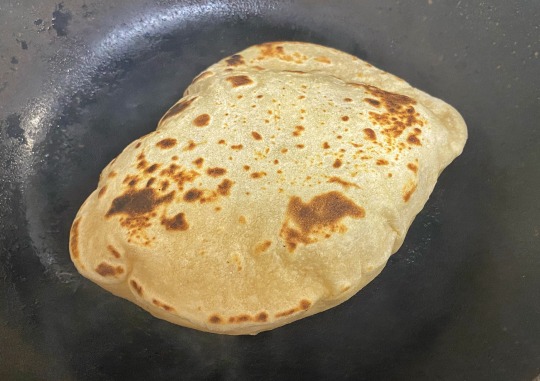


This was a satisfying project! I'd definitely recommend trying it out.
It says you can refrigerate the dough for up to 5 days, but I wouldn't do that again. The first half-batch was easy, but 3 days later, the dough was SO STICKY, I don't even know how much flour I used up getting it back to a workable consistency, and the sour flavor was also much more pronounced. Still tasty, but maybe intense for some people.
All told, I'm not gonna throw out this standard pita recipe (+ tips), which is easy and doesn't require sugar, but this one is definitely tasty and quick and good for managing discard.
Ingredients 235 g warm water (about 110°F) 7.5 g sugar 10 ml salt 45 ml olive oil plus more for greasing the bowl and for frying if cooking the pitas on the stove 15 ml active dry yeast 250 g unfed sourdough starter discard brought to room temperature and stirred down to remove any bubbles 350 g all-purpose flour, divided plus more as needed and for rolling out the dough 105 g cup whole wheat flour
Instructions Combine the warm water, sugar, salt, olive oil and yeast in a large bowl. Stir in the sourdough starter discard. Add half of the all-purpose flour and all of the whole-wheat flour and stir until well combined. Add the remaining all-purpose flour, half a cup at a time, mixing well after each addition. Form the dough into a ball. If the dough is too sticky to work with, add 1 to 2 tablespoons of flour or more as needed. Turn the dough out onto a floured surface and knead for about 5 minutes, until smooth and elastic. Wipe out the bowl and oil it lightly. Place the dough in it and turn it over to lightly coat the entire ball. Cover the bowl with a plate. Let the dough rest for 1 hour in a warm spot, until doubled in size. Punch down the dough. If you won't bake the pitas immediately, store the dough in the refrigerator for up to 5 days. Because the dough may double in size in the refrigerator, choose an appropriately sized container. (When you want to bake, remove as much dough as you’d like.) Turn the dough out onto a floured surface and cut it into 12 pieces. Roll into balls between your palms. With a rolling pin, roll the balls into 7-inch disks, between ⅛- and ¼-inch thick. As you work, add flour to the work surface as necessary to ensure that the dough doesn't stick. Oven method Place a baking sheet, cast-iron pans or a pizza stone on the middle rack of the oven and preheat the oven to 450°F. Once the oven has heated, arrange a few of the rolled-out disks onto the hot surface, at least 2 inches apart. Do this by placing a disk on the palm of your hand and flipping your hand to drop the disk onto the surface, being careful not to burn yourself. The pitas will puff up almost immediately. Bake for 2 minutes, flip over with tongs and continue to bake for 1 more minute. Remove the pitas from the baking surface and place them in a towel-lined basket or bowl. Fold the towel over the pitas to keep them warm. Repeat with the remaining dough disks. Stove top method Heat a medium-size skillet over medium-high heat and brush on a very thin layer of oil. You'll know the pan is hot enough to cook the pitas when it sizzles after you've sprinkled on a few drops of water. Place a disk in the hot pan. Cook until you see bubbles begin to form, about 2 minutes. Flip the disk over and cook for 1 minute. It should begin to puff up a bit. Flip over again and cook for 1 more minute on the other side. Transfer to a towel-lined basket or bowl to keep warm. Continue to cook the remaining pitas, brushing a very thin layer of oil onto the pan in between cooking. Place the pitas in a towel-lined basket or bowl. Fold the towel over the pitas to keep them warm. Repeat with the remaining dough disks.
70 notes
·
View notes
Text
20 Ways With Tinned Tuna
Way earlier than Lockdown, if I noticed a particular on tinned tuna, I might replenish. Why? Because tinned tuna is a flexible, ready-to-eat, good-for-you protein. And it might usually kind part of my work-day desk lunch rotation. In truth, I saved tins of tuna in my desk drawers for emergency lunches! So, to be trustworthy, when tinned tuna specials got here on throughout Lockdown (5 for R65 — I’m looking at you Woolworths), I purchased in…

Now in the event you consider tinned tuna, I guess you'll be able to consider perhaps 3, Four or 5 methods you should utilize it… however 20? I’ll admit, it was a stretch for me too… But then I began remembering recipes my gran would make once we had been youngsters. And recipes from the Jewish aspect of my household (as a result of in case you don’t know, you can't combine milk and meat, ie: no cheeseburgers for you)… So, right here, a complete checklist of recipe concepts that includes tinned tuna. READ MORE: 5 Delicious Lockdown Recipes That Won’t Need A Trip To The Shops
1/ Tuna-mayo sandwich
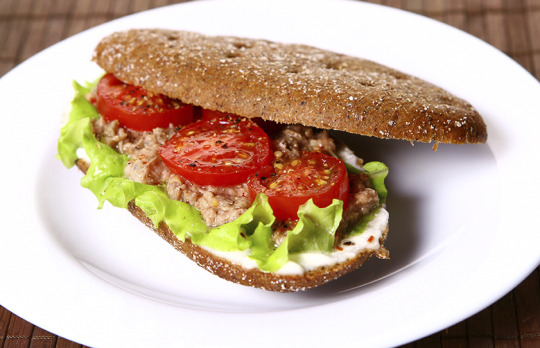
Okay, let’s begin basic right here. Tuna and mayo are a successful mixture. How to fancify this up? Add a squeeze of lemon juice, some freshly — and finely — shopped spring onion or crimson onion. Serve it on 100% rye toasted in sizzling olive oil with layers of chopped tomato and lettuce. YUM.
2/ Tuna-avo sarmie
Orrrr on rice truffles… Okay, so it is a WH HQ fave, particularly now when it’s avo season! Easy sufficient: mush one ripe avocado and mix it with one tin of tuna. Spread on sandwich bread or on rice crackers or in butter-lettuce leaves (relying on what number of carbs you’re chopping…) and munch. Why that is such a success: avos are actually good for you and full of vitamins. Yes, they're excessive in fat — the great type although — and once we’re speaking getting in nutrient-dense energy, avos trump mayo.
3/ Egg-mayo sarmie with tuna
Brunch you say? Who has the finances for salmon on this financial system anyway? Now once I grew up and we used to go on street journeys — all the youngsters squeezed at the back of a bakkie — my gran used to make egg-mayo sarmies. Easy sufficient: you boil the eggs, you mash with mayo, salt and pepper and unfold on a sarmie. Now, we already know eggs and tuna work nicely collectively, because of the French and recipe quantity 5. So why not double up on that good protein and add some tuna to the combination? It works! READ MORE: Yummy Vegan And Gluten-Free Healthy Chocolate Cereal Bars Recipe
4/ Basic tuna salad
Think of this extra like a inexperienced salad with tuna thrown on high. This is de facto what it’s about: you could have some salad substances and also you wish to add some protein. Oh, hey there, handy tin of tuna! Simply add on high with a primary olive oil and balsamic vinegar combine.
5/ Salade Niçoise
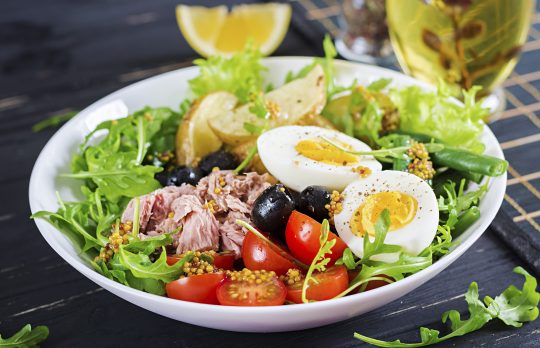
A way more intentional and fancy salad made handy by the ready-made tuna. This salad has the next fundamentals: tuna, boiled egg, olives, tomatoes, child potatoes and inexperienced beans. There are variations of this salad that embody lettuce, anchovies and capers… Mix it up as a lot as you want! It’s certain to maintain you fuelled for a busy day forward.
6/ Chopped Israeli-style tuna Salad
Think Israeli-style chopped salad: all the things chopped into same-size 5mm cubes. Tomatoes, carrots, peppers, cucumber… and chickpeas! It’s a leafless salad with a whole lot of crunch. Now add tuna and a few scrumptious avo (once more, chopped into little cubes) and you've got a filling dish that’s full of all the great things.
7/ Tuna salad wrap
Take recipe no.Three above and place all of the substances right into a wrap.
8/ Tuna salad wrap with mealies and mayo

The above recipe bulked up with flavour. I don’t know why sure combos work… Like Tuna and corn aka mealies. But they do! So combine your tuna with some mayo, add corn kernels, then wrap with greens in a big tender tortilla.
9/ Warm tuna pita
In a bowl, mix chopped celery, chopped crimson onion, tuna and mayo. Layer this right into a pita. Add grated cheese of your alternative (have you ever heard of Eatlean Cheese?). Bake within the oven for 10 minutes till the cheese has melted. This is critical consolation meals. Salad on the aspect non-obligatory.
10/ Tinned Tuna (not) Tartare

A play on the French delicacy, you should utilize the rules to assemble a similar-looking dish, simply with tinned tuna. Use finely chopped avocado as the bottom, then layer with chopped child rosa tomatoes, layered on high with tinned tuna. The secret is to decorate the substances beforehand. A beautiful lemony French dressing will do nicely, with some seasoning. Top with leaves and herbs, and serve. Thin slice of toast non-obligatory.
11/ Tuna pasta salad
A quite simple dish I used to make once I was a pupil, tuna-pasta-salad takes the instance of recipe 4 (primary tuna salad) and combines it with mayonnaise and penne pasta. It retains within the fridge for 3 days and it’s simple to pack in a Tupperware. It’s not very fairly to take a look at, however it’s easy and tastes good.
12/ Lemony zesty tuna pasta
A really quick-and-easy recipe that may be served heat or at room temperature the following day. What you want: lemon (zested and juiced), olive oil, garlic, 1 tin of tuna and a few pasta of your alternative, plus herbs of your alternative (parsley is an efficient one). Make it fancier: add wilted child spinach to the combination. Heat olive oil in a saucepan. Add chopped garlic clove. Allow to sizzle for a minute or two, then add the tuna, lemon juice and parsley and stir till heated. Add the recent cooked pasta to this pan with among the pasta water and stir to mix. Serve with zest sprinkled on high and a few additional herbs… For additional yum issue: add a sprinkle of Parmesan cheese.
13/ Tinned tomato and tuna pasta
Cupboard stacked with tinned tomatoes too? Well, that is a straightforward recipe that may assist make use of each tinned substances. What you want: olive oil; one massive onion, chopped; one clove garlic, chopped; one tin of chopped tomatoes; chilli (or chilli flakes); pasta of your alternative; one tin of tuna; contemporary basil (non-obligatory). Method: Sauté onion in olive oil. After a few minutes, add the garlic after which the tin of chopped tomatoes with the chilli. In the meantime, prepare dinner your pasta. Season the tomato combine with salt, pepper and a teaspoon of sugar if wanted to calm the acidity. Simmer to scale back liquid. Toss the recent pasta into the tomato combine and flake within the tuna. Serve with contemporary basil and a drizzle of olive oil. READ MORE: 3 Ways To Pimp Your Hummus For Your Next Mezze Platter
14/ Tuna Lasagne
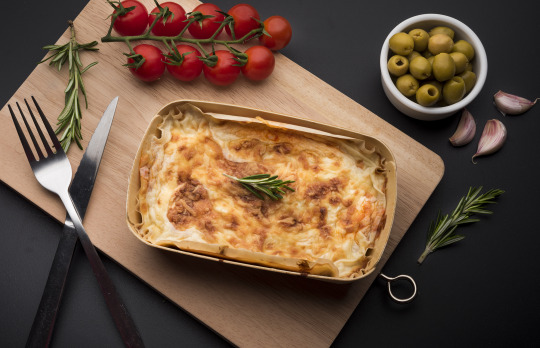
Heat oven to 200 levels Celsius. Tip one 400g tin chopped tomatoes, 250g of sliced peppers, 50g of olives, 1 tbsp blended dried herb herbs right into a pan, cowl and simmer for 10 minutes till the tomatoes have damaged down a bit of. Add the tin of tuna and season with salt and pepper. Pour one tub of cream cheese right into a bowl, season and blend to loosen a bit of, including a splash of water (or milk, if in case you have some) to make a thick white-sauce consistency. Assemble the lasagne in a baking dish, approx 20 x 30cm. Pour roughly a 3rd of the tuna sauce into the underside of the dish, high with Four lasagne sheets, a 3rd of the cream cheese sauce, then repeat the layers twice extra. Scatter over some mozzarella and bake for 40 minutes till golden and effervescent.
15/ Gluten-free tuna fishcakes
Who doesn’t love a superb fishcake? Mix collectively: 1 tin of tuna, 200g mashed potatoes, 1 egg, 1 tbsp gluten-free flour of alternative (rice flour works nicely), Four finely chopped spring onions, 1 tbsp finely chopped contemporary parsley, salt and pepper to season. Form patties together with your arms. Coat the patties in some extra rice flour earlier than cooking gently in a pan with some olive oil. Yum!
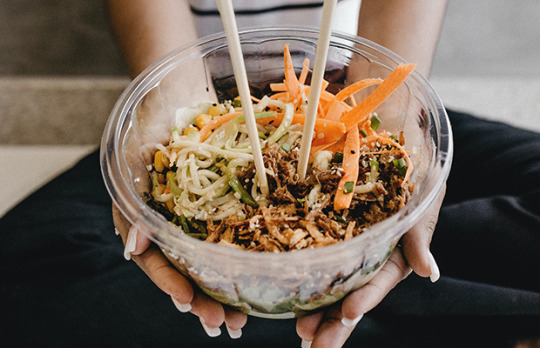
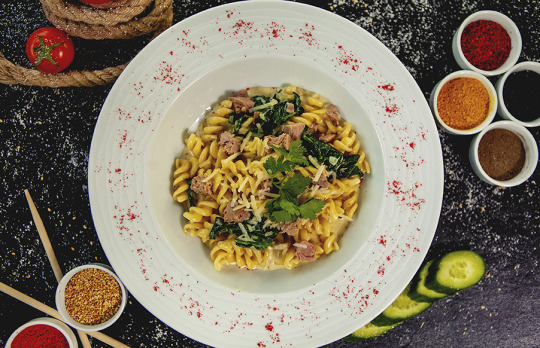
16/ Tinned tuna poke bowls
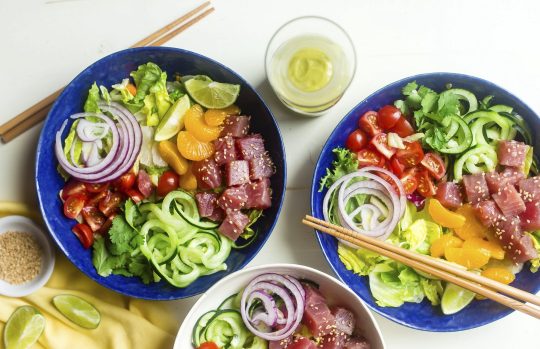
Ah, we love a superb poke bowl! But we don’t at all times have entry to freshly caught tuna (like on this pic). You could make these the way in which you'll another good poke bowl. The base: steamed rice topped with crunchy, contemporary veggies, nuts (almond or macadamias), avocado, spring onions, sesame seeds, fruit… The secret is the great dressing! 1 tbsp sesame-seed oil + 2 tbsp tamari + Juice of 1 lime + Tiny drizzle honey blended collectively and drizzled over. Find extra scrumptious, wholesome seafood recipes here!
17/ Baked potato with tuna
I like a superb baked potato. In truth, candy potatoes baked entire are in all probability my favorite. Their skins caramelise so fantastically and inside it’s tender and simply practically candy. Top this sizzling child with some tinned tuna blended with a bit of mayo (or creme fraiche in the event you eat dairy) and a few chopped spring onions and dill. Add a squeeze of contemporary lemon to complete it off and also you’ve bought a cracking little meal!
18/ Tuna frittata
A fast and simple lunch for the entire household — you'll be able to pump this up with additional veggies like peppers and mushrooms. Yes, added vitamins for the win! Preheat oven to 180 levels Celsius. In an oven-proof skillet, sauté chopped spring onions in a bit of olive oil. Add your veggies (child spinach, courgettes, tomatoes). Sauté till mixed and wilted. Add one tin of tuna, drained. Whisk collectively 12 eggs and 1/2 cup soya milk (or cow’s milk) with a pinch every of salt and pepper (to style). Pour egg combine into massive skillet. Place within the oven and prepare dinner for 15 to 20 minutes, till eggs are cooked via. Garnish with chilli flakes, Peppadews and contemporary basil. READ MORE: This High-Protein Peanut Butter Breakfast Smoothie Will Make Your Morning
19/ Tuna Tacos

Now the trick right here is to mix the tinned tuna with some crimson onion, corn, tomatoes and chilli to make a spicy salsa to fill your tacos with. So, finely chop half a small crimson onion, combine with one tin drained tuna, one massive chopped tomato, about 1/2 cup corn kernels and one finely chopped chilli. Add the juice of 1 lime and a bit of olive oil and stir collectively. Now mash avocado with chopped coriander, lime juice and salt and pepper. Have some bitter cream on the aspect. Spoon your tuna filling into the corn tacos, add guacamole and a dot of bitter cream. Delish. I like serving my tacos with a bit of shredded butter lettuce for additional crunch and freshness. Imagine the beneath with tuna as a substitute of mince – a lot more energizing!
20/ Tuna, olive and rocket pizza

Home-made pizza evenings are nice! But you won't at all times have a great deal of toppings a hand… Enter that outdated devoted tin of tuna. Get your bases prepared, smeared with some tomato puree, and your oven sizzling at 200-220 levels Celsius. Top your tomato bases with shredded tuna, chopped black olives, capers (if in case you have) and mozzarella cheese. Bake till golden and melted and scrumptious. Serve with contemporary rocket and skinny slices of crimson onion. So yum! Want extra? We’ve bought you coated: all of your healthy recipes sorted. READ MORE ON: Food Food News Health Advice Nutrition Nutrition Advice Recipes !function(f,b,e,v,n,t,s){if(f.fbq)return;n=f.fbq=function(){n.callMethod? n.callMethod.apply(n,arguments):n.queue.push(arguments)};if(!f._fbq)f._fbq=n; n.push=n;n.loaded=!0;n.version='2.0';n.queue=;t=b.createElement(e);t.async=!0; t.src=v;s=b.getElementsByTagName(e);s.parentNode.insertBefore(t,s)}(window, document,'script','https://connect.facebook.net/en_US/fbevents.js'); fbq('init', '2162521310492989'); fbq('track', 'PageView'); Source link Read the full article
1 note
·
View note
Photo
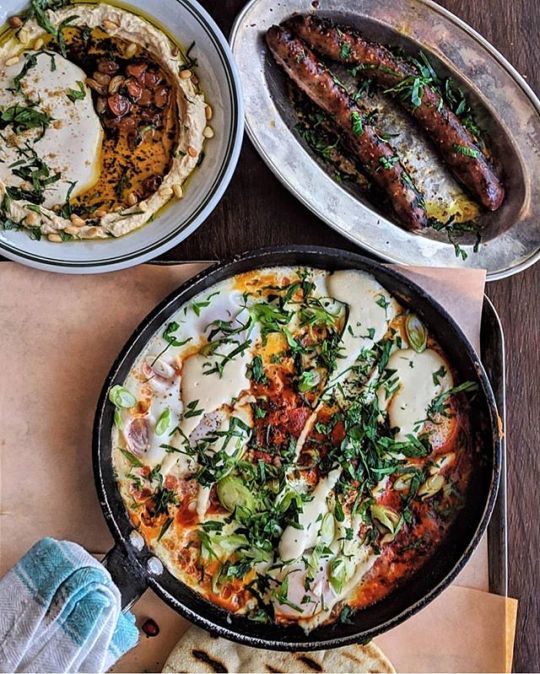
@clerkenwellboyec1 says... Breakfast of dreams @berberandq 🌞 A massive pan of sizzling Shakshuka with oozy eggs to share, spicy merguez sausages & the most delicious hummus bowl with mountains of pillowy pita bread by chef @chefjoshkatz || TAG a friend who'd like this! 🔥🍳🌿🥙💯💥♥️ . . . . #Brunch #Weekend #MakeHummusNotWar #thisislondon #londonfood ✌️🌱🕊️ https://ift.tt/2ApgMSw
16 notes
·
View notes
Text


Proxy order OPENED, these were bought with Christmas money, so I couldn’t open them until today, but !! I’m so happy to own these wall scrolls, and the Journalist/Nakaba plush was an absolute dream piece of merch! He’s SO cute!!!
2 notes
·
View notes
Text
Shakshouka
There is some controversy on the origins of shakshouka. It comes from the Northwest of Africa and there is the disagreement of this delicious dish coming from Libyan, Moroccan, Tunisian, Turkish, Algerian and Yemeni cuisine.
This dish originates no time before the New World era, as one of the main ingredients is the tomato, brought over to Northwest Africa during the Columbian Exchange. As dishes become more popular more variations are created. I’m not sure which variation I cooked here, but it was absolutely delicious and was a huge hit as a shared appetizer!
Ingredients
eggs
yellow onion
garlic cloves
olive oil
coriander seeds, sesame seeds, and cumin seeds
ground tumeric
cayenne
chile flakes
sumac
canned whole tomatoes
fresh parsley
Pita bread
Cost: If you don’t already have some of the seasonings, this could reach over $20! If you do, then about $14
Preparation
Sautee’ the onions in a skillet for a few minutes, then add the garlic and spices. Add the can of tomatoes, but first crush them with your hands (this was the best part, aside from eating it). Let it simmer with the seasonings for 5 minutes.
Now using a wooden spoon, make space in the sauce for each egg, place one in at a time. let it simmer on low heat until the egg whites are opaque and the egg yolks are still runny!
I served it sizzling hot in the pan with small pieces of pita bread, which were just the perfect size for this dish. This was perfect as a meal for two or an appetizer for 3 or 4 people, and it only took about 15 minutes to make with minimal dishes.

1 note
·
View note
Photo

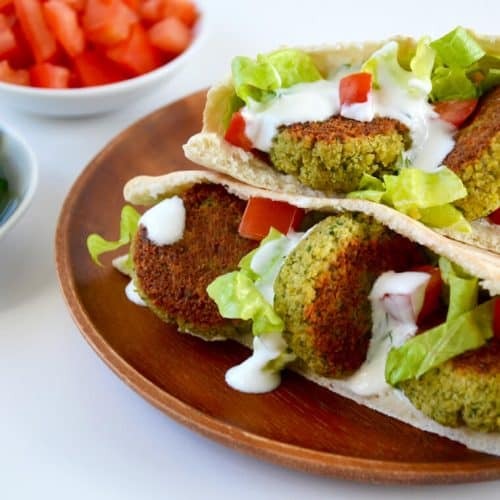
Falafel
Ingredients
400g can chickpea, rinsed and drained
1 small red onion, roughly chopped
1 garlic clove, chopped
handful of flat-leaf parsley or curly parsley
1 tsp ground cumin
1 tsp ground coriander
1⁄2 tsp harissa paste or chilli powder
2 tbsp plain flour
Instructions
1. Drain a 400g can chickpeas and pat dry with kitchen paper.
2. Tip into a food processor along with 1 small roughly chopped red onion, 1 garlic clove, handful of flat-leaf parsley, 1 tsp ground cumin, 1 tsp ground coriander, ½ tsp harissa paste or chillli powder, 2 tbsp plain flour and a little salt.
3. Blend until fairly smooth, then shape into four patties with your hands.
Pita Bread
Ingredients
1 cup warm water (not hot or boiling)
2 teaspoons active dry or instant yeast
2 1/2 to 3 cups all purpose flour
2 teaspoons salt
1 to 2 teaspoons olive oil (optional)
Instructions
1. Form the Pita Dough: Mix the water and yeast together, and let sit for about five minutes until the yeast is dissolved. Add 2 1/2 cups of the flour (saving the last half cup for kneading), salt, and olive oil (if using). Stir until a shaggy dough is formed.
2. Knead the Dough: Sprinkle a little of the extra flour onto your clean work surface and turn out the dough. Knead the dough for about 5-7 minutes, until the dough is smooth and elastic. Add more flour as needed to keep the dough from sticking to your hands or the work surface, but try to be sparing. It's better to use too little flour than too much. If you get tired, stop and let the dough rest for a few minutes before finishing kneading.
3. Let the Dough Rise: Clean the bowl you used to mix the dough and film it with a little olive oil. Set the dough in the bowl and turn it until it's coated with oil. Cover with a clean dishcloth or plastic wrap and let the dough rise until it's doubled in bulk, 1-2 hours.
4. At this point, you can refrigerate the pita dough until it is needed. You can also bake one or two pitas at a time, saving the rest of the dough in the fridge. The dough will keep refrigerated for about a week.
5. Divide the Pitas: Gently deflate the dough and turn it out onto a lightly floured work surface. Divide the dough into 8 equal pieces and gently flatten each piece into a thick disk. Sprinkle the pieces with a little more flour and then cover them with a kitchen towel or plastic wrap wrap until you're ready to bake them.
6. Shape the Pitas: Using a floured rolling pin, roll one of the pieces into a circle 8-9 inches wide and about a quarter inch thick. Lift and turn the dough frequently as you roll to make sure the dough isn't sticking to your counter. Sprinkle with a little extra flour if its starting to stick. If the dough starts to spring back, set it aside to rest for a few minutes, then continue rolling. Repeat with the other pieces of dough. (Once you get into a rhythm, you can be cooking one pita while rolling the next one out.)
7. To Bake Pitas in the Oven: While shaping the pitas, heat the oven to 450°. If you have a baking stone, put it in the oven to heat. If you don't have a baking stone, place a large baking sheet on the middle rack to heat.
8. Place the rolled-out pitas directly on the baking stone or baking sheets (as many as will fit), and bake for about 3 minutes. I've found it easiest to carry the pita flat on the palm of my hand and then flip it over onto the baking stone. The pita will start to puff up after a minute or two and is done when it has fully ballooned. Cover baked pitas with a clean dishtowel while cooking any remaining pitas.
9. To Bake Pitas on the Stovetop: Warm a cast iron skillet over medium-high heat until a few bead of water sizzle immediately on contact. Drizzle a little oil in the pan and wipe off the excess.
10. Lay a rolled-out pita on the skillet and bake for 30 seconds, until you see bubbles starting to form. Flip and cook for 1-2 minutes on the other side, until large toasted spots appear on the underside. Flip again and cook another 1-2 minutes to toast the other side. The pita should start to puff up during this time; if it doesn't or if only small pockets form, try pressing the surface of the pita gently with a clean towel. Keep cooked pitas covered with a clean dishtowel while cooking any remaining pitas.
Storing the Pitas: Pitas are best when eaten immediately after cooking. Leftover pitas will keep in an airtight bag for several days and can be eaten as they are or warmed in a toaster oven. Baked pitas can also be frozen with wax paper between the layers for up to three months.
RECIPE NOTES
Storing the Dough: Once it has risen, the pita dough can be kept refrigerated until it is needed. You can also bake one or two pitas at a time, saving the rest of the dough in the fridge. The dough will keep refrigerated for about a week.
Pitas That Won't Puff: Sometimes you get pitas that won't puff. The problem is usually that the oven or the skillet aren't hot enough. Make sure both are thoroughly pre-heated before cooking. Even pitas that don't puff are still delicious and can be used wraps or torn into pieces for dipping in hummus.
0 notes
Text
Crispy Falafel
Raise your hand if you love falafel! I’ve gone back into the archives to highlight my all-time favorite homemade falafel recipe. Making falafel at home can be tricky, but this recipe is easy.

Six reasons to love this healthy falafel recipe:
These falafels are golden brown and crispy on the outside. The insides are tender, delicious, and full of fresh herbs.
They’re baked instead of fried, so they contain significantly less fat than fried falafel. And your house won’t smell like fried food for days. Winning!
Once your chickpeas are sufficiently soaked, the falafel mixture comes together in no time. If you have someone to help shape the patties, they’ll come together even faster.
These falafels are gluten free and vegan, so they’re a great party appetizer.
These falafels freeze well, so they’re a fantastic protein-rich option to keep on hand for future salads and pita sandwiches.
On that note, this recipe is easily doubled! See recipe notes.
How to Make the Best Homemade Falafel
Bake it, don’t fry it. I say this because frying requires a lot of sizzling hot oil, and that scares me. I also don’t have a good vent over my oven to take the fried food smell far, far away. Plus, you can use a reasonably amount of heart-healthy olive oil in the baked version.
Coat your rimmed baking sheet with olive oil. That way, you get a fried effect in the oven, and you don’t have to brush the little falafels individually with olive oil. Winning!
Use dried chickpeas, not canned. Canned chickpeas do not work for falafel. They’re far too wet. If you try to use canned chickpeas instead of dried and soaked chickpeas, you’ll end up with sad falafel pancakes. Some recipes try to counteract the wetness by adding flour, which significantly dulls the flavor and makes the texture more doughy.
Soak the dried chickpeas for at least four hours. If your chickpeas aren’t sufficiently softened, you’ll have unpalatably tough pieces of chickpea in your falafel. There’s just no workaround here.
Choose your dried chickpeas wisely. Try to buy your dried chickpeas from a store with high turnover, because old chickpeas need longer to soften. If you have options, pick the chickpeas that are the smallest, since they’ll soften faster.
Falafel Serving Suggestions
Serve falafel as an appetizer, wrap it into a pita sandwich, or add it to salad for a protein-rich topping. Falafel goes great with any of the following ingredients:
Pita bread, warmed or toasted (tear it up for pita “croutons”)
Fresh greens (such as spring greens or chopped romaine)
Tomatoes, sliced
Bell peppers, cut into strips
Cucumber, thinly sliced
Kalamata olives, pitted and sliced
Raw red onion, thinly sliced, or quick-pickled onions
Feta cheese, crumbled
Sauce: Something creamy like tzatziki, hummus, or tahini sauce, and maybe a spicy sauce like zhoug or shatta, too
Here’s a tahini dressing recipe that goes great with this falafel, too:
1/4 cup tahini
Zest and juice of 1 small lemon
1 tablespoon white miso
2 garlic cloves, pressed
2 tablespoons fresh dill, chopped
1 tablespoon fresh parsley, chopped
Pinch of cayenne
1/3 cup water
Crispy Falafel
INGREDIENTS
¼ cup + 1 tablespoon extra-virgin olive oil
1 cup dried (uncooked/raw) chickpeas, rinsed, picked over and soaked for at least 4 hours and up to 24 hours in the refrigerator
½ cup roughly chopped red onion (about ½ small red onion)
½ cup packed fresh parsley (mostly leaves but small stems are ok)
½ cup packed fresh cilantro (mostly leaves but small stems are ok)
4 cloves garlic, quartered
1 teaspoon fine sea salt
½ teaspoon (about 25 twists) freshly ground black pepper
½ teaspoon ground cumin
¼ teaspoon ground cinnamon
INSTRUCTIONS
With an oven rack in the middle position, preheat oven to 375 degrees Fahrenheit. Pour ¼ cup of the olive oil into a large, rimmed baking sheet and turn until the pan is evenly coated.
In a food processor, combine the soaked and drained chickpeas, onion, parsley, cilantro, garlic, salt, pepper, cumin, cinnamon, and the remaining 1 tablespoon of olive oil. Process until smooth, about 1 minute.
Using your hands, scoop out about 2 tablespoons of the mixture at a time. Shape the falafel into small patties, about 2 inches wide and ½ inch thick. Place each falafel on your oiled pan.
Bake for 25 to 30 minutes, carefully flipping the falafels halfway through baking, until the falafels are deeply golden on both sides. These falafels keep well in the refrigerator for up to 4 days, or in the freezer for several months.
0 notes
Text

Speaking of Pokemon..! Special thanks to Pokemon Adventures throughout the years! This is my current collection, and it’s pretty complete to what’s currently out. This series has been important to me since I was pretty young, so it feels great keeping up!
30 notes
·
View notes
Text
extra-billowy dutch baby pancake
[Welcome back to ✨ Newer, Better Month ✨ on Smitten Kitchen, when I get update a few SK classics with new knowledge, new techniques, and with real-life time constraints in mind. Previously: Perfect Spaghetti and Meatballs and Extra-Flaky Pie Crust.]
Sometimes “newer, betters” emerge because the original recipe wasn’t as good as it could be. But most of them — like this — come from real life. Like, when you’re really tired on a Saturday morning and you look at a recipe that you swore by at some time in your life when nobody dragged you out of bed at 7am on a Saturday [and then, instead of handing you a cup of coffee for your troubles, as you’d once daydreamed they’d be trained to do by now, demanded pancakes] and say “WHUT.” A blender? No, I am definitely not getting the blender out right now. Wait, why am I turning on the stove and the oven? Do I really need this much butter? Why are there lumps in the batter? Why isn’t this as puffy as I thought it would be? Can I go back to bed yet? I mean, just for a random example that’s definitely not going down in my kitchen as we speak.
In the early days of this site, I told you about what my mom’s 1970s blender recipe insert called German Pancakes, confusing many German friends and readers, who had never heard of them. We better know these as Dutch babies — equally confusing, and said to have been coined by a corruption of the German deutsch — or David Eyre’s Pancakes, but they’re closer to popovers or Yorkshire puddings than anything else in batter. Because dramatic, rumpled crepe-like pancakes will always be more exciting than undramatic, unrumpled crepes, I’ve made a lot of versions over the years: buckwheat, cherry-almond and chocolate on the site; gingerbread (in The Smitten Kitchen Cookbook) and a parmesan dutch baby with creamed mushrooms (in Smitten Kitchen Every Day). It was when I was working on the chocolate Dutch baby that took a closer look at dutch baby formulas I’d been using and found through trial but mostly error one that I preferred.
I found that an eggier batter led to a more billowy pancake. I found a little less flour and milk also increased rumples. I found that by adding the flour first, a lumpy batter was fully avoidable. I also realized that a lot of what makes a Dutch baby “work” — i.e. have a dramatic and Instagram-worthy finish — making sure you have the right amount of batter for you pan and, often, cooking it a minute or two further than merely cooked through. An extra couple minutes helps the shape of the waves set, and provides a nice crispy edge underneath.
On sleepy Saturday mornings, I did away with the blender and sometimes even the whisk, the stove, and even the requirement of an ovenproof skillet. I also realized that you don’t even need to choose a sweet vs. savory angle (read: break up any arguments from children who didn’t agree on flavors) before you bake the pancake. You can shower it with anything you choose after it exits the oven — sugar, lemon, fruit, or chocolate for sweet tooths; cheese, herbs, sauteed vegetables, and/or ham or bacon for savory cravings. You could make it right now; believe me, I already am.
Previously
One year ago: Melting Potatoes Two years ago: Easiest French Fries and Peanut Butter Swirled Brownies Three years ago: Nolita-Style Avocado Toast and Chocolate Peanut Butter Tart Four years ago: Black-Bottom Oatmeal Pie and Potatoes with Soft Eggs and Bacon Vinaigrette Five years ago: Double-Chocolate Banana Bread and Sizzling Chicken Fajitas Six years ago: Coconut Bread and Chocolate-Hazelnut Macaroon Torte Seven years ago: Carrot Cake Pancakes Eight years ago: Oat and Maple Syrup Scones Nine years ago: Baked Rigatoni with Tiny Meatballs, St. Louis Gooey Butter Cake, Breakfast Pizza Ten years ago: Pita Bread, Layer Cake Tips + The Biggest Birthday Cake, Yet and Caramelized Onion and Goat Cheese Cornbread Eleven years ago: Hazelnut Brown Butter Cake, Chard and White Bean Stew, Pasta with Cauliflower, Walnuts, and Feta Twelve years ago: Skillet Irish Soda Bread and Lighter-Than-Air Chocolate Cake
And for the other side of the world: Six Months Ago: Breakfast Burritos 1.5 Years Ago: Pizza Beans 2.5 Years Ago: Piri Piri Chicken and Chocolate Pavlova 3.5 Years Ago: Oat and Wheat Sandwich Bread 4.5 Years Ago: Herbed Tomato and Roasted Garlic Tart and Cauliflower Slaw
Extra-Billowy Dutch Baby Pancake
Servings: 2 to 4
Time: 30 minutes
Source: Smitten Kitchen
Print
The two key things to keep in mind when aiming for Peak Billows in your puffy oven pancake are 1. Baking it long enough that the center sets too, getting a chance to slightly rumple, although it may not always. This usually involves setting the timer for the suggested time and checking back every 1 to 2 minutes after until it’s just right. 2. Having the right size pan for the batter yield. If there’s too little, the pancake will not have the same dramatic heights. The yield here is intended for one 12-inch round ovenproof skillet, two 9-inch round ovenproof skillets, the equivalent sized baking dishes, or even a 9×13-inch pan. If you pan is smaller, simply scale the recipe down. For the 2-quart oval casserole dish shown up top, I used 3/4 of this batter, i.e. 3 eggs, 6 tablespoons each flour and milk. Finally, I know people often balk at the amount of butter, and this uses less than some recipes, but it’s essential that there’s enough in the pan that the pancake can slide around and rumple over it; if there’s any even slight sticking, it will not.
2 to 3 tablespoons unsalted butter
4 large eggs
1/2 cup (65 grams) all-purpose flour
1/2 cup milk (ideally whole milk but most varieties will work)
1/4 teaspoon kosher salt
If savory: Freshly ground black pepper, wilted spinach or sauteed greens, bacon or ham cheese, herbs or comte, herbs (shown here with ham, gruyere, and chives)
If sweet: Powdered sugar, lemon juice, syrup, fresh berries, shaved chocolate or chocolate sauce
1 tablespoon sugar both optional)
Heat oven to 425 degrees F with one 12-inch round ovenproof skillet, two 9-inch round ovenproof skillets, the equivalent sized baking dishes inside.
In a large bowl, beat eggs thoroughly with a whisk or fork. Add salt and flour, whisk until lumps disappear. Add milk, whisking until smooth. If you know you’d like your pancake to end up sweet, you can add 1 tablespoon granulated sugar to the batter; if you know you’d like it to be savory, you can add freshly ground black pepper. But, you can also choose your own adventure when it comes out.
When oven and baking vessel are fully heated, wearing potholders, carefully remove skillet(s) or baking dish(es) from the oven. Melt butter inside and roll it around so it goes up the sides, too. If using one large dish, two-ish tablespoons is often sufficient; it’s best to use three tablespoons between two dishes, however.
Pour batter into buttered dish(es) and return it to the oven. Bake for 12 to 13 minutes to start, and then in additional 1 to 2 minute increments until the edges are deeply golden brown and the centers are just beginning to color. Have your finishes ready to go. Transfer to a cooling back or trivet. I finish sweet pancakes with lemon juice and a good coating of powdered sugar, and savory pancakes with grated cheese, vegetables and/or ham or bacon, and fresh herbs. Eat immediately; these pancakes are best hot from the oven.
Source: https://smittenkitchen.com/2019/03/extra-billowy-dutch-baby-pancake/

0 notes