#photography backpack reviews
Explore tagged Tumblr posts
Text
Top 10 Travel-Friendly Backpacks for Photographers
Looking for the best travel-friendly backpacks for photographers? Check out this top 10 list for safe and comfortable transportation of your camera gear while you travel and explore.
This top 10 travel-friendly backpacks for photographers post was provided as a guest post by Claire Wilson. In today’s fast-paced travel photography, where amazing moments unfold in the blink of an eye, and you need precision and quality, carrying the appropriate equipment is a must. Traveling as a photographer, be it a professional or an amateur photographer, a backpack matters a lot because it…
View On WordPress
#adventure photography backpacks#bag photography lowepro#best photo backpacks hiking#camera backpacks comfort#camera backpacks for beginners#camera backpacks professional#camera gear backpacks#great photography backpacks#modern photography backpacks#photo backpacks for travel#photographer backpacks#photographer travel backpack#photography backpack leather#photography backpack recommendations#photography backpack reviews#photography backpacks for camera#photography bag recommendations#photography bags and backpacks#photography bags for equipment#photography camera bag#photography for backpack#photography hiking backpack reviews#photography professional backpack#photography travel backpacks#photography travel bag
0 notes
Text
Best Camera Backpack for Travel Photography on a Budget!
#Photography Bag#camera backpack review#best camera backpack#SLR Camera Bag#learn photography#best camera bag#Outdoor Photography#DSLR
2 notes
·
View notes
Text

Today I finished this wonderful book, and decided to have some fun on a trail of my own!
_______________________________________________
Book Review
Title: The Trail to You & Me Author: Mandi Lynn Bell
Book Series: Road Trip Snapshot, book #3 (stand-alone)
No. of Pages: 319
ISBN: 9781953388070
Synopsis:
What was supposed to be a summer fling fails epically when opposites attract and sparks fly.
Lori has her life planned out for the next five years. She’s intent on graduating college early, becoming a yoga instructor, and starting her own business. Her plans have already been de-railed for two years after helping a friend in crisis and now it’s time to buckle down and focus. However, a regular shift at work, ends with flirtatious banter and a promise to a memorable evening.
Even with the unexpected date, Lori is determined to keep him at a distance. While he’s free-spirited and ready to embrace the unexpected, Lori can’t afford to be sidetracked from her dreams again. Besides, this summer romance is doomed to fail since he’s on his own mission to hike the Appalachian Trail. No matter how hard she tries to get him off her mind, she can’t help but be both envious and curious of his simple approach to life. Struggling to let go of her hard-set ways, Lori finds herself agreeing to something she’d never thought she’d do: ditch work to go backpacking.
After summer ends, will their romance survive, or will their differences pull their lives in two different directions?
The Trail to You & Me is a standalone novel in the Road Trip Snapshot Series. If you like books with witty banter, adventure, and coming of age elements, Lori’s story is sure to claim your heart.
_______________________________________________
What did I think of the book?
The Trail to You & Me by Mandi Lynn Bell My rating: ⭐⭐⭐⭐⭐ 5 of 5 stars I have never been more excited to start reading a book. This is such a sweet, feel-good story that has made me smile at almost every page. This is one of those books that have come into my life when I needed it most, and left me feeling absolutely euphoric, grinning from ear-to-ear, and wanting to immediately re-read it again. The story has many great life lessons, too, such as “it’s about the journey, not the destination”, and living your life. The characters were relatable, had good development, and the pacing of the story from chapter to chapter felt natural and real. It really feels like Mandi knew what she was doing when putting this book together. On release day, I didn’t hesitate to get this book with The Book Adventure Box from the author’s website. The gifts in the box took the reading experience to another level. It felt like I was part of the book, and going on the same adventures as the characters. Immersion is an important factor for me with reading, and The Book Adventure Box nailed that perfectly.
The hiking scenes were quite nostalgic, reminding me of when I used to go hiking and traveling with my family for a couple weeks over the school holidays every other year. The further I read, the more intensely I felt inspired to go hiking again myself. Favorite character/s: Caleb “Chip” - for the way he balances Lori out, and the life lessons he gives in the book. What drew me to this book? I was looking to read a romance and the Appalachian Trail was mentioned in the blurb of the book, so I was sold on the combination. Stars: 5/5 - it’s a wonderful Summer read, and I can’t wait to read the first two books in the Road Trip Snapshot series when they arrive in the mail.
*The Book Adventure Box View all my reviews
#booklr#book review#the trail to you & me#mandi lynn bell#summer reading#backpacking#hiking#appalachian trail#adventure#romance#fiction#book blog#books#bookish#bookworm#books and reading#book photography#would read again
2 notes
·
View notes
Text
MS05 Tripod Review
KF Concept MS05 Tripod: Our Verdict MS05 Tripod Star Rating ⭐⭐⭐ Rating: 3 out of 5. Pros Small Strong Cons Only two options for adjusting Lack of height Technical Details Dimensions Weight 208g Main Materials Aluminium Alloy Max Height 15.6cm Max Weight 20kg Where to buy You can also use the below button to purchase your own KF Concept MS05 Tripod from Amazon. By purchasing…

View On WordPress
#backpacking#EDC#K&F Concept#photography#Photography essentials#Review#smartphone#Tech#travel#travel essentials#travel gear#Travel photography#tripod
0 notes
Text
Hiking Guide to Crater Lake National Park: Discover the Spectacular Beauty of the Pacific Northwest
Welcome to our comprehensive hiking guide to Crater Lake National Park, Oregon. Immerse yourself in the Pacific Northwest’s stunning, pristine wilderness. From the crystal clear sapphire waters of Crater Lake to the park’s dramatic volcanic landscapes, prepare to embark on an adventure that will take your breath away. Whether you’re a seasoned hiker or a nature-loving novice, our guide will equip…

View On WordPress
#Backpacking#camping sites#Crater Lake National Park#flora and fauna#hiking guide#hiking safety#National Parks USA#natural wonders#nature exploration#nature photography#Oregon hiking#Oregon travel#outdoor adventure#Pacific Northwest trails#Scenic Views#trail reviews#US parks#weather and climate Crater Lake#wildlife sightings
1 note
·
View note
Text
Oh No! I got mad about something someone I dont know posted on the internet and I am brooding and angry about it! Instead of posting I will relax and reflect and do something more productive like:
Scuba diving
Yoga
National Park Travelers Club
Becoming A Nudist
Jigsaw puzzles
Wikipedia editing
Inventing A Time Machine
Woodworking
Masturbating
Succumbing To The Amulet
Genealogy
Masturbating
Dark Alchemy
Robot combat
Bungee jumping
Electronics repair
Beekeeping
Lego sets
Shuffleboard
Slacklining
Eating Lugnuts Off The Cars In the Walmart Parking Lot
Photography
Metalworking
Hacking
Golfing
Paintball
Transcending the Limitations of Flesh
Welding
Thrifting
Sleeping
Abolishing The Division of Night and Day
Pet fostering
Meteorology
Getting Gone
Bowling
Dumpster Diving
Book collecting
Amateur radio
Meditating On My Uncountable Failures
Weaving
Ice skating
Graphic design
Brewing
Masturbating
Car racing
Stealing
Camping
Teaching Crows How To Commit Tax Fraud
Getting Really Good At Beatboxing
Cooking
Getting My Stink Salted
Bird watching
Crocheting
Gymnastics
Screaming Into the Night Sky At God
Metal detecting
Masturbating
Driving Off A Bridge
Sleeping
Thinking about Masturbating
Revisiting Classics To See If They Hold Up
Origami
Drinking
Masturbating
Billiards
Chess
Sleeping
Geocaching
Bread making
Launching rockets
Calligraphy
Archery
Jewelry making
Smoking
Video games
Needlepoint
Water skiing
Animal breeding
Stealing
Podcasting
Fantasy sports
Learning Spanish
Wine tasting
Backpacking
Getting Way Too Into Sports
Alchemy
Karaoke
Stealing
Traveling
Turning Straight Women Gay
Taxidermy
Masturbating
Horseback riding
Fishing
Being a DJ
Quilting
Juggling
Record collecting
Baking
Glassblowing
Drones
Stealing Infant Teeth
Crossfit
Improvisation
Attuning Myself To Crystals For the Purposes of Psychic Attacks
Drinking
Playing a musical instrument
Stand-up comedy
Throwing Myself Into A Volcano
Skiing
Remote cars
Bonsai
Furniture restoration
Quitting While I'm Ahead
Drinking
Writing
Smoking
Meterology
Local historical society
Disappearing In A Mysterious Accident
Assassination
Painting
Handball
Masturbating
Cheese-making
Martial arts
Astronomy
App making
Table tennis
Web design
Letting All The Demons Out of Hell
Farming
Hiking
Home improvement projects
Swimming
Skydiving
Volunteering
Animal grooming
Forbidden Alchemy
Remote airplanes
Gardening
Burying A Bunch Of Eggs
Becoming The Worlds Preeminent White Maoist
Digging A Hole To The Center of the Earth
Trivia
Journaling
Video production
Masturbating
Drinking
Crossword puzzles
Vehicle restoration
Candle-making
Drinking
Reading
Art collecting
Drawing
Makeup
Smoking
Running
Dancing On the Graves of My Enemies
Sleeping
Kayaking
Poetry
Knitting
Sleeping
Designing clothing
Sailing
Acting
Rock climbing
Disc golfing
Scrapbooking
Winemaking
Wood burning
Running Away
Museum visiting
Pottery
Escape rooms
Soap making
LARPing
Freestyling
Flying
Smoking
Snowboarding
Board games
Just Eating A Bunch of Candy
Surfing
Masturbating
Mixology
Smoking
Card games
Kite surfing
Masturbating
Composting
Dancing
Creating The Perfect French Fry
Powerlifting
Model trains
The Rites And Rituals Forbidden To Me
Movie reviews
Frisbee Wizardry
81 notes
·
View notes
Text
How Men Can Build a Business Around Their Passion for Travel

Travel is one of those experiences that has the power to transform lives, broaden perspectives, and open up new opportunities. For many men, the idea of building a business around their passion for travel may seem like a distant dream—something only a lucky few can achieve. But in reality, there are countless ways to turn your love for exploring the world into a profitable business venture. Whether you're just starting out or looking for ways to pivot your current career into the travel industry, the possibilities are endless. Let’s dive into how men can leverage their passion for travel to build a successful and sustainable business.
1. Find Your Niche Within the Travel Industry
The travel industry is vast and diverse, and that’s a good thing! It means there are endless opportunities for you to carve out a niche that aligns with your interests, expertise, and passions. Building a business around your love of travel requires more than just visiting new places and taking beautiful photos. You need to think about what unique angle or service you can offer that others aren’t.
Here are some niche travel business ideas to consider:
Adventure Travel: If you have a love for hiking, backpacking, or extreme sports, you can create a travel business that focuses on adventure tourism. This could involve organizing guided treks, providing gear rentals, or even creating content like blogs and videos that promote adventure destinations.
Luxury Travel: On the other end of the spectrum, luxury travel caters to high-end experiences. If you have a knack for curating exclusive experiences like private yacht charters, luxury resort stays, or private tours, you can build a brand that appeals to affluent travelers.
Cultural Tourism: If you're passionate about immersing yourself in different cultures, you could create a business that offers cultural experiences, tours, or even immersive language classes. Think about niche offerings such as food tours, art history tours, or local artisan workshops.
Sustainable and Eco-Tourism: More travelers are seeking eco-friendly and responsible travel options. Starting a business that offers sustainable travel packages, eco-conscious accommodations, or environmentally friendly travel gear could be a way to tap into this growing market.
Digital Nomad Resources: Many men dream of working remotely while traveling the world. You could build a business around helping digital nomads—creating coworking spaces, offering coaching on how to balance work and travel, or even offering travel packages designed for remote workers.
When selecting your niche, think about what excites you the most, where you have the most expertise, and what gaps exist in the market that you can fill.
2. Start with Content Creation
One of the most accessible ways to enter the travel industry is by becoming a content creator. Content creation allows you to share your travel experiences, insights, and expertise while building an audience. Over time, you can monetize this content in several ways.
Travel Blogging: Starting a travel blog is a great way to document your adventures and share useful travel tips, guides, and destination reviews. You can make money through affiliate marketing, sponsored posts, advertising, and even selling your own products or services.
Travel Vlogging: If you’re more comfortable with video, creating a YouTube channel or sharing content on Instagram or TikTok could be a great way to reach a broader audience. Many travel influencers make money through brand partnerships, affiliate marketing, and selling their own travel-related products.
Photography and Writing: If you're a skilled photographer or writer, you can sell your travel photos to websites, magazines, or companies that need visual content. Travel writing for publications or blogs can also be a lucrative avenue.
Podcasting: For those who prefer audio, starting a travel podcast can help you connect with fellow travel enthusiasts. You can interview industry experts, share your travel experiences, and discuss tips and trends. Monetization options include sponsorships, ads, and paid memberships.
Creating content is a great way to establish your brand and build an engaged audience. The more you share your passion and knowledge, the more likely it is that people will follow your journey—and that’s where business opportunities will start to arise.
3. Leverage Affiliate Marketing
Affiliate marketing is one of the easiest ways to start earning income as a travel business owner, especially if you already have a blog, vlog, or social media following. Essentially, affiliate marketing involves promoting travel-related products, services, or experiences and earning a commission when someone makes a purchase through your referral link.
As a travel content creator, you could partner with companies in the following areas:
Accommodation Providers: Many popular platforms like Booking.com or Airbnb offer affiliate programs. You can earn a commission by recommending properties or destinations to your audience.
Travel Gear and Equipment: Travel accessories such as backpacks, luggage, cameras, clothing, and tech gadgets are highly sought after by travelers. You can become an affiliate for brands that sell these products.
Tour Companies: If you recommend tour packages, experiences, or activities, you can sign up for affiliate programs that pay you a commission for each booking made through your affiliate links.
Flight and Travel Booking Websites: Platforms like Skyscanner or Expedia offer affiliate programs where you can earn money by referring people to their sites to book flights, hotels, or rental cars.
Affiliate marketing requires an audience that trusts your recommendations, but once you have built that, it can be a passive income stream that grows over time.
4. Create and Sell Travel Products or Services
If you have expertise in a specific area of travel, you could create your own products or services that cater to travelers. This is where you can get really creative and offer something truly unique.
Guides and eBooks: If you have extensive knowledge of certain destinations, cultures, or travel hacks, you could create digital guides or eBooks to sell to your audience. These could range from detailed travel itineraries, packing lists, or even niche guides like “How to Travel with Kids” or “How to Travel on a Budget.”
Travel Coaching: Many men dream of traveling more but don’t know where to start. You could offer travel coaching or consultancy services, helping people plan their trips, navigate budgeting, and overcome common travel challenges.
Travel Merchandise: If you have a strong personal brand, you could design and sell branded travel merchandise like T-shirts, hats, travel mugs, or even travel accessories. Many influencers and businesses in the travel space make significant revenue from selling branded goods.
Customized Travel Experiences: If you're well-traveled and knowledgeable about certain destinations, you could offer bespoke travel experiences. This could include planning and booking everything for clients—flights, accommodations, activities, and unique experiences that fit their interests.
The key is to find products or services that complement your brand and the interests of your audience. This creates a more engaged customer base and adds a layer of authenticity to your offerings.
5. Monetize Through Partnerships and Sponsorships
As your business grows and your content gains traction, you'll start attracting the attention of brands looking to work with influencers or businesses in the travel space. Sponsorships and partnerships are a great way to bring in additional income and grow your brand.
Brands in the travel industry, including airlines, hotels, tourism boards, and travel gear companies, are often looking for content creators or business owners to promote their products and services to a wider audience. These partnerships can take many forms, such as:
Sponsored Posts: You can be paid to write a blog post, share an Instagram post, or create a YouTube video that features or mentions a brand’s product or service.
Ambassadorships: Some brands offer long-term partnerships, where you become an ambassador for their company in exchange for compensation and free products or services.
Collaborations: You can collaborate with brands to create co-branded content, such as joint social media campaigns, travel guides, or even travel events and meetups.
To successfully land partnerships and sponsorships, it’s essential to have a solid online presence, a clear brand identity, and an engaged audience. Once you’ve built your reputation as a reliable source of travel content, these opportunities will naturally come your way.
6. Building a Travel Brand Around Your Identity
Building a business around your passion for travel also involves creating a recognizable and authentic brand. Your travel business should reflect who you are, your values, and your unique perspective on the world. This authenticity is what will help you connect with your audience and stand out from the competition.
Here are some ways to build your personal brand:
Be Consistent: Consistency is key to building a loyal following. Post regularly on your blog, social media, and other platforms to keep your audience engaged and coming back for more.
Show Your Personality: Don’t be afraid to let your personality shine through in your content. People want to follow someone they can relate to and trust.
Offer Value: Whether through helpful tips, inspiring stories, or unique travel experiences, make sure your content adds value to your audience's lives.
Engage with Your Audience: Respond to comments, emails, and messages. Building a community around your brand is essential to growing your business.
Conclusion
Building a business around your passion for travel may take time, effort, and persistence, but it is entirely possible. By focusing on your niche, creating valuable content, leveraging affiliate marketing, offering products and services, and seeking out sponsorships, you can turn your travel dreams into a profitable business. The key is to stay true to your passion, continually engage with your audience, and be willing to adapt as the travel industry evolves.
Remember, the world is full of opportunities, and if you’re willing to take the plunge, the possibilities for your travel-based business are endless.
0 notes
Text
Are Nile River Cruises Safe? Discover the Truth Before You Sail!
Are Nile River Cruises Safe? the Nile River is one of the most enchanting ways to explore Egypt’s ancient wonders, from the majestic temples of Luxor to the serene beauty of Aswan. While these cruises are generally safe and well-regulated, it’s always wise to take the necessary security precautions before, during, and after your trip.
In this article, we’ll break down essential security measures to ensure a safe and hassle-free journey on the Nile.
🛂 Before Your Nile Cruise: Preparation & Precautions
1. Choose a Reputable Cruise Operator
Before booking your cruise, research different operators to ensure you travel with a licensed and well-reviewed company. Consider the following: ✅ Look for certified and established cruise companies with strong safety records. ✅ Read recent customer reviews on trusted travel websites. ✅ Check if the cruise adheres to Egyptian tourism security standards.
💡 Tip: Avoid extremely cheap deals from unknown operators, as they may compromise on safety and service quality.
2. Get Travel Insurance
Unexpected situations can arise, so having comprehensive travel insurance is crucial. Ensure your policy covers: 🔹 Medical emergencies (including hospital visits and evacuations). 🔹 Trip cancellations or delays. 🔹 Theft or loss of belongings.
💡 Tip: Carry a digital and printed copy of your travel insurance details for easy access.
3. Know the Safety Regulations
Familiarize yourself with Egypt’s travel safety measures: ✅ Check travel advisories from your country’s foreign office. ✅ Register with your country’s embassy in Egypt for emergency updates. ✅ Learn about local laws and customs, especially regarding photography and cultural etiquette.
4. Pack Smart for Safety
Carry only the essentials and pack strategically: 🎒 Secure backpack or anti-theft bag to prevent pickpocketing. 🔑 Padlock for your luggage if needed. 💊 Medications and first aid kit for minor health issues. 📑 Copies of important documents (passport, visa, travel insurance).
💡 Tip: Keep valuables in your hotel safe before boarding the cruise to avoid unnecessary risks.
🚢 During Your Nile Cruise: Onboard Safety & Excursion Security
1. Follow Cruise Security Briefings
Upon boarding, the cruise staff will provide a safety briefing. Pay attention to: ✅ Emergency exits and evacuation procedures. ✅ Onboard security measures (such as surveillance cameras and restricted access areas). ✅ Health protocols for hygiene and food safety.
2. Be Cautious with Strangers
While most fellow travelers are friendly, always remain cautious: 🚫 Avoid sharing personal information with strangers. 🚫 Do not accept drinks or food from unknown individuals. 🚫 If someone offers unsolicited "help" with luggage or excursions, politely decline.
3. Keep Your Belongings Secure
✔ Use the in-room safe for passports, cash, and valuables. ✔ Carry only small amounts of cash for daily expenses. ✔ When on deck or in public areas, keep bags within sight.
💡 Tip: Instead of carrying a wallet in your pocket, use a money belt or neck pouch for added security.
4. Stay with Your Group During Excursions
When visiting temples and local markets, always: ✔ Stick with your licensed guide and group. ✔ Follow the designated tourist paths at historical sites. ✔ Avoid wandering into less crowded or remote areas.
💡 Tip: If approached by aggressive vendors or touts, firmly say "La Shukran" (No, thank you) and keep walking.
5. Be Aware of Local Scams
While Egypt is generally safe, common tourist scams include: 🚨 Overpriced taxi rides – Always agree on the fare before getting in. 🚨 Fake "tour guides" offering free services – Stick with your official guide. 🚨 Phony souvenirs – Some vendors sell "antiques" that are actually mass-produced.
💡 Tip: Bargaining is common, but if you feel pressured, walk away.
🏁 After Your Nile Cruise: Ensuring a Safe Departure
1. Secure Your Belongings Before Leaving the Cruise
Before disembarking, double-check: ✔ Your passport, phone, and wallet are safely stored. ✔ You have all your luggage and haven’t left anything in your cabin. ✔ You’ve settled any onboard bills or service charges.
💡 Tip: Keep a small emergency stash of cash in a separate place in case of unexpected expenses.
2. Arrange Safe Transport
When heading to the airport or hotel: ✅ Use official transportation arranged by the cruise company or your hotel. ✅ Avoid unlicensed taxis or random drivers offering rides. ✅ If using Uber or a ride-hailing app, verify the driver and vehicle details before getting in.
💡 Tip: If you're unsure about a driver, take a photo of the license plate and send it to a friend or family member.
3. Be Cautious at Airports and Train Stations
These areas can be crowded and confusing, making them prime spots for pickpockets.
Keep your luggage in sight and avoid carrying your passport in your back pocket.
Arrive early to allow time for security screenings and possible delays.
💡 Tip: Wear a crossbody bag instead of a backpack to keep valuables in front of you.
Final Verdict: Is a Nile River Cruise Safe?
Yes! With proper security measures before, during, and after your cruise, you can have a safe and unforgettable experience on the Nile. Egypt is a welcoming country with a rich history, and the government prioritizes the safety of tourists.
Key Takeaways for a Safe Nile Cruise:
✅ Choose a reliable cruise operator with positive reviews. ✅ Stay alert and keep personal belongings secure. ✅ Follow your guide’s instructions during excursions. ✅ Avoid unlicensed taxis and unsolicited help. ✅ Get travel insurance for peace of mind.
By taking these precautions, you’ll not only stay safe but also fully enjoy the wonders of ancient Egypt on one of the most beautiful river journeys in the world
1 note
·
View note
Text

The digital marketplace though hard to navigate offers many opportunities for travel content creators. Crafting excellent digital products is only part of the battle for businesses looking to thrive in the travel industry. With millions of travel enthusiasts, nomads, and content creators online, simply having great digital travel products won't guarantee success. The key lies in how these products are marketed, reviewed, and endorsed by experts who can help push them to the front of the competitive market. From eBooks to online courses, the world of travel offers countless opportunities for profit. In this post, we’ll explore 20 Profitable Digital Travel Product Ideas and share strategies to effectively market and sell them, helping you achieve financial success. 20 Profitable Digital Travel Product Ideas for the Tourism Industry The travel and hospitality sector offers a wealth of cool, niche profitable digital products to sell online that cater to various traveler needs, from customizable itinerary planners to remote work-friendly guides. With endless possibilities, creators can tap into unique products that enhance the travel experience and address specific market demands. Travel E-books E-books filled with travel guides, tips, and destination insights are a great way to provide valuable content to travelers. E-books tailored to specific locations or types of travel (adventure, luxury, budget, etc.) are particularly attractive. Online Travel Courses Many aspiring travelers want to learn how to travel smarter, pack efficiently, or even earn money while traveling. Online courses offering such knowledge can be highly profitable. Destination-specific Itinerary Templates Selling ready-made itineraries for popular travel destinations or niche adventures (like safaris or remote island hopping) can save travelers time and effort. Printable Packing Lists Customizable packing checklists for different types of trips (beach vacations, city breaks, mountain hiking) make travel preparation easier for customers. Travel Budget Planners Interactive or printable budget planners tailored to different types of trips (backpacking, luxury trips) can help travelers stay financially organized. Photography Preset Packs Travelers love capturing beautiful moments. Preset filters for popular software like Lightroom can be sold to help travelers enhance their travel photos quickly. Travel-related NFT Art With NFTs rising in popularity, travel-themed digital art, like iconic destination landscapes, can be sold to collectors or travel enthusiasts. Interactive Digital Maps These maps could include must-see attractions, hidden gems, and even dining recommendations, offering travelers a fully curated experience. Travel-themed Stock Photography Content creators, brands, and websites constantly need high-quality, royalty-free travel images. Selling exclusive travel-themed stock photos can be lucrative. Language Learning Apps Travel-specific language apps tailored for popular tourist destinations or niche markets (e.g., learning Swahili for an African safari) can fill a unique niche. Virtual Travel Experiences With virtual tourism growing, selling virtual reality experiences of top destinations allows customers to explore the world from the comfort of their homes. Customizable Travel Journals Offering digital templates for travel journals can attract bloggers, content creators, or anyone who enjoys documenting their travel experiences. Travel-Themed Mobile Games Simple, fun games that feature iconic locations or challenges related to travel can attract the growing market of casual gamers. Local Experience Guides Offering digital guides or memberships that help travelers discover authentic local experiences can provide invaluable support, especially for solo or adventure travelers. Subscription-based Travel Newsletters Curating valuable content such as destination highlights, travel deals, and exclusive tips for a monthly fee can generate recurring income. Travel Photography Workshops Offering workshops on how to take stunning travel photos, particularly aimed at smartphone users, can attract a broad audience of travel enthusiasts. Visa and Passport Assistance Tools Digital products that guide travelers through visa applications or remind them when their passports are expiring are practical and highly useful. Digital Fitness for Travelers Travel-focused workout programs or meal plans that are designed for travelers can help people stay fit and healthy on the road. Travel-related Podcasting Guides Teaching others how to run a travel podcast, or offering equipment recommendations and guides for recording on the go, can tap into the growing podcasting trend. Customizable Travel Gift Vouchers For travel companies or even as personal gifts, customizable travel vouchers can be sold online and tailored for different experiences. Why Creating Excellent Digital Travel Products Isn’t Enough While these 20 digital products have great potential, simply developing and launching them isn’t enough to achieve success in today's competitive digital landscape. In a world where thousands of new digital products are introduced every day, having an outstanding product doesn’t guarantee visibility. What’s often missing is strategic marketing and expert validation. To stand out, digital products need to be recognized and recommended by influencers, niche content creators, expert reviewers, and bloggers who have built trust within the travel community. Here’s how these experts play a critical role in pushing digital travel products forward: 1. Niche Travel Content Creators and Influencers Amplify Reach Travel influencers and content creators have cultivated loyal audiences who trust their opinions. A positive review or mention of a digital travel product by these individuals can boost its visibility significantly. Their followers often look for recommendations on travel gear, itineraries, apps, and other tools that can enhance their journeys. By partnering with these influencers, digital product creators can benefit from authentic endorsements that amplify reach and drive sales. For instance, a travel influencer who tests and recommends a travel photography preset pack to their followers can lead to a significant uptick in sales. Their ability to visually demonstrate the product’s benefits through stunning photos creates a more persuasive case than a simple ad could. 2. Expert Digital Travel Product Reviewers Build Credibility Expert reviewers bring a level of trust and authority that many casual influencers may not have. Platforms dedicated to reviewing niche travel products—whether software, courses, or digital tools—provide in-depth analysis that can influence potential buyers. These reviews often focus on the practicality, usability, and real-world applications of the products, making them a valuable resource for travelers deciding between multiple digital tools. Travelers tend to trust expert opinions, especially when they’re backed by data, in-depth testing, or personal experience. When an expert reviewer recommends your digital product, they aren’t just giving it exposure—they’re lending it credibility, which can make all the difference in a crowded market. 3. Travel Bloggers Deliver Detailed Insights Travel bloggers, especially those with a focus on digital tools for travel, can offer thorough reviews that go beyond the surface-level features of a product. Their long-form content allows for detailed descriptions of how a product works, its pros and cons, and its potential value for different types of travelers. Unlike short social media posts, blog reviews can address a broader audience’s concerns and questions. For example, a blogger reviewing a destination-specific itinerary template may share their experiences using the product while traveling, including tips on how best to use the template. This type of detailed insight provides readers with a clear understanding of the product and increases the likelihood of a purchase. 4. Content Creators Drive Engagement and Authenticity Travel content creators—whether they’re YouTubers, Instagrammers, or TikTokers—can visually demonstrate the benefits of digital travel products in action. Video content showcasing how a travel budget planner helps save money on trips or how a virtual travel experience brings a destination to life provides viewers with tangible proof of the product’s value. Moreover, content creators’ authenticity resonates with their audiences. Their genuine use of a product in real-world settings often leads to higher engagement and stronger recommendations. Potential customers trust creators who use and benefit from the products they promote, leading to more organic sales. 5 Reasons to Craft Digital Travel Products If you're a niche travel creator with expertise in digital marketing, selling digital products can be a game-changer for your business. This shift can enhance your income streams, solidify your authority in the travel niche, and expand your brand's reach. Here’s why it’s a smart move: 1. Monetizing Expertise Efficiently As a niche travel creator, you already possess a wealth of knowledge about your specific travel domain—be it safari tours, budget travel hacks, or luxury getaways. By selling digital products like eBooks, travel guides, or online courses, you’re packaging this knowledge in a way that is easy for your audience to consume. This allows you to move beyond traditional forms of monetization, like sponsored posts or ads, and create products that can be sold repeatedly with minimal additional effort after the initial setup. For example, you could create an eBook titled "The Ultimate Guide to Solo Traveling in Africa" or an online course on "How to Find Affordable Flights Year-Round." These products solve specific pain points for your audience while establishing your expertise. Because digital products are scalable, they allow you to reach more people without the constraints of time and location, unlike one-on-one consultations or physical product sales. 2. Passive Income and Scalability A major benefit of selling digital travel products is the opportunity to generate an extra income that can be scalable. Once your products are created, they can be sold over and over without the need for significant ongoing input. Unlike physical products, there’s no inventory to manage, no shipping costs, and no geographical barriers. For a niche travel creator, this means you can generate income even while you're on the go. Whether you’re on a flight to your next destination or taking a break on a tropical beach, your digital products continue to work for you. This financial freedom is particularly appealing for those in the travel industry, as it complements the lifestyle of being location-independent and constantly on the move. 3. Boosting Brand Authority Offering digital products enhances your credibility within your travel niche. When you produce a high-quality eBook, course, or guide, it positions you as a thought leader—someone who not only travels but teaches and provides value. It shows your audience that you have deep, actionable insights that are worth paying for. Additionally, creating products tailored to your audience’s needs makes them trust you as a reliable source of information. For example, if you specialize in sustainable travel, creating a comprehensive guide on eco-friendly travel practices will help you become the go-to resource for this niche. This expertise can lead to more brand collaborations, media features, and increased visibility. 4. Customization for Your Audience One of the most exciting benefits of selling digital products is that they can be customized to fit the exact needs of your audience. Whether it’s a downloadable itinerary for a two-week African safari or a course on travel photography, digital products offer endless possibilities for personalization. You can segment your audience—families, solo travelers, luxury travelers—and create products that speak directly to their interests and pain points. Moreover, digital marketing expertise allows you to refine your offerings based on data. Tools like analytics can show which products are performing well, enabling you to tweak future offerings to meet demand. You can A/B test different product ideas, landing pages, and price points to optimize conversions. 5. Building a Sustainable Business Model While sponsored posts and affiliate marketing are common ways for travel creators to earn income, relying solely on them can be precarious. Brand deals may fluctuate, and affiliate income can be inconsistent. Selling niche digital travel products creates a more stable and predictable revenue stream. It’s a sustainable model that empowers you to control your earnings directly, rather than being at the mercy of algorithms or brand partnerships. By leveraging your digital marketing expertise, you can also promote your products through multiple channels—email marketing, social media, paid advertising, and SEO—creating a holistic strategy that continually drives sales. Takeaway: Selling digital products is a highly effective strategy for niche travel creators who possess digital marketing expertise. It allows for the efficient monetization of knowledge, creates passive income streams, enhances your travel brand authority, and offers tailored solutions for your audience. In a world where content creators are competing for attention, having your own digital products positions you as a leader in your niche while building a more sustainable, profitable business. How To Create Digital Travel Products: 9 Ways Creating digital travel products can be an exciting venture, especially in today’s technology-driven world. Whether you’re a travel blogger, digital nomad, or entrepreneur, crafting valuable digital products can not only enhance your brand but also provide travelers with resources that improve their experiences. Here’s a guide on how to effectively create digital travel products. 1. Identify Your Niche The first step in creating digital products is to pinpoint your travel niche. Are you passionate about adventure travel, luxury experiences, eco-tourism, or family-friendly vacations? Understanding your niche helps you cater to a specific audience, making your product more appealing. Conduct market research to identify gaps in the existing products and consider what unique perspectives or experiences you can offer. 2. Understand Your Audience Once you’ve identified your niche, it’s crucial to understand your target audience. What are their pain points, preferences, and needs when it comes to travel? Use surveys, social media polls, and engage with your audience through comments and messages to gather insights. Understanding your audience will inform your product development and ensure it meets their expectations. 3. Choose the Type of Digital Product There are various digital products you can create, including: E-books: Write comprehensive guides on destinations, travel tips, or itineraries. E-books can be packed with insights and practical advice, appealing to travelers looking for in-depth information. Online Courses: Share your expertise through video tutorials or courses. Topics could range from photography skills for travelers to packing tips or travel blogging techniques. Printable Resources: Create checklists, packing guides, travel planners, or itineraries that travelers can download and print. These products are often straightforward to design and can provide immediate value. Mobile Apps: If you have programming skills or can collaborate with developers, consider creating an app that addresses specific travel needs, like itinerary planning or local recommendations. 4. Develop Quality Content Regardless of the type of product you choose, the quality of your content is paramount. Invest time in researching and crafting engaging, informative, and visually appealing materials. For e-books and courses, include high-quality images, graphics, and charts to enhance the user experience. For printables, ensure they are aesthetically pleasing and easy to use. 5. Design and Branding Branding plays a vital role in the perception of your digital products. Develop a cohesive visual identity, including logos, color schemes, and typography, that resonates with your target audience. Design your products to reflect this branding, ensuring a professional appearance that builds trust with potential customers. 6. Pricing Strategy Deciding on the right price for your digital products requires balancing affordability with perceived value. Research similar products in your niche to gauge pricing standards. Consider offering tiered pricing, where you provide a free sample or a lower-cost product alongside premium offerings. 7. Set Up an E-Commerce Platform Once your product is ready, choose an e-commerce platform to sell your digital products. Platforms like Shopify, Gumroad, or Etsy can help you manage transactions and deliver products efficiently. Make sure your website is user-friendly and provides a seamless purchasing experience. 8. Market Your Product After launching, utilize various marketing strategies to promote your digital travel product. Use social media, email marketing, and content marketing to reach your audience. Collaborate with influencers in your niche to broaden your reach and generate interest. 9. Gather Feedback and Iterate Once your product is on the market, gather feedback from customers. Encourage reviews and suggestions to understand what works well and what could be improved. Use this feedback to iterate on your product, enhancing its value and ensuring customer satisfaction. Takeaway: Creating digital travel products involves understanding your niche, knowing your audience, and producing high-quality content that meets their needs. By leveraging your expertise and passion for travel, you can develop products that not only enrich your brand but also provide invaluable resources for fellow travelers. How to Price Your Digital Products Strategically and Profitably Pricing digital products strategically and profitably requires a nuanced approach, taking into account market demand, production costs, and consumer psychology. Here’s a guide on how to navigate this crucial aspect of your business. Understand Your Value Proposition Before setting a price, identify the unique value your product offers. This could be anything from exclusive content, ease of use, or the ability to solve specific problems for your target audience. Clearly articulating your value proposition will help you justify your pricing to customers. Research Your Market Conduct thorough market research to understand your competitors and the prevailing prices in your niche. Analyze similar products, their features, and customer reviews to gauge what consumers are willing to pay. This insight can inform your pricing strategy, ensuring it aligns with market expectations. Choose a Pricing Model Selecting the right pricing model is vital for maximizing profitability. There are key common pricing models you will need to consider: 1. Cost-Plus Pricing: This straightforward method involves calculating your total production costs and adding a markup percentage to determine the final price. While easy to implement, it may not account for market conditions or perceived value. 2. Value-Based Pricing: This model focuses on the perceived value to the customer rather than the cost of production. If your product addresses significant pain points or offers unique benefits, you can price it higher based on the value it provides. 3. Tiered Pricing: Offering different pricing levels for various product features or bundles can attract a broader audience. Read the full article
0 notes
Text
What to Wear and Pack for a Desert Safari in Dubai: A Complete Checklist
Organizing a desert safari in Dubai is one-of-a-kind experience. With miles of mesmerizing dunes and interesting cultural activities, it’s a trip like no other. To make your desert safari engaging and comfortable, it’s necessary to consider what to wear and pack for a desert safari. Let’s help you prepare for your desert safari in Dubai with this complete checklist.

Desert Safari Dubai Dress Code
Selecting appropriate clothing is essential to have a good time in the scorching desert atmosphere. Lightweight fabrics like cotton and linen are recommended for daytime activities. Women can choose loose trousers or maxi dresses with a headscarf to protect against dust, and men can wear shorts or trousers or light-colored shirts that don’t absorb heat. Sandals or comfortable sneakers for walking on sand are good choice. Of course, use sunglasses, a broad-brimmed hat, and sun lotion to shield yourself from the direct sunlight.
After sunset, the temperatures drop drastically. So, pack a jacket or shawl that can keep you warm and allow you to enjoy the cool desert breeze. Don’t wear or pack heavy clothes which will limit your movements during activities like dune bashing or camel riding. Don’t forget that it is appropriate to wear clothing that is simple and does not attract attention.
Packing Essentials for a Desert Safari

Preparing a checklist for a desert safari in Dubai can help with packing essentials.
Clothing: Lightweight, comfortable clothing, and a jacket or shawl to stay warm in the low temperatures at night.
Footwear: Sturdy sandals for women and closed-toe shoes for men.
Accessories: Sunglasses, hat, sunscreen lotion, reusable water bottle, a phone charge, and a small backpack to keep your belongings.
You may also carry a scarf or a bandana to cover your face from dust in windy conditions. If you’ve chosen sandboarding or other thrilling activities, take a spare set of clothes. These things will make your desert adventure enjoyable.
What to Pack for a Dubai Desert Safari?
These is a general packing list for desert safari in Dubai to be followed.
Reusable Water Bottle - Drink plenty of water to sustain yourself through the day /week.
Snacks – Light, simple foods for energy.
Photography – To capture the beautiful landscape of the desert and action-packed moments
Power Bank - To keep your mobile phone and camera fully charged.
Moisturizer – The dry climatic conditions in the desert can cause dryness. So, pack a moisturizer.
First Aid Kit – If anyone feels pain or discomfort, they should know where to get first aid from.
Small Cash – For small purchases during the safari.
Binoculars – To enjoy distant views closely.
Wet Wipes and Tissues–To wipe away dust from the face and stay fresh.
Using this packing list will make your excursion enjoyable. You can tailor the list based on the activities chosen.
Booking a Desert Safari?
To get the best out of your desert trip, make a desert safari Dubai booking with a local, licensed tour operator. Also, read online reviews about the experiences of others and confirm the type of safety standards used for the safari. Do include dune bashing and camel riding, as both these activities will offer contrasting experiences. Book the safari in advance as it gets full during peak season. Use the online platform of the chosen local tour operator and speak with their representative on a phone call.
Go for the safari, including transportation to and from your accommodation, cultural and entertainment activities, and a BBQ dinner. If children are with you, choose a family-friendly package with milder activities.
Desert Safari Experience
There are a few things to know before going on desert safari Dubai. The best time to visit the desert to enjoy daytime and evening under ideal temperatures is from November to March. There is a choice of morning safari that allows you to enjoy the desert in cool temperatures and with no crowds around. For total adventure, evening safaris are the best. They also enable one to admire desert sunsets and engage in cultural and entertaining activities along with a BBQ dinner.
You can carry medication in case you have motion sickness. This is because dune bashing is a bumpy ride that will jerk your entire body, causing you to throw up. Some tour operators also accommodate their guests’ special requirements or preferences. Just include any such requests before the trip only. You can even ask for a tripod or permission to use a drone to capture nature using your camera.
What to and What not to do in a Desert Safari

These dos and don’ts in Desert Safari Dubai will help you enjoy your trip.
Dos:
Wear clothes that are light in weight, color, and comfortable.
Apply sunscreen and cover your head and face with a wide-rounded hat.
Listen to and use the guide’s instructions for your safety
Respect the culture and traditions the Emiratis follow
Capture as many photos as possible
Drink lots of water during the activities.
Don’ts:
Don’t bring your valuables on a safari
Don’t get into restricted areas
Don’t litter and pollute the desert environment.
Do not carry or eat heavy food.
Don’t neglect sunscreen even if it’s winter season.
A desert safari in Dubai is a must to include in your trip since it is an activity perfect for exploring the charming desert, experiencing local culture, and admiring nature. To enjoy it in the best possible manner, consider what to wear and what to pack the things listed above. With prior preparation, you can allow yourself to engage in all the activities without any discomfort and be safe and active throughout the safari.
0 notes
Text
The Benefits of Shooting Fashion Outdoors
Fashion photography has evolved significantly over the years, with outdoor shoots becoming increasingly popular. There's something undeniably captivating about capturing fashion in natural settings. But why exactly should you consider shooting fashion outdoors? Let's dive into the many benefits of this dynamic approach to fashion photography.
Enhancing the Aesthetic Appeal
One of the primary benefits of outdoor fashion photography is the enhancement of aesthetic appeal. Natural settings offer an organic backdrop that adds depth and texture to images.
Natural Lighting Benefits
Natural light is a game-changer in fashion photography. Unlike studio lighting, which can sometimes create harsh shadows or unflattering tones, natural light provides a softer, more flattering illumination. This can enhance the model's skin tone and bring out the true colors of the clothing. For instance, the golden hour—shortly after sunrise or before sunset—creates a warm, glowing effect that's perfect for fashion shoots.
Dynamic Backgrounds and Their Impact
Outdoor settings also offer a variety of backgrounds that can make your photos more engaging. From lush green fields to urban landscapes, these settings add context and interest to your fashion shots. A well-chosen backdrop can complement the outfit, create a narrative, or even set a mood.
The Role of Outdoor Product Photography
Why Choose Outdoors for Product Shoots?
Outdoor product photography has its own set of advantages. Products often look more appealing when photographed in natural light and environments that relate to their use. For example, photographing outdoor gear like backpacks or hiking boots in a natural setting adds authenticity and helps potential customers visualize the product in use.
Examples of Successful Outdoor Product Photography
Many successful brands have leveraged outdoor settings for product shoots. For instance, outdoor apparel brands often use rugged landscapes to showcase their products' durability and style. This approach not only highlights the product's features but also creates a compelling visual story.
Finding the Best Outdoor Photoshoot Photographer Near Me
How to Locate Top Talent
Finding the right outdoor photoshoot photographer near me is crucial for a successful outdoor fashion shoot. Start by searching online for photographers who specialize in outdoor or fashion photography. Analyze their portfolios to make sure their style matches your vision.
Tips for Choosing the Right Photographer
When selecting a photographer, consider their experience with outdoor shoots. They should be adept at working with natural light and managing outdoor conditions. Don't hesitate to ask for references or reviews from previous clients to gauge their reliability and skill.
Selecting the Best Outfit for a Model Photoshoot
Importance of Outfit Choice
Choosing the right outfit for an outdoor photoshoot is essential. The best outfit for a model photoshoot should complement the natural surroundings and enhance the overall visual appeal. For instance, vibrant colors can stand out against neutral backgrounds, while earthy tones may blend beautifully with natural landscapes.
Best Outfits for Outdoor Photoshoots
For Best outfits for outdoor photoshoots, consider outfits that are both stylish and practical. Flowing dresses or casual, comfortable clothing often work well. Avoid overly busy patterns that might clash with the background. Instead, opt for outfits that create a harmonious balance with the outdoor setting.
Preparation for an Outdoor Fashion Shoot
Planning and Logistics
Proper preparation is key to a successful outdoor fashion shoot. Plan your shoot by scouting locations and checking weather conditions. Ensure that you have all necessary equipment and permits if required.
Weather Considerations
Weather can be uncertain, so have a backup plan. Rain or strong winds can disrupt a shoot, so be prepared with alternatives. Keeping a close eye on the weather forecast can help you schedule your shoot for optimal conditions.
Advantages of Natural Lighting
How Natural Light Enhances Photographs
Natural light brings out the true colors of your subject and creates a more authentic look. It can highlight textures and details that might be lost under artificial lighting. Moreover, natural light often creates a pleasing, even illumination that enhances the model's appearance and the outfit's details.
Tips for Maximizing Natural Light
To make the most of natural light, plan your shoot around the time of day when the light is most flattering. The golden hour is ideal, but even midday light can work if managed well. Use reflectors to bounce light and soften shadows, ensuring your photos are well-lit and balanced.
Creating Unique Visual Stories
Leveraging Outdoor Settings for Creativity
Outdoor settings provide a wealth of creative opportunities. Use the environment to your advantage by incorporating elements like trees, water, or urban features into your composition. This can add depth and intrigue to your photos, making them stand out.
Examples of Unique Outdoor Fashion Shots
Consider how photographers use outdoor elements creatively. For example, a model walking through a field of wildflowers or striking a pose on a city rooftop can create visually stunning images that tell a story.
Technical Considerations
Camera Settings for Outdoor Shoots
When shooting outdoors, adjust your camera settings to accommodate natural light conditions. Use a lower ISO to reduce noise, and adjust your aperture and shutter speed based on the available light. Consider using a tripod for stability, exclusively in low-light situations.
Dealing with Environmental Challenges
Outdoor shoots come with their own set of challenges, such as changing light conditions and unpredictable weather. Be prepared to adapt quickly and make necessary adjustments to your camera settings and shoot plans.
Collaborating with Models
Building Rapport with Models
A successful outdoor shoot requires good communication between the photographer and the model. Building rapport can help the model feel comfortable and confident, resulting in better photos.
Directing Models in Outdoor Settings
Directing models in outdoor settings can be different from studio shoots. Use clear, positive instructions to guide the model's poses and expressions. Take advantage of the natural environment to create dynamic and engaging poses.
Editing and Post-Production
Enhancing Outdoor Photos
Post-production is an important step in refining outdoor photos. Adjust colors and contrast to ensure the final images reflect the intended mood and style. Retouching can help eliminate any distractions and enhance the overall appearance of the photos.
Common Editing Techniques for Outdoor Fashion Photography
Common techniques include color correction, cropping, and sharpening. Use software like Adobe Lightroom or Photoshop to make adjustments that bring out the best in your outdoor fashion shots.
Successful Outdoor Fashion Shoots
Highlighting Famous Outdoor Fashion Campaigns
Examining successful outdoor fashion campaigns can provide valuable insights. For example, high-profile brands often use stunning natural landscapes or iconic urban settings to create memorable visual stories.
Lessons Learned from Notable Outdoor Shoots
Learn from the experiences of renowned photographers and brands. Understanding what worked well in previous shoots can help you plan and execute your own successful outdoor fashion photography projects.
Outdoor fashion photography offers a range of benefits, from enhancing aesthetic appeal to providing unique creative opportunities. By leveraging natural light, dynamic backgrounds, and effective preparation, you can create stunning fashion images that stand out. Whether you're a seasoned photographer or just starting, exploring the outdoors for your fashion shoots can take your work to new heights.
Get In Touch
Gmail- [email protected]
Phone- 8800124739
Website- www.studio1emporio.com
#Outdoorproductphotography#Outdoorphotoshootphotographernearme#Bestoutfitforamodelphotoshoot#Bestoutfitsoutdoorphotoshoots
0 notes
Link
Check out this listing I just added to my Poshmark closet: Vtg Vera Bradley Laurel Sling Bag Womens Black Red Beige Quilted Cotton Backpack.
0 notes
Text
Mirrorless Mover Camera Backpack by ThinkTank
If you are thinking of adding the Mirrorless Mover Backpack to your kit or other ThinkTank or MindShift products, please consider using my affiliate links. Referral purchases help support independent photography gear reviews like this.
I have been working with a ThinkTank Mirrorless Mover backpack for the past couple of months. This versatile camera backpack definitely has a space in my camera bag lineup… and they are finally shipping! In this article, let’s take a deeper look at this backpack.
Why Use The ThinkTank Mirrorless Mover Backpack
Photographers have several camera bags because each one serves a particular purpose. I’ve been using the Mirrorless Mover Backpack for a couple of months and it’s certainly got a space in my photo bag lineup. The Mirrorless Mover Backpack is lightweight, comfortable, and secure making it a great choice for serious photo activities where you need several lenses with you. I’ve been reaching for this backpack when I am in an urban environment or embarking on a lighter outdoor activity. I need a few lenses and a couple of bodies to capture the images I need… but my larger packs are simply overkill or don’t suit the environment I’m in.
The ThinkTank Mirrorless Mover Backpack is also a great travel companion. You can pack a healthy amount of your photo gear plus a laptop or tablet and the pack fits comfortably under an airplane seat and easily in an overhead bin. I used the backpack on a cross-country flight and it was a perfect balance between having the gear I needed and being economical with space and stowage.
Overall Thoughts
I found the ThinkTank Mirrorless Mover Backpack comfortable to wear. It has a well-padded anatomical back panel and padded shoulder straps, which offer plenty of adjustability to suit how you like to have a pack drape on your shoulders. The backpack travels extremely well. It easily fits under the seat on airplanes.
I also found working with the bag easy. The inner chamber has a lot of configurability. I’ve used this backpack on several different outings and changed up the compartments to suit the gear I needed to take. The lighter gray interior also makes it easy to find items, as most camera and photography equipment is black. Accessing the outer pocket for a laptop or tablet is fluid as well. I like that the pocket zippers only go down partially, so there is no risk of items spilling out.
The build quality and construction of the Mirrorless Mover Backpack is top notch. That’s no surprise to me. I expect that from ThinkTank and MindShift products and this backpack met my expectations. The included rain cover is a very nice touch. The backpack is made with weather resistant material, yet having another layer of protection at-the-ready if the weather turns is always appreciated.
Ample Storage And Organization
The Mirrorless Mover Backpack has two stowage areas, the main compartment and the front pocket. The key specifications are:
Exterior Dimensions: 11” W x 16.5” H x 9” D (28 x 42 x 23 cm)
Internal Dimensions: 10” W x 15.5” H x 4.75” D (25 x 39 x 12 cm)
Total Volume: 18 Liters
Front Pocket Volume: 5 Liters
Weight: 2 lbs. 13 oz (1.3 kg) including all dividers and rain cover
Check ThinkTank’s website for the detailed specs.
The main compartment is extremely configurable. I’ve used this pack on several different outings, from short city walks to light outdoor activities to cross-country trips. The main compartment is easily reconfigurable to carry the gear I needed for each trip… and I usually had room leftover. In the photo here, I have:
1 full-frame body w/ 24-70mm + hood attached
1 crop-sensor body (no lens mounted)
1 16-35mm lens
1 20mm lens
DJI Pocket Osmo, Rode mics, spare batteries, battery chargers, cables, and power adapters
A few examples of what fits in the main compartment from the ThinkTank website:
1 Standard Mirrorless Body, 4 to 6 lenses, small accessory bags
1 Standard Mirrorless Body and zoom trifecta with 70-200mm f/2.8 attached with hood extended
1 Standard Mirrorless Body, 2 lenses; flash, light jacket
The front pocket is more than just a front pocket. The 5 liter pocket can hold a light jacket or other personal items. It also has a dedicated padded laptop/tablet sleeve that accommodates most 14” devices. The pocket also has a small zipper pouch for items like batteries and memory cards. The mesh cover makes it easy to see what’s in the zipper pouch.
The backpack also has two expandable side for items like water bottles or a tripod. The backpack does not have straps or a tripod foot “flap” to center-lash a tripod to the back of the bag. Your tripod will be side-mounted.
Build Quality, Comfort and Ergonomics
As with all gear from ThinkTank, the Mirrorless Mover Backpack has solid construction. The backpack has a durable water-repellant coating, 3-ply bonded nylon stitching, and sturdy YKK RC zippers. The interior dividers strike the right balance, being sturdy yet flexible, and soft so they don’t scratch your gear.
The shoulder straps are well-padded and have an adjustable sternum strap. The anatomically designed back panel sits well on your back, has a waist stabilizer strap, and a lumbar pass-through for the ThinkTank Pro Speed Belt (not included with the backpack). The weight-centered top handle is strong and well padded for comfort. The chest and waist straps distribute the weight evenly, reducing fatigue.
Stylish Design
The Mirrorless Mover Backpack is highly functional, and it also looks fantastic! It’s got a sleek design, handsome but not overly flashy. The backpack comes in four accent colors, Cool Grey, Coast Green, Marine Blue, and Campfire Orange. The color schemes make it suitable for professional settings as well as casual outings. It's a bag you’ll feel good about carrying around… and knowing your gear is well-protected.
Pricing & Availability
The list price for the ThinkTank Mirrorless Mover Backpack is US$149.75 and is available now. Choose from one of the four color schemes offered.
Parting Thoughts
I’m very much enjoying using the Mirrorless Mover Backpack. I’m looking to it as my go-to backpack for some extended travel where my trusty rotation backpack is too bulky and frankly overkill for the types of photography I’ll be doing.
I will highlight this… When you’re packing a mix of heavier and lighter items, stow the heavier items toward the bottom of the bag. Weight distribution is important so the backpack will sit upright when put down, especially with a laptop or tablet in the front pouch. If the bag is top-heavy, it tends to tip over when put down.
0 notes
Text
Ulanzi MT-14 Review
Ulanzi MT-14 Desktop Tripod: Our Verdict Ulanzi MT-14 Desktop Tripod Star Rating ⭐⭐⭐⭐ Rating: 3.5 out of 5. Pros Adjustable legs Lightweight Cons Limited height Technical Details Main Materials Plastic Dimensions 15.8cm x 3.8cm x 3.6cm Weight 90g Max Height 15cm Max Weight 2.5kg Where to buy The link below will take you to Amazon where you can purchase your own Ulanzi MT-14…
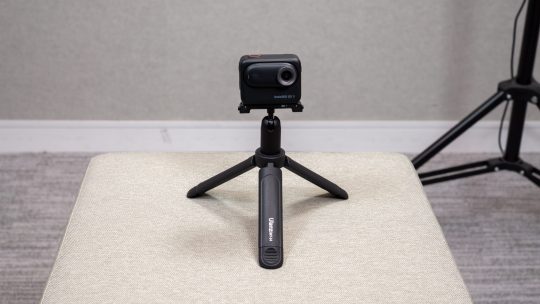
View On WordPress
#backpacking#Camera accessories#camera gear#EDC#photography#Photography essentials#Review#Tech#Tech essentials#tech review#travel essentials#travel friendly#Travel photography#Ulanzi
1 note
·
View note
Text
Exploring the Best Automotive Travel Blogs in the USA

Embarking on a road trip can be an exhilarating adventure, and having access to the best automotive travel blogs can enhance your journey significantly.
Whether you're planning a cross-country excursion or seeking inspiration for your next weekend getaway, these blogs offer invaluable insights, tips, and recommendations to make your travels memorable. Join us as we explore some of the top automotive travel blogs Article Website in the USA.
1. USA Blogger Book - Road Trips Edition
As your go-to destination for all things travel-related, USA Blogger Book offers a dedicated section focusing on road trips. From scenic routes to off-the-beaten-path destinations, our road trips edition provides comprehensive guides, practical tips, and inspiring stories to fuel your wanderlust. Whether you're a seasoned road warrior or a novice explorer, USA Blogger Book is your trusted companion on the open road.
2. The Drive
The Drive is a comprehensive automotive publication that covers everything from car reviews to travel guides. With a dedicated section for road trips and travel adventures, The Drive offers expert advice on planning the perfect journey. Whether you're interested in exploring national parks or scenic byways, The Drive has you covered with detailed itineraries and insider tips.
3. Roadtrippers
Roadtrippers is a must-visit website for anyone planning a road trip in the USA. With a user-friendly interface and interactive map feature, Roadtrippers helps you discover hidden gems and offbeat attractions along your route. Whether you're planning a weekend getaway or a cross-country odyssey, Roadtrippers provides personalized recommendations to make your journey unforgettable.
4. Overland Expo
For those with a passion for off-road travel and adventure, Overland Expo is the ultimate resource. With a focus on vehicle-based travel and exploration, Overland Expo offers tips, gear reviews, and trip reports for off-grid adventures. Whether you're dreaming of traversing rugged terrain or camping under the stars, Overland Expo provides the inspiration and information you need to make it happen.
5. Outside Online - Road Trip Guides
Outside Online is a treasure trove of outdoor adventure content, including a section dedicated to road trip guides. From scenic drives to epic road trips, Outside Online offers inspiration and practical advice for exploring the great outdoors by car. Whether you're seeking solitude in the wilderness or seeking adrenaline-pumping thrills, Outside Online has something for every adventurer.
6. Adventure Journal - Road Trips
Adventure Journal is a popular outdoor lifestyle publication that covers a wide range of topics, including road trips. With stunning photography and engaging storytelling, Adventure Journal inspires readers to hit the open road and explore the world around them. Whether you're interested in backpacking, camping, or road tripping, Adventure Journal offers insightful content to fuel your wanderlust.
7. The Road Junkies
The Road Junkies is a blog dedicated to the joy of road tripping. With a focus on slow travel and immersive experiences, The Road Junkies shares tales from the road, practical travel tips, and destination guides. Whether you're planning a scenic drive along the coast or a historic journey through the heartland, The Road Junkies offers inspiration and advice for your next adventure.
8. Lonely Planet - USA Road Trips
Lonely Planet is a trusted name in travel, and their USA road trips section is a valuable resource for road trippers. With detailed itineraries, insider tips, and recommendations from travel experts, Lonely Planet helps you plan the ultimate American road trip. Whether you're interested in exploring iconic landmarks or hidden gems, Lonely Planet has you covered with comprehensive guides and inspiring content.
9. Travel Channel - Road Trip Guides
The Travel Channel offers a wealth of travel inspiration, including a section dedicated to road trip guides. From scenic drives to themed itineraries, the Travel Channel provides detailed recommendations and insider tips for exploring the USA by car. Whether you're seeking adventure, relaxation, or cultural immersion, the Travel Channel offers inspiration and practical advice to make your road trip unforgettable.
10. National Geographic - Road Trips
National Geographic is synonymous with exploration and adventure, and their road trips section is a testament to that legacy. With stunning photography and captivating storytelling, National Geographic takes readers on a journey across the USA's most iconic landscapes and destinations. Whether you're planning a family road trip or a solo adventure, National Geographic offers inspiration and insight to fuel your wanderlust.
Conclusion
Embarking on a road trip is an opportunity to explore new destinations, connect with nature, and create lasting memories. With the help of the best automotive travel blogs in the USA, you can plan the perfect itinerary, discover hidden gems, and make the most of your time on the road. Whether you're seeking adventure, relaxation, or cultural immersion, these blogs offer invaluable resources and inspiration to enhance your travel experience. So pack your bags, hit the open road, and let the adventure begin!
0 notes
Text
Week 2: School Life at SJTU
Welcome back to this week’s blog on school life in Shanghai!! Before I reveal SJTU’s beautiful campus to you, I want to introduce a puzzle game called Flow Free. The rules are quite simple; the goal is to find a path that connects the same colored dots until all dots on the grid are successfully linked. The key is to employ a strategy that ensures no paths criss-cross. Now let’s get more applicable; imagine that the grid is a school campus and the colored dots are the students’ starting points and final destinations. When the school bell rang and dismissed the students, everyone hurried off in a disorganized scramble. As I was surrounded by a swarm of bikes, mopeds, and pedestrians, with my left hand ready on the brakes and right hand holding onto my phone, I steered carefully on a clear path and followed the map’s highlighted route to the nearest canteen.
Slow and Steady.
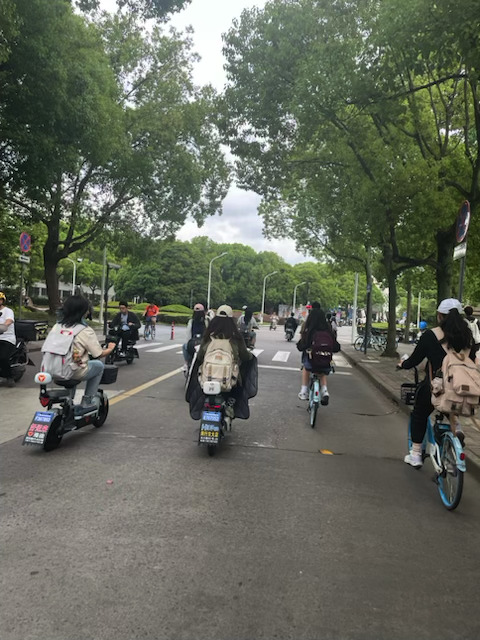
In this photo, I did not fully capture the bizarre traffic shortly after the school bell rang, when the road became, amazingly, a uniform bike line.
I am now in my second week of classes, and I have picked up my photography skills to show you around our campus. Get ready to immerse in Shanghai's school life :))

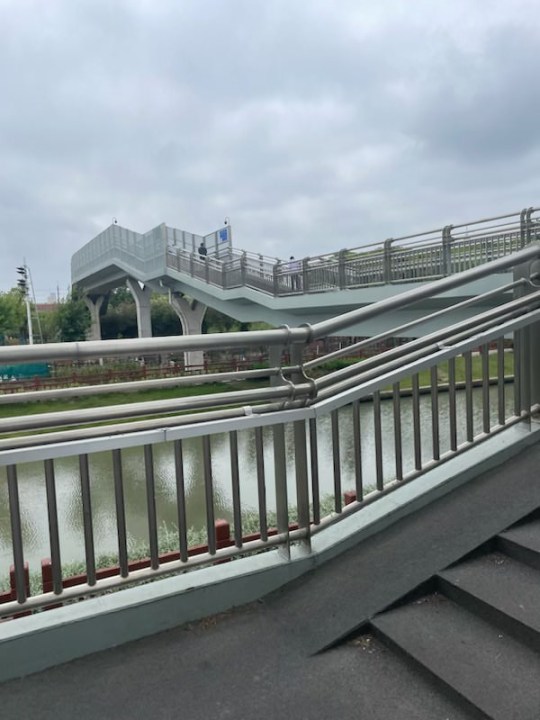
Biking to campus 🌤 : My earliest class is at 10AM, and I count myself very lucky to avoid the 8AMs. It gives me sufficient time to apply my sunscreen, grab my backpack and fully charged devices, and walk to the cafeteria downstairs for a steamed pork bun. I refuse to start reviewing convolution integrals on an empty stomach. With my 0.5 USD breakfast paid through WeChat Pay, I exited the main gate, scanned a blue bike parked on the sidewalk, and took off.
The newly constructed bridge from above is the shortcut path I take to save almost 10 minutes of my daily commute. I pedaled past canals where I sometimes see people practice rowing for the upcoming Dragon Boat Festival. A steady drum beat always announces the boat’s presence before it steers into clear view, the oars collaboratively moving in unison to glide the boat smoothly through.


You can kind of see a sneak-peek of the rowing practice on the canal above.

Here is where I attend my EECS216 lectures every Tuesday and Thursday mornings. With Calculus 3 meeting online, my Chinese Culture class starting next week, and after dropping Math471, this building is where I have been attending classes regularly. Using direct translation, the building is named Bottom Courtyard. The two neighboring classroom buildings are Top Courtyard and Middle Courtyard. I like the naming system here; it’s simple without needing much effort on memorization. The classroom buildings are also very pretty with modern Chinese drama’s high school/college life vibes. On the first floor, there’s a big screen that shows each classroom’s availability and the rooms that are colored green are open for students to go in and study. I usually arrive to class early and wander leisurely for half an hour. The room always feels stuffy when I first get there (maybe because of the 15 minute bike ride from my dorm); it felt less hot during class. Sipping my takeout soy milk, I prepared myself for the beginning of Chapter Two as the room began filling up.
An hour later, the most calming school bell announced our 10 minute break. In another hour, we got dismissed and braced ourselves for the road traffic that’s about to come.
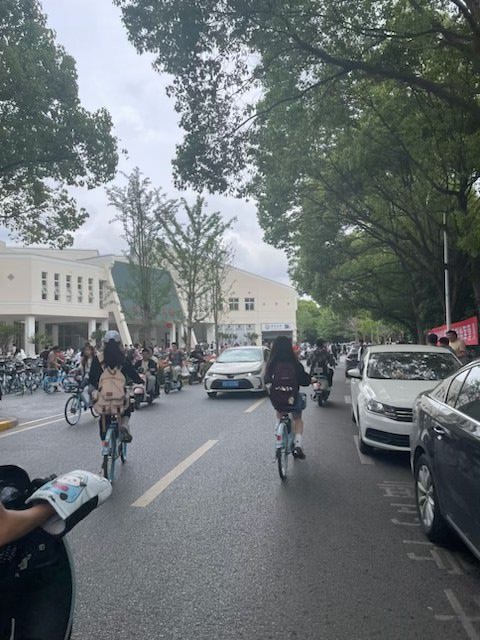
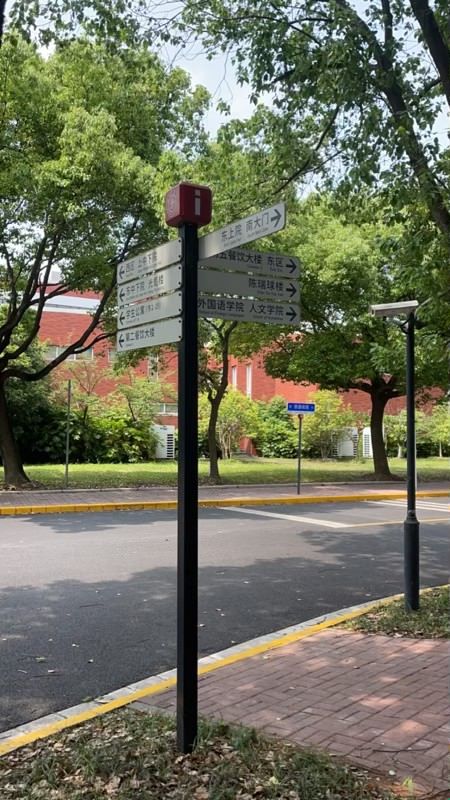
The SJTU campus is HUGE; oftentimes, I find class to class or class to canteen needing a 10 minute bike ride. There are not many cars on the campus, which is expected. I imagine it’d be very inconvenient to inch forward slowly and squeeze past bikers and moped riders who dominate the main road.
I hope you're not too hungry because we're about to check out delicious canteen food!



Each canteen offers a wide variety of food—anything that I can imagine for a satisfying meal— beef noodle soup, sizzling claypot, Korean bibimbap, and self-fixed Malatang. Some stations are cafeteria style where students pick up a tray and grab platters along the counter. But most food stations are self-order, which means I need to read the Chinese characters on the menu and decide on what sounds the best. Usually, pictures of the dishes are provided, and they help me a LOT on my decision making. I'm grateful whenever there's a line that gives me time to make up my mind. When there's so many options, it becomes unbelievably hard to choose. After I finally decided on something, I paid for the meal with the Siyuan Code on the My SJTU app, which I also use to enter the campus gates. The wait-time is not bad, with the food usually ready in less than five minutes. Then we picked up our chopsticks and dive in (there are no forks offered in the canteens).
As I've mentioned in my previous blog, there are a total of seven canteens. I have gone to Canteens 1,2, and 5 and that leaves 3,4,6, and 7 to check out. The exploration of all canteens is diverted by the fact that there are many food options called Waimai to explore on takeout apps that do convenient delivery. When I don't have in-person classes, I usually rely on Waimai and as I'm writing this blog, I'm going to order Beijing Duck for lunch.

This is mei fun noodles and wonton soup I had for Waimai a few days ago.
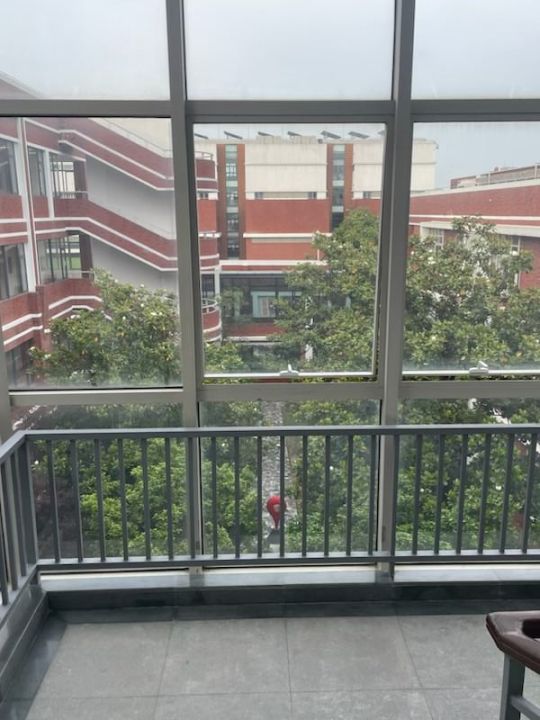

Back to school... For on campus studying spots, I prefer open classrooms over libraries because most seats in libraries require reservations and they can also be pretty crowded. Besides the triple Courtyards I mentioned above, there are three newer classroom buildings that are conveniently named East Top Courtyard, East Middle Courtyard, and East Bottom Courtyard. The triple East Courtyards were constructed in recent years, and the rooms are much nicer. I asked my buddy before about SJTU school color and she said it's red, as you can probably tell from the color of the campus buildings.
Here are some on-campus scenery I want to share with you all :)
I happened to pass by the botanical garden when the roses were still in blooming season. That's me with my all time scissor hand ✌️
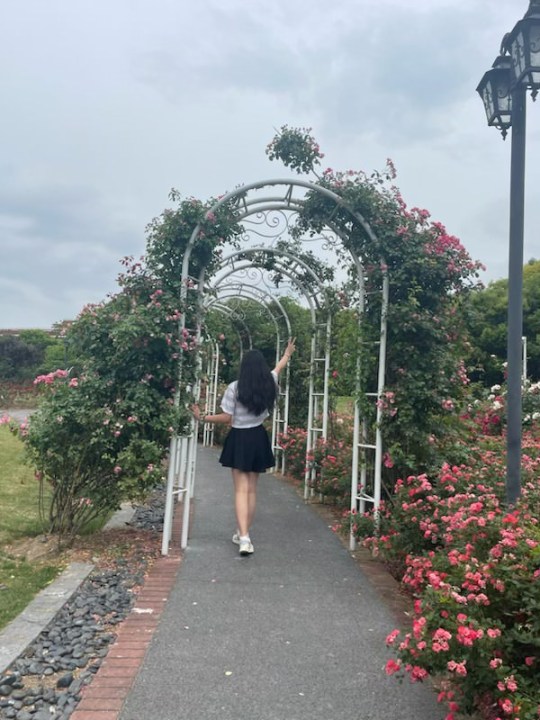



Passed by a loquat tree.
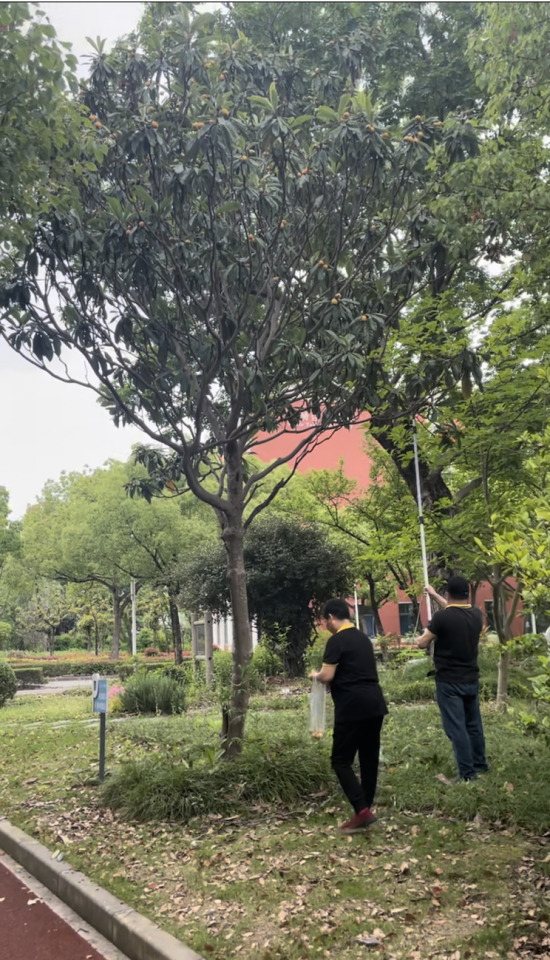
It is not too far into the summer yet, and there are a couple of loquat trees on our campus ready for harvesting. Loquats are mildly sweet fruits that look like apricots but in my opinion, taste way better. Sadly, I rarely see them in the U.S.


This is all for this week's content. I hope you had fun reading, see you all next week!
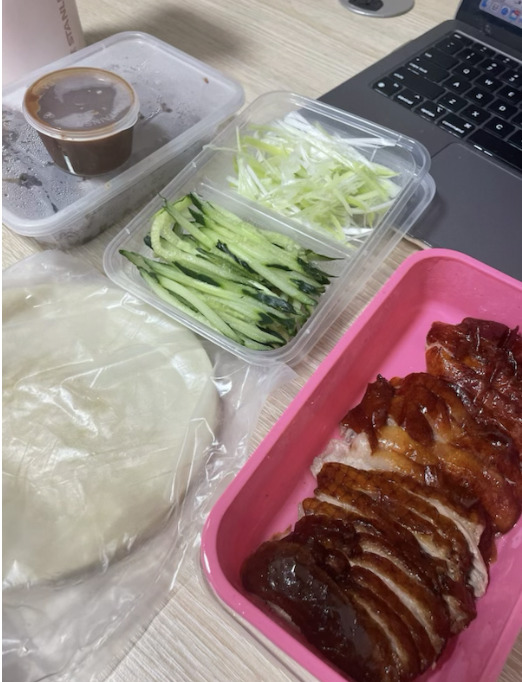
But not before the Beijing Duck arrived :) Bye bye!
Vivien Lin
Computer Engineering
UM-Shanghai Jiaotong University Joint Institute
0 notes