#order id format in shopify store
Explore tagged Tumblr posts
Visit Tumblr Blog
Explore Tumblr blogs with no restrictions, modern design and the best experience.
Last Seen Tumblr Blogs


Fun Fact
Hackers stole 65M passwords from Tumblr in 2013.
Video
youtube
Add Multiple Language, Add COD Payment Method to Shopify Store | Order I... Full Video Link - https://youtu.be/xWmvj5SWV4g Check out this new video on the CodeOneDigest YouTube channel! Add language in Shopify store. Add payment method in store and customise store id format. #shopify #shopifyadminconsole #shopifystoresetup #codeonedigest@java @awscloud @AWSCloudIndia @YouTube @codeonedigest @Shopify @typescript @nestframework
#youtube#shpify strore setup#add multiple language to shopify store#add cash on delivery payment method to shopify store#add cod payment to shopify store#order id format in shopify store
1 note
·
View note
Text
Are you the owner of a music store hoping to increase revenue and improve efficiency? Shopify POS is the only option! We'll look at six factors that make Shopify POS revolutionary for music stores in this video. Shopify POS features everything you need to expand your music store, including strong inventory control tools and seamless connection with online sales platforms. So take a seat back, unwind, and get ready to use Shopify POS to transform your company. [fusion_button link="https://www.clkmg.com/UltimatePeter/BRBlog" text_transform="" title="" target="_self" link_attributes="" alignment_medium="" alignment_small="" alignment="" modal="" hide_on_mobile="small-visibility,medium-visibility,large-visibility" sticky_display="normal,sticky" class="" id="" color="blue" button_gradient_top_color="" button_gradient_bottom_color="" button_gradient_top_color_hover="" button_gradient_bottom_color_hover="" accent_color="" accent_hover_color="" type="flat" bevel_color="" border_width="" border_radius="10" border_color="" border_hover_color="" size="large" stretch="default" margin_top="" margin_right="" margin_bottom="" margin_left="" icon="fa-store-alt fas" icon_position="left" icon_divider="no" animation_type="" animation_direction="left" animation_speed="0.3" animation_offset=""]Get Started With Shopify POS[/fusion_button] Robust Inventory Management. The strong inventory management system offered by Shopify POS is one of the main benefits for music companies. Due to the enormous number of SKUs and variants they offer, keeping track of inventory levels can be a difficult chore for music businesses. This issue is resolved by Shopify POS, which offers a thorough inventory management system that enables business owners to monitor stock levels in real-time. This makes it simple for store owners to maintain track of their inventory, determine when to place product reorders, and prevent stockouts. For music stores, Shopify POS offers a number of options that simplify inventory management. The technology, for instance, enables store owners to produce product versions depending on several formats, including CDs, vinyl, and digital downloads. This helps business owners manage their inventory depending on many product variations, which is useful. Shopify POS additionally enables store owners to set up notifications when stock levels are dwindling, ensuring they consistently have adequate product on hand to fulfill client demand. Music store owners may simply control their inventory levels across several sales channels using Shopify POS. It is simpler to handle all sales channels in one location thanks to the system's seamless integration with online sales channels. This guarantees that business owners, whether they sell in-person or online, can precisely track their inventory levels and sales data. In conclusion, Shopify POS gives owners of music stores a potent inventory management system that can help them streamline their processes and expand their businesses. Seamless Online and In-Store Integration. Shopify POS' easy connection with online and in-store sales channels is another important factor in recommending it to music stores. Today's music retailers must provide seamless in-store, online, and mobile shopping experiences for their customers. Music business owners can manage all of their sales channels in one location thanks to Shopify POS, which offers an all-in-one solution. Shopify POS makes it simple for business owners to sync inventory levels throughout their online and offline sales channels, guaranteeing that customers can always get the goods they want. In order to create solid customer relationships, Shopify POS also enables store owners to access client data from all sales channels. Store owners can track client behavior, preferences, and purchase history by having access to customer data, which enables them to provide targeted recommendations and promotions to their customers. This boosts sales and fosters consumer loyalty at music stores.
Moreover, Shopify POS enables music companies to give customers a seamless checkout experience. Many payment options, including credit cards, debit cards, and mobile payments, are available to store owners. Additionally, the technology enables store owners to handle returns, process refunds, and issue receipts, which expedites and streamlines the checkout process for both customers and staff. Overall, Shopify POS is a great option for music companies aiming to offer clients a smooth buying experience across different channels due to its seamless connectivity with online and in-store sales channels. Customizable Product Variants. Another important factor for adopting Shopify POS in music stores is customizable product versions. Products in the music sector frequently come in a variety of formats, including CDs, vinyl, digital downloads, and even cassette tapes. Moreover, deluxe editions and limited edition releases may be available in music retailers as multiple copies of the same album. Music store proprietors may quickly develop customised product versions using Shopify POS in order to precisely track their inventory and manage their sales. Shopify POS makes it easy and simple to create product variants. Shop owners may quickly set up many product variants, such as format, version, or color, and give each variant a separate price and SKU. By carefully tracking inventory levels for each version, music businesses can make sure they always have enough product to fulfill client demand. Music stores can provide clients with a more individualized buying experience thanks to customizable product versions. Depending on their tastes, customers can select from several album formats or versions, making it simpler for them to locate what they want. Music retailers can stand out from their rivals and draw in more customers by offering a large variety of customisable product options. Overall, Shopify POS is a great option for music companies that need to maintain inventories for a variety of products and provide customers with a tailored shopping experience thanks to its customisable product variants feature. Mobile Point of Sale. Another significant factor in favor of music stores adopting Shopify POS is the platform's sophisticated reporting and analytics features. As with any business, it is critical for music retailers to have access to precise and current data in order to track their performance and make educated decisions. Shopify POS offers store owners robust reporting and analytics capabilities that let them learn more about their sales, clientele, and stock levels. Owners of music stores may get real-time sales information from all of their sales channels, including in-store, online, and mobile, using Shopify POS. This makes it simple for them to monitor their progress and spot patterns, such which products are selling the most or which sales channels are generating the most income. In order to better manage their business, store owners can also create reports on inventory levels, sales by product, sales by customer, and more. The sophisticated reporting and analytics tools provided by Shopify POS help music stores find areas for expansion and development. Store managers can pinpoint areas where they can streamline their operations or create new products to satisfy customer demand by examining customer behavior and sales data. This can aid in the long-term success of music stores by keeping them one step ahead of the competition. Overall, Shopify POS is a great option for music stores that need to analyze their performance and acquire business insights due to its sophisticated reporting and analytics features. Advanced Reporting and Analytics. Fast transaction processing is frequently required for music retailers, especially during busy shopping seasons like the holidays or Black Friday. Here is when Shopify POS's quick and trustworthy payment processing abilities are put to use. Music stores can serve more customers and increase
sales by using Shopify POS, which enables them to process transactions fast and securely. Many payment options are supported by Shopify POS, such as credit and debit cards, mobile payments, and even gift cards. The Shopify mobile app allows business owners to accept payments from anywhere, which is perfect for music retailers that participate in trade exhibits and events. Shopify POS offers a secure environment for payment processing in addition to quick payment processing. The platform complies with stringent security requirements for handling credit and debit card payments, making it PCI compliant. Shop owners can relax knowing that the financial information of their customers is secure. Overall, Shopify POS is a great option for music companies that need to handle high numbers of transactions swiftly and securely. It is fast and dependable at processing payments. Music retailers may increase sales and improve customer satisfaction by providing a seamless checkout process. 24/7 Support. The ability of music stores to integrate with other apps and services through Shopify POS is yet another important benefit. Many different products and services, including accounting software, email marketing tools, and shipping services, are frequently used by music retailers to run their operations. Owners of music stores may quickly incorporate these tools and services into their business operations using Shopify POS, optimizing their workflows and saving time and effort. Numerous popular apps and services, like QuickBooks, MailChimp, and ShipStation, can be integrated with Shopify POS. Store owners may easily integrate their Shopify store with these services to automate processes like creating shipping labels or sending marketing emails. This not only saves time, but also lowers the possibility of mistakes and increases the business's general effectiveness. Shopify POS also integrates with other Shopify products, such as the e-commerce platform and the Fulfillment Network, in addition to third-party integrations. This decreases the need for human labor and increases overall efficiency for music retailers by enabling them to offer their products across a variety of sales channels and expedite the fulfillment process. Overall, music retailers looking to increase their processes and overall efficiency can consider Shopify POS due to its connectivity with various apps and services. Music stores can concentrate on what matters most—serving their clients and expanding their businesses—by automating operations and minimizing human labor. [fusion_button link="https://www.clkmg.com/UltimatePeter/BRBlog" text_transform="" title="" target="_self" link_attributes="" alignment_medium="" alignment_small="" alignment="" modal="" hide_on_mobile="small-visibility,medium-visibility,large-visibility" sticky_display="normal,sticky" class="" id="" color="blue" button_gradient_top_color="" button_gradient_bottom_color="" button_gradient_top_color_hover="" button_gradient_bottom_color_hover="" accent_color="" accent_hover_color="" type="flat" bevel_color="" border_width="" border_radius="10" border_color="" border_hover_color="" size="large" stretch="default" margin_top="" margin_right="" margin_bottom="" margin_left="" icon="fa-store-alt fas" icon_position="left" icon_divider="no" animation_type="" animation_direction="left" animation_speed="0.3" animation_offset=""]Get Started With Shopify POS[/fusion_button] Conclusion For music retailers wishing to optimize their processes and increase sales, Shopify POS provides a strong and complete solution. Music store owners may better manage their operations with the help of Shopify POS's features, which include inventory management, customer insights, advanced reporting, quick payment processing, and integrations with other apps and services. Music stores may give their customers a seamless and convenient shopping experience both online and in-store by implementing Shopify POS. Store owners and staff can easily
manage inventory, process payments, and receive insights into their business thanks to the platform's user-friendly design. Additionally, music retailers can make knowledgeable decisions about their operations, spot areas for expansion and improvement, and stay one step ahead of the competition thanks to Shopify POS's sophisticated reporting and analytics features. For music retailers trying to transform their operations and spur long-term success, Shopify POS is a game-changer. Music retailers can concentrate on what they do best by utilizing this potent platform, which allows them to give their clients excellent music and service.
0 notes
Text
Best barcode generator for shopify

#Best barcode generator for shopify software
#Best barcode generator for shopify code
#Best barcode generator for shopify license
Once you determine how many barcodes you need, you can buy a certain amount of barcodes and receive a company prefix. GS1 offers different payment tiers based on the number of product barcodes you need. If your POS has a barcode generation app, like Shopify POS does, then the entire process is integrated with your POS.īy using a UPC barcode, you’re bound to certain standards, and you must pay to procure your barcodes. You can scan the barcodes into your point-of-sale system and attach them to products in your inventory management system. Once you’ve defined your barcode, you can begin printing and labeling your products. In this way, it works similarly to a SKU (more on that later). You can get creative with the way you break down the digits into subcategories like product types and other classifiers.īy going custom, you create your own barcode format and point it to internal data you manage. The perks of going the custom route include affordability and more flexibility with product numbering. If you want to create custom barcodes that let you determine your own symbology and product numbers, you can do this on your computer with software, a scanner, and a label maker.Įasily create and print custom barcodes for your business.
#Best barcode generator for shopify software
The software will automatically generate a machine-readable barcode. Stores decide what information (quantity, color, type) they want to collect with the barcode and choose the barcode format. How are barcodes generated?īarcodes are generated using software. Plus, UPCs support more robust inventory management systems and product tracking, from production all the way to the point of sale. One advantage to retailers using UPC codes is immediate access to product information and pricing. These are numbers that GS1 assigns to your products once you upload criteria for certain fields, like name, quantity, description, etc. The remaining numbers are uniquely assigned product numbers. They’ll then be assigned a manufacturer ID number, which are the first numbers of the 12-digit UPC. In order to use a UPC, retailers must apply to become a part of the GS1. UPC barcodes represent a 12-digit number and follow a specific set of formatting rules. These codes follow a standardized barcode symbology and correspond with a Global Trade Item Number (GTIN).
#Best barcode generator for shopify code
Many products use a Universal Product Code (UPC) system. If, for example, an item is assigned a 10-digit number, a barcode will represent that number with 10 different black-and-white bar combinations. It’s simply a number that when looked up or keyed into a system pulls up more data about the driver, the car, etc.Įach number from 0 to 9 is assigned a different set of black and white bars.
#Best barcode generator for shopify license
There’s nothing stored in the license plate. The barcode itself is the visual representation of that number. The numbers located under the vertical lines, or bars, of a 1D barcode represent a uniquely assigned item number.
How are barcode labels for products printed?.
What's the difference between SKUs and barcodes?.
Are barcodes and QR codes the same thing?.
Can barcodes be used to look up products?.
How do barcode scanners work for stock management?.
How can barcodes help with the checkout process?.
0 notes
Link
If you are associated with the pet product industry, then data scraping could be a great assistant in many situations. The most general one is having products listed from the supplier, analyzing competitors’ products and price strategy, as well as monitor customer reviews, as well as others.
Here, we’ll show how to find a quality, well-structured, and usable data for all these tasks.
Extracting pet product information
Extracting pet stores’ prices (monitor different pricing on Amazon, Petco, etc.)
Extracting reviews on the pet products
Pet store contact data scraping
Extracting pet product information
The variety of pet products within a store may consist of thousands of points: pet care, pet food, pet supplies having multiple subs as well as – sub-sub categories. For creating products listings on the website, you require to get products with information: names, quality images, descriptions, product codes, and more.
From where, you can get these details? An ideal scenario would be when you get that from the supplier. However, there could be many troublesomeness:
Incomplete data – the file doesn’t have product descriptions or codes.
Inadequate image quality or else no images at all.
A file format can’t be introduced into the store or needs ample editing.
A general solution of getting the necessary details is scraping pet products data from a supplier’s website.
Note: Make sure to get a supplier’s permission before scraping data from their websites.
Let’s see that works with Retailgators web scraping service.
Discover an online form indicating the following:
Website for scraping data from. You might indicate a separate store address and also link to eBay, Walmart, Amazon, Etsy, as well as other marketplaces.
Different product fields include images, description, SKU, product title, wholesale price, and variations.
Specific requirements, comments, for example:
only have items, which are in stock
find descriptions using/without html
extract pet products categories
Make a file in a particular format (imported to Shopify, WooCommerce, Magento, PrestaShop, or other shopping carts).
1. Your email ID – in which, we could send a free as well as well scraped file.
After submitting your request, you would get a sample about scraped data. In case, you have identified your targeted shopping cart, a file would be arranged accordingly. The accessible formats include Shopify, PrestaShop, WooCommerce, and Magento. If you require any other formats, mention that in this form and have the file with the particular requirements.
Let’s see an example about the file having extracted pet products data well-structured for the:
All the highlighted columns have the data scraped from a website, whereas others include WooCommerce fields needed to make new products. Therefore, you get scraped data with an import-friendly file, which you can directly upload without and extra modifications.
Scrape Pet Products Reviews
Analyze reviews from different pet product websites could provide you many valuable insights:
brands with maximum reviews
brands with the highest score
how is a score changing actively
Many places are there where you could get reviews on cats’ or dogs’ food as well as other stuff: Walmart, Target, Amazon, PetSmart, Chewy.com, PETCO, and others.
To find reviews for the analysis, you just need to indicate a web address as well as fields to extract: review date, review, stars, title, images, and more. Retailgators will scrape the reviews as well as send a file into your FTP or email.
The data could be used to import or do manual analysis.
Pet Stores Contact Details Scraping
Presume that you’re launching the startup in a pet store business as well as need to get the listing of maximum brick-and-mortar pet stores in the area. Web scraping could help you with this job also.
How to Find Pet Store Contacts
On the Retailgators site, fill the following information in an online form:
Which area/location you are attracted with. There are a many resources listing different pet store addresses: https://www.petbusinessworld.co.uk/, https://pet-shops.regionaldirectory.us/, https://www.petsmart.com/store-locator/, Yellow Pages, Google Maps, and more. In case, you wish to scrape data from any particular website, just give us its URL.
Furthermore, you could outline data as well as location by a zip code or region and we would scrape company information from search results. Let’s see an example of the pet store contacts extracted from Google Maps:
Which company information you wish to see in a file:
Store’s Name
Address
City
Zip/Postal
State
After getting your request, we would share you some review samples as well as estimated price of web extraction.
Extracting Pet Store Pricing (Monitor Pricing on Amazon, Petco, etc.)
Online shopping helps pet-lovers in comparing prices across different websites before ordering anything. Therefore, to be competitive, you certainly require to track pricing, on maximum popular products.
With Retailgators, it’s easy to get the newest prices from the suppliers, manufacturers, local or worldwide competitors.
Just submit your form for the test pricing scraping, identify competitor list as well as stipulate fields to extract: product name, model, SKU, stock, special pricing, and more.
Conclusion
Having a eCommerce Data Scraping services from Retailgators, you’ll get the data you require as well as make suitable data-driven decisions.
source code: https://www.retailgators.com/how-to-scrape-pet-products-data-using-pet-products-data-scraping.php
0 notes
Text
Conversion Funnels Pro Review - Funnel That Will Triple Your Profits
What Are Conversion Funnels Pro?
Conversion Funnels Pro is a web-based framework of its kind that gives you access to more than 70 dfy funnels that convert in one click as well as the network that drives those funnels.
The Conversion Funnels Pro is quick to use and you do not need any technical expertise or prior experience. This will allow you to gather leads and enable the products to make profits. As well as running an agency, you can sell your own product. The main offer provides you with the main Conversion Funnels Pro Scheme, filled with loads of value and made by a professional marketer.

The Brain Behind The Conversion Funnels Pro.
JP Schoeffel is a professional marketer and he has been in the industry for over 17 years now and knows exactly what it takes to succeed. He used the exact tools, you can get inside to enhance his business.
Inside Of Conversion Funnels Pro
Within, there is a wide range of efficient and large conversion funnels:
Lead Generation Funnel: Free Traffic Generation Video Course.
Lead Generation Funnel: Email Deliverability Video Course
Lead Generation Funnel: Their Favorite Business Model Video Course
Lead Generation Funnel: Create & Sell & Share Funnels
Lead Generation Funnel: High Ticket Affiliate Marketing Webinar
Lead Generation Funnel: Instant Authority Interview Funnel
Lead Generation Funnel: Youtube Marketing Course
Lead Generation Funnel: Messenger Marketing Course
Give Away Funnel: Success Turning Point Video Course
Give Away Funnel: Affiliate Funnels SAAS Platform
Affiliate Funnel: 12 Native Ad – Clickbank Affiliate Funnels
Affiliate Funnel: Affiliate Funnels Mega Pack Collection
Affiliate Funnel: Facebook Conversion Funnel
Info Product Reseller Funnel: List Building 2-Hour Video Course
Info Product Reseller Funnel: Healthy With Paleo
Info Product Reseller Funnel: Affiliate Profit Masterclass
Info Product Reseller Funnel: Retired Super Affiliate
Info Product Reseller Funnel: Instant Facebook Traffic
Info Product Reseller Funnel: Passive Recurring Income
E-Commerce Funnels: 40 Ecom Funnels
SAAS Reseller Funnel: Copy Prophet (copywriting scoring engine)
Agency Reseller Funnel: Your Own Facebook Agency Service
Webinar Funnel: Interview Webinar Funnel (Simple Wifi Profits)
Webinar Funnel: Affiliate Profit Masterclass

Bonuses With Conversion Funnels Pro
BONUS #1 Extra e-Com Funnel
Instead of recruiting copywriters, product analysts, video graphics, and more. You can receive a complete e-com funnel with high conversion of any green min bid, and there is also a one-click upgrade.
BONUS #2
You get a DFY Native Ad Funnel to raise your affiliate commissions using the same high-converting landing page and pre-sell page that popular advertisers use worldwide to advertise those deals for over $10,000 a day. You don't need an expensive copywriter, a designer, a funnel maker, all is DFY and you can install it with just one press. Your affiliate connection can be put and you aren't. If that's what you want, you can position your affiliate connection and you are ready to get paid, or you can promote your own stuff. There is also a full package that directs you to use advertising and creatives to drive traffic for precise targeting.
BONUS #3
Access to Jp Schoeffel's flagship free traffic masterclass video course.
BONUS #4
Fast webinar plus an onboarding package for 10 days.
BONUS #5
One-On-One Discovery Call
With the team of developers, you can have 20 minutes, as they can help you to customize your journey with Conversion Funnels Pro. Bear in mind that a small number of slots are available and they will speak to limited persons every day. That's why they expect this offer from action takers and inspired individuals. You will be able to boost the performance in your company 100 times more with Conversion Funnels at the end of the session. This incredible bonus will be for a short period because they want serious people to take action, not people who are not inspired to succeed.
Features Of The Conversion Funnels Pro
Drag & Drop:
You can craft beautiful pages and funnels with blocks and components professionally designed to do that.
100 Ready-Made Blocks:
With all those blocks, you can build any form of website and layout or use them as a starting point without being mistaken for a blank page.
Templates Ready For You:
There are high-quality models to fit all your needs if you need inspiration, and you can also reuse all the funnels.
Scarcity:
To inspire people to take action, you can place daily countdown timers to increase your conversion rate a lot more.
Save & Share blocks:
You can easily do it on any page or reuse it on the pages or share it with any other page or funnel with ease, no need to build stuff from scratch.
1-Click Publish Optimized:
There's no need for hosting or even a domain. All you need to do this is simply plug your funnels into highly secure and fast servers.
Upgrades
OTO 1: 10x Module
You will get a complete DFY webinar funnel by having this, where you have power over the webinar experience with your affiliate ID from registration, webinar space, waiting and direct checkout form.
OTO 2: Unlimited Access to iFunnels Enterprise
By having this, you can get access to the iFunnels portal in order to access and use the unlimited modules.
OTO 3: 12-Month Group Coaching
There will be monthly training and coaching webinar. You will be able to join for just a one-time price.
Why You Should Have It
Drive Targeted Traffic To Your New Funnels With Our Underground Traffic Strategies!
Build Your List By Giving Away Free Products In These Done-For-You Funnels
Develop fast & simple high-converting affiliate funnels!
All funnels are SEO and Web Responsive Optimized
Use your funnels in different niches to market all kinds of products
No subscription payments & all safely hosted on OUR servers
Who Is It Beneficial To?
Shopify Stores
Authors
Coaches
Affiliate Marketers
Product Creators
List Builders
CPA Marketers
Benefits Of Conversion Funnels Pro
Unlimited access to iFunnels Studio Silver and everything that you will need for the high conversion funnel management.
You have a lot of powerful features such as drag and drop, just drag and drop professional blocks to create beautiful pages and funnels.
With 100 Ready-for-you blocks, Without the fear of a blank screen, you can craft or use any form of website and layout with those blocks as a starting point.
Access to templates which are ready for use. There are high-quality models for all your requirements if you need cool inspiration and you can also reuse all the funnels you can receive.
To maximize the conversion rates for scarcity, you can add countdown timers so that people can take action.
To reuse these on your website, save blocks easily on any page or you can share with any other funnel or page, no need to craft things from scratch.
Optimized, one-click publishing, no hosting needed, no domain required. With one click, on their safe and blazing quick servers, you can publish anything you need.
Lifetime iFunnels delivery Access
You may offer goods or services that are both digital and physical. One time or recurring, trial, fee set-up costs and a lot of alternatives.
Smooth journey via the checkout. YOU will pre-view the real-time checkout. Based on $5Billions in transactions, the experience is optimized.
On all goods and facilities, you have a Universal Login.
One-click Orders. Repeat clients will be identified by the system and asked to confirm the purchase,
Frictionless Experience, get rid of login formation, password forgetting, checkout pages, registrations. Without any of those old system sites, the system operates and embraces the future of sales.
Content security is now 100% protected, with just one click, and the content is secured.
Feeding Content Drip. You can drip feed your content with one click, so only the members who joined x months ago can get it.
It's simple to handle members, you can easily add and remove an entry, refund, add new members, change information and much more.
Advantages Of Conversion Funnels Pro
You get all that the maker of this uses to generate sales and leads in this everyday business and they give you access to the powerful funnels that function perfectly.
You don't have to pay for the hosting facility. The business depends on Studio 100%. With your fast-action bonuses, you can import three domains to access the studio. If you need more questions, you can ask them.
You can create an unlimited number of leads, purchases, and commissions.
Within, you actually get what you need, and in the world's current situation, you can be successful and will get what is needed.
Within, you have complete system control and everything is 100% working. No need for complicated things.
You'll be able to use as many things as you want. No special costs or any of these kinds of stuff. To start your webinar, there are also tutorials inside to help you get started.
Also, you don't need a domain, unless you have one. There are subdomains with the Tunnels Studio account, which you have. But if that's what you want or you can buy domains right within the website, there is an option to import domains.
Pros And Cons Of The Conversion Funnels Pro
Pros
Frictionless experience
Easy to Use and Implement
Saves you valuable time
It's is very affordable
Cons
Only available online and requires an internet connection to access.
Special 50% Discount On Conversion Funnels Pro
0 notes
Text
HOW TO INTEGRATE AMAZON FBA WITH SHOPIFY
One of the most common question arise among online seller these days is “How to integrate amazon FBA with Shopify” To answer this, let us first understand both the main terms in brief “SHOPIFY” and “AMAZON FBA”

SHOPIFY
Shopify is a leading electronic commerce popularly known as E-commerce platform that allow any person to sell their product and brand online. Shopify offers online platform to its user to sell their product and facilitate user to create their own virtual store for showcasing their products. Till now there are millions of seller which are connected with Shopify from 175 countries to promote their business and product on digital platform. It provides quick and fast services to their user like as ready-made temples and easy setup.
Amazon FBA
Amazon FBA better known as Fulfillment by Amazon. It facilitate seller to store their goods in huge warehouse of amazon. Moreover, amazon ship, pack and track product on behalf of seller to provide fast services to customer. They also take care of return or refund by customers.
Now the question arise why should we integrate fulfillment by Amazon (FBA) with shopify
Well, as per now Amazon has millions of visitors every day and the count is keeps on increasing each day. Amazon algorithms help seller to build organic traffic and the traffic is built as early you start selling. On other side Shopify is a user-friendly interface which enables you to sell product quickly and grow your business with speed.
Thus, Amazon Shopify integration gives you a large room for sellers to reap more profits and hype you sale.
Steps involve in integrating amazon FBA with Shopify
Following steps are involved in integrating Shopify account to your amazon seller’s account.
STEP 1
First of all, create account on Shopify or if you have already registered with Shopify as a seller sign up with your user id and password.

STEP 2
Set up your Amazon seller account on Shopify using the link below.
https://www.shopify.com/admin/fulfillment_services/signup_for_mws
This link will take you to amazon market web service (Amzon MWS) page. As it is a third party access, you will have to give access to Shopify after reading teams and condition given at the page.

STEP 3
Once you have provided with the access. It will take you to the page where you have to click on “continue” in order to move to the next step.

STEP 4
This is a crucial step in which you have to change default shipping settings of Shopify.
You have to match amazon shipping setting to Shopify shipping setting. But before that you have to delete pre shipping formats on Shopify.
After deleting default shipping format you can create own shipping rate as per your amazon seller’s account by clicking on “add rate”.
Like as amazon offers three different shipping rates as following
Standard shipping
Two day shipping
One day shipping
You have to create exactly same shipping rates as per your amazon account

If in case both the shipping rates did not match, you would not able to process further.
Click on “save” once you have created shipping rates according to your amazon account.
STEP 5
Now you have to configure your products for FBA (Fulfillment by amazon).
Follow the below process for adding new and existing product.
Add a new product
While adding new product on Shopify, click on “inventory” section on the “add a product “page.
There you will see a drop down menu under “inventory managed by” choose “amazon marketplace web” option.
Then, you will see a message underneath that reads “This product’s SKU must match the SKU used in Amazon Marketplace Web.” Match the SKUs across the two marketplaces which will ensure your Shopify listing is synced with your Amazon inventory.
Follow the below instruction to do it:
In Seller Central, go to the “Inventory” tab > “Manage Inventory.”
Then copy the 10-digit number under the SKU section.

Paste that SKU into your Shopify “Inventory” section under “SKU (Stock Keeping Unit).”

Be sure to leave the “Track quantity” box checked—that way you maintain correct inventory levels for your fulfillment.
Lastly, enter in the weight of your product. This also needs to match exactly as you entered it on Amazon.
Then, you can find this number quickly. Locate your product in “Manage Inventory” on Seller Central, go to the “Estimated fee per unit sold” section, and click on the drop down menu button.

Now you will be able to see what your item weighs.
Enter that exact value into Shopify.
Now scroll down to the bottom and click “Save”.
Following are the instruction for adding existing products for FBA (Fulfillment by amazon)
From your Shopify admin menu, go to Products > All products.
Click the name of the product you want to enable fulfillment for.
In the Shipping section, select “Amazon Marketplace Web” from the “Fulfillment service” drop-down menu.
In the “Inventory” section, select “Amazon Marketplace Web tracks this variant’s inventory” from the “Inventory policy” drop-down menu.
Double-check that the values you’ve entered for the weight and SKU fields exactly match what you’ve entered for the same product in Seller Central. On Amazon, the SKU is called Seller SKU or Merchant SKU (MSKU).
When you are done, click “Save.”
Now after adding new and existing product for fulfillment by amazon.
Amazon will automatically sync your orders after every short period of time but you will still need to request manually for the same.
Follow the below instruction to fulfill your order on Shopify.
From your Shopify admin, go to “Orders”.

From the “Orders” page, click the order number.
In the “Order Details” section, click “Start fulfilling” to open the order’s Fulfillment page. By default, every line item is set to be fulfilled, but you can fulfill part of an order if you want.
You’ll be able to see which shipping speed the customer chose. Apply their preferred shipping method (standard, expedited, priority.)
Select “Mark as fulfilled”.
Click “Fulfill items” to mark the order as fulfilled.
Once you have marked the order as fulfilled, it will be convenient for you to check your order status by clicking “order” section. It should be marked as “pending fulfillment”. After accepting by amazon, it will mark as “fulfilled.
Now your account Shopify is integrated with amazon FBA and order will be fulfilled by amazon.
Click this link to know how to transfer your FBA inventory to amazon.
https://sellercentral.amazon.in/gp/help/external/G201021820?language=en_IN
How much does it cost to use Amazon Multi-Channel Fulfillment?
Well, there are monthly fee charged by amazon for its storage services, which is also known as monthly storage fees. These charges vary in accordance with different criteria like as months, season, size of product, etc.


#Amazon#Amazon product listing#amazon service#shopify#Navustech#Navus IT Services#navus#amazonserviceprovider
0 notes
Photo
How to Start a New Business Selling Phone Accessories
Have you ever wondered how people are able to sell products like phone accessories online from the comfort of their homes? The phone accessory business is a $72 billion and counting industry. We have the information you need to get started listing your phone accessories at auction sites like eBay and online retailers. This article explores answers to questions such as “How do I find a phone accessory wholesaler I can trust?”, “What is involved in setting up a store online?”, and “What are the hottest selling phone accessories?”. Read on to learn some of our easy tips for customers looking to break into this globally appreciating industry. Decide Who, What, & Where Once you have received a tax ID for your business, you can begin buying phone accessories at wholesale prices. But, first, you need to determine what you want to sell, the buyer demographics you want to sell it to, and the venue you will use to sell your items. The targeted customer base and your budget often determine if you want to sell only power banks and phone cases or go big with adding Apple Airpods and Bluetooth headsets. Then, you will want to review the different online venues such as eBay or Shopify to see how much they charge for you to use their site and customer base for your transactions.
Select a Wholesaler & Stock Up Now that you have determined if you going to sell less expensive accessories, a wide variety, or high-end accessories only and you know how much selling it at your venue of choice will cost, you are ready to go shopping for a trusted wholesaler. By locating the accessories in their catalog, you are ready to contact the wholesaler for a quote. Use this quote to compare with the market prices online and other wholesaler quotes for the same make and model. This also gives you an idea of how much to charge your buyers. For Mighty Wireless, you would need to register as a business by clicking User Registration. After receiving approval to make a purchase, you simply note the item ID and volume needed in an email to us directly or use our form online for your convenience. We are confident you will find we offer the lowest prices and faster shipping on thousands of fully stocked wholesale phone accessories. Also, we back our quality products and in-house packaging expertise with a full refund for any defective items. Check us out! You will love working with us! Register on the Website as a Seller After you have ordered your discount phone accessories, this is a great time to register your business on your venue as a seller. To do this with most online retailers, you create an account with your contact information and payment preferences. eBay only requires an email address where other companies will ask for more information. A useful tip is to keep your business address, email, phone number, and tax ID handy for any purchases as well as business registrations. Post your Items with Full Descriptions For eBay, you click “Sell” from any page to begin. From here, you can begin posting your accessory description and photos. Sites like Shopify may require more information before you begin selling. However, you should be up and running with posting your items quickly. When posting, try to take professional photos to upload with your description. Some manufacturers will even give you the description and promotional pics to use. In addition, videos are great attention grabbers that offer the bonus of teaching buyers about the accessory’s features and how to use the product. A final note on pricing, if you select an auction site like eBay, you will need to decide if you are going to list the market price you wish to sell the item with no bidding involved or if you want to use the auction format to attract buyers and hope they will place higher bids than the starting price before the time runs out. Both methods of selling can be profitable. There is more risk with allowing people to bid on the price of the accessory. That said, the ending price could be greater than expected in an auction just as easily.
Ask for a 5 Star Review Whatever method you choose for selling your accessories, be sure to ask for a “5 Star Review” from your customers. We suggest sending them a nice notecard with their purchase on which you thank them for their business, leave them with a way to contact you with any concerns, and politely explain at the bottom how you would appreciate a “5 Star Review” to share their satisfaction with the product and customer service they received. Many people enjoy writing reviews for businesses, and getting good reviews shows potential buyers you are a reputable seller they can trust. In short, the phone accessory business is booming! With each new phone, people are purchasing phone cases, chargers, car mounts, and more. You can avoid some of the pitfalls new businesses face while taking part in this explosive industry by following the tips above. Pretty soon, you will be selling phone accessories online like a pro!
0 notes
Text
WooCommerce vs Magento
As a beginner, finding an ecommerce platform that is low cost and reliable is difficult, especially when you are being bombarded with deceptive advertising all the time. Many aspirational tycoons are eager to realize their dreams, but fail to comprehend which e-commerce platform will work best for them. We have many e-commerce platforms like Shopify, PrestaShop, etc, and the number is growing rapidly.
So how to choose which platform to use? The query relies on many factors such as niche of your business, resources you have and the technical leverage you can offer into your venture. And today we’re here to give you a clearer perspective of the two e-commerce giants; Magento, the Adobe Venture and WordPress’s e-commerce extension WooCommerce, which will help you in making an informed decision between the two behemoths.
When comparing with each other, many questions will strike your mind. In this blog we’ll cover:
Which platform is easy to use?
How much these platforms provide you with technical, automated support from backend?
Which platform can aid in the maintenance of product category you want to build?
Which one the options will help more in marketing your brand online?
Which one has better Analytics tool for measuring performance metrics?
Last but not least, which platform will open more opportunities to connect with relevant experts and efficient customer support?
By the end of this article, you’ll have all the answers at your threshold facilitating you in making an ever-right choice for your new online enterprise. And a much more information coherently provided, will work for your greater knowledge and confidence on the platform you choose.
WooCommerce vs Magento: The Comparison
Brand Building Made Easy
Effortless Web Management
Website Integrations
Optimized Online Sales Process
Secured Payment Gateways
Data Analysis
Optimization for Online Searches
Support and Communities
1. Brand Building Made Easy
Magento and WooCommerce provide the users alike with unlimited convenience in customization and management of the website. This helps to draw your potential audience to make a purchase by giving them a seamless and attractive on-store experience on multiple devices.
Magento being a PHP based Open-source Platform, allows complete freedom for web developers to customize web pages through the source code.
To add various features and responsiveness, the user can browse from 1000’s of plugin options from Magento Marketplace and integrate into the website.
It provides user to choose the hosting solution out of the best and secure options. Meanwhile a current user can opt for cloud hosting in collaboration with AWS for scalability and simultaneously decreasing the page load time.
Magento is focused primarily for those users who have the resources or skills of web development and are willing to take complete control of their website.
It supports multi business models from a single on-site point of contact.
WooCommerce is an Open-source Platform where the access to web source code is given, imparting partial control of the user on the website while customizations can be done from the backend.
Since it’s an Open SaaS solution it depends heavily on plugins to provide features on the WooCommerce website.
This platform is created considering the niche which want fast and easy creation of website as well as a partial control on the backend.
It has 54,000 plugins on WordPress to integrate your website for various dynamic features.
The WooCommerce hosting provides you with free SSL certificate and is fully PCI Compliant.
The platform in conjugation with a multi-vendor plugin can offer user the leverage of multi-vendor business model
Page load time is faster when the website contains more content rather than products for sale, like an e-commerce website.
2. Effortless Web Management
WooCommerce and Magento offers a wide area of online store management and since both the platforms are an open SaaS solutions, a user can access the backend to give unique customization features on your website besides utilizing the preset thematic versions. But which will be worth the money?
WooCommerce allows the user to access the source code, to give unique customization features on your website.Carousels, CTA’s and Pop Ups can be added with the help of Plugins from WordPress.
This Open-source platform carries the prestige of providing the best CMS backend to the user, highly suitable for website which have more diverse and proportion content.
WooCommerce seldom witness any cross browser issue until the website is not updated.
Yes, generally speaking both WordPress and WooCommerce have responsive websites on different devices.
Magento through backend control and compatibility with AWS Cloud Hosting, gives unlimited scalability to businesses.
Online store management can be accessed through mobile with ease.
Magento has strong CMS feature and various content formats can be optimized on the website.
The websites do not witness any cross-browser issues as they can be optimized from their source.
3. Website Integrations for Effective Marketing
Marketing comes indispensable for companies if they desire to grow among the saturated market of e-commerce. Almost every company now indulges in online marketing these days as it is effective in reaching a wider audience and getting returns.
Magento it involves the usage of APIs for integration other platforms and plugins.
A developer is required to deploy a Simple Object Access Protocol in the web service during Magento installation for integration to a third party website.
Social media portals can be integrated through plugins which will give user the chance to leverage his Magento account dashboard to automate social media posts through it.
WooCommerce provides the opportunity of multi-channel marketing and even automate the daily recurring activities in backend.
The e-commerce solution has numerous plugins in the market which act as a mediator between two apps for integrating features into your WooCommerce account server.
These add-ons, extensions and even plugins can be derived from WordPress’s affiliate marketplace, known as WooMultistore.
4. Optimized Online Sales Process
Both WooCommerce and Magento provide exceptionally friendly web experience for inventory management and handle complex back orders. While both platforms are at par when it comes to bringing efficiency into play, each platform brings a new innovation in the field of inventory management.
Magento provides a new strategy of automated intelligent sourcing which can drive 35% increase in company’s revenue. It extends the functionality through additional API’s which can re-module the supply chain model through amendments in the API directory, making out-of-the-box business logics easy to implement on web plethora.
This facilitates the management of multi-location inventory as well as enhancing stock visibility through barcodes. You can also turn your store into a mini distribution centre for other Magento based e-commerce portals.
It supports multi business models from a single on-site point of contact.
It’s order management system dashboard will provide you with metrics as Order ID, Store, Items, Language, Date, Customer, Status, Status reason and Pick list
Sales management allows the webstore owner to assess and refine the on-store assistance on every level of the purchase funnel, from shopping cart to printing invoices and sales collection.
WooCommerce’s Step-by-Step Ordering System allows the sellers to diversify their product categories through layers and add-ons. This comes out really beneficial in promoting cross-selling, pushing grouped and segregated products through enhancing the end user’s in-store shopping experience.
The user can view orders and sales status for a given time period.
Also he can change the order status, manage prices and inventories as well as product meta descriptions on the website.
The order, sales and store management analysis facility can be derived from plugins in the marketplace.
5. Secured Payment Gateways
Both WooCommerce and Magento have partnered with some of the most popular and secure payment gateways, giving their clients the satisfaction to grow on secured sales and revenue.
WooCommerce Payments and Magento Payments do not support 3D Payment Gateway but have numerous options in the marketplace to integrate the plugins and add 3D functionality to your checkout page.
WooCommerce, just like Magento offers a massive list of options from third party companies like PayPal, Stripe, Square, etc. to protect your online stores from cyber attacks.
They not only provide online stores with the securest of the payments processes, but also furbish their clients with SSL (Secure Sockets Layer) certificates of reputed organisations, for defenses against cyber attacks.
READ MORE: https://firstwirewp.com/woocommerce-vs-magento/
0 notes
Video
Shopify Store Setup | Add Languages | Add COD Payment Method | Order ID ... Full Video Link - https://youtu.be/_IW17GCRWTc Check out this new video on the CodeOneDigest YouTube channel! Add language in Shopify store. Add payment method in store and customise store id format. #shopify #shopifyadminconsole #shopifystoresetup #codeonedigest@java @awscloud @AWSCloudIndia @YouTube @codeonedigest @Shopify @typescript @nestframework
#youtube#shopify store setup#shopify store add language#shopify store add payment method#shopify store cod payment method#shopify store cash on delivery payment method#shopify order id format#shopify order id prefix#shopify store order id suffix
1 note
·
View note
Text
Top 5 Rental Software: Advice From Best Experts
Rental Industry is a thriving sector that continues to be lucrative yet rewarding for businesses. The persistent increase in pricing of products, customers are moving to affordable options. Equipment Rental is an incredible way to use & experience items without owning them. It not only serves the purpose but also lowers the cost too by replacing the need to buy the product. This fact made rental space one of the booming billion-dollar industry. This rampant growth in the rental sphere pushed entrepreneurs to explore relentless opportunities. While having your own business sounds like a daydream and offers a lot of freedom, but this isn’t a bed of roses. At every step, you have to deal with possible challenges and hurdles that make operating the business a daunting task. You need to be close to perfection to establish and scale your business. This task is not easy when you have many functions in your hands and work as a solo performer. Things can turn up messy and scary sometimes. So you got to have a backup to count on that can help you support and manage your rental business. This point is where rental management software comes to the picture. Rental software comes handy when you need to serve undivided attention across many aspects of your business. It saves you time and streamlines your rental business. Thus, keeping your business always on track and making it a profitable venture. Want to know? Which rental software works best? Learn about the recent recommendations of best rental software for the industry:
3. Reservety - Rental Software

Reservety is comparatively new, but its ease, functionality, and powerful features remain unmatched. Backed by the vast years of experience in rental space. And a clear aim to make the online rental management process easy for customers, it is what formed the basis of the development of Reservety. Reservety, with its ton of stunning and intuitive features, has a clear edge over its competitors. Some of the features that set-apart this rental management software from others are: What are the advantages of this rental software? Inventory Management and Tracking Reservety makes inventory management and tracking process a sheer joy for you. With its clean and straightforward dashboard, track all orders from a single window. This feature looks pretty much like those of other rental software, but it is not the case. Filter the orders as per date, customer name, product name or code, and reservation status. Thus, it makes sure no rental items remain untracked. From a rental owner’s point of view, it is an exceptional feature when there are a ton of products and need to track specific ones. Besides managing and tracking your bookings, you can change the reservation status. After the rental, once customers return the equipment, and inventory is instantly updated. This is not all; you can quickly generate inventory reports in your preferred format. Generate reports such as XLSX, doc, or pdf which can use in reports and managing to ship. Hence, it is quite distinct in its functionality and performance. Online Rental Store with drag and drop builder An online store is a place where most customers lands and make a reservation. It is the first element which pushes customers to whether to rent from you or not. So, space should be appealing at the same time smooth and functional. This element can make a positive impression of your brand on customers. Although, most of the rental software like EzRentOut and Booqable offers an online store. The hosting and maintenance cost for rental companies is hard to afford. Reservety as a saviour offers a free online website builder. It not only cuts down cost on building and maintaining a rental store but also take care of fo scheduling. And, eventually, save and manage your time. Thus, choosing Reservety for your business means added advantage over the competitor. Specific Reservation period Reservety makes it easy for rent manager to create a reservation for a particular period. There is a time when the customer needs equipment on alternative days and dates. Thus, it requires a skipping date and making custom booking schedule for renting equipment. So, the customer isn’t charged for more days than he wants. At times, it can make reservations for a particular period considering the working hours. Most of the other rental software doesn’t offer you the luxury to do this, but Reservety does it all. Shipping and Delivery Whether you operate from one property location or multiple ones, the rental companies have to keep the products available. The product should be available as close to the customer as possible. The customer hates long waiting times, so making sure products deliver to the customer quickly. Make sure from the moment they make a reservation, they can easily track it. Achieve this goal by making the product available through many warehouses. Reservety creates various shipping zones with custom prices for each of them. Alternatively, you can also create flat price shipping for all the zones. There are other super-powerful features like scheduling pickup from a custom location. In case, the business operates on a large scale multiple warehouses and pickup locations. You can easily add various picking and warehousing option. Plus, you can enable routing, which lets your customers review their bookings via Detrack integration. These features make a huge difference by adding flexibility for the customers who are busy with their routine stuff. Merchant Services and Payment Gateways Integrations Integrating many payment options in an online rental store works exceptionally well. This rental software supports 30+ payment gateways to accept and manage payment globally anywhere. This feature makes its competitors stand nowhere in terms of payment management. It includes some of the most popular payment platforms like Square, Authorize .net, PayPal, Stripe, Direct bank transfer, and cash on delivery. Setting up payment is quick and easy, and 24/7 customer support is always at your hand to help you out. While these all features sounds like too many. Reservety has other super exciting features to deliver superior performance for companies. Make Your Business Simplified Reservety comes with endless possibilities to make rental management simplified and easy. When you have two websites- First for the company and second to take bookings, it could be tough to handle and manage both with limited resources. It takes both time and money out of your pocket. Here Reservety presents with a possible solution to migrate your existing website. It can migrate from any of the popular platforms like Wix, Shopify, Magento, and Prestashop. Thus, merging each of the sites into a single platform will save your money, energy, and time to serve both. Take In-Store Reservations The business owners have to be ever ready for every possible opportunity that comes their way. At times, when patrons find a way to your store, and you should find a way to make a reservation. Taking orders manually can be time-consuming. Hence, Reservety can be a fabulous way to take in-store orders with an integrated POS solution, which makes a taking point of rental quickly. Invoicing with your Favorite Tools Accustomed to using popular accounting software like Xero, Quickbooks, and others? With easy Xero & Quickbooks integration, easily track your cash flows while enjoying functionality. Other Great Features Efficiently take orders with your smartphone calendar with Google calendar integrations. Plus, Features like SMS notifications quickly updates on the status of orders, when a customer makes reservations. What are the disadvantages of this rental software? As per our reviews: Managing a vast inventory can be an overwhelming task. Rental managers have to assign a serial or product id to figure out the products quickly. This feature is essential when you need to search for products from a ton of inventory items. At the moment, Reservety doesn’t hold this functionality to assign serial numbers to products. But, in an endeavor to be the best software, the feature is in development mode. How much will the software cost? Reservety offers competitive pricing, with the complete feature for your business to succeed. The basic Startup Business Plans of $29/month allows you to add up to 30 products. This plan with unlimited features with a bandwidth of 3000 unique visitors per month. All the other plans have the same features except for the number of visitors. The other plans are Small Business $49/month and Medium Business $79/month.
2. Booqable

Booqable is among the rental management software that has been for quite a long time in this space. Booqable software developed in 2014 focusing on every business size. The software promises to solve the predicaments faced by rental managers. It helps wipe-out complexities involved in handling the rental company. Booqable's simplified and minimal design caters to the need of many rental segments. This software combines modern technology and smart design essential to manage a rental business. Some of the features Booqable have: Pros: Inventory management Booqable lets rental manager, keep track of all your valuable inventories and manage them from a single dashboard. It not only manages inventory but also can create product variations, updating and pricing update. Document Creation Booqable incorporates ultra-modern technology. It is capable of generating rental agreements, invoices, tax statements, and other documents. It eliminates the need to spend time in long lines to complete documentation. Plus, you can customize the document and create beautiful designs. Also, it can send them to the patrons in one click. Thus, it is one of the simplified features of this software. Online Store It offers you a choice to take your business online. An online store combined with the online booking system for the rental process. The customers can choose and rent products within minutes. Thus create a phenomenal user experience. Multiplatform Integration This software integrates with popular platforms such as Shopify, WordPress, Weebly, and Squarespace. Currency Support The rental software allows accepting in local currency. It has pre-built support for many currencies to accept and process payments. Discounts A striking feature is creating and applying discounts on existing or new orders. This feature helps improve customer loyalty and gain more exposure to the business. Order Scheduling Scheduling orders are subject to the availability of the products in the inventory. With automated availability and pricing calculation, schedule orders and reserve products quickly. Customer Database Booqable makes it easy for business owners to maintain and use the database of consumers. Use it to the greatest to see order history, contact information, and create specific discounts for customers. Report Monitoring Data has a significant role to play in getting an insight into your business performance. With in-depth performance reports, It aids in understanding business better. Thus, it aids in a better decision-making process. Cons: As per our reviews: The major setback of Booqable is that it doesn’t allow partial payments before rental orders. This way, your consumers have to pay upfront or after receiving orders. This gap could refrain the customers from making rental orders and leave immediately.As there is no mobile app or mobile version available, it is quite challenging to work on this software.Organizing products can be as challenging as no way to group inventory products as per the category.If you operate your rental business with varied pricing on many events, days, or weekends. Setting up custom pricing will not be easy because it still lacks those features. Cost: The basic plan starts with Essential $35/month in which you get no essential reporting and scanning feature. Plus, limited support. To get more features you have to upgrade to Pro $95/month or the Premium $299/month plan. Learn more about it.
3. EzRentOut
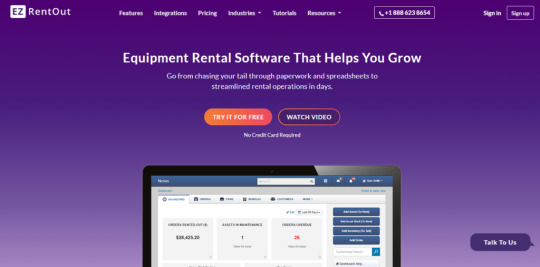
EzRentOut is another one in our recent recommendations for its interface. EzRentOut is a cloud-based rental management software that makes it easy for customers to book rental equipment. It developed keeping the precise need of many industries in mind. As the software is intuitive and highly customizable, it becomes an all-in-one solution to empower several sorts of rental businesses. The businesses range from construction rental, property rental, AV rental, party, event rental, IT rental, and sports rental. While you operate in any of these rental industries, it is imperative to keep every segment and department of your business optimized. So you can not only save your time but also can focus more on patrons and growing your business. EzRentOut has got many features that address each of your plights in keeping your business forward. learn more about features: Pros: Order management It allows you to create, manage, and schedule all your orders from the single dashboard. This is an exciting feature which comes handy while operating the rental business. Easy Invoicing Whenever items rented, it automates invoicing creation, generation, and customization process. It also helps to track payments of existing orders by the aid of an invoice tracking system. Moreover, it sends the generated invoice to customers. Hence, saves a big chunk of time. Staff Performance Employee performance is a critical metric. It helps rent manager to identify potential pitfalls and challenges in the growth of the business. This becomes crucial when you need to achieve the necessary milestones. So, it highlights the profitability and success of the company. This rental software delivers a quick report on your employee’s performance. So you can perform tweaks and turn the needle on your side. Invoice Designer Generating clean and beautiful invoices is pretty straightforward. This software has a remarkable attribute to be a professional designer. Bookings Create, schedule, and track all in advance or the moment when your customer demands. This software solves all your worries. It frees you from the hassle of managing manual rental for your equipment. Inventory Management Rental assets are a significant part of any rental business. EzRentOut rental software shows inventory status, state, maintenance, and location with ease. Android and iOS Mobile Apps The EzRentOut Rental software adds flexibility to control the rental business. It also comes with its dedicated android and iOS smartphone apps. Wherever you are, completely take control of every aspect of the rental business with an app. Online Store It is imperative to have an online store to take orders. The online store helps by driving prospects on your website. EzRentOut offers a professional rental webpage to showcase all assets in one place. Thus, it makes it easy for patrons to make a reservation. Yet, creating an online store is not free. It entails a cost in hosting, maintenance, and marketing of the website. Location Tracking Locating rental assets can be a pain when they float from one on-site project location to others. This feature lets you identify and manage all your equipment. So, they are not lost or damaged while in the rental process.
Cons:
As per our reviews: While it is easy to work but at times you need to check performance and accounts. And, you need to have consolidated reports. The report must showcase each of the details such as rental fees, time, taxes, shipping and delivery charges, and other costs. If you are looking for those features in this software, you would get disheartened.If you are a big fan of customizing things the way you want them to work, unfortunately, you would not be able to do it with this one. There are many features with little possibility of customization. For example: If you want to ship products as per your flexibility and not the date, software prescribes. You cannot do that.Missing features include Google tag manager functionality, ordering filtering by return dates, etc. Cost: There are 3 Pricing plans. With a standard plan of approx $50/month, you get limited features. There is no choice of online rental store, reports generation, credit card payments. To get more features like these ones, you have to upgrade to more expensive plans of Plus $135/month and Premium $225/month. Compare and learn about each before choosing.
4. Rentman
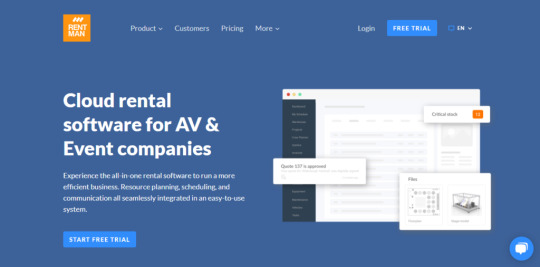
Rentman is cloud-based rental management software reviewed on the list. The rental software is precisely developed for audiovisual equipment rental industry. Rentman certainly increases productivity across all the departments. Also, it helps speed up collaboration with its next-generation software system. This rental software is suitable for all business size to manage any events. It can work with concerts, conferences, seminars, festivals, weddings, and other occasions. Rentman creates the perfect ambience for events by efficient management of all the resources. Thus, contributing to accomplishing a successful event. Some of the noteworthy features of the rental software are: Pros: Project Management Rentman enables to complete projects way faster by improving team collaboration and communication. Once you set up any plan, it quickly facilitates equipment for the desired job. Besides, it rapidly generates quotes and invoices for the same. This feature isn’t all; schedule rental resources on different time and locations. Warehouse Management If you have a large set of equipment in your inventory, managing and controlling each of them can be a daunting task. The Rentman elevates your warehouse productivity by swiftly scanning QR codes. It can also generate packing slips, invoices, and track damaged items. Repair and Inspections It assures that each of your equipment produces cash flow. It does this by efficient management of all rental equipment. In case any of the rental equipment requires repair. It can quickly notify about it. Crew Planning and Communication Time management is the key to generate more profit out of the rental business. With crew planning and communication features, you save time looking for the right person to move and transport all the equipment. Equipment Planning Managing stock level becomes absolute comfortable with automatic stock updating features. Moreover, it automates the cost calculation process whenever you plan for new or existing equipment in the inventory. Quoting and Invoicing Creating a professional document is what sets you apart from your competitor. With Rentman, entrepreneurs can quickly generate professional looking invoices, quotes, and reports. Plus, it becomes easy to send simple, fast, and accurate quotes for the customers. Cons: As per our reviews: The biggest shortcoming is it needs an internet connection to operate. Any fluctuation or connectivity issue can ruin the chances of effective and efficient management.There are varies features that make rental easy, but from the sales side, you don’t have many choices.The software works unexpectedly slow while searching for products in databases through QR Codes.The software doesn’t support many languages. Cost: Rentman has 3 pricing plans: first is Lite $35/month with limited support, customization, and data import. To get more features, you need to upgrade to Classic $65/month and Pro $75/month
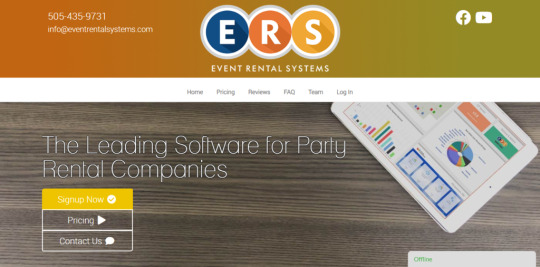
5. Event Rental System (ERS)
A web-based management software that automates the event rental management process. The event rental system (ERS) works precisely to take reservations & showcase’ real-time availability. It works with smart add-ons to provide you with many features. Some features are customer surveys, reports, electronic marketing, scheduling, and routing tool. This software is easy to work with. Access it from anywhere with an internet facility and even from your phone. Some of the Features of Event Rental System (ERS) are: Pros: Automated scheduling, routing, and load sheets ERS offers complete automation of scheduling process, routing, and loading sheets. Thus, easily track booking and reservation from point of reservation to the point of delivery. Tax, demographics and sales reporting ERS can generate insight reports for every much any part of the rental business. With quick reports of demographics, taxes, or sales, Take charge of your business. Digital Contracts From the consumer’s POV skipping desk hours waiting for bookings and documentation is critical. ERS can reduce the hassle of manual documentation. It helps by automatically generating digital contracts for your customers. Real-time online ordering Consumers can book your products in real-time with a complete easy to set-up website. The website is a great way to grow your online presence and take orders while you sleep. Automated marketing tools ERS offers automated marketing tools for rent manager. So, make sure you outrank your competitors and can dominate the online world. Automated reminders of their upcoming events ERS quickly notify you for future events with the automatic reminders feature. Thus, it makes sure you don’t miss out on important updates, which could be a matter of great importance. Cons: As per our reviews: The software needs much attention to showcase insight information. It provides minute details like routing, which is crucial from customer point-of-view.Limited functionality to generate coupons, promo codes.Tax calculation can be frustrating as the software works with the default tax rate. If your tax rate system is different, then this software is of no use for cost calculation. Cost: The reviewed prices are pretty high as compare to others which starts from $70/month to $500/month.
6. Rentmy
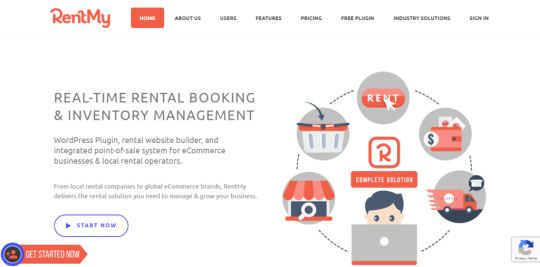
A complete rental booking and management solution for business owners. It alone can move your rental business forward. Rentmy offers rent manager with an intuitive dashboard, superb performance and flexibility to track and organize items. Some of the reviewed features of Rentmy are: Pros: Real-Time Rental Booking Rentmy makes it easy to take rental booking online or in-store with the rental store and POS solution. This trait makes your rental process optimized and super-fast and ultimately save time. Add Rental Functionality to Any website By installing a WordPress plugin, you can easily add functionality to rent equipment easily. So, customers can efficiently complete bookings from your website within minutes. Mobile-Friendly Rentmy designed to perform exceptionally well online on mobile. With a mobile-optimized design, you can take orders on the go and can manage all your store operations. Customer Relation Management It is easy to interact, help, and take feedback from your customers. Rentmy, with its flawless operations, can be a new trailblazer in the CRM segment. Social media Integration With this feature, you can easily share your rental products and customer responses over social media platforms. Cons: As per our reviews: There is no way to generate custom pricing for businesses in case you work with different pricing.There is no feature of scheduling orders on custom dates.Entice customers with many discounts, coupon codes, promotions, you are likely to face a setback. As no feature allows you to generate discount codes for specific events. Cost: There are 4 pricing plans. The starter plan of $44/month excludes technical support, hosting, and merchant processing options. For more features, you have to upgrade to bronze, silver, and platinum plan. Conclusion Technology has transformed the way we live our life. Having fascinating rental software for your business is a promising move. The move is what every business owner and customers would appreciate. Choosing the best rental software could be a tough bet when each of the software has many similar features. And, each of them incorporates pretty much identical technology in accomplishing those functions. It all boils down to the cost-effective rental solution, which is lucrative & effective for rent managers. Reservety has a clear advantage over other software by offering a free website. It also involves no hosting, development, and maintenance cost. This fact is although a small part of a bigger picture, but it has a significant impact on your business. The rental store is the first line of contact where customers interact, explore, and book the rental equipment. Having free easy to build a website is equal to half the job done. Additionally, Reservety possesses excellent features like creating a specific promotion and loyalty program. These features create a massive difference from a customer experience point of view. Having loyal customers for any business means repeated customers and, thus, enormous profit. Most of the other software doesn’t hold such features. So, it has a clear edge over others. Making the right move to choose the perfect software can be a decisive step to meet rental success. It takes only the right tool, an ideal strategy, teamwork, and passion for becoming the smartest in your niche. Read the full article
0 notes
Text
10 Tips to Pick The Best Shopping Data Feed Tool
The product data feed is the structure of every PPC-campaign on Google as well as various other purchasing channels. There are numerous devices to enhance your data feeds and campaigns: How can a data feed tool enhance your ROI? Which tools are around? Just what should you consider when reviewing various devices. Allow's resolve the problems and aid you obtain the device that is best for you.
How can an information feed device boost your ROI?
Let's initial rapidly rejuvenate your memory on WHY you ought to utilize a data feed device to begin with. A data feed device allows you to attain 3 orders:
1. Meet the data feed demands for every single channel
Every purchasing network has its very own demands - other field names (ID or SKU), different documents styles (csv or xml), other classifications, etc. An information feed device enables you to have the right feed for every channel.
2. Improve the data feeds
Your project results improve if you have much better information in your feed: "Levi's 501 denims - blue, size 32" is a far better title than "501", Update Schedule by refreshing your feed on a daily basis or add a personalized tag for products on Sale. Optimizing your data feed goes together with enhancing your campaigns.
3. Maximize Campaign performance
If you understand which individual items are performing well and which are just melting your budget plan, you can take immediate activity and also remove unprofitable products. A data feed device could track performance on item degree and could execute wonders for your ROAS.
Which tools are out there?
Most purchasing carts have a device (either built-in or 3rd-party apps) that makes it possible for the seller to export a feed to Google and also a few various other networks. These tools are generally totally free or really inexpensive as well as assist the eRetailer to obtain his items onto particular networks.
There are 100+ data feed tools worldwide that do more compared to that and also supply numerous kinds of optimization. Most devices are local gamers - they have great yet minimal capability and also strong links with the purchasing networks in their home country. There is additionally a smaller variety of big gamers that supply a done performance and also have integrated with countless purchasing channels in the US, Europe and South America.
A rough impression of the data feed device market resembles this:
There are a great deal even more information feed devices, especially neighborhood gamers in each country, yet the image above provides you an impact of how the market is structured and also that the main gamers are in every segment.
How to Locate the Finest Data Feed Device for You
These are the subjects that you should take right into account when reviewing tools.
1. Price
You better take into consideration cost at once, given that it is a major differentiator. You could save a great deal of time if you begin looking into devices that are within the rate range that you have in mind.
Take the nexting problems into account when considering the cost range:
☑ Fit your Budget
The most pricey devices (the ones in the leading right corner, like Channel Expert) usually charge a minimum cost of at the very least $1,000/ mo. If you can not pay for that, don't invest time evaluating these devices. If you have no spending plan in any way, just check out economical or cost-free tools.
☑ Functionality
Cheap tools have actually limited functionality, Expensive tools supply a lot. You may need to comprehend which capability you require (percieve section ‘Functionality') as well as after that number out who will certainly provide you the very best cost wherefore you need.
☑ Cost savings
A good data feed device will additionally save you money, since it shows you which items carry out well and which products are squandering your budget plan (see section ‘Analytics'). If you think about the expense of a tool, additionally take into consideration how much you will certainly obtain if your campaign RoI goes up by 20 or 50%.
☑ Modular Pricing
Pay only just what you may need. Paying for your variety of products or for a few functionalities is usually more economical than a taken care of cost that includes more capability and/or capability compared to you need.
2. Usability
Ease of use is crucial. Every action needs to take much less compared to a minute. We all understand that you wind up throwing out any tool that is difficult to use. Take the adhering to problems into account when assessing Functionality:
☑ Intuitive
In a great device, you find your way around with little or no instruction. Even if a device supplies a whole lot of capability, it needs to be very easy to browse. If you need to review a lengthy manual initially, forget it. If you need a 2-day training, something has to be incorrect.
☑ Demo
Take a trial. A good device ought to have the ability to reveal all features in 20-30 minutes. Percieve for yourself and also decide if it is user-friendly enough for you.
☑ Support and Advice
Does the device offer support on the phone or using Live Chat? If you are optimizing your feeds, you desire How-to-advice quickly - not the next day.
3. Functionality
There are many things that you can do with a device. Check just what you require on the here and after that see who offers that at the most effective price.
☑ Connect your store
☑ Shopping Cart
Does the device integrate with your ecommerce system? Magento, Demandware, Shopify, etc.? Or does it approve any type of resource feed in a csv/ xml/ txt/ json format?
☑ Variants
Is the tool able to download or produce variants.
☑ Merge feed
Can you combine information from different feeds right into one source feed.
☑ Multiple downloads
Can the device download your products numerous times each day.
☑ Schedule
Will you have the ability to arrange your downloads on the local time that you wish.
☑ De-duplicate
Are you able to get rid of duplicate items from your feed.
☑ Multi-store
Can the tool download numerous language variations of the very same shop, like multi-store-view on Magento.
☑ Create data feeds for channels
☑ Preloaded Templates, with the feed specifications of each channel.
☑ Auto-Mapping, input fields are mapped immediately for each channel.
☑ Automatic Mistake Correction, if you do not meet any type of requirements.
☑ Map Your Own Fields, to the fields that are needed by the channels.
☑ Add Missing Fields
☑ Combine, multiple input fields into one output field.
☑ Edit/Adjust Input Worths, replace, eliminate, pre and also suffix, etc.
☑ Re-calculate, numerical values.
☑ Recapitalize
☑ Regular Expressions
☑ Exclude Products, from your channel feeds.
☑ Add Categories, map your product types to the groups of each channel.
☑ Merge Variants, into a ‘parents-only' feed.
☑ Custom Feeds, create a feed according to your personal specs.
☑ Copy Feeds, from one channel to another.
☑ Picture Picker, select the appropriate image for each product.
☑ Marketplace Orders Sync, your orders in between your shop and marketplaces.
4. Which channels are supported
There are hundreds of shopping channels worldwide: Browse, Window shopping, Marketplaces, Affiliate Networks, etc. Make a list with the networks you want to get on (in which nation) and examine if the data feed tool of your selection offers them.
5. Performance Analytics
Knowing the efficiency of every specific item on each network is paramount to running a successful PPC-campaign on any kind of channel. Many networks are unable to supply you with this information and if they do, it is scattered in different locations as well as not-actionable.
Some information feed devices supply Analytics as well as enable you to identify your hot sellers and also remove unlucrative products from your information feeds. Sellers normally conserve a whole lot of cash or far better yet: the RoI-increase of their campaigns pays for the cost of the tool numerous times. Just what to inspect when reviewing analytics functionality:
☑ Product level statistics
Analytics each network or each classification is not sufficient.
☑ Cost data
You may need CPC, CPA. Cost and also ROAS for each and every item on each network to boost your ROI.
☑ Remove unprofitable products with a single click
☑ Bid Management
☑ Price
What is the added price for this capability as well as could you use it for selected channels.
6. Online Marketing Agencies
Some data feed tools offer extra performances for companies that are managing feeds for various customers.
☑ Agency pricing
To add as lots of (big as well as little) customers as you need.
☑ Sub-accounts
So each client could percieve his very own feeds.
☑ Usage data
To cost your consumers for your feed services.
☑ Token-access
To attach stores without having credentials.
7. Managed Service vs DiY
Data feed suppliers like Network Knowledge or Fusepump provide a handled service: you do not have the ability to maximize your personal feeds, they do it all for you. Most information feed tools provide a Saas (web based service) that allows you to do all of it internal.
The trend in the last few years is geared towards Do-It-Yourself: the project manager should handle the campaigns and also the data feeds at the very same time as well as there suffice tools that will enable him to do just that. With an intuitive device, data feed management is not tough or technical.
8. Quality
There are lots of means to assess the high quality of a device. Here are a number of active ingredients that make or break the quality of a tool.
☑ 24/7 monitoring
☑ Live support
☑ Instant notifications for failed Downloads, Processing and also Uploads
☑ Feed specifications pre-loaded for all channels
☑ Review feeds before uploading
☑ Password safeguarded source feeds
☑ Encrypted output feeds
☑ Custom Channels
☑ Fast downloads
9. Contract and Terms
Many SaaS tools do not offer an agreement or a minimum term. You could subscribe and also cancel whenever - no strings connected. That is often not the way to choose Venture consumers, however, for most others it is very convenient. Examine what help you:
☑ Contract or Terms and Problems or both
☑ Minimum Term
☑ Installation cost
☑ SLA
10. IT-requirements
Various devices have different IT-needs. An easy SaaS service has no impact on your IT-department whereas complicated tools may require a done system combination, keeping your IT people scheduled for weeks. Keep the list below aspects in mind when you select a tool and also percieve exactly what your company can deal with:
☑ SaaS
Subscription solution - organized as well as run in the cloud.
☑ Installation
Extensions, applications or other software application to obtain your information feed tool started.
☑ Integration
With your existing systems.
☑ Tracking software
To be installed.
Summary and Recommendations
After reviewing loads of information feed tools, we have a couple of basic final thoughts as well as referrals for you.
There are a great deal of tools around with attractive pricing and also really limited functionality and/or ease-of-use. Start your quest by specifying just what you may need and also what you can afford:
SMBs / Advertisers with a tiny budget have a great deal of selection: cost-free, affordable and also neighborhood tools that offer fundamental optimization in order to help you fulfill the requirements of each channel.
Large retailers have fewer devices to select from, yet there are several easy to use SaaS devices with excellent functionality as well as an affordable price.
Enterprise-retailers are typically currently with large players like ChannelAdvisor or Marin. These are the Ferraris both in functionality and cost, yet there excellent alternatives with a far better price.
To us, the sweet spot lies in the part where the tools for Big and Business overlap: Tools like DataFeedWatch provide nearly the same capability as the Enterprise tools, however have a simpler user interface and also a much far better rate. Retailers as well as Agencies with a big requirement for data feed optimization, yet without the requirement (and the budget) for a Ferrari, are most ideal served in this segment.
1 note
·
View note
Photo

How to Write a Business Plan in 2019: The Ultimate Guide for Every Entrepreneur https://ift.tt/2Z8vfQU
Are you starting a new business or trying to get a loan for your existing business? If so, you’re going to need to know how to write a business plan. Business plans give entrepreneurs the opportunity to formally analyze and define every aspect of their business idea. In this post, you’ll learn how to draft a business plan for your business along with the best resources to help you do it.
What is a Business Plan?
A business plan is a formal document that outlines your business’s goals and how you will achieve those goals. Entrepreneurs who start out with business plans are 16 percent more likely to build successful companies, according to the Harvard Business Review. It ensures sustainable success, guiding you as you develop your business, legitimizing your venture, and helping you secure funding (among countless other benefits).
What Are the Main Purposes of a Business Plan?
Most financial institutions and service providers require you to submit a detailed business plan to obtain funding for your business. Since your dropshipping businesses will likely have a low overhead to start, you may not need funding and therefore may not feel the need to write a business plan. However, you may need to write a business plan to secure a drastic increase limit on your credit card as your business grows or to open a business account. This varies per bank.
If you’re growing your business, use it to help you raise expansion capital, create a growth strategy, find opportunities, and mitigate risks.Palo Alto software found that business plans makes companies twice as likely to obtain outside funding.
If you’re just starting your business, use it to identify your business’s strengths and weaknesses, communicate your vision to others, and develop accurate forecasts.
What Are the Steps to Writing a Business Plan?
Establish goals
Research
Understand your audience
Determine your business plan format
Get to writing!
Establish Goals
There are two key questions to ask here:
What are you hoping to accomplish with your business?
What are you hoping to accomplish with your business plan?
Approaching your business plan through that lens will help you focus on the end goal throughout the writing process. These also provide metrics to measure success against.
Research
Before writing your business plan, gather the content and data needed to inform what goes in it. This includes researching your market and industry – spanning everything from customer research to legalities you’ll need to consider. It’s a lot easier to start with the information already in front of you instead of researching each section individually as you go.
Turn to guides, samples, and small business plan templates to help. Many countries have an official administration or service dedicated to providing information, resources, and tools to help entrepreneurs and store owners plan, launch, manage, and grow their businesses.
The following will take you to online business plan guides and templates for specific countries.
United States Small Business Administration (SBA) – The “write your business plan page” includes traditional and lean startup business plan formats, three downloadable sample business plans, a template, and a step-by-step build a business plan tool.
Australian Government – The “business plan template” page includes a downloadable template, guide, and business plan creation app.
UK Government Business and Self-Employed – The “write a business plan” page includes links to a downloadable business plan template and resources from trusted UK businesses. .
Canada Business Network – The “writing your business plan” page includes a detailed guide to writing your business plan and links to business plan templates from Canadian business development organizations and banks.
These business resource sites also offer a wealth of valuable information for entrepreneurs including local and regional regulations, structuring, tax obligations, funding programs, market research data, and much more. Visit the sites above or do the following Google searches to find official local business resources in your area:
your country government business services
your state/province government business services
your city government business services
Some Chamber of Commerce websites offer resources for business owners, including business plan guides and templates. Check your local chapter to see if they have any.
Banks that offer business funding also often have a resource section for entrepreneurs. Do a Google search to find banks that offer business funding as well as business plan advice to see the business plans that get funding. If your bank doesn’t offer any advice, search for the largest banks in your area:
business plan guide bank name
business plan samples bank name
business plan template bank name
If you’re looking for more sample business plans, Bplans has over 500 free business plan samples organized by business type as well as a business plan template. Their collection includes 116 business plans for retail and online stores. Shopify also offers a sample business plan for a fictional online clothing store.
Understand Your Audience
Because business plans serve different purposes, you’re not always presenting it to the same audience. It’s important to understand who’s going to be reading your business plan, what you’re trying to convince them to do, and what hesitations they might have.
That way, you can adapt your business plan accordingly. As such, your audience also determines which type of business plan format you use. Which brings us to our next point…
Which Business Plan Format Should You Use?
The United States Small Business Administration (SBA) presents two business plan formats:
The traditional business plan format is for entrepreneurs who want to create a detailed plan for their businesses for themselves or for business funding. Formal business plans.
The lean startup business plan format, on the other hand, is for business owners that want to create a condensed, single-page business plan.
If the business plan is just for you and internal folks, draft a lean startup business plan or a customized version of the traditional business plan with only the sections you need. If you need it for business funding or other official purposes, choose the traditional business plan thoroughly complete sections and extra attention to financial projections.
If your business operates outside the U.S., clarify the preferred format with your bank.
What Personal Information Should You Include in Your Business Plan?
As you write a business plan, take time to not only analyze your business idea, but yourself as well. Ask the following questions to help you analyze your business idea along the way:
Why do I want to start or expand my business?
Do my goals (personal and professional) and values align with my business idea?
What income do I need to generate for myself?
What education, experience, and skills do I bring to my business?
What Are the Main Components of a Business Plan?
According to the business plan template created by SCORE, Deluxe, and the SBA, a traditional business plan encompasses the following sections. Read through the descriptions of each section and work on them in the order that comes easiest for you.
Executive summary
Company description
Products & services
Market analysis
Marketing & sales
Management & organization
Funding request
Financial projections
Appendix
SWOT analysis
Executive Summary
The Executive Summary is the first part of your business plan, so this is where you need to hook readers in. Every business plan starts this way — even a simple business plan template should kick off with the Executive Summary. Summarize your entire business plan in a single page, highlighting details about your business that will excite potential investors and lenders.
Explain what your business has to offer, your target market, what separates you from the competition, a little bit about yourself and the core people behind your business, and realistic projections about your business’ success.
While this is the first section of your business plan, write it after you’ve completed the rest of your business plan. It’s a lot easier because you can pull from the sections you’ve already written, and it’s easier to identify the best parts of your business plan to include on the first page.
Company Description
In the Company Description, share 411 about your business. Include basic details like:
Name
Location
Legal structure (sole proprietor, partnership, corporation, etc.)
Business and tax ID numbers
Licenses
Permits
When the business started
Ownership information
Number of employees
Your mission statement, philosophy and values, vision, short- and long-term goals, and milestones along with a brief overview of your industry, market, outlook, and competitors should also be in the Company Description.
Pro tip: These are the details you’ll use each time you create a profile for your business on social media, business directories, and other networks. Keep your information consistent to reduce confusion and instill more confidence in potential customers.
Products & Services
The Products & Services section details what you plan to sell to customers. For a dropshipping business plan, this section should explain which trending products you’re going to sell, the pain points your products solve for customers, how you’ll price your products compared to your competitors, expected profit margin, and production and delivery details.
Remember to include any unique selling points for specific products or product groupings, such as low overhead, exclusive agreements with vendors, the ability to obtain products that are in short supply / high demand based on your connections, personalized customer service, or other advantages.
For dropshipping businesses selling hundreds or even thousands of products, detail the main categories of products and the number of products you plan to offer within each category. By doing this, it’s easier to visualize your business offerings as a whole to determine if you need more products in one category to fully flesh out your online store.
Market Analysis
The Market Analysis section of your business plan allows you to share the research you have done to learn about your target customer base — the potential buyers of your products. Your audience will want to know that you have a solid understanding of your industry, the competitive landscape, who’s most likely to become your customers. It’s important to demonstrate that there’s a large enough market for your product to make it profitable and/or to make a strong return on investment.
To complete the Market Analysis component of your business plan, check out the following resources for industry, market, and local economic research:
U.S. Embassy websites in most countries have a business section with information for people who want to sell abroad. Business sections include a basic “getting started” guide, links to economic and data reports, trade events, and additional useful business links for a particular region.
IBISWorld is a provider of free and paid industry research and procurement research reports for the United States, United Kingdom, Australia, and New Zealand.
Statista offers free and paid statistics and studies from over 18,000 sources including industry reports, country reports, market studies, outlook reports, and consumer market reports.
Use these websites and others to learn about the projected growth of your industry and your potential profitability. You can also use social media tools like Facebook Audience Insights to estimate the size of your target market on the largest social network
Another way to research your market and products is through Google Trends. This free tool will allow you to see how often people search for the products your business offers over time. Be sure to explain how your business plans to capitalize on increasing and decreasing search trends accordingly.
Marketing & Sales
Knowing your target market is half the battle. In the Marketing & Sales section, share how you plan to reach and sell products to your target market. Outline the marketing and advertising strategies you intend to use to introduce your product to potential customers – search marketing, social media marketing, content marketing, email marketing, and advertising channels.
If you’re unsure how to market your business’ products, analyze your competitors for some inspiration. Discovering your competition’s marketing tactics will help you customize your own strategy for building a customer base and ultimately taking your business to the next level.
Do a Google search for your competitor’s business name to find the websites, social accounts, and content they’ve created to market their products. Look at the ways your competitor uses each online entity to drive new customers to their online store.
Include how you plan to convert those you reach with your marketing and advertising messages into customers. For dropshipping businesses, conversions will typically take place on your website as people purchase your products and/or by phone if you take orders over the phone.
Management & Organization
In the Management & Organization piece of your business plan, describe the structure of your business. In terms of legal structure and incorporation, most businesses are classified as sole proprietorships (one owner), partnerships (two or more owners), corporations, or S corporations.
Draft a condensed resume for each of the key members of your business. If you’re a solopreneur , include how your past education and work experience will help you run each aspect of your business. If you have one or more partner(s) and employee(s), include their relevant education and experience as well.
Think of this as a great way to evaluate the strengths of each individual running your business. When self-evaluating, you’ll be able to identify the aspects of your business that’ll be easier to manage and which ones to delegate to freelancers, contractors, employees, and third-party services. This also makes it easier to find the best way to maximize their strengths for business growth.
Funding Request
Chances are, you don’t have a funding request for a startup dropshipping business since the appeal to dropshipping is the low upfront investment and overhead. If you’re looking for a loan, however, this would be the section where you outline the dollar amount you need, what you plan to invest in, and how you see the return on your investment.
Another way to use this section is to analyze the investment you have or plan to make when starting or growing your business. This should include everything, from the computer you use to run your website to the monthly fee for other marketing and business services.
Financial Projections
In Financial Projections, share your projected revenue and expenses for the first or next five years of your business. The idea here is to demonstrate that the revenue you’re anticipating will easily lead to a return on any investment, whether from your personal finances or a capital lending service.
If you’re looking for funding, you’ll need to go into detail with projected income statements, balance sheets, cash flow statements, and capital expenditure budgets. If you aren’t looking for funding, it won’t hurt to create these types of financial projections so you can realistically plan for the future of your business.
Appendix
The Appendix of your business plan includes any supplemental documents needed throughout the sections of your business plan. These may include, but are not limited to:
Credit histories
Resumes
Product brochures
References
Licenses
Permits
Patents
Legal forms
Permits
Supplier contracts
If you’re submitting your business plan for funding, contact the lender to see what documentation they want included with your funding request.
SWOT Analysis
In addition to the above sections, some business plans also include a SWOT Analysis. This is a one-page summary of your business’s strengths, weaknesses, opportunities, and threats. The strengths and weaknesses you include will be internal, whereas opportunities and threats you include will be external.
Depending on the revelations of this section, you may or may not want to include the analysis when submitting your business plan formally unless it is requested.
Summary: How to Write a Business Plan
As you can see, creating a business plan for your dropshipping business is a great way to validate your business idea, discover your business’s strengths and weaknesses, and make a blueprint for your business future. If you haven’t already, take the time to create a business plan to launch or grow your dropshipping business in 2019!
Want to Learn More?
How to Start a Dropshipping Business in 2019
How to Register a Business in the USA
How to Launch Your Ecommerce Store in Less Than 30 Minutes Flat
30+ Amazing Startup Business Ideas That’ll Make You Money
The post How to Write a Business Plan in 2019: The Ultimate Guide for Every Entrepreneur appeared first on Oberlo.
from Oberlo
Are you starting a new business or trying to get a loan for your existing business? If so, you’re going to need to know how to write a business plan. Business plans give entrepreneurs the opportunity to formally analyze and define every aspect of their business idea. In this post, you’ll learn how to draft a business plan for your business along with the best resources to help you do it.
What is a Business Plan?
A business plan is a formal document that outlines your business’s goals and how you will achieve those goals. Entrepreneurs who start out with business plans are 16 percent more likely to build successful companies, according to the Harvard Business Review. It ensures sustainable success, guiding you as you develop your business, legitimizing your venture, and helping you secure funding (among countless other benefits).
What Are the Main Purposes of a Business Plan?
Most financial institutions and service providers require you to submit a detailed business plan to obtain funding for your business. Since your dropshipping businesses will likely have a low overhead to start, you may not need funding and therefore may not feel the need to write a business plan. However, you may need to write a business plan to secure a drastic increase limit on your credit card as your business grows or to open a business account. This varies per bank.
If you’re growing your business, use it to help you raise expansion capital, create a growth strategy, find opportunities, and mitigate risks.Palo Alto software found that business plans makes companies twice as likely to obtain outside funding.
If you’re just starting your business, use it to identify your business’s strengths and weaknesses, communicate your vision to others, and develop accurate forecasts.
What Are the Steps to Writing a Business Plan?
Establish goals
Research
Understand your audience
Determine your business plan format
Get to writing!
Establish Goals
There are two key questions to ask here:
What are you hoping to accomplish with your business?
What are you hoping to accomplish with your business plan?
Approaching your business plan through that lens will help you focus on the end goal throughout the writing process. These also provide metrics to measure success against.
Research
Before writing your business plan, gather the content and data needed to inform what goes in it. This includes researching your market and industry – spanning everything from customer research to legalities you’ll need to consider. It’s a lot easier to start with the information already in front of you instead of researching each section individually as you go.
Turn to guides, samples, and small business plan templates to help. Many countries have an official administration or service dedicated to providing information, resources, and tools to help entrepreneurs and store owners plan, launch, manage, and grow their businesses.
The following will take you to online business plan guides and templates for specific countries.
United States Small Business Administration (SBA) – The “write your business plan page” includes traditional and lean startup business plan formats, three downloadable sample business plans, a template, and a step-by-step build a business plan tool.
Australian Government – The “business plan template” page includes a downloadable template, guide, and business plan creation app.
UK Government Business and Self-Employed – The “write a business plan” page includes links to a downloadable business plan template and resources from trusted UK businesses. .
Canada Business Network – The “writing your business plan” page includes a detailed guide to writing your business plan and links to business plan templates from Canadian business development organizations and banks.
These business resource sites also offer a wealth of valuable information for entrepreneurs including local and regional regulations, structuring, tax obligations, funding programs, market research data, and much more. Visit the sites above or do the following Google searches to find official local business resources in your area:
your country government business services
your state/province government business services
your city government business services
Some Chamber of Commerce websites offer resources for business owners, including business plan guides and templates. Check your local chapter to see if they have any.
Banks that offer business funding also often have a resource section for entrepreneurs. Do a Google search to find banks that offer business funding as well as business plan advice to see the business plans that get funding. If your bank doesn’t offer any advice, search for the largest banks in your area:
business plan guide bank name
business plan samples bank name
business plan template bank name
If you’re looking for more sample business plans, Bplans has over 500 free business plan samples organized by business type as well as a business plan template. Their collection includes 116 business plans for retail and online stores. Shopify also offers a sample business plan for a fictional online clothing store.
Understand Your Audience
Because business plans serve different purposes, you’re not always presenting it to the same audience. It’s important to understand who’s going to be reading your business plan, what you’re trying to convince them to do, and what hesitations they might have.
That way, you can adapt your business plan accordingly. As such, your audience also determines which type of business plan format you use. Which brings us to our next point…
Which Business Plan Format Should You Use?
The United States Small Business Administration (SBA) presents two business plan formats:
The traditional business plan format is for entrepreneurs who want to create a detailed plan for their businesses for themselves or for business funding. Formal business plans.
The lean startup business plan format, on the other hand, is for business owners that want to create a condensed, single-page business plan.
If the business plan is just for you and internal folks, draft a lean startup business plan or a customized version of the traditional business plan with only the sections you need. If you need it for business funding or other official purposes, choose the traditional business plan thoroughly complete sections and extra attention to financial projections.
If your business operates outside the U.S., clarify the preferred format with your bank.
What Personal Information Should You Include in Your Business Plan?
As you write a business plan, take time to not only analyze your business idea, but yourself as well. Ask the following questions to help you analyze your business idea along the way:
Why do I want to start or expand my business?
Do my goals (personal and professional) and values align with my business idea?
What income do I need to generate for myself?
What education, experience, and skills do I bring to my business?
What Are the Main Components of a Business Plan?
According to the business plan template created by SCORE, Deluxe, and the SBA, a traditional business plan encompasses the following sections. Read through the descriptions of each section and work on them in the order that comes easiest for you.
Executive summary
Company description
Products & services
Market analysis
Marketing & sales
Management & organization
Funding request
Financial projections
Appendix
SWOT analysis
Executive Summary
The Executive Summary is the first part of your business plan, so this is where you need to hook readers in. Every business plan starts this way — even a simple business plan template should kick off with the Executive Summary. Summarize your entire business plan in a single page, highlighting details about your business that will excite potential investors and lenders.
Explain what your business has to offer, your target market, what separates you from the competition, a little bit about yourself and the core people behind your business, and realistic projections about your business’ success.
While this is the first section of your business plan, write it after you’ve completed the rest of your business plan. It’s a lot easier because you can pull from the sections you’ve already written, and it’s easier to identify the best parts of your business plan to include on the first page.
Company Description
In the Company Description, share 411 about your business. Include basic details like:
Name
Location
Legal structure (sole proprietor, partnership, corporation, etc.)
Business and tax ID numbers
Licenses
Permits
When the business started
Ownership information
Number of employees
Your mission statement, philosophy and values, vision, short- and long-term goals, and milestones along with a brief overview of your industry, market, outlook, and competitors should also be in the Company Description.
Pro tip: These are the details you’ll use each time you create a profile for your business on social media, business directories, and other networks. Keep your information consistent to reduce confusion and instill more confidence in potential customers.
Products & Services
The Products & Services section details what you plan to sell to customers. For a dropshipping business plan, this section should explain which trending products you’re going to sell, the pain points your products solve for customers, how you’ll price your products compared to your competitors, expected profit margin, and production and delivery details.
Remember to include any unique selling points for specific products or product groupings, such as low overhead, exclusive agreements with vendors, the ability to obtain products that are in short supply / high demand based on your connections, personalized customer service, or other advantages.
For dropshipping businesses selling hundreds or even thousands of products, detail the main categories of products and the number of products you plan to offer within each category. By doing this, it’s easier to visualize your business offerings as a whole to determine if you need more products in one category to fully flesh out your online store.
Market Analysis
The Market Analysis section of your business plan allows you to share the research you have done to learn about your target customer base — the potential buyers of your products. Your audience will want to know that you have a solid understanding of your industry, the competitive landscape, who’s most likely to become your customers. It’s important to demonstrate that there’s a large enough market for your product to make it profitable and/or to make a strong return on investment.
To complete the Market Analysis component of your business plan, check out the following resources for industry, market, and local economic research:
U.S. Embassy websites in most countries have a business section with information for people who want to sell abroad. Business sections include a basic “getting started” guide, links to economic and data reports, trade events, and additional useful business links for a particular region.
IBISWorld is a provider of free and paid industry research and procurement research reports for the United States, United Kingdom, Australia, and New Zealand.
Statista offers free and paid statistics and studies from over 18,000 sources including industry reports, country reports, market studies, outlook reports, and consumer market reports.
Use these websites and others to learn about the projected growth of your industry and your potential profitability. You can also use social media tools like Facebook Audience Insights to estimate the size of your target market on the largest social network
Another way to research your market and products is through Google Trends. This free tool will allow you to see how often people search for the products your business offers over time. Be sure to explain how your business plans to capitalize on increasing and decreasing search trends accordingly.
Marketing & Sales
Knowing your target market is half the battle. In the Marketing & Sales section, share how you plan to reach and sell products to your target market. Outline the marketing and advertising strategies you intend to use to introduce your product to potential customers – search marketing, social media marketing, content marketing, email marketing, and advertising channels.
If you’re unsure how to market your business’ products, analyze your competitors for some inspiration. Discovering your competition’s marketing tactics will help you customize your own strategy for building a customer base and ultimately taking your business to the next level.
Do a Google search for your competitor’s business name to find the websites, social accounts, and content they’ve created to market their products. Look at the ways your competitor uses each online entity to drive new customers to their online store.
Include how you plan to convert those you reach with your marketing and advertising messages into customers. For dropshipping businesses, conversions will typically take place on your website as people purchase your products and/or by phone if you take orders over the phone.
Management & Organization
In the Management & Organization piece of your business plan, describe the structure of your business. In terms of legal structure and incorporation, most businesses are classified as sole proprietorships (one owner), partnerships (two or more owners), corporations, or S corporations.
Draft a condensed resume for each of the key members of your business. If you’re a solopreneur , include how your past education and work experience will help you run each aspect of your business. If you have one or more partner(s) and employee(s), include their relevant education and experience as well.
Think of this as a great way to evaluate the strengths of each individual running your business. When self-evaluating, you’ll be able to identify the aspects of your business that’ll be easier to manage and which ones to delegate to freelancers, contractors, employees, and third-party services. This also makes it easier to find the best way to maximize their strengths for business growth.
Funding Request
Chances are, you don’t have a funding request for a startup dropshipping business since the appeal to dropshipping is the low upfront investment and overhead. If you’re looking for a loan, however, this would be the section where you outline the dollar amount you need, what you plan to invest in, and how you see the return on your investment.
Another way to use this section is to analyze the investment you have or plan to make when starting or growing your business. This should include everything, from the computer you use to run your website to the monthly fee for other marketing and business services.
Financial Projections
In Financial Projections, share your projected revenue and expenses for the first or next five years of your business. The idea here is to demonstrate that the revenue you’re anticipating will easily lead to a return on any investment, whether from your personal finances or a capital lending service.
If you’re looking for funding, you’ll need to go into detail with projected income statements, balance sheets, cash flow statements, and capital expenditure budgets. If you aren’t looking for funding, it won’t hurt to create these types of financial projections so you can realistically plan for the future of your business.
Appendix
The Appendix of your business plan includes any supplemental documents needed throughout the sections of your business plan. These may include, but are not limited to:
Credit histories
Resumes
Product brochures
References
Licenses
Permits
Patents
Legal forms
Permits
Supplier contracts
If you’re submitting your business plan for funding, contact the lender to see what documentation they want included with your funding request.
SWOT Analysis
In addition to the above sections, some business plans also include a SWOT Analysis. This is a one-page summary of your business’s strengths, weaknesses, opportunities, and threats. The strengths and weaknesses you include will be internal, whereas opportunities and threats you include will be external.
Depending on the revelations of this section, you may or may not want to include the analysis when submitting your business plan formally unless it is requested.
Summary: How to Write a Business Plan
As you can see, creating a business plan for your dropshipping business is a great way to validate your business idea, discover your business’s strengths and weaknesses, and make a blueprint for your business future. If you haven’t already, take the time to create a business plan to launch or grow your dropshipping business in 2019!
Want to Learn More?
How to Start a Dropshipping Business in 2019
How to Register a Business in the USA
How to Launch Your Ecommerce Store in Less Than 30 Minutes Flat
30+ Amazing Startup Business Ideas That’ll Make You Money
The post How to Write a Business Plan in 2019: The Ultimate Guide for Every Entrepreneur appeared first on Oberlo.
https://ift.tt/2ZfegaU August 21, 2019 at 03:21AM https://ift.tt/2lXD3PO
0 notes
Text
How to Start an Online Store in 8 Simple Steps (Beginners Guide)
How to Start an Online Store in 8 Simple Steps - Starting an online store is a great business idea for those looking to create a strong online presence for their business, as well to extend their market reach. But, unfortunately, even with such a great idea, so many people find it "a long distance race", to start an online store.
Yes, I agree to that, it is "a long distance race". However, if you know the right steps to follow to start an online store, you will not only find it easy to start in just a few minutes but also get to grow your business in no time. It is my pleasure to guide you through all these steps to start an online store for your business. Here, I will be more practical guiding you through, with all the necessary information you need to start your online store and grow your business. I like to share this information, because, I know that you would likely want to get your business online, that notwithstanding, your business may be a kind that does not only target your geographic location but the world at large, and getting an online store will yield great benefits. Before we proceed to the next step, How to Start an Online Store. Let me quickly bring to your understanding, the importance of starting an online store.
Importance of Starting an Online Store.
1. Accessibility Today companies of all sizes and industries establish a successful online presence. This is an extremely important factor considering the fact that the Internet never sleeps and every portal you offer online gives your business a virtual showroom open 24 hours a day. This allows potential customers to search for your product or service after business hours and in the privacy of their home. If you sell products, an online store allows you to place an order 24 hours a day to enter a sale as soon as the customer is interested, instead of waiting for the opening of your physical store, by which time, the desire to buy may have passed. 2. Improving Your Brand Image If you do not have an online presence then you can't expect your prospects to take you seriously and you will lose business to competitors that do have an effective online presence. Providing online presence not only gives your customers or clients access to your product or service, but also allows them to "check" your business. Online reviews, your interactions with other customers, and the frequency and quality of your posts help create a positive impression of your business in the mind of a potential buyer, which increases the likelihood of future sales. 3. Target the Global Market With your physical store, you are limited to the number of people who can visit you at any time, not to mention finding you. With a good website, you can literally have thousands, if not tens of thousands even millions of people visiting your online store at once. Imagine the potential of your business if you could expose your products and services to a potentially unlimited number of interested people. This could open up a much-wider-customer-base than relying on face-to-face interactions would. 4. Easier and Extensive Marketing It's a well-known marketing fact that business minded people like to buy but do not like to be sold. A well-written copy of your products or services on your website allows buyers to make a more relaxed and informed buying decision, as opposed to the pressure of a potential aggressive seller. Marketing your business is also easier and more extensive because the electronic format allows for wider, more cost-effective distribution, as opposed to traditional marketing, which typically includes printing and mailing costs. 5. The Internet Was Made for Business Relationship with customers is really important for business success. The Internet helps companies connect with client communication channels and build strong networks. The beauty of the internet lies in the fact that your prospective customers or clients can literally be just a click away from your online store. Through the internet, you can now educate, instruct and solve their problems. You can accept orders and payments and receive them directly to your inbox. The more people who find you online the more leads and sales you will make. No doubt, with these reasons, we are sure you will agree with us that getting your business online that is, starting an online store, will reap great benefits. If this is so, let help you get started!
How to Start an Online Store.
The biggest mistake most users make is not choosing the right platform for their online store. Thankfully, you're here, and you will not be making that mistake If you are thinking about starting an e-commerce business, that is, having your own online store, there are two popular eCommerce platforms that we recommend: Shopify or WooCommerce. Shopify is a fully hosted eCommerce platform that usually starts at $29/ month. It's a powerful eCommerce solution that includes everything you need to create an online store. The downside to Shopify is that it gets quite expensive, and your payment options are limited unless you pay additional fees. This is why most users choose WooCommerce because of the flexibility it offers. WooCommerce is an e-commerce platform built on WordPress. It can be installed using a WordPress plugin or, even better, customize it directly from your web hosting providers, such as Bluehost, Siteground, Hostgator, Namecheap, A2Hosting, and any other provider of your choice. WordPress powers more than 28% of all websites in the world. This shows that creating your online store with WooCommerce is a brilliant idea because millions of entrepreneurs like you have been using this wonderful e-commerce platform, but still, they have never regretted it. With this comparison and points in mind, we are sure you will agree with us that WooCommerce is the best affordable platform to launch your products online. If this is so, let proceed to the next step of starting your online store.
Requirements to Start an Online Store
Below are the core requirements needed. Domain name and Hosting SSL Certificate Premium Theme Premium Plugins Contents (for pages, products' titles and descriptions) Images (for your products and logo) Now that you are aware of the few requirements to start an online store, it's time to set up your online store. Here we go; 1. Choose a Domain Name This is the first thing you need to do if you are intending to create your online store on Woo Commerce, choosing a domain name. A domain name is any name given to a website on the internet. (For example, when you type mmoinstitute.com into your browser to visit the site, that's the website's domain name). Now, it's time to pick a name for your website and make sure that your future readers out there are able to find it. Bluehost offers new customers a free domain name for the first year of their web hosting service. You can also choose the extension to use for your domain name, such as .com, .io, .ai or otherwise. While a .com is still the preferred domain extension, it's becoming less important as time goes on, so don't shy away from other less common domain extensions, especially if they're more affordable. For those of you who cannot claim your first choice of a domain name, take a few minutes to exchange ideas with friends and family. Think aloud and experiment with different words and variations to find the most appropriate domain name for your new site. 2. Pick a reliable hosting service To make your website accessible to other people on the Internet, you need a "host." The host keeps all your website files safe, secure and makes sure that people can access your site when they click on a link or type in your URL. There are tons of web hosting providers to choose from. I recommend Bluehost to anyone wishing to start an online store on WooCommerce because it acts as a one-stop shop for great and affordable hosting, quick and easy registration of your domain name in one swoop. 3. Install WordPress By now, you should be in fantastic shape on your journey to building an online store on WooCommerce. If you still remember, WooCommerce is a WordPress plugin, so it's time we set up WordPress There are several ways to install WordPress by Bluehost, Softaculous, FTP, Localhost, etc. But for this post, we will use Bluehost. After creating your profile on Bluehost, you can log in and start using all the features you have chosen. One of the unique features of Bluehost is that it comes with a one-click installer for WordPress. Instead of playing with files and databases, you can install WordPress and set up your website in minutes.
How to Install WordPress on Bluehost
Choose your preferred hosting page. I recommend the starter package. It offers a lot of speed, performance, features, and storage for your first website. You can move to a more advanced hosting plan as your website grows. You will be prompted to choose a domain name, choose your preferred domain. On the next page that appears, enter your personal information and credit card details. And make your payment. A green button indicating "install" on cPanel from Bluehost, click on the button to start the process. Although not necessary, you will be asked if you want to use your website with or without "www." Before the name of your website (www.YourWebsite.com or YourWebsite.com). If you are unable to decide, you can leave it as it is. It can be easily changed afterward. WordPress installation details such as email ID, username and password can be set. Read and accept all necessary terms and conditions under a license agreement. Then click on install! Once the installation is complete, you will see a clear message at the top stating "Your installation is complete!" And a button showing "View credentials". Clicking this button will take you to a page where you can find your newly installed WordPress login credentials. 4. Add SSL Certificates to your site (for Security) SSL stands for "security sockets layer". It adds a special security layer on your website, so you can accept sensitive information such as credit card numbers and other personal information. This is required for you to accept credit card payments on your website. The URL that appears as "https://" (and, often, also shows a green lock symbol). SSL is quite easy to set up with Bluehost since they offer it as a premium add-on during the payment process when signing up for the hosting. when signing up for the hosting. 5. Install WooCommerce Just log in to your WordPress dashboard. In the dashboard, you will see "Plugins" under "Appearance", click the Plugins item, and then click the Add New option. Search for "WooCommerce" and the WooCommerce plugin should appear as the first result. Click the Install Now button. This will automatically download and install the plugin files and should only take a minute. Once the plugin is installed, you must click the Activation link of the plugin to start using WooCommerce. (You can use the free or premium version). Then you should be prompted to start the setup. It's much easier to follow, so click on the Let's Go button to start. The installer will first ask you if you want WooCommerce to automatically create your key pages for you. These pages include your main store, your shopping cart, your order, and a default customer account page. You really want all these pages, so click Continue. The next step is to set up your store location, currency format, and units of measure. This is important so that your customers know how much you charge and what they get for their money. So make your selections and click Continue. When WooCommerce is activated for the first time, the WooCommerce Setup Wizard helps you set up your shop. Select "Let's go!" To begin. Or select "Not now" if you prefer to manually set up your online store. Set up your store. Now, choose your delivery address. Your next screen is the setup of your payments. If you still cannot afford credit cards, WooCommerce makes it easy to get two of the highest rated online payment services, Stripe and PayPal, by checking the appropriate box (es) yes, you can use both on this screen. When the Payments setup screen is complete, click Continue to access the 'Shipping' setup screen. Your WooCommerce installation is now complete. After the steps above, you can start installing your theme, product information, and additional plugins. 6. Choose a theme and design your online store By now you should be saying, hurray! But, hold on a minute, you know why? If you still remember, we promised you that we're going to help you get started. What we actually meant was that we're going to help you build an eye-catching (attractive) online store, for your business. It's our nature to help you get the best out of your business, so there is absolutely no need to thank us now, let finish it all well. After activating the WooCommerce plugin, you must start with the customization, which begins with the selection of the theme. You can think of a theme as a template for the visual layout of your store, having a good theme makes the design and organization of your site a snap. We do not recommend the use of free themes that have been downloaded on wordpress.org or that have been obtained elsewhere. Because free themes will lack some vital features that you need. You need a premium theme (paid theme). Paid themes are incredibly great and most of these themes are relatively inexpensive, like the one I most recommend, Mythemeshop. Once, you buy a theme, you will own it forever and get all the benefit of excellent support and customization options that come with premium WordPress themes.
How to Install your theme
After downloading your theme, go to your WordPress dashboard In the dashboard, you will see "Appearance", hover on it, sub-menus like theme etc. will appear. Click on theme >>> Add new >>> Upload file. Select the theme file you just downloaded and click Install. Wait a few minutes and the installation will be complete. Finally, "Activate" the theme!
Now let start customizing your theme.
When you uploaded your theme, there is a layout or drawing that you can easily re-edit to your liking. What we mean is that theme developers usually make it easier for users to edit these elements. (i) Name of the Site, Tagline, and Logo Go to your dashboard >>> Appearance >>> Theme >>>> Settings In the theme settings, you can change what you want, but it depends on the theme. Finally, click on "Publish" (ii) Homepage Setup This is very important. If you do not do it, you will not get the desired design. Go to your dashboard >>> Page >>> Add New page Create two new blank pages with the title "Home" and "Blog", publish the pages as they are (blank). Return to your dashboard Go to Settings >> Reading Under Reading Settings, choose "static page" A drop-down menu appears. The first is "Home Page". Under it, select the blank page you created with "home" as the title and proceed in the same way for the "Post page". Click on "save changes" (iii) The Slider Any versatile theme comes with an option for a slider. You can edit slider images by going to your dashboard, locating slider text (it can be Slider Revolution, Unison, etc.), change the images and texts to yours and save it. (iv) The Footer Go to your dashboard Hover on "Appearance" >>> "Widget" Choose the widget you want at the bottom of the page (3 is recommended, for example, "Pages", "Email Newsletter Subscribers", "Collection".) Then save! 7. Adding Products This is the main reason why you are creating an online store, to sell your products. Follow the steps below to add products to your store and start selling. Go to your dashboard Click on Products >>> Add New If you get to the page, you will know the next step because it is self-explanatory. But be sure to use an attractive image as your "Featured image" because it will appear as the image (it will be visible to customers). Write a good title, description and make sure you use keywords in them. Do not forget the keywords in the ALT image title. Put the price etc. Preview it, if it's OK, then "Publish" You are ready to start selling your products. Then, if you have new products, add them and repeat the processes as explained above. 8. Market your online shop Hang in there – you've reached the last section of this bumper guide on how to start an online store. Now, you should be confident enough to shout, I did it! But, before you do that, there's one last piece of the puzzle that hardly anyone will openly talk about: Promotion. Building a successful business online takes more than selecting brands, writing product reviews, and starting selling products online. Even the best business ideas can fail if you do not drive enough traffic to your site (potential visitors). Here is a list of four simple digital marketing strategies that any business owner can implement to help their business grow and make money. Search Engine Optimization (SEO) SEO is a marketing discipline focused on increasing the visibility of the results of organic (unpaid) search engines. SEO covers the technical and creative elements needed to improve rankings, drive traffic and increase awareness in search engines. Making money with digital marketing via SEO is very simple once you get to know the specifics. The main objective of SEO is to increase the visibility of your site in the search field. Each search engine gives a result based on certain keywords or key phrases of the search query typed in the box and the most relevant result arrives at the top. Search Engine Optimization (SEO) is the best partner for any business that wants to reach its target audience without spending a lot of money. In fact, most of today's business ventures such as Airbnb, Amazon, eBay and several others rely on SEO. Focusing on increasing the visibility of your site in organic search engines, (like Google, Bing, Yahoo, etc.), is the best way to drive traffic and attract potential visitors to your site. And all these things can be done effectively using SEO tools like SEMrush. Email Marketing Email marketing is an innovative way of marketing. This is a marketing tool in which an advertiser sends an email to the recipient detailing the products and offers available. It has the potential to reach millions of clients with a click. It's a blend of graphical contents and links that provide the customer with easy purchase and information. This is an easy way to measure customer response and marketing charts of products. A lot of email marketing tools come with the possibility of unsubscribing to eliminate unwanted customers and secure potential buyers. The best part of this type of digital marketing is, the product is advertised to a large audience and it has a far outreach than the traditional method of marketing. Here are some examples of email marketing tools that you can try 1. Contact form 2. Drip 3. SendiBlue 4. ConvertKit 5. Aweber 6. GetResponse 7. Mailchimp Social Media Marketing As an aspiring online entrepreneur, you cannot ignore the impending dominance of social commerce. As the name suggests, it is digital marketing (online marketing) that is performed in social media such as Facebook, Twitter, Instagram, and other social media platforms. Most social media networks have their own data analytics tools that make it easy to create and promote social media marketing campaigns. Due to the continuous dissemination of social media discussions and opinions, there would be an immediate notifiable product and it would also be shared on other platforms, which would help to publicize the product. You can post a marketing campaign on your social media account and make money for the number of campaigns published in your account, and the number of views you get from your friends and campaign performance will ensure you profitable online money making with Digital Marketing. You can also share a post on social media about how to monetize through digital marketing to attract more views and take advantage of them for product advertising. Content Marketing Content marketing refers to the creation and publication of free online content for the purpose of promoting a particular product or service. It is a bridge of information between the consumer and the seller. Content marketing is used in search engine searches. If you are creative and have a strong suit in writing, this is one of the ways to make money from online marketing. When writing content, you must be able to understand the dynamics of the product. Content must be presented in such a way that a layperson can understand and buy the product. So far, you've learned how to start an online store, without spending extra money on website designers. If you are looking to start your online store with WooCommerce, we suggest you follow this guide.
Do not hesitate to hire us if you are still confused or the processes seem too tedious/technical.
Thanks for reading this article and don't forget to share it... Read the full article
0 notes
Text
Import Shopify to WooCommerce - Migrate Your Store from Shopify to WooCommerce
New Post has been published on https://intramate.com/wordpress-plugins/import-shopify-to-woocommerce-migrate-your-store-from-shopify-to-woocommerce/
Import Shopify to WooCommerce - Migrate Your Store from Shopify to WooCommerce
LIVE PREVIEWGet it now for only $49
S2W – Import Shopify to WooCommerce help you to import data from Shopify to WooCommerce easily. With only 2 steps your Shopify store data will be imported included store settings, shipping zones, taxes, pages, blogs, coupons, customers, products and orders. The plugin uses Shopify API key to transfer data from Shopify to WooCommerce store directly, your data is kept private.
Unlimited import with no extra pay: You’re free to import all your data from Shopify to WooCommerce. There is no limit on how many products, data… you can import. You don’t need to pay any extra fee to import, just import as many as you want.
Commit import successful: We commit that you will import data successfully. Please follow our guiding document and video to know how to use the plugin to import data from Shopify to WooCommerce. If you have any trouble in the import progress, feel free to contact us.
IMPORT 9 DATA TYPES
You can select to import 9 types of data from Shopify to WooCommerce. Including STORE SETTINGS, SHIPPING ZONES, TAXES, PAGES, BLOGS, COUPONS, CUSTOMERS, PRODUCTS and ORDERS.
STORE SETTINGS: site title, admin email, store address, city, country, state, postcode, timezone, weight unit, currency code and currency format.
SHIPPING ZONES: shipping zones and shipping methods.
TAXES: tax name, tax rate, country, province, zip and shipping.
PAGES: title, content.
BLOGS: blog title, blog content, categories, tags and featured image.
COUPONS: coupon types that WooCommerce support, coupon amount, usage limit, expiry date and minimum amount.
CUSTOMERS: first name, last name, phone, company, address, city, province, zip and country.
PRODUCTS: title, content, excerpt, variations, product image, variations images, product gallery, SKU, stock, regular price, sale price, weight, categories and tags.
ORDERS: payment method, shipping method, first name, last name, company, country, address, zip, city, province, phone, total, subtotal, tax, discount, shipping cost, currency, date create, browser IP, customer user agent, line items, discount code, order number and order fulfillment.
IMPORT PRODUCTS
Import product may be the most important part when migrating from Shopify to WooCommerce. The plugin allows you to import all your products from Shopify to WooCommerce with title, price, description, variation, image, categories.
Restrict results to after the specified ID: choose to import only product with an ID greater than a specified ID.
Import by ID: Enter ids of Shopify products separated by “,” to import.
Filter results by product type: import only products in a Shopify product type.
Filter results by collection ID: import only product in a Shopify collection ID.
Import products by published date: choose to import products which published before/after a specified date.
Products sequence: Choose the sequence for imported products. There are 6 options to select orders by Title Ascending, by Title Descending, by Created Date Ascending, by Created Date Descending, by Updated Date Ascending, by Updated Date Descending.
Imported products status: choose to set imported products status as published, draft or pending.
Product categories: The plugin will create categories same with Shopify and add the imported products to. You can also add all imported products to a specific category, like “imported Shopify products”.
Download images: choose if you to download product images to your WooCommerce store. Product images will be downloaded in the background. You can also download images after importing all products by going to Products.
Import progress bar: the plugin display import progress bar which informs you of the import progress.
UPDATE IMPORTED PRODUCTS
After successfully imported product from Shopify to WooCommerce. If there is any change in the Shopify store, you can use the update option to update it into the WooCommerce store.
Import new products: when you have new products in Shopify, just import the whole store again in WooCommerce. The plugin will automatically skip imported products and import your new Shopify product.
Update imported products: if you change product details in Shopify, you can easily update the changes in WooCommerce. The update option allows you to update multiple products at once.
Update fields: Choose to update necessary fields among product title, price, inventory, description and images.
Status: The plugin provides you information about the updated time, status (success or failed), and updated field.
IMPORT ORDERS
Orders keep your customer and sale information. It is really necessary to save the orders when migrating. The plugin helps you to move your order to WooCommerce with customer name, billing address, shipping address, email, phone numbers, purchased time, products, shipping option, billing total
Restrict results to after the specified ID: import orders with an ID greater than a specific ID (newer orders).
Import orders by date: import orders which created/imported before/after a specific date.
Import orders sequence: set up the sequence for imported order. From latest to oldest or from oldest to latest.
Order status mapping: map your Shopify order to WooCommerce order using order status. For example: “Voided” orders in Shopify will appear as “Cancelled” order in WooCommerce.
UPDATE IMPORTED ORDERS
Similar to imported products, you can update the imported orders.
Update imported orders: update the order information includes order status, order date and order fulfillment.
Update status: display the updated time, updated fields, status (success or failed)
ADDITIONAL FEATURES
Security: your data is transferred directly from Shopify to WooCommerce without any intermediate serve.
Easy to use: the import progress is very simple to use. First, you need to create a Shopify private app then fill the app API private key and password into the back-end. And finally, just click the “Import” button.
Unlimited import: The plugin does not have any limitation of how many products, orders, customers… that you can import.
Logs: S2W – Import Shopify to WooCommerce provides log files to check the import history.
Auto-update the plugin: you can automatically update the plugin during your support period.
CHANGE LOG
/**1.0.8.1 - 2019.11.26**/ - Added: Import smart collections to categories /**1.0.8 - 2019.11.12**/ - Added: Filters for importing coupons - Added: Filter products to import by vendor - Added: Log for "Import by ID" function - Added: Support WooCommerce 3.8
LIVE PREVIEWGet it now for only $49
0 notes
Link
Do you need to go into the jewelry drop shipping or are you already having your web store? If yes then you might have faced jobs like getting different product listings from the supplier, updated product descriptions, stock, and prices. In this blog, we’ll show you how jewelry website scraping assists in getting these kinds of data very fast and well-structured.
Scraping Jewelry Website Data for Product Information
Assume that you need to feature your new jewelry range in the store. The quickest way of adding new products is uploading them from the file given by the manufacturer or supplier. Although, they would offer product listing in their individual format, you have to adapt the file structure to import it. Also, there might be many information missing as well as these information are required to make new products.
A workaround is scraping the required product information using Retailgators.
Retailgators is the data scraping service, which offers data-on-demand. Data is given in the well- structured CSV format as per your requirement. Ordering this service will help you find necessary product information scraped from the supplier website (provided they given their consent) as well as given in the import-compatible formats.
For hiring jewelry data scraping service, just fill the order form with the given details:
Product Information: Name, category, price, description, as well as other required fields.
Website to scrape data from: In case, you need data from any particular category(s), give a category list or links.
Targeted shopping cart: In case, you plan on import the extracted file to the online store as well as you need a file well-matched with the store admin, give name of a shopping cart.
Contact email: Give your email id to which extracted data would be sent.
When you send the request, you will find a test extracted file for assessment. You could import this file to ensure that it is correctly processed a well as products got uploaded. After confirming the extracted data that fits your requirements, the costing for complete scraping is given and you will get the whole listings.
Just go through the example of jewelry listing scraping tailor-made for importing to Shopify:
source code: https://www.retailgators.com/jewelry-website-data-scraping-use-cases.php
0 notes
Link
Getting StartedFirst of all you will need to sign up on https://www.shopify.com/. If you head over to their website you will get an option to get started with a 14 days trial plan. In the beginning, I mentioned I will explain how you can be profitable even before you spend a penny. This is a part of that. And if anyone is wondering I am no way affiliated with shopify.When you go for signing up Shopify will ask you for your email, password and store name. Use your email and pass and in the store name section choose a nice/catchy name which should be something like this, first an adjective like "amazing, awesome etc" then products/store. Hopefully you get the idea. Now one thing to remember is that if you are not gonna use a custom domain for your store, you will have to stick to this name meaning this StoreName.Shopify.com will be your permanent URL and you WON'T be able to change this so if you are going to be using a Shopify sub domain make sure you choose the store name you want when signing up. Then click on online store and on the next page fill up your info.Setting Up Your StoreThen once you are on the home page Shopify will tell you everything you need to do in different tabs which will include setting up your shipping setting, tax info, adding products, choosing themes etc. I will go through each of the things you will need to do step by step.First click on settings on the left and click General and choose your store name which will be the same as the URL and then the two email fields and then the store address. Just fill them up accordingly. Then click on the Payment. There are two payments that you have to include and that's Shopify payments by Stripe which will allow you accept credit cards which will ask you to a series of questions. Answer those questions randomly. They don't really matter but what I have seen a lot of people who live outside US struggle with here is Tax ID and SIN number. For those who are wondering you add your Payoneer US payment service here as well. The next thing you will need to choose is Paypal Express Checkout and you are done. Then moving on to Checkout, this part is really a personal preference but I will tell you what I will use.Keep the rest as it is except select automatically archive my order under after an order has been paid. Then you will see a box that says additional scripts, this is where you will be using your Fb retargeting/conversion pixels. I will explain in a later step. Once you are done with the above go the bottom of the page where you see three boxes (Refund policy, Privacy Policy and TOS) click on generate sample for all three and you are done here.Now let's move on to Shipping. First you will have your shipping rate, leave it as it is and move on to shipping rates and add them based on weight and add these shipping rates -0 - 0.9 = $9.991 - 1.9 = $14.992.0 - 2.9 = $17.993.0 - 3.9 = $19.994.0 - 4.9 = $21.99Designing Your StoreYour store design will depend on what niche your products are in but what I would recommend is going for multiple products. Okay so first choose your theme. From my experience the best converting free themes are Classic theme and the Minimal theme. And once you choose the theme you want click on install them and it will get set up. These themes come with everything already set up including the menus, categories and products which you will be editing according to the products you will use. You can modify the theme any way you right but I will just recommend changing the logo and tagline and keep the coloring and stuff same as it is as they are made in a way which will have the highest conversion rate.You can set up your own custom domain if you want which gives your store a more natural feel but I would say sticking with shopify works just fine but if you want to click on online store and then domains and choose a custom domain.Now one thing that I would like to put emphasis on is branding and how important it is so you will want a really professional logo as the logo is the first thing someone will see when they come to your site so get a nice logo for your site. And there you have it your store is all done. Next thing you need to do is get products in your store.Niche Product ResearchI could let you spend hours figuring out what products you should put in your store but I am just going to go ahead and provide you with what worked for me and all you have to do is just copy me. I am using a tool called https://dropshipscan.com/ for product research, it lets you sort all products by order growth rather then total orders and shows you the profit margin. Sign up for the free 14-day trial and start to search for different niches, make sure to set a minimum profit of $10 so it will only show you products where you can make $10 or more in profit. Everything else is not worth your time as the hassle to deal with customers and shipping is always the same no matter if it is a $1 profit or a $30 profit. The only thing that is different is that you need to do 30x times the work if your profit margin is only $1 instead of $30. I hope you get what I mean.Adding A ProductDropshipscan lets you export the products in a file format ready for shopify so you only really need to export and then head over to shopify to import them. I started with exporting all the products of their 'most popular' page, they are a good starting point. Make sure to check it frequently as they add about 5-10 new ones each day which you should add to your shopify store asap. This way you can easily get 50-100 products to your store with just a few clicks which saves you a lot of time you can use to get traffic and sales.Getting Traffic And SalesNow remember when I said I will show you how to do this without spending a penny, well this is the 2nd part of that. We will be using Facebook to bring in the traffic. Now Facebook allows you a credit of a certain amount which is more than enough to start getting sales and start banking. Whenever you add a card to your account Facebook lets you advertise right away and bills you once you reach that credit appointed to you by Facebook. So let's up the ad.First you will need to create a Facebook fanpage under brand/product then sub category website and fill up the about and add a profile picture and add your website URL. Now the aim here is to make a passive income from this so you have to make everything look generic so make sure you put emphasis on the details so everything looks natural.There is one more step before we finish up your ad setup and that it your target audience. I want everyone reading this thread to actually apply this and scale accordingly so you will need to how to find the right audience for your ads. Login to your ad manager then go to tools and then audience insights. Once it loads click on everyone on Facebook. So let's assume our ad is going to be for the plush toy above so what we will be doing is on the interest tab include everything that related to this product and any related pages and as soon as you include them you can see the demographics you will be targeting for your ads. Look for the ones with the highest bar for example lets say female and age 19 - 34 and change it up on the left.After demographics click on Page likes and then you will see the pages that these people are most interested in and that's by looking at the affinity score which determines how relevant the page is to the audience. The higher the score the more relevant it is. Add those pages on the interest tab on the left. Then save the audience. We will use this audience for our ad. Now create a conversion pixel and paste it in the store where I showed earlier.Since our post is ready. Go to create ad and click on Increase Conversions On Your Website and name the campaign and then and click on Use a Saved Audience and choose the audience from earlier and choose your pixel. Then for placement choose all platforms and in platforms choose only facebook and feeds. Cross out everything else and Set ad budget to $20/day on the first day (after 12pm set budget to $10 to gain edge rank, then $20 the next day).After that you will be going to the ad section and here select your page and and the post you made earlier and then click on place order and you are done.Scaling UpNow to scale up add more products and keep testing. Also create different ad sets with different target audiences. Kill the ones that don't convert and keep your top converting ads. You can do this for multiple products. And make sure to milk your top converting ad by increasing you budget. Once $ starts coming in there are few other things you can do to really kick it up a notch and it add apps on your shopify store. The only one you really need is "Yo - display recent sales in real time" which will show recent sales on the left side of your store.Other things you need to do is add an upsell by adding an upsell app like this https://apps.shopify.com/product-upsell which will allow you to upsell clients on items from the same niche. Also keep in mind you will be making a buyers list from this as well so don't hesitate to pitch other products in the same niche to your buyers. Once you start to really kill it with this business model you will want to start creating your own products.ConclusionOkay that's all. You will be suprised how much you can make with this method. Once people come into your store 70% of these people will buy other things too if you set up everything properly and that is why I said to make your site look as professional as possible and add as many products as you can. I have explained everything in details so everyone can apply this method. If you need any help and have any questions feel free to ask below. Now go and TAKE ACTION!
0 notes