#lofclutches
Explore tagged Tumblr posts
Visit Tumblr Blog
Explore Tumblr blogs with no restrictions, modern design and the best experience.
Last Seen Tumblr Blogs


Fun Fact
Tumblr.com rank in the US is 25.
Text

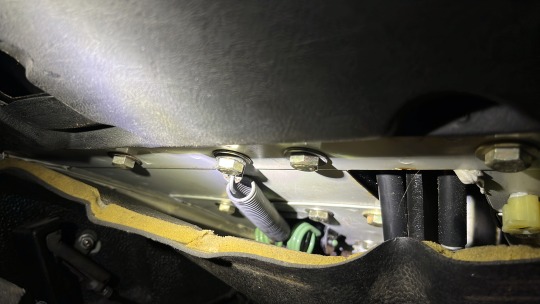
01/11/2024: Clutching Straws
Put it off for long enough and for sure it’ll bite you in the ass harder. I’m referring more the weather than the mechanical issues. Yep! I’ve got this leaky clutch system to eradicate, luckily it’s actually been functioning fine since I bled it through and renewed the oil. But with that said, it’s not recommended to ignore issues as it could end up being the root cause of an accident which no one wants.
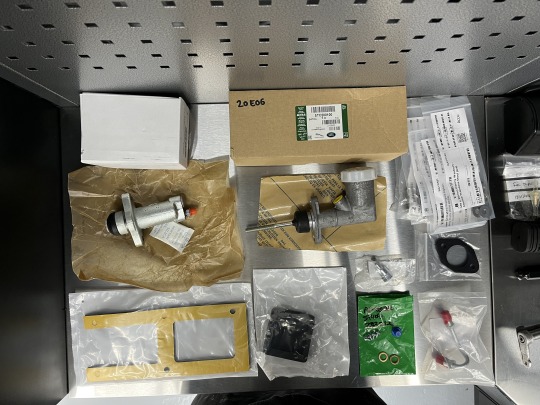
As always, I’m including the parts list with part numbers to give an idea what’s required (model dependent mind) I also have added a few extras in whilst I’m ordering, I’m inclined to get bits and bobs
Parts List
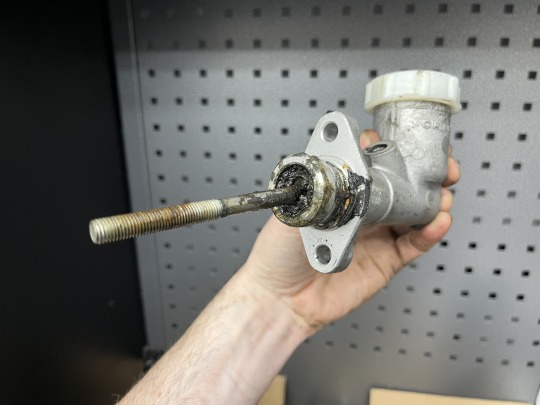
Master Cylinder Assy: STC500100LR
Adaptor: 139082
Gasket: 233220
Pipe Clutch: ANR2183
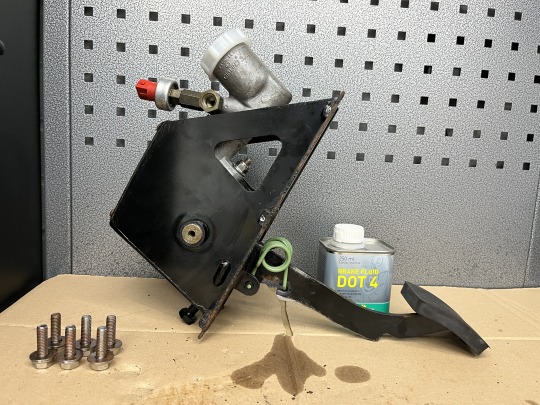
Clutch Slave Cylinder - Lockheed: FTC5202G
Dust Cap (single): 594091
Gasket-Clutch P: ANR6332
Pad-Pedal: SKE500060G
Gear Knob: BTR9270
8 x 3/8 Pansupa S T screw: AB608031L
L.O.F POWERspring Pedal Assist Kit: PM431
Furthermore, I’ve tried to be as generic as possible to note each step briefly to enable a good idea of what you’ll likely to anticipate when carrying out this job.
1. Understand where all the key components are located.
(a) master cylinder/pedal box - engine bay
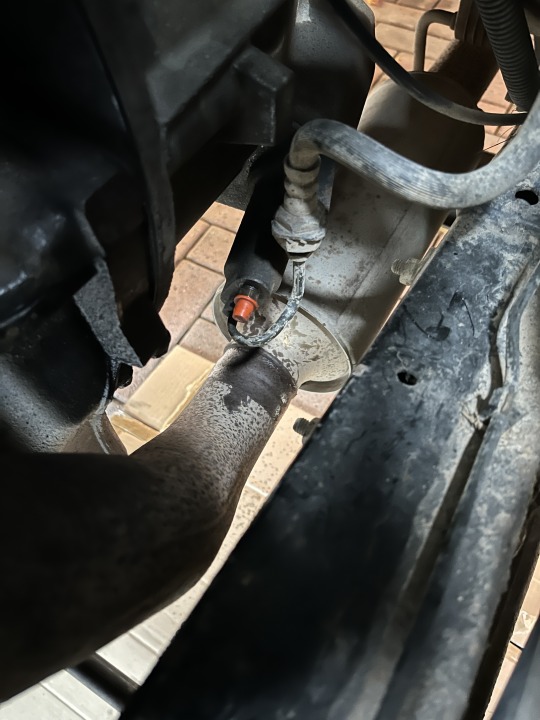
(b) slave cylinder - underneath near side of gearbox
2. Remove cap and loosen off the bleed nipple enough to create a drip.
3. Connect a bleed kit to slave bleed nipple and crack open nipple.
4. Bleed the system by pressing down on the clutch pedal, the pedal will eventually go light.
5. Tighten bleed nipple and remove bleed kit.
6. Now the system is mostly free from DOT 4 fluid, the system can now start being stripped.
7. I’ve got OEM air conditioning, so this step may not be applicable to you, but if like me you have AC, remove the lower A/C ‘dash’
8. Pull back the insulation and undo the first bolt retaining the clutch pedal spring, followed by the remaining x5 bolts.
9. Moving to the engine bay, install the reservoir cap back on just to ensure no residual spills.
10. With a rag to hand, undo the hydraulic line from the master cylinder.
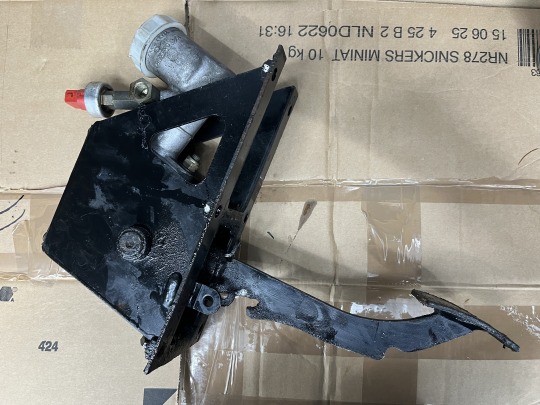
11. The pedal box is now able to be removed, take care when manoeuvring.
12. The slave cylinder at first glance seems to be pretty straight forward. But access is somewhat obscure.
13. Firstly undo the hydraulic line to allow better access and then with patience, undo the x2 retaining screws holding the slave cylinder to the housing.
14. When removing the slave cylinder, take extra care as the plunger/piston can fall out inside the housing and it’ll be a box off job!
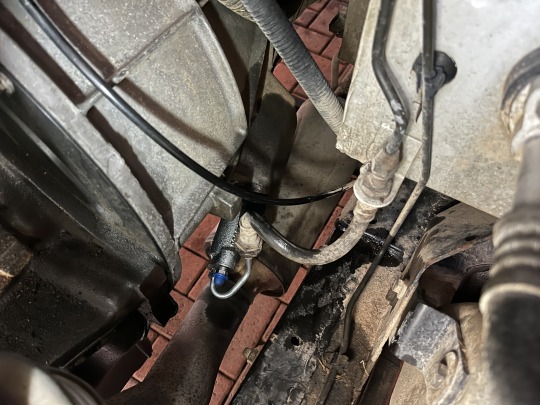
15. Remove the hard hydraulic line which connects to the slave whilst you’re down there (if you are planning to replace.
16. Now with everything on the bench, you can strip down the assembly and rebuild the pedal box with new components. I’ll let you figure out how as you’ll learn more.
Note: From the images, both Master and slave had failed, so I’d suggest swapping both out.
17. Now you’ve rebuilt, lubricated and admired your work. It’s time to install it all back in.
Note: FYI The LOF spring is a bitch to fit.
18. Working backwards, carry out steps 15 > 7
19. At this point, everything should be back to how it was before you started (minus the leaks).
20. Bleed time! It’s pretty straight forward if you’ve made it this far.
21. Fill the reservoir with fresh DOT 4 and fit the bleed kit to the slave cylinder,
22. Crack off the bleed nipple and press the clutch pedal down a couple of times.
23. Top up reservoir and replicate step 22 & 23 until the pedal goes firm and consistent.
Note: This may not feel odd with the LOF spring as it creates like a double movement, you’ll know what I mean if you fit one.
24. Tighten bleed nipple on the slave cylinder and fit the bleep nipple cap, be sure to mop up any excess spillage as brake/clutch fluid is horrible stuff, especially for paint.
Note: Spray the area in a non-aggressive degreaser if required.
25. Now for the reservoir cap back on, shut the bonnet and take the truck for a spin. You’ll likely notice a huge difference if you have been driving like me with an inefficient system.
26. After the test drive, check the reservoir to ensure the oil level hasn’t dropped and you are done.
#landrover#defender#landroverdefender#overlander#4x4#defendertd5#overland#defender110#jlr#paddockspares#shiftech#lofclutches#l.o.f
4 notes
·
View notes
Photo

Repost @callum_adamson__ with @make_repost ・・・ Shes finaly home 🙏🏻🔥 time to get cracking 🦾🛠⚡️🚜💨💨 @full_flex_springs_ @twisted_steel_worx @gwynlewis4x4 @pioneer.4x4.motorsport @whitbread4x4 #landrover #landroverdefender #fullflexsprings #defender90 #defender #custom #builtnotbought #fabrication #37s #winchchallenge #ultra4europe #ultra4racing #4x4 #offroad #offroading #rollcage #offroadracing #bigflex #redwinch #td5 #td5inside #boost #turbo #letsgo #sendit #fox #foxsuspension #rigidlights #lofclutches https://www.instagram.com/p/CVfPzRNru5D/?utm_medium=tumblr
#landrover#landroverdefender#fullflexsprings#defender90#defender#custom#builtnotbought#fabrication#37s#winchchallenge#ultra4europe#ultra4racing#4x4#offroad#offroading#rollcage#offroadracing#bigflex#redwinch#td5#td5inside#boost#turbo#letsgo#sendit#fox#foxsuspension#rigidlights#lofclutches
1 note
·
View note
Text


28/01/2024: Braking’s Bad
Ah the brake overhaul job, it’s becoming second nature to me. Yet the pain that comes with having to remove the hub assembly in order to change the disc for some is annoyance, it does mean you are in someways forced to inspect bearings and seals etc.
Following the below to get an idea of the methodology and required tooling to carry out this job. (Caliper and disc replacement).
How to Replace Rear Brake Discs & Calipers on a 2005 Land Rover Defender 110
This guide walks you through replacing the rear brake discs and calipers, which on this model require removing the hub assembly.
Tools & Equipment Needed:
- Jack and axle stands
- Breaker bar
- Sockets (13mm, 14mm, 17mm, 19mm, 52mm hub nut socket)
- Torque wrench
- Brake hose clamp
- Brake fluid (Dot 4 or 5.1)
- Brake cleaner
- Wire brush
- Copper grease
- Bungee cord or hook
- Brake bleeding kit
1. Preparation
1. Park on a level surface, engage the handbrake, and chock the front wheels.
2. Loosen the rear wheel nuts slightly.
3. Jack up the rear axle and secure it on axle stands.
4. Remove the wheels.
2. Remove the Brake Caliper & Pads
5. Use a brake hose clamp to prevent fluid loss and disconnect the brake hose from the caliper.
6. Remove the two caliper bolts.
7. Carefully remove the caliper and suspend it with a bungee cord (do not let it hang by the hose).
8. Remove the brake pads.
3. Remove the Drive Flange & Hub Assembly
9. Remove the drive flange bolts and remove the flange.
10. Remove the circlip and washer from the driveshaft end.
11. Undo the hub nuts and remove them.
12. Slide the hub and wheel bearing assembly off the stub axle. Be careful, as the outer wheel bearing may come loose.
4. Replace the Brake Disc
13. Remove the disc retaining screws.
14. Remove the old brake disc from the hub (may require a hammer or press).
15. Clean the hub face and install the new brake disc.
16. Secure it with the retaining screws.
5. Reassemble the Hub & Drive Flange
17. Reinstall the hub onto the stub axle with the bearings in place.
18. Tighten the hub nut fully, then back it off slightly to allow for proper bearing preload.
19. Reinstall the washer and circlip on the driveshaft end.
20. Reattach the drive flange and secure it.
6. Reinstall the Brake Components
21. Reinstall the caliper carrier and tighten the bolts.
22. Insert the new brake pads with copper grease on contact points (not friction surface).
23. Compress the caliper piston using a C-clamp or piston tool.
24. Reattach the caliper and tighten the bolts.
7. Reconnect Brake Hose & Bleed Brakes
25. Reattach the brake hose and secure it.
26. Refill brake fluid if needed and bleed the brakes to remove air.
8. Final Checks & Reassembly
27. Reinstall the wheels and tighten the wheel nuts.
28. Lower the vehicle and double-check all connections.
29. Pump the brake pedal to seat the pads.
30. Check for leaks and test drive at low speed.
Notes:
Always replace brake components in pairs.
Ensure wheel bearings are greased and properly adjusted before reinstalling the hub.
After installation, bed in the new brakes by performing several gentle stops from moderate speeds.
Parts list
Inner stub axle seal - OE Manufacturer: FTC5268G
Gasket - stub axle to axle: FTC3648
Rear stub axles: FTC3188
Stub axle mudshield: FRC2310
Screw M6 X 20: FS106207L
Washer: 2215L
Rear caliper AP (OEM) - 110/130 - LH - from 1A614448: SMC500260G
Rear caliper AP (OEM) - 110/130 - RH - from 1A614448: SMC500270G
Stainless Steel Brake Shield Bracket: DA4789
Wheel Bearings - Timken (OE): STC4382G
110 & 130 Rear POWERspec Brake Kit - From XA159807: 110-RP
Bolts: LR082331
I hope the above brief explanation gives you confidence to go give it ago yourself.
#landrover#defender#landroverdefender#overlander#4x4#defendertd5#defender110#jlr#paddockspares#lofclutches#L.O.F#aplockheed
2 notes
·
View notes