#linksys extender.linksys.com
Explore tagged Tumblr posts
Visit Tumblr Blog
Explore Tumblr blogs with no restrictions, modern design and the best experience.
Last Seen Tumblr Blogs


Fun Fact
Kazakhstan’s Minister of Communications and Informatics has blocked the Tumblr site because it contained 60 sites of terrorism, extremism, and pornography in 2015.
Text
The Linksys extender setup can be done using the WPS button, first, make sure that the networking device is powered on. Next, locate the WPS button on the extender and the router as well. Now, push down the WPS button on the extender and the router within 2 minutes until the LED begins blinking. For more details, approach us!
0 notes
Text
Linksys velop setup
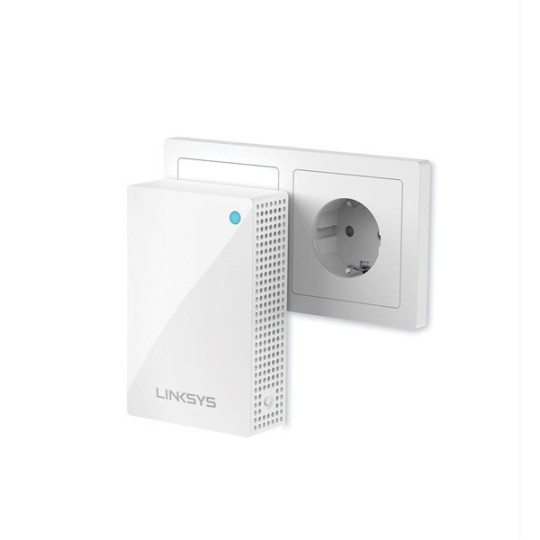
A Linksys Velop setup can greatly enhance the coverage of your home network. To get started, make sure you have the extender, an Ethernet wire, and a computer or mobile device with a web browser. The extender should first be connected to a power source, then you should wait for the LED indicator to turn solid blue. Then, join your device to the Velop extender's Wi-Fi network or create a wired connection using the Ethernet cable. After that, launch a web browser and type "extender.linksys.com" or the standard IP address listed in the user manual. To finish the configuration procedure, choose your current Wi-Fi network and input the network password as directed on the screen.
How do I setup the Linksys Velop extender manually?
Here are simple step-by-step instructions for the Linksys Velop setup manually:
Start by placing the extender in a central location within range of your existing Wi-Fi router. Make sure the extender is powered on and the LED indicator is solid blue.
On your device (laptop, smartphone, or tablet), go to the Wi-Fi settings and connect to the "Linksys Extender Setup" network. This network should be visible in the list of available networks.
Once connected to the extender's network, open a web browser and enter "extender.linksys.com" in the address bar. If that doesn't work, you can try entering the default IP address, which is usually "192.168.1.1" or "192.168.0.1".
You will be directed to the Linksys Velop extender setup page. Click on "Start Setup" or a similar button to begin the setup process.
Select your preferred language and click "Next" to proceed.
The extender will search for available Wi-Fi networks. Select your existing Wi-Fi network from the list and click "Next".
Enter the password for your Wi-Fi network and click "Next" to continue.
You will have the option to create a new network name (SSID) and password for the extender's network. If you prefer, you can keep the same network name and password as your existing Wi-Fi network. Make your selection and click "Next".
The extender will apply the settings and connect to your existing Wi-Fi network. This process may take a few minutes.
Once the setup is complete, you will see a confirmation message. You can now disconnect from the extender's network and connect back to your regular Wi-Fi network.
Note:- If you need any help regarding your Linksys velop extender so contact our technician or visit the official website that is 192.168.1.1.
Linksys WiFi Mesh Setup via Linksys App
During the unboxing process, you receive a few products that must be purchased for the Linksys Velop setup. The Velop setup, an instruction book, some ethernet cables, and a power cable are included. As soon as you have an Ethernet cable and the Velop setup, continue with the remaining instructions below.
Place the Linksys Velop next to the main router.
Put one end of the ethernet cable into the router's port and the other end into the ethernet port on the Velop to complete the connection.
The Velop setup should then be connected to the power connector by inserting the power line.
When hooked into a power outlet, the LED indicator turns blue to show that everything is ready.
Don't create the connection until the main router has finished booting.
After a few minutes, the Velop's LED will turn solid purple, signaling that it is ready for use.
Installing and utilizing the Linksys app on your device will then allow you to launch the Linksys Velop Setup.
Make sure the app is using the most recent release. Update your device's version if it is out of date.
Enter your email address and password after marking the terms as accepted.
Then a website will appear on your computer screen asking you where the internet comes from.
After choosing your internet connection, launch the Linksys app and pick the WiFi list.
The network name for Velop Setup will appear in the list.
Firmware Upgrade Linksys Velop extender
Updates to the Linksys Velop firmware are simple to do and solve many performance problems. Therefore, always enable the auto-update firmware feature in the Linksys app. You mostly have two options if you choose to do it manually. The first one entails going to a certain URL, whereas the second one requires signing into CA. Take these two actions independently.
Before utilizing this method, ensure that your node is setup or set to its factory default settings. The node's IP address is 192.168.1.1, so note it down. Read the printed instructions for further details.
Download your product's firmware file first onto a computer or laptop.
If the node has been setup, launch any web browser and type IP addressfupdate.html into the search bar. use the IP address of the node.
If the node is still using its factory default settings, look for IPaddressfupdate.html.
The screen will then display a sign-in page. To sign in, enter your username and password and then click "Sign In."
After viewing the firmware upgrade page, choose and upload the firmware file, then click Update.
Wait till the upgrade is finished.
Following the update, the designated node will power on and show a solid blue light.
However, when the factory default settings node is ready for setup, it will show a solid purple light.
The Linksys Velop Setup process should be repeated.
0 notes
Text
If you're struggling with weak Wi-Fi signals in certain areas of your home or office, a Linksys extender can be a game-changer.
#smartwifi#linksyslogin#extender.linksys.com#linksys setup#linksys smart wifi#linksys smart wifi login
0 notes
Text
Linksys AC2200 Extender Setup
We'll go over every step of setting up the Linksys AC2200 extender on this page. Dead zones will be eliminated in your house or business thanks to Linksys AC2200. Your signal will cover an additional 2000 square feet with this Linksys AC2200 Extender Setup . You receive a strong, quick signal from your extension, enabling you to stream HD movies and play games.
There are two ways to configure your Linksys AC2200. There are two methods for doing this: manually and through WPS.
Setting up your Linksys AC2200 range extender with your hands:
Grab every tool you can.
In the same room, bring your boost.
Next, establish an Ethernet cable connection between your device and the extender.
You must now connect your Linksys AC2200.
Type extender.linksys.com into the address bar.
You'll see a page where you can log in on your device.
Enter your default username and password, click the "Login" button.
If your Linksys AC2200 range extender still won't connect, give us a call at our toll-free number or start a live chat with us. Our specialists configure your problem.
Linksys AC2200 configuration with WPS
WPS, which stands for "Wi-Fi protected setup," is a protocol for securing wireless networks. Follow these instructions to configure your Linksys AC2200 extender through WPS.
Open the Linksys AC2200 box.
Link it up to a power source.
Ensure that your extension is in the same room as your router.
The orange light will turn green after two minutes.
On both your router and the AC2200 extension, press the WPS button.
Delay until the WPS is completely green.
It indicates that the Linksys AC2200 Extender Setup is complete.
How can Linksys AC2200 firmware be updated?
If you want quicker wifi, make sure your Linksys AC2200 has the most recent firmware. Do the following to upgrade the firmware on your Linksys Extender:
An Ethernet cable can be used to link your device and AC2200 extender.
Check to see that your booster is not plugged into your router.
Start a web browser.
Type 192.168.1.1 into the address bar.
On your smartphone, you may now see the page where you can log in.
Please enter your login information.
Next, select the "Login" button.
That’s how your Linksys AC2200 Extender Setup firmware is successfully updated.
Note: You can use live chat or our toll-free number to contact our specialists if you're still having issues with the firmware.
How is the Linksys AC2200 reset?
When they can't remember their admin password and wish to recover it, the majority of users reset to factory defaults. All of your personal information, including your password, username, and SSID, is deleted when you reset a Linksys AC2200 Extender Setup so that it may be configured anew.
Reset Linksys AC2200 by performing the steps below:
Turn on your Linksys AC2200 first.
Find the button on your booster that resets it to its initial configuration.
Get a toothpick for yourself.
Using a toothpick, press and hold the factory reset button for ten seconds.
The LED will begin to blink after a short while, at which point your booster will restart on its own.
You can now configure your extender in a different method.
This is how to perform a factory reset on your Linksys AC2200. In case you need assistance with any step of the procedure, you can phone our toll-free number or chat with one of our skilled professionals. We are accessible to you 24/7, every day of the week.
Typical setup problems with Linksys AC2200 Extender
The website extender.linksys.com is broken.
extender.linksys.com was accessed using the incorrect password.
Internet access is available, however the WiFi extension is inoperable.
The WiFi extender is not able to connect to extender.linksys.com since it is not connected to the network.
Accessing the IP address 192.168.1.1 is problematic.
After the Linksys WiFi Range Extender AC2200 has been configured, the Linksys setup screen is still visible.
My Linksys extender's default password has slipped my mind.
The extender's LED lights don't function properly.
When the internet connection drops, the Linksys EX2200 won't let you log in.
Updates to the Linksys firmware are not being made.
With a WiFi extension, there are issues getting online.
Linksys range extender has no network name.
On the Linksys AC2200 Extender Setup , the internet is not working.
issues with the red light of the Linksys extension.
Internet access but no functionality.
Tips for Linksys AC2200 Extender Setup and Troubleshooting
Try these steps if you're experiencing problems configuring your Linksys range extender EX2200:
Verify that the Linksys AC2200 Extender is receiving the appropriate amount of electricity from the wall outlet.
Check to determine if the wall plug is faulty or has a short circuit before plugging in the extension.
You can immediately connect to the internet using your device.
Every electrical connection should be checked. Utilize only undamaged cables.
Avoid placing your extension near devices like microwaves, fish tanks, cordless phones, room corners, metal objects, walls, and walls, as well as aluminum studs.
Check that you have the correct URL entered in the address box if you are having issues using extender.linksys.com.
Try configuring your Linksys Linksys AC2200 Extender once more after a power cycle.
To access extender.linksys.com, only use the most recent version of a web browser.
Your extender's firmware should be updated to the most recent Linksys version.
Put your AC2200's settings back to how they were when it left the factory.
Why didn't the aforementioned troubleshooting advice solve your issues? Not to worry. Simply contact us, and we'll assist you with configuring your Linksys AC2200 Extender.
1 note
·
View note
Text
A Quick Guide For Linksys WiFi Extender Login
Connect to the Linksys network and launch a web browser to access the Linksys WiFi Extender Login. Enter the IP address of the extender or "http: //extender.linksys.com." After logging in with your credentials, adjust the password and SSID. For best results and smooth signal extension, make sure the extender is within range of the router. It would be appropriate to visit our website if you have any questions. If you need any help with it, you can also speak with our professionals.
0 notes
Text
Step By Step Guide For Linksys Extender Login
Connect your device to the Linksys Extender's Wi-Fi network in order to log in. Enter "http //extender.linksys.com" or "192.168.1.1" in the address bar of an open web browser. Enter your Linksys extender's login information. "admin" is used by default as both the username and the password. You can also leave both fields empty. To get the best results, change the parameters as necessary. To find out more about Linksys Extender login, visit our website. Our professionals can help you further.
0 notes
Text
Quick And Easy Setup Process For All Linksys Extenders
Do you want to enjoy full connectivity throughout your home or office space but your router isn't allowing you to do so? If yes, then it is a clear indication to buy a Wi-Fi range extender. A good quality Wi-Fi range extender will remove all your connectivity issues and will provide you with full signals, fast internet speed and seamless connectivity. One of the best networking brands that makes high-performing range extenders is Linksys. They have vast options for every need, so you can select the one that fits your preferences, budget and network needs. So, if you choose to buy from them, here's the common easy and simple setup process for you to get started. We will provide three options for the setup process, so you can choose the one, which is easier and more convenient for you.
Before you begin, the first and foremost step which is common for all methods is to place the range extender in a central location of your home which should be near to your existing router. Connect the router and extender with the help of an Ethernet cable. Plug the range extender into an electrical outlet with the provided power adaptor and switch on the entire setup. Wait for a few minutes, so that all the devices are stable and ready for further setup. Now let's see the different methods.
Method 1: Setup With Linksys App
✓ First open the Wi-Fi settings of your device, and connect to the extender's wifi network.
✓ The next step is to download and install the Linksys App. If you are an Android user then download from the Play Store and if you are an iOS user then download from the App Store.
✓ Open the app, create your Linksys account or if you already use the app then login using the set username and password.
✓ Once you log in just follow the instructions to set up and configure the extender. The app will guide you through selecting your Wi-Fi network and entering the necessary details.
And that's all for the app-based setup. Wasn't it super easy and quick?
Method 2: Web Browser Based Setup
We will use extender.linksys.com for this setup method.
✓ Choose any device, and go to its Wi-Fi settings. In the list of all the available networks look for a network named Linksys, upon finding click on Connect. If there is no name as such then refresh the page and the name will appear automatically.
✓ Now, on the same device open a browser. You can use any browser like Google Chrome, Edge, Safari or any other of your choice.
✓ In the address bar of the browser enter extender.linksys.com and press enter. This will take you to the login page. If extender.linksys.com doesn't work then try adding http:// in front or you can also use the default IP address which is 192.168.1.1.
✓ Once you enter the login page, you have to enter the default login details. The username and password are both admin or sometimes it's admin for username and password for password. So if one doesn't work try the other combination. For accurate details always check the user manual that came along with your specific Linksys Extender model.
✓ Once you log in successfully, you have to select the name of your current network whose reach you want to extend and enter its password. Now the screen will guide you to complete the whole process, so keep following all the instructions carefully.
✓ Once done, you can now change the extender's settings as per your wish.
That's all for web browser-based setup. We hope you found it easy and straightforward.
Method 3: WPS Method
One of the easiest and quickest methods to set up Linksys Extenders is using the WPS method. So here's how you can perform this method:
✓ Firstly you need to ensure that your router supports WPS (Wi-Fi Protected Setup).
✓ Now, locate the WPS button on your router and press it. Usually, the WPS button can be found by moving the router upside down.
✓ Within two minutes, press the WPS button on your Linksys Extender.
✓ As soon as you press the button on the extender the light on it will start blinking to indicate that it is connecting to the router. Once it stabilizes, it means the setup is successfully done.
Bonus Points To Enhance The Working Of Your Linksys Extenders
Choose a less crowded Wi-Fi channel by visiting the settings of your extender for a better experience.
Regularly check for firmware updates, if found install them immediately for improved performance and better security.
Make sure the place where you have kept the range extender doesn't have any electronic devices or any metal objects as it can disturb the signals of your extender.
Consider changing the default username and password to something difficult and unique so that your network is protected from hackers.
Use Qos settings for Prioritizing bandwidth for critical applications.
1 note
·
View note
Text
Linksys RE4000w Setup
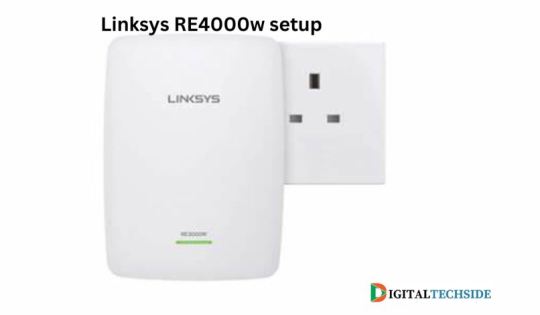
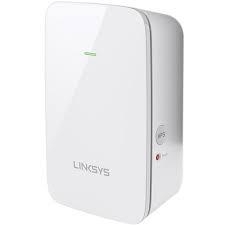
A small and easy-to-use Wi-Fi range extender, the Linksys RE4000W setup is made to improve wireless coverage in your house or place of business. With its simple setup process, users can quickly boost their existing Wi-Fi network without hassle. With cross-band technology, the RE4000W can transmit on one band and receive signals on another, guaranteeing a dependable and effective connection. Because of its small size and ease of plugging into any electrical outlet, the device is simple to monitor thanks to its LED indicators. Whether you’re dealing with dead zones or seeking to extend your network range, the Linksys RE4000W provides a straightforward solution for improved Wi-Fi coverage.
Linksys RE4000w extender setup using manual method
Plug-in Extender: Use the included power cable to connect the Linksys RE4000W to a power source. Wait for the LED indicator on the extender to turn solid amber.
Connect to Extender: On your computer or mobile device, go to the list of available Wi-Fi networks and connect to the “Linksys Extender Setup” network.
Launch Web Browser: Open a web browser and enter “extender.linksys.com” in the address bar.
Create an account: Follow the on-screen instructions to create a Linksys Smart Wi-Fi account if you don’t have one. If you have an account already, log in.
Select your network: Choose your existing Wi-Fi network from the list of available networks and enter the network password when prompted.
Configure Extender Settings: Set up a new extender network name (SSID) and password. Another choice is to join the current Wi-Fi network using the same network name and password.
Complete Setup: Once you’ve configured the settings, click “Next” or “Finish” to complete the setup process. The extender will reboot, and you should see the LED indicator turn solid green, indicating a successful setup.
Read More:-
1 note
·
View note
Text
A Quick Guide For Linksys WiFi Extender Login
Wanna access to your Linksys WiFi extender? Move ahead to perform the Linksys WiFi extender login. To complete the login procedure successfully connect it to its network & enter its web address (extender.linksys.com) in your browser’s address bar. Use default login credentials. Feeling difficulty in adjusting its settings for enhanced coverage? Don’t you know the detailed login steps? Reach us now! We’ll help you at every step.
0 notes
Text
Guide to Linksys WIFI Extender Setup
The Linksys Wi-Fi extender is another magnificent Wi-Fi repeater with a high-speed internet connection. If you wish to extend your current network’s WiFi range, this device is perfect. With the help of the extender, you can say goodbye to all the dead zones in your house. To start using this extender, you need to proceed with the Linksys WiFi Extender Setup.
You can easily set up the Linksys extender with the help of the correct instructions. That’s why we are here with this post to help users with the setup. This post will consist of the setup along with the crucial procedures you must know. Also, we’ll cover the issues you could face with the setup along with the troubleshooting methods.
Steps To Set Up the Linksys WiFi Extender
In this section, we will walk you through the complete procedure for the setup. You should know there are two methods you can use to set up the extender correctly.
Firstly, keep the extender and the router in the same room and power them on.
Now, connect your device to the router’s network to access the login page.
You can use an Ethernet cable to connect the PC to the router’s network.
On the device connected to the extender, open a web browser of your choice.
Hereon enter "extender.linksys.com" in the address bar to access the login page.
When the login page appears, enter the default username and password in the fields.
The home page of the extender will appear on the screen you can initiate the setup.
Now, the extender’s user interface will scan for all the nearby available WiFi networks.
After that, you need to select your WiFi network and enter the correct password.
Give the extender some time to form a connection successfully with the router.
When the connection is successful, you can configure the extender’s settings accurately.
In the end, relocate the extender and connect your devices to the extender’s network.
These are the methods you can use for the Linksys WiFi extender setup. When the setup is complete you can place the extender somewhere else. Just ensure to place the extender inside the router’s range, as the connection will break if the router is too far.
Conclusion
This blog post includes the complete process for you to set up your Linksys extender through a reliable web browser on your device. But if you are unable to set up your extender or facing issues during the process, chat with our technical experts. They will efficiently guide you through the complete setup process.
0 notes
Text
Linksys WiFi Range Extender Login And Installation Process
First, in a wall socket place the Linksys WiFi range extender power plug. After that, grab a WiFi gadget such as a laptop or computer and connect it to the Linksys extender network. Now, on a connected WiFi gadget open a web browser and enter extender.linksys.com in the address bar. Further, fill in all the details which are shown on the web management page. After filling in all the details, hit on the login button to complete the Linksys WiFi range extender login Process.
Check the manual booklet which comes with the Linksys extender device to verify the login details.
For the setup process, settle your Linksys extender device into the power or wall socket. Now, push the WPS button of your Linksys WiFi range extender device and in 30 seconds press the WiFi-protected setup button of the existing router. By doing this, a solid WPS LED starts blinking solid on both gadgets. The solid LED defines the extender and router successfully linked with each other. After linking, locate your extender in that location where you want fast internet speed.
After doing the Linksys WiFi extender setup process, if you are facing any issues then you will be required to take help from our Linksys technician. They will really help you fix that problem.
1 note
·
View note
Text
Linksys RE6500 Setup
Linksys RE6500 AC1200 Dual-Band Wireless Range Extender duplicates the wireless signal of any access point or router to offer internet connectivity in challenging-to-reach locations. The extender provides up to 10,000 square feet of wireless coverage. A Linksys RE6500 setup without the use of an installation CD.
With its high-speed AC technology, you may play online games and stream HD videos wirelessly without any lag or delays. With speeds 10x faster than Fast Ethernet, the RE6500's 4 Gigabit Ethernet ports enable speedy and dependable wired connections to computers and other Internet-capable devices.
Linksys RE6500 Wifi Setup via manual method
When you buy a new AC1200 extender, a Linksys RE6500 manual is packaged with it. From start to finish, this manual offers a variety of setup procedures.You can quickly get your Linksys RE6500 extender up and running by following these basic setup instructions.
For many users, it can be hard to follow the steps for setting up in the Linksys RE6500 manual. Contacting our experts via live chat or email will help you install your Linksys AC1200 RE6500 WiFi range extender quickly and easily.They will correctly configure your extender and guide you through each step.
Consider the following procedures for Linksys RE6500 extender setup:
Connecting your RE6500 range extender into a power outlet will first turn it on.
Your PC or laptop has to be turned on and connected to the internet.
You'll see a new window open and be asked for the WiFi password.
After that, enter the password to continue.
Open any web browser on your laptop or computer.
visit the website extender.linksys.com.
You will now be given the default range extender login page.
Fill up the correct boxes with the user ID and password.
After that, click the bottom-side login button.
There will be a number of on-screen instructions. Just carefully follow them.
Note: If you need any assistance regarding your Linksys RE6500 AC1200 so contact our technician or visit the official website that is linksys extender setup.
Linksys RE6500 Range Extender Setup with the WPS button?
Follow these directions to configure your Linksys RE6500 using WPS:
The Linksys RE6500 AC1200 must first be turned on.
Put the RE6500 in the same location as the router.
The WPS button on the extender needs to be depressed.
Check to see if the LED lights on the RE6500 extender are blinking as they should.
The Linksys AC1200 extender is in a great place.
Finally prepared for wireless device synchronisation is the Linksys RE6500 WIFI Extender.
HOW DO I INSTALL MY LINKSYS RE6500 WIFI EXTENDER?
Installing the Linksys RE6500 comes after connecting the repeater to the power source.
the moment the extender's light begins to flash.
Connect your booster's cat5 or ethernet cable to the main router.
Open a browser on your laptop and type extender.linksys.com.
You are now on the WiFi booster installation page. Click "Start Setup" to begin.
Follow the directions to connect your AC1200 to the main network or modem.
Linksys AC1200 Troubleshooting Steps
Here are some suggestions for resolving Linksys RE6500 range Setup issues:
Use your laptop to connect to an installed AC1200 repeater.
Make sure that the Linksys RE6500 extender is connected to the power outlet properly.
The Linksys AC1200 Extender's firmware needs to be updated.
Avoid placing your extender near doors, aluminium studs, and other access points.
Check to see if each wire is operational.
To configure the RE6500, simply utilise the most recent version of your web browser.
Reset your extender first, then the power of the booster.
If you've forgotten or lost your default login credentials, consult the handbook.
Linksys RE6500 Extender Firmware Upgrade
To update the firmware on your Linksys RE6500 AC1200 extender,follow these steps:
Start by making sure the Linksys RE6500 is plugged into a power source.
Visit the extender.linksys.com website immediately.
Thank you; this is the repeater login page. Enter your login details.
After logging in, look for the Administration option, and then select Firmware Upgrade.
Click "Update Now" after selecting the most recent upgrade.
Before selecting "download," verify the version of your AC1200.
Download the latest recent version, then launch the file.
Your repeater has now received the most current security patch.
How do I reset the Linksys RE6500 extender?
Have issues with irregular wireless connections even after setting up your Linksys extender RE6500? The extender.linksys.com RE6500 web-based setup page is not accessible. If so, reset the factory settings on your Linksys extender. There is a Linksys RE6500 reset that can fix any technical issues with your range extender.
Using the Reset button and the initial Linksys range extender setup, the RE6500 web page can be used to reset the Linksys RE6500.
To reset your Linksys RE6500 extender, follow these steps:
Upon your Linksys RE6500 AC1200 dual-band range extender, locate the Reset button.
Your extender can have a Reset button on the bottom panel or the back.
Continue to hold down the reset button.
To finish the reset of the Linksys RE6500, restart your WiFi range extender.
Linksys RE6500 Extender Reset with using web browser
Here's how to use the web-based interface to reset your Linksys extender RE6500:
Launch the most commonly used web browser.
Visit the RE6500 web-based setup page at extender.linksys.com.
Once you've logged in to your extender, select Factory Defaults.
The Restore Factory Defaults button should be clicked.
Power cycle your extender once more to complete the Linksys RE6500 reset procedure.
#linksys RE6500 setup#linksys re6500 extender setup#extender.linksys.com#linksys wifi extender setup
0 notes
Text
Linksys Extender Setup without Computer
n case you are also in dilemma as to how to perform Linksys extender setup without computer, walk through the step-by-step instructions mentioned in this blog. Before you even know it, you will be able to get your device up and running.
#linksys setup#linksys#linksys extender setup#Linksys WiFi Extender Setup#Linksys Range Extender Setup#Linksys Extender setup#Extender.linksys.com
0 notes
Text
How To Fix The Issue Of Linksys Extender Dropping Internet Connection?
Is your Linksys extender dropping internet connection? Well, this is the most common issue that Linksys extender users face. To fix this issue, you must reboot your device and make sure it is well within the range of the wireless router. If the issue does not fix, you must reset your device. After that, reconfigure the Linksys extender using the default address extender.linksys.com.
0 notes
Text
Simple Steps to Set Up Your Linksys RE6500 Extender
The main fix for your wireless network's slow or nonexistent connectivity is Linksys RE6500 Setup. It offers all of your devices constant, seamless wireless connectivity throughout your premise. When compared to other wireless extenders on the market, the RE6500 offers you the highest performance thanks to its cutting-edge technological features.
Setting up Linksys RE6500 refers to the process of configuring and installing the Linksys RE6500 Wireless Range Extender.
Linksys RE6500 Wifi Range Extender Setup via Manual method
The quick methods to manually Setting up Linksys RE6500 extender are as follows:
Connect the extender to the nearby Wi-Fi router.
Join the Wi-Fi network provided by the extender with your computer or mobile device.
Start a web browser, and in the address bar type extender.linksys.com or the default IP address, which is typically 192.168.1.1
To configure the extender settings, adhere to the on-screen directions.
Choose your current Wi-Fi network from the list, then type the password.
Any optional settings should be tailored to your preferences.
Click "Finish" or "Save" to finish the setup process.
Ideally, place the extender halfway between your router and the spot with spotty Wi-Fi service.
To get better performance and coverage, connect your devices to the expanded network.
You may manually configure your Linksys RE6500 extender and increase the coverage and range of your Wi-Fi network by following these simple steps.
How to setup linksys re6500 extender using the WPS push button?
To setting up Linksys RE6500 extender utilizing the WPS (Wi-Fi Protected Setup) push button technique, follow these steps:
Connect the extender to the Wi-Fi router in the same room.
The WPS button should be located on your WiFi router.
Hold down the WPS button on the router for a few seconds.
Press the Linksys RE6500 extender's WPS button within two minutes.
The extender will begin to attempt to connect to the router when the WPS LED on it begins to blink.
The WPS LED will turn solid or cease blinking after the connection has been made, signifying a successful setup.
Make sure the extender is within your Wi-Fi network's coverage area and move it to the best possible spot.
Your devices should be connected to the extender's extended network.
You may quickly configure your Linksys RE6500 extender utilizing the WPS push button technique by following these steps. This approach makes the setup procedure simpler by doing away with the need to manually configure network settings.
Common issues during the setting up linksys re6500 extender
The following are some typical problems that you could run into while configuring the Linksys RE6500 extender:
Weak signal: If the extender is situated too distant from the primary router, it may have a weak signal or a limited range.
Incorrect login details: Inputting the wrong Wi-Fi password during the setup procedure may result in connectivity problems.
Compatibility Problems: The extension might not work properly with some router models or software updates.
Outdated Firmware: The extender's outdated firmware may cause setup problems or have limited functioning.
Network Congestion: The performance of the extender may be impacted in locations with significant Wi-Fi network congestion.
Setup Page loading error: On occasion, you could have issues with the setup page clocking out or not loading correctly.
Try the offered fixes or consult the product manual to troubleshoot and fix any of these typical problems if you run into them. Additionally, getting in touch with Linksys customer service or asking for help from technical specialists might offer additional direction in resolving particular issues you may run across during the configuration of your Linksys RE6500 extender.
Troubleshooting steps
It's possible that your extension is out of range of the router or that it is situated on the border of the signal area. Here are some troubleshooting steps you can take to address common issues with the setting up linksys re6500 :
To avoid poor connectivity, place the extension close to the router.
Keep in mind that the wifi password, also referred to as WiFi, is case-sensitive when inputting.
Additionally, make sure the SSID (network name) to which you are connecting your device is correct. Linksys Extender Setup XXX is the extender's SSID at all times.
The last three characters of the extender's mac address make up the SSIDs XXX.
According to the router's compatibility, choose the wireless security. If your router uses WPA security, your extender needs to do the same.
The extender's outdated firmware can occasionally be the problem.
Your extender's firmware needs to be up to date to the most recent version for a Linksys Extender RE6500 configuration to be effective.
From the web-based extender settings page, you can upgrade the firmware.
The light on the extender's top panel will start blinking white when the firmware is updated.
How to upgrade the Linksys Extender Firmware? is a help link you can use to receive assistance with upgrading the extender's firmware.
Prior to setting up, you must reset an extension RE6500 that has been given as a gift or that has been used previously.
The bottom panel of your extension has a reset button. For 30 seconds, press the reset button, then wait for the gadget to respond.
Rebooting could take a moment
Update Linksys RE6500 Extender Firmware
To upgrade the firmware on your Linksys RE6500 extender, follow these 7 simple steps:
Join the extender's network using your PC or mobile device.
Open a web browser and type the default IP address or extender.linksys.com into the address bar.
If prompted, log in to the extender's administrative interface.
Search the menu for the "Administration" or "Firmware Upgrade" area.
From the Linksys support page, download the newest firmware.
Find the firmware update option on the extender's administration page, and then select the downloaded file.
Start the firmware update process, then wait for it to finish.
You may quickly and securely upgrade the firmware on your Linksys RE6500 extender by adhering to these straightforward procedures. To ensure top performance, security, and compatibility with the newest features, it is advised to keep the firmware on your extender up to date.
0 notes
Text
Quick Guide For Linksys Extender Firmware Update
To access the web-based setup page for your Linksys extender, enter the IP address or extender.linksys.com. In the Administration area, choose Firmware Update. Look for available updates and follow the steps to download and install the most recent firmware. Make sure that the extension is constantly turned on. If you need professional guidance or have any more questions about the Linksys extender firmware update, please visit our website.
0 notes