#laminate spray adhesive
Explore tagged Tumblr posts
Visit Tumblr Blog
Explore Tumblr blogs with no restrictions, modern design and the best experience.
Last Seen Tumblr Blogs


Fun Fact
Tumblr’s reach among the 26-to-35-year-olds in the US is 11%.
Text
MarketsandMarkets™ Report- Laminating Adhesives Market Predicted to Boom in Asia-Pacific In Coming Years!!
The report “Laminating Adhesives Market by Resin Type (Polyurethane, Acrylic, Others), Technology (Solvent-based, Water-Based, Solvent-less), End-Use Industry (Packaging (Food & Beverages, Pharmaceuticals, Consumer Products), Industrial, and Region (2023-2028)”, exhibits high growth potential and is projected to reach a market size of USD 5.1 billion by 2028 from USD 3.6 billion in 2022, at a…

View On WordPress
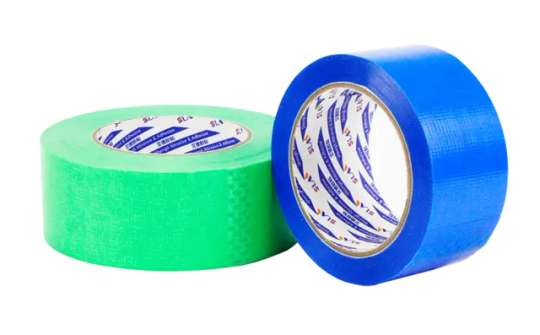
#Asia Pacific Laminating Adhesives market#contact adhesive for laminate#contact paper for laminating#COVID 19 impact on Laminating Adhesives market#Europe Laminating Adhesives market#Formica laminate adhesive#Global Laminating Adhesives market#laminate contact cement#laminate spray adhesive#laminate wood glue#laminating acrylic#Laminating Adhesives#Laminating Adhesives business research report#Laminating Adhesives Industry Trends#Laminating Adhesives market#Laminating Adhesives market Analysis#Laminating Adhesives Market Overview#Laminating Adhesives market Share#Laminating Adhesives research insights#Laminating Adhesives Research Report#lamination adhesives for flexible packaging market#North America Laminating Adhesives Market#Polyurethane Adhesive Market#self-adhesive laminate paper#solvent-based adhesives#Wilson adhesive
0 notes
Note
Not a suggestion, more a question - how do you make your stickers? Your art inspired me to make stickers but I don’t know where to start!!
Ooh Tutorial Time! I have a small rundown of my process here. (I’ve got a video here, but I’ve had an update in my materials. Also this got a little away from me, I hope this helps and lemme know if there’s anything I need to elaborate on!)
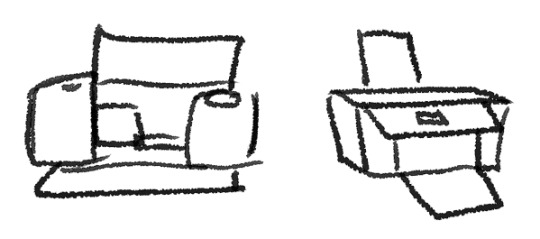
--- Materials: Printer - Epson Ecotank 8500 Cutters - Silhouette Cameo 4s (I’ve got 2 at the moment) Paper - Zicoto Glossy Vinyl Laminates - Glossy and Holo Star Laminate (Both Self Adhesive) Misc Off Brand Sticker Cutter mats Ruler Squeegee with extra microfiber wrap Sports glove tack spray or sewing basting spray
Printer - Aim for a photographic printer at the minimum. General print quality, color variety, and paper handling will make sure your prints are the highest possible quality. They’re a little more expensive, but my last printer lasted 4 years with frequent weekly printing. The ecotank is nice, it’s more visual that the ink is actually disappearing than the pre-filled cartridges lol. Cutter - I’ve only used Silhouette, but I’ve heard to stay clear of Cricut due to general cut unreliability and lack of customer service assistance. I’ve also heard great things about the Siser Juliet cutter from mutuals. In order to use 2 machines at the same time, I had to purchase the Business license ( p sure it was a one time $50 purchase, but I can work twice as fast). If you want to cut by hand, check out what kind of ergonomic scissors you can find. Classic scissors over time can really screw up your hands, especially when you’re making fine cuts.
Printing and Sizing - The Silhouette Studio resizes your stickers without many issues with quality changes. This does kinda depend on the base size of your files. I always make my stickers on a canvas 3000x2000 pixels and 300 dpi. I wouldn’t go any lower than 100 dpi for print, and no larger than 500 dpi, but you can always test this out.
Paper - I enjoy the luster of the paper I linked above, there’s almost a pearlescent quality to it. If you’d like a different quality, I recommend still sticking with glossy vinyl for your paper. Laminates on matte sticker paper have had a lot of trapped air underneath for me and it tended to be more likely to bleed in contact with water despite being laminated.
Laminate - If you’re just doing paper finish stickers, you can skip this step :)
Laminate them to make them more water and scratch resistant. The laminates I’ve listed are all self adhesive. There are also heat adhesive laminates, which require a heat laminator. I haven’t experimented much with heated laminates. Mine are best rated for hand wash, though they can go through the dishwasher a few times. When laminating your sticker sheet, be sure to not cover your registration marks. When your cutter tries to read over them and the surface is really reflective, it can cause the machine to read improperly (and it’s worse with the holographics lol). Either precut your laminates like I do in the video I linked above, or you can use matte tape over your laminate to dull the sheen. If you accidentally cover your registration marks, the matte tape is a lifesaver. Self laminating takes some muscle memory to not get bubbles trapped under the laminate, but a wide squeegee and firm pressure helps make sure you get as few bubbles as possible. Mats - Your cutter will come with a few, but I find that my off-brand ones are just as good and less expensive. I prefer low-tack, but there comes a time when the tack is absolutely gone, and I have 10+ mats just sitting around. That’s where the Sports Glove spray or Sewing basting spray comes in! After washing them (soap and water, then dry for a few hours), I hit them with a few coats of spray. Right now I’m using Pow’r Tac Grip Spray. It’s just ok, but this leaves less residue on the back of my stickers than the Basting Spray I used to use. I retack every month or so, but that’s more bc I’d prefer the mats to be less sticky than risk ripping my backing sheets.
----
If there’s anything you’d still like to know, please let me know!!
#my art#tutorial#stickers#sticker making#art tutorial#my process#i'll never gatekeep lol#paleo party
14 notes
·
View notes
Note
Hey! I’m a big fan of your binds, you are seriously so talented. I was wondering how you made your covers for Crimson Rivers and Grounds for Divorce. I’m very very new to book binding and I’ve only ever made blank covers, and I’m trying to figure out how to make designed covers but most binders use a Cricut and I don’t have one 😅 It looks like those binds aren’t heat adhesive vinyl, so I was wondering how you made them! Thank you SO MUCH!
Hiiii! Firstly thank you for the lovely words, you’re so kind! Also welcome to the most fun & frustrating hobby of all times 🙊. For grounds for divorce I did a wrap cover method where you just print your design on paper and then usually laminate or spray it to protect it from scratching and cover the book boards with that paper rather than using bookcloth and htv.
For crimson rivers- I did use bookcloth and htv for the actual binds but then made dust jackets with fan art for over top.
If you have a printer you can do the following methods for covers:
1) wrap paper cover (as I mentioned above)
2) print on fabric decorated or make your own decorative fabric
3) cardstock with foil using the toner activated foil through a laminator for the front and back covers and a cloth spine piece!
I do have the wrap cover tutorial on my insta and TikTok but there’s others ones I see that are probs more detailed.
Hope this helps!
MUAH,
Jules
#bookbinding#ask jules#hope this helps sorry for the long ass response#I can’t ever be casual about anything oops#I also can’t simplify anything#fanfic bookbinding#bookbinding hobby
12 notes
·
View notes
Text
My Experiences Making Stickers
Machines
In terms of making stickers, you don't inherently need any machine whatsoever. If you can find decent sticker paper to draw on, some kind of laminate or protective adhesive coat, and scissors, you can make stickers just fine. Hell, you don't even really need the laminate/coat, but people tend to use stickers in situations where they'll need that protection to stand up to rain, weather, or condensation.
However, importantly, producing stickers without a machine is slow as fuck. Hand drawing is much slower than printing, and hand cutting is much slower than using a machine like a Cricut. Ultimately, I'd recommend at least a printer, as it will probably be able to print on more material than you can draw on, and it's a fairly cheap way to speed up production. But going without a Cricut is a lot more reasonable, as the Cricut is quite expensive, and you'll likely not need to produce at a large enough scale where hand cutting is impractical initially.
I personally have both: a printer and a Cricut. I like them both, and the Cricut allows much more precise and uniform cutting than I can do myself. But I honestly might have gone without the Cricut if I had better realized it wasn't really necessary to create good die cut style stickers.
Paper
Sticker paper is fairly easy to find online, and I've seen some decent material in stores like Hobby Lobby and Wal-Mart. Generally, you'll get more for your money going with bulk options online, but a smaller order might be more in budget and more practical early on.
In terms of material, I'd personally recommend something along the lines of printable vinyl, or otherwise something with a coating already on it. I have some sticker paper that was effectively uncoated paper, and it doesn't stand up well to weather on its own. And laminate and coating options have been difficult to work with in my personal experience. The spray I tried ended up being scratchy and weird, and laminate sheets are extremely thick, to the point that the Cricut struggles to cut it, even on the highest setting I have (poster board).
Another note, home printers can be quite finicky when it comes to thick material. Try to pick fairly thin, but still durable, material when possible, as thicker materials can get snagged in the average home printer. I effectively couldn't print on some heavy cardstock I got because of this.
On a final note, unless you need very uniform, standard shapes, like circles, rectangles, etc., I don't recommend getting pre-cut label sheets. Die cuts tend to look much more interesting and work with much more designs, and it's fairly easy to make them even without a Cricut if you make the outline simple enough.
Designs

In terms of design, you can get away with a lot as long as you're working with a printable material. I'd recommend making the files fairly bright and saturated, as this tends to come out looking better. If you're working with an incredibly dark piece, make it slightly brighter than you would think it should be. In my experience, a lot of detail can get lost with darker works, as the print looks darker than what's on screen. I'd recommend going more saturated with very light, pastel works. I've had issues with the material coming out near white, with the color barely showing through. Ultimately, it may be best to simply test things out with your own machines, but these are my experiences.
With hand drawn stickers, something I haven't personally tried, you'll have to consider your own personal limitations and tools. Again, this is something you can probably experiment with, but be mindful of your body. You don't want to treat yourself like a printing machine and develop medical problems like carpal tunnel because of it. We already risk that enough as artists.
Selling
If you'd like to sell your stickers, I recommend ensuring they're fairly weatherproof, as the average person is going to want to stick them in places where that's at least somewhat important. Laptops, tumblers, their car, etc.
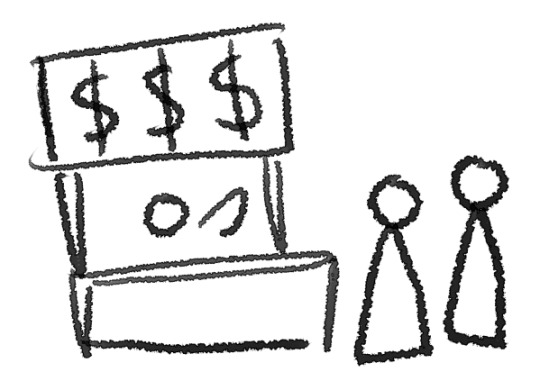
I won't get too much into places to sell items, because that could probably be its own post, but in terms of pricing, I'd base that on the effort, material, and size. For me, I tend to price tiny stickers (roughly 1-2 inches) at 50 cents and larger stickers (2-4 inches) at $1. I don't usually make much larger stickers, so I don't have personal pricing there. Beyond my anecdote, I'd recommend looking around at local events, sites like etsy, and possibly even calculating sheer cost to yourself plus the profit you want to make. Analyzing general “market trends” plus your own costs will probably be the best route to get a decent price tag.
Shipping is something I have limited experience with, but I'd recommend going with a fairly protective shipping container, such as a bubble mailer. Even with decent weatherproofing, stickers can be fragile. In addition, you may want to charge your customers for shipping. I've personally paid upwards of $5-6 to ship individual bubble mailers with artwork and stickers in it, but I was also paying for tracking. The prices without tracking were more around $1-2, and obviously this will vary massively depending on the size of your mailer and the weight of your items. You may also be able to talk to your local post office or research business shipping. I don't know much about how to keep shipping costs low, but I've seen options for savings on things such as bulk shipping.
Products
Cricut Explore Air 2 - Pretty useful, but I had some issues with calibration initially. Also glossy materials have some issues with the scanner: I've used scotch tape over the lines the scanner looks for to help that. You can also use some cloth to gently clean the scanner if it's having issues. You definitely need the software that works with it, the Cricut Design Space, and use the Print Then Cut feature for printed sticker designs. I personally print from the Design Space as PDF, then print out the PDF, because the Design Space doesn't have proper paper type settings from what I can see.
Cricut Machine Mat - I found some decent off brand ones at Hobby Lobby. The machine comes with one, but I damaged my first mat and had to buy more. Good to have at least one extra on hand just in case.
Cricut Weeder - This makes removing stickers from the mat very simple. You can get a lot of the big parts off by hand, but the weeder is good for getting little details off without damaging the sticker.
EPSON EcoTank ET-2803 - Pretty decent printer. I haven't had to change ink since I got it a couple months ago, and I use it pretty regularly. It can be finicky with paper and get jammed easily, but otherwise it's fairly reliable to me.
Cricut Printable Vinyl - I just started using this properly, but I ran tap water over it, and the damage was pretty minimal from what I could tell. It was still usable after the fact, and the art was undisturbed. Prints fine, though it likes to fold on the edges a bit and get ink on the very tips, which doesn't impact much in my process.
Pen+Gear Self Adhesive Laminate Sheets - Too thick for the Cricut, but useful for other applications. Would work amazing for hand cut stickers. I personally use this for bookmarks atm, and the stickers I got using this are incredibly well protected.
Scissors - Any brand works. Good to have even with a Cricut. Useful for less precise cutting.
4 notes
·
View notes
Text
"Hygiene Adhesives Market Expected to Rise from $3.9 Billion in 2024 to $7.2 Billion by 2034, at a 6.2% CAGR"
Hygiene Adhesives Industry encompasses the production and distribution of adhesive products specifically designed for hygiene applications, including diapers, feminine care products, and adult incontinence solutions. This sector is driven by innovations in adhesive technologies that ensure efficiency, comfort, and reliability. Key trends include the growing demand for eco-friendly adhesives, advancements in bonding techniques, and the expansion of the personal care market globally, which collectively underscore significant growth opportunities within the industry.
To Request Sample Report: https://www.globalinsightservices.com/request-sample/?id=GIS10630 &utm_source=SnehaPatil&utm_medium=Article
The Hygiene Adhesives Industry is experiencing robust growth, propelled by rising demand for personal care products and innovations in adhesive technologies. The baby diapers segment leads the market, driven by increasing birth rates and improved living standards globally. Feminine hygiene products emerge as the second-highest performing sub-segment, reflecting heightened awareness and acceptance of modern hygiene solutions. Geographically, Asia-Pacific dominates the market, benefiting from a large population base and rapid urbanization. North America follows closely, with significant contributions from the United States, where consumer awareness and technological advancements drive demand. Within Europe, Germany stands out due to its strong manufacturing base and focus on sustainable product development. These regions benefit from strategic collaborations and investments in research and development, which enhance product efficacy and environmental compliance. The industry’s growth is further supported by evolving consumer preferences towards eco-friendly and skin-sensitive products, creating lucrative opportunities for market players.
Market Segmentation
Type: Hot Melt Adhesives, Water-Based Adhesives, Solvent-Based Adhesives, Pressure Sensitive Adhesives, Reactive Adhesives
Product: Baby Diapers, Adult Incontinence Products, Feminine Hygiene Products, Medical Adhesives
Application: Disposable Hygiene Products, Medical and Surgical, Packaging
Technology: Nonwoven Technology, Spray Technology, Slot Die Technology
Material Type: Polyurethane, Polypropylene, Ethylene Vinyl Acetate, Styrenic Block Copolymers
End User: Healthcare, Personal Care, Household, Industrial
Form: Liquid, Solid
Component: Base Resin, Additives
Functionality: Bonding, Sealing, Coating
Process: Extrusion, Lamination
In 2023, the Hygiene Adhesives Industry reported a market volume of 1.2 billion metric tons, with projections indicating a rise to 1.8 billion metric tons by 2033. The personal care adhesives segment commands the largest market share at 45%, followed by medical adhesives at 30%, and industrial adhesives at 25%. Growth in personal care adhesives is driven by increasing demand for hygiene products in emerging markets. Key players such as Henkel AG, 3M Company, and H.B. Fuller Company dominate the market, leveraging advancements in adhesive technology and sustainable product offerings.
Competitive dynamics are shaped by these industry leaders through strategic mergers and acquisitions, enhancing their global footprint and product portfolios. Regulatory frameworks, particularly in the EU and North America, emphasize eco-friendly and non-toxic adhesive formulations, influencing market trajectories. Future projections highlight a 10% annual increase in R&D investments, focusing on biodegradable and high-performance adhesives. The industry outlook remains robust, with technological innovations and rising consumer awareness fostering growth. Challenges include compliance with stringent regulations and the need for continuous innovation to maintain competitive advantage.
#HygieneAdhesives #PersonalCareProducts #EcoFriendlyAdhesives #AdhesiveTechnology #BabyDiapers #FeminineHygiene #SustainableProducts #NonwovenTechnology #GlobalMarketTrends #HealthcareAdhesives #InnovationInAdhesives #ConsumerAwareness #RisingDemand #EmergingMarkets #TechnologicalAdvancements
0 notes
Text
Ensuring Print Quality: Addressing Adhesion Issues and Post-Printing Problems in Flexography


Learn how to address adhesion issues and post-printing problems in flexography to ensure high-quality prints. Discover effective solutions for substrate pre-treatment, ink formulation, and environmental control. Introduction Flexography, often referred to as flexo printing, is widely used for its versatility and efficiency in printing on various substrates such as plastic, paper, and metal. However, one of the persistent challenges in flexography is adhesion issues, which can significantly impact the final print quality. Understanding the root causes of these problems and implementing effective solutions is crucial for maintaining high-quality standards in flexographic printing. Understanding Adhesion Issues in Flexography Adhesion problems in flexography typically arise from several factors, including substrate properties, ink formulation, and environmental conditions. These issues can manifest as ink flaking, peeling, or poor adhesion to the substrate, leading to unsatisfactory print results. - Substrate Properties: The surface energy of the substrate plays a critical role in ink adhesion. Substrates with low surface energy, such as polyethylene or polypropylene, often require surface treatment to enhance adhesion. Techniques like corona discharge, plasma treatment, and flame treatment can increase surface energy and improve ink bonding. - Ink Formulation: The composition of flexo inks, including the choice of pigments, binders, and solvents, affects adhesion. Using inks specifically designed for the substrate type and application conditions is essential. Adjusting the viscosity and drying speed of the ink can also help achieve better adhesion. - Environmental Conditions: Factors like temperature, humidity, and air quality in the printing environment can influence adhesion. Maintaining consistent environmental conditions is crucial to prevent issues like ink drying too quickly or not drying sufficiently before coming into contact with the substrate. Common Post-Printing Problems and Their Solutions Post-printing problems in flexography can include issues like blocking, set-off, and surface defects, which can compromise the print quality and usability of the final product. - Blocking: This occurs when printed surfaces stick together, often due to excessive pressure, high temperature, or inadequate drying. Ensuring proper drying of the printed materials and optimizing storage conditions can prevent blocking. - Set-Off: Set-off refers to the transfer of ink from one printed surface to another, leading to smudging and loss of print clarity. Using anti-set-off sprays, increasing the drying time, and maintaining appropriate stacking pressure can minimize set-off problems. - Surface Defects: Scratches, abrasions, and other surface defects can occur during post-printing handling and processing. Implementing proper handling procedures and using protective coatings or laminates can safeguard the printed materials from damage. Effective Solutions for Adhesion Issues To effectively address adhesion issues and post-printing problems in flexography, a comprehensive approach is necessary. Here are some practical steps: - Pre-Treatment of Substrates: Implement surface treatment techniques like corona discharge to enhance substrate surface energy. - Optimizing Ink Formulation: Work closely with ink suppliers to select and formulate inks that are compatible with the specific substrates and printing conditions. - Maintaining Environmental Control: Ensure stable temperature and humidity levels in the printing environment to avoid fluctuations that can affect ink adhesion. - Quality Control Measures: Regularly monitor and test the adhesion and durability of printed materials to identify and address issues early in the production process. Conclusion Adhesion issues and post-printing problems in flexography can pose significant challenges, but with a systematic approach and the right techniques, these problems can be effectively managed. By understanding the factors affecting adhesion and implementing best practices, printers can ensure high-quality, durable prints that meet industry standards and customer expectations. Read the full article
0 notes
Text
Innovative Uses of Carboxylated SB Latex in Adhesives and Sealants

The adhesive and sealant industry has evolved significantly over the years, driven by the demand for higher performance, flexibility, and eco-friendliness in products. One material that has gained prominence in this field is Carboxylated Styrene Butadiene (SB) Latex. Known for its excellent adhesive properties, flexibility, and cost-effectiveness, Carboxylated SB Latex is finding innovative applications across various industries, from construction to packaging.
In this article, we will explore the unique properties of Carboxylated SB Latex and how its versatility makes it an ideal choice for adhesives and sealants. We will also highlight some key applications and the benefits it offers to manufacturers and end-users.
1. What is Carboxylated SB Latex?
Carboxylated SB Latex is a water-based copolymer made from styrene and butadiene, with carboxylic groups added to its structure. The addition of carboxyl groups improves the polymer's adhesive strength, flexibility, water resistance, and overall performance. This material is widely used in various industrial applications due to its ability to form strong, flexible films and its compatibility with other materials.
In the adhesives and sealants industry, Carboxylated SB Latex stands out because it can bond a wide range of surfaces, including wood, paper, plastic, and textiles. Its water-based nature also makes it environmentally friendly, as it reduces the reliance on volatile organic compounds (VOCs), which are harmful to both the environment and human health.
2. Superior Bonding Strength and Flexibility
One of the key reasons Carboxylated SB Latex is favored in adhesives and sealants is its superior bonding strength. When used in adhesive formulations, it provides strong adhesion to various substrates, making it ideal for applications where durable bonds are required. Whether it's binding paper, laminating plastic films, or adhering textiles, Carboxylated SB Latex delivers reliable performance.
In addition to its bonding strength, Carboxylated SB Latex offers excellent flexibility. This property is crucial for applications where the bonded materials need to withstand movement, stretching, or changes in temperature without the adhesive cracking or breaking. For example, in packaging applications where materials are frequently handled or bent, the flexibility of Carboxylated SB Latex ensures that the bond remains intact over time.
3. Water Resistance and Durability
Another significant advantage of Carboxylated SB Latex is its water resistance. This property makes it suitable for applications where the adhesive or sealant is exposed to moisture or humidity. For instance, in construction, where adhesives and sealants are used to bond building materials, water resistance ensures that the adhesive maintains its integrity even in wet or humid environments.
The durability of Carboxylated SB Latex also extends to its resistance to chemicals and aging. This means that adhesives and sealants made from Carboxylated SB Latex can perform well in harsh environments, including exposure to UV light, chemicals, and fluctuating temperatures. This durability makes it a preferred choice for long-lasting applications in industries such as automotive, construction, and consumer goods.
4. Cost-Effectiveness and Ease of Use
One of the most attractive features of Carboxylated SB Latex is its cost-effectiveness. Being a water-based material, it is easier and cheaper to produce compared to solvent-based adhesives and sealants. Manufacturers benefit from lower production costs while also complying with stringent environmental regulations, which are increasingly pushing for reduced VOC emissions.
Moreover, Carboxylated SB Latex adhesives are easy to apply, as they can be formulated into various consistencies to suit different application methods, such as spraying, brushing, or rolling. This ease of application, combined with its fast drying time, allows for more efficient production processes and faster turnaround times.
5. Innovative Applications in Adhesives and Sealants
Carboxylated SB Latex has found innovative applications in several industries due to its versatile properties:
Packaging Industry: In the packaging industry, Carboxylated SB Latex is used in adhesives for carton sealing, paper laminations, and label applications. Its strong bonding strength ensures that packaging materials stay securely attached, while its water resistance helps maintain the integrity of the package in various environments.
Construction: The construction industry benefits from Carboxylated SB Latex in sealants used for windows, doors, and other structural elements. Its flexibility allows it to accommodate movement and expansion in building materials, while its water resistance ensures that the seals remain effective in preventing leaks.
Textile and Upholstery: Carboxylated SB Latex is also used in adhesives for bonding fabrics and foam in the production of furniture and upholstery. Its flexibility and durability make it an ideal choice for ensuring that fabrics adhere securely to foam without losing strength over time.
Automotive Industry: In the automotive sector, Carboxylated SB Latex is used in adhesives and coatings for interior components like door panels and seats. Its strong adhesion and ability to withstand temperature changes and chemical exposure make it suitable for these demanding applications.
Conclusion
Carboxylated SB Latex has emerged as a versatile and innovative material in the adhesives and sealants industry. Its superior bonding strength, flexibility, water resistance, and cost-effectiveness make it an ideal choice for a wide range of applications, from packaging and construction to textiles and automotive. As industries continue to prioritize sustainability and performance, Carboxylated SB Latex offers a solution that meets these demands while contributing to the development of more efficient and environmentally friendly products.
With its wide range of applications and benefits, Carboxylated SB Latex is poised to play an even more significant role in the future of adhesives and sealants, driving innovation and improving the performance of products across industries.
0 notes
Text
5 Easy Steps to Create Custom Vinyl Covers at Home
Creating custom vinyl covers at home is a fun and creative way to personalize your collection, whether for your favorite records, DIY projects, or gifts. Here are five easy steps to make professional-looking covers without specialized equipment.
1. Choose the Right Materials
Start by gathering high-quality paper or cardstock for durability. You will also need adhesive vinyl sheets, a printer, and clear protective covers to enhance the longevity of your custom vinyl covers. For a glossy finish, select vinyl sheets designed for printing. A good selection of materials ensures that your covers look and feel professional.
2. Design Your Cover
Use design software such as Adobe Photoshop, Canva, or any other graphic design tool to create your custom artwork. Focus on the dimensions of a vinyl cover, which is typically 12.375 inches by 12.375 inches. Include album details, artwork, or personal touches to reflect your style. If designing for a vinyl record, add elements like the artist's name and tracklist. The key to an eye-catching design is to align the theme of the cover with the content it represents.
3. Print Your Design
After finalizing your design, print it on the adhesive vinyl sheets. Ensure your printer settings are adjusted for high-quality output. If your printer doesn't support vinyl sheets, print the design on regular paper and use a glue stick or spray adhesive to attach it to the vinyl. This method still gives a polished appearance. Remember to let the ink dry fully before proceeding to avoid smudging your custom vinyl covers.
4. Cut and Apply the Vinyl
Once the printing is complete, carefully cut your design to fit your vinyl. For precision, use a cutting tool like an X-Acto knife or a guillotine paper cutter. Align the cover design with your blank vinyl sleeve or project base and apply the adhesive backing slowly to avoid air bubbles or wrinkles. Start from one corner and smooth it out as you go for a perfect finish.
5. Protect and Seal
To ensure the longevity of your custom vinyl covers, place a clear protective sheet over your design. These can be purchased or created using laminating paper. This final step will protect the artwork from scratches, dust, and wear, keeping your cover looking new for years to come.
By following these steps, you can create beautiful, durable custom vinyl covers that add a personal touch to your collection.

0 notes
Text

Maintaining and Cleaning Vinyl Stickers in Kampala
Keeping your vinyl stickers looking fresh and vibrant is easy with the right care. In Kampala, we offer expert advice on maintaining and cleaning your vinyl stickers to ensure they last longer and stay bright. Thus, learn how to clean and protect your stickers from dirt, grime, and the elements with our simple tips and tricks. So, enjoy beautiful, long-lasting vinyl stickers that enhance your space.
How do I clean my vinyl stickers?
For example, cleaning your vinyl stickers is easy and quick. Then, start by gently wiping the surface with a damp cloth. Use warm water and mild soap if needed. Avoid harsh chemicals that could damage the sticker.
For tougher dirt or stains, use a soft brush. Gently scrub the affected area with soap and water. Rinse with a damp cloth and let it air dry. So, make sure to clean your stickers regularly to keep them looking new.
Therefore, keep your vinyl stickers in great condition by avoiding abrasive materials. Scrubbing too hard can scratch the surface. With proper care, your stickers will stay vibrant and last longer.
Are there special products for maintaining vinyl stickers?
Maintaining your vinyl stickers in top condition is easy with the right products. Specialized cleaning solutions help remove dirt and grime without damaging the stickers. In addition, these products keep your stickers looking fresh and vibrant for longer.
Use vinyl-specific cleaners for the best results. These cleaners protect the adhesive and prevent peeling. They also preserve the colors and designs, making your stickers stand out on any surface.
Another great product is a vinyl sticker protector. This spray forms a protective layer over the sticker, guarding it against UV rays, moisture, and scratches. Thus, with regular use, your vinyl stickers will maintain their original beauty and stickiness.
FAQ: Maintaining and Cleaning Vinyl Stickers in Kampala
How do I clean my vinyl stickers? Use a soft, damp cloth with mild soap to gently wipe the surface of the sticker. Avoid using harsh chemicals or abrasive materials.
Can I use water to clean my vinyl stickers? Yes, you can use water. Make sure the cloth is damp, not soaking wet, to prevent water from seeping under the sticker.
What should I avoid when cleaning vinyl stickers? Avoid using bleach, alcohol, or any harsh cleaning agents. Don't scrub the sticker with a rough sponge or brush.
How often should I clean my vinyl stickers? Clean your vinyl stickers as needed. If you notice dust or dirt buildup, it's time to wipe them down.
Can I use a pressure washer to clean large vinyl stickers outdoors? No, avoid using a pressure washer as it can damage the sticker. Stick to gentle hand cleaning.
How do I maintain the color and quality of my vinyl stickers? Keep your stickers away from direct sunlight for long periods to prevent fading. Clean them regularly to avoid dirt buildup.
In addition,
What should I do if my vinyl sticker starts to peel? Gently press the peeling area back down with a clean, dry cloth. If the peeling persists, you might need to replace the sticker.
Are there special products for maintaining vinyl stickers? You can use vinyl sticker cleaner sprays available in stores, but mild soap and water usually work just fine.
Can I apply a protective layer over my vinyl stickers? Yes, you can apply a clear, UV-protective laminate or spray to extend the life of your stickers, especially for outdoor use.
What do I do if my vinyl sticker gets stained? Gently clean the stained area with mild soap and water. If the stain persists, try using a vinyl cleaner, but test it on a small area first.
Keeping your vinyl stickers looking vibrant and long-lasting is key to enhancing their appeal and durability. By following these simple tips, you can ensure your stickers stay clean and well-maintained for years to come. Whether for personal use or business branding, proper care not only preserves their quality but also reflects positively on your attention to detail. Explore our range of vinyl stickers at Paulette Décor Arts and discover how easy it is to maintain their beauty in Kampala's diverse environments.
#metalartwork#vinylstickersdecalsmurals#woodartwork#2danimation#3dprinting#artisanskilling#learningentertainment#ugandanculturalcomicbooks
0 notes
Text
Holding it Together: Exploring Adhesives for Paper Crafts and Everyday Needs
Paper, a versatile and ubiquitous material, forms the foundation of countless projects, from everyday tasks to artistic endeavors. But what keeps those paper creations together? The answer lies in the world of adhesives – specialized solutions designed to bond paper securely and effectively. This article dives into the different types of paper adhesives, their characteristics, and applications, and helps you choose the right adhesive for your next project.
The Adhesive Arsenal: A Look at Common Paper Adhesives
The vast array of paper adhesives caters to various needs and project types. Here's a breakdown of some commonly used options:
Glue Sticks: A familiar choice for many, glue sticks offer a convenient and mess-free solution for basic paper adhesion. They are typically activated by heat from friction and work best for lightweight paper and temporary bonding.
Liquid White Glue (Polyvinyl Acetate - PVA): Also known as school glue, white glue is a water-based adhesive that dries clear. It provides a strong bond for a variety of paper types, making it suitable for everyday use, crafting projects, and adhering heavier paper items like cardstock.
Rubber Cement: A solvent-based adhesive, rubber cement offers a temporary but strong bond. It allows for repositioning before drying and is ideal for scrapbooking, photo mounting, and adhering delicate paper materials. However, due to its solvent content, ensure proper ventilation when using it.
Spray Adhesives: These offer a quick and even application for large paper surfaces. They are ideal for mounting photos, posters, or laminating documents. Remember, proper ventilation is crucial when using spray adhesives due to the presence of volatile organic compounds (VOCs).
Double-Sided Tape: This versatile option offers a clean and convenient solution for temporary or permanent bonding. It comes in various widths and strengths, making it suitable for attaching photos, lightweight objects to paper, or creating interactive elements in scrapbooks.
Specialty Adhesives for Specific Tasks:
Beyond these common choices, specialty paper adhesives cater to specific needs:
Archival Adhesives: These acid-free adhesives are formulated to prevent paper degradation over time. They are crucial for scrapbooking, photo mounting, and preserving valuable documents.
Decoupage Glue: Specially formulated for decoupage, this adhesive allows for adhering paper to various surfaces like wood, fabric, or canvas. It often dries with a glossy finish, adding a decorative touch to projects.
Hot Glue: While not strictly an adhesive for paper alone, hot glue can be used for adhering paper to different materials like wood, plastic, or foam. It offers a strong, fast-setting bond but requires a hot glue gun for application.
Choosing the Right Adhesive for Your Project:
Selecting the most suitable adhesive for your paper project depends on several factors:
Materials to be Bonded: Consider the type of paper you're using (lightweight, cardstock, etc.) and if you need to adhere it to other materials.
Bond Strength Requirement: Do you need a temporary or permanent bond? Stronger adhesives might be necessary for heavier paper or functional projects.
Drying Time: Quick-drying adhesives are ideal for some projects, while others might require a slower drying time for repositioning.
Application Method: Consider your comfort level and project scale. Glue sticks and double-sided tape offer mess-free application, while spray adhesives are quicker for large surfaces.
Acidity: For archival projects or preserving valuable papers, choose acid-free adhesives to prevent paper degradation over time.
Additional Tips for Working with Paper Adhesives:
Surface Preparation: Ensure the paper surfaces to be bonded are clean, dry, and free of dust or grease for optimal adhesion.
Read the Label: Always familiarize yourself with the instructions and safety precautions provided on the adhesive label.
Test on Scraps: Before applying adhesive to your final project, test it on a scrap piece of paper to ensure compatibility and desired bond strength.
Storage: Store leftover adhesive in a cool, dry place following the manufacturer's recommendations.
Conclusion:
Adhesives play a vital role in bringing paper projects to life. Understanding the different types of paper adhesives, their applications, and choosing the right one for your needs empowers you to create strong, lasting paper creations, whether it's a simple school project, a beautiful scrapbook layout, or a stunning piece of paper art. So, unleash your creativity, explore the world of paper adhesives, and start crafting!adhesive for paper
1 note
·
View note
Text
Thermal Spray Tape
Thermal spray masking tape is a Silicon rubber coated glass cloth tape, or a Aluminum foil-Glass cloth laminated adhesive tape. They are used for shielding protection of Sand blasting, Plasma spray coating, Gas fuelled HVOF, Flame spray, Vapor deposition.

0 notes
Text
How Many Coats of Polycrylic: Achieve Flawless Protection

Apply a minimum of two coats of Polycrylic for optimum results. Polycrylic is a popular protective finish used for various surfaces. It provides a clear and durable layer that enhances the appearance and longevity of wood, metal, and other materials. Applying two coats ensures a smooth and even finish that protects against moisture, UV rays, and wear-and-tear.
Choosing The Right Polycrylic Coats
When applying polycrylic, it’s important to consider the number of coats needed for proper coverage and protection. Generally, two to three coats of polycrylic are recommended to achieve a durable and long-lasting finish. Applying multiple thin coats, allowing proper drying time in between, ensures a smooth and even application. Factors To Consider Choosing the right number of coats of Polycrylic is crucial to achieve a flawless finish on your project. While applying more coats can provide added protection and durability, applying too many coats can result in an uneven or cloudy appearance. So, how do you determine the suitable quantity of Polycrylic coats for your project? Several factors come into play when making this decision. Suitable Quantity To determine the suitable quantity of Polycrylic coats for your project, consider the following factors: - The type of surface: Porous surfaces such as bare wood may require more coats compared to non-porous surfaces like laminate or metal. - The desired level of protection: If you anticipate the surface will be subject to heavy use, additional coats can provide enhanced durability. - The application method: Spraying Polycrylic generally requires fewer coats compared to brushing or rolling. - The environmental conditions: If you are working in a high-humidity or low-temperature environment, additional coats may be necessary for optimal results. - The level of sheen desired: Different sheen levels, such as matte, satin, or gloss, may require varying numbers of coats to achieve the desired finish. It is important to note that the manufacturer's guidelines should always be followed when determining the suitable quantity of coats. These guidelines can provide specific information about drying times and recoating intervals, ensuring you achieve the best possible outcome for your project. Conclusion Choosing the right number of coats of Polycrylic involves considering factors like the type of surface, desired protection level, application method, environmental conditions, and desired sheen. By following the manufacturer's guidelines and carefully assessing these factors, you can achieve a flawless finish that not only protects your project but also enhances its overall appearance.

Credit: www.powertownsend.com
Preparation For Application
Polycrylic application requires multiple coats for a smoother and more durable finish. Apply two to three coats, allowing each coat to dry thoroughly before applying the next for best results. Before applying polycrylic, proper preparation is essential to ensure a smooth and flawless finish. This will not only enhance the appearance of your project but also improve the durability of the coating. Follow these guidelines for a successful application:Surface ReadinessPrior to applying polycrylic, it is crucial to prepare the surface adequately. The following steps will help you achieve the best results: - Clean the surface: Remove any dirt, dust, or grease from the surface using a mild detergent and water solution. This will promote better adhesion of the polycrylic. - Smooth any imperfections: Sand the surface gently with fine-grit sandpaper to eliminate any rough spots or imperfections. This step ensures an even application and a flawless finish. - Eliminate existing finishes: If there are previous coatings or finishes on the surface, such as paint or varnish, they must be completely removed. Use a suitable stripping agent or sander for this purpose. - Remove sanding dust: After sanding, clean the surface thoroughly to remove any residual sanding dust. Use a tack cloth or a damp cloth to wipe away the dust completely. This is vital to achieve a smooth final result. - Proper ventilation: Make sure you are working in a well-ventilated area to allow the polycrylic to dry properly without any hindrance. Good airflow will also prevent dust particles from settling on the wet finish. Application ToolsUsing the right tools for the application of polycrylic is essential to obtain an even and professional finish. Consider the following: - High-quality brush: A synthetic bristle brush or foam brush is recommended for applying polycrylic. These brushes are known for their smooth application and minimal brushstrokes. - Lint-free cloth: In addition to a brush, a lint-free cloth comes in handy for wiping away excess polycrylic during application. This ensures an even and streak-free finish. - Paint tray or container: Pouring the required amount of polycrylic into a paint tray or container makes it easier to dip the brush and control the amount of product applied. - Gloves and protective gear: To protect your hands from the chemicals in the polycrylic, wear disposable gloves. Additionally, consider using eye protection and a respiratory mask for your personal safety. - Stir stick: Before application, stir the polycrylic gently with a stir stick to ensure the product is well-mixed. This will prevent any inconsistencies in the finish.
Applying The Coats
When applying polycrylic, it is recommended to use multiple coats for optimal results. By applying multiple coats, you can achieve a smooth and durable finish on your desired surface. When it comes to applying polycrylic coats, the process is crucial in achieving a flawless finish. The number of coats and the application method can greatly affect the final result. Let's dive into the details of applying the coats to achieve the best outcome. First Coat The first coat of polycrylic serves as the foundation for the subsequent layers. Before applying the first coat, ensure that the surface is clean and smooth. Use a high-quality brush to apply a thin and even layer. Work in the direction of the wood grain to minimize brush strokes. Subsequent Coats After the first coat has dried as per the manufacturer's instructions, subsequent coats can be applied. Lightly sand the surface with fine-grit sandpaper between coats to ensure adhesion and a smooth finish. Apply each coat thinly and evenly, avoiding over-brushing to prevent streaks or bubbles. Remember that proper drying time between coats is crucial for optimal results. Following these steps will result in a durable and professional-looking finish that enhances the beauty of the wood surface. By following these guidelines, you can attain a professional-quality finish for your project, ensuring the longevity and aesthetic appeal of the coated surface.

Credit: gillmanhomecenter.com
Troubleshooting Common Issues
Troubleshooting Common Issues with Polycrylic - How Many Coats of Polycrylic Polycrylic is a versatile and popular choice for protecting wood surfaces. However, like any coating, it can sometimes present its own set of challenges. Understanding and addressing these common issues will help ensure a successful and smooth finish. Bubbles And Brush Marks One of the frustrating issues that can occur when applying polycrylic is the presence of bubbles and brush marks on the surface. These imperfections can mar the overall appearance of the finish and detract from the smooth and professional result you desire. - Ensure that you are using a high-quality brush with fine bristles for a smooth application. - Don't overload the brush with polycrylic, as this can lead to excessive brush marks. - Apply thin coats, using smooth and even strokes in one direction to avoid brush marks. - Check for air bubbles by gently tipping the surface to catch any trapped air and release it. - If bubbles or brush marks appear, let the coat dry completely and then sand the surface lightly with fine-grit sandpaper before applying the next coat. Yellowing Another common issue with polycrylic is the potential for yellowing over time. This yellowing can alter the color of the finish and impact the overall aesthetic appeal. However, there are steps you can take to prevent or minimize yellowing: - Choose a water-based polycrylic formulation, as these tend to yellow less than oil-based products. - Avoid exposing the finished surface to direct sunlight, as UV rays can accelerate yellowing. - Consider using a polyurethane topcoat specifically designed to resist yellowing, if you want a more durable alternative. By following these tips, you can troubleshoot and overcome common issues that may arise when working with polycrylic. Whether you're dealing with bubbles and brush marks or concerns about yellowing, understanding how to address these challenges will help you achieve the best possible results for your project.
Final Tips For Flawless Protection
When it comes to protecting your furniture or wood projects, applying the right number of coats of polycrylic is crucial. Not enough coats may leave your surfaces vulnerable to damage, while too many coats can result in an uneven, clumpy finish. So, how many coats of polycrylic should you apply? Let's find out.Drying And Curing TimeBefore applying additional coats of polycrylic, it's important to allow sufficient drying and curing time for each coat. Polycrylic typically dries within 2 hours, but it can take up to 24 hours for it to fully cure. To ensure flawless protection, it's recommended to wait for at least 24 hours before applying another coat.MaintenanceOnce you've achieved the desired number of coats, proper maintenance is key to keeping your surfaces protected and looking their best. Here are some maintenance tips to ensure long-lasting results: - Use coasters or placemats: Avoid placing hot or wet objects directly on polycrylic-coated surfaces to prevent heat or moisture damage. - Regular dusting: Dust your furniture or wood projects regularly using a soft cloth or feather duster to prevent dirt and debris from scratching the protective coating. - Gentle cleaning: When cleaning polycrylic-coated surfaces, use mild, non-abrasive cleaners and avoid harsh chemicals that can strip away the protective layer. - Reapply as needed: Over time, the protective layer of polycrylic may wear off or become damaged. If you notice signs of wear or surface damage, consider reapplying a fresh coat of polycrylic to maintain optimal protection. By following these maintenance tips, you can extend the lifespan of your polycrylic-coated surfaces and keep them looking flawless for years to come.

Credit: www.powertownsend.com
Frequently Asked Questions Of How Many Coats Of Polycrylic
Can You Apply Too Many Coats Of Polycrylic? Applying too many coats of Polycrylic can result in a cloudy or milky appearance on the surface. It's essential to follow the manufacturer's instructions to avoid this issue. Sanding between coats can also help achieve a smooth finish. Is It Necessary To Sand Between Coats Of Polycrylic? Yes, it is necessary to sand between coats of Polycrylic. Sanding helps create a smooth surface for the next coat to adhere to, ensuring a professional finish. How Long Does Polycrylic Take To Fully Cure? Polycrylic typically takes about 24 hours to fully cure. How Many Coats Of Polycrylic Over Chalk Paint? Apply 2 to 3 coats of Polycrylic over chalk paint for durable protection and a smooth finish. It is essential to let each coat dry thoroughly before applying the next. This enhances the durability and longevity of your painted surface.
Conclusion
To wrap up, the number of coats of polycrylic you should apply depends on the level of protection and durability needed for your project. Whether you're working on furniture, floors, or other wooden surfaces, understanding the best practices for applying polycrylic can result in a finished product that is protected and long-lasting. Read the full article
0 notes
Text
How to choose the right types of masking tape?
Masking tape is an easily removed adhesive tape used temporarily covered or fixed. Masking tapes temporarily protect areas from painting, soldering, blasting, spraying, coating, plating, and polishing while these procedures are administered to nearby surfaces. The different types of masking tape use for different application.
Types of Masking Tape’s Carrier
A single-sided tape that it’s backing is self-wound around, without release paper liner. At present, there are mainly 6 different types of carrier on the market: Crepe paper masking tape, Washi paper masking tape, PE cloth masking tape, Cloth masking tape, PVC masking tape, PET masking tape.
Crepe paper or Washi paper is extra thin backing carrier.
It’s conformable ability to create crisp paint line and without paint bleeding past the edge. This type of masking tape is usually used as Painter’s Tape. It contains light and soft carrier and water based Acrylic adhesive. So painter’s tape mainly use to masking painting walls, automotive body.
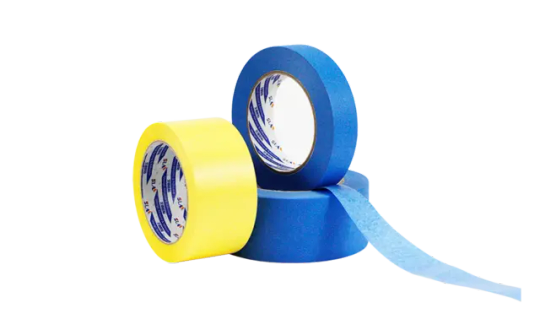
PE cloth is PE laminated flat yarns weaved cloth carrier.
It is light and soft carrier but more stretch-resistant. The flat yarns cloth easy tear by hand with linear fracture. PE cloth masking tape coating water based Acrylic adhesive. It is fairly Anti-solvent and Anti-UV, waterproof. Most of applications are masking building steel structure, bridge steel structure, granite exterior wall, ceramic tile, concrete.
Cloth mean spun rayon cloth that similar to duct tape’s carrier.
It is thick cloth backing with heavy duty Rubber adhesive. So most of Cloth masking tape similar to duct tape but adhesive free-residue. It is good tack for irregular surface such as granite exterior wall, ceramic tile, concrete.
Sandblast tape also is a heavy duty Cloth masking tape with a tough resistant cloth backing and a strong adhesive.
This abrasive blasting tapes mask components during sandblasting, shotpeening, or other coarse-media finishing process. The thick rubber adhesive and backing provides wear resistance to covered areas.

PVC film is a vinyl carrier, the backing has good conformable ability, as well as more flexible workability.
PVC masking tape is also relatively cheap. Most of PVC masking tape use to masking the metal panels, Aluminum alloy door and window frames, glass.

PET film is a Polyester carrier have high resistance temperature and clarity characteristics.
PET masking tape usually used for holding tape. It is designed for the purpose of temporary fixation. So holding tape is often used to temporarily fix certain parts of electrical appliances or office equipment during transportation. Its ease of use and non-residue characteristic makes it an excellent functional tape.
Types of Masking Tape’s Adhesive
Since masking tape’s intent is temporary, the removal needs to be residue-free. This limits the adhesive options for different types of masking tape. Most types of Masking tape for painting applications use water based Acrylic adhesive. Such as Painter’s tape and PE cloth tape, their adhesive layer is very thin and transparent. Acrylic-based adhesives create the good conformable and no bleed performance of Masking tape. It can reach their maximum adhesion almost immediately upon application, have adequate resistance, require no preparation, and have good sheer and peel strength Natural rubber adhesive mainly use to irregular surface masking. It’s thick adhesive layer have good tack. Such as cloth masking tape and Sandblast tape. Silicone adhesive have a high degree of flexibility and very high temperature resistance (600°F). It available as a heat masking application, or low temperature resistant, the masking tape will be wide application.
0 notes
Text
Revolutionizing Interior Door Manufacturing: Advanced Door Machines
Interior doors are not just functional elements within a building; they serve as integral design features, enhancing aesthetics and functionality. Behind the scenes of every meticulously crafted interior door lies a world of precision machinery designed to streamline production and elevate quality. Let's explore the cutting-edge interior door machines that are transforming the manufacturing process.
CNC Router Machines
CNC (Computer Numerical Control) router machines have revolutionized interior door manufacturing. These automated systems use precise computer-controlled movements to cut, shape, and carve door components with unparalleled accuracy. From routing intricate designs on door panels to creating precise joinery, CNC routers ensure consistency and precision in every detail.
Door Assembly Machines
Door assembly machines play a crucial role in efficiently joining door components together. These machines streamline the assembly process, ensuring that each door is put together with precision and speed. They handle tasks such as inserting hinges, locks, and handles, while also aligning and securing door frames and panels.
Edge Banding Machines
Edge banding machines apply decorative and protective edging to door edges, enhancing their durability and aesthetics. These machines efficiently apply veneers, PVC, or ABS edging to cover raw edges, providing a clean and polished finish to the door.
Door Sanding Machines
Sanding is a critical step in achieving a smooth and uniform surface for interior doors. Door sanding machines use abrasive belts or pads to precisely sand door surfaces, ensuring a consistent finish. These machines remove imperfections, smooth out surfaces, and prepare doors for finishing touches like staining or painting.
Door Laminating Presses
Laminating presses are utilized in the production of laminated doors, applying pressure and heat to bond layers of materials together. These machines ensure strong adhesion between various door components, such as veneers, cores, and decorative overlays, creating durable and visually appealing doors.
Door Stile and Rail Shaping Machines
Stile and rail shaping machines specialize in crafting the intricate profiles seen on door stiles and rails. These machines use precision-cutting tools to shape and contour wood, creating decorative edges, profiles, and designs that define the aesthetic appeal of interior doors.
Door Embossing and Engraving Machines
For doors requiring custom designs or patterns, embossing and engraving machines come into play. These machines use precision techniques to imprint or engrave intricate designs onto door surfaces, allowing for personalized and unique door finishes.
Automated Finishing Systems
Automated finishing systems ensure that doors receive a consistent and high-quality finish. These systems include spray booths and robots that apply stains, paints, varnishes, or coatings to doors, ensuring a flawless and uniform finish across all surfaces.
Benefits of Advanced Door Machinery
The integration of advanced machinery in interior door manufacturing offers numerous benefits:
Precision and Consistency: Machinery ensures uniformity and accuracy in door production, reducing errors and enhancing quality.
Efficiency and Speed: Automated systems streamline processes, reducing production times and increasing output.
Customization and Versatility: Machines allow for intricate designs and customizable options, catering to diverse customer preferences.
Quality Assurance: Advanced machinery ensures that each door meets stringent quality standards, enhancing reliability and durability.
For More Info:-
Door Lite Disposal
Interior Door Machines
Exterior door production
Automated door production
0 notes
Text
Unlocking the Power of Bonding with 3M Super 77 Spray Adhesive
When it comes to bringing together materials with precision and ease, adhesive solutions have become the go-to choice in various industries. Whether you're a DIY enthusiast or a professional in the field of crafts, woodworking, or construction, having the right adhesive at your disposal can make all the difference. In this blog, we'll explore the remarkable properties and applications of 3M Super 77 Spray Adhesive, a versatile and dependable choice for bonding various materials.
What is 3M Super 77 Spray Adhesive? 3M Super 77 Spray Adhesive is a high-quality, multi-purpose adhesive produced by the renowned American company 3M. It's designed to offer a strong and reliable bond between a wide range of materials, making it a popular choice in many industries. This adhesive is part of 3M's extensive line of products that cater to various bonding and adhesive needs.
The Versatility of 3M Super 77 One of the standout features of 3M Super 77 Spray Adhesive is its versatility. It's suitable for bonding a wide range of materials, including but not limited to:
Paper and Cardboard: If you're a crafter, artist, or packaging specialist, 3M Super 77 can securely bond paper and cardboard, ensuring your creations stay together.
Fabric: For fashion designers and upholsterers, this adhesive helps in securing fabric to various surfaces, allowing for clean and professional-looking finishes.
Foam: Whether you're working on furniture upholstery or DIY projects, 3M Super 77 effectively bonds foam materials, ensuring a lasting connection.
Plastic: In the automotive and construction industries, plastic bonding is crucial. 3M Super 77 handles this task with ease, providing a reliable and strong bond.
Metal: Even in industrial settings, this adhesive proves its worth by bonding different types of metal with precision.
Wood: Woodworkers and carpenters appreciate the reliability of 3M Super 77 for various woodworking projects.
Glass: While not suitable for load-bearing applications, it can bond glass to certain surfaces temporarily, often used in arts and crafts.
This adhesive's adaptability across such a broad spectrum of materials makes it an essential tool in many professionals' and DIY enthusiasts' arsenals.
The Benefits of Using 3M Super 77 Spray Adhesive Strong and Durable Bond: The primary reason for using any adhesive is to create a lasting bond, and 3M Super 77 doesn't disappoint. It offers a strong and durable connection that can withstand the test of time.
Quick Application: The convenience of a spray adhesive cannot be overstated. With 3M Super 77, you can evenly coat surfaces quickly and effortlessly, saving you time and effort.
Non-Wrinkling: This adhesive is designed to prevent wrinkling or bubbling of materials when bonded. This feature is especially crucial when working with delicate materials like fabric or paper.
Low Soak-In: 3M Super 77 exhibits low soak-in properties, which means it won't saturate the material, keeping it in the desired condition and not affecting its texture or appearance.
Temporary or Permanent Bonding: Depending on your specific needs, you can use this adhesive for both temporary and permanent bonding. This flexibility is a significant advantage for various projects.
Clear and Transparent Bond Line: For projects where aesthetics matter, 3M Super 77 dries clear, leaving no visible residue or marks on the bonded materials.
Applications of 3M Super 77 Spray Adhesive DIY Projects: Whether you're making a homemade costume, crafting a scrapbook, or creating custom home decor, 3M Super 77 can help you securely bond materials like fabric, paper, and foam.
Woodworking: Woodworkers can use this adhesive to bond veneers, laminates, and even temporary fixtures, enhancing the overall quality and durability of their creations.
Automotive: In the automotive industry, 3M Super 77 can be used for headliner and upholstery repair, ensuring that all components stay in place.
Construction: In construction, it's often used for adhering insulation materials and fabrics, providing both strength and thermal properties to buildings.
Packaging: Manufacturers and packaging specialists often use this adhesive for securely attaching labels, foils, and other packaging materials.
Textile Industry: Fashion designers and upholsterers rely on 3M Super 77 for attaching fabric to various surfaces, from furniture to car interiors.
Tips for Using 3M Super 77 Spray Adhesive Surface Preparation: Ensure that the surfaces to be bonded are clean, dry, and free from any dust, dirt, or contaminants. This will help create a stronger and more durable bond.
Proper Ventilation: When working with spray adhesives, it's essential to use them in a well-ventilated area to avoid inhaling fumes and to allow for proper drying.
Uniform Application: Apply the adhesive evenly to both surfaces to be bonded. Uneven application can result in weak spots in the bond.
Time and Pressure: After applying the adhesive, allow it to become tacky before joining the surfaces. Applying some pressure during bonding helps ensure a strong connection.
Temporary Bonding: If you're using 3M Super 77 for temporary bonding, you can simply peel or separate the materials when you're done with them.
In conclusion, 3M Super 77 Spray Adhesive is a versatile, reliable, and convenient solution for bonding a wide range of materials. Whether you're working on a DIY project or tackling a professional job, the strength and durability it offers make it an adhesive that stands out in the market. Its ability to bond various materials, low soak-in properties, and clear bond line add to its appeal. So, the next time you embark on a project that requires a strong and lasting bond, consider reaching for 3M Super 77 Spray Adhesive – your trusted companion in adhesive solutions.
0 notes
Text
DIY Magnetic Chalkboard Mirror

Project by Christina:
christina found this gorgeous (and cheap!) mirror on craigslist and decided to use it to make something custom for a huge empty wall in her kitchen. she wanted it to be something sentimental so she decided on a magnetic chalkboard so she could use it for family photos and words. rather than use magnetic chalkboard paint (which can admittedly sometimes not be strong enough for heavy objects), christina and her dad decided to use the frame as a template and cut a thin piece of steel (which is magnetic) to fit the frame. then they painted the metal piece with chalkboard paint and updated the frame with some glossy dove white spray paint. once it was reassembled it was ready to hold court in the kitchen and keep cherished family pictures and words together.

Materials:
-Vintage (or new, depending on your desire) frame or mirror -Thin piece of steel -Primer -Chalkboard Paint -Spray adhesive -Spray or regular paint for the frame

1. The mirror was disassembled and the mirror and backing board were saved
2. The mirror that was in the original frame was used as a template in order to draw the shape needed for the sheet metal, Easyboard, and spacing/backing cardboard. All items were cut out of the original stock. The sheet metal was cut with aviation snips, the Eashboard and cardboard were cut out with a carpet knife.
**if you’re not experienced or uncomfortable with cutting metal, please pick up a sheet of metal and have it cut to size at your local hardware store, or hire an affordable handyman on craigslist to do the cutting for you**
**alternatively: if you’d rather not deal with metal and don’t plan on hanging heavy items on the board, you can simply paint or spray the original frame/mirror with chalkboard paint and skip this step.**
3. The sheet metal was adhered to the Easyboard using the spray adhesive. A coating was applied to both surfaces in order to get a good lamination and then a large piece of plywood with cinderblocks were put on it in order to press them together for several hours.
4. The sheet metal surface was re-cleaned and then sprayed with a couple of coats of primer.
5. The sheet metal was then sprayed with the chalkboard paint.
6. The frame was cleaned and sprayed with the spray paint using numerous coats in order to get a complete coverage.
7. After the paint was dried, the frame was sprayed with clear coat in order to obtain a shiny, clean, hard surface for the frame.
8. After the frame dried completely the assembly took place first installing the metallic laminated chalkboard, then a cardboard spacer, and then the original backing was re-installed using the original screws and staples.
0 notes