#itemcard
Explore tagged Tumblr posts
Visit Tumblr Blog
Explore Tumblr blogs with no restrictions, modern design and the best experience.
Last Seen Tumblr Blogs


Fun Fact
Tumblr posted its first advertisements in May 2012 and subsequently earned $13M in revenue.
Text


A sword for a six-fingered man. #swordtember #swordtember2023 #drawingchallenge #princessbride #itemcards
8 notes
·
View notes
Text
Jest/Enzyme ShallowWrapper is empty when creating Snapshot
So I'm writing a test for my Item component and I tried to render the ItemCard component and then use that wrapper to create a snapshot but it returns an empty ShallowWrapper {}
Please see the code for more info:
Item.test.js
import { shallow } from 'enzyme';import { ItemCard } from '../Item';const fakeItem = { id: 'aksnfj23', title: 'Fake Coat', price: '40000', description: 'This is suuuper fake...', image: 'fakecoat.jpg', largeImage: 'largefakecoat.jpg',};describe('<ItemCard/>', () => { it('renders and matches the snapshot', () => { const wrapper = shallow(<ItemCard me item={fakeItem} showButtons />); // console.log(wrapper.debug()); expect(wrapper).toMatchSnapshot(); });});
The snap it creates:
// Jest Snapshot v1exports[`<ItemCard/> renders and matches the snapshot 1`] = `ShallowWrapper {}`;
As far as I know the ShallowWrapper should have some content in it instead of being empty...
https://codehunter.cc/a/reactjs/jest-enzyme-shallowwrapper-is-empty-when-creating-snapshot
0 notes
Photo

Final Fantasy Unlimited TCG Holo 3 types 🛒 https://www.aaa-japan-store.com/products/final-fantasy-unlimited-tcg-holo-3-types #finalfantasy #finalfantasyunlimited #unlimited #tcg #cardgame #tradingcard #holo #rarecard #clear #soil #ultimatehammer #itemcard #square #japangames #japananime #tetsuyanomura #illustrator #yoshitakaamano #ff #ffu #mediamix #lisa #fabula #kaze #omega #cardcollector #magan #gonzo https://www.instagram.com/p/CdCkaCwvgGE/?igshid=NGJjMDIxMWI=
#finalfantasy#finalfantasyunlimited#unlimited#tcg#cardgame#tradingcard#holo#rarecard#clear#soil#ultimatehammer#itemcard#square#japangames#japananime#tetsuyanomura#illustrator#yoshitakaamano#ff#ffu#mediamix#lisa#fabula#kaze#omega#cardcollector#magan#gonzo
0 notes
Photo

Here is my inktober drawing for day 9, which is skeleton themed. This item is the "Orb of skeletal reconstruction" which can be used to absorb all skeletal creatures within a 30ft sphere and re-assemble them into a new form. The form is determined by rolling a d10, which is the new number of skeletons, the power of the skeletons is the total challenge rating of the original skeletons divided evenly amongst the new ones. The aggression of the creatures is unaltered by the orb. #art #drawing #blackandwhite #penandink #traditionalart #drawings #ink #inktober2018 #dungeonsanddragons #item #itemcard #inktober #card #cardgame #cards #skeleton #bones #rpg #game #fun https://www.instagram.com/p/BpCz915gZYv/?utm_source=ig_tumblr_share&igshid=a8gopluumufk
#art#drawing#blackandwhite#penandink#traditionalart#drawings#ink#inktober2018#dungeonsanddragons#item#itemcard#inktober#card#cardgame#cards#skeleton#bones#rpg#game#fun
2 notes
·
View notes
Photo

Mariner's Armor #DungeonsAndDragons #dnd5e #magicitem . . . . #magicarmor #fantasyart #drawing #magic #dnd #ttrpg #micron #itemcard #Saltmarsh #LightsBelowSaltmarsh #homebrew https://www.instagram.com/p/B58kgySg-DL/?igshid=1dgg1e0inj8h5
#dungeonsanddragons#dnd5e#magicitem#magicarmor#fantasyart#drawing#magic#dnd#ttrpg#micron#itemcard#saltmarsh#lightsbelowsaltmarsh#homebrew
0 notes
Photo
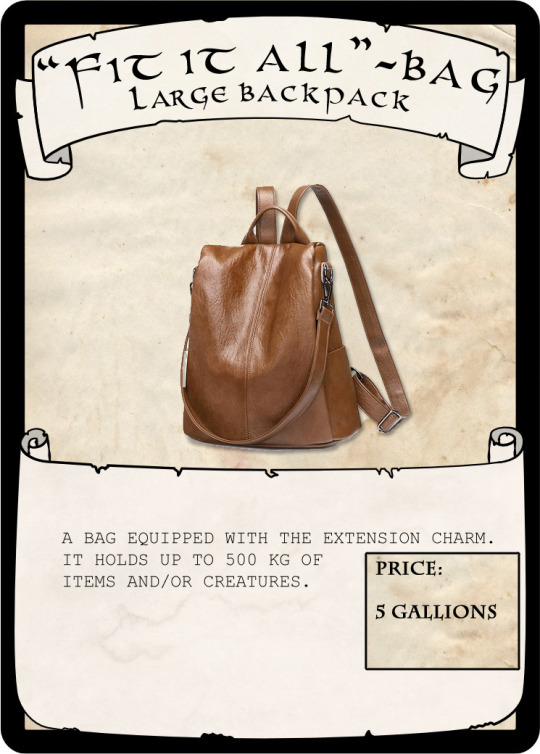
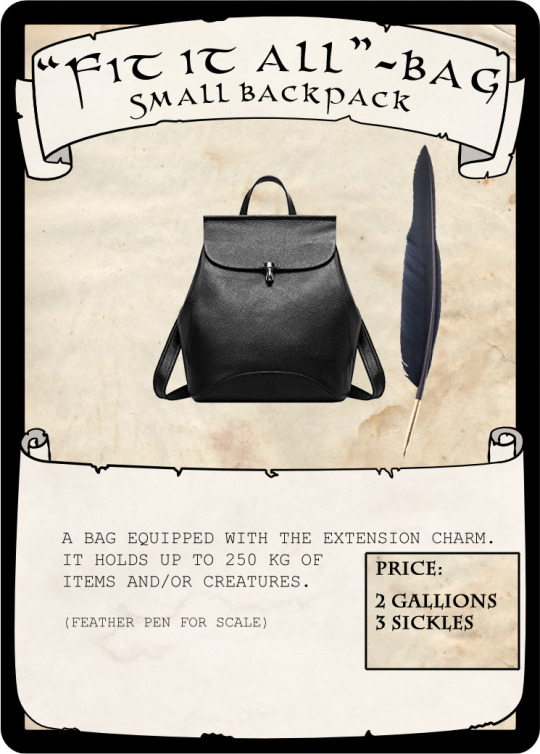
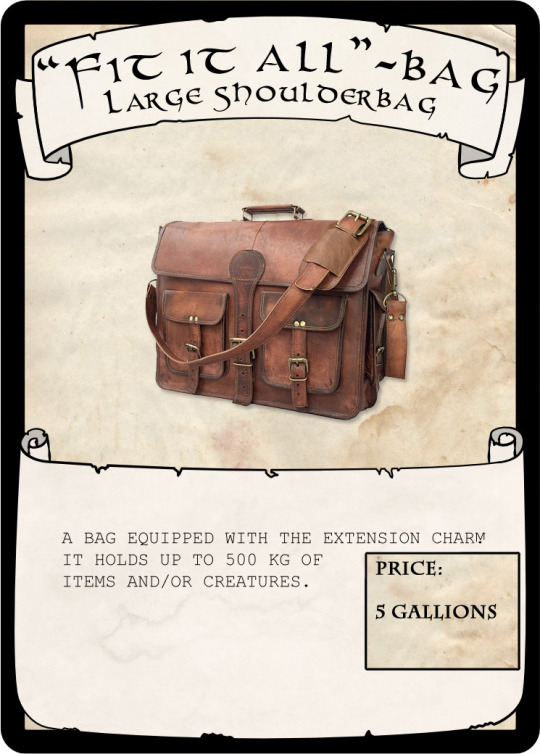
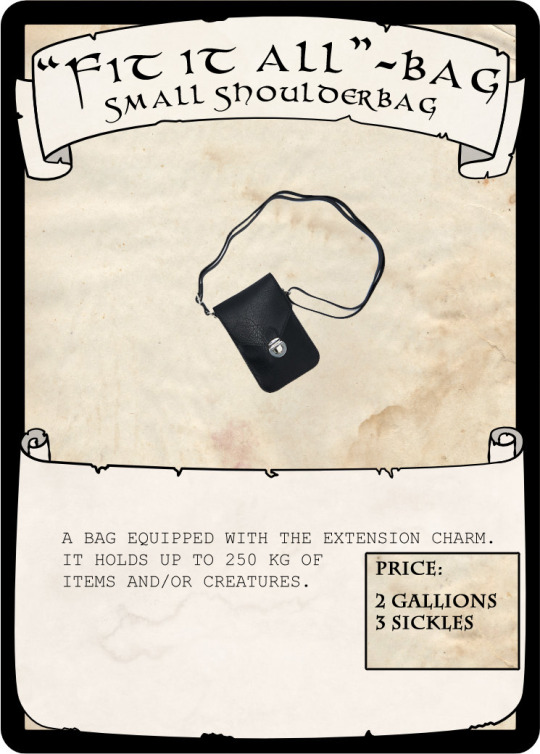
Every roleplaying game needs bags to hold stuff, right? Pack everything you own and never feel unequipped again!
Find new magical items [HERE] that are released during 2020.
#new items#harry potter roleplay#harry potter rpg#Harry Potter Adventure#Harry Potter#item cards#magical itemcards#Tabletop RPG#tabletop roleplay#harry potter tabletop
40 notes
·
View notes
Photo

...that would be my luck tho... 😤😩#digitalneverphysical #pokemontcgo #pokemontcg #pokemon #secretrare #secretrareweaknesspolicy #weaknesspolicy #trainercard #itemcard #rarepokemoncard #pokemoncard #rare #primalclash
#trainercard#secretrareweaknesspolicy#secretrare#pokemontcg#rarepokemoncard#primalclash#rare#itemcard#pokemoncard#digitalneverphysical#pokemontcgo#pokemon#weaknesspolicy
0 notes
Photo

A banshee was banished at #betrayalatbaldursgate tonight and boy was it satisfying to survive a betrayal when I was fighting as a bard! Tak igen @emilsaaby for hosting! . . . #bardclass #bardicinspiration #gamenight #boardgame #itemcards #miskasilversong #igdaily #instadaily #notsponsored #supportclass #playresearch https://www.instagram.com/p/ByGj51QhqQp/?igshid=pn1x2qxq5ej0
#betrayalatbaldursgate#bardclass#bardicinspiration#gamenight#boardgame#itemcards#miskasilversong#igdaily#instadaily#notsponsored#supportclass#playresearch
0 notes
Photo

Anyone going to Kamijyo’s event in Japan in July? I have this card, but I won’t be there to redeem it... I’m willing to ship it to someone who’ll get use out of it. #kamijyo #itemcard #emigre #sangitemcard
0 notes
Photo

86, Healing Kit. Bandages, poultices, stitches oh my! #ItemCards #DungeonsAndDragons #Pathfinder #FantasyRPG ---------------------------------------------- You can buy my stuff on DrivethruRPG Roll20 RedBubble I'm also available for commissions.
#Fitzhywel's Fantastical Paraphernalia#Michael Fitzhywel#Item cards#dungeons and drag#pathfinder#Fantasy RPG agnostic#Indie Artist
49 notes
·
View notes
Text
Consumir un API Rest en Flutter con Dart
Consumir un API Rest en Flutter con Dart aparece primero en nuestro https://jonathanmelgoza.com/blog/consumir-un-api-rest-en-flutter-con-dart/
Mucho del trabajo de un programador es crear y consumir servicios, en este caso tenemos que consumir un API Rest en Flutter con Dart para obtener una lista de productos a mostrar en nuestra app store, veamos cómo podemos hacerlo.
Tanto en desarrollo de software, web y móvil una tarea cotidiana es consumir apis.
Es muy común tener servicios web que conectan con base de datos y conectar a ellos para obtener la información.
En el caso de desarrollo de apps es muy común consumir servicios web para obtener o modificar información.
En mi caso estamos creando una app con Dart en Flutter, esta app es una tienda de productos y para lo que nos conectaremos a una api rest es para obtenerlos en tiempo real.
Tomando en cuenta que tenemos un servicio web que nos regresa un json con información de productos como este:
Vamos a proceder a ver cómo consumir un api rest en Flutter con Dart.
Lo primero es crear una clase con la estructura de la información que vamos a consumir:
class Product final String image, title, description; final int price, size, id; final Color color; Product( this.id, this.image, this.title, this.price, this.description, this.size, this.color, ); factory Product.fromJson(Map<String, dynamic> json) return Product( id: json['idproduct'], title: json['title'], description: json['description'], price: json['price'], image: json['image'], size: int.parse(json['size']), color: Color(int.parse(json['color'])));
Ahora necesitamos crear una lista de productos.
List<Product> products = [];
Te puede interesar, Hola mundo con Flutter y VSCode.
Para despues hacer lo más importante de este articulo, consumir el api rest mediante la siguiente funcion asincrona:
Future<List<Product>> getProducts() async var url = Uri.parse('..../get_products.php'); var response = await http.post(url).timeout(Duration(seconds: 10)); var data = jsonDecode(response.body); var records = List<Product>(); for (data in data) records.add(Product.fromJson(data)); return records;
Asegurate de incluir los import necesarios:
import 'dart:convert'; import 'package:http/http.dart' as http;
Por último ahora en nuestro StatefulWidget en el estado de nuestro componente vamos a indicar que hacer al finalizar:
void initState() super.initState(); getProducts().then((value) setState(() products = value; ); );
Igualamos una variable de products al valor resultante de la funcion getProducts.
En mi caso genero un GridView con la información de estos productos:
Expanded( child: Padding( padding: const EdgeInsets.symmetric(horizontal: kDefaultPadding), child: GridView.builder( itemCount: products.length, gridDelegate: SliverGridDelegateWithFixedCrossAxisCount( crossAxisCount: 2, mainAxisSpacing: kDefaultPadding, crossAxisSpacing: kDefaultPadding, childAspectRatio: 0.75), itemBuilder: (context, index) => ItemCard( product: products[index], press: () => Navigator.push( context, MaterialPageRoute( builder: (context) => DetailsScreen(product: products[index]))))), )
Sino sabes cómo funciona aquí puedes ver más sobre un GridView Builder.
Ahora nos toca agregar un indicador de carga para mostrar al usuario en lo que se recibe respuesta, ¿Se te ocurre cómo hacerlo? Cuentanoslo en los comentarios.
Si esta información sobre cómo consumir un API Rest en Flutter con Dart te ha sido de utilidad no olvides compartirla en tus redes sociales favoritas y dejarnos un comentario en la sección de abajo si tienes cualquier duda con respecto a este tema, será un placer ayudarte.
¡Hasta luego!
0 notes
Photo

Started prototyping a new solo project for D&D! Item cards and associated starter backpacks, for all those who can never remember all the cool stuff they have in there. . . . #illustration #art #design #drawing #dailysketch #sketch #sketchbook #ink #pen #fountainpen #dnd #dungeonsanddragons #papercraft #diy #itemcards #backpack
#backpack#art#ink#dungeonsanddragons#drawing#fountainpen#papercraft#sketchbook#illustration#pen#diy#dnd#design#itemcards#dailysketch#sketch
0 notes
Photo

This is my drawing for day 8 of inktober, themed off the minotaur. The "Mazemaster's Doll" which can, once per day be turned into a minotaur and lead a party through any maze or labyrinth they are stuck in. However the minotaur will have no interest in turning back into a doll, so if you want the item back you must defeat it in combat. #art #drawing #blackandwhite #penandink #traditionalart #drawings #ink #inktober2018 #dungeonsanddragons #item #itemcard #inktober #card #cardgame #cards #minotaur #monster #creature #magic #maze #fun #rpg https://www.instagram.com/p/BpAAI1GANy4/?utm_source=ig_tumblr_share&igshid=cv813wfmlqnh
#art#drawing#blackandwhite#penandink#traditionalart#drawings#ink#inktober2018#dungeonsanddragons#item#itemcard#inktober#card#cardgame#cards#minotaur#monster#creature#magic#maze#fun#rpg
1 note
·
View note
Photo

My favourite fruits for the summer. I have a weakness for citric/acid fruits, and bananas have the awesomest packaging nature could afford ever
#itemcard#stickers#food#fresh#color#estudio#dibujo#fruta#frutillas#sketch#summer#fruits#colorful#illustration#study#colour#cartoon#kiwi#strawberry#bananas
1 note
·
View note
Photo
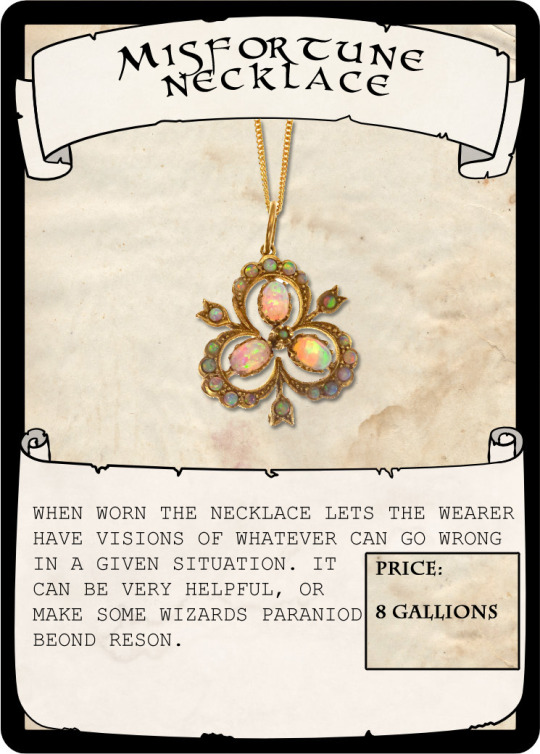
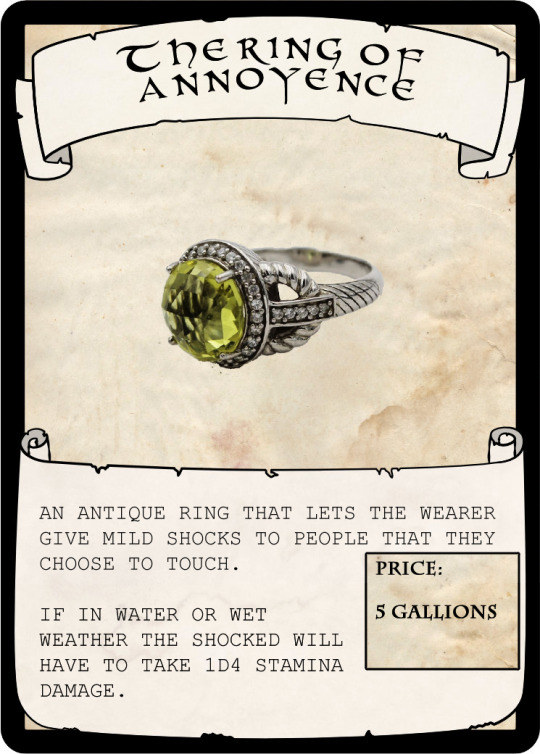
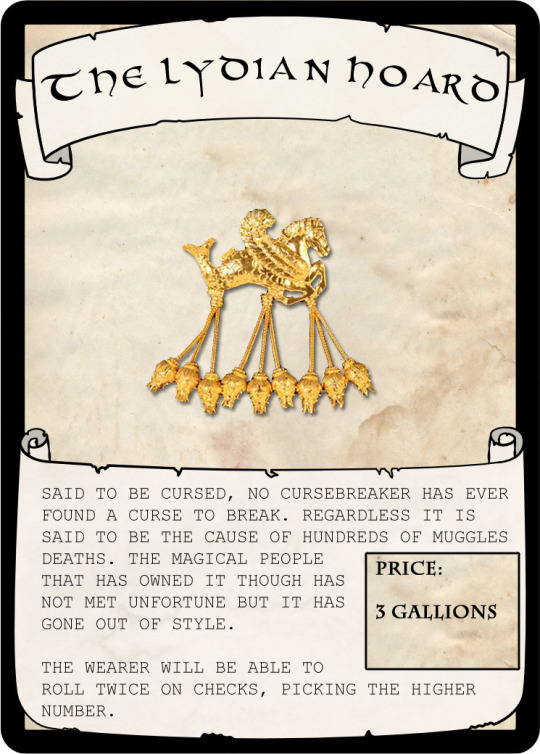
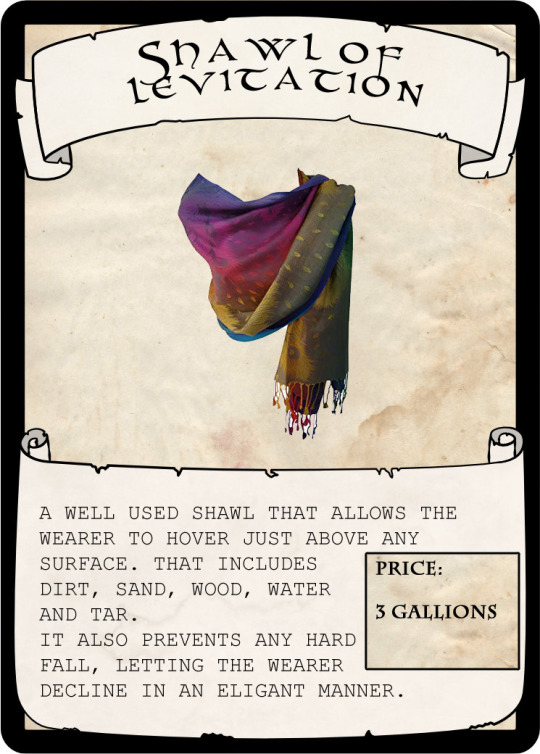
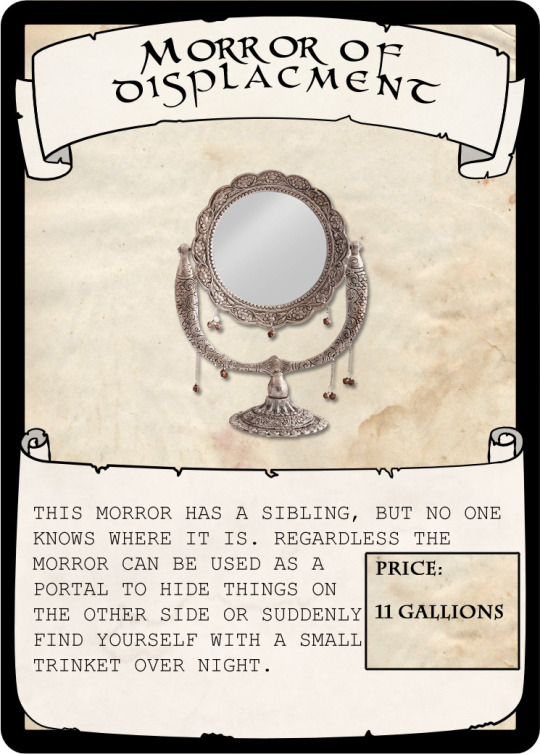
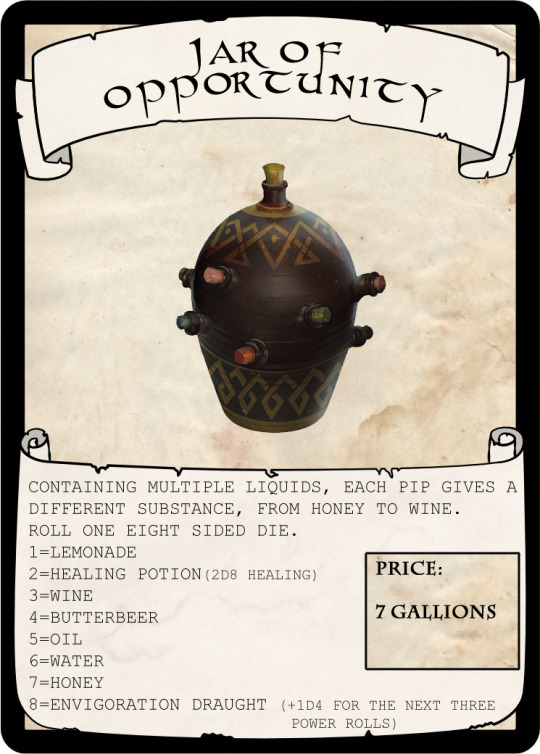
Some items are rare, passed down through generations or winding up in junk and antique shops. Get your hands on one of them and be the talk of the town!
Find the magical items [HERE] together with other magical items, and the food item [HERE].
#Harry Potter#harry potter roleplay#harry potter rpg#Harry Potter Adventure#item cards#magical items#magical itemcards#new items
10 notes
·
View notes
Photo
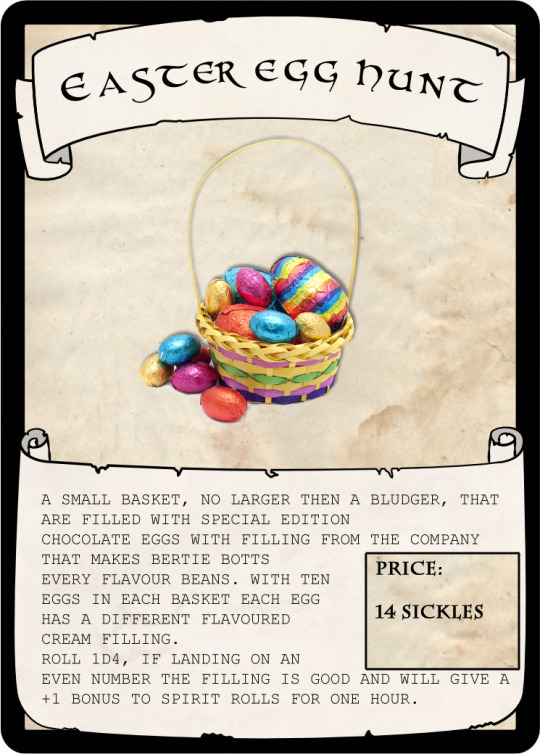
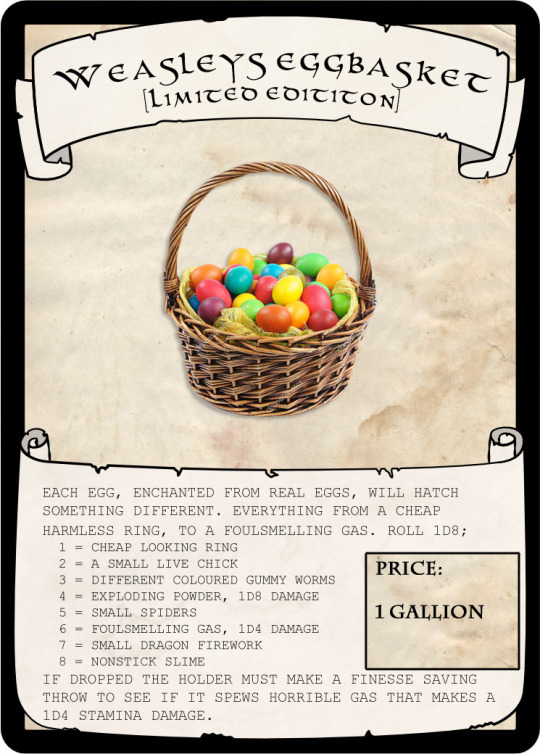
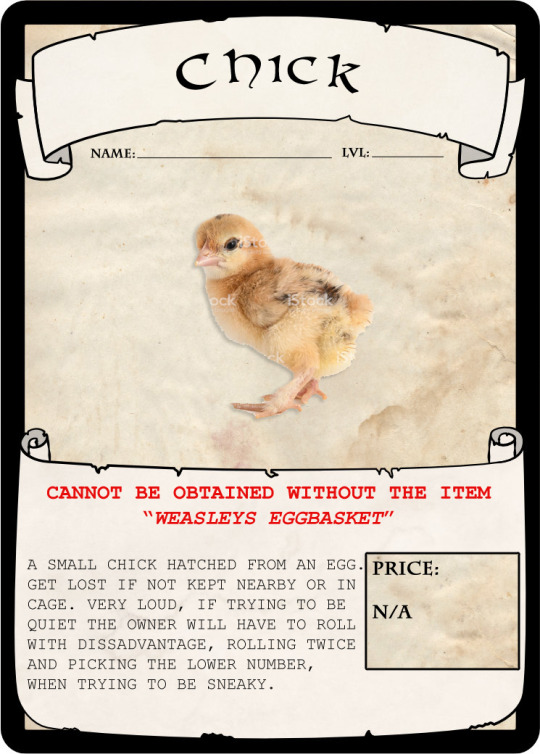
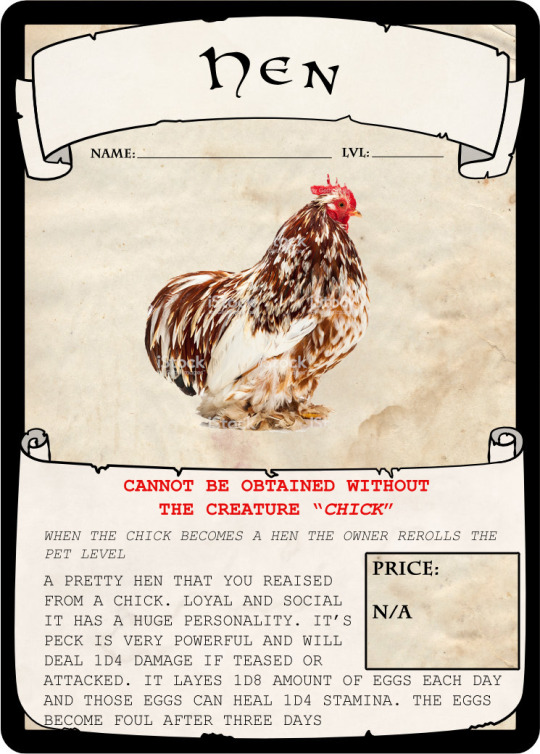
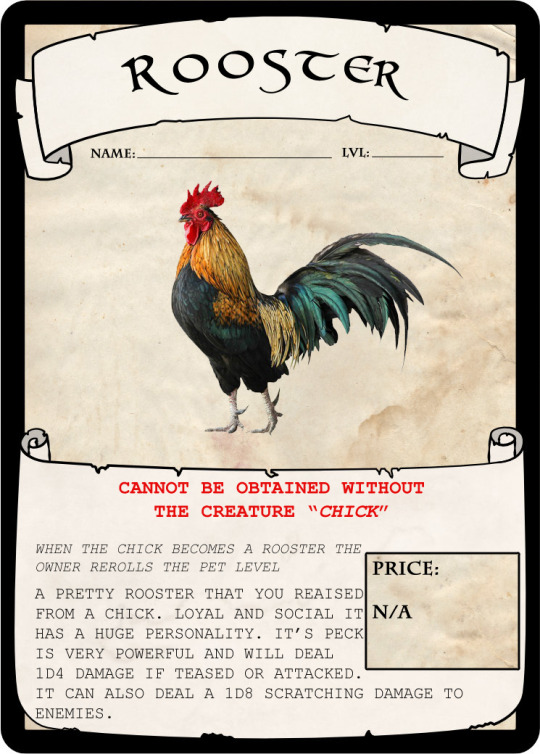
Easter is right around the corner, and being a very witchy season it’s a given that the HP RPG needs some easter themed items! These cards can be found in a special release folder [HERE]
Happy easter everyone! And happy gaming!
[The HP RPG does not condone getting chicks as easter gifts. Each chick, hen and rooster is a living creature and should be treated with love and respect. Getting any animal is a lot of responsibility and thurough research and preparation should be done before getting any pet.]
#Harry potter#harry potter roleplay#harry potter rpg#Harry Potter Adventure#item cards#rpg items#easter item cards#holiday itemcards
5 notes
·
View notes