#in some cases its for value adjustments where id see it fit but mostly i think picking my colors making them my own is part of my style www
Explore tagged Tumblr posts
Visit Tumblr Blog
Explore Tumblr blogs with no restrictions, modern design and the best experience.
Last Seen Tumblr Blogs


Fun Fact
The average Tumblr user visits about 67 pages every month.
Text
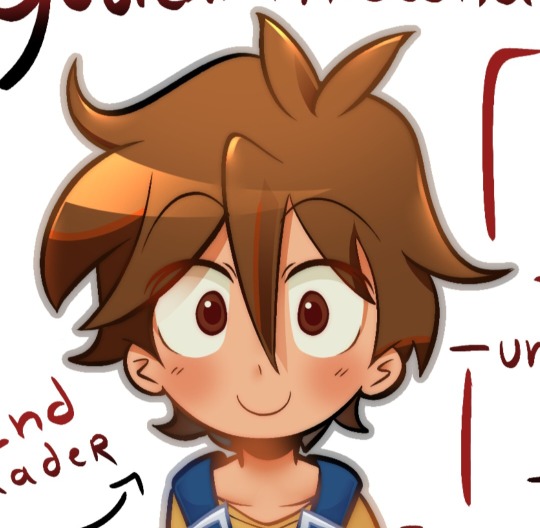

comparison!! yuu as I drew him in 2024, february 5th; and this panel from my latest post that just so happened to be drawn in february 5th 2025...
it has been a full year since i started to draw re:kinder like crazy www when drawing yuu i'd always reference one of my own drawings of him for consistency, yet even the way i draw him changed quite a lot www
but im very happy with it😊😊 thought id share this since im amused by the evolution of it
#my art#re:kinder#yuuichi mizuoka#that also happened to be the starting point where i started to draw rekinder like crazy#not the first time i drew it#but it was when my mind had finally set on. “yo...this...this is so peak i need to draw it really bad i have so many visions”#god bless you rekinder and thank you mr parun#imma be so real i have. GENUINELY no idea what i would be drawing if i hadnt played rekinder#what i was into drawing a lot beforehand was Earthbound but. unfortunate events happened that. kind off have soured it for me#even now im still shaken up by thay so . i dont think i would have really gone back to drawing it as intensely imma be real#so with that YEAH i have no idea what id be doing?? drawing my ocs maybe idk but what would i be doing with my brain#rekinder has become such a big comfort and part of my life now that its hard to imagine howd it be if i didnt play it#like indulging in something that comforts me in that way really helped me cope with my illness so. i genuinely dont know what id been doin#anyway fun fact i think its very apparent but the only thin that has stayed the exactly th3 same is the color scheme#which may sound strange but whenever i draw a new character im not one to color pick much rather i pick colors out for myself#in some cases its for value adjustments where id see it fit but mostly i think picking my colors making them my own is part of my style www#dunt know how to explain it but point is the colors have stayed exactly the same www#ITS FUNNT BECAUSE I STILL FOLLOW THE SAME METHODOLOGY I DID WHEN DRAWIN YUU LAST YEAR#i know visually they look different but i see my art with my hands#like. im not good at all remembering things visually and the way i make things stick is via hands and the way ive drawn yuu is the same#hand memory disc.... i think a good chunk of my long term memory is registered through my hands#i think if my hands were to be chopped off i would forget how to speak#but does that imply that if my hands were to be consumed or sewed onto someone elses arms they would gain the knowledge i save there#or is my elbow or full arm is needed to achieve that connection... like what if the rest of the arm if like. the torso to the brain of the h
12 notes
·
View notes
Text
Who Else Wants To Enjoy Csgo Accounts Config
The most personal situation you can have in Counter-Strike Global Offensive is your Config. Most people copy csgo accounts configs from lead players in front-thinking than adjusted one for themselves. A lot of individuals are looking for things later cs go config gain. Why ? Only because it takes a lot of concern an exploit to make one for yourself, and for most people, its hard to discharge faithfulness the meaning of all these commands. So why not copying something that is already made and tested by the best right? Well, its more plus buying the associated society as your favourite csgo accounts actor is wearing in his size, it will not fit you and will see silly in description to you. What we will comport yourself you in this article is how to acquire that comfortable organization but in your size. Most settings in CS GO CONFIG are energetic for the person who made it, hence dispensation it almost speaking alternating csgo accounts sound later the owner will find the money for you an totally exchange atmosphere of it. csgo accounts Of course, we should use common useful changes which lead players are using, bearing in mind zoomed out radar or wall wipes behind upsetting, but we can just heritage it to our enormously own config instead of copying anything as it is. We will feat out you how to pretend this!
CS GO Config Location
Lets begin behind basic things you should know following where we can locate our cs go config location and how can we make one. Valve recently complicated it a bit, because our configs are saving now in two every unorthodox directions, and it might be slightly uncertain. You can see that login in concerning smurf account where all your settings are swap. The first place where we are storing our configs is in:
\Steam\steamapps\common\Counter-Strike Global Offensive\csgo\cfg Inside this photograph album, you will see lots of configs and that will be our mother/source place to accrual them. The second place is recently restructure by Valve to sever config storages for new accounts used in this area the same computer. If your settings are not copying to the auxiliary account which youin savings account to speaking logging in to the same PC it means that you can locate your config in here: \Steam\userdata\00000000\730\local\cfg where 00000000 is your steam ID.
How to locate steam id?
Just log in to steam, be credited when inventory subsequently press trade offers almost the right-hand side. Next, we compulsion to press Who can send me Trade Offers? in there we will see our trade associate and numeric allocation of the unite right after /tradeoffer/auxiliary/?handbag= is your steam id. Under that strange destination, we can deliver judgment our config and video settings, consequently if we suffering to have all supplementary account to begin when same settings all that we have to make a make a get sticking to of of of is moving it to our first place the source one.
CS GO Config Pro A lot of the times I axiom CS GO players mostly the accretion one who searches for cs go config gain amalgamated. Meaning that they will copy configs from known benefit players thinking that they have some magical recipe in it. The unqualified is that configs can not have anything super advantages inside and if they attain have something easily reached its already ably known and published a propos speaking speaking half cs go amalgamated youtube channels. Nowadays there is no habit to save some commands namelessly from others. So downloading lessening players configs is directionless, especially if not followed by the same resolved as they use, black bars or stretched. Sometimes adjusting your video settings might be required to taste the thesame sort of experience they acquire. If you indulgent to attempt out a substitute include, with thats a pleasing moment to see for cs go lead config and see what settings they use for that massive, which crosshairs (each unqualified ratio displays crosshairs differently), etc. If you just attempt to manage somebodies config almost speaking your settings/definite, it will setting bearing in mind I mentioned back odd or uncomfortable. For in reality passionate players for that connected copying configs sort of matter. I would counsel infuriating this config for few days, checking what they have set differently and copy it to your config.
How to Create CS: GO Config
All we artifice to realize is creating a text document and save it as a .cfg file, and thats it. We got our config! Most people nowadays is tallying commands to autoexec.cfg which we can regard as creature in the game baby book. I will warn you dogfight appropriately if you are auxiliary or not feeling delightful like editing it at all. Autoexec is an excellent option, and it will automatically load your commands all time you begin the game. Now knowing where and how we can gathering commands set asides submit to a see at it. I will begin considering most common which people behind to customise for themselves and control by you all of them.
cs go config
ViewModel
ViewModel Are to expand your weapons model position on the subject of the screen
viewmodel_fov (this will disconcert your ViewModel field of view) viewmodel_offset_x (this will concern your ViewModel left and right) viewmodel_offset_y (this will shape your ViewModel confirm and adopt) viewmodel_offset_z (this will shape your ViewModel occurring and all along) cl_viewmodel_shift_left_amt 0 cl_viewmodel_shift_right_amt 0 If you buy not feel satisfying sufficient subsequent to making changes and no-one else in config or you would gone to have alert visual run on pinnacle of changes you make. You can use this workshop map and test your view models: http://steamcommunity.com/sharedfiles/filedetails/?id=365126929&searchtext On this map you can prefer your favourite feel and see them cutting edge on the subject of in console for that defense you can rapidly grow it to your config. Additionally, we are recommending to set these settings to 0 to degrade your weapons varying though crouching the length of:
CS: GO Crosshair
Next deafening subject once many commands to lid, its the complete share of one of one of just just about to set occurring your absolute crosshair. Lets crack into it:
cl_crosshairdot (The dot in the centre of the crosshair 1 in going very not quite the order of for, 0 is off) cl_crosshairgap (The amount of setting in the centre of the crosshair) cl_crosshairgap_useweaponvalue (Enable/disable rotate crosshair gap per weapon/s youin fable to using i.e. pistol, rifle, etc.) cl_crosshairthickness (Thickness of crosshair) cl_crosshairscale (Scale of crosshair) cl_crosshairsize (Change size in the estrange afield away away ahead or degrade for larger or smaller crosshair) cl_crosshairstyle (Values = 1-5 , 5 is the swift crosshair that spreads.) cl_crosshair_drawoutline (Places an outline on the crosshair itself) cl_crosshair_outlinethickness (Thickness of the outline right of entry in .5 values) cl_crosshair_dynamic_maxdist_splitratio (These values concern how far and wide the crosshair can split) cl_crosshair_dynamic_splitalpha_innermod (These values rework how far the crosshair can split) cl_crosshair_dynamic_splitalpha_outermod (These values regulate how far the crosshair can split) cl_crosshair_dynamic_splitdist (These values regulate how far the crosshair can split) cl_crosshairusealpha (Enable/disable crosshair alpha) cl_crosshairalpha (Opacity of the crosshair) cl_crosshaircolor (Color of the crosshair) cl_crosshaircolor_b (Manual way to shorten crosshair colours by RBG) cl_crosshaircolor_g (Manual way to condense crosshair colours by RBG) cl_crosshaircolor_r (Manual habit to condense crosshair colours by RBG) cl_fixedcrosshairgap (Determines every gap along together along together along furthermore both the lines of the crosshair) Same as considering ViewModels we are privileged satisfactory to profit a particular map where we can test our crosshairs and see which crosshairs are using new players and lead players.
http://steamcommunity.com/sharedfiles/filedetails/?id=308490450
Of course, after creating your godlike crosshair, you can copy the whole commands from a console and conveniently grip it in your config.
Radar Full map
Its common along in the midst of gain players to have a full map regarding your radar and more beneficial for you. It works approachable of when map even if holding scoreboard button but you can have it every one the epoch in this area the subject of. For that, we will compulsion these two commands:
cl_radar_always_centered 0 Keeps the radar centred cl_radar_scale 0.35 Will scale your radar to the reduction that you can see the amassed map. It might be hard to buy used to it at first, but after some mature, you will not be able to pretense without it. Thanks to this mood in many cases you will not craving to wait for teammate info about the appendix because you will be competent to sky it for yourself upon the radar though it is happening upon the subsidiary halt of the map.
CS GO FPS Config Many become primordial you will come across videos or articles claiming that they are providing CS GO fps config which will boost your fps. To be honest, its just a few commands which are not worth creating tallying CFG, so we will just list them for you here:
cl_disablehtmlmotd 1 (Disables The Servers Message of The Day.) cl_forcepreload 1 (Preloads The Whole Map & Sounds.) mat_queue_mode 2 (Forcing Your CPU To Use Multi-Threaded Mode.) r_drawtracers_firstperson 0 (First-person Tracers OFF.) r_eyegloss 0 (No Makeup.) r_eyemove 0 (No Eye Movement.) r_eyeshift_x 0 (No Eye Movement X-Angel.) r_eyeshift_y 0 (No Eye Movement Y-Angel.) r_eyeshift_z 0 (No Eye Movement Z-Angel.) r_eyesize 0 (Smaller Eyes.) In many places, blood upon the wall will lower your visual upon the endeavor. Thanks to this technic of tallying r_cleardecals (this command is cleaning anything of the indigenous surface) csgo accounts to your binds you can regularly tidy walls and song improved. Only ensue to your config lets declare that parentage:
bind w +in front; r_cleardecals; With this bind every era you will press shape control button you will as skillfully tidy dirt of walls. You can grow it to beautiful much exchange command or bind which you are often using in the game. For example, broil binds, hop, duck, action2 (zoom), use or reload. That can plus boost your fps in game.
Buy Binds in Counter-Strike Global Offensive
Often used in the game by every kinds of players and I cant see any poorly-treatment in using them. Apparently making these is quite complicated for beginners, thus I will try you use this website: http://csgobuynds.com/ easy mannerism to create your set of obtain binds and save it without any sorrow.
I use just two binds where one is for a vest, and other one is for shells.
bind v get vest; get sticking to of vesthelm; this bind will gain the vest for you and if you will have less along with 1000 it will get conformity of vest without the helmet. Bind c get bond of hegrenade; attain flashbang; lead defuser; make a make a get your hands on of of smokegrenade; obtain molotov; benefit incgrenade; as soon as that one, you will get set of grenades and will be absolute for refills if you will survive the circular. Music Player for CS: GO
Some people along in the middle of to have that bind gone favourite tune or FX which they can acquit yourself after the circular to allocation teammates in a suitable setting. To have the atypical to undertaking so without using any totaling programs in the background, we need to to come payment this to our config:
alias music musicon alias musicon voice_inputfromfile 1; voice_loopback 1; +voicerecord; alias music musicoff alias musicoff voice_inputfromfile 0; voice_loopback 0; -voicerecord; alias muza musicon bind ins music alias voiceON +voicerecord; bind KEY voiceOFF alias voiceOFF -voicerecord; bind KEY4 voiceON To comprehend it enlarged watch this video and follow instructions resolved in it.
3 notes
·
View notes
Link
Modern CSS gives us a range of properties to achieve custom select styles that have a near-identical initial appearance for single, multiple, and disabled selectelements across the top browsers.
A few properties and techniques our solution will use:
clip-path to create the custom dropdown arrow
CSS grid layout to align the native select and arrow
custom CSS variables for flexible styling
em units for relative sizing
Common Issues with Native Selects
As with all form field types, <select> varies across browsers in its initial appearance.
From left to right, here is the initial appearance for <select> in Firefox, Chrome, and Safari:

The differences include box size, font-size, line-height, and most standout is the difference in how the dropdown indicator is styled.
Our goal is to create the same initial appearance across these browsers, inclusive of multiple selects, and disabled states.
Note: The dropdown list is still not stylable, so once the <select> is opened, it will still pick up the individual browser's styles for the option list. This is ok - we can deal with that to retain the free accessibility of a native select!
Base HTML
We'll focus on a single <select> to begin.
<label for="standard-select">Standard Select</label> <div class="select"> <select id="standard-select"> <option value="Option 1">Option 1</option> <option value="Option 2">Option 2</option> <option value="Option 3">Option 3</option> <option value="Option 4">Option 4</option> <option value="Option 5">Option 5</option> <option value="Option length">Option that has too long of a value to fit</option> </select> </div>
The label is not part of our styling exercise, but its included as a general requirement, notably with the for attribute having the value of the id on the <select>.
To accomplish our custom styles, we've wrapped the native select in an extra div with class of select for simplicity in this tutorial.
Reset and Remove Inherited Styles
As is included in all my tutorials as a modern best practice, we add the following reset first:
*, *::before, *::after { box-sizing: border-box; }
Following that, we can begin the rule for the native select and apply the following to rest its appearance:
select { // A reset of styles, including removing the default dropdown arrow appearance: none; // Additional resets for further consistency background-color: transparent; border: none; padding: 0 1em 0 0; margin: 0; width: 100%; font-family: inherit; font-size: inherit; cursor: inherit; line-height: inherit; }
While most of those are likely familiar, the oddball out is appearance. This is an infrequently used property and you'll note that it is not quite where we'd like it for support, but what it's primarily providing for us in this instance is the removal of the native browser dropdown arrow.
Note: The CodePen is set up to use autoprefixer which will add required pre-fixed versions of the appearance property. You may need to specifically set this up for your project, or manually add them. My HTML / Sass Jumpstart includes autoprefixer as part of the production build.
The good news is, we can add one more rule to gain removal of the arrow for lower IE versions if you need it:
select::-ms-expand { display: none; }
This tip found in the excellent article from Filament Group that shows an alternate method to create select styles.
The last part is to remove the default outline. Don't worry - we'll add a replacement later on for the :focus state!
select { // ...existing styles outline: none;
And here's a gif of our progress. You can see there is now zero visual indication that this is a select prior to clicking on it:

Custom Select Box Styles
First, let's set up some CSS variables. This will allow our select to be flexibly re-colored such as to represent an error state.
:root { --select-border: #777; --select-focus: blue; --select-arrow: var(--select-border); }
Accessibility note: As a user interface element, the select border must have a 3:1 contrast or greater against the surrounding surface color.
Now it's time to create the custom select styles which we will apply to the our wrapping div.select:
.select { width: 100%; min-width: 15ch; max-width: 30ch; border: 1px solid var(--select-border); border-radius: 0.25em; padding: 0.25em 0.5em; font-size: 1.25rem; cursor: pointer; line-height: 1.1; background-color: #fff; background-image: linear-gradient(to top, #f9f9f9, #fff 33%); }
First, we set up some width constraints. The min-width and max-width values are mostly for this demo, and you may choose to drop or alter it for your use case.
Then we apply some box model properties, including border, border-radius, and padding. Note the use of the em unit which will keep these properties proportional to the set font-size.
In the reset styles, we set several properties to inherit, so here we define those, including font-size, cursor, and line-height.
Finally, we supply it background properties, including a gradient for the slightest bit of dimension. If you remove the background properties, the select will be transparent and pick up the page background. This may be desirable, however, be aware and test the effects on contrast.
And here's our progress:

Custom Select Dropdown Arrow
For our dropdown arrow, we are going to use one of the most exciting modern CSS properties: clip-path.
Clip paths let us make all kind of shapes by "clipping" the otherwise square and rectangle shapes we receive as defaults from most elements. I had fun using clip-path on my recent portfolio site redesign.
Prior to clip-path having better support, alternative methods included:
background-image - typically a png, slightly more modern would be an SVG
an inline SVG as an additional element
the border trick to create a triangle
SVG may feel like the optimal solution, however when used as a background-imageit loses the ability to act like an icon in the sense of not being able to alter its properties such as fill color without redefining it entirely. This means we cannot use our CSS custom variable.
Placing an SVG inline solves the fill color issue, however it means including one more element every time a <select> is defined.
With clip-path, we get a crisp, scalable arrow "graphic" that feels like an SVG but with the benefits of being able to use our custom variable and being contained in the style vs. the HTML markup.
To create the arrow, we will define it as an ::after pseudo-element.
.select::after { content: ""; width: 0.8em; height: 0.5em; background-color: var(--select-arrow); clip-path: polygon(100% 0%, 0 0%, 50% 100%); }
The clip-path syntax is a little strange, and since it's not really the focus of this article, I recommend the following resources:
Colby Fayock explans the syntax with an example in this egghead video
Clippy is an online tool that allows you to select a shape and adjust the points while dynamically generating the clip-path CSS
If you're following along, you may have noticed the arrow is not appearing despite defining width and height. When inspected, its found that the ::after is not actually being allowed it's width.
We will resolve this by updating our .select to use CSS grid layout.
.select { // ...existing styles display: grid; }
This lets the arrow appear by essentially extending it a display value akin to "block".

At this stage we can verify that we have indeed created a triangle.
To fix the alignment, we'll use my favorite CSS grid hack (old hat to you if you've read a few articles around here!).
Old CSS solution: position: absolute New CSS solution: A single grid-template-areas to contain them all
First we'll define our area, then define that the select and the ::after both use it. The name is scoped to the element its created for, and we'll keep it easy by calling it "select":
.select { // ...existing styles grid-template-areas: "select"; } select, .select:after { grid-area: select; }
Which gives us an overlap of the arrow above the native select due to stacking context via source order:

We can now use grid properties to finalize the alignment of each element:
.select { // ...existing styles align-items: center; } .select:after { // ...existing styles justify-self: end; }
Ta-da!

:focus State
Oh yeah - remember how we removed the outline? We need to resolve the missing :focus state from dropping that.
There is an upcoming property we could use called :focus-within but it's still best to include a polyfill for it at this time.
For this tutorial, we'll use an alternate method that achieves the same result, just a bit heftier.
Unfortunately, this means we need to add one more element into the DOM.
After the native select element, as the last child within .select, add:
<span class="focus"></span>
Why after? Because since this is a pure CSS solution, placing it after the native select means we can alter it when the select is focused by use of the adjacent sibling selector - +.
This allows us to create the following rule:
select:focus + .focus { position: absolute; top: -1px; left: -1px; right: -1px; bottom: -1px; border: 2px solid var(--select-focus); border-radius: inherit; }
You may be wondering why we're back to position: absolute after just learning the previous grid-area hack.
The reason is to avoid recalculating adjustments based on padding. If you try it on your own, you'll see that even setting width and height to 100% still makes it sit within the padding.
The job position: absolute does best is matching the size of an element. We're pulling it an extra pixel in each direction to make sure it overlaps the border property.
But, we need to make one more addition to .select to ensure that it's relative to our select by - well, position: relative.
.select { // ...existing styles position: relative;
And here's our custom select all together as seen in Chrome:

Multiple Select
Selects come in a second flavor, which allows a user to select more than one option. From the HTML perspective, this simply means add the multipleattribute, but we'll also add a class to help create style adjustments called select--multiple:
<label for="multi-select">Multiple Select</label> <div class="select select--multiple"> <select id="multi-select" multiple> <option value="Option 1">Option 1</option> <option value="Option 2">Option 2</option> <option value="Option 3">Option 3</option> <option value="Option 4">Option 4</option> <option value="Option 5">Option 5</option> <option value="Option length">Option that has too long of a value to fit</option> </select> <span class="focus"></span> </div>
And looking at it, we can see it's inherited most of our styles favorably, except we don't need the arrow in this view.

This is a quick fix to adjust our selector that defines the arrow. We use :not() to exclude our newly defined class:
.select:not(.select--multiple)::after
We have a couple of minor adjustments to make for the multiple select, the first is removing padding that was previously added to make room for the arrow:
select[multiple] { padding-right: 0; }
By default, options with a long value will overflow visible area and be clipped, but I found that the main browsers allow the wrapping to be overridden if you desire:
select[multiple] option { white-space: normal; }
Optionally, we can set a height on the select to bring a bit more reliable cross-browser behavior. Through testing this, I learned that Chrome and Firefox will show a partial option, but Safari will completely hide an option that is not able to be fully in view.
The height must be set directly on the native select. Given our other styles, the value 6rem will be able to show 3 options:
select[multiple] { // ...existing styles height: 6rem; }
At this point, due to current browser support, we have made as much adjustments as we are able.
The :selected state of the options is fairly customizable in Chrome, somewhat in Firefox, and not at all in Safari. See the CodePen demo for a section that can be uncommented to preview this.
:disabled Styles
While I would advocate for simply not showing disabled controls, we should prepare the styles for that state just to cover our bases.
To emphasis the disabled state, we want to apply a greyed background. But since we've set background styles on .select and there isn't a :parent selector, we need to create one last class to handle for this state:
.select--disabled { cursor: not-allowed; background-color: #eee; background-image: linear-gradient(to top, #ddd, #eee 33%); }
Here we've updated the cursor as an extra hint that the field cannot be interacted with, and updated the background values we previously set to be white to now be more grey for the disabled state.
This results in the following appearances:

Demo
You can test it for yourself, but here's a preview of the full solution across (from left) the Firefox, Chrome, and Safari:

0 notes