#im not yet DONE done either because I need to figure out how to resize the main post box so it doesn't stretch off the page
Text
» 𝐆𝐈𝐅 𝐈𝐂𝐎𝐍𝐒 𝐓𝐔𝐓𝐎𝐑𝐈𝐀𝐋 𝐁𝐘 𝐑𝐄𝐏𝐋𝐀𝐘𝐆𝐈𝐅𝐒 !


hi folks! i’ve gotten a few messages on how i make my gifs, on what tutorials i used, etc. so i decided to make my own (since i didn’t use one) in hopes of helping a few people get their footing on how to make gif icons from scratch! this tutorial has been made with the assumption that you have prior knowledge of using photoshop (e.g. like smart filters), but please don’t be afraid to ask me any questions if you need anything explained or you’re a lil confused. however, do bare in mind that i am no photoshop genius, and have never become more advanced than what i required for my needs. anyways, without further ado, the tutorial on how you can make something like the above can be found below the cut. please like or reblog if you found this useful in any way!
some starting tips:
gif icon making, or gif making in general can be strenuous. do not give up if it doesn’t look like you want it to the first time! it’ll take time to find what you like.
don’t compare your gif icons to other’s, which i’m guilty of, but your gif icons are unique and lovely in their own way and you should view them as such!
♡
i am using a macbook, with a mac operating system and adobe photoshop 2020.
keep in mind that this is the way i make my own gif icons, and i’m just sharing what i know so this may not be the best/easiest way to go about things, like you can probably include scripts that save it for you, etc. but i prefer having more control over to process.
♡
screenshots will be distorted, for easier viewing i’ve added a link that will take you to the full size image.
♡
before anything, a high quality gif comes from a high quality video. when downloading your content, make sure it's either 720p or 1080p resolution.
♡
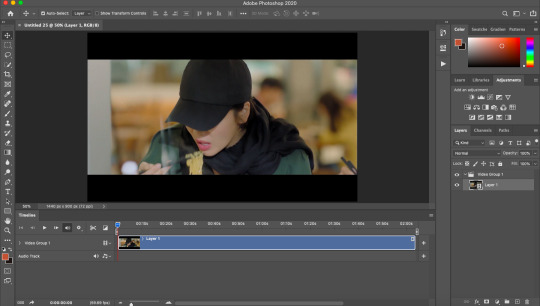
step 1: open up your .mp4 file
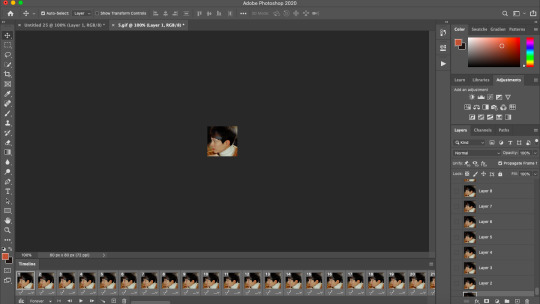
open it up as if you are opening any other file on photoshop. no need to import video frames to layers or anything of the sort. i find that way better for making gifs for gif sets instead of like 100+ gif icons. your photoshop should look like the image below.
this works best with shorter video files of around 1-3 minutes.
step 2: find your faceclaim
your video should now be open in photoshop as a video timeline, keep this the way it is, you’ll be able to move along the video to the next gif. using the timeline layers (see:layer 1), you can slide along until you find your faceclaim.
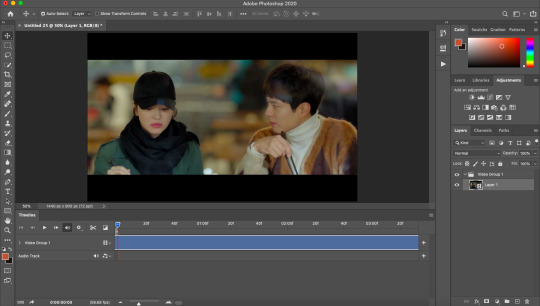
*extra info for those that don’t know. to extend your layer and make it easier to find your faceclaim, you can use the slider down below which looks like this:

this will essentially space the frames out more, if that makes sense?
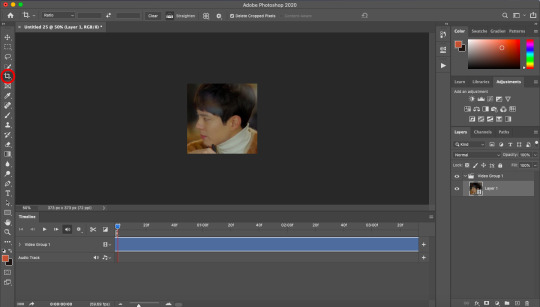
step 3: select your gif focus and crop
use the rectangular marquee tool (circled in red) and select the area of your gif icon.
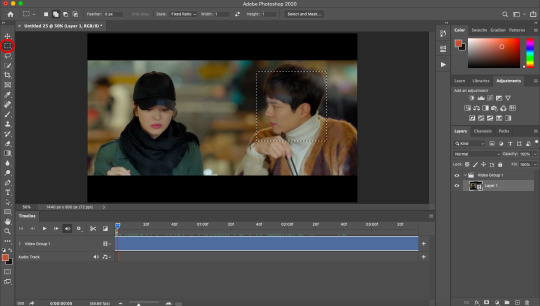
following this, use the crop tool (again, circled in red) to cut out the rest of the area. you are now left with a square.
step 4: select the length/frames of your gif
this step can be done pretty much anywhere between step 2 and step 7, depending on your preference. anyway, use the slider (red arrow pointing to it) to decide where you want your gif to end.
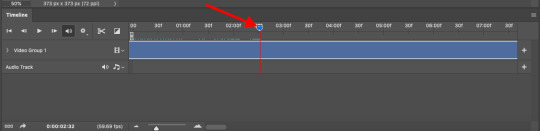
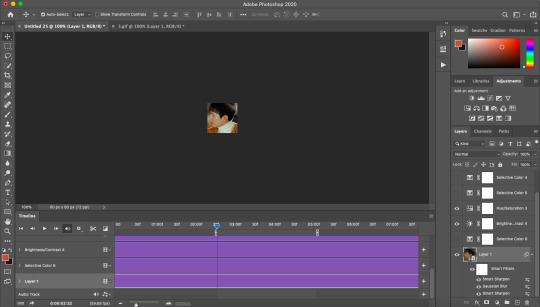
then, bring the end of your video timeline (red arrow pointing to it) to where your animation slider is. your video timeline should now look something like this:
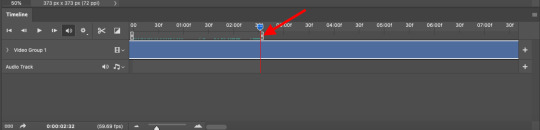
the space in between the lil sliders will only includes what will be in your gif.
step 5: resize
using image size, resize your gif to whatever size you wish. i prefer 80px.
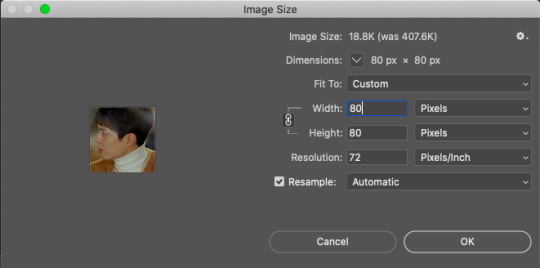
following this, it should say that your file is going to be converted into a smart object, click okay. (i can’t show the pop up since i got rid of it).
yet, now that you’re looking at your gif icon, you’ve realised you don’t really like the placement of it. simply cmd/ctrl+t to go to free transform. i moved it a tiny lil bit to the left.
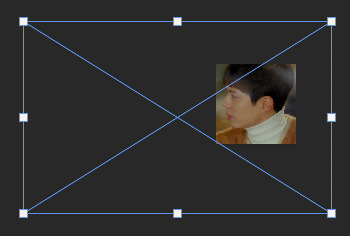
as you can see, the rest of the video area is still there. you can now transform it to your liking. this will be useful when you want to change the area again.
step 5: add sharpen settings
you now have an icon, you can sharpen it to your liking.
i use smart sharpen and gaussian blur. i tend to have them in this order.
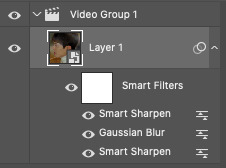
you can change the opacity of each smart filter to your liking. i won’t be sharing my exact sharpen settings (not that they’re hard to figure out), as i’d like them to stay unique to me, but do play around with this and see what you like the most (the key is less is more).
the trick here is to include the sharpen>blur>sharpen filters, which will give a sharpened appearance without overdoing it, and make your gif icon a lil smoother as well due to the blur.
**also, you may see the lil video group 1 in my layers there (and in your own too), this isn’t really necessary and is more of a pain in the ass that anything. if you have this, you can get rid of it by right clicking on it and ungrouping layers.
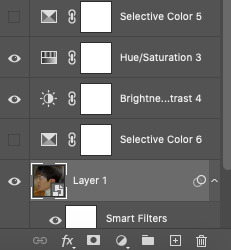
step 6: add your colouring
my colouring is a mixture of psds i’ve interchanged for years and i have lost the originals so do not intend on sharing. do look around at psds or make your own colourings that suit your tastes.
BE MINDFUL OF WHITEWASHING!!! if you are giffing people of colour, use colourings that do not make them into a white sheet or a gray mess. i see this constantly as if it isn’t 2020.
adjust! adjust! adjust! your colouring will not always work on different people or different scenes. adjust your levels, saturation, selective colour, brightness, etc to make sure the colouring works for your previous gif, as well as your next one.
even you can see here that my layers are mess because i adjust constantly.
step 7: save for web
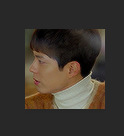
now that you’ve made your icon all pretty, save it for web and it should look like this:
step 8 (optional): speed
if you like your gif icons slower, you now have to upload the gif file into photoshop again. this will take you to the frame timeline. you can change the speed of your gif to whatever you want, and save again.
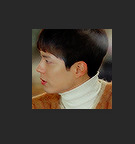
and there you have it, your is gif icon complete.

step 9: making more!
instead of going through this whole cropping process again, you can continue to move along the video timeline to different frames of your faceclaim, and making the next gif with just the exact sharpening settings, colouring, etc. this will make it super easy to make more gif icons in less time.
this can be done by simplying moving your animation timeline.
again you can use cmd/ctrl+t to adjust your gif placement. of course, this doesn’t always work, and you may need to revert back to your original video to crop the area again. an example of this is if you need a bigger or smaller area for the gif.
i just made this gif in a few seconds.
action
i use my own script to crop and have included the rest all in one action file. i did a lil digging and found this gif icon making action (resizes to 80px) that does essentially the same thing with no script. this will make it already 10x easier to make an icon. you can then make your sharpening into an action and you’ll basically have most of the job done for you in one click.
tips:
make things into actions! for example, i cut down a lil on the speed changing process by making actions that change the speed for me.
save your actions! you never know when you’ll lose them
you might get tired of looking at your gif icons after a while, they might even start to look ugly but that’s most likely because you’ve been looking at them for too long, so don’t feel discouraged!
crop close to the face, this is important! what in the fresh hell am i supposed to be seeing in a 70px gif icon if its so far away, or in general tbh
anddd that's about it! i hope you find this useful! again, if there are any questions, feel free to im me or send in a message and i'll do my best to help!
#rph#rpc#gif icons#gif icons tutorial#gif icon tutorial#i hope this is explained well im ...#i tried to be as thorough as possible to like make sure it all comes together
215 notes
·
View notes
Last Seen Blogs