#i would have fucked around more with colors and overlays and such but. i'm breaking out of artblock so. Not Doing All That
Explore tagged Tumblr posts
Visit Tumblr Blog
Explore Tumblr blogs with no restrictions, modern design and the best experience.
Last Seen Tumblr Blogs


Fun Fact
28.6 is the average number of monthly visits per US mobile user.
Text
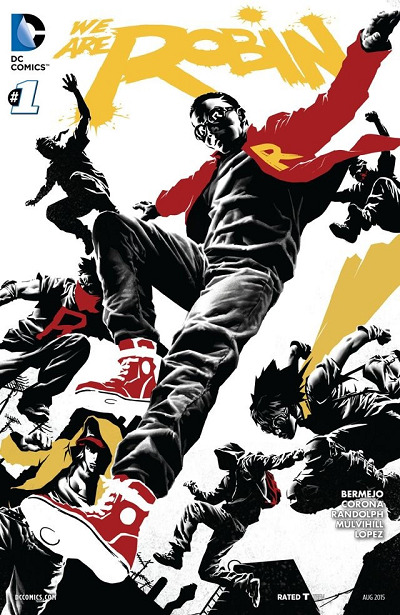
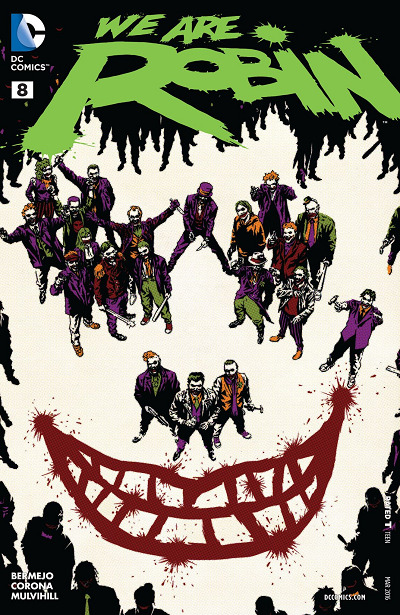
I got the full We Are Robin series for chirstmas! So here are some random silly things I noticed
Though I don't have any of the Robin War crossover or tie-in issues, which is a bummer but still.
Duke is like a self certified adrenaline junkie & says as much within like the first few pages
So yeah I get it. Mortality. It's about survival. Spent so much time surviving lately I feel like I've gotten addicted to it. To the Rush. I mean, I know why. It's all endorphins and adrenaline. I shouldn't trust it I shouldn't love it this much in all it's chemical falseness. But I'm a junkie now. worse stuff to be hooked on I guess. Issue #1, Page 4
Riko like definitely had a crush on Duke at some point and the angst is only further fueling my mind
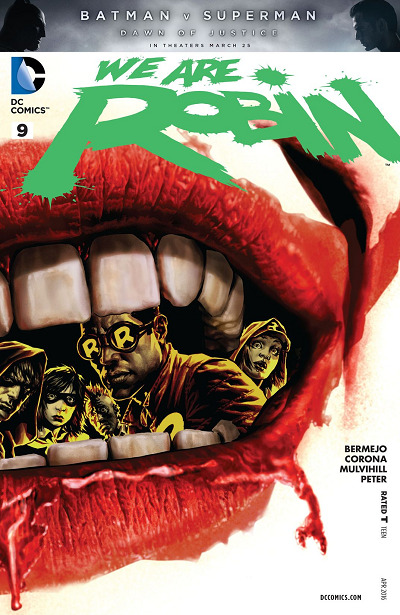
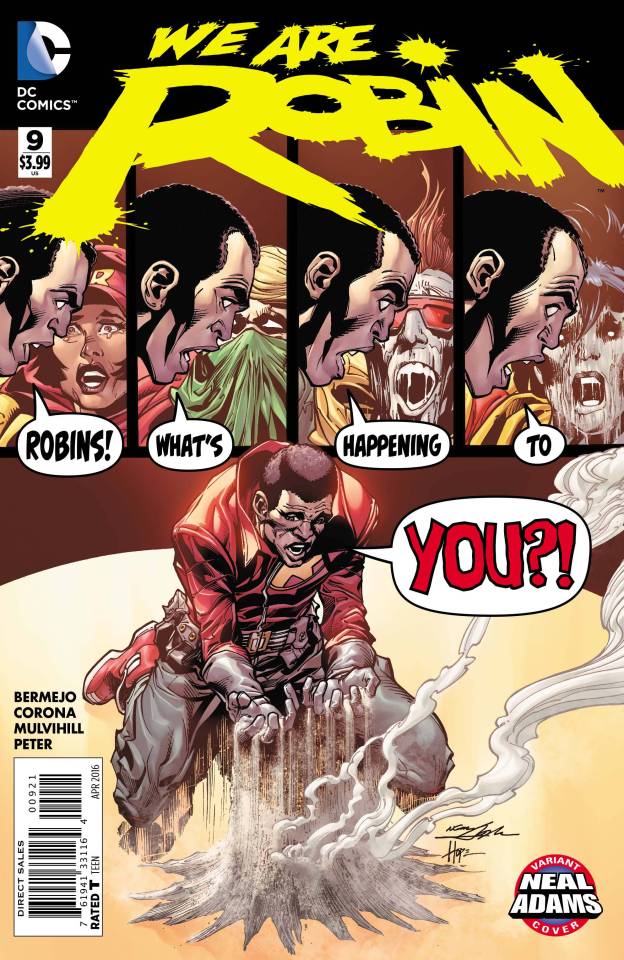
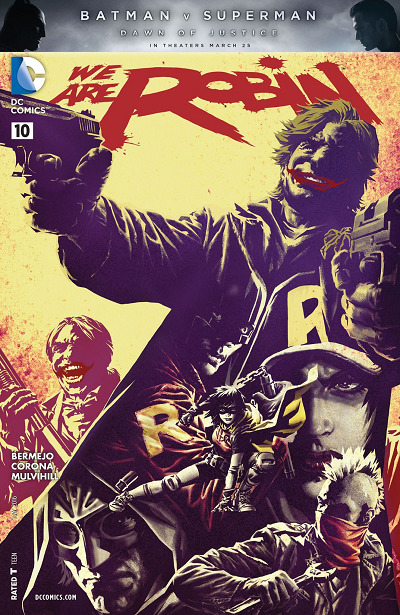
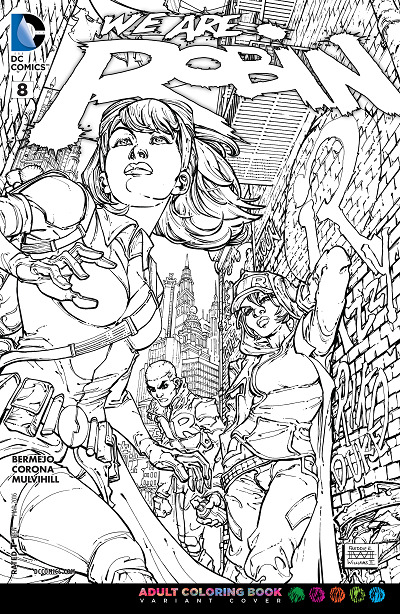
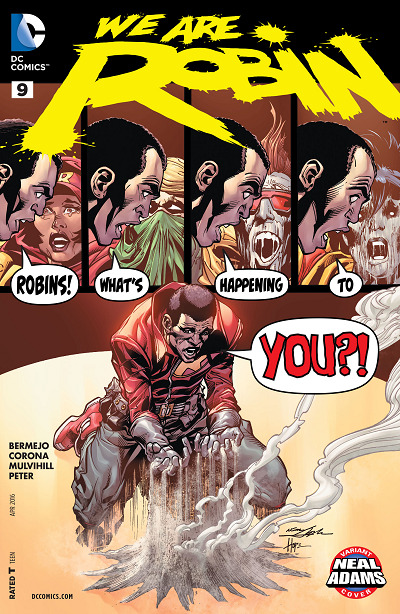
Not crazy about the alternative cover to Issue #9B[right], it's cute but it feels like it belongs to another plot idea, #9A[left] looks more inline and it's just genuinely one of the coolest covers for this series
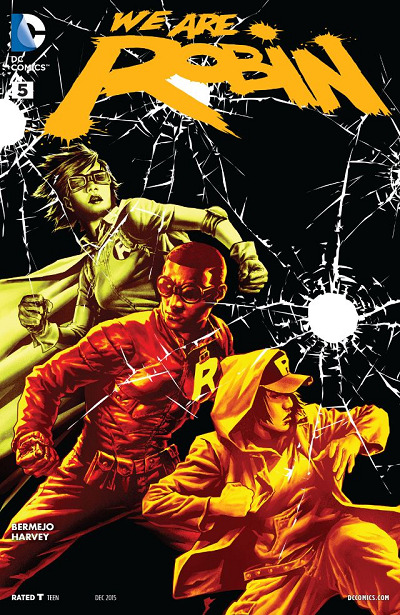
I really liked how it felt like all the Robin kids where pretty equal in page time & relevance to the story, I would have like some more of Riko in the later Issues but she did get a whole one to herself with a completely different artist
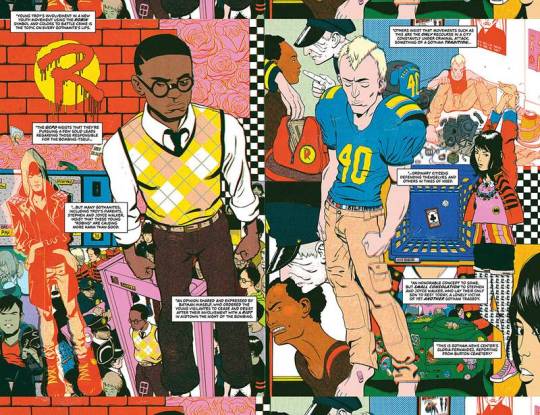
Focusing on that, Issue #4 is fucking gorgeous, like Jorge Corona's style is so much fun and comicy but the combined work of James Harvey, Diana Egea & Alex Jaffe brings to life a completely different type of very comic/graph novel style. Along with the fact the busyness of it reflects off of Riko's own personality & mentality. The two page spreads, the lack of barely any panel lines b/c each panel just looks that different from each other, the colors & pattern overlays, it's gorgeous and I could go off on a separate post about it another time. It's a shame I don't have all the covers with their style!
Though having Babs specifically be Riko's batgirl doesn't make much sense in a real world timeline but this is comic time soooo, i still would have like Steph to be her batgirl!
Duke has watched the Hobbit, and he thinks of himself as himself as more of the sword guy but he also like Legolas b/c he thinks he's cool & honestly that says alot about Duke's personality
Always thought of myself as more swarthy sword-weilding badass with the five-o'clock shadow. Or at least that elf dude. Yeah... that elf dude had style. Issue #1 Page 3
I've already read these volumes a couple months ago, so coming back to them was refreshing and I'm glad to have them physically, makes them alot easier to read and understand when I have 'em there physically
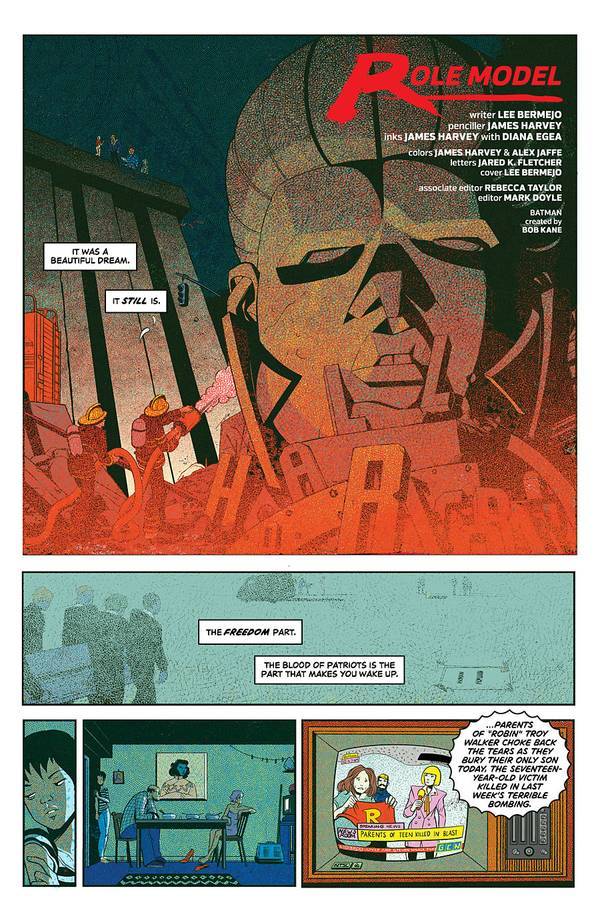
Also made me learn more about Troy, I thought he was a bit full of himself at first but he was genuinely just a good kid trying to do good, and his failure to do so resulted in his death and it's one of two things that breaks down our group of Robins [the other being Gordon's robo-batman denouncing the We Are Robin movement as a whole]
Troy Walker...Above average student with interests in political activism, history, and philosophy. Issue #4 Back Page 2
I'm pretty sure Duke is the youngest of our group of Robins, like the character summaries at the back of Issue #4, Duke-16, Riko-16, Dax-17, Izzy-17, Troy-17, Dre-17, which I think is one of best realizations I had about this story
No Duke isn't really the leader of WaR I'd say but the end of the series he's more just a working member of the most active group of Robins
By #12 they're very much a "We" "Us" "All" sort of group and saying they have a distinct leader would do them a disservice, though if I remember correctly there was some sort of hierarchy mentioned in the Robin War crossover issues, but we're gonna work around those for a second, at least until I get me hands on them/reread them again
I'd say the leaders are who ever is most determined to be a Robin within the moment, which Duke isn't at the beginning but is later on [round #6 #11 & #12] and even then he's often sharing that drive to be Robin with another Robin [usually Riko honestly]
And I'd say the Robin with the biggest & consistent want are Riko, Shug & Dax, in that order but mainly cause Dax had an era of doubt after Troy died & Robo-Batman denounced them
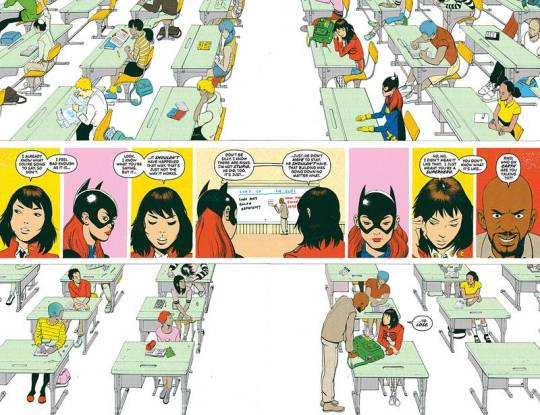
Riko hallucinates Batgirl and I need that to be talked about, like the hallucination isn't all that strong, purely visual, but it's high-def and it moves like a person and reacts to what she says to it [in the middle of class while a teacher is trying to get her attention mind you] I think the spread where it happens is the 2nd one I put up top
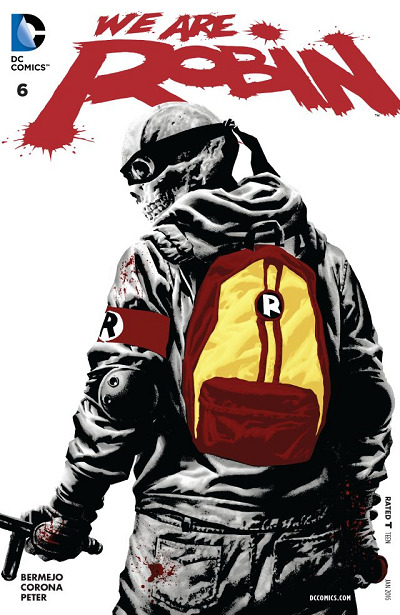
Izzy is actually a very emotional person, and I think she's the first character to cry in the series, [they are literally disarming a highly dangerous explosive and I think that's so valid for her] and honestly non of her emotions are like unwarrented, she's constantly on her last fucking leg, between late nights at her family resturant, combined with homework till 3 and chronically late to school to the point it might get her held back or expelled she's pretty tired with it all
I think my favorite moment for her was when her brother Hector [who she despises but also that's her brother so like] died to that weird Owl-Man Talon thing [which like I'm pretty sure died in Robin War], and when Talon-Man was about to kill Duke & Riko, like her black mascara/eyeshadow tears as she held that thing at gun point where devastating, not to mention it's goading her on & Duke & Riko are trying to get her to drop the gun aswell
Talon: Yes! this one understands the true nature[kill or be killed] of things! Izzy:...Gonna...gonna bury this creep. Tryin' to sell us the future Duke: C'mon, drop the gun! Talon: Pull the trigger, my beautiful killer. Take your first step towards a new world. Izzy: I'll so it...come any closer an I'll-- Issue #6 Page 7
This Issue also cements our Robins and their relationship to batman some more
Riko, Duke & Dax are the leaders in this Issue, more so the 1st two cause Dax doesn't have much page time, but still the sentiment of them not being wannabes/worshipers Batman's like everyone thinks and instead their own group is important here
Talon: Your code...the Bat's code...it is folly...He won't help you. Issue #6 page 5 Riko: Robins don't kill Izzy. You know this. Remember who we are. Talon: Young fool! Your false idol will be your undoing. Riko: Not trying to be like Batman. Trying to be better. Issue #6 page 10
I like Dre he's actually a really interesting guy, and you have to look past all the walls he pulls up [which are interesting in'n'off themselves] and see a kid who wants to be a vigilante, he's one of the leaders for Issues #9 & #10, being his own vigilante & operative after the Robin Laws are passed, he doesn't back down one bit & stays steadfast in his want to help people, going against Smiley in his Joker era as the first Robin to do so
He's just honestly cool, and I like the way he starts as a pessimist to the idea of Nest, but that doesn't fully stop him from wanting to help people, he gets back into it the moment he pulls himself together
I don't think I've brought up Dax properly yet but he's definitely one of the connectors of the group, [the others being Shug & Riko], once he gets out of his early bought of pessimism after Robo-Bat disavows them he is a consistent leader within the group and pushes the others to fucking do something, but his connecting work is mainly done for Izzy & Dre, Izzy when she's in her slump later on, & when Dre when he's running solo without the others, he pulls the wayward birds closer to the rest of the flock
Having read this series & reminiscing on "Batman & The Signal" & "The Outsiders" I don't like the way they portray Duke much at all
Lee Bermejo gets Duke in a way I don't think the other writes really do, this Duke, WaR!Duke, would not have become The Signal, he would have been Lark, and I mourn the lose of what he could of been had he not been pushed into become The Signal, it would have been interesting to see Damian & Tim share Robin with a kid they had to actually deal with, it might have actually forced Tim to move on completely from Robin, it might have gotten Damian more friends, it would have given Duke a more interesting story in my opinion
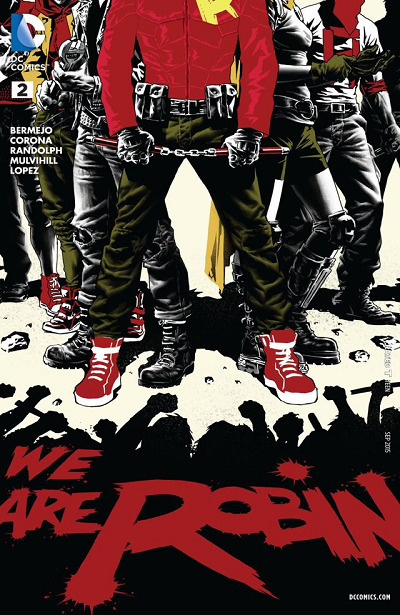
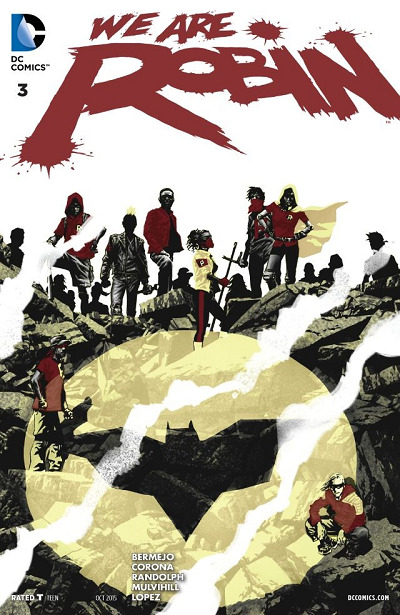
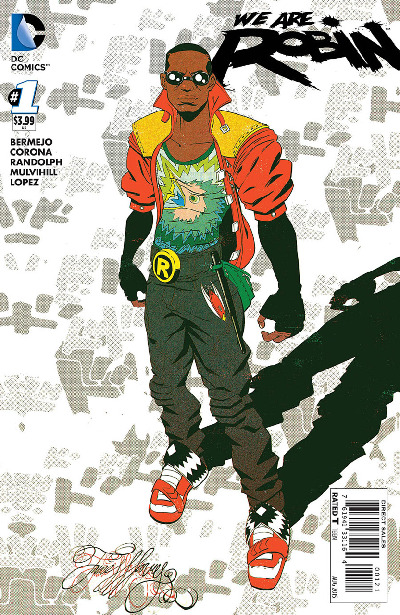
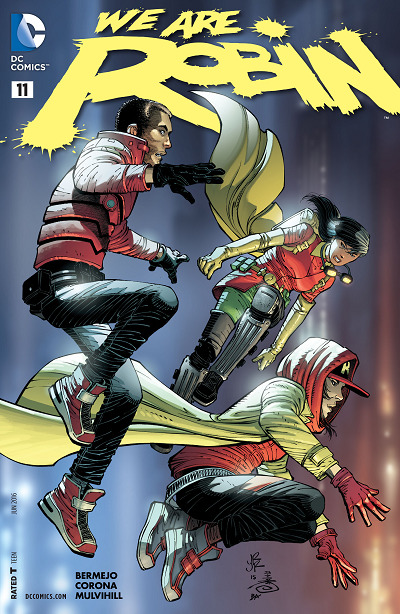
Okay I'm tired now, so i'm just put my fav covers of the ones I have from this series in left to right descending order of favorite-to-least favorite.


Goodnight! & Happy Holidays everyone!!!!
#duke thomas#riko sheridan#dax chill#izzy ortiz#troy walker#dre cipriani#batman#we are robin#dc robin#the signal#signal dc#dukeposting#robinposting#WaRposting#millywrites
30 notes
·
View notes
Note
hi!! i am absolutely obsessed with your mulan edit (and the rest of them like. holy shit they're all fucking incredible. but that one in particular) and i was wondering if you'd mind sharing how you made the fifth gif? if you're not feeling it or don't do that sort of thing, no worries, it's just so unique and i think i can parse it but i really would love to hear about your process! regardless, thank you for sharing it and i hope you have a lovely day/night!
Hi there!! Thank you!!! 🥺 I'm always happy to talk about gif-making! 💙 (I also just made a new tag for tumblr/photoshop help and some of my other mini tutorials)
I used a few techniques in this gif. So, I'll quickly talk about the typography + shapes and multiple blended gifs. But I'll go more in-depth on the delayed fade-in transition since, I think, that's the most unique aspect of this gif (I haven't seen anyone do it before, but I'm sure I didn't break ground here either lol). I didn’t expect to get so detailed but hopefully that’s a good thing. 😅 More under the cut!
If you’re not here for the typography and if you already know how to blend, skip to the end for the delayed fade-in transition effect. But since I’m not sure what you already know (and because I hope this can be helpful for others too), I’ll try to explain in as much detail as I can.
PART 1: TYPOGRAPHY + SHAPES
Here are all the specs for the typography and shapes!
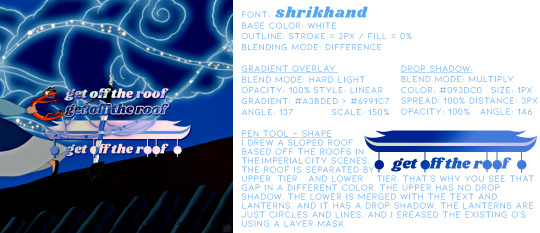
The pen tool is my best friend for interesting typography. Just click to create a point and continue clicking to connect the dots with straight lines! To create a curve, you just long-press and drag your cursor until you get the curve you want. You can also use this tool to create paths, like wavy lines, and write text on them (I did this in the second gif of the same set).
PART 2: MULTIPLE BLENDED GIFS
There are lots of tutorials about how to blend gifs so I’m mostly just going to talk about the details for my gifs.
For context: I use the Timeline method — so I make my screencaps, load into stack, convert frames into smart object, sharpen, etc. [For any blending beginners: When you use Timeline to blend, it’s important to have the same amount of caps for each scene, otherwise, your gif will create duplicate frames for one scene while the other scene continues to move. This makes the animation look choppy/not smooth.]
Start with your base gifs as sharpened smart objects, then put them all into one canvas. If you don’t have a clear idea for your composition, my advice would be to make sure you have “Delete Cropped Pixels” unchecked when you use the crop tool. This will preserve the cropped out parts of your gif, so you can still use them if you decide to move things around. Do this all with the upper gif layers set to Screen, so you can see how the gifs will intersect and blend. Now, let’s talk about the coloring and blending modes I used.
THE BG: Let’s start with the background gif. I’m going to call it the BG (the one with Mulan grabbing Mushu from the sword and running away). I colored the BG as I normally would on its own. Since this was a rainbow set, I also made the blue pretty saturated. Whenever I blend, I always put all the layers per scene into groups. So I put the adjustment layers and the gif into a grouped folder. Keep this group below everything else and leave the group’s blending mode set to Pass Through.
THE FIREWORKS OVERLAY: This is the wide shot gif at the bottom. I colored this so the lighter portions (the reds and yellows of the explosion) were as vibrant as possible and the darker portion (the sky) was as black as possible. When you set the blending mode to Screen for blending, it’s important to have this contrast to make the blending as seamless as possible. The light portions are most visible when it’s overlaid above the BG. And because I made the sky super black, I didn’t have to erase the edges with a layer mask to blend it into the BG.
THE BW OVERLAY: Next is the black and white overlay gif (the one that fades in but I’ll go over that later). Color this however you like to do black and white coloring. I like gradient maps and levels. But remember, like before, creating contrast is crucial. Set this group to Screen as well and you can always go back to your adjustment layers and tinker with them until you like how the gifs blend! Here’s what it looks like broken down with the frames on their own and then blended on top of each other:
PART 3: DELAYED FADE-IN TRANSITION
So, this idea came about because I didn’t like how all the light areas of the smoke blocked Mulan’s face in the BG as she was running off screen. So, I thought, if the overlay explosion happened later, just as Mulan’s face goes off screen, it wouldn’t overlap!
Now, before I get into how I did it... remember how I said you need to have the exact same amount of caps per scene when blending, otherwise things get choppy? Well, that all kind of goes out the window here for two reasons:
Problem 1: We’re moving one smart object gif. Once you move a smart object gif layer away from the beginning of the timeline, the frame synchronization can go wonky if you’re not paying attention.
Problem 2: We’re using Timeline’s fade tool. It’s such a handy tool, but when you convert back to Frame Animation (which you absolutely MUST do if you do the bulk of your work in Timeline), you’ll see it: revenge of the duplicate layers.
I’ll go over how to mitigate these issues as I continue explaining. I’m going to reference the different colored lines and boxes in the screenshot below as we walk through the steps I took.

1. First, I moved my BW Overlay gif so it started a little later than the other gifs. You can see I moved it almost to the halfway point of the BG, where I placed the playhead (the vertical red line).
2. Problem 1 — If you were to export your gif right now and if you were lucky enough to move your gif to the perfect spot on the first try, your gif would look smooth. But if you didn’t move it to the perfect spot, you’d notice some choppy animation. Timeline does a weird thing with frame delays. You see this when you convert back to frames: some frames are at 0.07 sec and others are at 0 sec or something (that’s why we always have to reset the frame delay before exporting). I don’t know how to explain why this happens, I just know it does. But because of this, making gifs start at different points in Timeline creates gaps. The way I fixed this was by zooming in on the Timeline as much as possible. Then I kept clicking the next frame button while moving my BW Overlay over one frame at a time until all the gifs were all moving at the same time and stopped at the same time. It’s really just trial and error, and you keep nudging things til it’s in sync and the animation looks smooth.
3. Now, if I had only done these two steps, my BG and Firework Overlay would have just stopped and you would have seen the BW Overlay blended over nothing. See the vertical pink line? That’s where the gifs all stopped before I did Step 1. They wouldn’t be moving behind my BW Overlay. They wouldn’t even be visible. That’s where the green boxes come in. I labeled those green boxes “Freeze Frames” because they’re the very last frame of each gif, frozen. So, it’s as if the original gifs simply stopped on the last frame for an extended amount of time. You can have your BG continue to loop instead, but to minimize the distraction as my BW Overlay faded in, I decided to make them still frames. (You can make a freeze frame by duplicating your layer, moving the playhead/red line to the last frame of the scene, right-clicking, the layer and selecting “Rasterize Layer.” Move the freeze frame so it’s after your gif.)
4. Problem 2 — The easy part here is adding the Fade transition. The annoying part is the magically appearing duplicate layers. To do this simple Fade transition, just click that square in Timeline with the diagonal split. Then, I dragged the Fade effect (yellow box) over the beginning of my BW Overlay (other yellow box). The Fade effect is indicated by the right-angle triangle. All looks fine and dandy until you finish the rest of your gif, convert back to frames, adjust your frame delay, and see choppiness due to some duplicates. Luckily, the duplicates only pop up where the fade transition is. Again, idk how to explain why this happens, it just does. And to fix it, I simply go to the spot where the fade starts and delete all the duplicate frames until I get to the end of the fade. Once the duplicates are gone, it’s all good and the animation should be a lot smoother!
And ta-da! That’s pretty much how I made this gif:
I’m sorry this was so long a;slkdfjs 😅 Please feel free to ask any specific questions if I made something unclear!! I hope this helps!
#cosmiccas#ask#gif tutorial#photoshop tutorial#completeresources#allresources#resourcemarket#onlyresources#resource#photoshop help#tutorial#nik.help#resource*#gfx*
436 notes
·
View notes
Note
Hello! May I ask how you draw? I'm currently learning how to myself and would be highly interested into a step to step process by you! Like from sketch to the done thing (no color necessary)
Hello there!
I dunno how I feel about showing how I work/giving advice to someone who’s learning (and I say it as a pro artist who went through years of traditional art education) because when I do the illustrations you see here on my tumblr I BREAK THE RULES you’d learn though life drawing routine, and give in to bad habits, and my methods are rather unplanned and chaotic which makes it difficult to pinpoint significant stages. But I used my portable potato to take some photos during working on my last piece, so I’ll throw it here with a bit of an explanation of what’s going on.
Before I begin - and because you’re about to look at a mess of a WIP - I’d like to give you some general advice that generally makes life easier when you draw (again, things that I learned in traditional arts education - another artist might advise you the complete opposite, dunno!)
Work holistically. Forget them satisfying-to-look-at clips on instagram showing someone produce a hyperrealistic portrait starting from an eye, with each and every element emerging being finished before they proceed to another part. It takes a lot of talent, yes, but these are ppl redrawing a photo in a kind of a mechanical manner. Most artists don’t work this way. Especially if you’re working without a reference, or if you’re doing a life drawing - your process will be layering and changing and finding what works best to give an impression of what you’re drawing rather than reproduce the exact image, and your artwork is likely to look messy most of the time.That said: don’t start with the details. Don’t spend too much time on a particular part while neglecting others. Your goal is to keep the whole piece at the same level of ‘finished’ (even though it’s unfinished - do I make sense?) before you’re confident that everything is where it should be and proceed to the details. So sketch out the composition first. See how things fit, what’s the dynamics. You’ll save yourself from limbs sticking out from the frame, odd proportions etc etc.
Because it’s a game of relationships between different parts of the picture/scene. I ask you not to worry about finishing a single element before laying out the rest because you’ll find that said element will look different once the other part appears! For instance - you might think that the colour you picked for a character’s hair is already very dark. But once you’re done with the night sky background, you’ll find that it’s in fact too light, and doesn’t work well with the cold palette. You’ll have to revisit different parts of the image as you go to balance these relationships and make the picture work as a whole.
Give an impression of something being there without actually drawing it ‘properly’- because details are hard, mate. You’ll see that my lineart usually has hardly any, and my colouring is large unrefined stains, but the finished thing looks convincing. Like, fuck, I can never focus on how Crowley’s eyes are really shaped. So I just turn them into large glowing yellow ellipses crossed by a line, and heard no protests so far.
Don’t panic if you messed up (you probably didn’t anyway). It might turn out to be a completely unnoticeable mistake - because, remember, things work together to balance each other, so another finished off prominent element will probably drown that badly placed line that looked so visible and out of place a second ago.
It might not look good before it’s finished. I’m mostly immune to it after years of drawing, and my recent illustrations all follow a specific method (ykno, my sunset glow effects and all that) so I can kinda predict the next stage. But I do my linearts on a specially picked crap paper, I don’t bother erasing the smudged graphite, and it looks messy af until I make the background white in Photoshop. Conclusion: you might have a moment of doubt as you work through a piece, but try to break through it - I often suddenly start to like what I cursed a minute before! - and try to finish it even if it’s meant to be bad. This way, looking through your past pieces, you’ll see the progress. And trust me, I can’t even look at my art from literally three months ago. It’s normal.
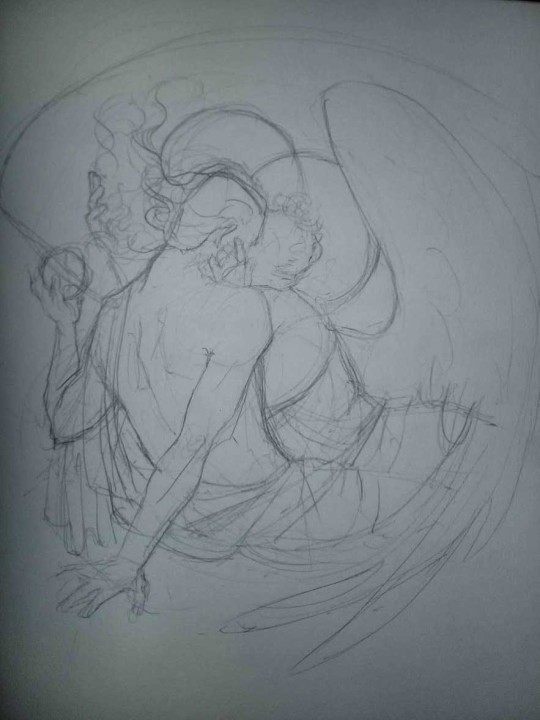
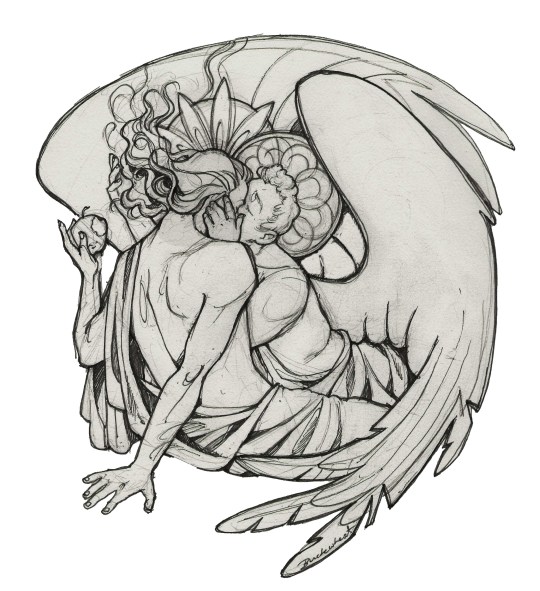
Now, pics! The sketches are paler in real life, but I increased the contrast a little so you can see something.
1. Laying out the composition!
I wanted to just show them kissing, but I got carried away due to some Art Nouveau inspiration. As you might have noticed, most of my illustrations are quite self-contained (ykno - they look like a sticker on a plain background). So I wanted a tight swirl bordered by Aziraphale’s wings creating a sort of rounded, yin-yang like bubble around them. Consequently I made the whole composition revolve around their heads.

2. Adding more details to the sketch. It’s messy af. It will be messy until I’m done. It’s fine.
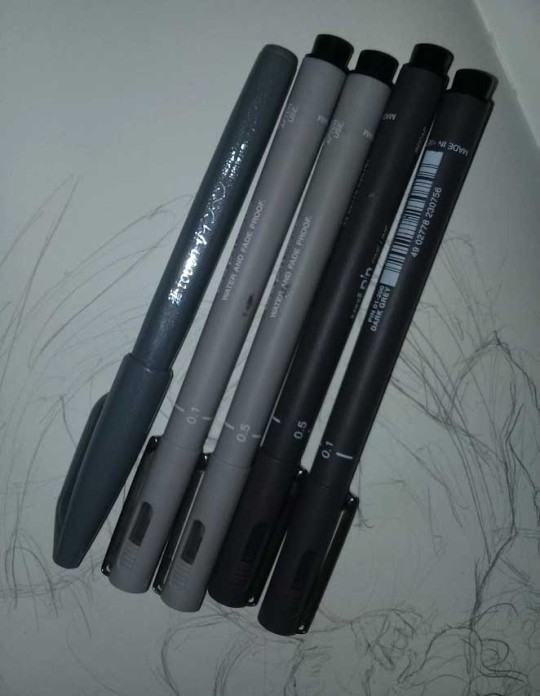
3. These are the fineliners I use for the linearts! They are made by Uni-ball and come in light and dark grey. I also sometimes use the guy on the left - ‘Touch’ sign pen by Pentel, when I want more brush-like, wider strokes. I work in grey because when I scan it and do my usual boring trick with sunlight highlights - which is an Overlay mode layer in Photoshop - the highlights ‘burn out’ the lines too and make them vanish a little, and the lighting effect gets more striking. I also like to use the light grey ones to make something look pencil-y without actually using pencil, because pencil fucking smudges.
4. It smudges! So because I am right handed, I start inking from the right hand side, no matter how tempted I am to do their faces first.
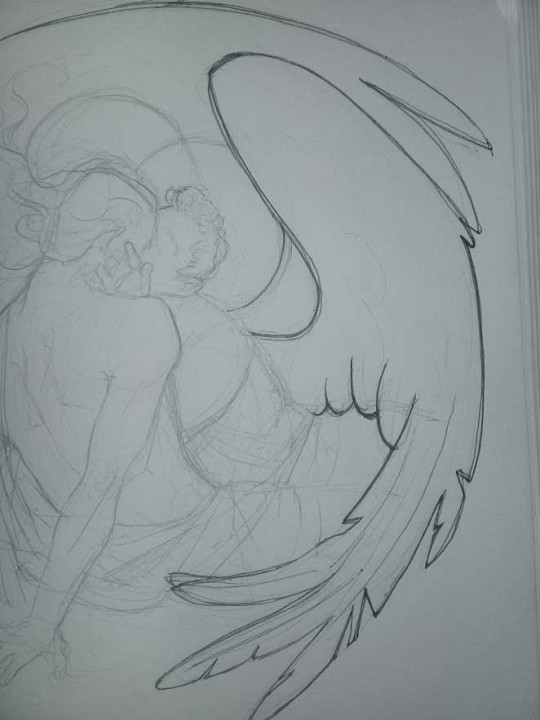
5. You can see the composition directions here. I made it intuitively, but ofc some ppl actually use grids etc to lay out their drawings.

6. See how pale ans thin the lineart was at first? I kept adjusting it as new inked parts were appearing. It starts to look nice and consistent now!

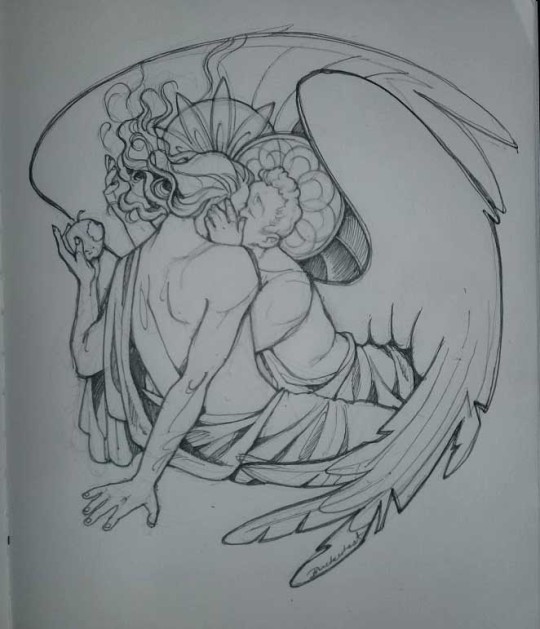
7. Finished lineart? There are some mistakes which I later corrected in PS. Notice that Aziraphale’s face has hardly any details on it - I tried to make the drawing suggest his expression rather than risk overdoing it.
8. Photoshop time!! You can totally do what I did here even if you don’t have a graphic tablet. I used Curves tool to enhance the lineart, then Quick Selection Tool to select the background around around my sticker-like piece and filled it white (on a new layer ofc). I keep this white layer on top of the layer order so it works as a mask as I colour. I decided I did not like the hatching shading underneath Aziraphale’s halo, so I erased it with a Stamp tool (because I wanna keep the textured grey fill my crap paper naturally gives me!). It’s done roughly but won’t be visible once the thing is coloured.
9. And the reason why I keep the grey shade instead of easily getting rid of it by using Curves/Levels is because when I set this layer to Multiply mode and colour underneath, it gives me this nice desaturated look like from an old cheap paper comic page. It works as a natural filter! But of course I can’t do bright colours this way, so all my glowing highlights happen ABOVE the lineart layer - on a separate layer in Overlay mode!
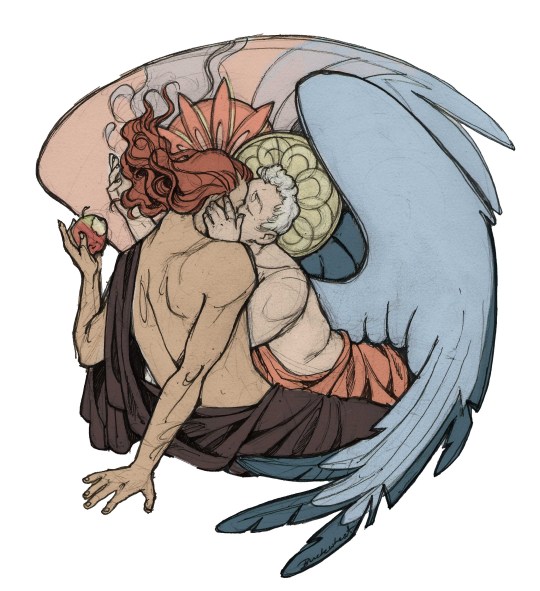
Finished thing here!
_____
Commission infoBuy Me a Coffee - help me with my transitioning expenses!Prints and stickers and things on my Redbubble!
#ask the buckwheat#long post#tutorial#drawing advice#drawing tutorial#good omens#ineffable husbands#good omens fanart#good omens art#my illustrations#doodles#toastedbuckwheat
1K notes
·
View notes