#i used the wrong psd on this icon bUT I DON'T EVEN CARE
Explore tagged Tumblr posts
Visit Tumblr Blog
Explore Tumblr blogs with no restrictions, modern design and the best experience.
Last Seen Tumblr Blogs


Fun Fact
China blocked Tumblr because of pornography and censorship problems in 2013.
Text

THE SHIFTING FREELY WAS a work in progress... to put it kindly, at least. cat just offered a toothy grin upon the muzzle, deciding to not say anything. there was a STRONG chance she would jinx herself if she tried to put any semblance on confidence in her improvements. and if she downplayed it, her luck would probably have her shift right then and there just to be an asshole.
though his statement d i d entice a low rumble in her throat. not a purr but one of thoughtful intent. she actually did believe it; though maybe for a reasoning different than the truth. he wasn't exactly a normal animal by humanity's standards - to be found out would be probably some scientific hunt. so keeping on the down low lay in his interests... at least that was what flickered to her mind.
"eh, attention sucks." the comment she opted for instead, though her eyes would scrunch, as if she didn't fully believe her own words. it was true in her opinion, but she pondered those like scott... where fame gave them fortune... but also no privacy. you win some, you lose some?
that felt a hollow statement in her head, but her stomach answered before she could try and r e f o c u s on the matter. long growl from the depths, and so awkward laugh bubbled from her throat. "heh, how could y'have possibly guessed that..."

𝐄𝐯𝐞𝐧 𝐭𝐡𝐫𝐨𝐮𝐠𝐡 𝐡𝐢𝐬 𝐚𝐭𝐭𝐞𝐧𝐭𝐢𝐯𝐞 𝐩𝐚𝐰𝐬𝐭𝐞𝐩𝐬, he feels her small body gravitate towards him. Airin falls back. His stride slows to match hers, allowing his warm flank to gently press against hers– an act of comfort, of companionship. Tonight has already felt like a decade, and truthfully he won’t put her through any more so-called lessons. He’ll get her back to his place with a full stomach.

He blinks, a humorous chirrup stirring. “ …Well, yeah? Unlike you can shift freely. Back there I could’ve shifted just to make those kids shit themselves, but… This might sound ridiculous… I don’t like being the center of attention. ” Another purr to bypass the actual explanation.
“ Plus, you’re hungry, yeah? This will be much faster. ”

#airxn#&&. verse ( escape life into another )#i used the wrong psd on this icon bUT I DON'T EVEN CARE#so igNORE THE BRIGHT COLORS#but what i cannot ignore is that airin would LIE#NOODLES AND CO DOESN'T EVEN H A V E RAMEN !!!!#tsk tsk ):#this thread is: cat's body constantly betrays her and it takes years to go to mcdonald's#&&. queue ( patience makes for better aim )
112 notes
·
View notes
Text
How to make icons like these:


Flags: Idol system, Bubblegender, Musicstar
Warning: This tutorial relies on the idea that you have some understanding of how to use photoediting software like photoshop, however if something that doesn't make sense then feel free to ask and I will explain it as best as I can.
All the icons we made for this can be found here! Thank you for reading, please consider reblogging this post and the icons because this took forever to write up and the icons take a LONG time to make.
In this tutorial I will make DID/OSDD Aoi Miyake icons.


Anyway let's get into it!
Step one, choose what you're going to make (and gathering resources)
This may seem obvious, but going in with a plan makes these so much easier.
In this stage we consider three things:
The flag and/or colors we want to use in the icon, this is important as it can affect the images used or even the character depending on how similar their colors are
Character and the general colors associated with them, this is important as it can makes the filtering stage easier (or harder) and can make an icon look 'wrong' or 'right' sadly
The border of the icon and how that will affect the icon itself, sometimes they're easy to work with, others not so much. Our method differs from a lot of other peoples so we take more time with them than most others
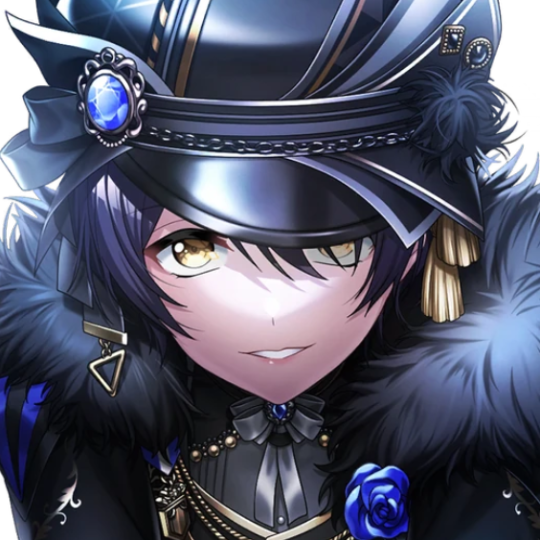
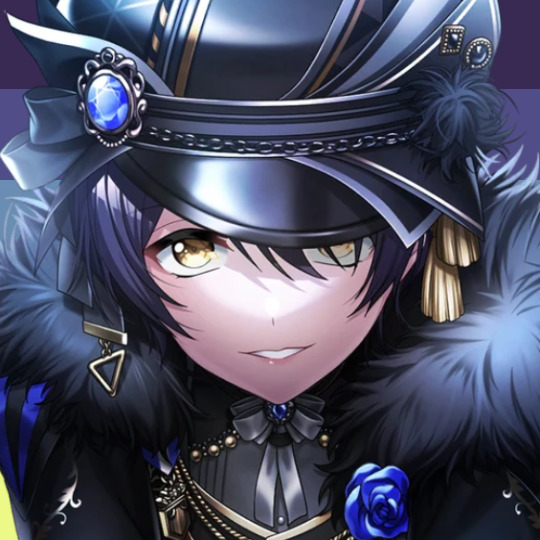
In this case I will be making DID icons of Aoi Miyake from D4DJ, however due to how most of her cards have a blue tint I will be using the plural peafowl flag by m0dem0n than the original DID flag- This is to save time and make th icons look more harmonious.
We will also be using this mask by i'mjustchillinghere as the icon base


Step two, coloring the middle image (optional step)
This is a lot of guess work and everyone has a different process for this. Essentially we're going to make a PSD that makes the image look better with the colors of the flag.
As shown above we have the flag and the character image, but they don't match completely. The rose and other blue accents are too saturated compared to the flag and the black is too black and the wrong blue hue, the eye could also be a bit greener and saturated imo.
What I like to do is open the image with the flag behind or infront, so I can see the colors I'm working with.
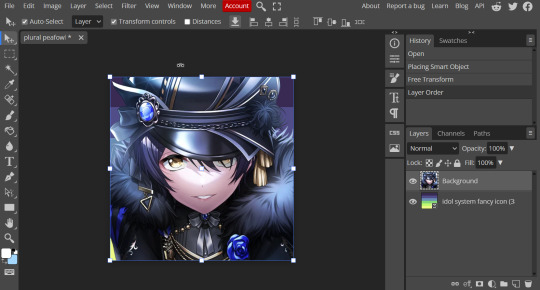
Then I open the hue editor layer (Layer > New Adjustment Layer > Hue and Saturation). It's very important to clip the hue layer to the image so it doesn't start messing with the colors of the flag (we've had this happen many times before it's very awkward trying to match a color that keeps changing) to clip right click 'Clipping Mask'.
Your screen should then look like this:
Okay so if you need to adjust the screen to get the icon in the center so you can see everything do this now.
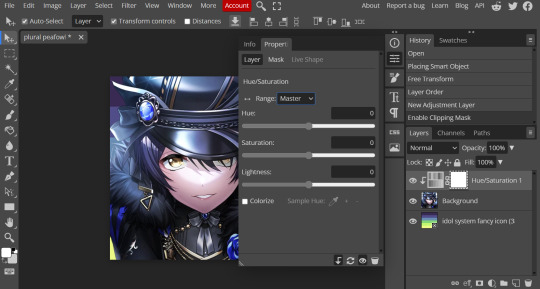
Next where the box with the hue options says master, click it.

These are all the color options you can change, in this we'll mostly be using, yellow, green and blue. For other projects blue and cyan sometimes get 'mixed up' and can control both shades so be careful with that.
Other color settings we personally use are: Vibrance and Selective Color (both are located under the Layer option), but in this case I'm happy to just use Hue and Vibrance.
This is what the icons look like:

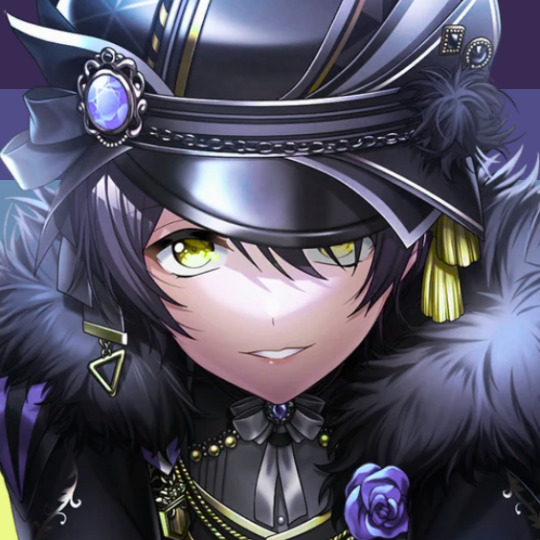
No color editing | Just Hue and Saturation | Hue and Saturation + Vibrance
Now your middle icon is ready turn off the background layer and save the image as a transparent png!
Step three, preparing the mask for use
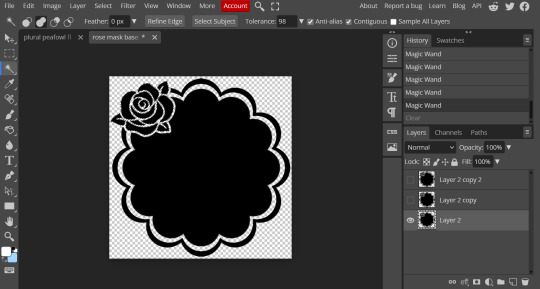
So the mask is the base of your icon, however if you clip all aspects of your icon to the mask it looks like this and you can't see the flag.

So what you need to do is layer the mask. This will vary in difficulty, it can depend on how far apart the pieces of the mask are and how they interlink. You could erase the border parts but that takes a lot of time.
This icon is simple because to me there's three clear sections, the middle part, the border and the rose. What you need to do is copy the layer three times and get the wand- I would reccomend having the wand strengh over 100 or else black lines may remain, but this will depend on how close the black parts are.
Hide the top two layers and work from the bottom up. Select all the areas you want to delete, in this case I can only delete the rose (the border is too close to the middle part and would delete that as well) and then hit delete.
In this case, I will just erase the border by hand, and then BOOM, you have a base!
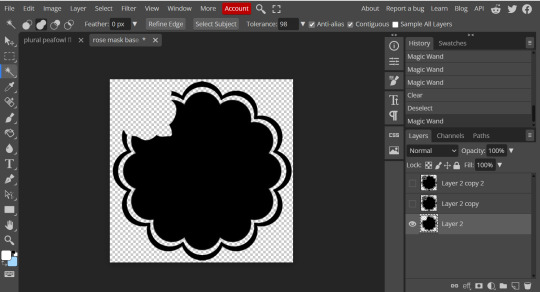
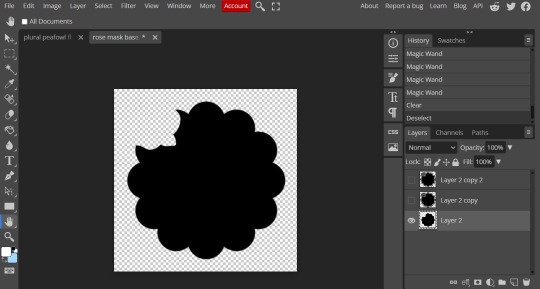
Hide this layer and move to the next, for this one I'm removing the middle and the rose.
For the next layer you can select what's in the layer below and delete it without it impacting the border, which makes the icon process easier, however in this case I'm going to give out the border layers for you here!


Step four, using the mask
NOW you can clip the flag to the layers! We always clip it to the base and border layer.
As for the rose... We make a seperate layer and clip it to those rose. Then (using the eye dropper tool) pick colors from the flag to use to color it in! As shown:
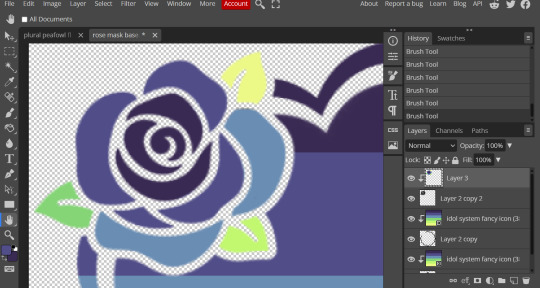
Next step is to add the image you colored!
Go to File > Open and Place and then choose the PNG from your gallery and place it in the icon. Once it's there fiddle around with it until you get the image you want and then BOOM!

Now you have a singlar icon!
Feel free to repeat this as many times as you want and make as many icons as you want.
-
All the icons we made for this can be found here! Thank you for reading, once again please consider reblogging this post and the icons because this took forever to write up and the icons take a LONG time to make.
84 notes
·
View notes