#i left my browser and the tag cut i ;-;
Explore tagged Tumblr posts
Visit Tumblr Blog
Explore Tumblr blogs with no restrictions, modern design and the best experience.
Last Seen Tumblr Blogs


Fun Fact
Mobile Tumblr US users spend an average of 4.04 minutes per session on the app.
Text
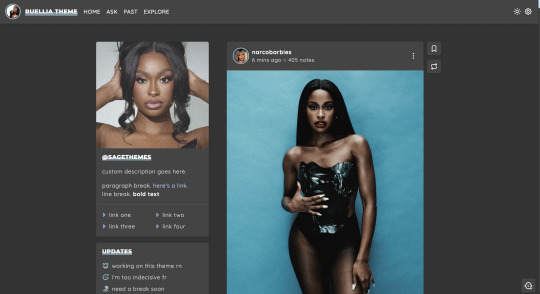

ruellia | theme by sage
get the code: preview v1 / preview v2 personal version of my fansite theme abelia!
features (more info below the cut):
toggle: tags on click, explore popup, & updates box
choose between left or right sidebar
headerbar includes icon/blog title, home/ask/archive links, search bar or explore popup, scroll to top, day/night, & tumblr controls buttons
sidebar includes an uploadable image with a custom description, up to 6 links, & an updates box
customizable: colors, body & title fonts, and font size
npf supported, responsive design, 3 corner options, tabler icons
nothing needs to be changed in the code, everything can be changed in the customize panel!
terms:
reblog if using
do not touch the credit
all terms / faq
credits listed in the code / credits page
please consider supporting me ♡
blog name !! important
make sure you fill out the blog name field, this is what will show on the top of all your original posts. to clarify: your blog name is your blog’s url - for example: phantomcodes
responsive sidebar
when the browser window gets too small the sidebar will disappear and become toggleable, the sidebar toggle button will appear on the right side of the headerbar next to the day/night button
explore popup
the explore menu has a search bar, bio text section, up to 5 info stats, up to 4 blogs, up to 4 socials, and up to 8 extra links
the blogs, socials, and links are all optional! leave the first one blank if you don't want these
sidebar
the sidebar will stick to the top of the page, if you use the updates the sidebar will scroll and the updates box will stick to the top of the page
general notes
many things will not show up if they’re left empty, some examples: if you don’t want the sidebar links leave the sidebar link 1 field blank
reminders
remember tumblr’s customize panel is buggy, toggle the options on/off before saving
i’m still on a sort of semi-hiatus, i’ll be around for questions but please check my faq, answered asks, etc. before asking - i will not answer repeated questions!
#theme hunter#themehunter#code hunter#tumblr resources#tumblr themes#completeresources#all resources#userbru#userdre#userbrina#usernik#userduzi#tuserlucie#useraashna#usercharithra#userrajan#usertj#ruellia#phantom code#phantom theme
497 notes
·
View notes
Note
Hi hi! I hope you're having a good day so far! 😊 I have been super appreciating seeing you creating site skins and I saw you said you were self taught. I wanted to ask if you might share some of the resources you've found helpful in learning to make them. I've gone through the posts ao3 has in the FAQ and I have got some limited experience with html from the myspace/livejournal/early tumblr days (though it's been a while since I used them and am definitely rusty lol) so I got a grasp on basics. I can figure out how to make changes like color and font and padding and etc, but where I've been struggling is trying to figure out what the available selectors are and what they control. Like .workskin and .bookmarks. I've tried to find something like a glossary or list of what's available to mess with and I've tried just going through other people's skins to see what I can decipher, but it's definitely been a struggle to process and understand working that way. Any pointers or resource suggestions you might have are greatly appreciated! Thank you!
My main resource for the CSS code skills is W3Schools.com. The tutorials are mostly easy to follow, and most of them have an option where you can run their code and then modify it to run your own version.
If I can't find what I need there then I just google "CSS drop cap" or whatever I'm trying to do and something usually pops on StackOverflow or CSS Tricks.
As for the selectors, that's where you want to be on a computer instead of a mobile device so that you can use your browser's Inspect feature. Right click on the page you want to look at and this menu pops up. You can choose Inspect down there near the bottom.
Using a cut because of length and screenshots.

This is what AO3 looks like with the Inspect window open in the Firefox browser. If you're using Chrome, the window will open along the right hand side instead.
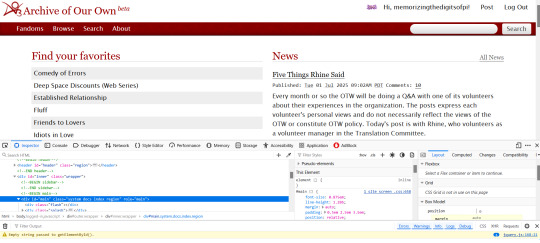
The thing that makes the magic happen is the tiny little arrow inside the tiny little box in the far left upper corner.
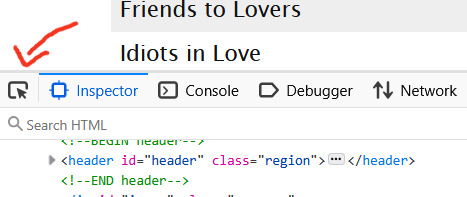
Click on that little arrow and then hover your mouse over the website. As you move your mouse around, different areas will highlight. You'll also see some mouseover text telling you the selector for that element.

a.tag is still pretty generic, though. That just tells you it's a link (the html a tag) that is also a tag. So how do you get to know that specific link in particular in that specific part of that specific page?
Click on it. When you do that, the inspect window will shift automatically to that exact area of the code, including selectors
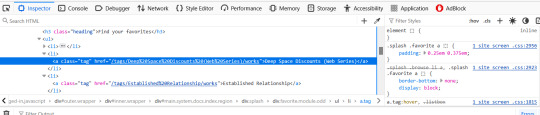
On the left, you can see the favourited tag link is highlighted. On the right, you can see a couple of different snippets of code that start with .splash .favorite a
if I scroll down within that window, I can see more code for that area of the page
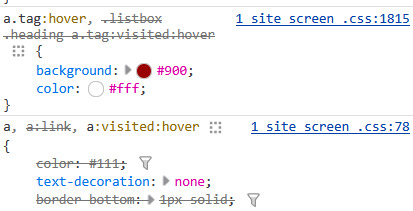
this shows me that tag links have a red background and white text when you hover over them
a.tag:hover { background: #900; color: #fff; }
The great thing about the inspect window is that you can do temporary edits in there to try stuff out. So you could change that red to a blue. You could change the white to black. You can add more lines of code like a border or increased padding etc and see it change live on the screen. All changes will revert if you refresh the page.
The other thing, that I only JUST noticed as I was making that medieval skin (or maybe the rustic hospitality one I made just before it?) is that there's also a breadcrumb along the bottom of the lefthand window!

That breadcrumb shows me the exact selector I need for the element I clicked on! In this case, that favourited tag can be styled with
.splash .favorite.module.odd li a
I have no memory of why I know this but you leave off the div when you're writing the CSS
You can get as specific as a link (and even use a pseudo-class like nth-of-type if you want to make each one of those links a different colour) or you can leave off the li a (list item link) and just style the box itself. That's how I added the woman throwing hearts into the favourites in the medieval skin.
This might be too much information or it might make you crave even more, but either way I hope it gets you started? Good luck!
96 notes
·
View notes
Text
crush | logan howlett x female reader

hi everyone! i wrote this for fun. it'll probably turn into a series of small chapters while i write my more hefty logan fic. i hope you guys enjoy!
warnings: reader's kinda horny i guess, sexy man, based on crush by ethel cain, 1.5k words (i wrote this in like an hour)
You’d seen him around town.
At the laundromat with the blinking fluorescent lights. At the dingy bar around the corner from the laundromat. At the gas station, filling up the tank of his red truck.
You never thought to say hi, never to engage with him in any way.
He created such a stir when he first arrived. No one moved to your town unless something was truly wrong with them. Most of the men had leering gazes and dangerous intentions, but not him. Never him. You were in his vicinity frequently, but never once did he attempt what many others had. All failures, of course.
You lived contently in your grandmother’s old home, moving there after her cancer took a turn for the worst a few months ago. When she passed away quickly after that, she left the house to you and you decided to keep it. It still smelled like cigarettes, the stench burned into the walls and carpet, but the smell reminded you of childhood trips to Kansas. Those trips were scorched to the back of your eyelids, forever being replayed. Everything was the same as when you were a child; the small Mexican restaurant, the old movie theater, the arcade that closed seven years ago.
Now, you sat behind the counter at the small antique shop you spent most of your days in. It was quaint, filled to the brim with every kind of knick-knack you could think of. There were crates filled with records and CDs, most scratched or completely unplayable. There were pieces of furniture, dusty mirrors, moth-eaten upholstery, chipped paint jobs, and broken hinges. The bookshelves that lined the walls of the store were stacked with books. You’d taken a few home in the past, knowing that they wouldn’t be missed.
And the clothes. There were racks on racks of vintage clothes. Most were out of fashion (even for the time they were made) or damaged. Still, you liked to play dress-up every so often.
The job was boring and mundane, but it paid the bills. The family who owned the store didn’t seem to have time to keep up with the place, so you managed the inner-workings of it.
Today, you watched cars go by, wondering when would be the best time to cut your losses and close for the day. Some days you managed to get more than a few browsers, but today was not one of those days. You had one person come in around lunch, but they looked for about five minutes before heading out.
Your mind wandered as you watched people walk by the storefront.
You thought of him. The man you saw everywhere. The man who never spoke to you, not even to say, “Excuse me.”
The man that just walked through the front door.
Eyes widening, you sat up straighter and calmed your heartbeat that suddenly thundered in your ears. “Welcome in! Everything with a blue tag is sixty percent off today,” you said with a bright smile.
He simply looked over at you and then continued his perusal.
You deflated. Harsh.
As he walked around the store, you felt like a live-wire. Every creak of the floorboards sent your heart spinning in your chest. You hadn’t felt like this about a man since you still called men boys. Being in your late twenties, that meant a very long time.
You grabbed a box of donations from the back room and moved to the floor to start stocking items on the shelves. You rationalized your decision to suddenly start restocking items after having a full day to do so by telling yourself that if you looked busy, he might feel inclined to buy something. You could nearly feel your nose growing by the second at that thought.
Moving through the rows of shelves and assorted items was second nature to you at this point, knowing where everything went in this mess of a store. You conveniently moved to the side of a shelf that viewed his aisle through gaps in the many items strung about. As you placed a silver mirror on the shelf, your gaze moved to watch his face on the other side of the rack. He was stunning.
You hadn’t had much time to analyze him; it was only small glances here and there in the time he’d been around. Now, you took your time. He was looking at an old book, bound in red fabric. It looked as if it had seen the bottom of a sewer. Luckily, he seemed to be making a careful inspection of the text, giving you enough time to look him over.
He was beautiful in a rugged kind of way. He looked like he worked with his hands; they were large and rough, with calluses around the fingers. His knuckles were prominent with sharp edges. You wondered what he did for a living. Did he move here to get away from city life? Was he a runaway circus performer? You internally smacked yourself in the head for the stupid thought.
He’d probably make the circus look sexy, though.
He had a large figure hidden by a flannel and white t-shirt. His attire pointed to him being a worker of the land. A farmer, maybe. That would check out with the truck you'd seen him driving around in. Always covered in mud with logs of wood piled high in the back.
His hair was a rich brown and you wanted to dig your fingers into it. You wanted to feel his beard against your skin.
What the hell is wrong with me?
You don’t have sex for so long that your brain goes fuzzy at the idea of a stranger’s beard scratching your neck. God. Get a grip.
You straighten your back and continue restocking things. Play it cool.
Soon, you fell into the rhythm of it, nearly forgetting the other person in the room. You moved to the bookshelves, loading more books onto the already strained wood. People really needed to stop donating things to you and start actually buying things. You’d be out of business by next summer.
As soon as you realized you needed to go back to the stock room to grab another box, you heard a grunt behind you. You nearly jumped out of your skin. You dropped the box you were holding and faced the man. Your mystery man.
He was so close, you could smell him. He smelled like smoke and sweat. You felt yourself salivate.
You looked him in the eyes for the first time. “Do you need help?” You asked quietly, scared that he’d run off if you spoke too loud, like a wounded animal.
“How much for this?” He asked, keeping your gaze. His voice was smooth.
You looked down to his hands, which were holding the book he had been examining earlier. “It doesn’t have a price tag?”
He shook his head.
Now you felt like you were being held under a microscope. The way his eyes ran over your face made you go red; you hadn’t felt this flustered because of a man in a long time.
“Okay, I can check at the front,” you said, keeping your quiet tone.
He just grunted again and followed as you led him to the register. You had a book of all the prices for things so that you could properly mark them. If you didn’t have the vague feeling that you were going to explode at any moment, you’d know off the top of your head the price of that tiny book. It was about the size of his hand, making you bite the inside of your cheek.
You opened the book and searched for the page with book prices. When you found the page, you ran your finger down the list.
Small = $1.99
When you looked up at him, you jumped a little. He was looking at you with such intensity, you’d thought he was going to have an aneurysm. It made your cheeks flush again, but you cleared your throat and said, “It’s $1.99. With tax, it’ll be $2.30.”
He nodded, putting the book down on the counter as he reached for his wallet. You read the book title: Frankenstein. “I love Mary Shelley,” you said as you reached for a brown paper bag.
He looked at you, his expression not revealing anything.
For some reason, you decided to keep talking. “It’s such a perfect analysis of ‘how far is too far’ in science and experimentation. I loved reading it in high school, I think you’ll really enjoy it,” you said, not particularly needing a response.
He placed the exact change due on the counter and looked you in the eyes as he said, “Thank you.”
Your heart fluttered. “You’re welcome…” You trailed off, hoping to God that he’d tell you his name.
He thought about it for a moment. “It’s Logan.”
You smiled. “I’m glad you stopped by, Logan.” You introduced yourself. It would be nice to have another person to say ‘hi’ to on the street. And you imagined he was thinking the same thing.
His face didn’t jump into a smile, but it didn’t look as harsh as it did when he first walked in.
And so began your crush on the stoic man who moved to town.
133 notes
·
View notes
Text
A Gift From Papa. (No CW)
CW: NONE
Characters: Phantom, Papa Copia, Other Misc.
Based off this lovely idea by @damagedghoulette !
Read it under the cut or on AO3!
A soft bundle of knocks, “Papa? May I come in?”
Papa Emeritus looked up from his desk, smiling at the new summon that peeked his head in. “Phantom! Pipistrello! Come in, come in.”
The ghoul smiled, stepping in before closing the door, he quickly waddled up with a nervous smile, holding his phone tightly.
“Papa… I found something I'd like to spend my allowance and savings on, but it's online so Aether told me I had to come to you.”
“Oh?” Copia tilted his head and held out his hand. “May I see?”
Phantom's tail began to wag as he gave Papa the item, watching Copia hum and observe the listing. “A onesie?”
“Yes! Yes, I have the money, too!”
Reaching into his pocket, Phantom laid the crumbled wad of cash on the desk with some change, smiling wide as Papa began to count with ease. He looked over at Phantom's phone, the wad again, then back.
Copia frowned, “Little one, I apologize, but you don't have enough.”
An instant frown and Phantom's tail stopped wagging. “I don't…?”
“No, Pipistrello. You have 158 krona, you need 264.”
Phantom's tail went between his legs, slowly nodding as he gathered up his cash and change, mumbling a thanks to his master for his phone back. Phantom bowed, mumbling again with an apology before he turned and left the room. Copia eyed the bat until he left before sighing, turning back to his open computer to finish inputting the band's weekly expenses. However, the image of Phantom's defeat stayed adamant in his mind, Copia sighing before opening up his browser tab and going to the exact site Phantom found his onesie on.
…
“Phantom! You have mail!”
The Quintessence ghoul perked up, tilting his head as he jumped up from the couch in the common room to meet Cirrus half way. He eyed the tag and in return his tail began to wag with interest.
“To: Phantom, My Pipistrello.”
Cirrus looked over his shoulder, smile wide. “What is it?”
“M’ dunno!” Phantom chirped back, quickly hopping into the kitchen to place the box down and undo the ribbon.
Lifting the top, Phantom let out a loud squeak and gasp, wings expanding as pure excitement filled him. He grabbed the box and ran into his room, leaving the pack nearby utterly confused. It took a few minutes before Phantom came out again, holding a stuffed witch toy - but more importantly his pajamas changed. A bat onesie hugged his form, but customized slits for both his wings and tail. He began to jump up and down, running to the common room where his pack cooed over his attire.
“Aww, Tom'! That's adorable!” Swiss laughed, looking as Phantom turned to show off his backside.
“Isn't it?! I can't believe Papa got it for me! I-I totally thought I'd never be able to get it!”
Dew tilted his head, holding the plush as Phantom let him touch the hair. “That's really sweet. You know Papa loves letters, maybe you should write him a thank you letter.”
The newly gasped, flapping his hands with excitement. “I should! I should! Oh thank you Sodo, I'm gonna do it right now!”
He quickly hugged the fire ghoul, unable to contain his joy before grabbing the plushie back and running to his room once more. With Phantom gone, Cirrus was able to fist-bump Aether who sat next to Dew.
“Hell of a job on those slits, Cirrus.” He complimented.
The Ghoulette chuckled, “Nice job getting his measurements.”
35 notes
·
View notes
Text
People, Running - Chapter 8
Pairings: Fem!Reader x Yeosang, Mingi, and Hongjoong
Summary: As you look to the future, you begin to explore the notion that you have the capacity to love more than one person-- and what you find surprises even you. That being said, you aren't upset... even when your heart leads you down an unexpected path. Being loved is the best thing, and you are certainly very, very loved.
Genre: Vampire AU
WC (Total): 50,021
Rating: Explicit
Originally Published (Completed): 230601 on ao3
Tags: Under the cut
A/N: Set just after Dancing In The Dark
Tags: tw/cw vampire attacks, heavy angst, vampire turning. Yeosang is super mushy, promise rings, smut, teasing, vaginal fingering, Hongjoong gets a bit possessive, vaginal sex, aftercare, midnight snacking gone wrong?, accidental vampire attack, Yeosang has a short fuse it turns out, misunderstandings, growing apart, more angst, reader puts herself in danger, the clan comes to her rescue in more ways than one, love confession

“Can I take you on a date tonight?” Yeosang whispered in your ear as he squeezed you tight. You yawned and stretched, rolling over and finally opening your eyes to see him peering down at you with a soft smile on his fair features, made even prettier by the early morning light filtering through the window.
“You took me on a date last night.”
“I know.”
“So…”
“So, I fail to see the problem,” he said cheerily, quirking an eyebrow as he heard your stomach rumble. “Should we get you fed, and then go from there?”
“As long as you promise you’re not going to try to cook again. I know Mingi has been trying to teach you, but…”
“I know,” Yeosang sighed, wrinkling his nose. “Let’s just not…”
“They didn’t even look like eggs anymore,” you snickered.
“Just don’t tell—”
“Oh, I sent pictures to Mingi,” you cackled. Yeosang groaned loudly.
“Wait, how many... Why would you do that?” He wailed, hiding his face with his hands.
“It’s only fair considering you set off the smoke alarms for the building and everyone had to evacuate. It needed to be immortalized."
“I— I’m going back to sleep now, goodbye,” Yeosang said with a laugh, pulling the covers over his head. You giggled and scooted closer to him, trying to pull the blanket away.
“I still love you, you know. Even though you can’t scramble an egg.”
Yeosang sent you off to get your nails done that afternoon, something you felt was highly suspicious. That being said, it had been a while since you’d been last, so you agreed to it anyway, even though you were still figuratively giving him a hefty side eye about it. You enjoyed the time with your regular nail tech, cutting up and sharing stories and generally catching up.
When you returned home, Yeosang was nowhere to be found, but had left a note for you.
I’ll be back soon to pick you up. I love you, jagi. – Yeosang
Okay, what is going on here? What is he planning?
You found a garment bag hanging in your room. Inside was yet another pinup-style dress, this time in a pretty blue and white gingham with puffy sleeves and a swing skirt.
Well, he’s been going through my browser history again. This man, I swear to god. At this rate I'm going to have a whole vintage wardrobe in no time.
The blue in the dress went well with the deep red you’d chosen for your nails, and after grabbing a white crinoline to wear underneath it, you wandered over to your closet, shuffling through the pile of shoes on the floor for a few minutes. Eventually, you found a pair of red flats to match everything else. Once you were fully satisfied, you headed into the bathroom to shower and get ready for the evening, mind racing as you tried to think of what Yeosang could possibly have planned.
You had just spritzed on some of your favorite perfume when Yeosang popped his head around the bathroom door.
“Oh, don’t you look gorgeous,” he breathed, looking you up and down. You blushed and waved him away. You did have to admit though, as you looked back in the mirror at yourself, that you looked nice in the outfit. Yeosang was certainly looking at you as though you were the only other person in the world.
“So… where are we going?” You asked warily, noting that Yeosang was dressed in dark slacks and a white button down, with a matching suit coat and tie.
“Don’t look so worried,” he giggled, reaching into his coat pocket and whipping out an envelope. “I got us tickets to see the symphony. You mentioned a few weeks ago that you wanted to go.”
“I’m gonna need all three of you men to stop being so observant,” you laughed. “Between you and Mingi and Joong, I’ve been completely spoiled.”
“Good, that was our intent from the start,” Yeosang replied with a grin as he leaned in to give you a quick kiss. “Shall we?”
Yeosang had gotten great seats, with a full view of the stage, and he held your hand during the entire performance. When it was over, he turned to you, beaming.
“Was it everything you hoped it would be?”
“It was incredible,” you nodded. “I’ve been wanting to come for years honestly, but I told myself I shouldn’t spend the money. I guess it’s silly considering, but… whatever. I’m so glad that I got to share it with you.”
“I know it’s a little chilly out,” he said as the two of you navigated through the coat check and got ready to head out into the night. “But could we take a walk?”
“Oh, sure,” you nodded. “It’s still kind of early. I’m up for whatever you want to do,” you said with a grin.
Yeosang dropped by the coffee shop, dipping in to grab your favorite drink for you, and then steered you towards the park. You were getting a little nervous now, and you weren’t sure why. It was just a date. But it was too much like your first date. Something had to be up. There had to be some sort of ulterior motive.
Sure enough, when the two of you reached a familiar bench, Yeosang led you over and sat you down. He reached out to you, gently smoothing your hair away from your face, fingertips trailing down your cheek.
“I love you,” he said in a low voice. It was the one you knew he used when he felt like crying, not that he could. “I love you so much. You are so special to me, and I want you to know that all this time I’ve been able to spend with you has been the best of my life.”
“Y…Yeosang?” You mumbled. You watched, eyes wide, as the vampire fumbled with a small box as he pulled it from his pocket.
“It’s not an engagement ring,” he said hurriedly when he saw your expression. “No. That wouldn’t be fair to Mingi and Hongjoong. But…” He opened the lid, and you gasped. It was a ring, an elegant silver band with a glittering pear-shaped sapphire set in the center.
“I…” You had no words. Your mind was racing, but the words were not connecting in the middle, and nothing came out as you sat there, gaping at him.
“It’s a promise ring,” Yeosang told you. “I know we’ve talked about forever. I know we’ve talked about turning you someday. And I will never pressure you about any of that. But, in the meantime, I wanted you to have this tangible reminder. Something physical that you can touch and hold and know that even when I’m not around, that my love for you is always with you, that you are dear to me, and that I’ll be here for you, for however long forever is for us.”
The words still would not come, but you were on the verge of happy tears, and he grinned and bit his lip, plucking the ring from the box and slipping it onto your right hand as you held it out to him.
“I love you,” you finally blurted out. “Oh my god, I love you so much, Yeosangie. You… you kinda scared me with the whole fancy date tonight. I wasn’t sure what you were up to.”
“Would I ever do something mischievous?” He feigned horror.
“Um, yes. Have you met yourself?” You giggled, looking down at your ring, admiring how it shone in the moonlight. “Sangie, this is beautiful. Thank you. I could never forget you, you know. You’ve changed my life for the better in so many ways.”
“I’m so glad to hear that, jagiya,” he said happily, reaching for your empty coffee cup as you finished your drink. “Here’s to many more years together, yes?”
“Sounds like a great plan,” you nodded. You shivered a bit as a stout breeze blew by, and Yeosang got up, tossing the cup into the trash before coming back to collect you.
“Let’s get you home into the warmth,” he said, offering an arm to you.
“You’re just full of good ideas tonight.”
“Aha, and I might even have a few more up my sleeve,” he winked at you.
Unfortunately for both of you, whatever plans had been in store were circumvented when you arrived back at your apartment to find that the heating unit was blowing air only. You sighed as you stared at the thermostat— with the rapidly dropping temp outside, it was already down to 60 degrees in your home. You switched the unit off and sat down at your laptop with another heavy sigh, pulling up the apartment building’s website to make a maintenance request.
“Oh, perfect,” you grumbled as it went through. “Medium priority. In the winter. Okay.”
“Hey,” Yeosang said softly, sitting down beside you. “It’ll be okay. Come on. Let’s pack you a bag and you can come stay at the clan’s house for a few days.”
“Oh, I don’t want to intr—”
“Nonsense, you know Hongjoong would tell you it’s fine. Like he’d pass up a chance to have you around, he’s so damn smitten it’s not funny.” Yeosang laughed as you flushed red.
“Okay, okay. Let me get some stuff together.”
You changed into some sweatpants and a hoodie, and slipped on some more comfortable shoes, and Yeosang helped you gather what you’d need for a few days away. You supposed you’d call the office in the morning and ask for them to work a little faster.
In the meantime, you weren’t upset at all about spending more time with your partners. You missed them so much when they weren’t around. You knew Yeosang was right, as well, Hongjoong and Mingi were already excited about your visit, from the second Yeosang had told them what had happened.
When you walked through the door, Yeosang on your heels and holding your bag, a grinning Wooyoung met you in the foyer.
“Oh, moving in finally? It’s about time!” He giggled wildly. "I've been wondering when you would."
“Wooyoung!” You smacked him in the arm, and he did an excited dance in place, and reached out to hug you gently.
“I’m just joking. Although…”
“It’s not a bad idea,” Mingi’s voice sounded from the hallway, and he came over to hug you. Whatever he said next was quickly drowned out, however, by the sounds of the Star Wars opening theme coming from a few doors down. You raised an eyebrow.
“Seonghwa is having a movie night. Said we could all join him if we wanted to. I think Yunho is in there with him.”
You turned to Yeosang, a wide grin on your face.
“That sounds like fun. We should join them."
“Well, go on then,” he shooed you away. “I’ll put your bags in my room and I’ll be there in a few.”
Seonghwa had clearly not been expecting you to walk through the door to the clan’s home theater, but both he and Yunho leapt to their feet when they saw you.
“Great timing!” Seonghwa said cheerily. “We were just about to start. Episode Four. We were going to watch movies all night… maybe.”
“You said that last time, and you fell asleep on me two movies in,” Yunho cackled.
“I did not!”
“You were drooling on my arm,” the blonde vampire retorted. Seonghwa crossed his arms and stuck his tongue out at Yunho. Yunho, however, was staring at your right hand. You blushed and tried to hide behind Mingi, but Yunho was too quick, and he stepped to you, grabbing for your hand and holding it up.
“Yeosang gave you the ring!” He hummed happily. It looks so pretty on you.”
“Wait… you guys knew?”
“Of course we did, precious girl,” Mingi murmured. “We all helped him pick it out.”
“Oh.”
At that moment, the rest of the clan started to trickle in, Wooyoung and San, with Yeosang on their heels. Hongjoong was the last to come in, and grinned widely when he saw you.
“Little bird! I wasn’t expecting you tonight.”
“The heat is out at my apartment,” you explained. “You guys are stuck with me for a couple days I think, if that’s okay.”
“Oh, heavens, how will we cope, having our favorite human around?” He feigned horror, then giggled and kissed you lightly. “You stay as long as you need, love. It’s okay.”
“Are we all ready?” Seonghwa asked.
“Where’s Jongho?” Yeosang inquired, looking around the room.
“He’s out for the evening. He said he thought he could handle it. It’s been a while and he seemed to be doing fine, so I gave it the okay,” Hongjoong shrugged. “I told him to call me if he needs anything.”
“Do you want some ice cream?” Mingi asked you, pulling you close.
“Ooh, yes.”
“I can get it!” Yeosang interjected, but Mingi shook his head.
“No. You’ll burn the kitchen down.” He snickered as he slipped out of the room, leaving Yeosang standing there glowering. You sidled over to him and gave him a quick kiss.
“It’s just ice cream,” he huffed.
“Oh, Sangie, I know,” you giggled. “You’re never gonna live down the egg incident though. You might as well stop trying.”
When Mingi returned bearing two large ice cream sundaes, you took yours and settled into Hongjoong’s lap, and Seonghwa restarted the movie. You laughed to yourself as the others gave Hwa flack for quoting the whole thing, especially when Wooyoung started a pillow fight over it— until Seonghwa broke out a lightsaber from seemingly nowhere and stood in front of Yunho and Woo, a mischievous grin on his face.
“How dare you cross a Jedi Master!” He told them.
“Sit down, you dorks,” Mingi told them. “Come on, it’s almost over.”
You were laughing quietly as you watched the whole exchange. Some days you were still unsure how you’d come by this odd lifestyle and into the fold with a clan of vampires, but they were so endearing that you had no regrets whatsoever.
When the movie was over, you yawned and stretched, and Hongjoong squeezed you a little tighter and buried his face in the crook of your neck.
“Who are you spending the night with tonight, little bird?”
“I— hadn’t thought that far ahead,” you laughed. “Yeosang took me on a date tonight, but…”
“She’s all yours, Joong,” Yeosang chimed in. “I imagine she will be here for a week or so… maintenance at that apartment building is so slow with everything they do.”
Mingi collected your ice cream bowl and bid you goodnight with a deep kiss. You gave a kiss to Yeosang as well, and let Hongjoong lead you by the hand to his room.
According to the antique clock in the corner, it was only half past 11pm, but Hongjoong didn’t seem to be sleepy at all although you knew this was the time he normally went to bed. He was quick to shed his clothes, and to strip you down to your underwear and bra, pulling you into bed with him so he could hold you close.
“Hmmm, this is so nice,” he hummed happily. “Little bird, do you know how happy you make me?”
“That depends, are we talking in general, or when I’m ribbing you for your overall lack of awareness regarding modern culture?”
“In general,” he said, sticking his tongue out at you before leaning in for a kiss. “But I like you even when you’re poking fun at me. Your humor is refreshing.”
“Oh, well that’s good. As long as I keep you on your toes.”
“Definitely.”
The two of you lapsed into silence for a while, Hongjoong petting your hair and humming a song you didn’t recognize while he peppered your face with soft kisses. You reached around to scratch his back, and he groaned low and pressed closer to you.
“That feels so good.”
“That’s the idea, goober.”
“Did you just call me a goober?” Joong stopped what he was doing and pressed his forehead to yours, clearly trying to stifle a giggle.
“Oh, no, it must have been a ghost. This house is old, right? I’m sure it’s haunted.”
“A likely story.”
He pressed his lips to yours in a light kiss, and without thinking, you reached up to card your fingers in his hair, tugging lightly as you knew he liked. His demeanor changed in less than a second, and the kiss turned hungry, desperate, as he tightened his grip on you.
“Hongjoong!” You whined as he trailed kisses down your neck, nipping at the soft skin.
“Hmm, yes, little bird?” His hand was wandering lower, down your tummy to your center, and he gently worked it between your legs, fingertips ghosting over your clothed cunt. “Ah. Do you have a problem?”
You had a bit of one— you were already soaked. Hongjoong’s touch never failed to drive you insane, and he knew it. Half a dozen scenarios were running through your head, and all you could think about was how you wanted him to fill you up and fuck you until you could barely breathe, let alone think.
While you lay there in your jumble of thoughts, Hongjoong was pushing your panties to one side, playing between your slick folds with a wicked grin on his face. His thumb found your clit, and you shrieked as he pinched the sensitive nub.
“Oh, my,” he murmured. “What do you need, little bird? Tell me,” he said as he continued to kiss your neck, using his body to push you onto your back so he could get better leverage to slip two fingers inside your aching cunt. He was circling his thumb on your clit in small, quick strokes that already had you seeing stars, and began to thrust firmly.
“Do you hear that, little bird? You always get so wet for me. This pretty, delicious cunt of yours is just waiting to take my cock. How lucky am I that you’re all mine tonight?”
“Jooooong,” you whined, arching your back as your release crept closer. "Hongjoong. Ohhhh fuck. Joong."
“That’s right. Say my name. Whose are you?”
“YOURS, HONGJOONG, I’M YOURS!” You screamed as your orgasm came crashing down, causing your vision to go white as your body quaked under Hongjoong’s touch. He slowed and stopped, allowing you to catch your breath as you trembled with the aftershocks of the startlingly hard climax.
“Joong…” You mumbled, reaching over with a shaky hand to run it over his shoulder and down his arm. “Fuck, that was… oh god.”
“I’m not done with you yet, little bird. Are you ready to sing for me some more?” He pulled his fingers from your cunt and licked them clean, then hooked his thumbs into your panties and pulled them down and off, tossing them over the edge of the bed. He made quick work of your bra as well, and once you were fully naked, he flipped you over onto your belly, guiding you until your ass was in the air.
Your heart felt like it was going to beat out of your chest as you felt him settle behind you— you could feel his heavy cock brushing against your ass, and he lined the head of it up with your entrance, sinking into you in one smooth motion. You cried out as he filled and stretched you, and you pushed back against him, craving even more, wanting to feel him as deep as you possibly could. His hands gripped your hips, fingers digging into your curves, as he began to thrust with long, hard strokes that left you breathless. He made a babbling mess of you in no time, strings of curses falling from your lips amid calls of his name, deep moans and shrill shrieks as he hit you in all the right spots over and over.
“Fuck, little bird,” he whined as he continued to fuck into you you. “Fuck, you’re so perfect. This pretty cunt feels like it was made for me. So tight… wet… fuck… little bird, I’m getting close…”
“Come,” you mumbled, the word muffled as you buried your face in the pillow in front of you. “Come inside me, Joong, please, wanna feel…”
He needed no more urging, and you could feel it as he shuddered against you, filling up your cunt with his cum, cock pulsing as your pussy spasmed around him with your own release following his.
He stopped suddenly, but did not pull out, instead leaning over you to trace his fingers down your spine to your ass, cupping it gently.
“So beautiful, my little bird,” he said quietly. “So lovely… soft and pretty. I’m so lucky to be able to call you mine.”
Once Hongjoong had helped you clean up, the two of you settling into a warm bubble bath for well over an hour, you both dressed for bed and crawled under the covers, warm and content.
A couple hours later, however, you awoke, stomach growling. You managed to get out of Hongjoong’s grip just enough to reach for your phone— 3:08am.
Maybe I’ll just sneak out to the kitchen and grab a snack.
“Noooo,” Joong mumbled as you extracted yourself from his hold. "Stay heeeeere."
“I’m hungry,” you whispered. “I’ll be right back.”
“Mmkay,” he sighed, rolling over and promptly falling asleep again.
Quietly, you tiptoed past Yunho and Wooyoung’s rooms, stealing out to the kitchen. There was a container of cranberry orange scones on the counter, and you nabbed one, opening the fridge to grab the milk and pouring a small glass for yourself.
After you cleaned up from your snacking, you slid back out into the living area, and jumped when the front door swung open and Jongho stumbled through.
“Oh, hi,” you whispered. “You’re home late.”
Jongho did not speak, but his crimson eyes flicked up to meet your gaze, and in the dim light of the lamp left on in the corner, you realized that something was off. He was moving sluggishly, almost clumsily.
“You.” He pointed at you, and before you knew it, he was standing in front of you. Clearly, whatever was in his system had no bearing on his speed. You backed away, but had nowhere else to go as he advanced on you further, locking you in place with one arm on either side of you, his palms splayed out against the wooden paneling of the wall.
“Jongho, what are you doing?” You spoke a little louder now, your own hands on his firm chest, trying to push him away with no luck.
“You smell… so fucking good…” He mumbled. “Just a taste. I need just a little. Give…”
“NO!” You shouted, beating against him. You tried to slip down and away, but he was quicker, and wrapped his arms around you, hissing as he bared his fangs and tried to go for your neck.
Not a second after you started screaming, strong hands were there, pulling Jongho off of you, and another set of arms wrapped you in a comforting hug. You looked up to see Wooyoung holding you gently, rubbing your back as he tried to soothe you. You glanced over to see Yunho struggling against Jongho, and he was quickly joined by San, Yeosang, and Hongjoong as they came flying out of the hallway.
“What the FUCK?!” Yeosang shouted. "Jongho, what the FUCK ARE YOU DOING?!"
“Calm yourself, Yeosang,” Hongjoong snapped.
“He’s drugged,” Yunho called out, leaning in to sniff cautiously at Jongho. “Not sure with what. But he’s definitely drugged.”
“God damn it. No more clubs. Back to square one,” Hongjoong sighed. “Fuck.”
You watched as Yunho and Hongjoong dragged Jongho away to his room. Yeosang followed them, leaving you standing there with Wooyoung.
“Are you okay there, friend?” He reached up to brush your hair out of your face. “Come on. Let’s get you a drink of water. You look pale.”
You let Woo take you back to the kitchen, and he got some ice water for you after he made sure you were firmly seated at the kitchen table.
“What…” You started.
“Jongho likes to go clubbing,” Wooyoung sighed as he took a seat next to you. “It’s gotten him in trouble a few times. He inevitably winds up drinking from someone who’s on something, and, well, this is the result. I’m just glad that the rest of us were home— that could have been ugly, otherwise.”
“Has he ever—”
“Killed someone like that?” Wooyoung grimaced. “Yeah. More than once. It's been a long time. I thought he had learned his lesson. But here we are. I'm so, so sorry this happened to you. I promise you that once he's better he's going to feel so badly. He likes you, you know. I know he seems wary of you still, but he's quite fond."
You winced as you heard shouting from the other end of the house, and leapt to your feet.
“Oh dear. Sounds like Yeosangie. We should stay here—” Woo started, but you were already headed out the door. You followed the noise down the hall, to the end, where Jongho’s door stood open. Jongho was in bed, and Hongjoong was standing there with what you recognized as one of the bags of blood the clan kept on hand for emergencies. Jongho seemed to be calmer, more lucid.
“How the ever loving FUCK are you trying to justify this right now?!” Yeosang demanded. Jongho mumbled something you didn’t catch, which only served to make Yeosang angrier. You shivered. You’d never seen him like this— bristling with anger, hands balled into tight fists, and a glare on his pretty features that could probably kill anyone who wasn’t already dead. It was terrifying.
“Yeosang,” you said quietly, and he turned to you, his eyes flickering with rage as he stood there seething.
“No. You stay out of this!”
“Sangie, please!”
“Get OUT!” He shouted, and you backed away, nearly tripping over the door sill, but Wooyoung caught you. You turned to go back to Yeosang’s room, but Mingi intercepted you in the hall.
“What the fuck is going on?” He inquired, rubbing his eyes.
“Jongho got drugged at the club. Again,” Woo sighed. “I think he’s fine now, but Yeosang is in there giving him hell.”
“Looks like that’s over now,” Mingi nodded, and you turned to see Hongjoong dragging Yeosang out of Jongho’s room, muttering at Yeosang under his breath. Yeosang was silent now, and he stalked away to his own room, brushing past you without a word.
“Mingi?” You took a deep breath, trying not to cry. “Can you please get my stuff from Yeosang’s room? I want to go home.”
"Yes, precious girl. If you're sure."
"Yes."
“Why don’t you stay the rest of the night, little bird?” Hongjoong appeared at your elbow. “It’s so late.”
“No. I want to go now.”
Mingi came back with a sigh, explaining that Yeosang had locked his door and wouldn’t let him in.
“That’s fine. I can make do for now. I just wanna go home.”
Hongjoong brought you your phone, watch, and chargers, and you tossed them into your purse. Wooyoung offered to drive you, and you accepted. Mingi and Hongjoong told you they’d take care of Yeosang, and apologized profusely for his behavior. You shrugged. You were still in shock that Yeosang had yelled at you like that. You knew what had happened was upsetting, but even so, he had never spoken to you in that manner before. Part of you wondered if he'd ever been on the verge of snapping at you like that, and you shuddered.
You tried to text Yeosang, but he didn’t answer, so with a heavy heart, you gave up, and let Wooyoung take you home.
You gave it a few days before you tried to text Yeosang again, even calling him a couple times, but he never answered, despite you leaving multiple voicemails. Mingi and Hongjoong checked on you a couple times, but when you didn’t put much heart into your answers, contact dropped off with them as well.
You took off the ring Yeosang had given you after about a week, feeling as though it was the right thing to do considering he seemed to be done with you. You carefully tucked it back into its box and put it away in a drawer where you knew it would be safe.
With nothing else to do, you threw yourself into your work. You’d had several clients email you over the past several days, asking for your services, one of whom was a local TV station who needed some video editing done urgently. The pay was great, so you emailed back to let them know you’d be happy to help them, and settled into the job with all the determination you could muster.
A couple days into your new project, you were startled by a knock on the door. You looked through the peephole to see a sheepish looking Yunho holding a slender pink box.
You pulled the door open, and he offered the box to you with a halfhearted grin.
“I heard this cookie place has good reviews,” he told you. “They’re probably not as good as… well. I just figured… considering… maybe you needed..."
“Thank you, Yunho,” you told him warmly. “I love Crumbl. Do you wanna come in?”
“Admittedly, I probably shouldn’t,” he sighed. “I turned off my location to bring you these, so no one would fuss at me. Things have been tense at the house since the incident with Jongho.”
“Oh. Okay,” you nodded in understanding. “Um. Yunho?”
“Yeosang is okay. He was incredibly upset by what happened. Hongjoong and Mingi are fine too. But you take your time, okay? You’re very important to all of us, including Jongho. He feels awful about what happened, and wants to talk to you when you feel up to it. Okay?”
“Okay.”
“Do you want a hug?” Yunho asked.
“Yes.”
The blonde vampire stepped forward, wrapping you in his long arms, hugging you gently.
“It’s gonna be okay,” he told you, patting you on the shoulder reassuringly. “Don’t worry too much. Things will work out.”
Another four days went by, with no word from any of your partners, or anyone else in the clan for that matter. You had finished your client’s videos, but as the 10pm deadline inched closer, you were having a lot of trouble uploading them to the website they had asked you to use.
Frustrated, you shot an email off, asking what to do. The reply was short, just telling you that they needed them by tomorrow morning, and asking if you could just bring them by the station on a flash drive.
You sighed, glancing at the clock. It was pushing 10 now, and you were really in no shape to go gallivanting around town. At the very least, you figured there would be no traffic since it was a Thursday night.
Oh, to hell with it, you grumbled internally. You grabbed a flash drive and loaded the content onto it, then tossed it in your purse, slipping your phone into your back pocket and pulling on a sweatshirt.
When you arrived at the TV station, you frowned. The entire front of the building was under construction, and the parking lot was blocked off. There were several signs directing parking to the back of the building.
Well, this seems super fucking safe. What could go wrong?
You were well past the deadline now, and an email came across your phone.
Either deliver the videos, or we will find someone else. Hurry, please, we need this content tonight.
“Fuck, give me a break,” you muttered. You navigated to the back of the building, noting that it was deserted, and parked not too far away from the back door where you saw there was a drop box. You steeled yourself, and plucked the flash drive from your bag, holding your car keys defensively in one hand as you rushed to the drop box, yanking it open and tossing the flash drive in. Satisfied, you headed back to your car, but as you were fumbling to get to the right button on your key fob, something collided with you, slamming you into the side of your car.
You hit the ground with a thud, wind knocked out of you from the impact, and you felt blood seeping from a cut on your forehead, trickling down your cheek. You rolled over, trying to catch your breath, and saw a pair of boots in front of your face, before hands grabbed your sweatshirt and yanked you roughly back up to your feet.
There was no mistaking it— your attacker was a vampire. Scarlet irises peered down at you. This vampire looked rough— clothes ripped, covered in dirt, clearly had been living on the streets for a long while.
A rogue, for sure. And from the looks of it, one who probably isn’t welcome anywhere.
“I’ve been waiting to get my hands on you for a very long time, little one,” he sneered. "And now you've played right into my plan. It's about time."
“What—” You struggled against him, noticing the crusted blood in his scraggly beard, the fury in his gaze as he glared daggers at you. “I didn’t do anything!”
“Maybe you didn’t. But your little boyfriend… What's his name? Yeosang? He killed my brother. Three years ago, now. So now it’s my turn— it's time for a little bit of revenge.”
You remembered all too well, the day that Yeosang had shown up on your doorstep, bleeding profusely, saying how he’d gotten in a fight with a rogue that he had killed. Now you realized— you vaguely remember Yeosang having mentioned at some point that there had been another, who had run away at first sight of him, before the fight with the one he’d killed.
You glanced behind you to see your phone sitting in the center console of your car, but your keys were on the ground, and the vampire was holding you fast, pressed against the car door.
“Please, just let me go,” you babbled. “Please, don’t hurt me. I— I didn’t know… I’m sorry. I’m sorry that happened. Please…”
“It’s too late now,” the vampire hissed, as he bent down, plunging his fangs roughly into your neck.
You were met at once with white-hot, searing pain, and you continued to struggle, pushing and punching and beating against the vampire as he drank from you. As you began to grow lightheaded, you thought you heard shouting.
In the next second, the vampire was forcefully pulled away from you, and you watched as he slipped easily out of the grip of whoever had yanked him off you. You slumped onto the concrete, lying down on your back, gasping for breath, your vision swimming. You heard more shouts, the thudding of boots on the pavement.
Hongjoong’s face came into your line of vision as he knelt over you, hands gently cradling your head off the concrete.
“Little bird, oh, little bird...” he whispered. “I’m so sorry. We came as soon as we could. It took us a while to find you. I am so sorry.”
You looked around, bewildered, to see Yeosang standing there, next to Mingi, who was staring at you in absolute panic. Yeosang, however, was just looking down at you with a forlorn expression.
“You took it off,” was all he said.
Took… oh… the ring… Your head was spinning from the blood loss, and you whined and tried to sit up.
“No, no, stay, little bird. We need to get you to the hospital.”
“I… I… Hongjoong,” you mumbled. “I’m gonna pass out. Am I gonna die?” You were in tears now. “Someone… Someone please help… I don’t wanna die!” Your cries were edging towards hysterics, and you looked around wildly at Yeosang and Mingi, but they continued to stand there, unmoving. Mingi had turned around, and you could see him shaking, hugging himself as he muttered words you couldn't hear.
“I am not going to let you die, little bird,” Hongjoong told you firmly.
“Please, no! Fuck,” you whimpered. “I love you all so much. Please, I don’t want to leave. I don’t want to die. Please. Turn me. Do something. DO SOMETHING!” You screamed. “HONGJOONG, PLEASE!”
“You want to be turned?” He asked, smoothing the hair from your face. You nodded vigorously.
“I don’t wanna leave you. I love… you… I love you and I love Yeosang and I love Mingi and I don’t… please… don’t let me die…”
Hongjoong leaned further over you, fangs grazing the other side of your neck. You felt him bite, gently, so gently, but it still hurt as he began to drink what little was left of your blood. It felt like another eternity before he broke away, offering his wrist to you, and in your haze, you were confused at first.
It’s wet. Why…
“Drink, little bird. Drink from me.”
You locked your lips around his wrist at once, wincing as the tang of his blood hit your tongue, and as you drank, you felt your heartbeat slowing, each thud inside your chest spacing further and further apart, until it stopped altogether, and your vision went black.
You awoke in Hongjoong’s arms, alone with him in the parking lot of the TV station, still next to your car. You were immediately hyper aware of everything going on in your periphery, all the various sounds flowing from the half-asleep city around you. The roughness of the pavement against your skin, the softness of Hongjoong’s hands as he held you. The few streetlights nearby seemed ultra-bright compared to before, and you shook your head, trying to get your bearings.
“Little bird?”
You glanced up to Hongjoong's face, blinking slowly as you took in the sight of him like you were seeing him for the first time, all over again.
Fuck, he’s so pretty, you sighed. How have I never noticed just how pretty he is?
“Little bird.” His voice was clear, and you could hear it above the cacophony around you, a soothing sound amid the buzzing in your head.
“Did… what happened?”
“It’s done. You’re safe.”
You realized in the next second that you could not feel your heart beating, and flung yourself out of Hongjoong’s arms to clutch at your chest.
“It’s… I’m…” You glanced back at him. “I’m…”
“You’re a vampire.”
A sharp pain had settled into your throat, and you clawed at it, whining.
“My throat hurts…”
“I know, little bird. Come on. Give me your keys. Let’s get you fed, and then we’ll go home.”
“Home?”
“Home, with me. Is that okay?”
“Home,” you repeated. “As long as I’m with you and Yeosang and Mingi, you can take me anywhere you want.”
“That’s the plan, love.”
You picked up your keys from where they lay next to you and handed them to Hongjoong, and he picked you up, insisting on carrying you around to the passenger side and helping you into the seat.
“It’s going to be okay, little bird,” he assured you. “We’re going to find you somewhere to feed, get you feeling better, and then we can go home and get you cleaned up. You can see Yeosang and Mingi. How does that sound?”
“Good,” you said quietly, flashes of the scene earlier coming back to you now. “Hongjoong?”
“Yes, little bird?”
“I meant what I said. Earlier. I know I was out of it. But I know what I said. And I mean it.”
“Hmm?”
“I love you.”
“I know, darling. I love you too.”
#ateez fanfic#kpop fanfic#themoonlightfae#kpop x y/n#ateez x reader#kpop x reader#ateez vampire au#yeosang x reader#hongjoong x reader#mingi x reader#ateez smut
7 notes
·
View notes
Text
↬ OC Verse Trading Cards
Here it is! The reason (well, one of the reasons) for why I've been so inactive lately. I saw this super cool trading card template by @squea and @buttertrait and thought it was super fun, so I wanted to make something similar for my mutuals and myself. And, as you can see, I rediscovered my love for art deco on the way, so it's very art deco lol
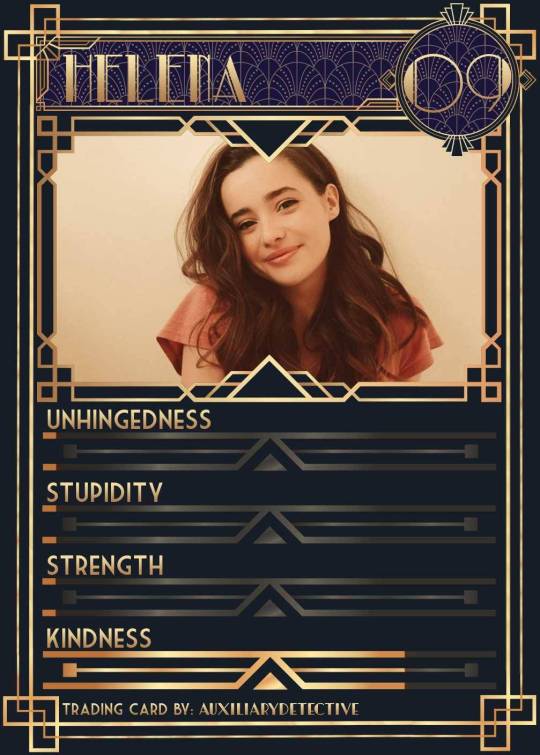
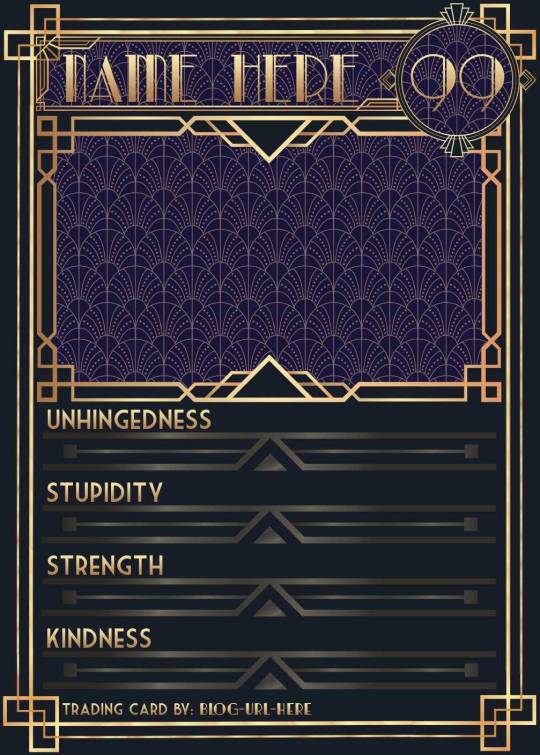
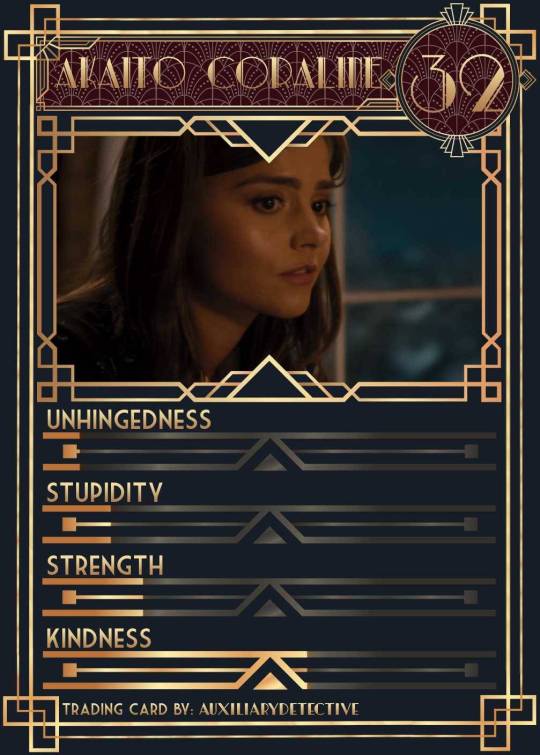
You can find the template to make your own cards here - and I explicitly encourage you to make your own, because I was kinda hoping I would get to see cards of you guys' OCs and we could collect them all in a binder like this one. It would be really fun! (The number next to the name is the power level btw - I wanted to imitate a set of Star Wars trading cards I used to collect as a kid) Make sure to @ me when you do and tag your post with #ocversetradingcards!
I tried to make the template as accessible as possible so that even beginners should be able to use it without any issues. So, I color-coded the layers!
The red layers are ones you shouldn't touch. They make up the main frame of the card. The orange layers are ones where you can play around with the colors, but that's for advanced photoshop/photopea users. The green ones are the ones where you put in text! Edit those freely. Blue ones are ones you have to select and move as a batch - if you don't know how to do that, check below the cut ^^
You'll need to download these fonts:
Park Lane (name & power level)
Market Deco (main text font)
Artisual Deco Black Italic (blog url)
Below the cut, you'll find a tutorial for the template and a list of the image resources I used - Quick info for everyone, including the more experienced Photopea users: Save your image at 50% quality. The template is a big file and the exported image will also be pretty big if you don’t save it at a lower quality. 50% is what you can see above and I think it's a nice size-quality ratio.
Tutorial Time
Opening the File
Step one: Get either Photoshop or Photopea. Photoshop costs money, Photopea is free and runs in your browser. Take three guesses which one I use. Yeah, it's Photopea. As such, this tutorial will be Photopea-centric, and I also have no clue what the Photoshop interface looks like, so I can't really help you if you work on Photoshop. But I'm told they're essentially the same, so...
Step two: Download the fonts listed above from the links in this post.
Step three: Click on the link above to go download the template. It's a bit of a big file, so I put it into a zip file for you. Don't worry, you don't need a special program to open it. Photopea will do that for you.
Step four: Open Photopea. Click on "File" -> "Open..." and select the "TradingCardTemplate" zip file.
Step five: Click "File" -> "Open..." again and select the zip files for the fonts. This will import them to Photopea. There are also preview images included in at least one of the zip files for the fonts, so just close the windows for those projects when they pop up by clicking on the little "x" next to their file name. You only need the "TradingCardTemplate.psd" tab to be open in your Photopea window.
Great! Now you're all set to edit!
Editing the name, power level and blog url
I decided to group these together because they function essentially the same way
Step one: Select the typing tool. It's the little "T" symbol in the toolbar on the left side of your screen.
Step two: Select the layer of the text you want to edit. The blog url one is in plain view. For the name and power ones, you need to open the corresponding folders first. They're the green layers in the folders!
Step three: Click on the text you want to edit. It's easiest to aim for the middle, that way you have the least chances of missing. The typing tool is a bit finicky with that sometimes, especially if the text is small.
Great! Now you can use your keyboard to delete the placeholder text and replace it with your own! The power level will only fit two digits and picking "00" will look bad. Your OC should have at least some power. They need it to breathe.
Changing the size of the name text
As you might be able to tell, the basic text size only works for fairly short names. So, you might have to make it smaller for your OC's name to fit
Step one: Enter your OC's name as described above.
Step two: Select the text as you would anywhere else in your browser.
Step three: Above the little tag where it says "TradingCardTemplate.psd", there's an options bar. You'll find a box there labelled "Size" with a box that says "150px" and a down arrow next to it. Click on the down arrow and a slider will pop up. Play around with that slider until your text has a good size. Then click on the checkmark.
Step four: Switch to the transformation tool. It's the cursor with the directional cross next to it, at the top of your left-hand tool bar. Move your text so that it aligns well with the left side of the frame but make sure it's below the middle.
Step five: You now have to select two layers at once. The text layer and the frame for the name tag. Do do that, either press and hold your control key on your keyboard while selecting the other layer or toggle the control key using the on-screen keyboard at the bottom left of the toolbar. If you use the toggle, don't forget to untoggle it after.
Step six: On your horizontal toolbar above your project window, click on the icon that's a horizontal line with two boxes centered on it.
Congrats, your text should now be centered!
Adding in your OC picture
Step one: Open the "Picture" folder and select the layer beneath "Add picture here". This will make sure your picture will be in the right spot. Also make sure to click on the eye next to the "Pattern" layer tag to make it go invisible.
Step two: Select "File" -> "Open & Place..." and pick a nice image.
Step three: Once the image has been imported, make sure you change the zoom percentage to 100%, that way the image doesn't look pixely or weird. Click on the checkmark.
Step four: Resize your image so your OC fits nicely into the frame. The image should fill the entire space inside the frame and can stick out as much as you want.
Step five: Right-click (or press and hold, if you're on mobile) your image' layer and select "Clipping Mask".
Perfect! Now your image should no longer stick out of the frame. Feel free to adjust your image's coloration, brightness etc. by selecting "Image" -> "Adjustments" and your preferred action.
Changing your stats bars
This works the same for each bar and I tried to make it as simple as possible.
Step one: Open the corresponding folder.
Step two: Select the set of three blue layers together. You can do this by selecting one layer normally, then selecting the other two while holding your control key or while having it toggled using the built-in on-screen mini keyboard at the bottom left of your screen. If you use the toggle, don't forget to untoggle it after.
Step three: Switch to the transformation tool (the one at the top of your left-hand toolbar, it's a cursor with a directional cross) and move your layers. By moving them to the right, you'll reveal more of the gold underneath the overlay. More gold = higher level of the corresponding stat.
Great job! Now adjust the bars to your liking.
Saving your project + card image
To save the project: Click on "File" -> "Save as PSD". This will download the current project under the same name as the file that you downloaded it as. So, it will be called "TradingCardTemplate (1)" or something similar. Make sure you change the name in your files so you know which is which. Alternatively, you can also change the name of the project by double-clicking the little square that currently says "TradingCardTemplate" and type in your new name. If you save again now, it will show the new project name! Make sure to save your project if you want to be able to recover it and/or work on it later!
To save the card image: Click on "File" -> "Export as >" and pick your preferred image file type. I suggest JPG for best results. Make sure to turn the quality slider to 50%, then hit the save button. This will download an image file of your chosen type, under the same name as the project name. To change that name, refer to the bullet point above or go to your files :)
Advanced: Changing the BG color of the pattern
Step one: Select the pattern background of either the name tag, power score or picture and turn it to 100% opacity.
Step two: Color-pick the current background color of the pattern.
Step three: Click "Image" -> "Adjustments" -> "Replace Color..." and click on the colored rectangle in the new pop-up. Replace the default color with your color-picked color. Now use the Hue, Saturation and Lightness sliders to get a new color that you like. Note down your slider values for later so you have them for the other elements.
Step four: Color-pick your new color and select the corresponding solid background layer. For those layers, click "Edit" -> "Fill..." and make sure you have "Foreground" and "Normal" selected, your Opacity is 100% and you have "Preserve Transparency" checked.
Step five: Don't forget to turn the opacity of your pattern layers back down to 60%.
Congrats! You have your colors changed! Repeat this process for the other two patterned elements.
Extra advanced: Changing the card's background color
NOTE: I DON'T recommend this. You can do it, but it's a lot of work.
Step one: Select the background layer and change its color to the new color you want. You can do it with the "Hue/Saturation..." adjustment, with the "Fill" edit as described above, or whichever way you want. Color-pick your new color.
Step two: Open the smart object PSDs for the frames for the frames for the picture, the name tag, and the power counter by double-clicking on the preview image of the layer.
Step three: Select the lowest colored layer of each and change its color to the same as your new card background color. Click on "File" -> "Save (Smart Object)". Close the project windows.
Step four: Open the folders for the various stat bars and select the "Color Overlay" layers. Change their colors the same way you did for the other layers. Warm colors and high-saturation colors will most likely not look good here and you might need to find a different way of making the stat bars look good. Playing around with the "Brightness/Contrast" adjustment layers above might help, but I can't promise anything. This is the main reason why I don't recommend changing the card background color. The stats bars are adjusted to the background color.
There we are! Either your card looks very pretty now or you understand why I don't recommend this. Either way: Good job!
Resources from Freepik:
Corners by tartila Power counter frame Picture frame by pch.vector Stats bar by tartila Pattern

Taglist (we're bringing out all fandoms today): @starcrossedjedis @oneirataxia-girl @daughter-of-melpomene @bravelittleflower @box-of-bats @fluffle-system @wheresmybloodynauglamir @nanukanal @supermarine-silvally @cody-helix02
#ocversetradingcards#artsy#photopea adventures#oc: akaito coraline#oc: helena#holy freaking shit i finally did it#look everyone!!!
21 notes
·
View notes
Text
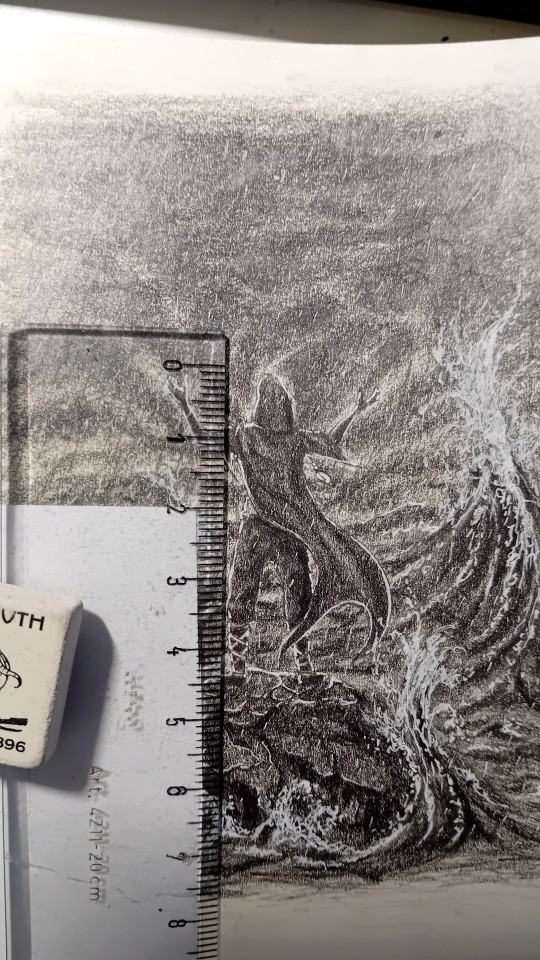
Okay so the tags all day under my high water small offering genuinly made me super emotional..
I don't know if anyone would be interested in it seeing almost step by step while i ramble about it a bit? But i did it anyway. I'm missing a lot of stages because i wasn't planning to do something like this. I'm not even completely sure why i scanned some of the steps to be honest. But at least you can see some of the progression of it?
Anyway if any of you is interested in it i put a rundown under the cut. Also the obligatory measuring tape/ruler shots at the end of it, because yes i've seen those tags as well. Spoiler for those who understandably do not want to chew through my pointless ramblings: yes, it is fairly small.
Disclaimer: It's long and rambly, you have been warned
Just to preface this: this is not advice on art because i can't give you that. If you ask me how i do stuff i can tell you but beyond that i'm useless. This is just for funzies.
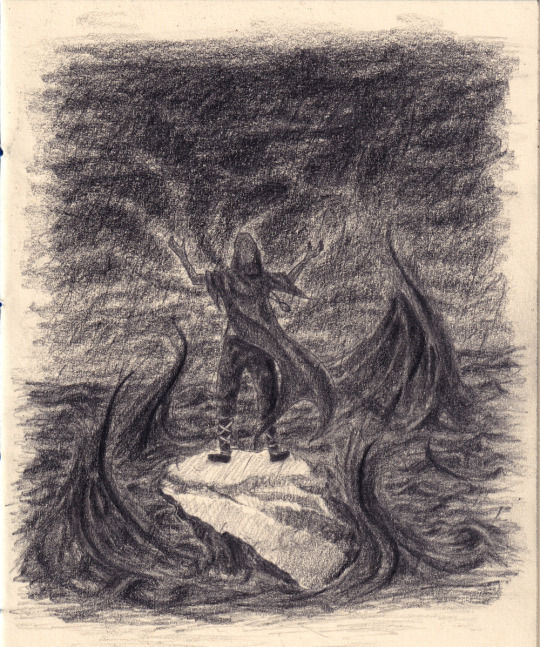
Okay so i don't have the step with sketching Vessel, but you still can see some of what is left from his torso and head and spine-line under the cloack. Maybe even traces of the right arm connecting to the torso.
When i draw figures, i usually start out with a line for a spine and then build it outwards. And i always draw them semi-naked first. It's so much easier for me to dress them, rather than go for the clothed version immediately. Helps me a lot with the fold placement.
Also for pose references i use a free browser app. I certainly can't draw human figures from scratch if the pose is more dynamic or the angle is something more complicated, but i'm decent at eyeballing what i can see. This one didn't really needed that 'cause Vessel does this a lot and i looked at the man's pictures and videos so much at this point, i can kinda mock it up. And like.. i usually draw up a standard male figure and just.. make it slightly skinnier and bam. Vessel proportions. Or something close enough to pass for it. But in general i look up a lot of reference photos for stuff because it is easier to understand something you see rather than something you imagine. At least for me.
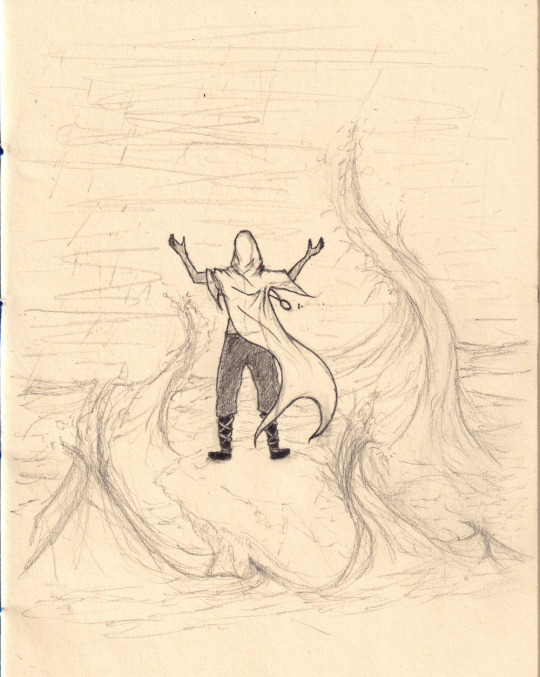
Initially i was planning to add tendrils into the waves to indicate that those are raising the water around Vessel. That pulling himself beneth the waves maybe not so much just his own decision he just can't fully see the outside force hiding inside the water or something something i don't know i'm not smart for stuff like this.
What you can't see is that i was thinking about putting a faint silhouette of the tmbte moon behind the clouds but i quickly forgone that, because it was just not dark enough visually that way and also felt far too busy.
So i laid out a rough shading idea for where i want stuff to sit tonally and was like, nope, still not dark enough.
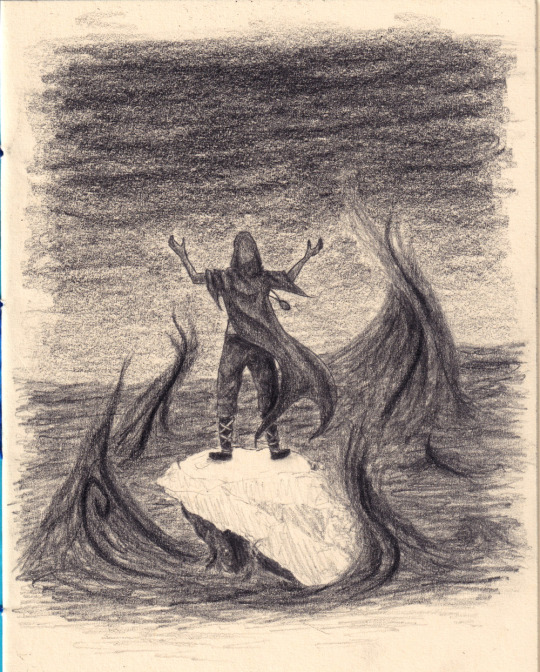
And so darker it got. But the sky felt flat, it needed something. So i was like, okay i have no moon or anything but like i could warp the clouds towards Vessel. Like as if the sky is collapsing into him or sending him a sign or maybe it's just in his head or whatever? I'm still not smart enough for concepts.
Also rain had to be added, because "wash me clean again before..." you know. To stick to the prompt.
It's almost there at this point but the waves look so sad and got smaller than the initial sketch. But i knew there is going to be froth on top of them so it was not a big deal. I knew they would be a sorry sight if i only do it with pencil anyway. It was never an option. So the trusty gel pen came out and it is such a drastic difference:
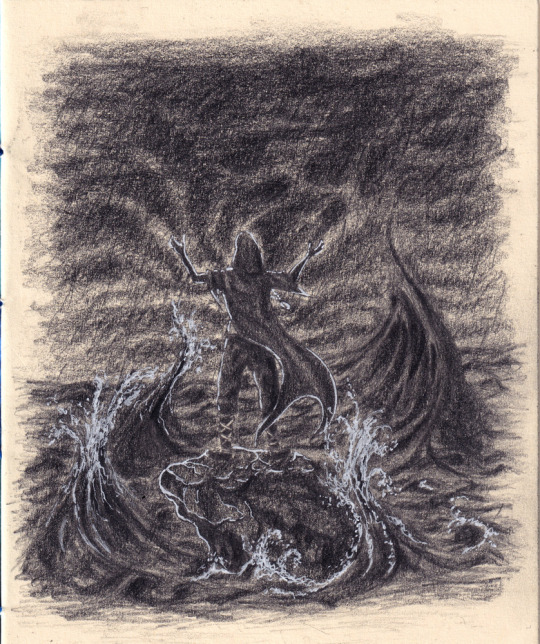
It also gave Vessel and the stone he stands on a sharp edgelight which is super dramatic looking. Also lifts him out from the background a bit more so he doesn't fully disappear into it. And the waves actually started to look like waves insted of weird grey cones.
And here again the finished version:
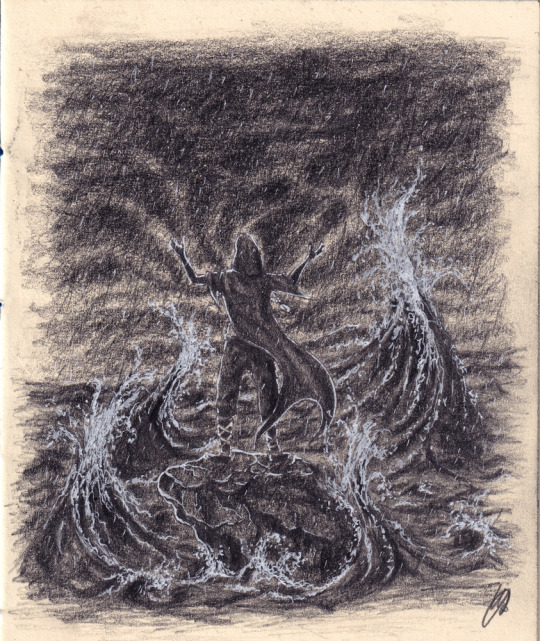
There is not much thought or like amazing skill that goes into these, i'm just trying to hide what i can't do and lean into what i can. And what i can do is shading. Someone told me close to two decades ago now that "don't rely on the outlines, shade behind the things to create depth" and that is something that my brain just latched onto and wanted to do that. And so i did. Or at least tried. Didn't took long for me to really start to enjoy shading and got fairly good at it, because i did that most of the time. And that's it, i guess.
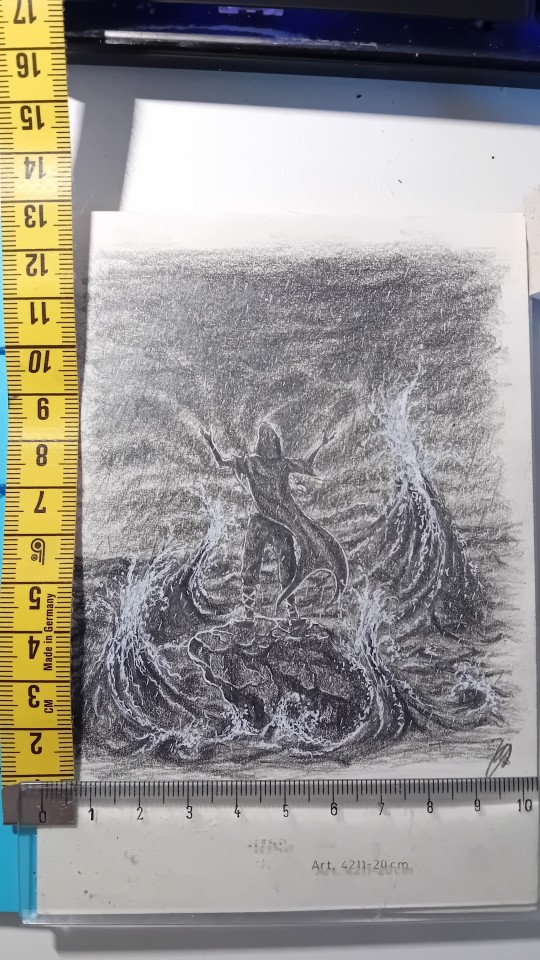
Also yes it is small-ish. I'm using two relatively small sketchbooks, the "larger" one (with the ecru/yellowish paper, which i use for the small offerings <- this is where tha name came from originally) is 15x10,5 cm, and a slightly smaller one (with the grey-ish reused paper, which i use for everything else currently) which is 14,5x9,5cm. The card i did Ash's ballpoint pen iii is 16,5x11,4cm.
Basically everything i do is kind of small. I don't know how to draw large anymore to be honest. If i can't see the entire piece properly in one i mess up proportions big time. And i love detailwork and if i draw small the less detail i have to put into it. Because i'm also lazy.
So Vessel is about 4,5cm tall here... which is only a cm taller than the average height of Tiny Token.
18 notes
·
View notes
Note
Hi, I noticed one of your bookmarks when I looked through the ones of a fic. I noticed that you have a very interesting way of doing those 🥰 mind sharing how you did this?? Or where I can DIY for dummies for me? Would be quite thankful 🙇♀️
Hi! Yeah I can explain the logic behind the tags, no problem :D Before I get into that though, some unasked for advice: Please add a profile pic and bio, there's too many bots in everyone's inbox these days so this ask was almost lost in a "report bot first, ask questions later" type rush, before I realized this was an actual question and not spam😂 So, the tags are a new thing for my ao3 account; I've been on ao3 since 2015 and the amount of fics I've read is ungodly- but I didn't have a decent way to go back and look through the fics I had saved (either in private bookmarks, marked for later fics, or spreadsheets even), so there's a small amount of fics publicly tagged compared to how many are actually saved, since I only really came up with this system like this past week. (There's a lot of information so I'm gonna cut the post here bc I probably went into too much detail)
The short Summary and Last Accessed section is from a browser script, it generates those automatically when I press "bookmark". You can find the script here (works with a simple browser add on like Tampermonkey, I use the script with Tampermonkey on both PC and Mobile on Firefox, not sure what other alternatives exist for other browsers).
The tags are all based around being able to look for fics to re-read later; so every tag serves the purpose of letting me know few key things about the fic and also to let me filter works based on niche things.
There's a few "Utility tags" for lack of better word, that I use for things like marking the pov character ("X-Character centric"), and if they're AUs the character or event that the AU is centred around: so "Jon Snow Variant" for Game of Thrones fics where his character is different and "Red Wedding Variant" for fics where the Red Wedding goes differently and the divergence from canon starts there. Some fandoms also get custom tags for the Event Variant tag (because I think I'm funny).
Similarly I might tag the type of AU or content: "Time Travel", crack and crack-ish fics, crack treated seriously, angst, different types of AUs as I come across them.
I'm personally a big Crossover reader, so you'll see a lot of "X Fandom Crossover" in the tags or "Into X Fandom Crossover" (the second version used to signify what canon/world the fic is in). I also use "Get Isekai-ed" for fics where a character gets... Iseakai-ed or transmigrates or gets reborn into another fandom basically. And lastly there's tags I'd categorize as "The impression the fic left me" so if a fic made me cry irl (see: "I'm not crying there's just something in eye I swear"), if I really like the world-building and original characters, if i thought the fic was all around really well developed ("Excellence 🤌" or "5⭐️" the difference here is vibe based, I can't explain it any better), if I was going feral while reading, if I thought a relationship was really well written, so on and so forth.
Really, if you want to start tagging your bookmarks the thing I'd recommend is just not putting too much thought into it. You want your tags to be simple in a way you'd understand while looking through them (or alternatively just use them as comments for the fic, that's how my tag system started).
tl;dr -Use tags you don't need to think about for more than 2 seconds to know what they are -Tag based on what feels right for you and customize your use of bookmarks as you see fit -Have fun with it
I hope this helped :D
2 notes
·
View notes
Text
ADHD Things - Day 2 of Vyvanse
I didn't get to crack this one open since I was out the door by 7:35 AM so this one is a bit retroactive.
Adding a new tag for this so I can find it in case the psych wants it. (No idea why he would want it! but better safe than sorry.)
7:00 AM - Wake up. I hate Tues/Thurs. Hurriedly ate some toast and drank some coffee and threw on some gym clothes. Found my missing foot lotion, so that was nice.
7:35 AM - Get ready to get out the door. The "phone/wallet/keys" mini checklist passed without incident. I did have to run back for a headband, though. One of my sensory issues has always been hair getting in my face. I need to stop letting them cut "face framing locks." Screw that.
7:55 AM - Remembered to schedule out my March sessions with coach. Had to move my Thurs 20th session to the 21st due to a follow up with the psych.
8:00 - Personal training session with Coach Joe. I warned him I started a new medication and probably shouldn't go too high intensity, but I can already tell that the tachycardia problem with Vyvanse isn't as intense with the phentermine. So that's nice. Did my workout without much drama. Guh. Resistance training sucks. Deadlift of 105 using the machine for 15 reps was the heaviest thing he had me do, although I did do 1 rep of 135 by accident. (it had 45 plates on and I missed my coaching saying 'do a warm up set without them.')
8:45 AM - took a Vyvanse
905: AM - Left gym after stretches, returned home
9:20 AM - Home. Finally remembered to get the gardening crap out of my trunk
9:30 AM - Checked into work. Immediately got smacked in the face with Chrome killing off my favorite extensions. Discovered that my organization blocks Chrome web store???? Started researching alternative testing software suites besides Selenium.
10 AM - Put in a ticket with my organization to unlock my Chrome profile :(
10:45 - Hunger kicked in. Ate cottage cheese and grapes.
11 AM - Started rooting around other software updates. Discovered that my screenshot software went subscription model; that ain't gonna get updated.
11:15 AM - Gave myself a short Tumblr break and here I am.
11:30 AM - Realized I am procrastinating working on the payment integration project for our client in Montreal. Better get on that. But also hungry. The room mate came out and fired up the air fryer, which I still find incredibly irritating. I should have never taught him how to use it. EARPHONE TIME! Oh no, a new Tasting History..... At least I opened up a spreadsheet for the Montreal client thing and prepped that while I watched it.
11:45 AM - Escaped the noise and started some laundry.
12:00 PM - Ate lunch - shrimp and pasta and broccoli. The reason I am so fat is because I am a good cook. Had a cookie. Corrected someone who was WRONG on the INTERNET in the comments of today's Tasting History episode. This is why YouTube is dangerous.
12:30 PM - Flipped laundry. Lunch break over. Next break I'll have to start the muffins to replace the cookies (I make one dessert a week.) I also still need to take a shower at some point..... Room mate discovered his scooter won't start AGAIN. Dude just needs to get a new battery.
12:45 PM. Found duct tape for room mate. Put a pomodoro timer on this browser to force me over to the work browser for the stupid Montreal client.
12:46 PM - Immediately had to end the session because I had to let my husband know that our football season tickets are due for renewal. School spirit is expensive.
1:15 PM Trying not to have a panic attack over the threats to dismantling Social Security. I can't afford to take care of my disabled sister on my own. My parents have been dead for 21 years but I'm the representative payee for my sister, and if she doesn't get her monthly check, we're fucked.
1:55 PM - Managed a solid chunk of actual work related stuff for the Montreal project. Had a bit of a breakthrough. The client is trying to get a new eCommerce payment system in place, but use our software to launch it. We need our API to pass in a JSON string to their API with all the correct information; all the documentation that the client sent me was for a fully integrated custom solution, which we would have to build as a special interface. That's 10K that we'd have to charge them for custom development. eCommerce platforms are all supposed to be standardized to avoid that. I'm trying to figure out if they can use our existing stuff to just pass in the value of the transaction and the necessary client account info. I think I finally found the right documentation.... right as my FitBit yells at me for not getting 250 steps in. This is why modern workplace life is not healthy.
2:15 PM - Folded laundry to appease the step count gods. Had my first analysis paralysis of the day where I briefly wavered between showering, doing another load of laundry (but then the clothes I am wearing would not be in the load), and making tea (so that the tea could cool while I was showering. Then I could be clean AND have drinkable tea when I was done, and THEN put the load of laundry in.) Order of operations was halted by remembering I was supposed to have baked the muffins during that last break instead. Fuck.
3:00 - Lost 45 minutes panic attacking about Social Security again.
3:15 - Muffins in the oven. "Panic" has led to "manic" and I realize I'm in the throes of amphetamine high. Definitely didn't experience this yesterday. I get myself back to work researching this stupid Payment vendor.
4:50 - The husband has returned and drops the bombshell that his anime club meeting is at 6PM tonight. I hurriedly start dinner prep. At least he put the muffins up for me.
5:20: Dinner is done for him, but I still have 10 minutes of kitchen cleanup. I set my food aside. I still have not showered. He started the dishwasher early, which means dirty dishes have to sit on the counter. Alas.
5:50 PM - I continued working while I slowly munched on my salad. I actually got to the point of getting an error message on their website in a JSON string which.... is exactly what I think I needed? I think I've done enough homework on this project and it's time to bring in an actual developer. I'm just a business analyst; my job is to do the homework so the more valuable people don't have to.
7:10 - Decompression time over. I'm full of food and calmed down from the afternoon panic attacks. NOW I CAN SHOWER! Well, first I have to swap the cats, and open the dishwasher, and oh yeah I needed to see if we still have a cobbler in town because my favorite boots are disintegrating... we do!
7:18 - Sister called. Had to make plans with her for Saturday.
7:55 - Clean! Realized I'd never started the second load of laundry so I did that before I showered. The analysis paralysis from earlier was no longer a threat, as showering NOW was more important than making sure the laundry had the previously dirty clothes in them. It's okay to not always be efficient. Time for vidya games.
8:00 PM - Jeuno night in FFXIV.
8:01 PM - Forgot about last night's patch.... had to restart the forbidden tools AND Discord.....
10:00 - Remembered to take out the trash for pickup tomorrow. At least it's only cool, not cold. Knocked out DuoLingo. Played with the cat. made some tea. existed.
12:30 AM - Stayed up too late reading fanfiction.
1 note
·
View note
Text

meadow | theme by sage
get the code: static preview full length carousel sidebar theme
features (more info below the cut):
toggle: tags on click & updates panel
headerbar includes blog url, home/ask/archive links, scroll to top, day/night, & tumblr controls buttons
sidebar includes an uploadable image with panels for a custom description, search bar & up to 10 links, up to 5 info stats, and up to 4 updates
customizable: colors, body & title fonts, and font size
npf supported, responsive design, 3 corner options, tabler icons
nothing needs to be changed in the code, everything can be changed in the customize panel!
terms:
reblog if using
do not touch the credit
all terms / faq
credits listed in the code / credits page
please consider tipping or supporting me ♡
blog name !! important
make sure you fill out the blog name field, this is what will show on the top of all your original posts. to clarify: your blog name is your blog’s url - for example: phantomcodes
responsive sidebar
when the browser window gets too small the sidebar will disappear and become toggleable, the sidebar toggle button will appear on the left side of the headerbar next to your blog url
general notes
many things will not show up if they’re left empty, some examples: if you don't want the fifth info stat leave info 4 blank
reminders
remember tumblr’s customize panel is buggy, toggle the options on/off before saving
i’m still on a sort of semi-hiatus, i’ll be around for questions but please check my faq, answered asks, etc. before asking - i will not answer repeated questions!
#themehunter#theme hunter#tumblr themes#tumblr resources#completeresources#allresources#userbru#userdre#userbrina#usernik#tuserlucie#userduzi#useraashna#usercharithra#userrajan#usertj#meadow#phantom code#phantom theme
398 notes
·
View notes
Text
Make a work skin on ao3, when you publish there is a spot to specify which work skin to apply.
You define different "elements" with CSS - CSS options are easy to look up.
To change how body text is displayed (the <p> tag in the ao3 html editor), in the work skin editor you type "#workskin p {" and everything after the brackets is a list of the changes you want. You can see below the cut for examples.
For font, you use "font". In my example workskin I use "font-family" which is just a way to make it very safe across browsers, but you don't have to do that. Look up "web safe fonts" to find ones that are likely to translate across devices well.
You close the list with another bracket "}".
If all you want to do is change the font then that's it!
If you want multiple fonts, you'll have to define a "class", which just assigns even more specific changes. You'd append any tag like <p> <img> or <div> with "class="different"", like <p class="different">. You define "different" in the CSS workskin. Here's a link for this: https://www.w3schools.com/html/html_classes.asp
Feel free to ask, really the best way is to just try and fail until you get what you want. Once you understand how CSS styling works, you can infer from there. W3Schools is a good website for CSS questions.
This looks complicated, but it's basically the ao3 html box next to the workskin css box. It updates in live time when you make changes. It's a good way to fiddle with the css until you get it looking how you want. Just copy paste your fic in html into the right side, and work on #workskin p { font: Georgia } on the other side. https://jsfiddle.net/
Here is my full example work skin - you don't need all of this, an example just may be helpful.
#workskin {
background-color: #333;
}
#workskin body {
text-align: justify;
background: #333;
color: #eee;
font-family: Georgia,Times,Times New Roman,serif;
font-size: 1.05em;
max-width: 800px;
margin: auto;
}
#workskin p {
padding: 10px 10px 10px 10px;
font-family: Georgia,Times,Times New Roman,serif;
text-align: justify;
background: #333;
color: #eee;
font-size: 1.05em;
max-width: 800px;
margin: auto;
}
#workskin i {
font-style: italic;
}
#workskin a:link {
color: #f2d285;
}
#workskin a:hover {
color: #f2d285;
text-decoration: underline;
}
#workskin a:active {
color: #f2d285;
text-decoration: underline;
}
#workskin a:visited {
color: #f2d285;
}
#workskin img {
max-width: 800px;
width: 70%;
padding: 1.5em;
border: 3px solid #f2d285;
font-size: .8em;
display: block;
margin-left: auto;
margin-right: auto;
}
#workskin h1 {
color: #f2d285;
font-family: Georgia,Times,Times New Roman,serif;
border: 0px;
}
#workskin h2 {
color: #f2d285;
font-family: Georgia,Times,Times New Roman,serif;
border: 0px;
}
#workskin h2.title.heading {
color: #f2d285;
font-family: Georgia,Times,Times New Roman,serif;
border: 0px;
text-align: center;
}
#workskin h3 {
color: #f2d285;
font-family: Georgia,Times,Times New Roman,serif;
border: 0px;
}
#workskin h3.heading {
color: #f2d285;
font-family: Georgia,Times,Times New Roman,serif;
border: 0px;
text-align: center;
}
#workskin div.preface.group {
background-color: #333 !important;
}
#workskin div#work_endnotes.end.notes.module {
background-color: #333 !important;
}
#workskin blockquote {
min-width: 200px;
max-width: 400px;
width: 50%;
padding: 1.5em;
border: 3px solid #f2d285;
font-size: .8em;
margin: 2.5em auto;
font-style: italic;
color: #eee;
}
#workskin .section {
max-width: 800px;
padding: 10px 10px 10px 10px 1.5em;
border: 3px solid #f2d285;
margin-top: 70px;
margin-right: 2.5em auto;
margin-left: 2.5em auto;
margin-bottom: 2.5em auto;
font-weight: 700;
font-variant: small-caps;
text-align: center;
background-color: #333;
color: #f2d285;
}
#workskin .firstcharacter {
color: #f2d285;
float: left;
font-family: Georgia;
font-size: 40px;
line-height: 35px;
padding-top: 4px;
padding-right: 8px;
padding-left: 3px;
}
#workskin .script {
font-family: Edwardian Script ITC, Zapfino, Georgia,Times,Times New Roman,serif;
color: #f2d285;
font-size: 1.8em;
text-align: left;
}
Hey @ao3commentoftheday and anybody else who might know, is there a way to use different fonts in the body of a work on AO3 (and how much HTML do you have to know to make it work)?
538 notes
·
View notes
Text
Banned Tags
When I made my original Tumblr Purge 2: Electric Boogaloo PSA, I knew the situation was bad, but I still had no idea how bad. It was only after I started noticing how many posts were missing on iOS, investigating exactly which tags caused them to be blocked, and making my own list that it really sunk in. Y’all it’s bad. It’s real bad.
While most of the banned tags are at least somewhat logical (nsfw, porn, kink, etc) there are also a significant number that have no relation to “sensitive content” whatsoever. In fact, these tags are so ubiquitous you would be hard pressed to find a single tumblr user that doesn’t regularly use at least some of them, especially content creators. I don’t know how these tags could’ve possibly ended up on the banned list, but my guess based on my findings and tumblr’s general level of competence: a bunch of blogs flagged as explicit were scraped and all of the tags that were used x amount of times were dumped into a “banned tag” database and never checked by a real human. I can only assume that some of these will be walked back eventually once the backlash becomes great enough (as they did in the Original Purge), but until that happens we’re left managing this mess as best we can.
And in case you’re thinking to yourself “surely it can’t be that bad,” here are all of the general/fandom tags I’ve found so far that are now hidden, from both searches and dashboards, on the iOS app (more under the cut):
[Updated Feb 8, 2023]
mine
my stuff/mystuff
my gif(s)/mygifs
my photo(s)/myphotos
my face/myface
my thing
my life
my post
my video
my words
made by me
queue/queued
upload
reblog/reblogged
reply
request
submission
about/about me
self/selfie
answered
tagged
misc
me
long post
repost
donate
ask to tag
don’t reblog
self reblog
trigger
trigger warning
cw
1k
user
userstream
userveronika
userjessie
usercandy
usertana
userrishi
userrobin
useronce
bbelcher
winterswake
marveladdicts
womenedit
ladiesblr
othedit
dailymlgifs
the winter soldier
alec lightwood
Obviously these are not the only tags that have been banned but they’re the most commonly used for content creators and the least obvious so I wanted to put them right up front to spread awareness.
I’ve been compiling my own comprehensive list of banned tags for the past couple days and was planning to post them, but it looks like someone beat me to the punch and there’s now a whole blog dedicated to collecting them and multiple posts with fairly extensive lists so far! With that in mind, I’m going to continue adding to my list of banned general/fandom tags above, since I feel those are the most important to single out and be aware of, but I’ve decided to forgo posting my own complete list and let @bannedtags take over as the primary resource. This is honestly for the best, since with the extreme number of banned tags that currently exist (and still growing!), I’ve come to realize I just do not have the time, energy, or mental health capacity to continue this project right now.
What I would like to offer instead is a bit more information on how these banned tags seem to work and what you can do to mitigate the damage from this disaster of an update.
There are two main types of banned tags:
Softblocked on all platforms – Posts tagged with these words are unsearchable on all browsers and apps but will still appear on your dashboard (as long as you’re not using the iOS app). These seem to be the same tags that have been softblocked since the Original Purge. On the iOS app, these tags are now hardblocked (type #2).
Hardblocked on the iOS app (as of version 22.5.1) – Posts tagged with these words are unsearchable + hidden on iOS dashboards. This applies to both tags on reblogs and original posts. Also, if the OP uses a banned tag, any reblogs will be hidden on all iOS dashboards regardless of the reblogger’s tags.
IMPORTANT NOTE: The new hardblock system ONLY applies to the iOS app. If you’re accessing tumblr via any other browser or app, even Chrome or Safari on iOS, the only ban that directly affects you is the first one.
How do you identify a banned tag and how do you know which type it is?
The only way to determine if a tag has been banned is to search it. If it’s banned you will generally get one of two results depending on the type. Softblocked tags will appear to be searchable but have no search results (with some sort of cheeky message about not finding anything). Hardblocked tags will display a pop-up saying “This content has been hidden.” There is no way to know if a tag has been hardblocked on iOS without searching for it on the iOS app.
Softblocked on all platforms (+ hardblocked on the iOS app):

Hardblocked only on the iOS app:
This message system is a good rule of thumb but it’s not a 100% foolproof way to know which type is which. The only way to know for sure is to search on both iOS and another browser/app. If the tag displays search results in a browser but not the iOS app then it’s only blocked on iOS.
In addition to the two types, here are the basic “rules” for how all banned tags seem work as of right now, at least that I’ve been able to discern through trial and error since there’s no explanation provided anywhere:
Only tags are searched for banned content. This means you can still write whatever you want in the body of the post without fear of it being blocked.
Sometimes banned words embedded in a longer tag will result in the post being blocked, but not always. This especially seems to be true if the banned word is the first word in the tag. For example, the tag for the movie “single all the way” appears to be banned because it includes the banned word “single”. For this reason, it’s safest to just assume you can’t use a banned word or phrase anywhere in a tag unless you’ve checked it and know for sure it’s safe.
Banned words merged with no spaces are not recognized as banned content unless that specific combination has also been banned. For example, “sugar daddy” is banned but “sugardaddy” is still searchable.
So what can you do if you find out one of the tags you’ve been using regularly is now banned and your old posts are hidden to a large percentage of the userbase?
Luckily there’s an extremely handy website called Mass Tag Replacer that allows you to find and replace any given tag on hundreds of posts in seconds! You do have to give it read/write access to your blog, but you can revoke the access at any time. I’ve used this website for many years and never had any issues with it.
As for how to search a banned tag? The @bannedtags blog actually discovered some semi-workarounds: adding apostrophes around the tag (ex: ‘nsft’) or adding a period after the tag (ex: nsft.). I’ve tested this and can confirm that it generally works (at least at the moment), but the results can be spotty. Still, it’s better than nothing!
This whole situation is very new and in a state of flux so I’m going to continue my research and keep this post updated as we learn more.
#tumblr#I'm sure there's lots of posts about this now after my PSA got so much traction#but I'm posting my own anyway in case any of this isn't covered elsewhere#tumblr purge 2: electric boogaloo#my words#wendy's help desk
1K notes
·
View notes
Text
An Introduction to the Beta Editor
Hello all! I’ve gotten some feedback that the tutorials on using the new Beta editor and xKit Rewritten has been confusing a few people, so I wanted to make my own! I’ll try to cover everything below, but if something isn’t clear or you need extra help, let me know please! This post is gonna be pretty long, but I sectioned it up so hopefully you can find what you need with ease.

Step 1. Switching to Beta
You very well may be able to skip this part, because all new blogs are automatically switched to the newer editor. But if you’re still using an older blog, don’t worry, it’s easy! There should be a big purple button in the corner, pretty hard to miss. Should look like this!
Go ahead and hit “Let’s go!” and, well... let’s go!
Step 2. Getting to Know Beta
The Beta editor is very, very different from what we’re all used to. But really, it’s kind of intuitive in a lot of ways. You have to know a lot less shortcuts. Whenever you highlight your text, you’ll see this little guy pop up:
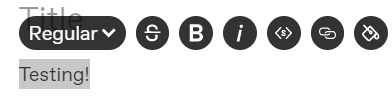
Now, from left to right, here’s what we’re looking at: strikethrough, bold, italics, small text, link in text, and colored text. Most of your keyboard shortcuts should still work (I can’t speak for all computers, but the shortcut for small text no longer works for me with the Beta editor), but we also have handy-dandy buttons now, too! We also have the 'Regular' drop down menu, which opens this:
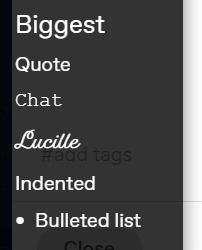
This one is pretty self explanatory, and it shows what the text will look like if you select that option.
Step 3. Finer Details
I’m still personally getting used to a lot of the smaller details that come with the Beta editor, but here are some that I’ve learned! Hopefully I’ll be adding to this list when more troubleshooting comes into my realm of knowledge.
Auto-Readmores: For whatever reason, Tumblr has taken to cropping any posts over a certain length by itself? Annoying, but this is something you can toggle on/off in your Dashboard Settings!
Editing Tags: This isn’t something that needs to be fixed, but it was big news to me! Instead of having to delete your tag completely when you’ve made a typo, you can just edit your post and edit the tag! Handy!
Links on Gifs: This isn’t a bad thing, it’s just new, different, and weird. But if you dislike it, there is a way to stop it from happening! It’s just a manual task. When you copy and paste a gif into your reply, you’ll see three little images on it. We’re going to click on the circled one below.
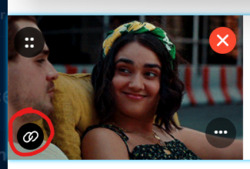
That’ll open up a link box, with a link to your gif. Just backspace that, hit the ‘Done’ button, and boom! No more link at the bottom of your gif!
Step 4. xKit Rewritten
I know what a lot of people’s main concern is: cropping replies. This is how we get to that point. The first step is going to be to download the newest iteration of xKit. You do not have to uninstall your old one to do this, they coexist on purpose! New xKit and xKit Rewritten have different features, so I’ve found it best to have both and utilize all the features!
xKit rewritten is a Chrome extension, and it can be found at this link! Just follow the instructions on that page to install it. Once it’s all good and installed, it’ll be found next to your other extensions, or by the URL bar on your browser window. Looks like this!
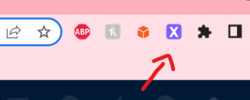
Now you have xKit Rewritten!
Step 5. Cropping Replies
Alright, this is where the money is. Just like with regular xKit, you have to toggle on the setting that allows you to cut replies down. Once you click on that purple X icon, you’ll see a drop down with lots of options. I’ve underlined the one we’re looking for right now, "Trim Reblogs."
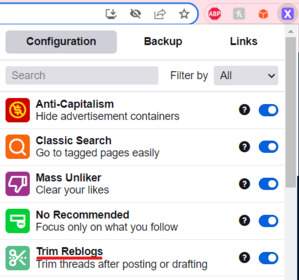
Once you toggle that little switch on, you can go ahead and start replying. If you’re replying to a starter, then there is no need to worry about this feature. You have nothing to crop, so don’t worry! But if you’re replying to an active thread, here’s what you’re gonna do. Type out your reply, format it however you want, and then draft it. Then we’re gonna go into our drafts.
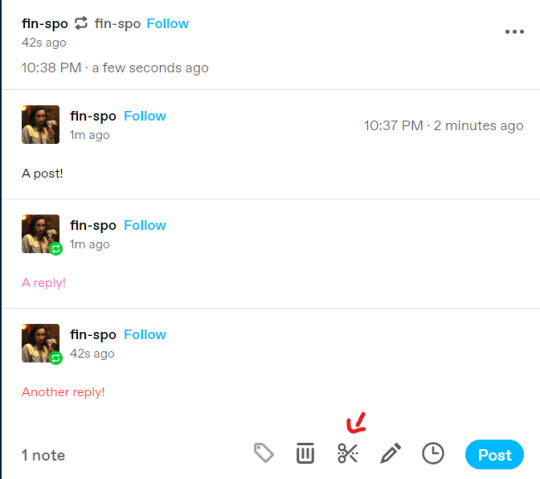
Here’s my thread with three tiers to it! The standard is two replies per post, and that’s what a lot of people like to stick to. So let’s make that happen! If you’ll notice at the bottom of that draft, there’s a scissor icon. I drew an arrow to it in the photo above. We’re gonna click on that.

And that icon brings this up! You’ll see it says “Select trail items to remove,” and it shows the trails separately. “Trails” are each individual reblog, and of course, we only want two of those, not three. This is really easy to fix! We’re just gonna select that top “trail,” aka the first reply in the thread, and hit the “Trim!” button.
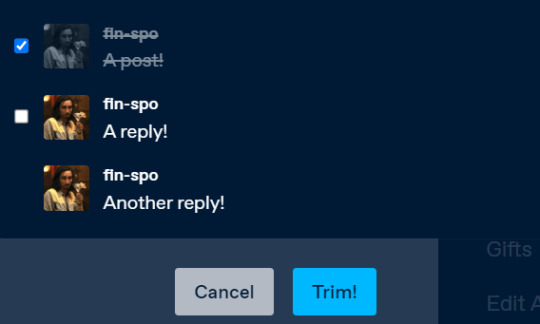
And once we’ve done that, the first “trail” is gone! You just have the two more recent replies on the post, and you’re good to reblog it!

The one caveat of this is that you can no longer edit parts of other people’s replies, so you can’t format the posts to your heart’s content like we’re used to. A downside for sure, but so far, this isn’t something there’s a fix for. Hopefully in the future, xKit will figure that out for us!
Step 6. That’s All!
Once you have all that down, you’re a master of the Beta editor and a master of xKit Rewritten! Tumblr staff has mentioned phasing out the Legacy editor all together in the future, so it appears this will be our new reality. It is worth it to mention that the Beta editor is still, well, in beta, so it is subject to change. If it does and we get even more features or work-arounds, I’ll be sure to come back and edit this post! Until then, if you have any questions, please let me know! I am here to help!
xoxo, Kirby
13 notes
·
View notes
Text
~just passing through~
~.*Sakuatsu Fic Masterlist *.~
[for my personal use to keep track and close tabs from my browser. But, feel free to read them as well ( ^ω^ ) Contains my fave lines or quotes from the fic, will update regularly hehe ★〜]
Legend:
♡彡 ~ Timeless Personal Favorite
★彡 ~ Favorite
★彡 play me like a movie (that you’ve never seen) by lunarins (G, 13.2k, 1 ch, entertainment industry au)
Blurb: It’s not that Atsumu doesn’t get along with Sakusa Kiyoomi. Miya Atsumu is someone who gets along with everyone. He’s an idol, after all. They just…well, they just don’t really get along.
Fave Quote: “Sakusa Kiyoomi and I are very good friends,,
Personal Note: Okie, paying homage to the first Sakuatsu fic I have read. Cut to me not knowing how to navigate AO3 that much and just looking up the haikyuu tag and coming across this fic *wheeze*. It was really cute and I was hooked, led me to the rest of these fics and I’m never looking back. Really cute, fluff and all (*´꒳`*).
♡彡 Four Vlogs and a Wedding by lettersinpetals (T, 15.6k, 4 ch, canon, pt 3 of this love isn’t crazy series)
Blurb: Sakusa and Atsumu go road tripping in California. What could go wrong?
Fave Quote: (Atsumu, ch 2) “When I say I cried, I mean I f*cking cried. And then...I fell to my knees and practically begged him to marry me,, (Kiyoomi, ch 3) “To those who are inevitably going to ask, ‘Have you gone insane? Were you two drunk?’ I want you to know that I made this decision with eyes wide open,,
Personal Note: Alright this fic— I advise that you read the series in order to get the full effect. This is pt 3 out of 4 in the series [link with title]— this fic has and still remains my favorite Sakuatsu fic I have read, ever. When I think of them, I think of this. I have cried reading almost every chapter. No regrets (*´∀`*). CHAPTER 3, GUYS CHAPTER 3, I swear I cried the most there. The writer, lettersinpetals, if u have tumblr pls I want to send u my regards <33, you have every right when being that good AAAA kudos kudos!! PLS, I WANT WHAT THEY HAVE >_< Though shorter, this barred a little bit higher than my other timeless fave “ATSU101: how to fall in love with your fake boyfriend”. For the quote, I couldn’t pick just one. But, the ones above really just sunk to me. Luv luv luv this fic, could and would read it anytime, how many number of times, and it wouldn’t get old. Pls send it and the author some love (*^ω^*).
♡彡 ATSU101: how to fall in love with your fake boyfriend by solyn (M, 110.6k, 11 ch, university au)
Blurb: Atsumu needs a fake date. Sakusa needs a fake boyfriend. What could possibly go wrong?
Fave Quote: “Kyoomi, d’ya trust me?,, “Yes,,
Personal Note: This fic *clap* I just can’t— omg. Though it is a (very) slow burn, it was very enjoyable to read. It was really hard choosing my fave quote cause there are a LOT. But, I think what I have chosen encapsulated the fic as a whole (to me). Definite must read!
The Story of Us by thesweetestners (M, 98.2k, 11 ch, canon)
Blurb: Atsumu has spent the last year falling in love with Sakusa Kiyoomi, but it's a secret they've never told anybody else. When a car accident snatches Omi's memories from the past two years away, Atsumu is left as the only one in the world who ever knew their relationship existed.
Fave Quote: “Ya remember my team motto, right? I don’t need the memories,,
Personal Note: I AM DECEASED. I— i cried a lot. It actually took me a while to get to this for fear of the plot, like the blurb sounds so good but idk there was a fear of me reading it. Actually, as i look back, its probably the angst tag that scared me HAHAAHHA but im so glad i did read it. Would recommend if you want to cry. Especially the last 2 chapters \(//∇//)\
The MSBY Black Jackals Read Thirst Tweets by isaksara (syailendra) (M, 11.4k, 2 ch, canon)
Blurb: In which Atsumu realizes that he is attracted to Sakusa Kiyoomi in the most inconvenient way possible.
Fave Quote: “What is wrong with people,,
★彡 The MSBY Black Jackals Take a Lie Detector Test by sifuhotman (T, 12.4k, 1 ch, canon)
Blurb: The MSBY Black Jackals test their friendship as they probe deep into each others' personal lives.
Unfortunately for Sakusa, that means confessing to a number of accusations: who he thinks is currently the best V. League player, if he thinks he'll make the Olympic Volleyball team, and whether or not he has feelings for Miya Atsumu.
Fave Quote: “It’s you, it’s always been you,,
every action has an equal and opposite reaction by akanemnida (T, 10.4k, 1 ch, canon)
Blurb: Miya Atsumu gets a modeling contract with Calvin Klein, which sets Kiyoomi's heart in motion.
Fave Quote: “But why is it that I don’t give more than two f*cks about your advertisements, or the fact that you give me the best tosses, or that you’ve perfected three serves, but I can’t stop thinking of the day you gave me onigiri?,,
Take Me Home by thesweetestnerd (T, 4.1k, 1 ch, canon)
Blurb: Atsumu and Kiyoomi decide to keep their relationship a secret from the team, but when Kiyoomi gets drunk, he might blow their whole cover.
Fave Quote: “Don’t answer that, Omi,, “Yes,, “Ah, damn it,,
Clipped to You by littleboat (T, 8.1k, 1 ch, canon)
Blurb: Sakusa starts wearing hair clips and Atsumu is more than a little obsessed
Fave Quote: “Can I put one in your hair?,,
all my life, been wanting this forever by comfortcharacters (T, 1.0k, 1 ch, canon)
Blurb: Nothing seemed to be out of place. Except, of course, for the small fact of Atsumu facing his own personal hell come to life, taking the form of one Sakusa Kiyoomi perched happily in his lap.
Fave Quote: “Atsumu, does it look like I care?,,
Call Me Maybe by kitkatwrites (T, 1.8k, 1 ch, ER visit au)
Blurb: “What caused your nosebleed?” Dr. Sakusa asks, typing something into a computer next to him.
“M’ brother smacked me in the face with a Wii controller,” Atsumu tells him. “We were playing Just Dance 4,” he adds.
Dr. Sakusa raises an eyebrow. “What song?” He asks, and suddenly Atsumu feels very awkward.
“Call Me Maybe,” he mumbles.
Fave Quote: “Call me maybe,, “No thank you,,
The Wisdom Tooth Incident™ by allinadayofiwaoi (G, 4.8k, 1 ch, canon)
Blurb: “I dun think ma boyfriend will ‘preciate ya touchin’ me like that,” he whispered, dead-serious. “ ‘m not a cheater.”
Fave Quote: “And you call me Omi,, “Omi! Thank ya omi. Omi-Omi-Omi-Omi,,
have my heart, my love by samugiiri (1.7k, 1 ch, canon songfic)
Blurb: “Mm, Omi?” The setter’s voice is muffled by the spiker’s shirt as the former buries his head into the latter’s chest. Kiyoomi gives a soft hum in reply and Atsumu continues speaking.
“This song reminds me of us.”
“How so?”
“Listen ta the lyrics, Omi!”
Fave Line: “I love you because you have those Polaroids of me inside your nightstand,,
★彡 Last One to Midnight Loses! by evelynwrites (T, 14.9k, 2 ch, canon)
Blurb: The year may be new, but this love story was many in the making. Miya Atsumu vs His New Year's Resolutions: Speedrun Edition
Fave Quote: “What would you want to have if it didn’t cost you a damn thing?,, (wait,,, i ask myself the same thing (>人<;) )
tooru talks by floatyyourself (T, 5.5k, 1 ch, alternate profession au)
Blurb: Sakusa Kiyoomi, best-selling author of the Memento Mori series, has been confirmed to be making an appearance on late-night show Tooru Talks, staring Oikawa Tooru. The news has been confirmed by Sakusa's agency Itachiyama, who had just recently released a schedule of the author's promotional schedule.
According to Oikawa, Sakusa will also be joined by another guest but the identity of the guest will remain a secret. "The guest is someone we're all big fans of," the talk show host reveals. "But that's all I'm going to be saying about the topic because I don't want to spoil the fun."
Tooru Talks airs live nightly every weekend.
Fave Quote: “Who would want to listen to love songs over and over?,, “You talk a lot for someone who just published a romance story for the twentieth time,,
Champagne Problems by TwilaFrost (T, 3.0k, 1 ch, canon)
Blurb: Atsumu struggles with depression and how it affects his self-worth in the eyes of others, especially his boyfriend who he thinks deserves so much more.
Fave Quote: “Share your burdens with me, I’ll take them. I’ll hold them all,, (pls get me someone like sakusa kiyoomi T^T)
Yours if You Want It by keenbean (G, 2.4k, 1 ch, canon)
Blurb: Sakusa asks Atsumu out. Naturally, Atsumu panics.
Fave Quote: “Then tell me. What do you want?,, “You,,
One Time Thing by awkwardedgeworth (G, 1.6k, 1 ch, canon)
Blurb: "Hey. Is your face okay?" Atsumu leans back slightly, brows pulled together in concern, "You look like you're emotionally constipated."
"Shut up."
Then Sakusa leans forward, closes his eyes and presses his lips against something cool.
Fave Quote: “Remember, Omi? Just like old times,, “Idiot,,
atsumu and his love for kisses by sakusakym (T, 1.5k, 1 ch, canon)
Blurb: “Absolutely insufferable. But, you’re also absolutely beautiful, Miya.”
Fave Quote: “Have I told you how much I love you, Omi-kun?,, “You have, multiple times.,, “I know,,
you stole my heart (with just one look) by yearningbi (T, 2.3k, 1 ch, canon)
Blurb: Kiyoomi proposes, accidentally. Title from 'stole my heart' by one direction
Fave Quote: “Good, because I have a no-return policy,, “I wouldn't give you up for anything in the whole world,,
penny for your thoughts (dollar for your smile) by blulights (T, 3.3k, 1 ch, canon)
Blurb: Their nightly outings have taught Atsumu three things. 1. Bokuto Koutarou has a liver of steel and trying to outdrink him will result in alcohol poisoning (see subject no. 1, Hinata Shoyo, for proof). 2. Meian Shugo is a highly coordinated volleyball player but can’t get his head out of his ass long enough to actually land a shot in pool. 3. Sakusa Kiyoomi is a happy drunk.
Or: Atsumu learns that Sakusa has dimples
Fave Quote: “Thank you Bokkun for sendin’ me into the early stages of liver failure.” ( it’s not sappy, but this one is just hilarious XD )
Curiousity killed the Jackal by yamaguchis_ahoge (T, 2.6k, 1 ch, canon)
Blurb: “Oh sh*t.” Atsumu exclaims, panicked look on his face. Bokuto cocks his head to the side,
“What?” Atsumu pulls at the ring on his finger, it doesn’t budge.
“I can’t take it off!” He whispers, though there’s no one to reprimand them. Hinata’s eyes widen,
“Take it off.” He says, unhelpfully. Atsumu scowls,
“I can’t! I just told ya! It’s stuck.” He whines.
Fave Quote: “Marry me?,, “Yeah, I think I will,,
hands that heal by n33ks (G, 1.5k, 1 ch, canon)
Blurb: Sakusa somehow sprains his wrist during practice. Atsumu is the first to notice something is wrong and offers to help.
Fave Line: “And dimples. He has dimples,,
Your b*stard by TroglodyteMonologue (T, 6.9k, 1 ch, canon)
Blurb: Atsumu has asked Sakusa Kiyoomi to marry him three times. The fourth time, Kiyoomi beats him to the punch.
Fave Quote: “You’re not the only one scared of being vulnerable,,
Read the Receipt by hhhhhhhappycow (G, 6.6k, 1 ch, canon)
Blurb: “I think we’re done here, thank you, Osamu. If we could just have the bill?”
As though waiting for those words, Osamu removed a small square of paper from his pocket.
And leaned over to slam the paper down on the table in front of Sakusa. “You’re paying tonight.”
“What?”, Atsumu squawked, his eyebrows traveling further up his forehead. “Why?”
“He knows why.”
Fave Quote: “Maybe they’re involved in something shady. You know, like the mafia,,
7 notes
·
View notes
Text
Ao3 Tips and Tricks
So I thought I would make a post about some cool stuff you can do with Ao3 and userscripts, and some tips I’ve learned from setting them up for myself! I promise it's not hard, though this is a lot of info. I'm happy to help if I can.
What You’ll Need:
First, you will need the Tampermonkey extension for your browser (depending on what browser you use, Greasemonkey is the equivalent). On Android, you can even run Chrome extensions on mobile with Kiwi Browser! It is easiest to configure the scripts on your desktop and then sync to mobile with Tampermonkey’s cloud sync feature or by exporting the configured scripts and importing in your mobile browser (I will explain how to do this later in the post). If you use any of the tweaks I outline below, be sure to backup your scripts in case your settings are lost.
Once you have Tampermonkey installed, you can get scripts from GreasyFork. The inimitable @flamebyrd also has some great scripts and bookmarklets and has been incredibly helpful while I figured all this out.
Find a script that looks interesting, click on it, and then click “install this script.” Pretty straightforward. Once you have it installed, you can go to Tampermonkey to configure it (only necessary for some scripts) by clicking on the Tampermonkey extension icon in your browser (under the three dot menu in Kiwi) and clicking “dashboard”, then clicking the edit icon next to the script you want to configure. When you’re done, click File->Save.
Scripts and instructions under the cut
Some of my favorites:
Flamebyrd’s Incomplete Works script - fades out WIPs on works listings, and displays the work stats (wordcount, chapters, etc) in red on single works to make it more obvious that they’re WIPs as you’re browsing:

Flamebyrd’s Ao3 to Pinboard bookmarklet/script - if you click the bookmarklet while on a work’s page, it opens the Pinboard save screen and prefills the title, tags, description, word count, etc, and adds ?view_full_work=true&view_adult=true to the URL so Pinboard’s archiver will archive the complete work and not the adult content warning screen (note that Pinboard still cannot correctly archive works locked to Ao3 users, so you may want to download them as a backup. I’ve asked him about fixing that.), based on your selections when configuring the bookmarklet on the linked page. If you use the userscript, it adds a button to the works listings page so you don’t even have to open the work to save it:
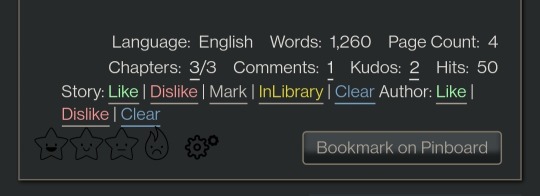
I tweaked this script so that it only grabs the first pairing tag, since I don’t typically care about secondary pairings and they were clogging up my Pinboard tags. It’s a simple fix (though I know nothing about coding so I had to do some googling and inspect-sourcing; kinda proud of myself tbh):
Just change this part of the script
if ( options.relationship_include ) {
- $(".relationships a.tag", $work).each(function () {
To this
if ( options.relationship_include ) {
- $(".relationships a.tag:first", $work).each(function () {
I also found this cool mobile-optimized Pinboard bookmarklet called Pincushion and combined it with Flamebyrd’s script. Everything works except the auto-tagging, but I’ve reached out on GitHub to see if he can help (according to Flamebyrd, there’s no tag field ID attribute to map to). However, this bookmarklet has tagging autocomplete features that make it easy to tag manually. For example, if you type “steve 21st” it will suggest “steverogersvsthe21stcentury” rather than having to type out “steverogersvs…” in order for it to autocomplete like it does on the regular Pinboard bookmarklet. I actually have two buttons set up (which you can see in the next screenshot) - Flamebyrd's to quickly grab the tags and close without me having to do anything, and then the Pincushion one to quickly edit the tags. If anyone's interested, I can explain how to do that.
To combine Pincushion with Flamebyrd’s script (so it works from the Ao3 works listings page as mentioned above), simply change this part of Flamebyrd’s script:
t = t.split(" ").join( options.space_replacement );
var pb_url = "https://pinboard.in/add?url=" + encodeURIComponent(q) + "&description=" + encodeURIComponent(d) + "&title=" + encodeURIComponent(p) + "&tags=" + encodeURIComponent(t);
void(open(pb_url, "Pinboard", "toolbar=no,width=700,height=350"));
To this
t = t.split(" ").join( options.space_replacement );
var pb_url = "https://rossshannon.github.io/pincushion/?user=YOURUSERNAME&token=YOURAPITOKEN&url=" + encodeURIComponent(q) + "&description=" + encodeURIComponent(d) + "&title=" + encodeURIComponent(p) + "&tags=" + encodeURIComponent(t);
void(open(pb_url, "Pinboard", "toolbar=yes,width=600,height=700,left=50,top=50"));
You’ll need to get your API Token from your Pinboard account and plug it in where it says YOURUSERNAME and YOURAPITOKEN (number part only) above.
FanFictionNavigator - mark fics as Like/Dislike/Mark/InLibrary, highlight with colors based on which option you select, hide/show based on category, like/dislike author and highlight with color. Only you will see how you've marked things.
You can tweak the colors for the highlighting by configuring the script (I find the default colors make the text hard to read because I use the Reversi skin on Ao3 for white-ish text on a gray background). I also changed it so that when I click “hide likes” it only hides liked fics and not liked authors (i.e. hides fics I’ve read, but not unread fics by authors I like), changed the color of the like/dislike/etc links to match the highlighting color and to show up better, and changed the way it highlights authors (I think the default is bold/strikethrough which doesn't really catch my eye. I changed it to highlight the author name in red/green):
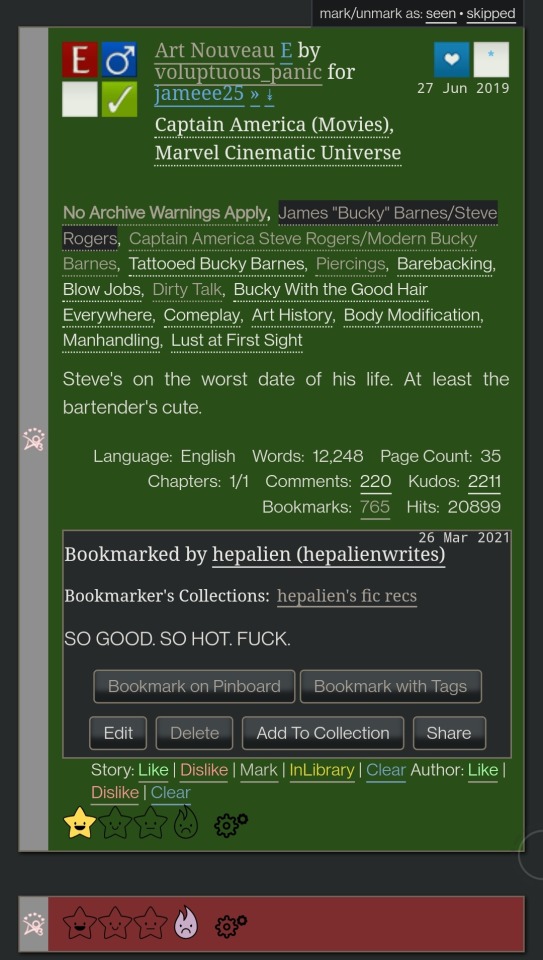

Here are my configured scripts if you’d like to use them instead of tweaking yourself (you need to install both):
FanFictionNavigator
FanFictionNavigator - Colors
Note: Your settings for this script will sync via Tampermonkey but not your data (i.e. fics you’ve liked/marked/etc). If you ever switch between browsers, you’ll need to go to your Ao3 Dashboard and click FFNOptions, export your data, then go through the same process to import it into the new browser.
AO3: Kudosed and seen history - highlight or hide works you kudosed/bookmarked/marked as seen. If you want to use this with FanFictionNavigator, you’ll need to turn off “highlight bookmarks” from the settings under the “Seen Works” dropdown that gets added to your Ao3 navbar or FFN’s colors won’t show. Again, data doesn’t sync between browsers but you can copy it from the dropdown settings. However, it pulls your kudosed and bookmarked fics from Ao3 itself, so that will always show. It's just seen/skipped that doesn't sync:
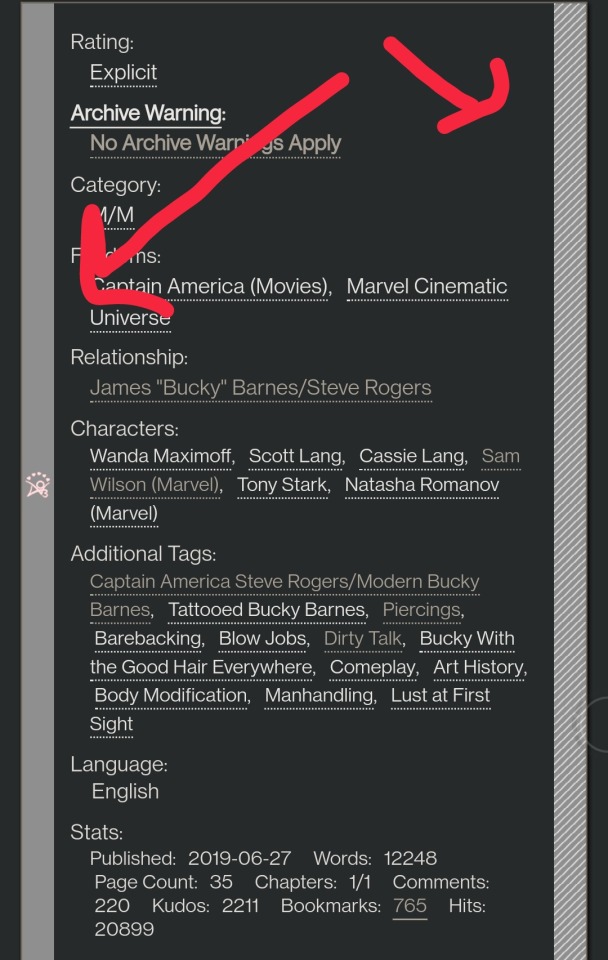
Ao3 download buttons - adds a download button to the works listings page so you don’t have to open the fic to download it. However, it also doesn’t play nicely with FFN’s colors, so I’m using AO3 Review + Last Chapter Shortcut + Kudos-sortable Bookmarks script which also has a download button that works with FFN (a small down arrow next to the author name). The download button doesn’t work as-is from that link, so here’s my tweaked version based off of this comment. You can configure what format you want it to download by default in the script. There’s also a tweak in the comments to fix kudos-sorting, but it overloads Ao3 and you get a “retry later” error for a few minutes when you try to open Ao3, so I don’t recommend it. I don’t know if any of the other functionalities of the script work because I don’t use them, but it looks like there are tweak suggestions in other comments you can try:

I was using Ao3 Replace Words to replace words in fics that bug me but I realized it wasn’t working on mobile, so I’m using zensurf instead which is not Ao3-specific but works basically the same way. If you want to limit it to just Ao3 (so it doesn’t change words on non-fic sites), just add this
// @include http://archiveofourown.org/*
// @include https://archiveofourown.org/*
Above this line
// ==/UserScript==
(function() {
You can // @include other fic sites like ffnet that way too.
AO3: Links to Last Chapter and Entire Works does what it says on the tin, but the creator was kind enough to give me a code snippet to add that makes the “E” (for Entire Work) appear next to all works and add ?view_full_work=true&view_adult=true to the work URL so that I can easily right-click and share to Instapaper and have it be saved correctly (not just the first chapter but the whole work + not the content warning screen for NR/M/E works). Here is the script with this tweak applied:

I think those are the only ones that I’ve done special tweaks for. Here are some others that I find useful that either don’t require any configuration, or should be pretty straightforward to configure and are explained on the script page.
AO3 author+tags quick-search - doesn’t require configuration
Generates quick links from AO3 fics to more by the same author in the same fandom (or character/pairing/any other tag):
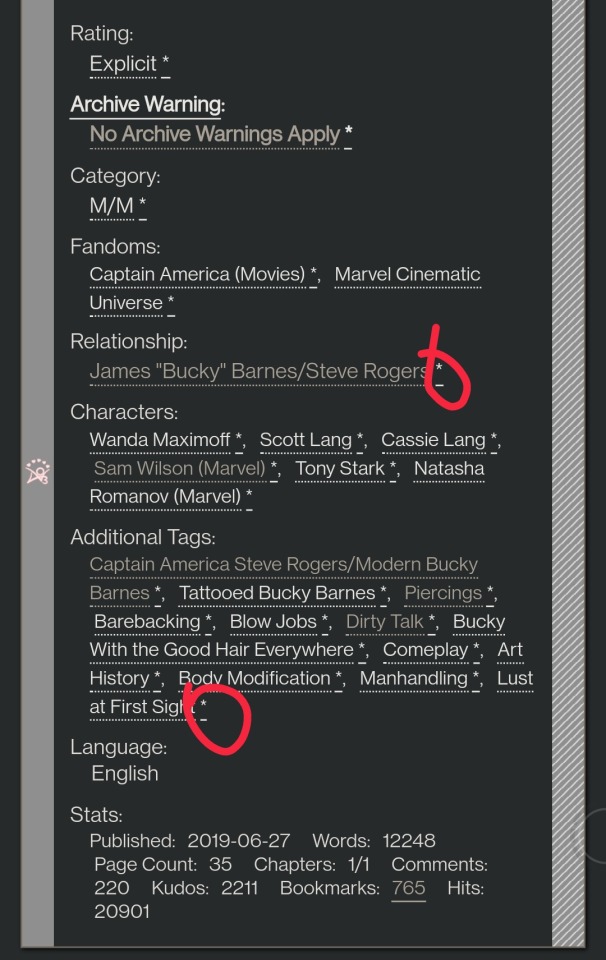
Remove leading spaces in AO3 - doesn’t require config
Removes the leading indents for paragraphs in AO3 works.
Ao3 Only Show Primary Pairing - you have to enter the pairings you want in the script, and you can change how early in the sequence they must appear before the work is hidden. Also works with character tags.
Hides works where specified pairing isn't the first listed. Hidden works show a placeholder that you can click to unhide:

AO3: highlight tags - have to enter the tags you want highlighted, as well as the color you want. It matches case so you may have to enter both “Dog” and “dog”, for example.
Configure tags to be highlighted with different colors. This makes a tag more obvious to your eye when browsing. I use it to highlight things I’m wary of in red so I don’t miss them and start reading a fic I might not want.
AO3: Tag Hider - configure how many tags you want to see before it hides them
Hide tags automatically when there are too many tags. Add hide/show tags button to browsing page and reading page.
AO3 Remove Double-Spacing - no config
Removes awkward double spaces between paragraphs on AO3. Doesn’t smush together paragraphs that have a single line break - it leaves those alone.
ao3 series collapser - no config
Collapse works that are later than part 1 of a series. Leaves a placeholder so you can uncollapse if you want to see it.
AO3 Blocker - no config, but you enter what you want to block from the added navbar dropdown in Ao3
Fork of ao3 savior; blocks works based on certain conditions. I find this simpler to use than Ao3 savior.
FYI there are also style scripts for Pinboard on greasyfork and userstyles.org (this site is slow af for some reason, so be patient while it loads). I use show unread bookmarks more clearly and Modern Pinboard Style (basically a dark mode). Neither require config unless you just want to tweak the settings to your liking. To install to Tampermonkey from userstyles, scroll down to “Install style as userscript”.
I also use these extensions in Kiwi:
Ao3rdr - Adds a star rating system (pictured in some of the screenshots above) to Ao3 works that only you can see. This one will sync your data between devices if you use the cloud sync option, which I recommend so you don’t lose your data if something happens to your device or browser.
Dark Reader - not really necessary for Ao3 if you use Reversi skin, but does make all browser pages dark mode if you want it on sites other than Ao3.
Speaking of Ao3 skins, I have another one set up in conjunction with Reversi that shows all the fandoms on a user’s profile, rather than having to click “expand”:
Unfortunately, I can’t remember where I found this. To set it up yourself, go to your Ao3 -> Dashboard -> Skins -> Create Site Skin, fill in the Title (has to be unique), and paste the code below in the CSS box:
#user-fandoms ol.index {
padding-bottom: 0;
text-align: center;
}
#user-fandoms ol.index li {
display: inline;
margin-right: .5em;
line-height: 2.15em;
}
#user-fandoms ol#fandom_full_list {
padding-top: 0;
padding-bottom: 1.5em;
display: block !important;
}
#user-fandoms p.actions {
display: none;
}
Then hit Submit -> Use. There are ways to hide or highlight various elements (ships, characters, blurbs, work stats, etc) on a works listing page using skins on Ao3. This is getting long so I’m not going to go into that, but I’m happy to help if you want to try it. It’s very easy.
Once you have everything configured on Tampermonkey on your desktop, you can migrate it to your mobile device in one of two ways:
Option 1: Go to Tampermonkey settings and change Config Mode to Advanced
Go down to Script Sync and select your preferred cloud service and save
It will ask you to log in to said cloud service
Install Tampermonkey in Kiwi and do the same thing
Wait for it to sync (this can be slow)
It should sync any changes you make moving forward, but again, it’s slow
Option 2: go to Utilities and check all 3 checkboxes under general (include script storage, include Tampermonkey settings, include external script resources)
Either export to your preferred cloud service or
Export as a zip file, move it to your mobile device, go to this same screen and import
I would recommend exporting as a zip for a backup even if you don’t use it to migrate your scripts
You can unzip and upload individual script files (.js) on this page if you ever need to reinstall a single script with your settings instead of all of them
Let me know if you run into any issues and I can try to help! The script writers are also super nice and helpful if you reach out to them. Yay fandom!
#ao3#archive of our own#fanfiction#ao3 resources#fandom#fanfic#tech#Tampermonkey#userscripts#ao3 tips#musette22#I hope you don't mind that I used you for the 'liked author' example ^_^#ditto voluptuous_panic#y'all should read art nouveau it's so good
484 notes
·
View notes
Text
Tip The Ferrymen Masterpost

This post is to help mobile users navigate the comic while also giving some information to new comers! Please read this post IN IT’S ENTIRETY before sending any questions to @toonbly
MOBILE USERS: Please keep in mind you need to use your BROWSER APP to navigate this comic. The Tumblr mobile app will NOT navigate the links properly.
“Tip The Ferrymen” is a Paranormal Mystery webcomic created by @toonbly that updates on Fridays. It was originally uploaded on Feburary 28th 2022 on Tapas and can still be read there!
What makes you "you?"
In the world of Elysium City, the answer to that question can grant you magical abilities. Specs are powers rooted in your very being, and for one Nathan Vargas, that means having the ability to see and speak to ghosts.
That used to matter to him, before he retired from paranormal investigation.
But when the spirits of Elysium start going missing, Nathan must take up the helm as Elysium's ferryman once more to rescue the ones that are most forgotten.
As Nathan journeys through the remnants of a life he's long left behind him, he's forced to ask himself: What parts of himself did he leave behind with it? TTF updates on Fridays!
NAVIGATIONAL LINKS FOR MOBILE USERS:
START READING RIGHT HERE!
About The Comic | Cast | Chapter Index | Support The Comic!
Underneath the cut is an FAQ for newcomers, please read this before directing any asks to the author! I will NOT be answering questions that are already on this FAQ.
What content warnings should I be aware of?
Content warnings are spelled out on a page before the comic begins! But just in case you missed it: Ghosts/General paranormal happenings, fire, indepth discussions of mental health (particularly PTSD), death, missing persons, loss of identity, depictions of abelism (specifically abelist abuse against an autistic individual), etc. While Tip The Ferrymen is a webcomic about overcoming adversity and trauma, I understand these topics may be upsetting to some readers, so please mind yourself while reading! Your mental health matters more than a silly webcomic.
How often does this comic update?
Every Friday!
How do I use this on mobile?
Read this entire post, buddy.
I have a question/I need something trigger tagged!
Direct your questions/tag requests to @toonbly ! I’ll be happy to answer and/or tag anything for you.
IMAGE IDS QUESTIONS
As a quick run down for those who don’t know: Tip The Ferrymen uses image IDs so that readers who use screen readers can read the comic. It’s an accessibility tool that I’m still working on implementing fully, but I will keep this FAQ updated for what pages have them and what pages don’t!
What pages have IDs?
Any pages after 11/2/2022 will have IDs in the alt text for images. I’m currently going back and adding IDs to older pages.
As of 11/2/2022, all older pages up to Page 3 have image IDs.
Why is the IDs format inconsistent?
Tumblr currently allows users to directly add IDs to images, BUT it won't allow me to add them to images that have already been posted. So, until this is fixed, I'm gonna be putting the image IDs in the text portions of older pages instead. So if things seem a bit inconsistent, that's why!
Does Ferrymen’s website use image IDs?
Not currently, I want to get that going as soon as possible! Just give me some time to futz with the HTML template I’m using to figure it out. As of right now, Tumblr is the only place where screen readers can be used to read Tip The Ferrymen.
I have a question/comment/criticism concerning how you format/write image IDs
Send it my way @toonbly ! I’ll be happy to make any necessary adjustments, and thanks so much for sending these my way!
24 notes
·
View notes