#i know my crochet looks a bit wonky but when i hold it up to work on it for a while it does that a bit
Explore tagged Tumblr posts
Visit Tumblr Blog
Explore Tumblr blogs with no restrictions, modern design and the best experience.
Last Seen Tumblr Blogs


Fun Fact
The total number of visits Tumblr.com received during January 2021 is 327 million.
Text
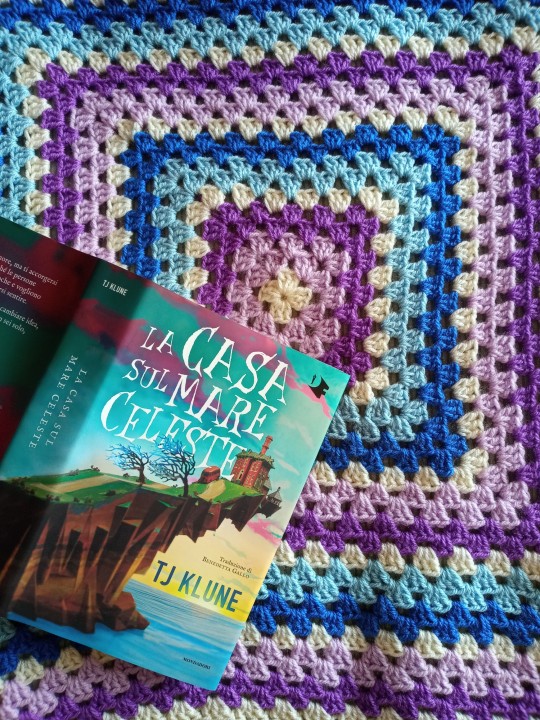
I am currently crocheting a pic-nic blanket and I am very happy with how it's looking so far!
25|06|2023
I thought it would be nice to do a bit of an update on what I am currently reading, since it's been one of the main activities I have been filling my time with. I am still following the re:dracula podcast, although these last few weeks had few updates. My main read right now is The House In The Cerulean sea by T.J. Klune, a book I doubted I would ever pick up because for some reason I just assumed I wouldn't like it. I decided tovgive it a try after I saw my local book store had a small discount on it, and I had heard some people calling it a lighthearted cozy fantasy. This description is definitely what intrigued me, as it sounded like the perfect thing for me at the moment. As I have mentioned I bured myself out pretty badly while studying for my summer exams, and I am still getting out of there. This is indeed a cozy and wholesome fantasy that is bringing me so much joy without requiring too much brain power. For the moments in which I have very little brain power even for that book (mostly the evenings before bed when I find myself exhausted even if my day was chill and uneventful) I have a graphic novel. I am rereading L'Elenco Telefonico Degli Accolli by Zerocalcare, another collection of the work he originally published on his blog. It's again been years since I read this, and I am really enjoying diving back into his books. Finally the audiobook that has been keeping me company as I crochet is The Black Corsair by Emilio Salgari. It's actually my first Salgari novel! It's been on my tbr for ages because I love anything with pirates, and I want to read more Italian litterature so this felt like the perfect fit. I am more or less half way into it and I am pretty sure the audiobook was the perfrct choice for this book because it's helping me immerse much more into the adventures it narrates. For some reason I wasn't expecting such a romantic depiction of pirates but I am really enjoying it. It's definitely putting me into a more summery mood. This read in particular is also sperking in me a new interest in a couple of classics I have been putting off reading for a while, but we'll talk about it when I get to them.
#i know my crochet looks a bit wonky but when i hold it up to work on it for a while it does that a bit#well enough#i know this kind of post is not that usual for me but since i'm not posting daily i thought it be fun#i also have a couple of reading challenge updates i should write and post now that i think about it#current reads#currently reading#bookblr#booklr#books#book cover#studyblr#studyinspo#uniblr#book#knife gang#journaling#mine#the---hermit
23 notes
·
View notes
Text
Tulips & Moony
Pairing: Remus Lupin x Fem! Reader CW: Sirius and Remus' banter and language (around 700 words) Summary: Remus tries to crochet you a tulip. Note: Hi darlings! I hope you like this mini fic; I love to crochet so why not make a fic out of it, right? Also, my uni's third term is about to end so I'll have more time to finish my WIPs! Hope you enjoy!

Remus loves knitted things— he considers the “unfashionable” grandpa sweaters that Sirius always complains about to be his prized possessions, not forgetting to mention how he’s got every neutral and earthy tones of cardigans arranged neatly in his trunk.
Yes, Remus is an avid fan of those things, but he doesn't really express any interest in making them from scratch.
So, imagine Sirius' surprise walking in on Remus who’s red in the face as he fumbles with a ball of yarn.
“Now Moony, when did you suddenly become a grandma?” Sirius asked, raising an eyebrow at the poor bloke who’s struggling looping a yarn.
“Since he learned Y/n loves to crochet.” James quipped from his bed, eating a chocolate frog that he most likely stole from Remus’ stash who was too busy to notice.
“He’s been at it for a good hm… three hours or so?” Peter shrugs, working on his charms essay in the corner of the room and trying to block out the strings of curses Remus grumbles out every now and then.
“Can you all be quiet? I’m trying to concentrate, you sods.” The werewolf grumbled, furrowing his brows and sticking his tongue out the side of his mouth in concentration. The sight was quite amusing. James lets out a laugh, getting off his bed. “Alright then, I’m getting quite tired watching you fail miserably,” Remus grunted, “Yeah, go bother someone else.���
Sirius plopped next to Remus, looking closely at his creation. “That’s a nice square you got there, Moony.” He hummed, nodding in approval at the wonky shape.
“It’s a bloody circle, you git.”
Sirius didn’t even try to stifle his laugh, “What are you trying to make anyway?”
“A tulip.”
“Doesn’t look like one though.”
“Thanks Pads, really. You’re such a great friend.” Remus rolled his eyes, sarcasm dripping from his tone as he repeats a certain stitch a couple of times. “Geez Moony, that’s alright now.”
“No, it’s not, the stitch looks weird and much looser than the others,” Remus complained.
Sirius raised an eyebrow, “You call that a stitch? Doesn’t look like it.”
"Yeah, the next time you'll see Poppy is because of the stitches you're gonna get because of me-"
Safe to say they both were kicked out to the common room by a very annoyed Wormtail.
It took about a week full of wonky, weirdly shaped tulips, and sleepless nights for Remus to successfully make a single red tulip.
Remus gripped the wrapped tulip tightly, the familiar feeling of nervousness eating up his system seeing you with your friend hanging out in the corner of the common room. He was pulled out of his thoughts by James showing him lightly.
“Look, now’s your chance, Moony.”
Sure enough, your friend left you on one of the couches to go Godric knows where, Remus didn’t really care that much if he’s honest. He even silently thanked your friend as his feet lead him to where you’re sitting. “Oh, Remus!” You looked up to see his tall frame, standing quickly as you could and offering him a smile. “Hi.” He grinned nervously before stretching his arm out that’s holding the crocheted Tulip to you, albeit a bit awkwardly but you on the other hand, find it endearing. “Erm… Is it for me?” You asked, chuckling nervously. “Ah, yeah! I made it, I heard you like to crochet so…” He trails off, scratching the back of his neck as blush dusted his cheeks. He saw how your eyes lit up, and your smile widening as you gently took it from his hand. “Woah…” You let out a soft gasp, examining the flower carefully. “Since when did you learn how to crochet?” “Just last week,” “Just last week?! Remus, you are gifted. I couldn’t even make something remotely similar when I was a month in crocheting.” You told him, hugging it close to your cheeks. “Thank you, Remus.” You smiled shyly, going on your tippy toes to place a kiss on his cheek before waving shyly to him and heading off to girls’ dormitory, leaving Remus who was still trying to process what just happened.
“Another one? I’ve already told you leather is much better!” Sirius threw his hands up in the air, entering their room to see Remus smiling to himself as he wore the cardigan you crocheted for him. “I wouldn’t say that if I were you, Pads.” Peter looked up from his and James’ game of exploding snap. “Why? It’s not fashionable!” “It’s made by Y/N, you wanker. Now shut your mouth before I hex you out of this room.”
#marauders fanfiction#remus lupin x reader#remus lupin fluff#remus x reader#marauders x reader#remus x you#james potter#sirius black#remus lupin#moony wormtail padfoot and prongs#marauders fic#marauders x y/n#marauders x you
320 notes
·
View notes
Text
Imperfections
Pairing: Huxley & GN Freelancer (could be read as romantic if you squint) WC: 896 TW: Mentions of the inversion, mentions of Freelancer anxiety. Genre: Fluff Ahhh i haven't written in two whole years so im trying to work off the rust a bit lol. This was inspired by my actual first scarf I made. It was also super mishapen, but i had used this pretty yarn that had greens and browns in it and it reminded me of Huxley. And how i was kind of able to be proud of finishing it was cause I thought "oh well, even though it's bad Huxley would wear it with pride." and that's how this came to be.
This was stupid.
Freelancer glares at the misshapen yarn in Huxley’s hands. Unsatisfied with their work. Work that had taken them hours, and yet seemed to amount to nothing when they were finally able to look at the finished product.
Crocheting,it was supposed to be a new hobby, something to help with the anxieties that had a tendency to overwhelm them. Anxieties that had only grown worse after the Inversion, even with how much time had passed since then. Something to do with their hands, something to keep their mind distracted, and if something cute came out of it then that would have been even better.
Yet everything they had made looked quite similar to the wonky scarf they currently held in their hands. One end was far too big and yet it seemed to shrink as it stretched out, appearing to look like a snake with a large head as opposed to a scarf, not to mention how many of the stitches were stretched out, leaving the yarn filled with holes.
You couldn’t tell that by the look on Huxley’s face though as he pulled it from the small bag that it had been wrapped in.
“Whoa! Dude, did you make this?” He sounds amazed, and proud. Freelancer couldn’t help but feel that the pride was misplaced. One of his hands trails along the poorly crafted item and the biggest goofy smile sits on his face.
Freelancer sheepishly nods, not meeting his eyes. Trying to hide the shame they felt at presenting him such a lackluster gift for his birthday.
“Yeah, it’s pretty obvious isn’t it.” They laugh weakly, putting up their walls again out of anxiety. Ironic that the exact thing they had been working on to get rid of their anxieties was now the cause of it. “It’s not that great so if you want something else or if you-”
“I love it,” His words weren’t loud or boisterous like, his tone tinged with vulnerability. Huxley’s large hands grip the scarf tightly, holding it close to his chest like it were the most precious thing in the world. “One of my best friends made it for me, how could I not love it.”
His genuine smile seems to comfort them for a moment before their gaze lands on the scarf once more.
“It’s bad.” they bluntly say, absentmindedly picking at the edge of their D.A.M.N hoodie sleeves. “It was supposed to look good but I…I couldn’t get it, but i didn’t want to show up empty handed, and Gavin said that I should just give it to you.” They explain. If it were any other time, they would have laughed as they realized they were going on a very Lasko like rambling session.
But Huxley wasn’t laughing.
He was just watching them, his eyes full of a tenderness that they recognized. That familiar smile on his face, the one he wore whenever he was genuinely happy. It wasn’t the same as his usual smile, large and unapologetically him, it was soft and tender. Freelancer couldn’t help but feel that they didn’t deserve it.
“I just wanted it to be…special. I wanted it to look nice.” They explain, struggling to find the words they want to say. “You were my first real friend here in Dahlia. I know you had walls up, but that didn’t stop you from being a good friend. For helping me when not many other people had. I wanted this to kind of show that. Instead it just…well it looks like that.”
They gesture to the offending item in question, tenderly clutched in Huxley’s hands.
There’s a silence that lingers between the two for a moment as Huxley seems to take the words in. Then all at once they’re enveloped in a tight hug, a familiar one, one that makes their eyes mist with tears. Freelancer wraps their arms around Huxley in return, holding him tightly.
“It doesn’t matter that it’s not perfect, dude.” he begins, obviously thinking hard about the words he’s saying. Wanting to get his message across clearly.
“I mean, it’s kinda like our friendship. It didn’t really start out perfect, and it still isn’t because like, no one is perfect dude.” He laughs a bit, a deep rumble that they can feel in his chest as he holds them close. “But you made it. You thought about me and you made that, all by yourself. I don’t think anyone has ever done something like that for me. Not even my Moms.”
He bends just a bit more and rests his forehead against their shoulder.
“That means the world to me, dude. I couldn’t have asked for a better birthday present.”
Freelancer knew that he was serious, and they knew that Gavin would be giving them a very teasing “i told you so” when they got home.
When Huxley pulls away from the embrace, he wraps the wonky scarf around his neck. It didn’t look any better on that it had off, but Freelancer was looking at it with different eyes.
It was something that brought their friend joy, something that made him feel important and cared for. They couldn’t bring themselves to hate their work anymore. It resembled their friendship, the way the twisted around itself even with all the holes and the thinning, it held together.
Just like they always would.
16 notes
·
View notes
Text
8. Pomefiore look, I love pomefamily with all my heart but I’m not a huge fan of their building castle thingy, it’s too ugly. The inside is sorta pretty but imagining all the perfume and scents make me feel sniffy. Plus, 90% of the dorm are full of preppy, rich kids and their rules, i don’t know I’d even pick Heartslabysul over this dorm. I just expected more from something based off one of my favorite movies. On the other hand, I love love their uniforms, i need one irl
7. Scarabia all the orientalism aside, I love Kalim and Jamil so much 😭 they’ve been done dirty both by game and fandom, it hurts to place this dorm so low but it had to be done. A bit headcanony but I can imagine there’s a huge prayer room and the tower are for the azaan, all their food is 100% halal (Ramadan sounds so fun there) and they definitely do traditional folk dances like Dabke + drums i love drums. My yuu is desi diaspora in mena region like me so scarabia is like home to them ^^
6. Heartslabysul I am very (not) normal about their dorm, it’s very much my style, I love their building, love the pink/blue hedgehogs and crocheting sounds so much fun. The 800+ rules is pretty funny to me (not as bad as the 3000 rules of the Cloud recess), just everything about this dorm is so weird and wonky, I love it. Also you get to eat Treys sweet treats for free?? and omg the adeuce so silly + painting roses sounds pretty fun to me.
5. Octanivelle very close tie with Heartslabysul BUT UNDERWATER FISHY DORM WITH SO MUCH FISH FOR FREE (okay maybe not free) AND THOSE COOL SUITS YES PLEASE. I love love LOVE this dorm, it’s so so pretty plus you wake up and check your window to SEE FISHES?? Also the music of this dorm is SSR tier, I love it. I need to mention this because like going to aquariums, scuba driving with pure oxygen tanks and living or staying in underwater hotels/island homes are so EXPENSIVE but here, it’s basically free (I mean you might have to sign off your soul to Azul but eh free viewing experience plus interaction, BEING ACTUALLY UNDERWATER IS SO COOL LIKE). The inside is very pretty like chef kisses, Azul’s so good with the interior like those jellyfish chandeliers!
4. Ignihyde first of all, those GIANT SKELETONS OUTSIDE THE DORM IS SO COOL!! The whole tech vibe is very cool. I mean they make the coolest cybercorepunk idk motorbikes there?? They may not have a kitchen but they are sure as hell cooking 🔥🔥 I do like how dark this dorm can be when the lights are switched off and I dunno, that being paired with insanely good wifi, sounds like a safe haven to me. Also I would 100% enjoy movie and gaming sessions with the shroud brothers (I hold them dear to my heart, almost nothing can come close). Music is very cool too like really cool.
3. Diasomnia VERY VERY CLOSE TIE WITH SAVANACLAW but yes spooky gothic castle with bunch of gargoyles and thorns I am so normal about this dorm and the ones in it. I cannot even begin to describe how ecstatic I would be if I were to step foot inside that castle like it’s based off the forbidden castle from Sleeping Beauty (1959), what else should I say? I stare at the concept art a lot. Alright moving on, the inhabitants ah yes the DIASOFAMILY UM YES I LOVE ALL OF THEM WITH MY HEART, I THINK ABOUT THEM 24/7, so so normal (also waiting for my oomf to unleash the desi diasomnia hcs I am awaiting no pressure tho 😭). Also the music 🔥🔥
2. Savannaclaw the only dorm with Ruggie, Jack and Leona. I don’t know about you but compared to other dorms, this is the only dorm with actually good teamwork and cooperation, sure Diasomnia has that soldier thingy going on but Savanaclaw feels more family, respect like the pack thing going on, it feels nice to see. Also the way they were all bawling thinking Leona turned into a tsum is so funny and really endearing 😭😭 like that’s so cute. ALSO THIS IS THE ONLY DORM WITH A POOL, A POOL!! 1000 points to Savanaclaw!!! The cast, the music, the whole dorm look 🔥
1. Ramshackle GHOST MICKEY MOUSE DORM BASED WITH A FLAMING CAT, SAY NO MORE! Look it may be prettyy much rundown but Tsunotarou was absolutely right about it’s charm, cause imagine how much things, furniture, clothes, paintings, maybe even toys and dish ware you could scavenge!! Its all free too! I used to watch videos about people going to abandoned mansions/houses, it was like a timecapsule with the wallpaper coming off and cobwebs I LOVE IT. Also I do love love my ghost roomies, they were really sweet in Halloween part 1 😭 like while I know it’s based off the 1936 Mickey Mouse short film, I also like to make it more cinderella (with the mouses) and belle (talking closets etc), that really matches with the Disney Princess criteria. 1) Talking Animal companion who just wants to eat (GRIM I LOVE YOU) ✅
2) Stranded alone and has a whole load of work being dumped on often unfairly ✅
3) Rando who shows up infodumping about gargoyles, architecture and history, turns out to be a Prince ✅.
Also just like in idia sr lab vignette, HEARTSHACKLE MOVIE SESSIONS WITH HONORARY MEMBER MALLEUS AND FIRST YEAR SLEEPOVERRR (fairy gala remix was so cute).
(Thanks for tagging! very late response like I wrote half of this in my notes a month or two ago 😭😭 sorry!! Most of this was me babbling because I can’t put much into words, it’s not really my strength but I hope my enthusiasm shows??) also added ramshackle because why not 😼).
@ibee00725 @hopsof tagging ^^
hey a little tag game i want to try!!! order your favorite twst dorms from least fave to favorite!
Scarabia: their characters on their own are good but seeing them together makes me extremely uncomfortable?? it’s probably because the orientalism plus people shipping together..it’s not jamil and kalims fault but i have a complicated relationship with scarabia
Octavinelle: idk they just don’t stand out to me. jade is neat but i feel like the tweels are overhyped. don’t really have an opinion about azul
Savanaclaw: again the characters are great but. as a whole they don’t stand out to me. i love jack and ruggie but leona 😬 if you got rid of the sarcasm and smug expression he would be a cool character (i kin him more than i would like) but i feel like he’s wasted potential. also book 2 was the hardest to get through because it was so boring it really did them dirty
Heartslabyul: the card guys!! don’t really care much about them either..i usually like alice in wonderland vibes but their dorm uniforms are the worst things i’ve ever seen. WHY DO THEY WEAR T-SHIRTS?? other than that i don’t have much to say about them.
Pomefiore: THE GAYS okay they’re awesome. this is mostly because of rook i just really like rook. and rookvil. epels great to actually. also on the complete opposite note their dorm uniforms are amazing (maybe even my favorite) i would totally wear them myself. but even though they’re in the top three i don’t really think about them more than any of the other dorms.
Ignihyde: okay of course my second favorite dorm is the cute family. what did you expect. but also they are so interesting?? book 6 has been the best book so far especially with all the lore. also ortho is best boy AND LITERALLY A ROBOT. how can you not like precious robot boy who loves his brother. also their designs are cool the hades hair and teeth are very gender.
Diasomnia: you already knew this was coming. my beloved dark romanticism found family dorm<33 i am literally obsessed with them okay. not only are their designs peak gender but they’re WRITING is so. augh. just the contrast between them. we got two faes who are centuries old and have experienced years upon years of hardship. war. suffering. and then we have two (one and a half) humans who have never experienced loss. or grief. they are honest and hardworking and loyal, they represent youth and joy!! and yet they all have so much LOVE and TRUST for eachother it makes me go INSANE!!!! also you can never miss with gothic aesthetics and fairies…literally the greatest thing out there
anyways in conclusion i think any dorm that isn’t diasomnia and doesn’t have tragedy and fate weaved inside them are plain and boring. if i placed your favorite dorm low feel free to tell me why im wrong and why they are the best!! i would love to hear :)) (also feel free to include ramshackle too)
tagging: @rayroseu-reblogs @ethanwinterfan69 @drdepper @shrimpyjustwrites @llondonfog @wondergeek @frogeloise @morays @hxneylavendxr @teslathelame @the-v-lociraptor @anotherlavendergay @chaoticsnacc @aloodonut @valsol-909 if you guys would like<3
54 notes
·
View notes
Text
Blind Spot
Spencer Reid x (Gender Neutral) Reader
Word Count: 2640
Warnings: Hair pulling kink! Bucketloads of sexual tension but no actual sex. Gratuitous facts about bird nests. Dorks being oblivious. Lots of fluffy heart-eyed banter. Accusations of intercourse with fictional tree-beasts.
A/N: I saw a gif that made me want to pull Spencer’s hair. That’s it. I have zero shame.
For the “friends to lovers” square on my @cmbingo card! Proofread by @fangirlxwritesx67 because she’s the best.

“You look like you fucked an Ent,” you commented cheerfully, stealing sideways glances at Spencer while you waited for the light to change.
“Thanks, that’s helpful.” He grimaced, trying to tug another burr out of a snarled curl.
“Oh my god, you’re just making it worse! I’ll help you when we get back to your place. Leave it, you goober.”
“Did you just call me a goober?” Spencer asked, trying not to laugh.
“You’re like the dictionary definition of a goober,” you said fondly.
“I have three PhDs!”
“I really wish I’d gotten a video of that tumble, Doctor Goober.”
Spencer was blushing, grinning down at his lap as he shredded a piece of leaf. It was hard not to stare at him when he smiled like that.
He’d essentially face-planted into a burr bush earlier, somewhere in the Virginia woods — he’d been so excited about explaining some wonky bit of Star Trek physics theory to you that he just forgot to pay attention to his feet — and he’d floundered out with half a hedge stuck in his hair before picking up exactly where he’d left off.
In other words, Doctor Spencer Reid was a ridiculous human being. You knew that, objectively. It didn’t stop you from having a massive crush on him.
Either he was pretending not to notice, to spare your feelings, or he was socially oblivious; you tended to believe the former, considering how well you’d seen him read other people, but you appreciated it. There was a chance you’d make it out of this — if you could just get over it already — with your friendship intact.
You cleared your throat and told him, “You look like the bastard child of Grandmother Willow and the Wizard of Oz scarecrow.”
“Even if they were real, the anatomical —”
“You didn’t mention that when I brought up the Ents. Something you want to tell me about you and Treebeard?”
“You’re ridiculous,” he huffed, trying to sound exasperated, but he could barely keep a straight face for a second before he was laughing, that scratchy sunny childish giggle that only came out when he was really relaxed and carefree.
“Close the window before a bird sees you and decides to take up residence.”
“How about you watch the road?”
“What, no facts about bird nests?”
“Is that a rhetorical question?”
“Nope.”
“Well in that case… gyrfalcon nests are frequently re-used and passed along for generations. The oldest one that’s been discovered was in Greenland, and it was actually estimated to be approximately 2,500 years old.”
“Seriously?”
“Yes! In fact…”
You had to remind yourself, yet again, to stop staring.
Maybe someday you’d get sick of hearing Spencer talk, but you couldn’t really understand the way most of your teammates reacted to his rambling. Even if you didn’t care about what he was saying, there was something amazing about the way his eyes lit up and his hands fluttered around to illustrate his point.
You parked in front of his building and followed him upstairs. His apartment had become comfortingly familiar — ever since you and Spencer bonded over a shared love of sci-fi, you’d taken to driving him home and, if it wasn’t too late, sticking around for an episode or two of Doctor Who.
He got his ancient little DVD player up and running, and you settled on the couch, fluffing pillows and shoving aside his nest of colorful crocheted blankets, getting cozy. There was something about Spencer’s space that always felt like home; maybe it was the smell of books, or just the general Spencer-ness of the whole place.
Just being around him had always kinda felt like home, too. Sometimes you forgot you’d only known him for six months.
He disappeared into his room for a second and came back with a comb. It was cheap plastic, missing a couple teeth, and looked like it hadn’t been used in a while. You looked from him to the comb and back again.
“That actually explains a lot,” you said, grinning. Spencer rolled his eyes and sat down on the floor in front of you, leaning back against your shins, and after a dismayed glance at his curls, you commented, “We could always just shave it all off.”
“I’m not going to dignify that with an answer,” he said primly.
You started with a couple of the less tangled pieces, finger-combing carefully through one soft lock at a time. You half-expected some comment about primates and social grooming, or at least a few facts about the quantum theory behind the TARDIS, but Spencer was uncharacteristically quiet and still, his eyes fixed on the TV.
You separated out one of the worst knots, and he tilted his head to the side to give you better access. You were being as gentle as possible, but you knew you were hurting him at the first tug — he sucked in a breath, knuckles going white as his fingers clenched on his knees.
“Sorry, I’m trying,” you sighed.
With his head tilted like this, you could see the muscle clenching in his jaw and the way his Adam’s apple bobbed as he swallowed hard.
“S’okay,” he whispered hoarsely. “It’s not — not your fault.”
He sat there stiffly as you worked. His hair was silky, where it wasn’t hopelessly knotted, and you were close enough that you could smell whatever clean, sweet shampoo he used. Something about it made you want to hold your breath; it felt like you were too close. Spencer rarely let you inside his little bubble of personal space.
Maybe that was why he seemed uncomfortable. He was usually so fidgety, tapping out a rhythm or twirling a pen between his long fingers, and it was strange to see him motionless like this.
You ran your fingers through a de-tangled section, slow and careful, and Spencer shivered, his shoulders trembling for a moment before he went unnaturally still again.
Spencer blurted out, “Maybe this isn’t a good idea.”
At the same time, you asked, “Are you cold?”
You paused for a moment, surprised by the reaction, but after hesitating, Spencer just muttered, “Yeah. Cold.”
You couldn’t shake the feeling that you were missing something. It was too warm, if anything; Spencer had a patchy flush crawling up his neck and over the sharp lines of his jaw and cheekbones.
“Here you go, goober,” you said, awkwardly cheerful in an attempt to cover your uncertainty as you grabbed an afghan from the couch and draped it around his shoulders.
“Thanks.” He pulled the blanket down onto his lap without looking at you. “But maybe I should just do this myself.”
“You’re never gonna get this loose on your own, not without scissors,” you warned, plucking at the knot around the last burr in his hair. “I’ll just, um — I’ll try to be more gentle.”
“Maybe just go for it,” he said. “Get it over with.” His voice had gone all high-pitched and strained, like he was on the verge of a panic attack. If this was how much he disliked physical contact, no wonder he always avoided hugging you.
You tried to go quickly, figuring that one quick moment of pain was better than another ten minutes of making Spencer uncomfortable. In your nervousness, you ended up tugging the burr out much more abruptly than you’d intended, and Spencer let out this rough, low, choked-off sound. Before you could apologize, he was jerking away from you, curled in on himself with his shoulders up around his ears like he was worried you were going to hit him, and —
“Sorry,” he said, voice cracking.
— what?
“Spence?” you said tentatively. “What—”
He was still just curled up on the floor in a ball of gangly limbs, but he half-turned to you, twisting around. He wouldn’t make eye contact, though; he was staring intently at the pillow that was on the couch next to you. It felt weird, looking down at him like this, so you slid down onto the floor, hoping it wouldn’t spook him. He shifted back slightly, but at least he didn’t flinch away.
“I’m sorry,” he mumbled. “I didn’t — this was a bad idea.”
The profiler in you couldn’t help but notice a few details. He was blushing, for starters. His lower lip was red where he’d been biting it, and — this was the part that surprised you most — his pupils were huge.
You knew what Spencer looked like when he was panicking, and this wasn’t it.
“Oh,” you breathed. “Oh.”
He looked down at his lap, frowning as he played with the loose thread in the cuff of his sweater.
“Sorry,” he repeated. “I know you don’t feel the same way, I wasn’t trying to — I didn’t realize it would be like that, I didn’t mean to make you uncomfortable, and—”
“Wait, what?”
“I’m sorry if I made you uncomfortable! I shouldn’t have asked—”
“I don’t feel the same way about what?”
“I know you’re not attracted to me,” Spencer said, barely audible.
“You’re… you…what?”
He looked up, at that, genuinely startled. There was something sweet and vulnerable shining in his eyes, and your heart was racing. You slid a little bit closer, so that your knees were almost touching Spencer’s as you faced each other, cross-legged.
“I thought you knew.” His hushed, croaky voice broke on the last word. “I thought I was being obvious.”
You gaped at him for a second before letting out a sharp, hysterical giggle.
He ducked his head again, hiding behind a curtain of hair, but not before you saw the hurt expression that flashed across his features.
“No, that’s not—” you blurted out. “Spence. Spencer.”
“Forget it,” he said sharply, his body going tense like he was about to bolt. “Can we just forget this happened?”
Before you could think better of it, you reached out and pushed a few curls back behind his ear, and then you grabbed, twisting your fingers in his hair to tug him forward. You cut off the startled noise he made with a clumsy, eager kiss.
The angle was all wrong, both of you leaning forward awkwardly, but it felt like sparks all down your spine.
You pulled away just far enough to get the words out: “I thought I was being obvious.”
Then Spencer was surging closer on his hands and knees, crowding into your space, until you had a lapful of rumpled doctor pressing you back against the couch. He cupped your jaw with gentle spidery fingers, gaze locked on your mouth, and leaned in slowly like he was still waiting for you to push him away.
There was nothing awkward about it this time. If the first kiss was sparks, this was fireworks — it was such a goddamn cliche you wanted to kick yourself for thinking it, but it was true. Your head was spinning. Every pillowy press of his lips and soft slide of his tongue seemed to steal the breath from your lungs.
By the time you broke apart you were panting, but at least you weren’t the only one. Spencer’s chest heaved as he pulled away. He was still staring at your mouth like he couldn’t help himself. Part of you wanted to kiss him again and maybe never stop, but another part of you was paralyzed, trying to process the fact that this was actually happening.
You just wanted to put the world on pause so that you could memorize everything: the way he licked his lips, the smell of his laundry detergent, the barely-perceptible movement of his pulse — you’d never seen that before because you’d never been this close to him before. You wanted to hold onto it, even the less-than-perfect details — the soundtrack of buzzy Dalek screeching in the background — the way you were folded together on the floor, all too-long legs and bony elbows, which was going to get uncomfortable fast.
Spencer seemed to feel the same way. He grazed the pad of his thumb over your lower lip, then followed the curve of your smile out to your temple and traced the shell of your ear with careful fingertips. When he brushed his curled-up fingers along the ridge of your cheekbone, you turned your head and kissed his knuckles.
His hand came to rest on your shoulder, and you wrapped your fingers around his wrist, holding it in place, feeling the blood and bones shifting under the skin.
“You really didn’t know?” you whispered.
He shook his head shyly and gave you one of those incandescent smiles that always made your heart race. “No idea.”
“I thought you were just ignoring it to spare my feelings,” you confessed.
“I thought you were doing that.”
“I thought you were good at your job!” you laughed. “Aren’t you supposed to be a genius or something?”
“I think I have a blind spot, where you’re concerned.” He was blushing again. “But I was so distracted by you that I walked into a bush! How did you not —”
“I’m the one who stares at you all the time like a creep.”
“You thought you were being creepy?” he said sheepishly. “As soon as you started touching my hair — oh my god that’s embarrassing.”
“That’s not the word I would’ve used.”
You tangled your fingers in his curls, tugging experimentally. His breath hitched.
Both of you were utterly still for a moment, watching each other, and the tension between you seemed to fill the air like a living thing. You were excruciatingly aware of all the places your bodies were touching.
You considered all the places you could touch. It would be so easy. You could tug him in, kiss him, melt into each other… there were so many possibilities, suddenly, and there was something incredible about that: the electricity, the excitement, the moment of pure potential in the pause between certainty and action.
Spencer sighed, long and shaky, and you were so close that you could feel the current of exhaled air.
“I couldn’t think straight,” he murmured, with a twitch of a smile. “That doesn’t happen to me often.”
“So you didn’t know…”
You scritched your fingernails down his scalp, marveling at the way he shivered and swayed closer like he was hypnotized. He curled his hand around the side of your neck, thumb slowly stroking the hinge of your jaw.
“I knew I liked it,” he confessed. “But — within a certain context? Not out of nowhere like that. I didn’t think it would be... like that.”
“Like what?”
“Intense.”
“Yeah?”
“But I think maybe it’s just you.” His eyes had gone all glassy and heavy-lidded, and you could barely breathe. “Maybe you drive me crazy no matter where you’re touching me.”
“I can think of a few ways to test that hypothesis.”
You caught a glimpse of his grin, but then he pressed his forehead to yours and his features went blurry, too close for you to focus.
“Never really thought I’d be into dirty talk, but if you’re going to start quoting the scientific method…”
“Funny, most of the time you never shut up,” you said, giddy and overwhelmed.
The tip of his nose brushed yours. There was maybe an inch of space between your mouths, and you wanted to close that gap so badly it felt like a physical ache.
“I mean, if you want me to start rattling off statistics—”
“Spencer.” You fisted both hands in his hair, tugging sharply, and he shuddered. “Take a hint.”
“Blind spot, remember?” he whispered, lips brushing yours as they shaped the words, feather-light and maddening.
“You know, for a genius—” you started, but he kissed you, hungry and sweet like he was making up for lost time, until you’d completely forgotten what you were going to say.
.
.
There is now a sexy follow-up here!
.
If you enjoyed this, please reblog or leave a message!
#cmbingo21#criminal minds fic#spencer reid#spencer reid fanfiction#spencer reid x reader#spencer x reader fic
658 notes
·
View notes
Text
ok i have an inbox full of prompts, but i was making valentine’s day plans & all of a sudden felt very inspired to write some valentine’s day gallavich! featuring uncle mickey, homemade cards and a lot of domestic fluff- i’ll probs have a part two up sometime this week!<3
--
It was a lazy, slow-paced Sunday afternoon at the Gallagher house. Mickey had been lying on the couch passively watching trashy reality TV for god knows how long—and apparently at some point he’d fallen asleep, because now the TV volume was just a low hum, and he was being woken up to the startling crash of the kitchen back door slamming shut, and the rustling of shoes and coats being taken off and discarded by the front door.
“Alright Franny, let’s set this stuff up on the kitchen table.” Mickey heard Ian’s voice sail across the room, his eyes still closed to block out the cheery sunshine teeming in the living room.
Mickey tried to doze off again, attempting to block out the bright light infiltrating his eyelids, but it was no use— whatever Ian and Franny were doing, murmuring and clanging in the kitchen, there was no way for Mickey to escape the sound now and drift back into his sunwarmed sleep. He begrudgingly shoved the scratchy crocheted blanket off of his lap, stretching as he rose and stumbled into the kitchen.
He wasn’t expecting the carnage that he saw when he turned the corner; the kitchen table was covered in an explosion of sheets of multicolored construction paper, all reds and pinks and whites, with tiny multicolored stickers and tubes of glitter and shiny ribbons arranged and spread wide across the countertop, scattered with glue sticks and pairs of scissors and an exploded box of crayons. There was a small mountain of cut-out hearts piled high on the table, smattered with glitter-glue and blocky handwriting.
Mickey rubbed his eyes, taking in the scene. “What’re you two Picassos up to?” he asked drowsily.
Ian looked up, his eyes light. “Look who’s awake!” He gestured at the table emphatically, like it was Christmas morning. “Isn’t it great? Me and Franny grabbed all this stuff at the dollar store for less than ten bucks. The glue sticks definitely kind of suck, but I think it’ll get the job done.”
Mickeys eyes scanned to Franny, who was hard at work trying to cut a shape out of a piece of red construction paper, her brows furrowed in concentration. Ian kept chattering on as he unwrapped another sheath of the paper.
“Debbie left Franny with me since some rich lady called her with a weekend handywoman emergency that popped up at the last minute, so now I’m helping Franny make her valentines for school.”
Mickey scoffed. “Fucking valentines?”
Ian rolled his eyes as he contentedly started to glue together two pieces of paper. “Yes, Mickey, valentines. You know, those nice things that normal people give to each other on Valentine’s Day, along with a box of chocolates or some shit and a note about how much they love each other—”
“Yes, I know what they are, smartass. Don’t know why you didn’t just buy the little cardboard ones at the store though.”
Ian smirked, his eyes still focused on the paper beneath him that he was smudging glitter on. “Yeah, well. Franny wanted to make them, and I thought it’d be kind of fun.”
Just then Franny gasped triumphantly, raising a lopsided and crumpled paper heart up for Mickey to see. “Look, Uncle Mickey! I cut a heart! Uncle Ian showed me how!”
Mickey raised his eyebrows at Ian, who had a sheepish look on his face. “Didn’t know you had so many hidden talents, Gallagher.”
Ian flashed a grin. “I used to be really into art class in elementary school, what can I say.”
Franny looked up at Mickey with wide eyes. “Do you want to make valentines with us? We have to make twenty-seven, because that’s the number of people in my class.”
Mickey faltered. Sitting here gluing fucking glitter to pieces of paper was not exactly what he’d had in mind as his plans for the weekend…
“Uh. That’s okay kiddo. I think you two’ve got it covered.”
Franny seemed to readily accept Mickey’s answer, instantly looking downward again and grabbing a fistful of crayons from the table to continue enhancing her masterpiece. Ian, on the other hand, tore his gaze from his own valentine.
“Oh c’mon Mick, you don’t wanna help?” Ian asked, his voice goading and his eyebrows raised.
Mickey rolled his eyes. “Yeah, thanks but no thanks.” He turned, walking over to open the fridge and grabbing a beer from the top shelf.
“C’mon, just one valentine. Franny can show you how to cut out a heart shape, right Fran?”
Franny nodded vigorously. “Yes, I know how!”
Mickey took a swig of his beer and sighed. “Jesus, fine.” He pulled a chair between Ian and Franny, slowly scraping it on the linoleum, and then perched on the edge uncomfortably. “Alright Franny, show me what you’ve got.”
“Okay, so the first thing that you have to do is pick which color is your favorite. What’s your favorite color?”
Mickey had taken another sip of his beer, and now he sputtered slightly. “I don’t know Franny, you pick for me.”
Franny’s face melted into a pout. “But you have to pick, Uncle Mickey, it’s your favorite color!”
Ian bit back a laugh, his eyes still bright and cheerful. “Yeah, Mick, c’mon. What is your favorite color? We’ve never gotten this deep in our relationship before.”
Mickey gulped again from his beer can and flipped Ian off in the process. “I don’t fucking know. Never thought about it before.”
Franny held the stack of construction paper up to Mickey. “Look! There’s red, and yellow, and blue, and purple, and green—”
Mickey cut her off. “Uh, give me a green one.”
Ian smirked. “Green?”
“Fuck you, it was the first color I thought of.” Of course, that wasn’t really true—if Mickey needed to have a favorite fucking color, it was obviously going to be green, like the green eyes that met his gaze every morning and were the last thing he saw before he went to sleep at night— even if he would never be caught dead admitting that sappy bullshit to Ian.
Ian looked like he was holding back a smile. “Right,” he mused. “Hey, Franny, pass me a blue paper? Cause y’know, that’s my favorite color.”
Mickey gently shoved Ian in the square of his chest. “You’re being fucking soft.”
Ian let a crooked smile burst onto his face. “Yeah, I guess I am.”
Mickey leaned back in his chair, holding the piece of thick green paper in front of him appraisingly. “Okay Franny, what’s step two?”
Franny stretched her body across the table to reach for one of the strewn pairs of scissors. “Now, you fold the paper in half, and then you cut out the shape of half of a heart, like this.” She drew an example of the curved pattern on the backside of Mickey’s paper with the tip of her finger. “And then you unfold it and it’ll be a perfect shape!”
“Sounds easy enough.”
Mickey took the scissors from Franny’s grasp, and held them up to the paper. It was just a fucking half circle with a little indent at the top— this wasn’t going to be too difficult. Ian and Franny went back to being absorbed in crafting their valentines, while Mickey started to botch and slash at his piece of construction paper.
When he was finally satisfied he unfolded the shape, the outer shell of the paper falling away. It was… well, it was kind of a heart, with two slanted sides and a wonky top half. It looked more like a blob attached to an angle than anything else.
Ian looked up from where he was doodling on a glittery heart and snickered.
“That’s uh… that’s a good first try, Mick.”
Mickey slammed the piece of paper down onto the table. Fucking arts and crafts, he was never good at this shit even when he was little—he fingers were always too fumbling, too clumsy for him to make anything delicate and pristine. Ian’s hands should have been as ungainly as his, but instead they were quick and nimble, smoothly cutting perfectly-rounded circles and gluing neat lines of glitter.
Franny noticed that Mickey was done cutting his shape. “Good job Uncle Mickey! Now you just have to draw on it, and put on stickers and glitter.”
“Yeah Mickey, let’s see those artistic skills.”
Mickey aggressively flicked some flecks of glitter from the table in Ian’s direction, then picked up a crayon and gripped it with an iron fist. What the fuck was he supposed to draw? This was a valentine for kids at Franny’s school, the fuck did kids like anyways? He started to draw some sort of stick figure, but the arms were too long and the head was too small, so he tried to color over it and make some sort of tree or some shit…
As Mickey scratched at the paper, he looked over at noticed suddenly how content Ian looked—how blissed out and settled he was, just running a crayon over the colorful paper and shaking bits of glitter onto pools of glue. If Mickey was being honest, he hadn’t seen Ian this light and happy in a while; he’d had a hunch in his shoulders for months after the wedding and the pandemic and all the minimum-wage job bullshit, the shadows of expectation hanging over him and causing a deflated weariness in his gaze that was impossible to ignore. But right now, Ian looked like he was having as much fun as Franny was, practically vibrating with satisfaction as he put the finishing touches on his drawing and reaching to place his completed valentine in the growing pile.
Mickey snatched the paper out of Ian’s hand, slightly crumpling it around the edges. “Wait a second. How the fuck did you do that?”
The valentine was immaculate, the heart symmetrical and traced in a thin outline of glitter. In the center of the paper there was a perfect little cartoon of a dog in a top hat, with an air bubble that read “Happy Valentine’s Day.”
Ian shrugged. “Watched a lot of cartoons when I was little. And I’ve always kind of liked to draw.”
Mickey shoved the valentine back in front of Ian. Goddamn perfect fucking husband who’s good at fucking everything. He crossed his arms and leaned back in the chair, suddenly losing all motivation to play along.
Ian smirked, then reached to rest a hand on the back of Mickey’s neck. “Giving up already?”
Mickey rolled his eyes. “Fuck you, Gallagher.”
Ian’s smile just widened. “Here, how about I cut the fucking shapes and you glue stuff onto them. That’d still help me and Franny a lot, right?”
Franny nodded. “It’s okay Uncle Mickey, I was bad at cutting the shapes too at first.”
Mickey huffed. Okay, so maybe he was horrible at this shit, but the least he could do was suck it up for Franny’s sake. “Fine,” he muttered, and grabbed a glue stick and a bottle of glitter.
A few minutes passed and they settled into a comfortable silence, enveloped in the sound of the scissors gliding and Franny scribbling on paper.
Suddenly, Franny looked up as Mickey reached across the table to grab a pad of stickers.
“Hey Uncle Mickey, what do you and Uncle Ian do for Valentine’s Day?”
Mickey didn’t really know how to answer that question— he darted a glance over at Ian, trying to signal as much. Could you ruin the spirit of Valentine’s Day for kids in the same way you could fuck up Christmas? “Uh, nothing really.”
Ian chimed in. “We used to like Valentine’s Day when we were little like you Franny, but now that we’re big we don’t really celebrate it. Right Mick?”
“Yup.”
Franny’s brows were furrowed again, this time in contemplation. “But. You love each other, right?”
“Sure, Franny. But we don’t need a special day for us to remember that,” Ian explained.
Franny seemed appeased enough by that answer to resume her drawing. “You don’t give each other valentines or candy or anything?”
Mickey almost laughed. Of course he and Ian had never celebrated fucking Valentine’s Day; if he was being honest, he didn’t remember even really thinking about Valentine’s Day before now, other than it being a day when Mandy came home crying in middle school because the boy she liked didn’t ask her out, or buying all the half-priced chocolates in red and pink wrappers at the drugstore a week later with his brothers. With all the shit in his life the past few years, frilly fucking holidays like Valentine’s Day were just… not on Mickey’s radar.
But maybe— maybe this year was different. This year, for maybe the first time in his life, Mickey felt secure and steady in a way that he never had before, like the ground was solid beneath him and wasn’t going to cave in at any minute. He had a fucking husband that he loved—why couldn’t they celebrate Valentine’s Day like a normal goddamn couple? Ian didn’t seem to be too bothered that they both didn’t give a fuck about the holiday, which was all the more reason to catch him off guard. He kept pressing stickers down onto the construction paper, his mind starting to churn.
By the time they’d made the twenty-seven fucking valentines, Mickey had made up his mind; this year, he and Ian were going to celebrate Valentine’s Day.
part two here!
#my bbys definitely do not seem the type to celebrate valentines day#but i had to make them try lol#lmk if u are interested in a part two!#gallavich#gallavich fic#shameless#shameless fic#ian gallagher#mickey milkovich#ian x mickey#ian and mickey
73 notes
·
View notes
Text
Where You Want My Lipstick Part Nine
Previous Part | Final Part | Masterlist
Notes: This turned out way longer than I thought this chapter would be, soz If you’re viewing on mobile, I’ve noticed that the italics can get a little wonky. For the conversations below, the texts that start with ‘-’ indicated Reader’s texts. Thanks for all of the likes/comments/reblogs/replies. I’ll be honest, I was pretty nervous posting this story and the positive feedback has made me feel way more confident, so yeah. Thank you!! Not beta-read
The warnings below lists a running/growing list of warnings that vary from chapter to chapter. Not everything on the list below will be in every chapter.
Warnings: This fic has explicit sexual content.
Sugar daddy-esque relationship, oral sex, dirty talk, fingering, vaginal sex, Daddy kink mention, Dom/Sub dynamics, alcohol, under-negotiated kinks, possessive behavior, jealousy, public sex, cock warming, shower sex, phone sex, praise kink If you dislike these, please don’t read. Thank you. Pairing: Andy Barber x Reader
Summary: Andy wouldn’t give me any hints or clues about what he had up his sleeve.

After our little... talk, we seemed to have defined some of the invisible lines. Andy still teased me about coming into his office to fool around, but he never pressed, knowing I was wary of becoming the talk of the office. Our meet-ups weren’t limited to his place or weekends anymore. I told him when I was going out people (I hadn’t seen Max again after our drink, and hadn’t gone on anything that could be classified as a date) and he told me when he and Selena got another drink...And then another (though it seemed to stop at that).
--
AB: What are you doing this weekend?
I glanced at Andy. He rarely messaged me during meetings; he was typically too immersed in work, but the staff meeting had devolved into whether ketchup should be drizzled over fries, or left on the side.
I’ve got some stuff to do.
AB: Stuff you can put off?
Maybe. Why?
Andy’s eyes narrowed at me playfully.
AB: Can you clear your schedule, yes or no.
What are you planning?
AB: Yes or no. I leaned back in my seat, eyeing the chat window before I minimized it, opening my email and pretending to skim on as I considered the question. I had loosely made plans with a friend of mine, but we hadn’t set anything in stone; I needed to do some laundry, but besides that and maybe a Breaking Bad marathon, I didn’t have any pressing business. I glanced up at Andy, knowing he was still watching me, before I opened the chat window.
Yes.
--
Andy wouldn’t give me any hints or clues about what he had up his sleeve. He wouldn’t even come in when I invited him up that night. “What was the point in following me home, then?” I asked, folding my arms across my chest. He tipped his head to the side, amused at my irritation as he kept his distance, hands tucked in his pockets as he leaned against his car. “To tell you to be ready to go at one tomorrow afternoon,” He said. “Could’ve told me that over the phone.” He quirked a brow. “And because I feel like I never get to see you anymore. I mean outside the office, and besides...You know.” I averted my eyes, shifting from foot to foot. There was some truth in that. When Andy and I had had our disagreement, I hadn’t been ready to own up to the feelings I had for him - I still wasn’t, especially not to him. Before we’d fought, I’d gotten used to spending my weekends curled up in bed with him, or hanging out on his couch, ribbing him for the boxes left unpacked. We’d order takeout, or I’d talk him into letting me poke around in his fridge, making do with what he had there for dinner before we wound up back in bed. It felt sweet, domestic. It was one of the reasons I had felt so fucked up when we finally talked. What we had worked better now - I’d un-planted the mental flag I’d once staked at Andy’s apartment, on Andy, with that stupid, possessive, vicious little voice in me that whispered, “mine,” when I looked at him. Spending less time with him took the sting out of the truth: the relationship Andy and I had was sexual, full-stop. “We’ve both been busy,” I pointed out, lifting my head again to meet his eye. Andy didn’t say anything to that, just pulled his hand out of his pocket and held it out to me. When I didn’t take it right away, he asked, “What, you think I’m going to bite?” I rolled my eyes. “No, I’ve seen your face pre-bite. This face is much more calm,” I waved my own hand in the direction of his face before taking hold of his. Andy smiled, pulling me closer. He pressed a kiss to my forehead, and I felt myself relax a bit. “I’ll see you tomorrow, alright?” He said. I sighed, nodding. “Alright,” I agreed, looking up at Andy, “Are you coming to pick me up?” His eyes glinted mischievously, and I groaned. “Come on, you can’t even tell me that?” I whined. Andy leaned in, giving me a soft, teasing kiss. His tongue skimmed over my lower lip, then his teeth. He leaned away before I could chase the feeling. I groaned, closing my eyes. “... I deeply dislike you right now,” I sighed. Andy laughed, giving me another quick peck. “One o’clock. Don’t be late,” he said as he let go of me.
--
It felt like it took me ages to fall asleep. I couldn’t fathom what Andy was even planning. When I woke up the next morning, I had a text.
Sir🖤 Good morning, princess
I was glad he wasn’t there; every time Andy started in with a new term of endearment, it threw me at first. I could feel a blush rising to my cheeks and a warmth spreading through me. I read it over a couple more times, imagining how he’d say it - as a murmur, or a moan, or a growl. -Good morning, sir
Sir🖤 Pack an overnight bag. What time are you gonna be ready by?
A bag? I had at least one outfit’s worth of clothing at his place.
-One o’clock
Sir🖤 Good girl
I squeezed my thighs together, groaning in frustration. This wasn’t making me any less impatient for the day ahead.
--
I dressed casually; Andy hadn’t given me any indication that we’d be doing anything outlandish or fancy, so I figured casual was a safe middle. I had gotten a text at 12:58 that the car was downstairs. I had assumed he’d meant his - with him in it. I was wrong. There was hired car waiting for me. The driver introduced himself as Joey as he took my bag from me, setting it in the trunk. “You’re not allowed to tell me where we’re going, are you?” I asked as I go into the car. He smiled a little, shaking his head. “I’ve been told it’s a surprise.” I leaned back in the seat, pulling my phone out.
-What are you up to? Sir🖤 Just relax, baby
I shook my head, narrowing my eyes at the phone. ‘Relax’. Like that was so easy.
-- Our first stop was a lingerie boutique. I was told we had half an hour before I got out of the car. I’d been there before with Andy - it had been a pretty quick trip, as we’d both wanted to get back to his apartment as quickly as possible. I flashed the salesgirl a smile as I began to look around. I fingered a few price tags, thoughtful. I found myself looking for things with Andy in mind. I usually didn’t - I focused on what made me feel hot - but I also knew from experience that when Andy was feeling impatient, he tended to get a bit hurried and rough, and was more likely to rip something off of me than to try and get it off the right way.
I picked out two sets - one white and one black. The white bra underwire framing, with no fabric anywhere else but a band than stretched across the nipples; the matching underwear were equally sparse - thick elastic bands to hold up the lace that covered what needed to be covered. The black set had a similar underwire cut, but there was a vertical black band to cover the nipples, as well as a floral crochet pattern that decorated the cup; the matching underwear was black mesh, high-waisted and cheeky. I knew we’d both love how my ass looked in them. I headed over to the counter to pay and when I passed the salesgirl my card, she frowned at it. “Something the matter?” I asked. “Oh! No, the opposite. It’s already taken care of,” She passed my card back to me before she turned, rooting around for something on her station. She produced a small handwritten card, passing it to me before she turned away to bag my order. I looked down at the card, reading Andy’s message, Can’t wait to see what you picked, sweetheart. Get back in the car for your next surprise. I smiled down at the card, unable to help the giddiness I felt. It was like a treasure-hunt where I didn’t actually need to do any hunting. I thanked the salesgirl before heading back out to the car.
--
-Thank you, sir Sir🖤 You’re welcome, princess
-- The next stop was a clothing boutique. Joey mentioned that I had another half hour, and I thanked him. I was a little irked, though. Half an hour did not feel like enough. -I’m gonna need a tiny hint about what we’re doing
-Please, sir?
Sir🖤 Dinner.
And that was all I got. I raised a brow. Dinner. Well, if he was going to all this trouble, it was safe to assume he wasn’t going to just take me to grab takeout and then back to his. Us going out somewhere like that would be...New. I looked over the dresses, keeping the lingerie I’d just bought in mind. The black set would be easier to pair with something. I grabbed a few dresses that caught my eye right off the bat and tried them on. I settled on a low-cut, burgundy dress that hugged my body and had a hemline that stopped just above my knees. I figured I had finished with a few minutes to spare, but when I reached the cashier and handed over my card, the sales attendant looked dubious and said, “Mr. Barber asked me to tell you not to forget shoes and a purse.” So I wouldn’t be heading back to my apartment? I grabbed a pair of gold heels and a matching clutch, texting Andy as the sales attendant bagged the purchase. -How’d you know I’d forget?
Sir🖤 Just a hunch, sweetheart. You happy with your pick? -Yes, sir
Sir🖤 Good
-Am I heading to see you now?
Sir🖤 Not yet. Get in the car
I took the bag from the sales attendant with thanks and did as I was told.
-- When Joey pulled up in front of a spa, I was confused. “Um... You’re sure we’re at the right place?” I asked when he opened the door for me. “Positive,” He smiled. I thanked him before I headed inside. I gave my name and the receptionist smiled, informed me that I was right on time, and that my esthetician would be with me shortly. I sat in the reception area, pulling my phone out. I glanced at the ‘No Cellphones Beyond This Point’ sign and hurried to text Andy.
-You’re spoiling me.
Sir🖤 You deserve to be spoiled, princess
-I have to shut my phone off when I go in
Sir🖤 I know
-I like being able to talk to you :(
Sir🖤 You’ll get to talk to me later
I looked up as my name was called at I stood, still texting.
-I’m heading in now.
Sir🖤 Have a good time, princess
--
I had never been so relaxed in my life. Andy had pre-arranged for me to have a Swedish massage, a body polish, a manicure and pedicure, and for my hair and makeup to be done. I spent the entire time almost in a daze. There were moments when I selfishly wanted Andy to be there with me, but I pushed those thoughts away in favor of happier ones - how nice tonight was going to be, how good I felt... How much I liked Andy.
--
Joey drove me to a hotel a couple of towns over. I had no idea where we were going; Andy hadn’t answered my text asking when I got to see him once I got out of the spa. He helped me out of the car, getting my bags for me. When I went to tip him, he waved me off saying, “Mr. Barber’s got it.” There was a chilled bottle of champagne waiting for me in the hotel room when I got inside, and a handwritten note from Andy on the bedside table.
I’ll pick you up at 6:30, princess -Andy
I smiled, putting the note back down where I’d found it. I opened the champagne, pouring myself a glass and setting it down beside the note. I took a picture of the two, texting it to Andy and adding Wish you were here. x
Sir🖤 Soon
-Can’t you come by and have some fun before dinner?
Sir🖤 Don’t be a tease
-Then can I have some fun before dinner?
Sir🖤 Don’t be a brat
I pouted, picking up the glass of champagne and taking a sip. When I didn’t answer his text, I got another one.
Sir🖤 Don’t touch yourself. Promise me. -I wanna
Sir🖤 I know you do. I want to, too, but we’re gonna wait. I’m gonna take care of you tonight. Understand?
-Yes, sir.
Sir🖤 Good girl
--
I didn’t know why I was so damn nervous. This wasn’t a blind date, it was Andy. But there I was, standing in the middle of the hotel room with paper towels folded in half and tucked under my arm pits to stop the stress sweat. I jumped at the knock on the door. I pulled the paper towels out from under my armpits, tossing it away and doing a quick double-check to make sure there were no bits stuck or left behind before I walked over to the door. I smoothed the fabric of the dress down before I opened the door. He looked good - he always looked good - in a slate grey button down and a pair of black slacks. “Damn,” I commented, looking him over. He laughed, cupping my cheek. “I was about to say the same about you,” He murmured before he leaned in, kissing me gently. I smiled, resting my hands on his chest. That smile quickly turned to a pout when he leaned away. “None of that, sweetheart, we don’t wanna be late,” He said, tapping the tip of my nose with his finger, “Grab your bag and let’s go.” As soon as I’d made sure I had my phone, room key, wallet, and lipstick, I met Andy at the door. He took hold of my hand, intertwining our fingers as we walked down the hall. I had the immediate urge to pull my hand away from his, but pushed it down. We weren’t in our town, where it was highly likely anyone could see us. No one around here knew us.
--
Dinner was at an Italian bistro a couple of blocks away. It was a quiet spot; Andy got us a table in the corner, where we could play footsie, hold hands, sneak the occasional kiss. It felt foreign to me, but definitely not unwelcome in any way. Even when we weren’t being touchy, things with Andy just felt comfortable. We could talk about work, sure, but that wasn’t all we had to talk about. It felt a little bit more like it had when my burgeoning crush on him had yet to be a fling, when we would still eat lunch together on a regular basis. It felt domestic and romantic and sweet. I ached for that.
-- I was on him the second we got back to the hotel room. “Slow down,” Andy laughed. I didn’t even care that he was laughing at me; I didn’t look away from where my freshly manicured, carnation pink nails were making quick work of the buttons on his shirt. “Hey,” He added when I didn’t stop, catching hold of my wrists to get my attention. I looked up at him, biting my lip, a bit bashful as I lowered my eyes back to his chest. “You’ve been taking care of my all day,” I said softly, “I wanna take care of you, too.” Andy’s eyes softened. “You know that just because I give you something doesn’t mean you have to give me something, right?” He asked, letting go of one of my wrists to push a lock of my hair behind my ear, “Sometimes I just wanna do things for you.” “This was more than just something, Andy, today was so much, I just--...” I trailed off, closing my eyes. I didn’t trust my words right now. I leaned in, pressing a kiss to his neck, then another, then another. I pressed my released hand to his chest, sliding it down over the skin I’d exposed and slipping it into his shirt. “Let me,” I begged, “Please.” I could feel Andy hesitate before he let go of my other wrist. I leaned up, brushing my lips against his a few times and drawing away before he could press in for a kiss. His hands settled on my hips, squeezing whenever I drew away, frustrated. I smiled as looked up at him. I hooked my fingers in his belt loops, pulling him further into the room. I nudged him to sit on the bed, watching as he went down. I reached behind myself, unzipping my dress and pulling it up over my head. I watched Andy’s eyes wander my body as I tossed it aside. I felt a swell of self-satisfaction as Andy’s lips parted, speechless at the sight of me. His hands came up to skim over the outside of my thighs as I stepped closer, resting my hands on his shoulders as I straddled his lap. “Do you like it?” I teased. Andy’s eyes lifted from my chest to my face as he slid his hands up to cup the swell of my ass. “You look beautiful.” I dipped my head, hiding my flushing face in his neck and peppering kisses along the skin there as he squeezed my ass. I pressed back against his hands before I pressed down against his hardening dick, gently rolling my hips. I felt Andy’s lips skim over my shoulder tenderly, a hand slipping up my side to slid under the bra’s strap, thumbing over the skin. It slid back down then, settling on my rib cage and gently pushing me back. I sighed as he kissed over my collarbones, mouthing a hot, wet line down to my breasts. His tongue traced along the skimpy floral pattern, teasing the exposed skin. I slid a hand into his hair, lightly scratching my nails along his scalp as he lapped at me, tongue lapping over the fabric covering my nipple before he moved on to the other breast. I whined, pressing my breast against Andy’s mouth as he gave it the same teasing treatment.
When I couldn’t take it anymore I tightened my hold on Andy’s hair, pulling him up for a kiss. He groaned into it, tightening his grip on me.
“Careful, princess,” he growled. I squirmed at the tone, unable to ignore the throbbing between my legs as I ground down against him harder. “Sorry, sir,” I breathed. I dropped a light kiss to his lips, then another, and another as I undid the rest of the buttons on his shirt. Once I’d undone them all, I reached up, pushing it away. He let go of me for a moment, pulling it off and tossing it atop my dress.
I climbed out of his lap before he could reach for me again. I felt him watching me as I got down on my knees. I slid my hands up his thighs, taking my time as I undid his pants. I saw his hand in my periphery. I figured he was going to slide his hand into my hair, but he cupped my cheek, tipping my face up to look at him. When he didn’t say anything, I turned my head, pressing a kiss to his palm. He smiled, trailing his thumb over my lips. I leaned out of his touch to take him into my mouth. Andy hummed low in his throat as I swirled my tongue around the head. I didn’t take anymore of him into my mouth, just trailed my nails up and down over his shaft. I did this a couple more times, then flicked my tongue over the slit. I leaned back, letting the head go and flicking my tongue over it once more before I leaned down, kissing along the underside. I started with gentle pecks at the head, then increased the pressure as I moved down, adding my tongue. Andy’s hand slid into my hair as I reached the base, and I tipped my head to peer up at him from under my lashes. He was watching me with this unguarded lust, licking his lips as my tongue flicked out before I pressed another wet kiss to his dick. I trailed the kisses back up, getting sloppier as I got closer to the head. I kept my eyes on his as I took him back into my mouth, hand working over what I didn’t take into my mouth. “Feels so good, princess,” he breathed as I swirled my tongue around his head. I moaned around him, clenching my thighs as his grip tightened in my hair. I pulled off of him, hand still working over his shaft. “I’ve been thinking about this all day,” I murmured. “Yeah? You’ve been thinking about getting on your knees for me?” Andy asked. I nodded. I didn’t know why the admission made me feel so open and dirty. “What else have you been thinking about?” He asked. I leaned down sucking a kiss against the side of his dick before answering, “I’ve been thinking about you fucking me,” I murmured, “Just thinking about you gets me so fucking wet sometimes-- It was so hard not to touch myself earlier, I wanted to so bad--” “But you didn’t, right?” Andy gave me a sharp look and I shook my head quickly. “I didn’t, I promise,” I pouted. That look melted and he leaned down, catching my lips in a heated kiss. “I believe you, baby,” He murmured, “I know you’re a good girl for me.” I nodded, leaning up for another quick kiss as I murmured, “Yours.” Andy’s face changed after I said that. It was like something overtook him, something hungry and frantic. He hauled me up, back into his lap. I gasped against his mouth as he kissed me greedily. I could feel his dick pressing against my clit through the mesh of my panties. “Please,” I mumbled, pressing down against him harder. He reached down, slipping his hand into my underwear and pressing a finger into me. I sighed into his mouth, working my hips against his hand. He added a second finger, then a third in quick succession, working me open faster than he had before. I leaned away from him, reaching under one of the pillows where I had stashed a condom earlier. Andy lightened for a moment, turning and pressing a kiss to my shoulder. “Someone’s prepared,” he teased. “I need you in me,” I whined, not in the mood to be teased anymore. I rolled the condom onto him, stroking him a couple of times once it was on. Andy slid his fingers out, slapping my clit once before he pulled his hand out of my underwear. I keened, hips bucking at the pleasure that chased the sting. Andy pulled the seat of my underwear aside. “Go on, sweetheart,” He murmured, “Take what you want.” I rested my forehead against Andy’s, closing my eyes. “Look at me,” he ordered. I opened my eyes, watching him as I took him in. I didn’t bother trying to cover up the desperate little sighs and moans that fell out of my mouth; now and again my eyes would start to drift shut from the feeling and he’d squeeze my thigh, reminding me. I kept my eyes on his as I settled in his lap. “Feels so big, Andy,” I murmured, kissing him gently as I began to move. “Yeah?” He breathed. I smiled, watching a flush spread over his cheeks. I felt his hands on my hips, even as I took control of the pace. I nodded. “Mhm,” I murmured, “You feel so good-- You always feel so good.” I leaned in, biting at the hinge of his jaw. "I‘ve never wanted anyone the way I want you,” I murmured, “Never liked being anyone’s the way I like being yours.” Andy groaned lowly, arms wrapping around me to still me. His hips drove into me in quick, sharp thrusts. I wrapped my arms around his shoulders, moaning as he fucked me. I closed my eyes, pressing my face into his shoulder and meeting his thrusts as best I could. “Fuck-- Andy,” I warned, feeling myself growing close. Andy turned his head, catching my mouth with his. “Cum,” He murmured, “Cum on my cock, princess, I wanna feel you tighten up on me-- Fuck that’s it--” I threw my head back as I came, gasping his name as his thrusts quickened. He drew me into his chest so I didn’t tumble off of his lap and I slouched against him, flushed and panting. He nuzzled into my hair, gently laying us both on the bed. I curled up against his chest, closing my eyes for a few moments. I felt his hand drift over my back in slow, soothing circles. I whined when he got up, but let him go. I didn’t open my eyes as I felt Andy take hold of my ankle, undoing the strap of one shoe and removing it before removing the other. He gently peeled my underwear off next. I lifted my hips to help him, settling down again once they were off. “Lean up just a little for me, baby,” Andy’s voice was soft in my ear. I did as I was told, propping myself up on my elbows as Andy reached around, unclasping my bra. I sighed as he eased it off my shoulders, settling back down onto the bed. Andy chuckled, pressing a kiss where one of the straps had been. “C’mere,” He laughed softly. I opened my eyes, watching him settle by the headboard. I pushed myself onto my hands and knees, crawling up the bed to join him and climbing under the covers. I curled into Andy’s side as he pulled me in, wrapping my arm around him and sliding a leg between his. I heard him murmur, “Sweet dreams, baby,” before I drifted off.
36 notes
·
View notes
Note
do u have any crochet tips for beginners? im making a baby blanket for my nephew but my fingers hurt and i always feel like im doing something wrong 😭
AHH okay first of all good luck!!! i’m sure it will be a treasured blanket regardless of how it turns out and always remember that any mistakes you make are going to be very obvious to you but mostly not to the people looking at the blanket unless you point them out – and even then it’s just another little thing that makes it homemade!
this got super long so i’m gonna put the rest of it under a cut kajsdlgks
as for tips, i think one of the main ones for me was not to worry about how i was holding the yarn/hook as long as i was getting good tension – i find it really difficult to hold the yarn how you’re “supposed” to because it’s more comfortable for me to hold it a different way, so i just did it that way and my projects came out just as good! so if your fingers hurt it might be a case of holding your yarn in a way that you find uncomfortable, maybe try a few different ways of holding it to see if that helps?
i actually find that watching youtube tutorials from a variety of crochet youtubers gives me a lot of peace in terms of holding yarn because they all do it so differently. sometimes i just watch their tutorials even if i have no intention of making whatever they’re demonstrating just because i like to see how they hold their yarn lmao? i think the person closest to how i currently hold my yarn is hooked by robin but there are sooo many people who wrap the yarn around the hook with their left hand like i used to. i think this also helped me become more familiar with the shapes of stitches and identifying them in different circumstances/with different yarns tbh! i literally watch it’s all in a nutshell videos because her voice is so sweet and soothing, but she’s SO comprehensive in her tutorials about pointing out where everything goes lmao, a lifesaver!!!
also, i used to crochet super tightly, but i feel like my stuff comes out better now i have a better grip on my tension, and i only really got used to the idea of loosening my tension after i did a big project in tunisian crochet. idk if you know what that is, but basically it’s like hybrid crochet/knitting where you’re always on the same side of the piece rather than turning at the end of each row, and you load a bunch of loops onto your hook on the ‘forward pass’ and then pull them off two at a time on the reverse pass (there’s a really great basics video on it here). if you crochet REALLY tightly with tunisian then your fabric is so angry and curled up that it’s difficult to crochet into the next row, so i really had to work on making all my movements super loose and then when i went back to regular crochet i found it so much easier to modulate my tension because i knew what crocheting more loosely was like, if that makes sense? ANYWAY that’s just the way i personally worked out my tension, there are definitely other ways to loosen up and i’m sure that will help with any finger troubles!
i know that a lot of beginners struggle with their work either getting wider or narrower as they crochet which can be super frustrating (it happened to me SO MUCH). most of the time that’s either because they’re adding/skipping stitches where they shouldn’t be (usually by missing the last stitch on the row), or because they’ll change their tension as they’re crocheting without realising. if you’re worrying about things like how you’re holding your yarn and your stitch count and not making mistakes you’re gonna be crocheting really tightly, and if you’ve relaxed into it you’re probably gonna be crocheting with less tension than you started with, so it’s super important when you start out that you know whether you tend to skew tighter or looser with your tension and really try to match that at the beginning. again, though, if your blanket is a little bit wonky there are things you can do like putting a border on it or trying to block it a bit, but also remember that it’s either going to be folded up or tucked over a baby, so nobody’s ever really going to see it stretched out completely flat and if it just has a SLIGHT discrepancy it’s honestly no big deal!!
besides stuff about tension i would generally say that reminding yourself you’re going to make a few mistakes as you’re learning is really important. like, i’ve been crocheting for a few years now and i still fuck up and have to frog yards and yards of yarn because of a mistake, but unless you get really bent out of shape about mistakes and it’s like upsetting you that you made a mistake (or it’s something that would throw off the rest of the pattern in a way that really needs to be fixed) then i would also suggest not being too strict with yourself! i empathise with the feeling of needing everything to be perfect, but if you wanted something to be perfect you would just go buy a blanket online somewhere right? if you drop a stitch somewhere and you only notice that you’ve done that like three rows later, just throw in an extra stitch somewhere in the row you’re on and you’re gucci!
i also think it’s good practice as a beginner to count your stitches and mark the first/last stitch on each row so you don’t accidentally miss ones there since i know that’s a really common mistake! i know counting your stitches is a pain, so you don’t have to do it every row, maybe just every few rows as you get more confident – also, if your blanket is massive and there are TONS of stitches in a row, you can use stitch markers to mark every 10th/20th stitch or something, so you’re just counting to 10 or 20 instead of 120 stitches in one go.
also, this might sound crazy but if you’re just doing a blanket that’s plain single/half double/double crochets or something, it might actually help you to switch to a pattern that has a slightly more “complicated” stitch pattern, like a granny stripe or something – that way it’s not as difficult to miss stitches by accident, you can see exactly where you’re working your clusters so there’s no mistakes about where to put them.
ultimately like i said up there, mistakes are noticeable to you because you’ve been staring at this thing for ages and you remember seeing the mistake and you see it every time you look at it, but i promise you NOBODY is going to pay that close attention, and if they are and they think less of this thing you’ve made because of a mistake then fuck em! the most important thing is being comfortable while you’re crocheting so make sure you’re holding everything in a way that makes the most sense to your hands and it will help you even out your tension if tension is an issue, and will also let you work for longer without getting uncomfy!
also, again, GOOD LUCK!! the blanket will be amazing and much loved because you made it! every project you make is practice with a new technique or a new stitch or a new yarn or a new hook so there’s always going to be some readjustments you’ll have to make but the more you crochet the better you’ll feel about everything. lmk if you need help with anything else!! 💕💕💕💕
5 notes
·
View notes
Text
Crochet cushion
This make took me quite a while to complete, so apologies for not posting for a while. I found a retro style cushion pattern in an old issue of Mollie Makes which I really liked, but I really didn’t like the colours they used. A quick sketch later and my colour palette was in place!
I also modified the pattern a little so that the cushion is a cover; at least then I can take it off if need be. That and I currently don’t have a cushion to put in it!
I had a lot of fun with this, and for a first attempt and something with a lot of granny squares, I don’t think it turned out to badly. It is a little bit wonky because I currently don’t have anything I can block things with (which, as an aside, is the reason I haven’t uploaded a photo of my tunisian crochet placemat; the edges have curled like crazy). Hopefully it’ll look better when it actually has a cushion in it!
Here’s the front:

And here’s the back:

Other than that, I’m currently working on a crochet dreamcatcher (which was a bad idea because I don’t have a hoop to attach it to but nevermind), and then I hope to get started on a crochet blanket. I’m looking at potentially doing the Sophie’s Universe one, or potentially doing part of it and filling the rest with squares. I’m trying to use up some of my stash so I have a legitimate excuse to buy more wool! There’s also a lovely crochet clutch bag that I’d like to have a go at. I’ve got a whole list of projects I’d like to do so don’t be surprised if the next one is something completely different!
Game wise, the update for Animal Crossing came out today, and I have to say, it’s a lot of fun! Although it seems my character can’t swim very fast which is a little bit frustrating. Maybe getting some flippers would speed me up a bit?
I started Hollow Knight earlier this week. I am a little bit lost as to where to go at the minute, and I’m struggling a little bit with the platforming. The jumping feels a bit more floaty than what I’m used to, and the character has a habit of sliding when he lands. I guess it’ll just take a bit of getting used to. The combat is quite difficult to get the hang of as well (my perception of where the hit box is is apparently not the same as the devs...) but then again the game is supposed to be difficult. I think it’s a game I’ll be playing intermittently, rather like Ori seems to be right now. I did dip my toe into Don’t Starve as well, which was a lot of fun.
Oh right, and I FINALLY got hold of Ring Fit Adventure, and I’m really enjoying it! It may be cheese overload, but I think that’s part of it’s charm. It certainly gives me a good workout.
I’m having a bit of a crochet surge at the minute (potentially because I joined a couple of groups on facebook), so I’m excited to see what I can make with the yarn I have left floating around. If anyone’s got any good ideas on what I can make out of fluorescent lime green wool, please let me know. (I ordered it thinking it was going to be slightly more muted. How wrong I was...)
Keep being lovely!
NightWolf
3 notes
·
View notes
Text
Wood Inlay Ornament with German Glass Glitter
Hi friends! And hi to new friends visiting from the #CreativeChristmas Challenge hosted by Remodelaholic!
youtube
To those of you who don’t know me yet: welcome. Everyone else has already started drinking and saying really embarrassing things (about themselves, not you… we’re not a super judgmental bunch). To those of you who already know me: cheers. As always, you rock. And I was just kidding about the drinking thing (unless it’s football season and a Saturday, which yes to both).
Anyway, from time to time, I like to throw my hat in on a DIY challenge or two because nothing excuses buying more power tools like overcommitting to a deadline for fun (like the 2×4 summer challenge and boom: new coffee table!). This time around, the theme was making something for Christmas. I’ve already been finding inspiration for my color scheme this year in the form of acorns, snowflakes, owls, and other wintery-woodland things, so I figured: why not see if I can fill up the inevitable empty parts of my tree with what I have on hand, rather than buying a bunch of new ornaments? I also just happened upon a set of carving bits for my Dremel and have been itching to experiment with epoxy/inlays/resins, so I started playing around until this happened:
And as a fun little bonus: I actually made a video of it too!
Tools and Materials
affiliate links of items I recommend and use are listed in this post, which support this site at no cost to you… thanks!
scrap wood (I had 1″ x 4″ poplar)
scissors
printer paper
inkjet printer
acetone or nail polish remover
Dremel 200
Dremel engraving/carving kit
band saw or scroll saw
random orbit sander
wood stain (I used Minwax Ipswich Pine and washed while it was still wet with Early American… I’ll have to show you guys more about this as I’ve done it a number of times to get the colors I like)
Mod Podge
small detail paint brush
Miss Mustard Seed’s German Glass Glitter in Silver Tiara
Martha Stewart Crafts extra fine glitter in Smoky Quartz
clear spray sealer (gloss)
small drill bit
thread (I used stuff from my cross stitch stash)
First things first: print out the image (mine is available for download near the end of the post) and cut it out. I used a scrap piece of poplar that was bound for the burn pile, so I wasn’t really expecting perfection (in fact as you can see, I first used a different image that was WAY too intricate for a first-time experiment and then decided on the final design).
To transfer the ink from the printer paper, I swabbed the back with an acetone nail polish remover. As you can see, the image didn’t transfer perfectly, but it was good enough (I got the idea from my buddy Brad’s video here — then went with the option that wouldn’t require changing out of my pajama pants or going into the cold garage that morning).
Next, I took out my Dremel and a new engraving/carving set I’d recently purchased for another inlay project. In my opinion, crafting is a good intro before graduating to larger pieces, so I figured this would help me practice with diamond tips, how to control the carve, etc. A good method is to create the hard outline first, then carve out the middle, and continue to make the inlay deeper and deeper until it’s got enough depth to hold the inlay material (glitter, epoxy I assume, whatever).
Next, I sketched out the overall shape (spoiler: it wasn’t at all even, so I highly recommend using the template) and then went to cut out the piece. And this is when it seemed like things were conspiring against me: my new scroll saw was broken… right out of the box. Womp, womp.
To make the situation a little stickier, I was about 5 hours away at this point from needing to head out of town to Raleigh, NC (recap here), and I had no other tools that would give me the right depth and shape. Disappointed but undeterred, I figured the next best thing would be to ask to borrow tools from the person I’d be visiting (thankfully, it was a trip to visit some DIY blogging friends just for fun — my pal Brittany just so happened to have a band saw in her garage). Of course, now I want one of those, too.
Of course, I’d never actually used a band saw before, so despite the general don’t-cut-your-fingers-off rule, the piece still came out a little wonky (mostly due to my non-templating sketch). I was able to shape it a little more with an orbital sander. I also carved the edges out a little more and did a final sanding with high grit sandpaper before stain.
Since the overall concept was to make this look like an inlay, I wanted to use glitter with a little more grit and sparkle: enter, German glass glitter. It’s really amazing stuff in person. To paint it into place, I relied on a small paint brush (tip: if the brush starts to fray a little, spin it as you’re dipping it into the glue to get the point fine again… check out my video to see a demo of that).
You can layer the glitter in, too: after giving it some time to dry, paint another bit of glue on top of the glitter and add more into the recessed areas. It will add depth!
I added extra-fine gold glitter around the edge and sealed the whole thing with a clear gloss spray, then drilled a hole through the top and threaded it so it could hang on the tree.
Caveat: before I sealed with a clear gloss, I actually tried to seal with an old polycrylic which unfortunately made the top and bottom tips look faded/cloudy once it dried. At first I thought I’d lean into the mistake by painting the back and sides with chalk paint and sanding to make it look rustic, but it looked really sad instead and totally detracted from the sparkle on the front. I wanted to get this done in time for the blog hop, so I just continued on with sealing again and adding the glitter around the edge. So, if you try a project like this, don’t make my mistake and you’ll get even better results!
You can also try other inlay methods, other glitter colors, fill in the center vs the outer rings with opposite hues, etc… the possibilities are pretty endless!
All in all, I think it’s going to make a nice addition to my white/gold/chrome/woodland Christmas decor theme this year (and the less I need to spend on ornaments, the more budget I have to make Christmas cocktails, hehe).
Want to try this for yourself? You can download my template here.
To be perfectly frank, I think the photos really don’t do the sparkle on this piece enough justice (in fact, I worried that it was looking too drab in photos). So, I made a video tutorial too (I’d love it if you subscribed if you haven’t already… with what I’ve learned in making this tutorial, there is more to come no doubt!).
youtube
As I mentioned, this DIY was part of a blog hop, with 25 other bloggers participating — aka, enough DIY Christmas ideas to keep you busy right up until the actual holiday (if you were so ambitiously inclined). So, check out a preview of the other projects and bloggers participating in the images below. You can also head over to the Remodelaholic post (who is hosting this hop) to check out other DIYers submitting their inspired ideas (on social media, you can look for #CreativeChristmas to find them all).
DIY Christmas Trees and Ornaments
Wintry Silver Dollar Store Christmas Tree Decor | Remodelaholic Marbled Christmas Ornaments | Doodlecraft Scrap Wood Inlay Ornaments | The Ugly Duckling House (you’re here!) Woodburned Wood Slice Ornaments | Sisters What Flocked Pine Cones | Practical and Pretty Abstract Monogram Ornaments | Domicile37 Concrete Christmas Ornaments | The Palette Muse Wood Slice Deer Ornaments | Our Crafty Mom Vintage Gumball Machine Ornaments | Beth Watson Design Studio Etched Glass Ornaments | Just Call Me Homegirl Unicorn Inspired Christmas Tree | The DIY Mommy Driftwood Reindeer Ornaments | Sustain My Craft Habit
DIY Christmas Gifts and Decor
Christmas Pine Hoop Wreath | This Mama’s Dance Gingerbread Man Candles | Nourish and Nestle Wire and Glass Chandelier | Home with Cupcakes and Crinoline Christmas Scroll Wall Art | Grace In My Space Lighted Wood Trees | Frazzled Joy Crocheted Christmas Hat | Luz Patterns Christmas Card Photo Display| Hertoolbelt JOY Porch Sign | Ginger Snap Crafts Folding Bar Cart Table | Everyday Party Magazine Wood and Burlap Christmas Sign | Leap of Faith Crafting Wood Block Snowman | Anika’s DIY Life Holiday Candle Wrap | Dragonfly & Lily Pads Christmas Pom Pom Pillow | Small Home Soul Handlettered Wall Art | Smiling Colors
Those of us who did videos for this hop can be found in the playlist below, so those of you who would rather watch than read (or just want to blow off work for a few more minutes) have something, too! *If you’re having difficulty playing it, you can jump over to the playlist here.*
youtube
There you have it! Hope you’re getting into the holiday spirit just in time. Will you be working on any decor ideas this Christmas? This is going to be a very busy holiday season for me, so be sure to check back in for more DIYs (I’m going to give that epoxy inlay idea a shot, and a few more scrap ideas are just bubbling in the ol’ brain). Have a great weekend!
You'll Also Love
25 Great Gift Ideas for the Craft Beer Lover
DIY Wooden Couch Sleeve
It’s Pronounced “Damn Good Cookie̶...
Lots of Sneak Peeks: Riding the Buildathon Wave
.yuzo_related_post img{width:170px !important; height:170px !important;} .yuzo_related_post .relatedthumb{line-height:14px;background:#ffffff !important;color:#454747!important;} .yuzo_related_post .relatedthumb:hover{background:#ffffff !important; -webkit-transition: background 0.2s linear; -moz-transition: background 0.2s linear; -o-transition: background 0.2s linear; transition: background 0.2s linear;;color:#454747!important;} .yuzo_related_post .relatedthumb a{color:#102a3b!important;} .yuzo_related_post .relatedthumb a:hover{ color:#113f5e}!important;} .yuzo_related_post .relatedthumb:hover a{ color:#113f5e!important;} .yuzo_related_post .relatedthumb:hover .yuzo__text--title{ color:#113f5e!important;} .yuzo_related_post .yuzo_text, .yuzo_related_post .yuzo_views_post {color:#454747!important;} .yuzo_related_post .relatedthumb:hover .yuzo_text, .yuzo_related_post:hover .yuzo_views_post {color:#454747!important;} .yuzo_related_post .relatedthumb{ margin: 0px 6px 0px 6px; padding: 0px 0px 0px 0px; } jQuery(document).ready(function( $ ){ jQuery('.yuzo_related_post .yuzo_wraps').equalizer({ columns : '> div' }); });
The post Wood Inlay Ornament with German Glass Glitter appeared first on The Ugly Duckling House.
Website // Subscribe // Advertise // Twitter // Facebook // Google+
Wood Inlay Ornament with German Glass Glitter published first on http://ift.tt/2qxZz2j
0 notes
Text
Wood Inlay Ornament with German Glass Glitter
Hi friends! And hi to new friends visiting from the #CreativeChristmas Challenge hosted by Remodelaholic!
To those of you who don’t know me yet: welcome. Everyone else has already started drinking and saying really embarrassing things (about themselves, not you… we’re not a super judgmental bunch). To those of you who already know me: cheers. As always, you rock. And I was just kidding about the drinking thing (unless it’s football season and a Saturday, which yes to both).
Anyway, from time to time, I like to throw my hat in on a DIY challenge or two because nothing excuses buying more power tools like overcommitting to a deadline for fun (like the 2×4 summer challenge and boom: new coffee table!). This time around, the theme was making something for Christmas. I’ve already been finding inspiration for my color scheme this year in the form of acorns, snowflakes, owls, and other wintery-woodland things, so I figured: why not see if I can fill up the inevitable empty parts of my tree with what I have on hand, rather than buying a bunch of new ornaments? I also just happened upon a set of carving bits for my Dremel and have been itching to experiment with epoxy/inlays/resins, so I started playing around until this happened:
And as a fun little bonus: I actually made a video of it too!
Tools and Materials
affiliate links of items I recommend and use are listed in this post, which support this site at no cost to you… thanks!
scrap wood (I had 1″ x 4″ poplar)
scissors
printer paper
inkjet printer
acetone or nail polish remover
Dremel 200
Dremel engraving/carving kit
band saw or scroll saw
random orbit sander
wood stain (I used Minwax Ipswich Pine and washed while it was still wet with Early American… I’ll have to show you guys more about this as I’ve done it a number of times to get the colors I like)
Mod Podge
small detail paint brush
Miss Mustard Seed’s German Glass Glitter in Silver Tiara
Martha Stewart Crafts extra fine glitter in Smoky Quartz
clear spray sealer (gloss)
small drill bit
thread (I used stuff from my cross stitch stash)
First things first: print out the image (mine is available for download near the end of the post) and cut it out. I used a scrap piece of poplar that was bound for the burn pile, so I wasn’t really expecting perfection (in fact as you can see, I first used a different image that was WAY too intricate for a first-time experiment and then decided on the final design).
To transfer the ink from the printer paper, I swabbed the back with an acetone nail polish remover. As you can see, the image didn’t transfer perfectly, but it was good enough (I got the idea from my buddy Brad’s video here — then went with the option that wouldn’t require changing out of my pajama pants or going into the cold garage that morning).
Next, I took out my Dremel and a new engraving/carving set I’d recently purchased for another inlay project. In my opinion, crafting is a good intro before graduating to larger pieces, so I figured this would help me practice with diamond tips, how to control the carve, etc. A good method is to create the hard outline first, then carve out the middle, and continue to make the inlay deeper and deeper until it’s got enough depth to hold the inlay material (glitter, epoxy I assume, whatever).
Next, I sketched out the overall shape (spoiler: it wasn’t at all even, so I highly recommend using the template) and then went to cut out the piece. And this is when it seemed like things were conspiring against me: my new scroll saw was broken… right out of the box. Womp, womp.
To make the situation a little stickier, I was about 5 hours away at this point from needing to head out of town to Raleigh, NC (recap here), and I had no other tools that would give me the right depth and shape. Disappointed but undeterred, I figured the next best thing would be to ask to borrow tools from the person I’d be visiting (thankfully, it was a trip to visit some DIY blogging friends just for fun — my pal Brittany just so happened to have a band saw in her garage). Of course, now I want one of those, too.
Of course, I’d never actually used a band saw before, so despite the general don’t-cut-your-fingers-off rule, the piece still came out a little wonky (mostly due to my non-templating sketch). I was able to shape it a little more with an orbital sander. I also carved the edges out a little more and did a final sanding with high grit sandpaper before stain.
Since the overall concept was to make this look like an inlay, I wanted to use glitter with a little more grit and sparkle: enter, German glass glitter. It’s really amazing stuff in person. To paint it into place, I relied on a small paint brush (tip: if the brush starts to fray a little, spin it as you’re dipping it into the glue to get the point fine again… check out my video to see a demo of that).
You can layer the glitter in, too: after giving it some time to dry, paint another bit of glue on top of the glitter and add more into the recessed areas. It will add depth!
I added extra-fine gold glitter around the edge and sealed the whole thing with a clear gloss spray, then drilled a hole through the top and threaded it so it could hang on the tree.
Caveat: before I sealed with a clear gloss, I actually tried to seal with an old polycrylic which unfortunately made the top and bottom tips look faded/cloudy once it dried. At first I thought I’d lean into the mistake by painting the back and sides with chalk paint and sanding to make it look rustic, but it looked really sad instead and totally detracted from the sparkle on the front. I wanted to get this done in time for the blog hop, so I just continued on with sealing again and adding the glitter around the edge. So, if you try a project like this, don’t make my mistake and you’ll get even better results!
You can also try other inlay methods, other glitter colors, fill in the center vs the outer rings with opposite hues, etc… the possibilities are pretty endless!
All in all, I think it’s going to make a nice addition to my white/gold/chrome/woodland Christmas decor theme this year (and the less I need to spend on ornaments, the more budget I have to make Christmas cocktails, hehe).
Want to try this for yourself? You can download my template here.
To be perfectly frank, I think the photos really don’t do the sparkle on this piece enough justice (in fact, I worried that it was looking too drab in photos). So, I made a video tutorial too (I’d love it if you subscribed if you haven’t already… with what I’ve learned in making this tutorial, there is more to come no doubt!).
As I mentioned, this DIY was part of a blog hop, with 25 other bloggers participating — aka, enough DIY Christmas ideas to keep you busy right up until the actual holiday (if you were so ambitiously inclined). So, check out a preview of the other projects and bloggers participating in the images below. You can also head over to the Remodelaholic post (who is hosting this hop) to check out other DIYers submitting their inspired ideas (on social media, you can look for #CreativeChristmas to find them all).
DIY Christmas Trees and Ornaments
Wintry Silver Dollar Store Christmas Tree Decor | Remodelaholic Marbled Christmas Ornaments | Doodlecraft Scrap Wood Inlay Ornaments | The Ugly Duckling House (you’re here!) Woodburned Wood Slice Ornaments | Sisters What Flocked Pine Cones | Practical and Pretty Abstract Monogram Ornaments | Domicile37 Concrete Christmas Ornaments | The Palette Muse Wood Slice Deer Ornaments | Our Crafty Mom Vintage Gumball Machine Ornaments | Beth Watson Design Studio Etched Glass Ornaments | Just Call Me Homegirl Unicorn Inspired Christmas Tree | The DIY Mommy Driftwood Reindeer Ornaments | Sustain My Craft Habit
DIY Christmas Gifts and Decor
Christmas Pine Hoop Wreath | This Mama’s Dance Gingerbread Man Candles | Nourish and Nestle Wire and Glass Chandelier | Home with Cupcakes and Crinoline Christmas Scroll Wall Art | Grace In My Space Lighted Wood Trees | Frazzled Joy Crocheted Christmas Hat | Luz Patterns Christmas Card Photo Display| Hertoolbelt JOY Porch Sign | Ginger Snap Crafts Folding Bar Cart Table | Everyday Party Magazine Wood and Burlap Christmas Sign | Leap of Faith Crafting Wood Block Snowman | Anika’s DIY Life Holiday Candle Wrap | Dragonfly & Lily Pads Christmas Pom Pom Pillow | Small Home Soul Handlettered Wall Art | Smiling Colors
Those of us who did videos for this hop can be found in the playlist below, so those of you who would rather watch than read (or just want to blow off work for a few more minutes) have something, too! *If you’re having difficulty playing it, you can jump over to the playlist here.*
There you have it! Hope you’re getting into the holiday spirit just in time. Will you be working on any decor ideas this Christmas? This is going to be a very busy holiday season for me, so be sure to check back in for more DIYs (I’m going to give that epoxy inlay idea a shot, and a few more scrap ideas are just bubbling in the ol’ brain). Have a great weekend!
You'll Also Love
25 Great Gift Ideas for the Craft Beer Lover
DIY Wooden Couch Sleeve
It’s Pronounced “Damn Good Cookie̶...
Lots of Sneak Peeks: Riding the Buildathon Wave
The post Wood Inlay Ornament with German Glass Glitter appeared first on The Ugly Duckling House.
Website // Subscribe // Advertise // Twitter // Facebook // Google+
from mix1 http://ift.tt/2mesqe5 via with this info
0 notes
Text
Wood Inlay Ornament with German Glass Glitter
Hi friends! And hi to new friends visiting from the #CreativeChristmas Challenge hosted by Remodelaholic!
To those of you who don’t know me yet: welcome. Everyone else has already started drinking and saying really embarrassing things (about themselves, not you… we’re not a super judgmental bunch). To those of you who already know me: cheers. As always, you rock. And I was just kidding about the drinking thing (unless it’s football season and a Saturday, which yes to both).
Anyway, from time to time, I like to throw my hat in on a DIY challenge or two because nothing excuses buying more power tools like overcommitting to a deadline for fun (like the 2×4 summer challenge and boom: new coffee table!). This time around, the theme was making something for Christmas. I’ve already been finding inspiration for my color scheme this year in the form of acorns, snowflakes, owls, and other wintery-woodland things, so I figured: why not see if I can fill up the inevitable empty parts of my tree with what I have on hand, rather than buying a bunch of new ornaments? I also just happened upon a set of carving bits for my Dremel and have been itching to experiment with epoxy/inlays/resins, so I started playing around until this happened:
And as a fun little bonus: I actually made a video of it too!
Tools and Materials
affiliate links of items I recommend and use are listed in this post, which support this site at no cost to you… thanks!
scrap wood (I had 1″ x 4″ poplar)
scissors
printer paper
inkjet printer
acetone or nail polish remover
Dremel 200
Dremel engraving/carving kit
band saw or scroll saw
random orbit sander
wood stain (I used Minwax Ipswich Pine and washed while it was still wet with Early American… I’ll have to show you guys more about this as I’ve done it a number of times to get the colors I like)
Mod Podge
small detail paint brush
Miss Mustard Seed’s German Glass Glitter in Silver Tiara
Martha Stewart Crafts extra fine glitter in Smoky Quartz
clear spray sealer (gloss)
small drill bit
thread (I used stuff from my cross stitch stash)
First things first: print out the image (mine is available for download near the end of the post) and cut it out. I used a scrap piece of poplar that was bound for the burn pile, so I wasn’t really expecting perfection (in fact as you can see, I first used a different image that was WAY too intricate for a first-time experiment and then decided on the final design).
To transfer the ink from the printer paper, I swabbed the back with an acetone nail polish remover. As you can see, the image didn’t transfer perfectly, but it was good enough (I got the idea from my buddy Brad’s video here — then went with the option that wouldn’t require changing out of my pajama pants or going into the cold garage that morning).
Next, I took out my Dremel and a new engraving/carving set I’d recently purchased for another inlay project. In my opinion, crafting is a good intro before graduating to larger pieces, so I figured this would help me practice with diamond tips, how to control the carve, etc. A good method is to create the hard outline first, then carve out the middle, and continue to make the inlay deeper and deeper until it’s got enough depth to hold the inlay material (glitter, epoxy I assume, whatever).
Next, I sketched out the overall shape (spoiler: it wasn’t at all even, so I highly recommend using the template) and then went to cut out the piece. And this is when it seemed like things were conspiring against me: my new scroll saw was broken… right out of the box. Womp, womp.
To make the situation a little stickier, I was about 5 hours away at this point from needing to head out of town to Raleigh, NC (recap here), and I had no other tools that would give me the right depth and shape. Disappointed but undeterred, I figured the next best thing would be to ask to borrow tools from the person I’d be visiting (thankfully, it was a trip to visit some DIY blogging friends just for fun — my pal Brittany just so happened to have a band saw in her garage). Of course, now I want one of those, too.
Of course, I’d never actually used a band saw before, so despite the general don’t-cut-your-fingers-off rule, the piece still came out a little wonky (mostly due to my non-templating sketch). I was able to shape it a little more with an orbital sander. I also carved the edges out a little more and did a final sanding with high grit sandpaper before stain.
Since the overall concept was to make this look like an inlay, I wanted to use glitter with a little more grit and sparkle: enter, German glass glitter. It’s really amazing stuff in person. To paint it into place, I relied on a small paint brush (tip: if the brush starts to fray a little, spin it as you’re dipping it into the glue to get the point fine again… check out my video to see a demo of that).
You can layer the glitter in, too: after giving it some time to dry, paint another bit of glue on top of the glitter and add more into the recessed areas. It will add depth!
I added extra-fine gold glitter around the edge and sealed the whole thing with a clear gloss spray, then drilled a hole through the top and threaded it so it could hang on the tree.
Caveat: before I sealed with a clear gloss, I actually tried to seal with an old polycrylic which unfortunately made the top and bottom tips look faded/cloudy once it dried. At first I thought I’d lean into the mistake by painting the back and sides with chalk paint and sanding to make it look rustic, but it looked really sad instead and totally detracted from the sparkle on the front. I wanted to get this done in time for the blog hop, so I just continued on with sealing again and adding the glitter around the edge. So, if you try a project like this, don’t make my mistake and you’ll get even better results!
You can also try other inlay methods, other glitter colors, fill in the center vs the outer rings with opposite hues, etc… the possibilities are pretty endless!
All in all, I think it’s going to make a nice addition to my white/gold/chrome/woodland Christmas decor theme this year (and the less I need to spend on ornaments, the more budget I have to make Christmas cocktails, hehe).
Want to try this for yourself? You can download my template here.
To be perfectly frank, I think the photos really don’t do the sparkle on this piece enough justice (in fact, I worried that it was looking too drab in photos). So, I made a video tutorial too (I’d love it if you subscribed if you haven’t already… with what I’ve learned in making this tutorial, there is more to come no doubt!).
As I mentioned, this DIY was part of a blog hop, with 25 other bloggers participating — aka, enough DIY Christmas ideas to keep you busy right up until the actual holiday (if you were so ambitiously inclined). So, check out a preview of the other projects and bloggers participating in the images below. You can also head over to the Remodelaholic post (who is hosting this hop) to check out other DIYers submitting their inspired ideas (on social media, you can look for #CreativeChristmas to find them all).
DIY Christmas Trees and Ornaments
Wintry Silver Dollar Store Christmas Tree Decor | Remodelaholic Marbled Christmas Ornaments | Doodlecraft Scrap Wood Inlay Ornaments | The Ugly Duckling House (you’re here!) Woodburned Wood Slice Ornaments | Sisters What Flocked Pine Cones | Practical and Pretty Abstract Monogram Ornaments | Domicile37 Concrete Christmas Ornaments | The Palette Muse Wood Slice Deer Ornaments | Our Crafty Mom Vintage Gumball Machine Ornaments | Beth Watson Design Studio Etched Glass Ornaments | Just Call Me Homegirl Unicorn Inspired Christmas Tree | The DIY Mommy Driftwood Reindeer Ornaments | Sustain My Craft Habit
DIY Christmas Gifts and Decor
Christmas Pine Hoop Wreath | This Mama’s Dance Gingerbread Man Candles | Nourish and Nestle Wire and Glass Chandelier | Home with Cupcakes and Crinoline Christmas Scroll Wall Art | Grace In My Space Lighted Wood Trees | Frazzled Joy Crocheted Christmas Hat | Luz Patterns Christmas Card Photo Display| Hertoolbelt JOY Porch Sign | Ginger Snap Crafts Folding Bar Cart Table | Everyday Party Magazine Wood and Burlap Christmas Sign | Leap of Faith Crafting Wood Block Snowman | Anika’s DIY Life Holiday Candle Wrap | Dragonfly & Lily Pads Christmas Pom Pom Pillow | Small Home Soul Handlettered Wall Art | Smiling Colors
Those of us who did videos for this hop can be found in the playlist below, so those of you who would rather watch than read (or just want to blow off work for a few more minutes) have something, too! *If you’re having difficulty playing it, you can jump over to the playlist here.*
There you have it! Hope you’re getting into the holiday spirit just in time. Will you be working on any decor ideas this Christmas? This is going to be a very busy holiday season for me, so be sure to check back in for more DIYs (I’m going to give that epoxy inlay idea a shot, and a few more scrap ideas are just bubbling in the ol’ brain). Have a great weekend!
You'll Also Love
25 Great Gift Ideas for the Craft Beer Lover
DIY Wooden Couch Sleeve
It’s Pronounced “Damn Good Cookie̶...
Lots of Sneak Peeks: Riding the Buildathon Wave
The post Wood Inlay Ornament with German Glass Glitter appeared first on The Ugly Duckling House.
Website // Subscribe // Advertise // Twitter // Facebook // Google+
from car2 http://ift.tt/2mesqe5 via as shown a lot
0 notes
Text
Wood Inlay Ornament with German Glass Glitter
Hi friends! And hi to new friends visiting from the #CreativeChristmas Challenge hosted by Remodelaholic!
To those of you who don’t know me yet: welcome. Everyone else has already started drinking and saying really embarrassing things (about themselves, not you… we’re not a super judgmental bunch). To those of you who already know me: cheers. As always, you rock. And I was just kidding about the drinking thing (unless it’s football season and a Saturday, which yes to both).
Anyway, from time to time, I like to throw my hat in on a DIY challenge or two because nothing excuses buying more power tools like overcommitting to a deadline for fun (like the 2×4 summer challenge and boom: new coffee table!). This time around, the theme was making something for Christmas. I’ve already been finding inspiration for my color scheme this year in the form of acorns, snowflakes, owls, and other wintery-woodland things, so I figured: why not see if I can fill up the inevitable empty parts of my tree with what I have on hand, rather than buying a bunch of new ornaments? I also just happened upon a set of carving bits for my Dremel and have been itching to experiment with epoxy/inlays/resins, so I started playing around until this happened:
And as a fun little bonus: I actually made a video of it too!
Tools and Materials
affiliate links of items I recommend and use are listed in this post, which support this site at no cost to you… thanks!
scrap wood (I had 1″ x 4″ poplar)
scissors
printer paper
inkjet printer
acetone or nail polish remover
Dremel 200
Dremel engraving/carving kit
band saw or scroll saw
random orbit sander
wood stain (I used Minwax Ipswich Pine and washed while it was still wet with Early American… I’ll have to show you guys more about this as I’ve done it a number of times to get the colors I like)
Mod Podge
small detail paint brush
Miss Mustard Seed’s German Glass Glitter in Silver Tiara
Martha Stewart Crafts extra fine glitter in Smoky Quartz
clear spray sealer (gloss)
small drill bit
thread (I used stuff from my cross stitch stash)
First things first: print out the image (mine is available for download near the end of the post) and cut it out. I used a scrap piece of poplar that was bound for the burn pile, so I wasn’t really expecting perfection (in fact as you can see, I first used a different image that was WAY too intricate for a first-time experiment and then decided on the final design).
To transfer the ink from the printer paper, I swabbed the back with an acetone nail polish remover. As you can see, the image didn’t transfer perfectly, but it was good enough (I got the idea from my buddy Brad’s video here — then went with the option that wouldn’t require changing out of my pajama pants or going into the cold garage that morning).
Next, I took out my Dremel and a new engraving/carving set I’d recently purchased for another inlay project. In my opinion, crafting is a good intro before graduating to larger pieces, so I figured this would help me practice with diamond tips, how to control the carve, etc. A good method is to create the hard outline first, then carve out the middle, and continue to make the inlay deeper and deeper until it’s got enough depth to hold the inlay material (glitter, epoxy I assume, whatever).
Next, I sketched out the overall shape (spoiler: it wasn’t at all even, so I highly recommend using the template) and then went to cut out the piece. And this is when it seemed like things were conspiring against me: my new scroll saw was broken… right out of the box. Womp, womp.
To make the situation a little stickier, I was about 5 hours away at this point from needing to head out of town to Raleigh, NC (recap here), and I had no other tools that would give me the right depth and shape. Disappointed but undeterred, I figured the next best thing would be to ask to borrow tools from the person I’d be visiting (thankfully, it was a trip to visit some DIY blogging friends just for fun — my pal Brittany just so happened to have a band saw in her garage). Of course, now I want one of those, too.
Of course, I’d never actually used a band saw before, so despite the general don’t-cut-your-fingers-off rule, the piece still came out a little wonky (mostly due to my non-templating sketch). I was able to shape it a little more with an orbital sander. I also carved the edges out a little more and did a final sanding with high grit sandpaper before stain.
Since the overall concept was to make this look like an inlay, I wanted to use glitter with a little more grit and sparkle: enter, German glass glitter. It’s really amazing stuff in person. To paint it into place, I relied on a small paint brush (tip: if the brush starts to fray a little, spin it as you’re dipping it into the glue to get the point fine again… check out my video to see a demo of that).
You can layer the glitter in, too: after giving it some time to dry, paint another bit of glue on top of the glitter and add more into the recessed areas. It will add depth!
I added extra-fine gold glitter around the edge and sealed the whole thing with a clear gloss spray, then drilled a hole through the top and threaded it so it could hang on the tree.
Caveat: before I sealed with a clear gloss, I actually tried to seal with an old polycrylic which unfortunately made the top and bottom tips look faded/cloudy once it dried. At first I thought I’d lean into the mistake by painting the back and sides with chalk paint and sanding to make it look rustic, but it looked really sad instead and totally detracted from the sparkle on the front. I wanted to get this done in time for the blog hop, so I just continued on with sealing again and adding the glitter around the edge. So, if you try a project like this, don’t make my mistake and you’ll get even better results!
You can also try other inlay methods, other glitter colors, fill in the center vs the outer rings with opposite hues, etc… the possibilities are pretty endless!
All in all, I think it’s going to make a nice addition to my white/gold/chrome/woodland Christmas decor theme this year (and the less I need to spend on ornaments, the more budget I have to make Christmas cocktails, hehe).
Want to try this for yourself? You can download my template here.
To be perfectly frank, I think the photos really don’t do the sparkle on this piece enough justice (in fact, I worried that it was looking too drab in photos). So, I made a video tutorial too (I’d love it if you subscribed if you haven’t already… with what I’ve learned in making this tutorial, there is more to come no doubt!).
youtube
As I mentioned, this DIY was part of a blog hop, with 25 other bloggers participating — aka, enough DIY Christmas ideas to keep you busy right up until the actual holiday (if you were so ambitiously inclined). So, check out a preview of the other projects and bloggers participating in the images below. You can also head over to the Remodelaholic post (who is hosting this hop) to check out other DIYers submitting their inspired ideas (on social media, you can look for #CreativeChristmas to find them all).
DIY Christmas Trees and Ornaments
Wintry Silver Dollar Store Christmas Tree Decor | Remodelaholic Marbled Christmas Ornaments | Doodlecraft Scrap Wood Inlay Ornaments | The Ugly Duckling House (you’re here!) Woodburned Wood Slice Ornaments | Sisters What Flocked Pine Cones | Practical and Pretty Abstract Monogram Ornaments | Domicile37 Concrete Christmas Ornaments | The Palette Muse Wood Slice Deer Ornaments | Our Crafty Mom Vintage Gumball Machine Ornaments | Beth Watson Design Studio Etched Glass Ornaments | Just Call Me Homegirl Unicorn Inspired Christmas Tree | The DIY Mommy Driftwood Reindeer Ornaments | Sustain My Craft Habit
DIY Christmas Gifts and Decor
Christmas Pine Hoop Wreath | This Mama’s Dance Gingerbread Man Candles | Nourish and Nestle Wire and Glass Chandelier | Home with Cupcakes and Crinoline Christmas Scroll Wall Art | Grace In My Space Lighted Wood Trees | Frazzled Joy Crocheted Christmas Hat | Luz Patterns Christmas Card Photo Display| Hertoolbelt JOY Porch Sign | Ginger Snap Crafts Folding Bar Cart Table | Everyday Party Magazine Wood and Burlap Christmas Sign | Leap of Faith Crafting Wood Block Snowman | Anika’s DIY Life Holiday Candle Wrap | Dragonfly & Lily Pads Christmas Pom Pom Pillow | Small Home Soul Handlettered Wall Art | Smiling Colors
Those of us who did videos for this hop can be found in the playlist below, so those of you who would rather watch than read (or just want to blow off work for a few more minutes) have something, too! *If you’re having difficulty playing it, you can jump over to the playlist here.*
youtube
There you have it! Hope you’re getting into the holiday spirit just in time. Will you be working on any decor ideas this Christmas? This is going to be a very busy holiday season for me, so be sure to check back in for more DIYs (I’m going to give that epoxy inlay idea a shot, and a few more scrap ideas are just bubbling in the ol’ brain). Have a great weekend!
You'll Also Love
25 Great Gift Ideas for the Craft Beer Lover
DIY Wooden Couch Sleeve
It’s Pronounced “Damn Good Cookie̶...
Lots of Sneak Peeks: Riding the Buildathon Wave
.yuzo_related_post img{width:170px !important; height:170px !important;} .yuzo_related_post .relatedthumb{line-height:14px;background:#ffffff !important;color:#454747!important;} .yuzo_related_post .relatedthumb:hover{background:#ffffff !important; -webkit-transition: background 0.2s linear; -moz-transition: background 0.2s linear; -o-transition: background 0.2s linear; transition: background 0.2s linear;;color:#454747!important;} .yuzo_related_post .relatedthumb a{color:#102a3b!important;} .yuzo_related_post .relatedthumb a:hover{ color:#113f5e}!important;} .yuzo_related_post .relatedthumb:hover a{ color:#113f5e!important;} .yuzo_related_post .relatedthumb:hover .yuzo__text--title{ color:#113f5e!important;} .yuzo_related_post .yuzo_text, .yuzo_related_post .yuzo_views_post {color:#454747!important;} .yuzo_related_post .relatedthumb:hover .yuzo_text, .yuzo_related_post:hover .yuzo_views_post {color:#454747!important;} .yuzo_related_post .relatedthumb{ margin: 0px 6px 0px 6px; padding: 0px 0px 0px 0px; } jQuery(document).ready(function( $ ){ jQuery('.yuzo_related_post .yuzo_wraps').equalizer({ columns : '> div' }); });
The post Wood Inlay Ornament with German Glass Glitter appeared first on The Ugly Duckling House.
Website // Subscribe // Advertise // Twitter // Facebook // Google+
Read more http://ift.tt/2mesqe5 Areas served: Winston-Salem, High Point, Yadkinville, Mocksville, Advance, Clemmons, Kernersville, Greensboro, Walnut Cove, Statesville, NC, North Carolina Services: House painting, roofing, deck building, landscaping, Carpentry, Flooring, tile, hardwood, remodeling, home improvement, interior, exterior
0 notes
Text
Wood Inlay Ornament with German Glass Glitter
Hi friends! And hi to new friends visiting from the #CreativeChristmas Challenge hosted by Remodelaholic!
To those of you who don’t know me yet: welcome. Everyone else has already started drinking and saying really embarrassing things (about themselves, not you… we’re not a super judgmental bunch). To those of you who already know me: cheers. As always, you rock. And I was just kidding about the drinking thing (unless it’s football season and a Saturday, which yes to both).
Anyway, from time to time, I like to throw my hat in on a DIY challenge or two because nothing excuses buying more power tools like overcommitting to a deadline for fun (like the 2×4 summer challenge and boom: new coffee table!). This time around, the theme was making something for Christmas. I’ve already been finding inspiration for my color scheme this year in the form of acorns, snowflakes, owls, and other wintery-woodland things, so I figured: why not see if I can fill up the inevitable empty parts of my tree with what I have on hand, rather than buying a bunch of new ornaments? I also just happened upon a set of carving bits for my Dremel and have been itching to experiment with epoxy/inlays/resins, so I started playing around until this happened:
And as a fun little bonus: I actually made a video of it too!
Tools and Materials
affiliate links of items I recommend and use are listed in this post, which support this site at no cost to you… thanks!
scrap wood (I had 1″ x 4″ poplar)
scissors
printer paper
inkjet printer
acetone or nail polish remover
Dremel 200
Dremel engraving/carving kit
band saw or scroll saw
random orbit sander
wood stain (I used Minwax Ipswich Pine and washed while it was still wet with Early American… I’ll have to show you guys more about this as I’ve done it a number of times to get the colors I like)
Mod Podge
small detail paint brush
Miss Mustard Seed’s German Glass Glitter in Silver Tiara
Martha Stewart Crafts extra fine glitter in Smoky Quartz
clear spray sealer (gloss)
small drill bit
thread (I used stuff from my cross stitch stash)
First things first: print out the image (mine is available for download near the end of the post) and cut it out. I used a scrap piece of poplar that was bound for the burn pile, so I wasn’t really expecting perfection (in fact as you can see, I first used a different image that was WAY too intricate for a first-time experiment and then decided on the final design).
To transfer the ink from the printer paper, I swabbed the back with an acetone nail polish remover. As you can see, the image didn’t transfer perfectly, but it was good enough (I got the idea from my buddy Brad’s video here — then went with the option that wouldn’t require changing out of my pajama pants or going into the cold garage that morning).
Next, I took out my Dremel and a new engraving/carving set I’d recently purchased for another inlay project. In my opinion, crafting is a good intro before graduating to larger pieces, so I figured this would help me practice with diamond tips, how to control the carve, etc. A good method is to create the hard outline first, then carve out the middle, and continue to make the inlay deeper and deeper until it’s got enough depth to hold the inlay material (glitter, epoxy I assume, whatever).
Next, I sketched out the overall shape (spoiler: it wasn’t at all even, so I highly recommend using the template) and then went to cut out the piece. And this is when it seemed like things were conspiring against me: my new scroll saw was broken… right out of the box. Womp, womp.
To make the situation a little stickier, I was about 5 hours away at this point from needing to head out of town to Raleigh, NC (recap here), and I had no other tools that would give me the right depth and shape. Disappointed but undeterred, I figured the next best thing would be to ask to borrow tools from the person I’d be visiting (thankfully, it was a trip to visit some DIY blogging friends just for fun — my pal Brittany just so happened to have a band saw in her garage). Of course, now I want one of those, too.
Of course, I’d never actually used a band saw before, so despite the general don’t-cut-your-fingers-off rule, the piece still came out a little wonky (mostly due to my non-templating sketch). I was able to shape it a little more with an orbital sander. I also carved the edges out a little more and did a final sanding with high grit sandpaper before stain.
Since the overall concept was to make this look like an inlay, I wanted to use glitter with a little more grit and sparkle: enter, German glass glitter. It’s really amazing stuff in person. To paint it into place, I relied on a small paint brush (tip: if the brush starts to fray a little, spin it as you’re dipping it into the glue to get the point fine again… check out my video to see a demo of that).
You can layer the glitter in, too: after giving it some time to dry, paint another bit of glue on top of the glitter and add more into the recessed areas. It will add depth!
I added extra-fine gold glitter around the edge and sealed the whole thing with a clear gloss spray, then drilled a hole through the top and threaded it so it could hang on the tree.
Caveat: before I sealed with a clear gloss, I actually tried to seal with an old polycrylic which unfortunately made the top and bottom tips look faded/cloudy once it dried. At first I thought I’d lean into the mistake by painting the back and sides with chalk paint and sanding to make it look rustic, but it looked really sad instead and totally detracted from the sparkle on the front. I wanted to get this done in time for the blog hop, so I just continued on with sealing again and adding the glitter around the edge. So, if you try a project like this, don’t make my mistake and you’ll get even better results!
You can also try other inlay methods, other glitter colors, fill in the center vs the outer rings with opposite hues, etc… the possibilities are pretty endless!
All in all, I think it’s going to make a nice addition to my white/gold/chrome/woodland Christmas decor theme this year (and the less I need to spend on ornaments, the more budget I have to make Christmas cocktails, hehe).
Want to try this for yourself? You can download my template here.
To be perfectly frank, I think the photos really don’t do the sparkle on this piece enough justice (in fact, I worried that it was looking too drab in photos). So, I made a video tutorial too (I’d love it if you subscribed if you haven’t already… with what I’ve learned in making this tutorial, there is more to come no doubt!).
As I mentioned, this DIY was part of a blog hop, with 25 other bloggers participating — aka, enough DIY Christmas ideas to keep you busy right up until the actual holiday (if you were so ambitiously inclined). So, check out a preview of the other projects and bloggers participating in the images below. You can also head over to the Remodelaholic post (who is hosting this hop) to check out other DIYers submitting their inspired ideas (on social media, you can look for #CreativeChristmas to find them all).
DIY Christmas Trees and Ornaments
Wintry Silver Dollar Store Christmas Tree Decor | Remodelaholic Marbled Christmas Ornaments | Doodlecraft Scrap Wood Inlay Ornaments | The Ugly Duckling House (you’re here!) Woodburned Wood Slice Ornaments | Sisters What Flocked Pine Cones | Practical and Pretty Abstract Monogram Ornaments | Domicile37 Concrete Christmas Ornaments | The Palette Muse Wood Slice Deer Ornaments | Our Crafty Mom Vintage Gumball Machine Ornaments | Beth Watson Design Studio Etched Glass Ornaments | Just Call Me Homegirl Unicorn Inspired Christmas Tree | The DIY Mommy Driftwood Reindeer Ornaments | Sustain My Craft Habit
DIY Christmas Gifts and Decor
Christmas Pine Hoop Wreath | This Mama’s Dance Gingerbread Man Candles | Nourish and Nestle Wire and Glass Chandelier | Home with Cupcakes and Crinoline Christmas Scroll Wall Art | Grace In My Space Lighted Wood Trees | Frazzled Joy Crocheted Christmas Hat | Luz Patterns Christmas Card Photo Display| Hertoolbelt JOY Porch Sign | Ginger Snap Crafts Folding Bar Cart Table | Everyday Party Magazine Wood and Burlap Christmas Sign | Leap of Faith Crafting Wood Block Snowman | Anika’s DIY Life Holiday Candle Wrap | Dragonfly & Lily Pads Christmas Pom Pom Pillow | Small Home Soul Handlettered Wall Art | Smiling Colors
Those of us who did videos for this hop can be found in the playlist below, so those of you who would rather watch than read (or just want to blow off work for a few more minutes) have something, too! *If you’re having difficulty playing it, you can jump over to the playlist here.*
youtube
There you have it! Hope you’re getting into the holiday spirit just in time. Will you be working on any decor ideas this Christmas? This is going to be a very busy holiday season for me, so be sure to check back in for more DIYs (I’m going to give that epoxy inlay idea a shot, and a few more scrap ideas are just bubbling in the ol’ brain). Have a great weekend!
You'll Also Love
25 Great Gift Ideas for the Craft Beer Lover
DIY Wooden Couch Sleeve
It’s Pronounced “Damn Good Cookie̶...
Lots of Sneak Peeks: Riding the Buildathon Wave
.yuzo_related_post img{width:170px !important; height:170px !important;} .yuzo_related_post .relatedthumb{line-height:14px;background:#ffffff !important;color:#454747!important;} .yuzo_related_post .relatedthumb:hover{background:#ffffff !important; -webkit-transition: background 0.2s linear; -moz-transition: background 0.2s linear; -o-transition: background 0.2s linear; transition: background 0.2s linear;;color:#454747!important;} .yuzo_related_post .relatedthumb a{color:#102a3b!important;} .yuzo_related_post .relatedthumb a:hover{ color:#113f5e}!important;} .yuzo_related_post .relatedthumb:hover a{ color:#113f5e!important;} .yuzo_related_post .relatedthumb:hover .yuzo__text--title{ color:#113f5e!important;} .yuzo_related_post .yuzo_text, .yuzo_related_post .yuzo_views_post {color:#454747!important;} .yuzo_related_post .relatedthumb:hover .yuzo_text, .yuzo_related_post:hover .yuzo_views_post {color:#454747!important;} .yuzo_related_post .relatedthumb{ margin: 0px 6px 0px 6px; padding: 0px 0px 0px 0px; } jQuery(document).ready(function( $ ){ jQuery('.yuzo_related_post .yuzo_wraps').equalizer({ columns : '> div' }); });
The post Wood Inlay Ornament with German Glass Glitter appeared first on The Ugly Duckling House.
Website // Subscribe // Advertise // Twitter // Facebook // Google+
from Home Improvement https://www.uglyducklinghouse.com/wood-inlay-ornament-german-glass-glitter/ via http://www.rssmix.com/
0 notes
Text
Wood Inlay Ornament with German Glass Glitter
Hi friends! And hi to new friends visiting from the #CreativeChristmas Challenge hosted by Remodelaholic!
To those of you who don’t know me yet: welcome. Everyone else has already started drinking and saying really embarrassing things (about themselves, not you… we’re not a super judgmental bunch). To those of you who already know me: cheers. As always, you rock. And I was just kidding about the drinking thing (unless it’s football season and a Saturday, which yes to both).
Anyway, from time to time, I like to throw my hat in on a DIY challenge or two because nothing excuses buying more power tools like overcommitting to a deadline for fun (like the 2×4 summer challenge and boom: new coffee table!). This time around, the theme was making something for Christmas. I’ve already been finding inspiration for my color scheme this year in the form of acorns, snowflakes, owls, and other wintery-woodland things, so I figured: why not see if I can fill up the inevitable empty parts of my tree with what I have on hand, rather than buying a bunch of new ornaments? I also just happened upon a set of carving bits for my Dremel and have been itching to experiment with epoxy/inlays/resins, so I started playing around until this happened:
And as a fun little bonus: I actually made a video of it too!
Tools and Materials
affiliate links of items I recommend and use are listed in this post, which support this site at no cost to you… thanks!
scrap wood (I had 1″ x 4″ poplar)
scissors
printer paper
inkjet printer
acetone or nail polish remover
Dremel 200
Dremel engraving/carving kit
band saw or scroll saw
random orbit sander
wood stain (I used Minwax Ipswich Pine and washed while it was still wet with Early American… I’ll have to show you guys more about this as I’ve done it a number of times to get the colors I like)
Mod Podge
small detail paint brush
Miss Mustard Seed’s German Glass Glitter in Silver Tiara
Martha Stewart Crafts extra fine glitter in Smoky Quartz
clear spray sealer (gloss)
small drill bit
thread (I used stuff from my cross stitch stash)
First things first: print out the image (mine is available for download near the end of the post) and cut it out. I used a scrap piece of poplar that was bound for the burn pile, so I wasn’t really expecting perfection (in fact as you can see, I first used a different image that was WAY too intricate for a first-time experiment and then decided on the final design).
To transfer the ink from the printer paper, I swabbed the back with an acetone nail polish remover. As you can see, the image didn’t transfer perfectly, but it was good enough (I got the idea from my buddy Brad’s video here — then went with the option that wouldn’t require changing out of my pajama pants or going into the cold garage that morning).
Next, I took out my Dremel and a new engraving/carving set I’d recently purchased for another inlay project. In my opinion, crafting is a good intro before graduating to larger pieces, so I figured this would help me practice with diamond tips, how to control the carve, etc. A good method is to create the hard outline first, then carve out the middle, and continue to make the inlay deeper and deeper until it’s got enough depth to hold the inlay material (glitter, epoxy I assume, whatever).
Next, I sketched out the overall shape (spoiler: it wasn’t at all even, so I highly recommend using the template) and then went to cut out the piece. And this is when it seemed like things were conspiring against me: my new scroll saw was broken… right out of the box. Womp, womp.
To make the situation a little stickier, I was about 5 hours away at this point from needing to head out of town to Raleigh, NC (recap here), and I had no other tools that would give me the right depth and shape. Disappointed but undeterred, I figured the next best thing would be to ask to borrow tools from the person I’d be visiting (thankfully, it was a trip to visit some DIY blogging friends just for fun — my pal Brittany just so happened to have a band saw in her garage). Of course, now I want one of those, too.
Of course, I’d never actually used a band saw before, so despite the general don’t-cut-your-fingers-off rule, the piece still came out a little wonky (mostly due to my non-templating sketch). I was able to shape it a little more with an orbital sander. I also carved the edges out a little more and did a final sanding with high grit sandpaper before stain.
Since the overall concept was to make this look like an inlay, I wanted to use glitter with a little more grit and sparkle: enter, German glass glitter. It’s really amazing stuff in person. To paint it into place, I relied on a small paint brush (tip: if the brush starts to fray a little, spin it as you’re dipping it into the glue to get the point fine again… check out my video to see a demo of that).
You can layer the glitter in, too: after giving it some time to dry, paint another bit of glue on top of the glitter and add more into the recessed areas. It will add depth!
I added extra-fine gold glitter around the edge and sealed the whole thing with a clear gloss spray, then drilled a hole through the top and threaded it so it could hang on the tree.
Caveat: before I sealed with a clear gloss, I actually tried to seal with an old polycrylic which unfortunately made the top and bottom tips look faded/cloudy once it dried. At first I thought I’d lean into the mistake by painting the back and sides with chalk paint and sanding to make it look rustic, but it looked really sad instead and totally detracted from the sparkle on the front. I wanted to get this done in time for the blog hop, so I just continued on with sealing again and adding the glitter around the edge. So, if you try a project like this, don’t make my mistake and you’ll get even better results!
You can also try other inlay methods, other glitter colors, fill in the center vs the outer rings with opposite hues, etc… the possibilities are pretty endless!
All in all, I think it’s going to make a nice addition to my white/gold/chrome/woodland Christmas decor theme this year (and the less I need to spend on ornaments, the more budget I have to make Christmas cocktails, hehe).
Want to try this for yourself? You can download my template here.
To be perfectly frank, I think the photos really don’t do the sparkle on this piece enough justice (in fact, I worried that it was looking too drab in photos). So, I made a video tutorial too (I’d love it if you subscribed if you haven’t already… with what I’ve learned in making this tutorial, there is more to come no doubt!).
As I mentioned, this DIY was part of a blog hop, with 25 other bloggers participating — aka, enough DIY Christmas ideas to keep you busy right up until the actual holiday (if you were so ambitiously inclined). So, check out a preview of the other projects and bloggers participating in the images below. You can also head over to the Remodelaholic post (who is hosting this hop) to check out other DIYers submitting their inspired ideas (on social media, you can look for #CreativeChristmas to find them all).
DIY Christmas Trees and Ornaments
Wintry Silver Dollar Store Christmas Tree Decor | Remodelaholic Marbled Christmas Ornaments | Doodlecraft Scrap Wood Inlay Ornaments | The Ugly Duckling House (you’re here!) Woodburned Wood Slice Ornaments | Sisters What Flocked Pine Cones | Practical and Pretty Abstract Monogram Ornaments | Domicile37 Concrete Christmas Ornaments | The Palette Muse Wood Slice Deer Ornaments | Our Crafty Mom Vintage Gumball Machine Ornaments | Beth Watson Design Studio Etched Glass Ornaments | Just Call Me Homegirl Unicorn Inspired Christmas Tree | The DIY Mommy Driftwood Reindeer Ornaments | Sustain My Craft Habit
DIY Christmas Gifts and Decor
Christmas Pine Hoop Wreath | This Mama’s Dance Gingerbread Man Candles | Nourish and Nestle Wire and Glass Chandelier | Home with Cupcakes and Crinoline Christmas Scroll Wall Art | Grace In My Space Lighted Wood Trees | Frazzled Joy Crocheted Christmas Hat | Luz Patterns Christmas Card Photo Display| Hertoolbelt JOY Porch Sign | Ginger Snap Crafts Folding Bar Cart Table | Everyday Party Magazine Wood and Burlap Christmas Sign | Leap of Faith Crafting Wood Block Snowman | Anika’s DIY Life Holiday Candle Wrap | Dragonfly & Lily Pads Christmas Pom Pom Pillow | Small Home Soul Handlettered Wall Art | Smiling Colors
Those of us who did videos for this hop can be found in the playlist below, so those of you who would rather watch than read (or just want to blow off work for a few more minutes) have something, too! *If you’re having difficulty playing it, you can jump over to the playlist here.*
youtube
There you have it! Hope you’re getting into the holiday spirit just in time. Will you be working on any decor ideas this Christmas? This is going to be a very busy holiday season for me, so be sure to check back in for more DIYs (I’m going to give that epoxy inlay idea a shot, and a few more scrap ideas are just bubbling in the ol’ brain). Have a great weekend!
You'll Also Love
25 Great Gift Ideas for the Craft Beer Lover
DIY Wooden Couch Sleeve
It’s Pronounced “Damn Good Cookie̶...
Lots of Sneak Peeks: Riding the Buildathon Wave
.yuzo_related_post img{width:170px !important; height:170px !important;} .yuzo_related_post .relatedthumb{line-height:14px;background:#ffffff !important;color:#454747!important;} .yuzo_related_post .relatedthumb:hover{background:#ffffff !important; -webkit-transition: background 0.2s linear; -moz-transition: background 0.2s linear; -o-transition: background 0.2s linear; transition: background 0.2s linear;;color:#454747!important;} .yuzo_related_post .relatedthumb a{color:#102a3b!important;} .yuzo_related_post .relatedthumb a:hover{ color:#113f5e}!important;} .yuzo_related_post .relatedthumb:hover a{ color:#113f5e!important;} .yuzo_related_post .relatedthumb:hover .yuzo__text--title{ color:#113f5e!important;} .yuzo_related_post .yuzo_text, .yuzo_related_post .yuzo_views_post {color:#454747!important;} .yuzo_related_post .relatedthumb:hover .yuzo_text, .yuzo_related_post:hover .yuzo_views_post {color:#454747!important;} .yuzo_related_post .relatedthumb{ margin: 0px 6px 0px 6px; padding: 0px 0px 0px 0px; } jQuery(document).ready(function( $ ){ jQuery('.yuzo_related_post .yuzo_wraps').equalizer({ columns : '> div' }); });
The post Wood Inlay Ornament with German Glass Glitter appeared first on The Ugly Duckling House.
Website // Subscribe // Advertise // Twitter // Facebook // Google+
from The Ugly Duckling House https://www.uglyducklinghouse.com/wood-inlay-ornament-german-glass-glitter/
0 notes