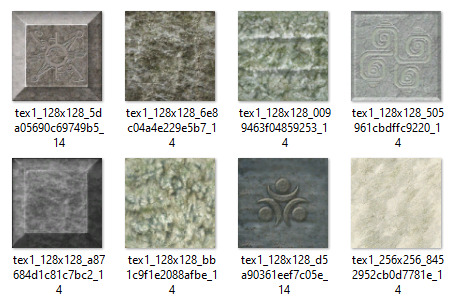
#i had to go back into my files and disable layers to get these screenshots Dx and i have a LOT of layers but for you anon i did it
Explore tagged Tumblr posts
Visit Tumblr Blog
Explore Tumblr blogs with no restrictions, modern design and the best experience.
Last Seen Tumblr Blogs


Fun Fact
The KCSC sent more than 20K requests to delete posts related to prostitution and porn to Tumblr from January to June 2017.
Note
Hiii can u pls do a face tut pls I’m begging you
heya! sorry this took some time, i just moved and it's been really hectic @@
and thank you for the question! i'll use stuff for bela and shadowheart as an example for ya for the two styles i usually do
warning, i am not a teacher and i'm still experimenting and learning so uhh some of this might be scuffed but is how i do it :>
also noting that i use csp or photoshop depending on my mood and what brushes i want to use but the same technique works for either and i use 2 brushes for the main bits and additional brushes if i want to add texture
--
1 - so after i have the sketch roughed, i usually put it on a multiply layer and add a background layer under it (i leave it white or almost white if i'm just doing a doodle or sketch) and i start to figure out the lighting and shading under the outline layer
the lighting is usually pretty rough and i'll start to understand what i'm going for as it starts to shape up but i try not to reduce the brush size too much so i don't get too muddled


(at this point i'm going thru my mantra of "trust the process" and breathing into a paper bag and kicking and screaming about how i want to quit)
--
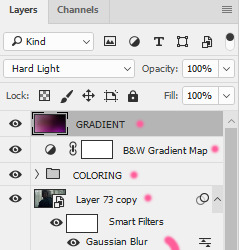
2 - once i have the lighting somewhat how i want it, i start tweaking the color and i do it by using adjustment layers and manually painting. this part is kinda like cooking and tasting as you go, if i feel i want the image to feel colder/warmer i'll adjust accordingly but i will tell you how i did it for both examples below:


for bela, i actually painting above the shading/lighting layer and used "soft light" and "hard light" blending modes for the hair and skin to fit more with how i wanted it to look. i used color balance and curves for the background to get it to more of a purple/blue and darker
for shadowheart, i actually put the color below the shading/lighting layer and left the color as is and swapped the blending mode for the shading/lighting layer to "multiply" and then did adjustments using curves and gradient maps using "hard light" and "soft light" too and i think i had a "color burn" just for fun
this is my fav part of the process bc i just experiment and mess around with different layers. i usually have a vision for how i want the color and lighting to look but there's always room for new ideas! so i just mess around for a while here till i'm happy!
--
3 - rendering time! um i don't really have much advice here except i just start going in and rendering in closer detail. and remember references are your friend!!!
bela render progression:


shadowheart render progression:


i sometimes end up changing the drawing quite a bit during rendering but that's okay bc as you go into detail, you will notice discrepancies from the pre-render stages
for the style i used with shadowheart i just paint over the outline pretty much with some bits of it left it and i blend more to smooth it out more. for the style i used with bela, i add back in any outlines i painted over that i wanted to keep
--
and at the end of the day it's your art and how you express it is what's always gonna be the best so trust your gut (and references) but also it's okay to take creative liberties and go with the "cool rule" :3
and keep practicing!!!! i def feel i've gotten better with drawing faces compared to a year ago
i hope this helps and if it didn't ":3 i hope you had fun reading
#i hope this makes sense#i had to go back into my files and disable layers to get these screenshots Dx and i have a LOT of layers but for you anon i did it#i didn't know if u just wanted a broad tut of how i draw the face or if you wanted smth specific but i hope this helps anyways#i didn't promise this would help#pretty long post#asks#anonymous#my art
5 notes
·
View notes
Text
So, as some of you might know, one of my GIFs was recently featured on the Tumblr Radar - which is pretty cool! I was fairly happy with how that one turned out, especially considering that I made it rather last-minute on a whim to acknowledge Valentine’s Day. It understandably received a lot of attention as a result of this, and I’ve loved reading through all the comments and tags (especially all the ones about how people want to eat the heart containers from TP); however, I wanted to clear up a bit of a misunderstanding surrounding the creation of that GIF, as there were additionally a lot of tags along the lines of #3d art or #artists on tumblr in that influx of reblogs. I don’t want to take credit for something I didn’t do, even accidentally, and so allow me to be perfectly clear: the heart container GIF is not something I modeled and rendered myself! It is the original in-game model, recorded in-game using the Dolphin GCN/Wii emulator, with very little done in the way of post-processing in Photoshop. If that sounds impossible or confusing (which is perfectly understandable, for those of you unaware of what Dolphin is capable of), I’d like to take this opportunity to give you guys a bit of a “peek behind the curtain,” as it were, to show you guys exactly how I made that particular GIF, as well as similar ones I’ve made (such as those in my #items tag).
I didn’t take screenshots of my initial process (nor did I save the edited textures I used), so I’ll be recreating it from the ground up for the sake of demonstration, but that shouldn’t be a problem.
First thing’s first: finding a heart container! For this particular GIF, I wound up using the one that spawns after the Morpheel fight at the end of Lakebed Temple. I’m sure many others would work just as well (I think, at the time, this one just happened to be the most accessible to me), but let’s use the same one for the sake of it.

Morpheel: defeated. And I didn’t even need Zora Armor! (Seriously, we do that in the speedrun. But I’m getting off-topic.) Of course, we’re going to need clean, close-up footage of the heart container rotating in order to do what we want to do, so let’s shift into first-person mode and and get a bit closer to the thing.

Now, because the only UI-element in this shot is Link’s health (and it’s in the corner and relatively non-obtrusive), removing it isn’t strictly necessary - but I’ve already made a texture pack that removes UI elements as part of my Text Free TP project from a while back, so let’s load it anyway, for the sake of being thorough. This shot is also still a bit too far away, so next we’ll be utilizing Dolphin’s free cam feature (which can be accessed by going to Graphics > Advanced > Free Look and checking “Enable” in Dolphin) in order to get the heart container in a more central position. Now we’re left with this:

And we’re already looking well on our way to making a nice, solid color background GIF. But how do we get the solid color? Well, that’s where more texture editing comes into play - and here I have to give credit where credit is due, as this is a trick I picked up from 186px, after wondering how they were able to make this GIFset of Link fighting Ganondorf in The Wind Waker in a great, black void. (Seriously, shoutouts to them, their stuff was and still is amazing.)
But, very basically, we’ll be using Dolphin’s texture dump feature in order to find the textures that need to be edited so we can replace them with pure black ones. Texture dumping can be enabled by going to Graphics > Advanced > Utility and checking “Dump Textures,” and the file path for these dumped textures by default is Documents > Dolphin Emulator > Dump > Textures > [Game ID]. (In the case of Twilight Princess, the Game ID is GZ2E01). After dumping the textures in the Morpheel arena, my GZ2E01 folder looks like this:

When editing textures, sometimes you’ll have to endure a bit of trial and error until you find the correct ones. Luckily, in this scene, the textures making up the sand floor and the stone walls are rather large, so let’s isolate the ones we’re pretty sure are responsible (plus a few others that are obviously environmental, just to be safe).
Now, when loading custom textures, it’s important that the file name you’re trying to load matches up exactly with the original texture that you’re trying to replace. I have a plain, black, square PNG that I keep on my desktop specifically for this purpose; I copy the file names of the textures I’ve isolated, then rename and drag and drop the black PNG into the folder where custom textures are loaded (Documents > Dolphin Emulator > Load > Textures > [Game ID]). Like so:
And now, to refresh our custom textures by disabling and reenabling them in Dolphin’s graphics settings:

And voilà! We have something that very nearly resembles the GIF I made (well, a still of it, at least). I skipped over a few details, such as the fact that TP has a pretty significant amount of bloom surrounding just about everything, which I’m fairly certain I disabled using cheat codes when I made the original GIF in order to give it an overall cleaner look. It’s hard to tell from this still, but TP’s heart containers also sparkle considerably in a way that’s random and not loopable; I found the texture responsible for this sparkle and replaced it with a transparent 1x1 PNG, in order to remove it entirely (as well as the texture behind the “glow” of the thing). After that, it was as simple as recording the game with OBS, dumping the MP4 into Photoshop, cropping and cutting it to make it loop, and adding some adjustment layers for contrast and color. So...yeah!
I hope this has served to clear up any confusion about some of the things that I’ve made in the past. I’m not a 3D artist - just a person with an emulator and way too much free time on their hands. This stuff is really, super simple, and also lots of fun, so I would highly encourage anyone with the means to mess around with emulation on their own some time to see what they can do! (Even if you don’t have Photoshop and can’t make GIFs, there are always edits, such as this one I made of Midna.) For Twilight Princess in particular, I also highly recommend checking out TPGZ; it’s a patch you can apply to a clean ISO of the original game, designed with the purposes of helping folks learn and practice the speedruns (yes, I had to bring up speedrunning one last time, kill me), but it’s got nifty features like built-in savestates, cheat codes, and HUD removal, as well as the ability to freeze actors while maintaining the ability to move the camera freely, among other things (all things that are very useful as far as making unique graphics go). Sorry this post got as long as it did, but I at the very least hope that some of you found it educational and/or interesting. Cheers!
#uhhhhh i don't even know how to tag this#not like it will show up in the tags anyway because i've linked five billion things#twilight princess#long post#tutorials#i guess????#resources#myposts*#i didn't intend for this to be a tutorial i just wanted to explain that i'm not a 3d artist lmfao#OTL
72 notes
·
View notes
Photo

GIF ICON & HEADER TUTORIAL
I was asked to do a tutorial on my old mobile layouts where I had a gif as both my icon and header, so here we are! I also uploaded a PSD here that you can use either as a template or as a guide/reference point in case you get lost somewhere along the way.
You’ll need Photoshop and basic knowledge on how to make gifs using the timeline.
I think this goes without saying, but before I get into it, I do want to clarify that you won’t actually be uploading a gif as your icon. It’s just the illusion of having a gif as your icon, when in reality it’s just an all-in-one header image. You’ll need to make sure your icon is disabled, though!
[NOTE: This is using the old dashboard’s mobile theme dimensions, because new dashboard is truly whack and I haven’t the slightest clue what the new dimensions for headers are. If you know the new dimensions, you’re welcome to change numbers and dimensions as you see fit—which you’re welcome to do regardless, obviously—though I do think it’s a bit of a vice versa situation, where anything that looks normal on the old dashboard may look off on the new, and anything that looks normal on the new dashboard may look slightly off on the old.]
I. MAKE YOUR GIFS
We’ll be making two gifs separately.
Here are the dimensions I’ll be using:
583x327 for the actual header itself (I normally size my headers 640x360, but these are the dimensions I pulled when I took a screenshot on desktop and measured the mobile header in PS)
135x135 for the icon, later to be cut to a round 128x128
Again, you’re free to play around with the dimensions! I did these particular dimensions to get as close as possible to the actual header and icon size.
This is more of a recommendation than an actual necessity, but what I like to do when I make my headers (and I do this for all my gifs in general as well) is oversize. For example, I make the gif 587x331 so that I can crop it down to 583x327. This is to avoid having borders on the edges.

Here's my header after sharpening and coloring:

And here's my icon:

When I want that extra pop of color, I go ahead and play around with gradients. Not Gradient Map, or Gradient Fill, but actual gradients. You can play around with the Gradient Tool, make your own using the Brush tool, or download gradient textures. @argetnallison has a great tutorial on making your own gradients here.
This is my header after adding my gradient and setting it to Hard Light:

II. GROUP YOUR LAYERS
After you’ve sharpened and colored, you should put all your layers into a group. Make sure to do this for both gifs.
CTRL + A or Select > All
Layer > Layer Mask > Reveal Selection
Both your gifs should now be in a group with a Layer Mask.

For the icon, you'll want to use the round selection tool (Elliptical Marquee Tool) to make a 128x128 selection.

SHIFT + CTRL + I or Select > Inverse
CTRL + I or Image > Adjustments > Inverse (ON THE LAYER MASK!)
III. FINISHING TOUCHES
Before we actually bring the two gifs together, we’re going to go back to our header gif and make our borders. What kind of border you use at the bottom is entirely up to you, so long as it's the same color as the background of your mobile theme. My personal favorite is the ripped paper effect.

To make the border for the icon, we're first going to make a guide in the middle of the gif. I use guides to make sure everything (like text, for example) is perfectly centered.
View > New Guide > Vertical > *WIDTH DIVIDED BY 2*
Using the round selection tool again, we're going to make a selection of 135x135 (7px bigger than our icon, which means we'll have a 3.5px border) and paint it the same color as our other border. Place this in the center, 3px from the bottom.

From there, all that's left to do is drag the icon group onto the same file as the header and center it with the icon border.

And tada! We have our final product.
#completeresources#allresources#yeahps#itsphotoshop#resources#tutorials#ps asks#mine*#please feel free to send me a message if any of this is too confusing or too vague#it always takes me eons to write tutorials because i feel like i'm not adequately explaining things
2K notes
·
View notes
Text
”Quick” panshot tutorial.
Since anon wanted to know my process. I apologize if it’s not that good (or long. I’m writing this out as I make this pan).
Under a read more because it might get screenshot heavy (though I still think it doesn't work too well on mobile...)
1. Get the screenshots.
I get my screenshots by downloading the video files, and then use the screencap feature on Media Player Classic. There are other media players, with their own ways of screencaping, so it’s always good to do a quick search on the option works.
Print screening also works, if streaming is preferred, but I like downloading, because I can get the best quality possible. I can also get clean pauses and use the frame by frame feature this way.

2. Open them in an image editing program.
For this part, I use Gimp. It’s similar to Photoshop, but free. Like screencapping though, I’m sure other image editing programs/apps can be use, and I don’t use any fancy tools for these, so it should be easy to ‘translate’ to other programs.
3. Create a New Image
Open up a new canvas with File > New.
Since the image in this tutorial in on the vertical side, we need a canvas side that’s pretty tall. Don’t worry if the canvas is too big. Since one screencap here is 1280x720, we can safely use a width of 1300, so for height, I’ll go with...3000, to be really safe.

-

4. Move the screenshots to the blank canvas.
This can be done in 2 ways. Each image has it own tab, go to one, copy (Ctrl+C), and paste (Ctrl+V) the image. Then use the Move tool to move around the blank image.

-

There’s going to be a moving dotted line around the image pasted, because it’s a ‘floating’ selection and needs to be ‘anchored’. On the Layers window, on the lower right, click the anchor symbol, before the trash icon. If you want each screenshot to be its own Layer, click the first icon (Create New Layer) instead.

The images can also be dragged and dropped onto the blank canvas, With this method, a new Layer is created automatically.

-

-

5 Align the image.
With the newly pasted/moved image, align the first screencap with lower one. To make this easier, reduce the image opacity. This can be adjusted on the same window, with the Layers. I usually reduce it to around 50%.

-

Now with that done, the image can be aligned much easier. Pick a spot, zoom in, and move it around.

-

Afterwards, to make it blend easier, I take a 100 pixel soft eraser, and erase around the area of the dotted line. This step is optional, but it reduces that harsh line on some images.
Here’s a good example. The screenshots have been aligned, yet, looking at it closer, shows this.

...and here it is already a quick brush with the Eraser (The dotted circle is where I had my erase when I PrntScreen).

Oh,and make sure to change the opacity back to 100% after alignment.

(The bottom layer is disabled here)
6. Repeat Step 5 for the others images.

7. Merge the image.
Once all of the images in the scene have aligned, we now got a bunch of Layers.

Gotta turn those into one. To do that, on the top of the window, go to Image > Flatten Image.

8. Crop the Image.
We’re almost done. Image has been edited together, it’s all one neat Layer, but, we gotta deal with the white around it. Using the Crop tool, select the parts of the image you want to keep, then simply click on it to confirm.

-

Once it’s cropped, you can do some finishing touches, like color adjusting sharpening, etc.
When you’re really done, save the final image by going to “File > Export as...”, name it, select the file type, and you’re done.
Hopefully, that was too complicated? If there’s anything that needs further explanation, feel free to ask.
0 notes
Text
Ableton Live 9 Suite Crashes When Loading Plugins Mac

Ableton Live 9 Suite Crashes When Loading Plugins Macbook Pro
Ableton Live 9 Suite Crashes When Loading Plugins Macbook
Ableton Live 9 Suite Crashes When Loading Plugins Mac
Ableton Live 9 Suite Crashes When Loading Plugins Mac Free
Ableton Live 9 Suite Crashes When Loading Plugins Mac Os
Delicious Audio Software and Plug-ins
Products
Ableton Live 9 Suite Crashes When Loading Plugins Macbook Pro
Internet Radio Broadcasting
Rocket Broadcaster
Internet radio broadcast encoder.
Rocket Streaming Audio Server
Deliver streaming audio over the web.
Radio Mast
Streaming audio cloud platform.
Music Production
BeatCleaver
Audio editor and sample slicer.
JamDeck
Organic music sketchpad.
VST Plug-ins
SodaSynth
Classic mellow synthesizer.
Analog Extracts
Raw analog synth samples.
ShopDownloadsSupportBlogContact
Ableton Live 9 Suite Crashes When Loading Plugins Macbook
Our SodaSynth and Analog Extracts plugins are both available as VST plugins on Windows, and compatible with Ableton Live. Video joiner for mac. Here's some instructions to show youhow to use VST plugins in Ableton Live:
Ableton Live 10 Suite for MAC free allows users to compose, record, remix (remix), create and edit their own music ideas in a natural way. New Live 10 Suite devices can create bolder sounds. Keep flowing through multiple workflow improvements. Use Push to move away from your computer. Use the planning library to build your voice. And get the unlimited potential of Max for Live, seamlessly.
Problematic Plug-ins. Certain plug-ins may cause Live to crash at launch. Press and hold the ALT key, then launch Live - this will temporarily disable Live's initial plug-in scanning. If Live launches successfully while plug-ins are disabled then this would indicate a problematic plug-in is contained in your plug-ins folder. Possible solution.
My big worry was plugin support - I subscribe to the Eventide plugin suite, use some of the bundled Ableton plugins, as well as a few from SoftTube. Everything has worked like a dream so far - I had 6 tracks of audio running 2-3 plugins each, no crashes, no audio anomalies, and maxed out at 25% CPU usage.
'The VST2 plug-in is damaged and can't be opened' (macOS) Live Versions: 10.1.2 and later Operating System: macOS 10.13, 10.14 and 10.15 Due to new security requirements in macOS, certain outdated or cracked plug-ins can crash Live 10.1.2 and Live 10.1.3.
Ableton Live 9 Suite Crashes When Loading Plugins Mac
Prior to Komplete 10 and mainly, Komplete Kontrol my Ableton Live was ROCK solid, never a problem. Now it crashes all the time, one particular way since installing Kompete Kontrol. I start it, I open a project and everything seems fine, I then click ANYWHERE on the screen and get a crash to desktop with a Reopen option, I reopen, I recover.
Ableton Live
Setup your VST Plug-ins Directory
Mac OS X users can skip this step!
In the Ableton Live preferences, go to the 'File Folder' tab.Ensure 'Use VST Plug-In Custom Folder' is ON, and click 'Browse' to choose the folder where all your VST plugins are.After that, click 'Rescan' to make sure Ableton Live has refreshed the list of installed plugins.
On Windows, Oscillicious VST plugins install to 'C:VST Plugins' by default, or 'C:VST Plugins (64-bit)' for 64-bit plugins.
On Mac OS X, Oscillicious plugins install to the system-wide standard VST plugins folder, so no configuration is required (/Library/Audio/Plug-Ins/VST).
Open the Plug-in Devices Tab
Back in the main window, click the icon to open the Plug-In Devices tab. This tab displays a listof all the plugins Ableton Live has detected on your computer, by looking in both system-standard paths and your custom VST folder that we set up in the previous step.
Add a Plug-In Instrument to a Track
Double-click on one of the plug-in instruments in the list to add it to a track, or drag and drop it to the specific track you'd like to add it to.For example, you'll if you double-click on SodaSynth, you should SodaSynth added to a track in the Sesion or Arrangement view, and appear in the bottom panel.
Select a VST Preset
VST presets (synth patches or programs) appear in the bottom panel, and have been circled in red in the next screenshot. Clicking on that combobox allows you toquickly select any of the presets bundled with the VST plugin.
Open the Custom VST Editor
Most VST plugins come with a built-in custom editor screen, with knobs and extra help. Clicking the iconbeside the SodaSynth label in Ableton Live will open up the SodaSynth editor, which gives you access to our extra help screens.
Adjusting Parameters inside Ableton Live
Clicking the icon beside the SodaSynth label will open up the parameter area, allowing you to adjust the VST plugin'sparameters directly from inside Ableton Live. Right-clicking on a parameter allows you to set up automation curves and MIDI mappings for that parameter.
Compose!
Create a MIDI part and in the track that you added the SodaSynth VST instrument to, and either record from your MIDI keyboard or start writing a melody in the MIDI editor. If youwant to fatten up SodaSynth's sounds a bit, try adding a little bit of chorus or delay using the built-in Ableton Live effects. Informant for mac.

That's it! This tutorial covered how to setup your VST plugins folder in Ableton Live, how to find plug-in devices and add them to a track, and how to change VST presets and paramters using both the Ableton Live and a plugin's custom VST editor. From here, you can use VST plugins as instruments in tracks, and create MIDI parts that trigger them.
Ableton Live 9 Suite Crashes When Loading Plugins Mac Free
We hope this tutorial was helpful, but if you need extra help or have suggestions on how we can improve this tutorial, please let us know!
Oscillicious VST Plugins for Windows
Ableton Live 9 Suite Crashes When Loading Plugins Mac Os
Analog Extracts is a sample pack containing 227 samples produced from a legendary analog modular synthesizer, capturing a range of 100% original synth sounds.
These raw analog sounds can be triggered by the included bonus VST plug-in that instantly transforms each sample into an instrument mapped to the entire keyboard, to save you the hassle of mapping them into a sampler. The plug-in works with any VST host, and doesn't require an existing sampler!
SodaSynth is a pristine, clean sounding synth that's easy to layer and mix.
Starting with an ensemble of oscillators, SodaSynth smoothly adds or subtracts harmonics whilemodulating the frequencies of these new components in novel ways.The results are clean harmonies that sound familiar, yet can morph in new ways.
0 notes
Text
How to Build a Kubernetes Cluster with ARM Raspberry Pi then run .NET Core on OpenFaas
First, why would you do this? Why not. It’s awesome. It’s a learning experience. It’s cheaper to get 6 pis than six “real computers.” It’s somewhat portable. While you can certainly quickly and easily build a Kubernetes Cluster in the cloud within your browser using a Cloud Shell, there’s something more visceral about learning it this way, IMHO. Additionally, it’s a non-trivial little bit of power you’ve got here. This is also a great little development cluster for experimenting. I’m very happy with the result.
By the end of this blog post you’ll have not just Hello World but you’ll have Cloud Native Distributed Containerized RESTful microservice based on ARMv7 w/ k8s Hello World! as a service. (original Tweet).
Not familiar with why Kubernetes is cool? Check out Julia Evans’ blog and read her K8s posts and you’ll be convinced!
Hardware List (scroll down for Software)
Here’s your shopping list. You may have a bunch of this stuff already. I had the Raspberry Pis and SD Cards already.
6 – Raspberry Pi 3 – I picked 6, but you should have at least 3 or 4.
One Boss/Master and n workers. I did 6 because it’s perfect for the power supply, perfect for the 8-port hub, AND it’s a big but not unruly number.
6 – Samsung 32Gb Micro SDHC cards – Don’t be too cheap.
Faster SD cards are better.
2×6 – 1ft flat Ethernet cables – Flat is the key here.
They are WAY more flexible. If you try to do this with regular 1ft cables you’ll find them inflexible and frustrating. Get extras.
1 – Anker PowerPort 6 Port USB Charging Hub – Regardless of this entire blog post, this product is amazing.
It’s almost the same physical size as a Raspberry Pi, so it fits perfect at the bottom of your stack. It puts out 2.4a per port AND (wait for it) it includes SIX 1ft Micro USB cables…perfect for running 6 Raspberry Pis with a single power adapter.
1 – 7 layer Raspberry Pi Clear Case Enclosure – I only used 6 of these, which is cool.
I love this case, and it looks fantastic.
1 – Black Box USB-Powered 8-Port Switch – This is another amazing and AFAIK unique product.
An overarching goal for this little stack is that it be easy to move around and set up but also to power. We have power to spare, so I’d like to avoid a bunch of “wall warts” or power adapters. This is an 8 port switch that can be powered over a Raspberry Pi’s USB. Because I’m given up to 2.4A to each micro USB, I just plugged this hub into one of the Pis and it worked no problem. It’s also…wait for it…the size of a Pi. It also include magnets for mounting.
1 – Some Small Router – This one is a little tricky and somewhat optional.
You can just put these Pis on your own Wifi and access them that way, but you need to think about how they get their IP address. Who doles out IPs via DHCP? Static Leases? Static IPs completely?
The root question is – How portable do you want this stack to be? I propose you give them their own address space and their own router that you then use to bridge to other places. Easiest way is with another router (you likely have one lying around, as I did. Could be any router…and remember hub/switch != router.
Here is a bad network diagram that makes the point, I think. The idea is that I should be able to go to a hotel or another place and just plug the little router into whatever external internet is available and the cluster will just work. Again, not needed unless portability matters to you as it does to me.
You could ALSO possibly get this to work with a Travel Router but then the external internet it consumed would be just Wifi and your other clients would get on your network subnet via Wifi as well. I wanted the relative predictability of wired.
What I WISH existed was a small router – similar to that little 8 port hub – that was powered off USB and had an internal and external Ethernet port. This ZyXEL Travel Router is very close…hm…
Optional – Pelican Case if you want portability. I’ll see what airport security thinks. O_O
Optional – Tiny Keyboard and Mouse – Raspberry Pis can put out about 500mA per port for mice and keyboards. The number one problem I see with Pis is not giving them enough power and/or then having an external device take too much and then destabilize the system. This little keyboard is also a touchpad mouse and can be used to debug your Pi when you can’t get remote access to it. You’ll also want an HMDI cable occasionally.
You’re Rich – If you have money to burn, get the 7″ Touchscreen Display and a Case for it, just to show off htop in color on one of the Pis.
Dodgey Network Diagram
Disclaimer
OK, first things first, a few disclaimers.
The software in this space is moving fast. There’s a non-zero chance that some of this software will have a new version out before I finish this blog post. In fact, when I was setting up Kubernetes, I created a few nodes, went to bed for 6 hours, came back and made a few more nodes and a new version had come out. Try to keep track, keep notes, and be aware of what works with what.
Next, I’m just learning this stuff. I may get some of this wrong. While I’ve built (very) large distributed systems before, my experience with large orchestrators (primarily in banks) was with large proprietary ones in Java, C++, COM, and later in C#, .NET 1.x,2.0, and WCF. It’s been really fascinating to see how Kubernetes thinks about these things and comparing it to how we thought about these things in the 90s and very early 2000s. A lot of best practices that were HUGE challenges many years ago are now being codified and soon, I hope, will “just work” for a new generation of developer. At least another full page of my resume is being marked [Obsolete] and I’m here for it. Things change and they are getting better.
Software
Get your Raspberry PIs and SD cards together. Also bookmark and subscribe to Alex Ellis’ blog as you’re going to find yourself there a lot. He’s the author of OpenFaas, which I’ll be using today and he’s done a LOT of work making this experiment possible. So thank you Alex for being awesome! He has a great post on how Multi-stage Docker files make it possible to effectively use .NET Core on a Raspberry Pi while still building on your main machine. He and I spent a few late nights going around and around to make this easy.
Alex has put together a Gist we iterated on and I’ll summarize here. You’ll do these instructions n times for all machines.
You’ll do special stuff for the ONE master/boss node and different stuff for the some number of worker nodes.
ADVANCED TIP! If you know what you’re doing Linux-wise, you should save this excellent prep.sh shell script that Alex made, then SKIP to the node-specific instructions below. If you want to learn more, do it step by step.
ALL NODES
Burn Jessie to a SD Card
You’re going to want to get a copy of Raspbian Jesse Lite and burn it to your SD Cards with Etcher, which is the only SD Card Burner you need. It’s WAY better than the competition and it’s open source.
You can also try out Hypriot and their “optimized docker image for Raspberry Pi” but I personally tried to get it working reliably for a two days and went back to Jesse. No disrespect.
Creating an empty file called “ssh” before you put the card in the Raspberry Pi
SSH into the new Pi
I’m on Windows so I used WSL (Ubuntu) for Windows that lets me SSH and do run Linux natively.
ssh pi@raspberrypi
Login pi, password raspberry.
Change the Hostname
I ran
rasbpi-config
then immediately reboot with “sudo reboot”
Install Docker
curl -sSL get.docker.com | sh && \ sudo usermod pi -aG docker
Disable Swap. Important, you’ll get errors in Kuberenetes otherwise
sudo dphys-swapfile swapoff && \ sudo dphys-swapfile uninstall && \ sudo update-rc.d dphys-swapfile remove
Go edit /boot/cmdline.txt with your favorite editor, or use
sudo nano /boot/cmdline
and add this at the very end. Don’t press enter.
cgroup_enable=cpuset cgroup_enable=memory
Install Kubernetes
curl -s http://ift.tt/22fimui | sudo apt-key add - && \ echo "deb http://ift.tt/2f7PUy5 kubernetes-xenial main" | sudo tee /etc/apt/sources.list.d/kubernetes.list && \ sudo apt-get update -q && \ sudo apt-get install -qy kubeadm
MASTER/BOSS NODE
After ssh’ing into my main node, I used /ifconfig eth0 to figure out what the IP adresss was. Ideally you want this to be static (not changing) or at least a static lease. I logged into my router and set it as a static lease, so my main node ended up being 192.168.170.2, and .1 is the router itself.
Then I initialized this main node
sudo kubeadm init --apiserver-advertise-address=192.168.170.2
This took a WHILE. Like 10-15 min, so be patient.
Kubernetes uses this admin.conf for a ton of stuff, so you’re going to want a copy in your $HOME folder so you can call “kubectl” easily later, copy it and take ownership.
mkdir -p $HOME/.kube sudo cp -i /etc/kubernetes/admin.conf $HOME/.kube/config sudo chown $(id -u):$(id -g) $HOME/.kube/config
When this is done, you’ll get a nice print out with a ton of info and a token you have to save. Save it all. I took a screenshot.
WORKER NODES
Ssh into your worker nodes and join them each to the main node. This line is the line you needed to have saved above when you did a kubectl init.
kubeadm join --token d758dc.059e9693bfa5 192.168.170.2:6443 --discovery-token-ca-cert-hash sha256:c66cb9deebfc58800a4afbedf0e70b93c086d02426f6175a716ee2f4d
Did it work?
While ssh’ed into the main node – or from any networked machine that has the admin.conf on it – try a few commands.
Here I’m trying “kubectl get nodes” and “kubectl get pods.”
Note that I already have some stuff installed, so you’ll want try “kubectl get pods –namespace kube-system” to see stuff running. If everything is “Running” then you can finish setting up networking. Kubernetes has fifty-eleven choices for networking and I’m not qualified to pick one. I tried Flannel and gave up and then tried Weave and it just worked. YMMV. Again, double check Alex’s Gist if this changes.
kubectl apply -f http://ift.tt/2qJxB6N
At this point you should be ready to run some code!
Hello World…with Markdown
Back to Alex’s gist, I’ll try this “markdownrender” app. It will take some Markdown and return HTML.
Go get the function.yml from here and create the new app on your new cluster.
$ kubectl create -f function.yml $ curl -4 http://localhost:31118 -d "# test" <p><h1>test</h1></p>
This part can be tricky – it was for me. You need to understand what you’re doing here. How do we know the ports? A few ways. First, it’s listed as nodePort in the function.yml that represents the desired state of the application.
We can also run “kubectl get svc” and see the ports for various services.
pi@hanselboss1:~ $ kubectl get svc NAME TYPE CLUSTER-IP EXTERNAL-IP PORT(S) AGE alertmanager NodePort 10.103.43.130 <none> 9093:31113/TCP 1d dotnet-ping ClusterIP 10.100.153.185 <none> 8080/TCP 1d faas-netesd NodePort 10.103.9.25 <none> 8080:31111/TCP 2d gateway NodePort 10.111.130.61 <none> 8080:31112/TCP 2d http-ping ClusterIP 10.102.150.8 <none> 8080/TCP 1d kubernetes ClusterIP 10.96.0.1 <none> 443/TCP 2d markdownrender NodePort 10.104.121.82 <none> 8080:31118/TCP 1d nodeinfo ClusterIP 10.106.2.233 <none> 8080/TCP 1d prometheus NodePort 10.98.110.232 <none> 9090:31119/TCP 2d
See those ports that are outside:insider? You can get to markdownrender directly from 31118 on an internal IP like localhost, or the main/master IP. Those 10.x.x.x are all software networking, you can not worry about them. See?
pi@hanselboss1:~ $ curl -4 http://ift.tt/2zWjCfR -d "# test" <h1>test</h1> pi@hanselboss1:~ $ curl -4 http://ift.tt/2xuMdHf -d "# test" curl: (7) Failed to connect to 10.104.121.82 port 31118: Network is unreachable
Can we access this cluster from another machine? My Windows laptop, perhaps?
Access your Raspberry Pi Kubernetes Cluster from your Windows Machine (or elsewhere)
I put KubeCtl on my local Windows machine put it in the PATH.
I copied the admin.conf over from my Raspberry Pi. You will likely use scp or WinSCP.
I made a little local batch file like this. I may end up with multiple clusters and I want it easy to switch between them.
SET KUBECONFIG=”C:\users\scott\desktop\k8s for pi\admin.conf
Once you have Kubectl on another machine that isn’t your Pi, try running “kubectl proxy” and see if you can hit your cluster like this. Remember you’ll get weird “Connection refused” if kubectl thinks you’re talking to a local cluster.
Here you can get to localhost:8001/api and move around, then you’ve successfully punched a hole over to your cluster (proxied) and you can treat localhost:8001 as your cluster. So “kubectl proxy” made that possible.
If you have WSL (Windows Subsystem for Linux) – and you should – then you could also do this and TUNNEL to the API. But I’m going to get cert errors and generally get frustrated. However, tunneling like this to other apps from Windows or elsewhere IS super useful. What about the Kubernetes Dashboard?
~ $ sudo ssh -L 8001:10.96.0.1:443 [email protected]
I’m going to install the Kubernetes Dashboard like this:
kubectl apply -f http://ift.tt/2xudwS6
Pay close attention to that URL! There are several sites out there that may point to older URLs, non ARM dashboard, or use shortened URLs. Make sure you’re applying the ARM dashboard. I looked here http://ift.tt/2zWjCMT.
Notice I’m using the “alternative” dashboard. That’s for development and I’m saying I don’t care at all about security when accessing it. Be aware.
I can see where my Dashboard is running, the port and the IP address.
pi@hanselboss1:~ $ kubectl get svc --namespace kube-system NAME TYPE CLUSTER-IP EXTERNAL-IP PORT(S) AGE kube-dns ClusterIP 10.96.0.10 <none> 53/UDP,53/TCP 2d kubernetes-dashboard ClusterIP 10.98.2.15 <none> 80/TCP 2d
NOW I can punch a hole with that nice ssh tunnel…
~ $ sudo ssh -L 8080:10.98.2.15:80 [email protected]
I can access the Kubernetes Dashboard now from my Windows machine at http://localhost:8080 and hit Skip to login.
Do note the Namespace dropdown and think about what you’re viewing. There’s the kube-system stuff that manages the cluster
Adding OpenFaas and calling a serverless function
Let’s go to the next level. We’ll install OpenFaas – think Azure Functions or Amazon Lambda, except for your own Docker and Kubernetes cluster. To be clear, OpenFaas is an Application that we will run on Kubernetes, and it will make it easier to run other apps. Then we’ll run other stuff on it…just some simple apps like Hello World in Python and .NET Core. OpenFaas is one of several open source “Serverless” solutions.
Do you need to use OpenFaas? No. But if your goal is to write a DoIt() function and put it on your little cluster easily and scale it out, it’s pretty fabulous.
Remember my definition of Serverless…there ARE servers, you just don’t think about them.
Serverless Computing is like this – Your code, a slider bar, and your credit card.
Let’s go.
.NET Core on OpenFaas on Kubernetes on Raspberry Pi
I ssh’ed into my main/master cluster Pi and set up OpenFaas:
git clone http://ift.tt/2eHgAFS && cd faas-netes kubectl apply -f faas.armhf.yml,rbac.yml,monitoring.armhf.yml
Once OpenFaas is installed on your cluster, here’s Alex’s great instructions on how to setup your first OpenFaas Python function, so give that a try first and test it. Once we’ve installed that Python function, we can also hit http://ift.tt/2zWjFIz (where that’s your main Boss/Master’s IP) and see it the OpenFaas UI.
OpenFaas and the “faas-netes” we setup above automates the build and deployment of our apps as Docker Images to Kuberetes. It makes the “Developer’s Inner Loop” simpler. I’m going to make my .NET app, build, deploy, then change, build, deploy and I want it to “just work” on my cluster. And later, and I want it to scale.
I’m doing .NET Core, and since there is a runtime for .NET Core for Raspberry Pi (and ARM system) but no SDK, I need to do the build on my Windows machine and deploy from there.
Quick Aside: There are docker images for ARM/Raspberry PI for running .NET Core. However, you can’t build .NET Core apps (yet?) directly ON the ARM machine. You have to build them on an x86/x64 machine and then get them over to the ARM machine. That can be SCP/FTPing them, or it can be making a docker container and then pushing that new docker image up to a container registry, then telling Kubernetes about that image. K8s (cool abbv) will then bring that ARM image down and run it. The technical trick that Alex and I noticed was of course that since you’re building the Docker image on your x86/x64 machine, you can’t RUN any stuff on it. You can build the image but you can’t run stuff within it. It’s an unfortunate limitation for now until there’s a .NET Core SDK on ARM.
What’s required on my development machine (not my Raspberry Pis?
I installed KubeCtl (see above) in the PATH
I installed OpenFaas’s Faas-CLI command line and put it in the PATH
I installed Docker for Windows. You’ll want to make sure your machine has some flavor of Docker if you have a Mac or Linux machine.
I ran docker login at least once.
I installed .NET Core from http://dot.net/core
Here’s the gist we came up with, again thanks Alex! I’m going to do it from Windows.
I’ll use the faas-cli to make a new function with charp. I’m calling mine dotnet-ping.
faas-cli new --lang csharp dotnet-ping
I’ll edit the FunctionHandler.cs to add a little more. I’d like to know the machine name so I can see the scaling happen when it does.
using System; using System.Text; namespace Function { public class FunctionHandler { public void Handle(string input) { Console.WriteLine("Hi your input was: "+ input + " on " + System.Environment.MachineName); } } }
Check out the .yml file for your new OpenFaas function. Note the gateway IP should be your main Pi, and the port is 31112 which is OpenFaas.
I also changed the image to include “shanselman/” which is my Docker Hub. You could also use a local Container Registry if you like.
provider: name: faas gateway: http://ift.tt/2xtjend functions: dotnet-ping: lang: csharp handler: ./dotnet-ping image: shanselman/dotnet-ping
Head over to the ./template/csharp/Dockerfile and we’re going to change it. Ordinarily it’s fine if you are publishing from x64 to x64 but since we are doing a little dance, we are going to build and publish the .NET apps as linux-arm from our x64 machine, THEN push it, we’ll use a multi stage docker file. Change the default Docker file to this:
FROM microsoft/dotnet:2.0-sdk as builder ENV DOTNET_CLI_TELEMETRY_OPTOUT 1 # Optimize for Docker builder caching by adding projects first. RUN mkdir -p /root/src/function WORKDIR /root/src/function COPY ./function/Function.csproj . WORKDIR /root/src/ COPY ./root.csproj . RUN dotnet restore ./root.csproj COPY . . RUN dotnet publish -c release -o published -r linux-arm ADD http://ift.tt/2zVAP98 /usr/bin/fwatchdog RUN chmod +x /usr/bin/fwatchdog FROM microsoft/dotnet:2.0.0-runtime-stretch-arm32v7 WORKDIR /root/ COPY --from=builder /root/src/published . COPY --from=builder /usr/bin/fwatchdog / ENV fprocess="dotnet ./root.dll" EXPOSE 8080 CMD ["/fwatchdog"]
Notice a few things. All the RUN commands are above the second FROM where we take the results of the first container and use its output to build the second ARM-based one. We can’t RUN stuff because we aren’t on ARM, right?
We use the Faas-Cli to build the app, build the docker container, AND publish the result to Kubernetes.
faas-cli build -f dotnet-ping.yml --parallel=1 faas-cli push -f dotnet-ping.yml faas-cli deploy -f dotnet-ping.yml --gateway http://ift.tt/2xtjend
And here is the dotnet-ping command running on the pi, as seen within the Kubernetes Dashboard.
I can then scale them out like this:
kubectl scale deploy/dotnet-ping --replicas=6
And if I hit it multiple times – either via curl or via the dashboard, I see it’s hitting different pods:
If I want to get super fancy, I can install Grafana – a dashboard manager by running locally in my machine on port 3000
docker run -p 3000:3000 -d grafana/grafana
Then I can add OpenFaas a datasource by pointing Grafana to http://ift.tt/2zVaKqu which is where the Prometheus metrics app is already running, then import the OpenFaas dashboard from the grafana.json file that is in the I cloned it from.
Super cool. I’m going to keep using this little Raspberry Pi Kubernetes Cluster to learn as I get ready to do real K8s in Azure! Thanks to Alex Ellis for his kindness and patience and to Jessie Frazelle for making me love both Windows AND Linux!
* If you like this blog, please do use my Amazon links as they help pay for projects like this! They don’t make me rich, but a few dollars here and there can pay for Raspberry Pis!
Sponsor: Check out JetBrains Rider: a new cross-platform .NET IDE. Edit, refactor, test and debug ASP.NET, .NET Framework, .NET Core, Xamarin or Unity applications. Learn more and download a 30-day trial!
© 2017 Scott Hanselman. All rights reserved.
How to Build a Kubernetes Cluster with ARM Raspberry Pi then run .NET Core on OpenFaas syndicated from http://ift.tt/2wBRU5Z
0 notes
Text
Does Googlebot Support HTTP/2? Challenging Google's Indexing Claims &ndash; An Experiment
Posted by goralewicz
I was recently challenged with a question from a client, Robert, who runs a small PR firm and needed to optimize a client’s website. His question inspired me to run a small experiment in HTTP protocols. So what was Robert’s question? He asked...
Can Googlebot crawl using HTTP/2 protocols?
You may be asking yourself, why should I care about Robert and his HTTP protocols?
As a refresher, HTTP protocols are the basic set of standards allowing the World Wide Web to exchange information. They are the reason a web browser can display data stored on another server. The first was initiated back in 1989, which means, just like everything else, HTTP protocols are getting outdated. HTTP/2 is one of the latest versions of HTTP protocol to be created to replace these aging versions.
So, back to our question: why do you, as an SEO, care to know more about HTTP protocols? The short answer is that none of your SEO efforts matter or can even be done without a basic understanding of HTTP protocol. Robert knew that if his site wasn’t indexing correctly, his client would miss out on valuable web traffic from searches.
The hype around HTTP/2
HTTP/1.1 is a 17-year-old protocol (HTTP 1.0 is 21 years old). Both HTTP 1.0 and 1.1 have limitations, mostly related to performance. When HTTP/1.1 was getting too slow and out of date, Google introduced SPDY in 2009, which was the basis for HTTP/2. Side note: Starting from Chrome 53, Google decided to stop supporting SPDY in favor of HTTP/2.
HTTP/2 was a long-awaited protocol. Its main goal is to improve a website’s performance. It's currently used by 17% of websites (as of September 2017). Adoption rate is growing rapidly, as only 10% of websites were using HTTP/2 in January 2017. You can see the adoption rate charts here. HTTP/2 is getting more and more popular, and is widely supported by modern browsers (like Chrome or Firefox) and web servers (including Apache, Nginx, and IIS).
Its key advantages are:
Multiplexing: The ability to send multiple requests through a single TCP connection.
Server push: When a client requires some resource (let's say, an HTML document), a server can push CSS and JS files to a client cache. It reduces network latency and round-trips.
One connection per origin: With HTTP/2, only one connection is needed to load the website.
Stream prioritization: Requests (streams) are assigned a priority from 1 to 256 to deliver higher-priority resources faster.
Binary framing layer: HTTP/2 is easier to parse (for both the server and user).
Header compression: This feature reduces overhead from plain text in HTTP/1.1 and improves performance.
For more information, I highly recommend reading “Introduction to HTTP/2” by Surma and Ilya Grigorik.
All these benefits suggest pushing for HTTP/2 support as soon as possible. However, my experience with technical SEO has taught me to double-check and experiment with solutions that might affect our SEO efforts.
So the question is: Does Googlebot support HTTP/2?
Google's promises
HTTP/2 represents a promised land, the technical SEO oasis everyone was searching for. By now, many websites have already added HTTP/2 support, and developers don’t want to optimize for HTTP/1.1 anymore. Before I could answer Robert’s question, I needed to know whether or not Googlebot supported HTTP/2-only crawling.
I was not alone in my query. This is a topic which comes up often on Twitter, Google Hangouts, and other such forums. And like Robert, I had clients pressing me for answers. The experiment needed to happen. Below I'll lay out exactly how we arrived at our answer, but here’s the spoiler: it doesn't. Google doesn’t crawl using the HTTP/2 protocol. If your website uses HTTP/2, you need to make sure you continue to optimize the HTTP/1.1 version for crawling purposes.
The question
It all started with a Google Hangouts in November 2015.
youtube
When asked about HTTP/2 support, John Mueller mentioned that HTTP/2-only crawling should be ready by early 2016, and he also mentioned that HTTP/2 would make it easier for Googlebot to crawl pages by bundling requests (images, JS, and CSS could be downloaded with a single bundled request).
"At the moment, Google doesn’t support HTTP/2-only crawling (...) We are working on that, I suspect it will be ready by the end of this year (2015) or early next year (2016) (...) One of the big advantages of HTTP/2 is that you can bundle requests, so if you are looking at a page and it has a bunch of embedded images, CSS, JavaScript files, theoretically you can make one request for all of those files and get everything together. So that would make it a little bit easier to crawl pages while we are rendering them for example."
Soon after, Twitter user Kai Spriestersbach also asked about HTTP/2 support:
His clients started dropping HTTP/1.1 connections optimization, just like most developers deploying HTTP/2, which was at the time supported by all major browsers.
After a few quiet months, Google Webmasters reignited the conversation, tweeting that Google won’t hold you back if you're setting up for HTTP/2. At this time, however, we still had no definitive word on HTTP/2-only crawling. Just because it won't hold you back doesn't mean it can handle it — which is why I decided to test the hypothesis.
The experiment
For months as I was following this online debate, I still received questions from our clients who no longer wanted want to spend money on HTTP/1.1 optimization. Thus, I decided to create a very simple (and bold) experiment.
I decided to disable HTTP/1.1 on my own website (https://goralewicz.com) and make it HTTP/2 only. I disabled HTTP/1.1 from March 7th until March 13th.
If you’re going to get bad news, at the very least it should come quickly. I didn’t have to wait long to see if my experiment “took.” Very shortly after disabling HTTP/1.1, I couldn’t fetch and render my website in Google Search Console; I was getting an error every time.
My website is fairly small, but I could clearly see that the crawling stats decreased after disabling HTTP/1.1. Google was no longer visiting my site.
While I could have kept going, I stopped the experiment after my website was partially de-indexed due to “Access Denied” errors.
The results
I didn’t need any more information; the proof was right there. Googlebot wasn’t supporting HTTP/2-only crawling. Should you choose to duplicate this at home with our own site, you’ll be happy to know that my site recovered very quickly.
I finally had Robert’s answer, but felt others may benefit from it as well. A few weeks after finishing my experiment, I decided to ask John about HTTP/2 crawling on Twitter and see what he had to say.
(I love that he responds.)
Knowing the results of my experiment, I have to agree with John: disabling HTTP/1 was a bad idea. However, I was seeing other developers discontinuing optimization for HTTP/1, which is why I wanted to test HTTP/2 on its own.
For those looking to run their own experiment, there are two ways of negotiating a HTTP/2 connection:
1. Over HTTP (unsecure) – Make an HTTP/1.1 request that includes an Upgrade header. This seems to be the method to which John Mueller was referring. However, it doesn't apply to my website (because it’s served via HTTPS). What is more, this is an old-fashioned way of negotiating, not supported by modern browsers. Below is a screenshot from Caniuse.com:
2. Over HTTPS (secure) – Connection is negotiated via the ALPN protocol (HTTP/1.1 is not involved in this process). This method is preferred and widely supported by modern browsers and servers.
A recent announcement: The saga continuesGooglebot doesn’t make HTTP/2 requests
Fortunately, Ilya Grigorik, a web performance engineer at Google, let everyone peek behind the curtains at how Googlebot is crawling websites and the technology behind it:
If that wasn’t enough, Googlebot doesn't support the WebSocket protocol. That means your server can’t send resources to Googlebot before they are requested. Supporting it wouldn't reduce network latency and round-trips; it would simply slow everything down. Modern browsers offer many ways of loading content, including WebRTC, WebSockets, loading local content from drive, etc. However, Googlebot supports only HTTP/FTP, with or without Transport Layer Security (TLS).
Googlebot supports SPDY
During my research and after John Mueller’s feedback, I decided to consult an HTTP/2 expert. I contacted Peter Nikolow of Mobilio, and asked him to see if there were anything we could do to find the final answer regarding Googlebot’s HTTP/2 support. Not only did he provide us with help, Peter even created an experiment for us to use. Its results are pretty straightforward: Googlebot does support the SPDY protocol and Next Protocol Navigation (NPN). And thus, it can’t support HTTP/2.
Below is Peter’s response:
I performed an experiment that shows Googlebot uses SPDY protocol. Because it supports SPDY + NPN, it cannot support HTTP/2. There are many cons to continued support of SPDY:
This protocol is vulnerable
Google Chrome no longer supports SPDY in favor of HTTP/2
Servers have been neglecting to support SPDY. Let’s examine the NGINX example: from version 1.95, they no longer support SPDY.
Apache doesn't support SPDY out of the box. You need to install mod_spdy, which is provided by Google.
To examine Googlebot and the protocols it uses, I took advantage of s_server, a tool that can debug TLS connections. I used Google Search Console Fetch and Render to send Googlebot to my website.
Here's a screenshot from this tool showing that Googlebot is using Next Protocol Navigation (and therefore SPDY):
I'll briefly explain how you can perform your own test. The first thing you should know is that you can’t use scripting languages (like PHP or Python) for debugging TLS handshakes. The reason for that is simple: these languages see HTTP-level data only. Instead, you should use special tools for debugging TLS handshakes, such as s_server.
Type in the console:
sudo openssl s_server -key key.pem -cert cert.pem -accept 443 -WWW -tlsextdebug -state -msg sudo openssl s_server -key key.pem -cert cert.pem -accept 443 -www -tlsextdebug -state -msg
Please note the slight (but significant) difference between the “-WWW” and “-www” options in these commands. You can find more about their purpose in the s_server documentation.
Next, invite Googlebot to visit your site by entering the URL in Google Search Console Fetch and Render or in the Google mobile tester.
As I wrote above, there is no logical reason why Googlebot supports SPDY. This protocol is vulnerable; no modern browser supports it. Additionally, servers (including NGINX) neglect to support it. It’s just a matter of time until Googlebot will be able to crawl using HTTP/2. Just implement HTTP 1.1 + HTTP/2 support on your own server (your users will notice due to faster loading) and wait until Google is able to send requests using HTTP/2.
Summary
In November 2015, John Mueller said he expected Googlebot to crawl websites by sending HTTP/2 requests starting in early 2016. We don’t know why, as of October 2017, that hasn't happened yet.
What we do know is that Googlebot doesn't support HTTP/2. It still crawls by sending HTTP/ 1.1 requests. Both this experiment and the “Rendering on Google Search” page confirm it. (If you’d like to know more about the technology behind Googlebot, then you should check out what they recently shared.)
For now, it seems we have to accept the status quo. We recommended that Robert (and you readers as well) enable HTTP/2 on your websites for better performance, but continue optimizing for HTTP/ 1.1. Your visitors will notice and thank you.
Sign up for The Moz Top 10, a semimonthly mailer updating you on the top ten hottest pieces of SEO news, tips, and rad links uncovered by the Moz team. Think of it as your exclusive digest of stuff you don't have time to hunt down but want to read!
http://ift.tt/2yqKuWp
0 notes
Text
How to Build a Kubernetes Cluster with ARM Raspberry Pi then run .NET Core on OpenFaas
First, why would you do this? Why not. It’s awesome. It’s a learning experience. It’s cheaper to get 6 pis than six “real computers.” It’s somewhat portable. While you can certainly quickly and easily build a Kubernetes Cluster in the cloud within your browser using a Cloud Shell, there’s something more visceral about learning it this way, IMHO. Additionally, it’s a non-trivial little bit of power you’ve got here. This is also a great little development cluster for experimenting. I’m very happy with the result.
By the end of this blog post you’ll have not just Hello World but you’ll have Cloud Native Distributed Containerized RESTful microservice based on ARMv7 w/ k8s Hello World! as a service. (original Tweet).
Not familiar with why Kubernetes is cool? Check out Julia Evans’ blog and read her K8s posts and you’ll be convinced!
Hardware List (scroll down for Software)
Here’s your shopping list. You may have a bunch of this stuff already. I had the Raspberry Pis and SD Cards already.
6 – Raspberry Pi 3 – I picked 6, but you should have at least 3 or 4.
One Boss/Master and n workers. I did 6 because it’s perfect for the power supply, perfect for the 8-port hub, AND it’s a big but not unruly number.
6 – Samsung 32Gb Micro SDHC cards – Don’t be too cheap.
Faster SD cards are better.
2×6 – 1ft flat Ethernet cables – Flat is the key here.
They are WAY more flexible. If you try to do this with regular 1ft cables you’ll find them inflexible and frustrating. Get extras.
1 – Anker PowerPort 6 Port USB Charging Hub – Regardless of this entire blog post, this product is amazing.
It’s almost the same physical size as a Raspberry Pi, so it fits perfect at the bottom of your stack. It puts out 2.4a per port AND (wait for it) it includes SIX 1ft Micro USB cables…perfect for running 6 Raspberry Pis with a single power adapter.
1 – 7 layer Raspberry Pi Clear Case Enclosure – I only used 6 of these, which is cool.
I love this case, and it looks fantastic.
1 – Black Box USB-Powered 8-Port Switch – This is another amazing and AFAIK unique product.
An overarching goal for this little stack is that it be easy to move around and set up but also to power. We have power to spare, so I’d like to avoid a bunch of “wall warts” or power adapters. This is an 8 port switch that can be powered over a Raspberry Pi’s USB. Because I’m given up to 2.4A to each micro USB, I just plugged this hub into one of the Pis and it worked no problem. It’s also…wait for it…the size of a Pi. It also include magnets for mounting.
1 – Some Small Router – This one is a little tricky and somewhat optional.
You can just put these Pis on your own Wifi and access them that way, but you need to think about how they get their IP address. Who doles out IPs via DHCP? Static Leases? Static IPs completely?
The root question is – How portable do you want this stack to be? I propose you give them their own address space and their own router that you then use to bridge to other places. Easiest way is with another router (you likely have one lying around, as I did. Could be any router…and remember hub/switch != router.
Here is a bad network diagram that makes the point, I think. The idea is that I should be able to go to a hotel or another place and just plug the little router into whatever external internet is available and the cluster will just work. Again, not needed unless portability matters to you as it does to me.
You could ALSO possibly get this to work with a Travel Router but then the external internet it consumed would be just Wifi and your other clients would get on your network subnet via Wifi as well. I wanted the relative predictability of wired.
What I WISH existed was a small router – similar to that little 8 port hub – that was powered off USB and had an internal and external Ethernet port. This ZyXEL Travel Router is very close…hm…
Optional – Pelican Case if you want portability. I’ll see what airport security thinks. O_O
Optional – Tiny Keyboard and Mouse – Raspberry Pis can put out about 500mA per port for mice and keyboards. The number one problem I see with Pis is not giving them enough power and/or then having an external device take too much and then destabilize the system. This little keyboard is also a touchpad mouse and can be used to debug your Pi when you can’t get remote access to it. You’ll also want an HMDI cable occasionally.
You’re Rich – If you have money to burn, get the 7″ Touchscreen Display and a Case for it, just to show off htop in color on one of the Pis.
Dodgey Network Diagram
Disclaimer
OK, first things first, a few disclaimers.
The software in this space is moving fast. There’s a non-zero chance that some of this software will have a new version out before I finish this blog post. In fact, when I was setting up Kubernetes, I created a few nodes, went to bed for 6 hours, came back and made a few more nodes and a new version had come out. Try to keep track, keep notes, and be aware of what works with what.
Next, I’m just learning this stuff. I may get some of this wrong. While I’ve built (very) large distributed systems before, my experience with large orchestrators (primarily in banks) was with large proprietary ones in Java, C++, COM, and later in C#, .NET 1.x,2.0, and WCF. It’s been really fascinating to see how Kubernetes thinks about these things and comparing it to how we thought about these things in the 90s and very early 2000s. A lot of best practices that were HUGE challenges many years ago are now being codified and soon, I hope, will “just work” for a new generation of developer. At least another full page of my resume is being marked [Obsolete] and I’m here for it. Things change and they are getting better.
Software
Get your Raspberry PIs and SD cards together. Also bookmark and subscribe to Alex Ellis’ blog as you’re going to find yourself there a lot. He’s the author of OpenFaas, which I’ll be using today and he’s done a LOT of work making this experiment possible. So thank you Alex for being awesome! He has a great post on how Multi-stage Docker files make it possible to effectively use .NET Core on a Raspberry Pi while still building on your main machine. He and I spent a few late nights going around and around to make this easy.
Alex has put together a Gist we iterated on and I’ll summarize here. You’ll do these instructions n times for all machines.
You’ll do special stuff for the ONE master/boss node and different stuff for the some number of worker nodes.
ADVANCED TIP! If you know what you’re doing Linux-wise, you should save this excellent prep.sh shell script that Alex made, then SKIP to the node-specific instructions below. If you want to learn more, do it step by step.
ALL NODES
Burn Jessie to a SD Card
You’re going to want to get a copy of Raspbian Jesse Lite and burn it to your SD Cards with Etcher, which is the only SD Card Burner you need. It’s WAY better than the competition and it’s open source.
You can also try out Hypriot and their “optimized docker image for Raspberry Pi” but I personally tried to get it working reliably for a two days and went back to Jesse. No disrespect.
Creating an empty file called “ssh” before you put the card in the Raspberry Pi
SSH into the new Pi
I’m on Windows so I used WSL (Ubuntu) for Windows that lets me SSH and do run Linux natively.
ssh pi@raspberrypi
Login pi, password raspberry.
Change the Hostname
I ran
rasbpi-config
then immediately reboot with “sudo reboot”
Install Docker
curl -sSL get.docker.com | sh && \ sudo usermod pi -aG docker
Disable Swap. Important, you’ll get errors in Kuberenetes otherwise
sudo dphys-swapfile swapoff && \ sudo dphys-swapfile uninstall && \ sudo update-rc.d dphys-swapfile remove
Go edit /boot/cmdline.txt with your favorite editor, or use
sudo nano /boot/cmdline
and add this at the very end. Don’t press enter.
cgroup_enable=cpuset cgroup_enable=memory
Install Kubernetes
curl -s http://ift.tt/22fimui | sudo apt-key add - && \ echo "deb http://ift.tt/2f7PUy5 kubernetes-xenial main" | sudo tee /etc/apt/sources.list.d/kubernetes.list && \ sudo apt-get update -q && \ sudo apt-get install -qy kubeadm
MASTER/BOSS NODE
After ssh’ing into my main node, I used /ifconfig eth0 to figure out what the IP adresss was. Ideally you want this to be static (not changing) or at least a static lease. I logged into my router and set it as a static lease, so my main node ended up being 192.168.170.2, and .1 is the router itself.
Then I initialized this main node
sudo kubeadm init --apiserver-advertise-address=192.168.170.2
This took a WHILE. Like 10-15 min, so be patient.
Kubernetes uses this admin.conf for a ton of stuff, so you’re going to want a copy in your $HOME folder so you can call “kubectl” easily later, copy it and take ownership.
mkdir -p $HOME/.kube sudo cp -i /etc/kubernetes/admin.conf $HOME/.kube/config sudo chown $(id -u):$(id -g) $HOME/.kube/config
When this is done, you’ll get a nice print out with a ton of info and a token you have to save. Save it all. I took a screenshot.
WORKER NODES
Ssh into your worker nodes and join them each to the main node. This line is the line you needed to have saved above when you did a kubectl init.
kubeadm join --token d758dc.059e9693bfa5 192.168.170.2:6443 --discovery-token-ca-cert-hash sha256:c66cb9deebfc58800a4afbedf0e70b93c086d02426f6175a716ee2f4d
Did it work?
While ssh’ed into the main node – or from any networked machine that has the admin.conf on it – try a few commands.
Here I’m trying “kubectl get nodes” and “kubectl get pods.”
Note that I already have some stuff installed, so you’ll want try “kubectl get pods –namespace kube-system” to see stuff running. If everything is “Running” then you can finish setting up networking. Kubernetes has fifty-eleven choices for networking and I’m not qualified to pick one. I tried Flannel and gave up and then tried Weave and it just worked. YMMV. Again, double check Alex’s Gist if this changes.
kubectl apply -f http://ift.tt/2qJxB6N
At this point you should be ready to run some code!
Hello World…with Markdown
Back to Alex’s gist, I’ll try this “markdownrender” app. It will take some Markdown and return HTML.
Go get the function.yml from here and create the new app on your new cluster.
$ kubectl create -f function.yml $ curl -4 http://localhost:31118 -d "# test" <p><h1>test</h1></p>
This part can be tricky – it was for me. You need to understand what you’re doing here. How do we know the ports? A few ways. First, it’s listed as nodePort in the function.yml that represents the desired state of the application.
We can also run “kubectl get svc” and see the ports for various services.
pi@hanselboss1:~ $ kubectl get svc NAME TYPE CLUSTER-IP EXTERNAL-IP PORT(S) AGE alertmanager NodePort 10.103.43.130 <none> 9093:31113/TCP 1d dotnet-ping ClusterIP 10.100.153.185 <none> 8080/TCP 1d faas-netesd NodePort 10.103.9.25 <none> 8080:31111/TCP 2d gateway NodePort 10.111.130.61 <none> 8080:31112/TCP 2d http-ping ClusterIP 10.102.150.8 <none> 8080/TCP 1d kubernetes ClusterIP 10.96.0.1 <none> 443/TCP 2d markdownrender NodePort 10.104.121.82 <none> 8080:31118/TCP 1d nodeinfo ClusterIP 10.106.2.233 <none> 8080/TCP 1d prometheus NodePort 10.98.110.232 <none> 9090:31119/TCP 2d
See those ports that are outside:insider? You can get to markdownrender directly from 31118 on an internal IP like localhost, or the main/master IP. Those 10.x.x.x are all software networking, you can not worry about them. See?
pi@hanselboss1:~ $ curl -4 http://ift.tt/2zWjCfR -d "# test" <h1>test</h1> pi@hanselboss1:~ $ curl -4 http://ift.tt/2xuMdHf -d "# test" curl: (7) Failed to connect to 10.104.121.82 port 31118: Network is unreachable
Can we access this cluster from another machine? My Windows laptop, perhaps?
Access your Raspberry Pi Kubernetes Cluster from your Windows Machine (or elsewhere)
I put KubeCtl on my local Windows machine put it in the PATH.
I copied the admin.conf over from my Raspberry Pi. You will likely use scp or WinSCP.
I made a little local batch file like this. I may end up with multiple clusters and I want it easy to switch between them.
SET KUBECONFIG=”C:\users\scott\desktop\k8s for pi\admin.conf
Once you have Kubectl on another machine that isn’t your Pi, try running “kubectl proxy” and see if you can hit your cluster like this. Remember you’ll get weird “Connection refused” if kubectl thinks you’re talking to a local cluster.
Here you can get to localhost:8001/api and move around, then you’ve successfully punched a hole over to your cluster (proxied) and you can treat localhost:8001 as your cluster. So “kubectl proxy” made that possible.
If you have WSL (Windows Subsystem for Linux) – and you should – then you could also do this and TUNNEL to the API. But I’m going to get cert errors and generally get frustrated. However, tunneling like this to other apps from Windows or elsewhere IS super useful. What about the Kubernetes Dashboard?
~ $ sudo ssh -L 8001:10.96.0.1:443 [email protected]
I’m going to install the Kubernetes Dashboard like this:
kubectl apply -f http://ift.tt/2xudwS6
Pay close attention to that URL! There are several sites out there that may point to older URLs, non ARM dashboard, or use shortened URLs. Make sure you’re applying the ARM dashboard. I looked here http://ift.tt/2zWjCMT.
Notice I’m using the “alternative” dashboard. That’s for development and I’m saying I don’t care at all about security when accessing it. Be aware.
I can see where my Dashboard is running, the port and the IP address.
pi@hanselboss1:~ $ kubectl get svc --namespace kube-system NAME TYPE CLUSTER-IP EXTERNAL-IP PORT(S) AGE kube-dns ClusterIP 10.96.0.10 <none> 53/UDP,53/TCP 2d kubernetes-dashboard ClusterIP 10.98.2.15 <none> 80/TCP 2d
NOW I can punch a hole with that nice ssh tunnel…
~ $ sudo ssh -L 8080:10.98.2.15:80 [email protected]
I can access the Kubernetes Dashboard now from my Windows machine at http://localhost:8080 and hit Skip to login.
Do note the Namespace dropdown and think about what you’re viewing. There’s the kube-system stuff that manages the cluster
Adding OpenFaas and calling a serverless function
Let’s go to the next level. We’ll install OpenFaas – think Azure Functions or Amazon Lambda, except for your own Docker and Kubernetes cluster. To be clear, OpenFaas is an Application that we will run on Kubernetes, and it will make it easier to run other apps. Then we’ll run other stuff on it…just some simple apps like Hello World in Python and .NET Core. OpenFaas is one of several open source “Serverless” solutions.
Do you need to use OpenFaas? No. But if your goal is to write a DoIt() function and put it on your little cluster easily and scale it out, it’s pretty fabulous.
Remember my definition of Serverless…there ARE servers, you just don’t think about them.
Serverless Computing is like this – Your code, a slider bar, and your credit card.
Let’s go.
.NET Core on OpenFaas on Kubernetes on Raspberry Pi
I ssh’ed into my main/master cluster Pi and set up OpenFaas:
git clone http://ift.tt/2eHgAFS && cd faas-netes kubectl apply -f faas.armhf.yml,rbac.yml,monitoring.armhf.yml
Once OpenFaas is installed on your cluster, here’s Alex’s great instructions on how to setup your first OpenFaas Python function, so give that a try first and test it. Once we’ve installed that Python function, we can also hit http://ift.tt/2zWjFIz (where that’s your main Boss/Master’s IP) and see it the OpenFaas UI.
OpenFaas and the “faas-netes” we setup above automates the build and deployment of our apps as Docker Images to Kuberetes. It makes the “Developer’s Inner Loop” simpler. I’m going to make my .NET app, build, deploy, then change, build, deploy and I want it to “just work” on my cluster. And later, and I want it to scale.
I’m doing .NET Core, and since there is a runtime for .NET Core for Raspberry Pi (and ARM system) but no SDK, I need to do the build on my Windows machine and deploy from there.
Quick Aside: There are docker images for ARM/Raspberry PI for running .NET Core. However, you can’t build .NET Core apps (yet?) directly ON the ARM machine. You have to build them on an x86/x64 machine and then get them over to the ARM machine. That can be SCP/FTPing them, or it can be making a docker container and then pushing that new docker image up to a container registry, then telling Kubernetes about that image. K8s (cool abbv) will then bring that ARM image down and run it. The technical trick that Alex and I noticed was of course that since you’re building the Docker image on your x86/x64 machine, you can’t RUN any stuff on it. You can build the image but you can’t run stuff within it. It’s an unfortunate limitation for now until there’s a .NET Core SDK on ARM.
What’s required on my development machine (not my Raspberry Pis?
I installed KubeCtl (see above) in the PATH
I installed OpenFaas’s Faas-CLI command line and put it in the PATH
I installed Docker for Windows. You’ll want to make sure your machine has some flavor of Docker if you have a Mac or Linux machine.
I ran docker login at least once.
I installed .NET Core from http://dot.net/core
Here’s the gist we came up with, again thanks Alex! I’m going to do it from Windows.
I’ll use the faas-cli to make a new function with charp. I’m calling mine dotnet-ping.
faas-cli new --lang csharp dotnet-ping
I’ll edit the FunctionHandler.cs to add a little more. I’d like to know the machine name so I can see the scaling happen when it does.
using System; using System.Text; namespace Function { public class FunctionHandler { public void Handle(string input) { Console.WriteLine("Hi your input was: "+ input + " on " + System.Environment.MachineName); } } }
Check out the .yml file for your new OpenFaas function. Note the gateway IP should be your main Pi, and the port is 31112 which is OpenFaas.
I also changed the image to include “shanselman/” which is my Docker Hub. You could also use a local Container Registry if you like.
provider: name: faas gateway: http://ift.tt/2xtjend functions: dotnet-ping: lang: csharp handler: ./dotnet-ping image: shanselman/dotnet-ping
Head over to the ./template/csharp/Dockerfile and we’re going to change it. Ordinarily it’s fine if you are publishing from x64 to x64 but since we are doing a little dance, we are going to build and publish the .NET apps as linux-arm from our x64 machine, THEN push it, we’ll use a multi stage docker file. Change the default Docker file to this:
FROM microsoft/dotnet:2.0-sdk as builder ENV DOTNET_CLI_TELEMETRY_OPTOUT 1 # Optimize for Docker builder caching by adding projects first. RUN mkdir -p /root/src/function WORKDIR /root/src/function COPY ./function/Function.csproj . WORKDIR /root/src/ COPY ./root.csproj . RUN dotnet restore ./root.csproj COPY . . RUN dotnet publish -c release -o published -r linux-arm ADD http://ift.tt/2zVAP98 /usr/bin/fwatchdog RUN chmod +x /usr/bin/fwatchdog FROM microsoft/dotnet:2.0.0-runtime-stretch-arm32v7 WORKDIR /root/ COPY --from=builder /root/src/published . COPY --from=builder /usr/bin/fwatchdog / ENV fprocess="dotnet ./root.dll" EXPOSE 8080 CMD ["/fwatchdog"]
Notice a few things. All the RUN commands are above the second FROM where we take the results of the first container and use its output to build the second ARM-based one. We can’t RUN stuff because we aren’t on ARM, right?
We use the Faas-Cli to build the app, build the docker container, AND publish the result to Kubernetes.
faas-cli build -f dotnet-ping.yml --parallel=1 faas-cli push -f dotnet-ping.yml faas-cli deploy -f dotnet-ping.yml --gateway http://ift.tt/2xtjend
And here is the dotnet-ping command running on the pi, as seen within the Kubernetes Dashboard.
I can then scale them out like this:
kubectl scale deploy/dotnet-ping --replicas=6
And if I hit it multiple times – either via curl or via the dashboard, I see it’s hitting different pods:
If I want to get super fancy, I can install Grafana – a dashboard manager by running locally in my machine on port 3000
docker run -p 3000:3000 -d grafana/grafana
Then I can add OpenFaas a datasource by pointing Grafana to http://ift.tt/2zVaKqu which is where the Prometheus metrics app is already running, then import the OpenFaas dashboard from the grafana.json file that is in the I cloned it from.
Super cool. I’m going to keep using this little Raspberry Pi Kubernetes Cluster to learn as I get ready to do real K8s in Azure! Thanks to Alex Ellis for his kindness and patience and to Jessie Frazelle for making me love both Windows AND Linux!
* If you like this blog, please do use my Amazon links as they help pay for projects like this! They don’t make me rich, but a few dollars here and there can pay for Raspberry Pis!
Sponsor: Check out JetBrains Rider: a new cross-platform .NET IDE. Edit, refactor, test and debug ASP.NET, .NET Framework, .NET Core, Xamarin or Unity applications. Learn more and download a 30-day trial!
© 2017 Scott Hanselman. All rights reserved.
How to Build a Kubernetes Cluster with ARM Raspberry Pi then run .NET Core on OpenFaas syndicated from http://ift.tt/2wBRU5Z
0 notes