#i had to do a lot of clone stamping on the sides! :o
Explore tagged Tumblr posts
Text


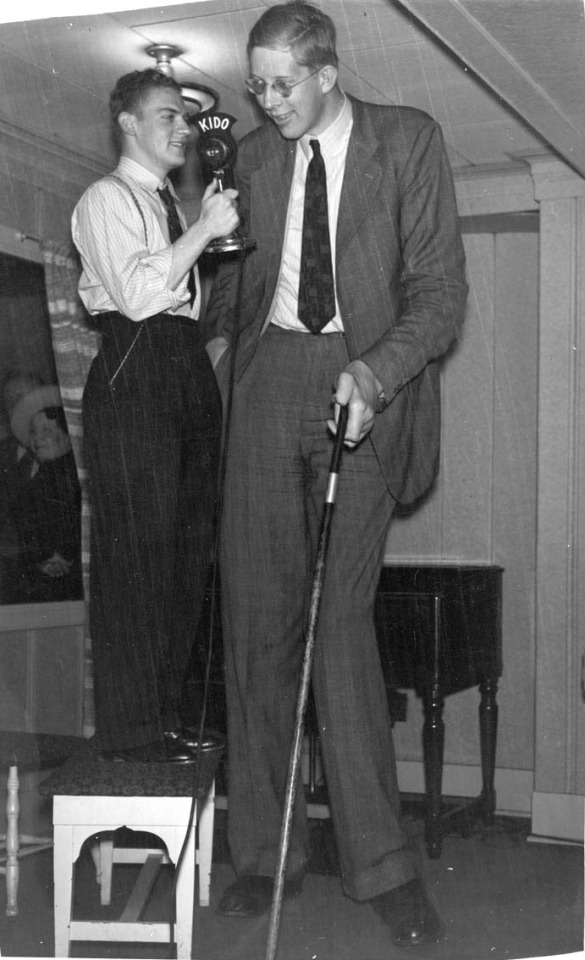
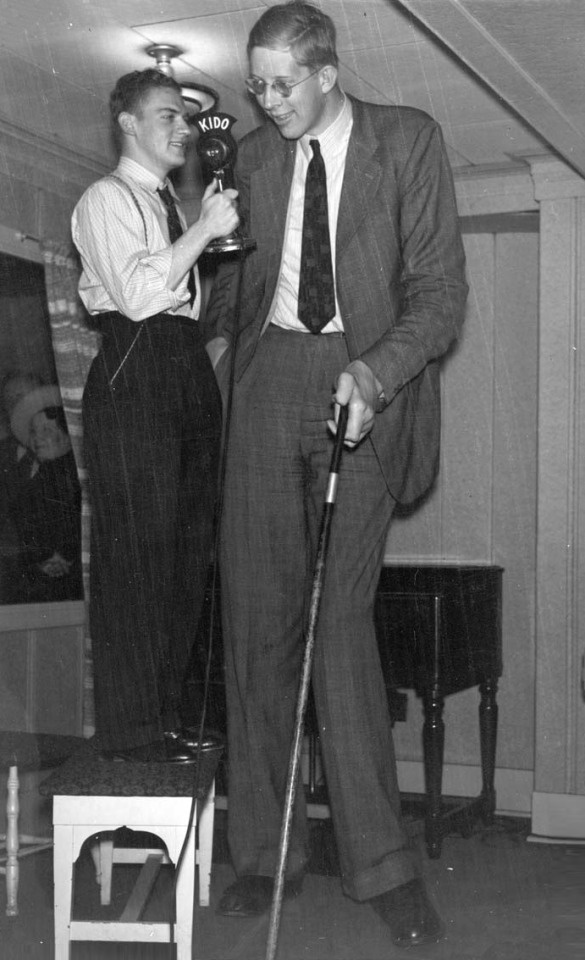
senpai talking to a guy from kido radio- the original pic and my tweaked version! ;)
#robert wadlow#robert wadlow trash#i had to do a lot of clone stamping on the sides! :o#and the stool and wall corner are stretched out a bit! ;)#kido radio is in boise idaho#senpai was there in september of '39 so that could be the date of this pic!#he has his cane so it checks out! ;)#that's also when the hotel/school kids article happened#that's from september 28th and he was there until october 2nd#so this pic could even be from october! :o#no matter when it is i'm glad i could clean up the pic! :)
1 note
·
View note
Text
My Still Life
My Idea
I not sure why it came to my head but it was a movie quote from Gladiator. “What we do in life echoes in eternity”
How to make it a picture.
I was thinking about how could I show it goes on for ever. I thought at first I could have a couple of mirrors reflecting the objects. When I was setting up the still life it just so happen that I face the mirror each other and it bounced lot of reflection for ever and ever. As soon as I saw it I knew that is what I want to create. However how to photograph it. I googled it and saw it was done in Starwars by using 2 way mirror.
I wanted to pick some more modern look and feel for a my still life. What I wanting the items to represent:
Cross - religion, for some people religion can be a big part of people lifes.
Poppy - is to represent war and death
Light bulb - is ideas, knowledge
Key - new beginnings
Ring - love or commitment
mirror - echoing for eternity
The Set Up

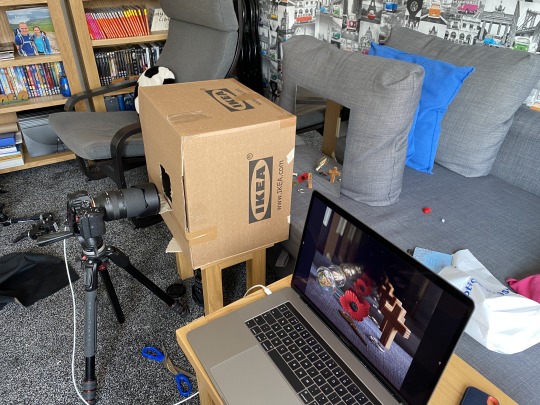
I had my camera connect to the computer and shot tethered. I used a black velvet over the camera to eliminate the reflection in the two way glass and meets I didn't need to be under the velvet.
The box held the mirror in place but also acted as a flag as the sun light was 5 o clock. (12 o clock from is mirror side of the box) which casted the shadow in the foreground.
I picked the grey sofa to shot on for two reasons. I didn't what a colour or pattern that was going to take away from the subject. When I saw the grey sofa I though the colour grey was a good option as it was not distracting but I felt like it added something to the image. I am not 100 % sure what it what it is adding but i feel like it is a good decision.
Problems that I had to overcome
1. For the 2 way mirror to work I needed to make the camera side darker that the subject. To do this I got a cardboard box and a hole of the 2 way glass to sit and a smaller hole on the other side for the camera.
2. The next problem was reflection for the glass. even though I cut a small hole for the camera light was getting into box and bouncing on the 2 way mirror to get rid of that problem I put a my black velvet cloth over my camera and the box to stop the reflection.
3. I bought all the mirrors the same sizes this was a mistake. the background mirror needs to be smaller that the 2 way mirror as I was getting the cardboard box reflection in the mirror which I did not want. There was no getting around that fact.i tried shooting landscape and portrait. I used the longest Len and tried playing with the foreground distance but you could alway see the box. In the end I did the best to get rid of it in real life. I though I could try and tackle it in photoshop.
4. The natural light had some problems in the sense made it almost impossible to repeat due to the changing light.
To make life easier I shot tethered so I didn't need to be under the blanket the whole time.
Raw Image

Photoshop
To fix the cardboard box I used the used the clone stamp tool and copy and flip the background. After I used the spot healing brush and the clone stamp to clean up the image.

Edit

0 notes