#i dot like this one i messed up with the lineart :( also it doesnt look. like my art style idk LOL
Explore tagged Tumblr posts
Note
draw a cat

french cat ?
#I wasnt gonna finish this actually but i saw rhe opportinutiy with this ask#i dot like this one i messed up with the lineart :( also it doesnt look. like my art style idk LOL#too round#langue de chat cookie#cookie run#my art#cookie run fanart
78 notes
·
View notes
Photo

a few ppl wanted a tutorial on how to make these kind of gifs so here u go! it goes thru a few basics of blender so if u already kno that stuff u can just skim most of it djsfhfkjh
warning: very long and probably doesnt make sense in some parts
OK step 1: draw the creature u wanna animate as a doodle:

step 2: lineart all the different parts u wanna use and fill them in solid black. (keep each shape on a separate layer)
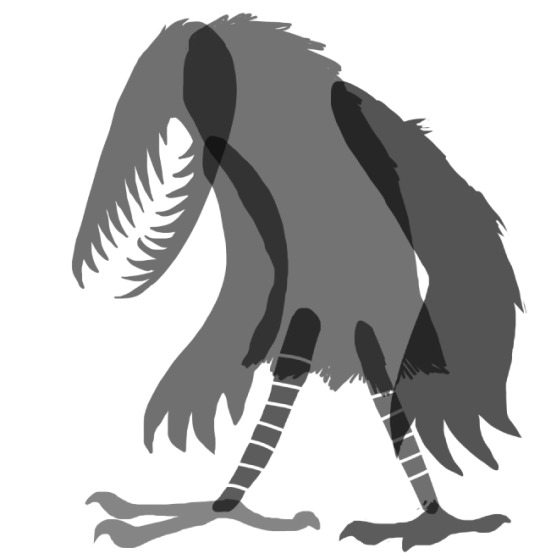
step 3: if you wanna use a blinking animation for an eye, draw out a fully coloured one n save it in its own file for later (ill do an AnimAll tutorial for it at some point kjhdkjh) otherwise u can just draw it straight on the head.

step 4: disassemble the puppet so all the parts are spaced apart. u might wanna take a picture of what it looks like assembled in case it gets difficult lining up parts later. save as a transparent png.

step 5: open a new file in blender. press num pad 5 to go into orthographic mode,and then num pad 1 to align your view to the front. if u cant see an extra menu to ur right that has options like background images/motion tracking etc press N.
open the background images tab and add your disassembled puppet as an image.

step 6: set your mesh view to wireframe, and add a plane mesh by pressing shift+A. there should b an operator panel that pops up to ur left with an Align to View option, check this box. (unnecessary note: u can also make a plane without aligning it, go to edit mode, delete the plane, and add in a new plane aligned to ur view so it doesnt mess with its object rotation but it doesnt rlly matter in this context)

step 7: position planes in edit mode over each part. it doesnt have to be super neat, as long as it covers the whole part and accounts for any joints.
its probably best to b generous with the amount of space you leave around each part, so it doesnt shrink too much when you apply a subdivision surface modifier in the next step.

step 8: go back to object mode, go to the wrench icon on the tabs to the right, and add a subdivision surface modifier. (apply it to the mesh with the settings as they are already)

step 9: go back into edit mode. to your right, pull up a small window from the corner tab thingy at the bottom, and switch the view for that window to UV/Image Editor.

step 10: select all of your mesh part by pressing A, click on the shading/UVs tab to ur left, and choose Unwrap>Project from View (Bounds)

step 11: press the image tab at the bottom of the UV window, and open your puppet image again. u may notice everything is misaligned bc i dont know a better way to do this kjfdhdkjhlkjdfh
you can realign them by putting your mouse over a part and then pressing L to select it, and G to move it.
extra notes for ppl who havent used blender a lot: pressing X or Y while in move mode will lock it to the X or Y axis. you can do the same when you scale by pressing S instead of G.

step 12: focusing back on the actual mesh in the edit mode window, go to the materials tab at the right and make a new material with the plus button. scroll down until you see a shading tab, and check the shadeless button.

underneath that, check the transparency box and set the alpha bar to 0.

now go to the textures tab add a texture slot with the plus button, and import your puppet picture where the folder icon is.
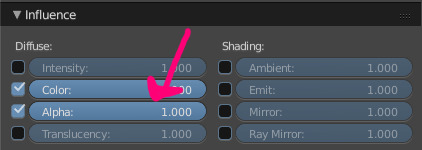
scroll down to the influence tab and check the alpha option.
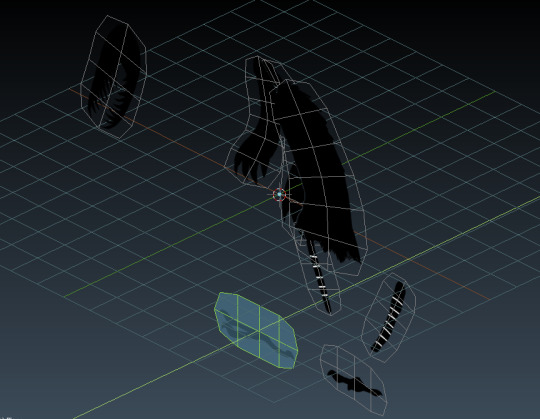
13: your mesh should now have the puppet texture on it yaay
in edit mode, move parts into the correct layer order u decided on when making the drawing. (eg, head is at the front, arms are slightly in front of the body etc)
the order doesnt matter too much if the puppet is a solid colour, but it helps when rigging it.

14: assemble the parts so its in the right place like your original picture was, then go back to object mode. add a single bone thru the same way you added a plane.

15: place/extrude (e) bones over the parts/points you want to move/bend. make sure to name them smth Not Ridiculous in the N menu so you can find them easily later.
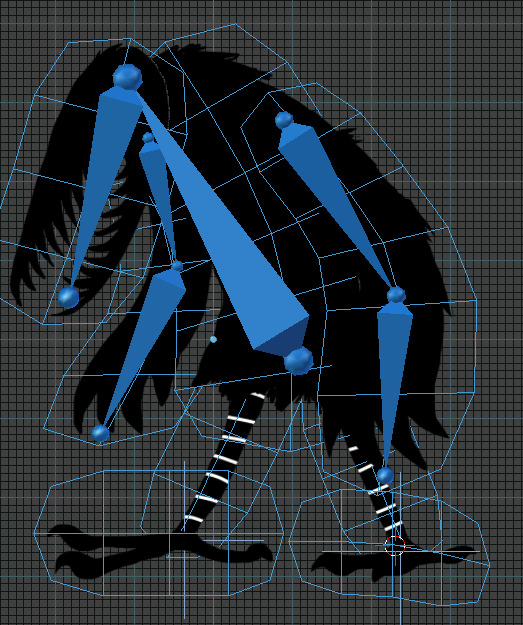
if you want bones to move with other bones automatically (like arms moving with the body) you can go to this tab, and select a parent bone for it.

16: once u have all the bones u need, go back to object mode. deselect the armature. now, click on the mesh to select it. click the armature second while holding shift to select them both. press control+P and choose the With Empty Groups option.
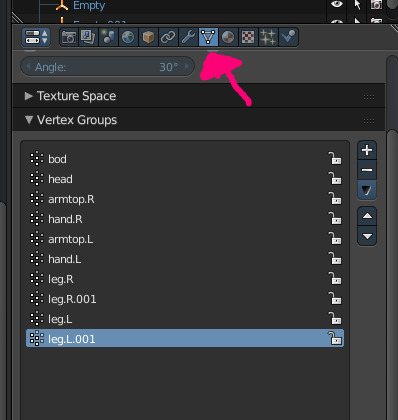
17: deselect them both and click on your mesh. in edit mode, click on the triangle dot thing tab to see your vertex groups. (this is y you need to name bones)
this part is straightforward. if your mesh part has no joints in it, you can select the part for the vertex group by hovering your cursor over it and pressing L. then click on the correct vertex group name from the list on the right, and press Assign. (if u fuck up you can also use Remove in the same way)
you can assign individual faces by using the face selector thing for meshes w multiple bones.
if you wanna see how it works, select the armature and change the view to pose mode and try moving/rotating a bone. (if u rigged it, it should move)
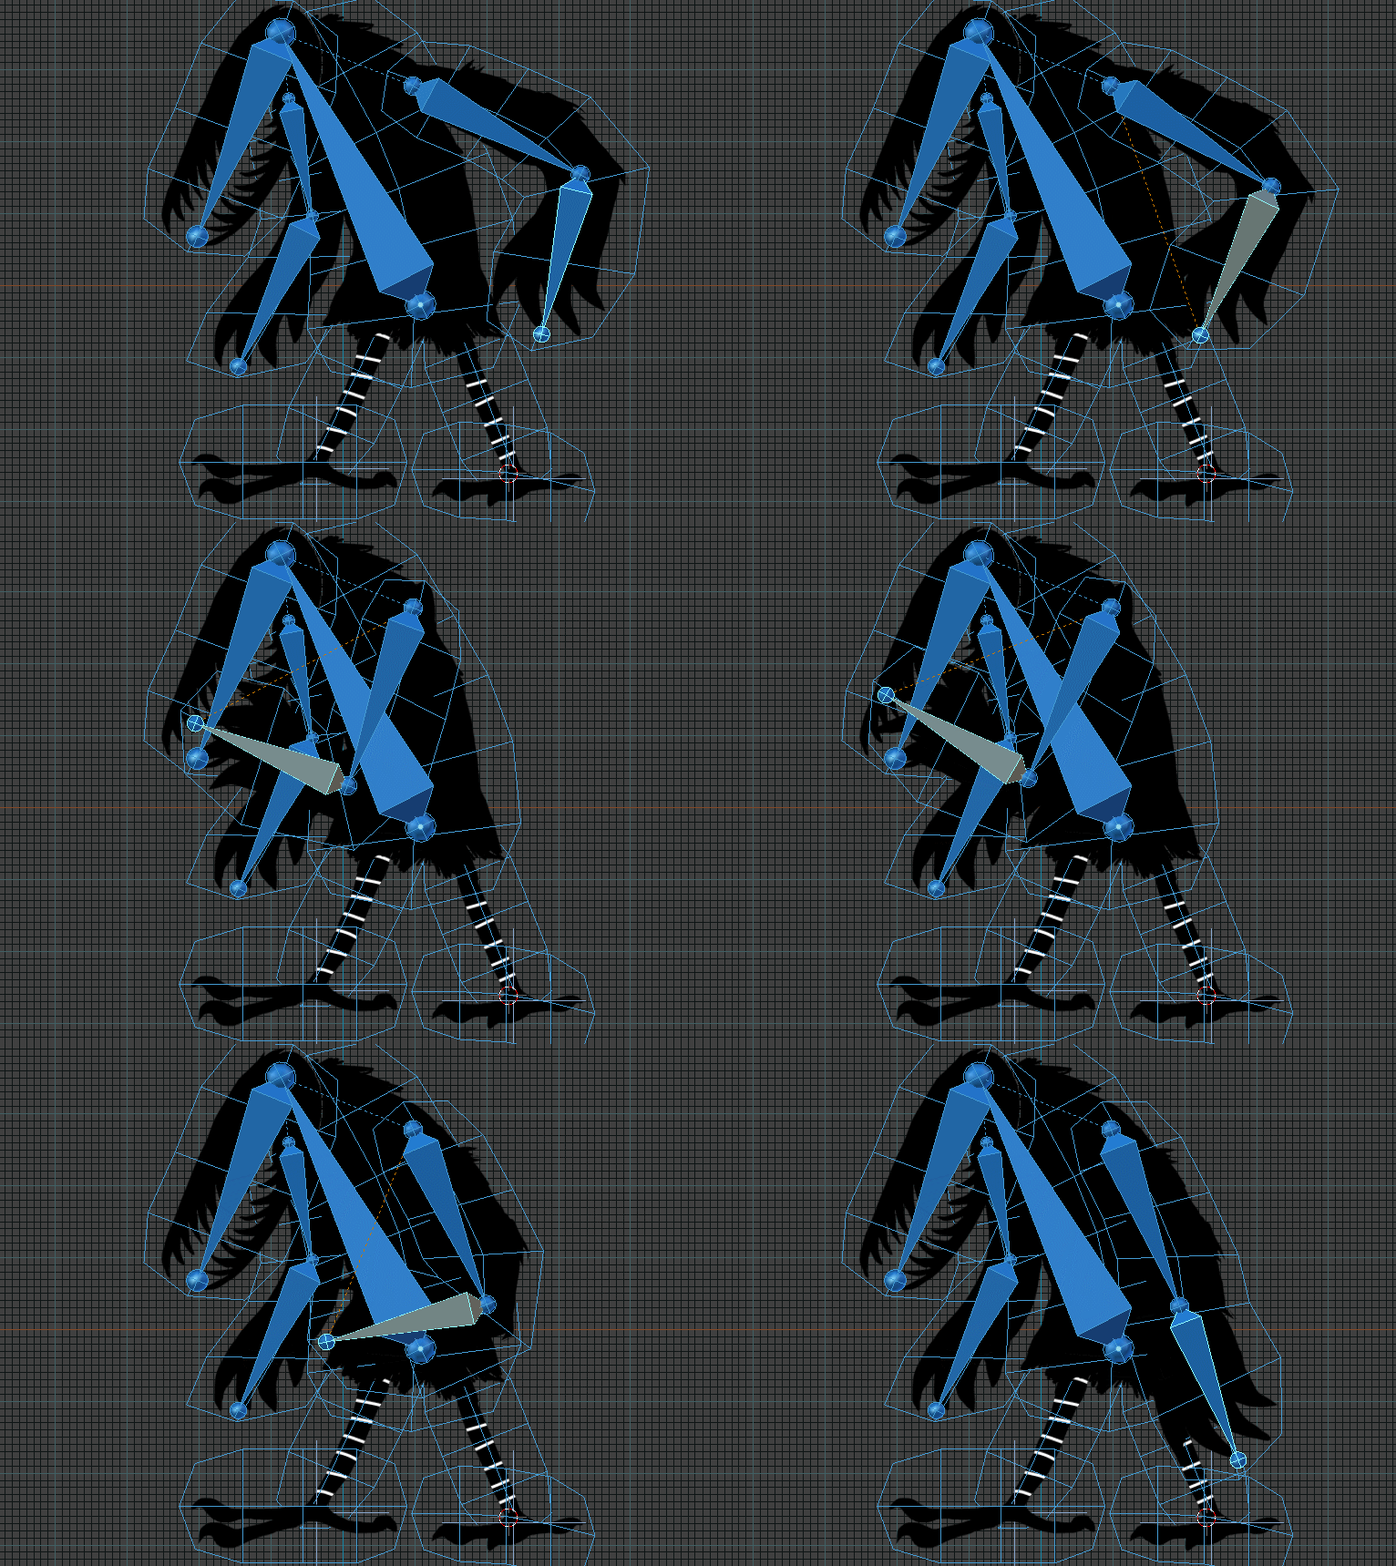
if you go to pose options, theres a box that says Auto IK. if you check it, you can grab bones like this!

18: to begin keyframing ur animation, you need to press this button at the bottom of the timeline. if you want the animation to loop, you need to copy/paste the starting pose on the first and last frame.
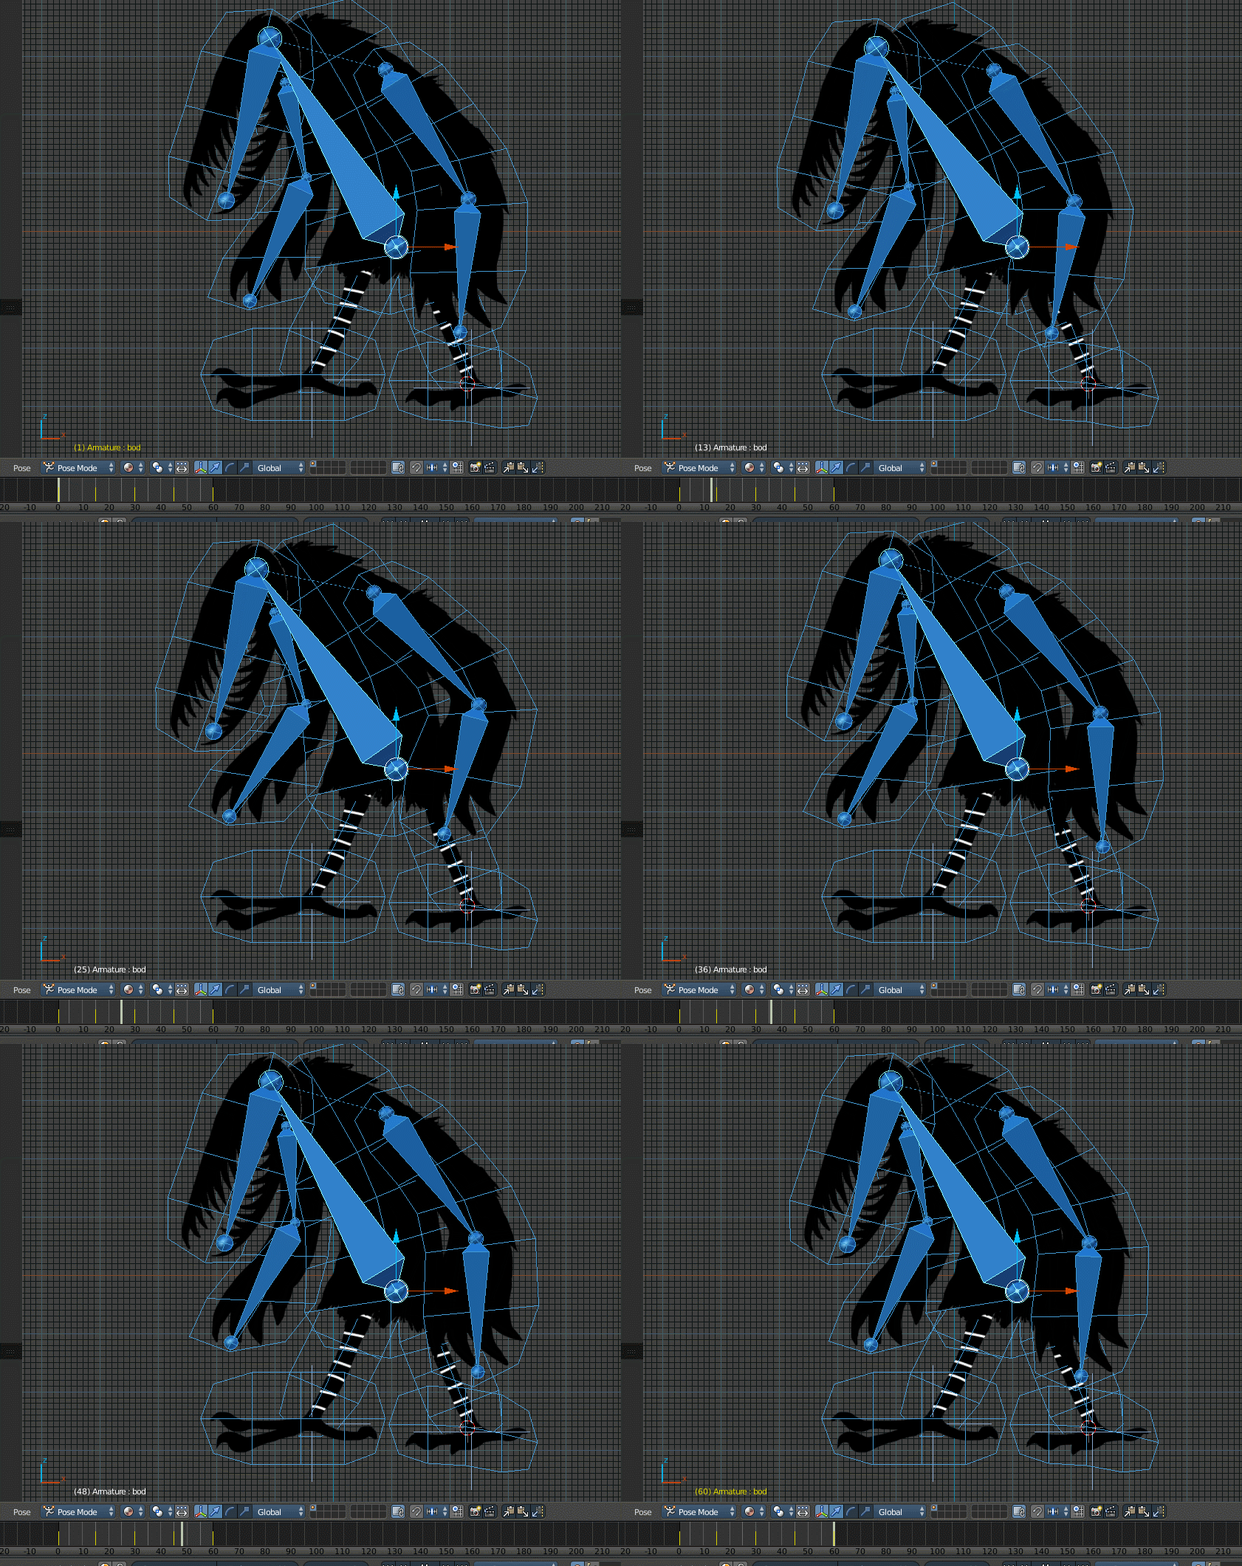
if u wanna make it look creepier, you can select all (or just some) bones , change your view on the window to ur right to Graph editor:
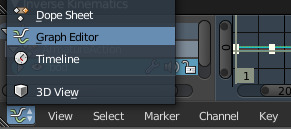
and go to Key>interpolation>pick any (the gif uses bounce)
...aaaaand thats basically it! heres a few extra steps if you wanna render it also:
to render the animation:
go to object mode, add a camera, go to the camera tab to the right and set it to orthographic. you may need to adjust the view thing so your mesh fits on the screen (moving the camera back wont work in ortho)
to stop the texture looking sorta blurry:
go to your texture tab, scroll down to image sampling and turn interpolation off or to Box.
i think i got everything dskjfjdfhj this was written at like 4 in the morning so forgive me for typos
2K notes
·
View notes