#how to wrap text in a column of page block table
Explore tagged Tumblr posts
Visit Tumblr Blog
Explore Tumblr blogs with no restrictions, modern design and the best experience.
Last Seen Tumblr Blogs


Fun Fact
Tumblr is used by 21% of adults online aged 18-29 years.
Text
White Knuckles
Awhile back, I asked y’all to send me a song so I could take its energy, lyrics, and/or feeling and write you a 1,000-word Clexa fic.
This one shot meandered way beyond 1,000 words. It’s based on White Knuckles by Tegan and Sara, as requested by @damiana-atx.
Angsty academia AU. No content warnings except for some swearing.
You can also find it on ao3.
-----------------------------
“Fuck, this is good,” Clarke said aloud to no one as she tossed the journal on the table. She leaned back in her chair. Godlessness Centered: Negotiating Queerness in The Left Hand of Darkness by Alexandria J. Woods, PhD. When Clarke had first picked up the journal, she scoffed. The Left Hand of Darkness? Really? And queerness? How overdone.
But it was brilliant. A discourse on Le Guin’s own spirituality and how it defied casual dualities.
I should have thought of that.
She looked at her watch. Twenty minutes.
---
Lexa smoothed the lapels on her blazer, though they were already perfectly flat. She gazed at herself in the hotel mirror, staring at the buttons on her shirt. She had a choice to make—the choice of the one awkward button. Button it, and she would seem, well, buttoned-up, uptight. But unbuttoned, it was a bit...revealing. There was no middle ground.
She pushed her glasses up on her nose and took a breath. Then buttoned the button.
---
They met in Bloomington, Indiana. All the sci fi literature conferences seemed to be in random small cities in the Midwest. They were strange events. Mostly men in khaki and tweed carrying beat-up leather satchels, experts on Vonnegut and Wells (H.G., that is). But there was also the overt geek element. Undergrad boys carrying frayed copies of Asimov and Gaiman, their laptops covered in Star Trek and My Little Pony stickers, and the occasional girl wearing a Strong Female Character t-shirt.
Then there was Lexa, sharp in a plain black cashmere sweater and grey herringbone slacks, her glasses suggesting both intelligence and the ability to break you. The geeks followed her but kept an admiring distance.
Clarke, for some reason, seemed more approachable. As she sipped her gin and tonic at the hotel bar, the kids (as she called college students) would creep up to her, their eyes down.
“Dr. Griffin?” they’d ask.
“Call me Clarke,” she’d say, smiling.
“I just had some questions on your takedown of the Darkover series.”
Clarke would always give them about twenty minutes then politely end the conversation, turning back to her drink.
She had had three such conversations when she felt a tap on her shoulder. Clarke didn’t mind the attention, but she was getting tired. She spun around, ready to dismiss herself.
“Dr. Griffin.” Lexa stood above her.
“Dr. Woods,” Clarke replied, nodding politely. She had read all of Lexa’s work. She had to. They were two of the only feminist sci fi lit scholars who were regularly publishing. But they’d never actually met.
“I don’t really prefer the term ‘doctor.’” Lexa said, looking just past Clarke. “It’s a little....” She didn’t finish her thought. After a moment she tilted her head. “Do you really think we should stop reading Bradley because of her scandal?”
Clarke put her drink down. “Scandal is kind of an understatement. And I didn’t say we should stop. I just said it’s hard.”
Without invitation, Lexa sat down at Clarke’s table. “If we bring every artist’s personal life into how we engage with their work, we probably won’t be able to enjoy anything.”
Clarke raised an eyebrow. “I never took you for a modernist.”
“That’s not what I’m saying.”
“Then what are you saying?”
“That sometimes shitty people create amazing art.” Lexa’s eyes lit up with her smile, like she was issuing a friendly challenge.
“Are you flirting with me?” Clarke returned her version of the same smile.
Lexa sat back and shrugged. She took a sip of her martini.
---
A few hours later, Clarke was sprawled across Lexa’s bed looking up, her hair in tangles across the pillow, a corner of the sheet pulled over her midsection. Lexa was curled up next to her, sweaty and wondering what just happened. She took a few breaths, looking for words. She squinted to herself, couldn’t think of anything to say. She felt Clarke shuffle a bit and prepared for the awkward banter that would come when they’d get up to look for their clothes.
“Do you believe in God?” Clarke asked instead. She didn’t get up.
“Pardon?”
“Do you believe in God?” Her tone was so casual.
“I...I don’t know.” Lexa looked up at the ceiling. She suddenly felt cold and reached down for a blanket. “Why do you ask?”
“I think I do,” Clarke said, not answering the question.
“Why?”
“I just look around this world, and it seems pretty incredible to me. Like it wasn’t an accident. Someone had to have created all this. Created us. Then made us creators.” Clarke shook her head and looked past Lexa. “It all seems like such a miracle.”
“Are you a Christian?” Lexa felt her face crumple.
Clarke laughed. “I don’t know. I do like the idea of the trinity.”
“When I grew up, my parents took me to one of those born again churches.” Lexa looked down. “It was mostly Jesus. I mean, I know what the trinity is, but…” Why was she telling her this?
“No, that’s not what I mean.” Clarke shook her head. “Not like God as some guy who makes you love him or else you burn in hell. That’s bullshit.”
Lexa squinted.
“The trinity. It’s like a dance between these three ways God reveals herself.” Clarke smiled. “It’s beautiful actually.” She looked at Lexa. “Did you ever read A Wrinkle in Time?”
Lexa side-eyed her. “Clarke, I’m a sci fi scholar.”
“Okay, so there’s Mrs. Who, Mrs. Whatsit, and Mrs. Which…”
They stayed up the rest of the night, moving from L’Engle to Shelley to Jemisin and the spiritual worlds of their stories. Evil and suffering, goodness and hope. Retribution, sacrifice, and justice. Beauty and joy. Mouth to neck, hands to curves, skin to skin.
By dawn, Lexa had found God.
---
Lexa went back to UC Irvine and Clarke returned to her adjunct job at Georgetown, but they emailed constantly. Long, meandering messages about particular chapters of The Stone Sky and Spinning Silver. Clarke sent her Marilynne Robinson essays, and Lexa responded with questions. Together, they laid theologies over imagined worlds, mapped them out and connected them to other imagined worlds. They took down Ender’s Game, built up The Hainish Cycle, and even let themselves dabble in Stardust, which they both had to admit they secretly admired. Back and forth, tens of thousands of words over the course of months. They only talked on the phone a few times, but the emails were constant.
Not long into their messages, Clarke had mentioned how her father had died when she was young. Lexa hinted at being on her own at age 16. These details were wrapped in blankets of analysis and metaphor, the theological undercurrents of the imagined worlds they studied, the anthropology of beings who only existed on pages and in minds.
They made plans to meet in Cleveland to present together at a lit crit conference. A week before, Lexa bailed. “Sorry,” the text said. “An emergency came up.”
“Everything okay?” Clarke responded.
Nothing.
The conference was rough. Clarke knew it would be, but she thought she’d have Lexa’s powerful presence demanding attention. The lit crit crowd all secretly loved what they called “genre” fiction—sci fi and fantasy—but they publicly derided it as “unserious” or “not literary.” She held her own, but it wasn’t fun.
She texted Lexa when she got back to her hotel room. “Wish you had been here. Same straight white male bullshit as usual.”
Silence.
“Did I say something wrong?” Clarke texted a few days later. At that point, though, she knew Lexa was gone.
A heaviness set in on her. Clarke reread their messages looking for hints, but Lexa’s words seemed wide open, even joyful. What happened?
She immersed herself in a chapter she was writing for a textbook on book fandoms and lecturing on feminism and postmodernism in Harry Potter—not her favorite topic, but it was a popular course. She had almost let herself forget about Lexa when, six months later, she was flipping through Foundation: The Journal of Science Fiction and saw her byline in the table of contents. Justice & Joy: The God Revealed in the Feminist Imagination. By Alexandria J. Woods, PhD.
Clarke turned to page 137 and ran her eyes down the columns. She bit her lip. The essay was essentially a catalog of their emails, one idea bridged skillfully to another by Lexa’s pointed and lucid prose. But they weren’t just Lexa’s ideas. They weren’t just Clarke’s, either, but a stream of their thoughts flowing together like a river. It was beautifully done.
Clarke didn’t notice that her hands were balled into fists until she felt her nails cutting into the skin. She opened her laptop and pulled up the messages. Lexa had been careful to rephrase Clarke’s words, but it was all there, even with citations of Marilynne Robinson. The Death of Adam.
Clarke pounded out an email. How dare you...couldn’t even ask for me to be a coauthor...you hadn’t even thought about these things until you met me. She knew Lexa wouldn’t see it. She probably had blocked her address. She didn’t bother hitting send.
Her face fell into her hands. She remembered that night in San Diego. Lexa’s smile—that curiosity despite herself. The way her hands traced the skin over Clarke’s side.
That woman wouldn’t have done this. But there it was. Twenty-six pages of shared conversation now claimed for Lexa only.
---
Clarke’s department was buzzing about it the next day. The religious studies chair was also a huge geek who kept up with Foundation, and he had been blown away by how seamlessly interdisciplinary the article was. “I hadn’t thought to connect the Christian trinity and A Wrinkle in Time, but it’s really so obvious when you think about it.”
Clarke seethed. She thought about printing up the emails, sending them to Foundation and the UC Irvine Disciplinary Committee, but something stopped her. Allegations of plagiarism would ruin Lexa’s career as a scholar. And was it really plagiarism? Clarke wanted to be sure, but she wasn’t.
So she wrote instead. A deep and cutting rebuttal highlighting where Alexandria J. Woods’ religious arguments were rudimentary at best, illustrating how shallow her connections were, and then plunging further, mining Catherine Keller and other theologians for an even deeper exploration of the worlds of Butler and Clarke (Arthur C., that is). Foundation published her essay the next quarter. Lexa answered, bringing in Buddhism and Humanism. A spotlight grew around their debate, so they continued writing—back and forth between literary, cultural, and religious journals. WIRED magazine picked up the story: Feuding Feminists Shifting the Sci Fi Landscape.
That’s when the invites started rolling in. A conference on spirituality and pop culture invited them to speak on a panel together, but Clarke refused. She couldn’t bear to see Lexa in person. Instead, she accepted an invitation to lecture at NYU while Lexa spoke at Cal.
Clarke’s classes filled with long waitlists every semester, her success intertwined with Lexa’s and their endless intellectual feud. They both thrived. Lexa’s ideas sharpened Clarke’s, and Clarke’s sharpened Lexa’s. She couldn’t admit it, but she needed Lexa as much as she despised her.
---
Lexa was in her office when the call came.
“Dr. Woods?” A male voice.
“It’s Professor Woods.”
“Excuse me, Professor Woods,” he corrected himself. “This is Dr. William Porter at Georgetown. The chair of the Department of English.”
Lexa felt something jump in her chest. “Good morning.”
“I’m calling because a very generous donor has recently endowed a tenure-track professorship here specifically for women in science fiction studies.”
“You’re kidding me.” it felt like a prank, and a mean one at that. Lexa had never heard of such a thing.
“Uh, no.” Dr. Porter seemed thrown off. “We’re inviting only a few people to apply, and you’re on our short list. Is this something you’d be interested in?”
They hung up with lingering plans to arrange flights and meetings.
Lexa sat for a few minutes, her fingers tapping idly on her closed laptop. Clarke would be one of the other candidates—and maybe the only other candidate—she was sure. She looked down and shook her head, thinking back to that day when she made the worst decision of her life.
She had printed out some of the emails she had sent Clarke to reference them against some short stories when the dean knocked on her door. He noticed a copy of L’Engle’s Walking on Water open on her desk.
“What’s that about?” he asked.
“Uh, just a side project I’m working on.” Her face burned with the exposure of her new interest in religious studies.
“Mind if I look?” he asked, picking up one of the print-outs before she could answer.
She bit her lip as he read, his forehead creasing.
After a few minutes, he looked up. “Professor Woods, this is good stuff.”
She took a deep breath and let it out. “Thank you. I’ve been working with Professor Griffin at Georgetown—”
“But these are your words, right?”
“Yeah, what you’re holding. That’s mine.”
“You need to publish this. It could be really good for you and the department.”
“Yeah, Professor Griffin and I—”
“Lexa,” he said in that kind but firm I’m-A-Man-In-Charge voice, “there’s a distinction to be made between attribution and inspiration. I’m inspired every day by the ocean, by James Joyce.” Lexa hid her contempt. Scholars who pretended to understand Joyce were pretentious liars. “But I’m not citing them.”
“Dr. Titus.” Her voice was firm. “I couldn’t have written that without Professor Griffin.”
“Professor Woods.” He looked her straight in the eye. “This department doesn’t need a co-authored paper with someone from Georgetown. We need a win.” He tapped the paper. “These are your words. Are they the product of a broader conversation? Sure, but what isn’t?” He looked out the window at the budding trees. “We took a chance on your genre work. And I’m seeing some good stuff. But I need to see more if we’re going to keep you on.”
Lexa looked past Dr. Titus and took in a silent breath. Jobs in her specialty was rare. UC Irvine had invested more than most schools to create a department where someone like her could thrive. She nodded.
“Get me an abstract and outline next week,” the dean said. “The managing editor at Foundation is a former student.”
When he left, she took off her glasses and rubbed her eyes. She would need to cancel her panel with Clarke in Cleveland. She wasn’t sure if she’d ever be able to look at her again.
---
Clarke let out a deep breath as she stepped into the crisp fall air. It had been a long day of interviews. She stopped on the stairs. She knew Lexa was close by. She had to be. They were the two people in the country most qualified for the job. She’d been on these interview panels before. Two, sometimes three, a day, candidates rotating between deans and panels. Clarke was surprised she hadn’t seen her yet.
She shook her head. Maybe she should have said something about that first paper. The job would be hers if she had. But would she even be considered without that paper? It had launched her career. Her public debate with Alexandria J. Woods, PhD, got her lectures around the country, a longform article in The Atlantic, and the keynote spot at conferences that two years ago would have never taken her seriously. Their refusal to appear together added to their mystique. Geeks and academics alike lined up on reddit and twitter to take sides.
Her success was bound to Lexa’s, two sides of the same double helix.
She bundled a scarf around her neck. It didn’t matter where Lexa was. Clarke loved the work she did, and she had rocked the interviews. But she was tired. It was time for a drink. She pulled out her phone to call a Lyft. Something about the fading purple sky changed her mind, though, and she decided to walk.
The cobblestones on O Street felt somehow comforting under her feet. Solid. Old. Not going anywhere. She thought about calling Dr. Reyes from the engineering department to join her—Raven was always good for either a loud night of much alcohol or a quiet night of raw, stinging truth—the latter of which was why Clarke had never told her all that had happened with Lexa. She shook her head. Maybe she just needed some gin and silence.
She sat at the bar at L’Annexe and ordered a Tom Collins. Bartenders always smiled curiously at her when she ordered one. Funny, you don’t look like a 75 year-old man to me. She’d smile back impatiently. Just make my damn drink. When the drink arrived, she took a sip and let out a deep breath as the gin started to glow through her. No one can fuck up a Tom Collins. It was simple and always felt good and sharp and bright going down.
She was halfway through her drink when a man sat next to her and ordered a scotch. Clarke glanced at his plaid scarf, wool sweater, and worn leather shoulder bag. Definitely a TA. He noticed her looking at him and smiled.
“I’ve seen you,” he said. “You teach that Harry Potter course.”
Clarke’s stifled a sigh. “That’s me.” She tilted her head back and drank the rest of her Tom Collins in one swig.
“Can I get you another?”
“No,” she said, picking up her bag. She made eye contact with the bartender. “I need to pay.”
“Whoa,” the man in the scarf said, raising his hands. “I’m just trying to be nice.”
“And I was just trying to be alone.” Clarke nodded towards the guy sitting on the other side of him. “Maybe you can be nice to him.” She dropped some cash on the check that had arrived and made her way to the door.
It was darker outside than when she’d arrived. And colder. She buttoned her wool coat and started making her way down Pennsylvania Ave. towards the bus stop.
---
Lexa was sipping a Syrah at a window table when she saw Clarke walk by outside. She took in a breath, remembering how Clarke’s eyes got soft when she asked, “Do you believe in God?” She shook her head. She could just let her keep going, and they could go on avoiding each other forever. Unless Lexa got the job.
Shit.
She grabbed her coat, leaving a $20 under her mostly full glass. By the time Lexa got out the door, Clarke was halfway down the block, almost lost in a crowd of loud students. Lexa didn’t button her coat, and it billowed out as she jogged down the street.
“Clarke!” she shouted as she got closer. She saw Clarke stop, her back straighten and stiffen. She didn’t turn around.
---
Clarke wanted to be angry. When she heard that voice, she wanted to spin on her heel and unleash a cascade of expletives that would make the passersby uncomfortable. She not only wanted Lexa to hear the words traitor, cheat, betrayed, she wanted her to feel the force of them rip through her body like a landmine.
But she froze. When she heard that voice, she felt tears sting at the corner of her eyes. She felt a slow storm in her chest, all rain and no lighting. She closed her eyes. She wanted to be angry, but all she felt was heaviness. She held her breath and waited.
When she opened her eyes, Lexa was in front of her, her eyes uncertain and her arms folded in front of her. “Hey…” she said after a few moments.
Clarke bit into her lip, hoping not to draw blood. She looked up, her blue eyes blazing, about to spark. She could tell Lexa was waiting for her to say something, so she stayed silent.
Lexa nodded. “I’m so sorry, Clarke.” She didn’t know what else to say.
Clarke’s eyes locked on Lexa’s, but she refused to respond.
“I don’t expect you to understand...” Lexa trailed off. “It wasn’t right. It wasn’t fair.” She looked past Clarke to a stoplight turning from yellow to red.
Lexa’s open coat revealed a gray plaid suit, smart and uncompromising, the top button studiously and chastely buttoned. So she had interviewed today. In this moment, though, it all felt wrong. Lexa seemed so small to Clarke. She wasn’t the woman she met at the hotel that night, but she also wasn’t the woman who submitted that article. This woman was drawn in on herself, her hair falling around her face like a curtain. Clarke remained silent.
Lexa sucked in her lips. “I know you probably hate me, and I get it.” She looked down. “I hate me, too.”
“No.” Clarke’s voice was deep and quiet. “You don’t get to do that.” She felt confused when she saw a shadow of relief cross Lexa’s face.
“You’re right,” Lexa said. “That’s not fair.” She took a long, deep breath and let it out. “I’m going to tell them.” She looked Clarke in the eye. “I’m going to tell Georgetown, and I’m going to tell Foundation. I’ll—”
“Don’t.” Clarke cut her off. “It’s done.”
“But—”
“Fuck you, Lexa.” She barely looked at her as pushed past, a slow fire burning through her as she walked briskly towards Dupont Square.
---
Lexa was freezing by the time she got back to her hotel room. She had stood on the sidewalk for a long time, watching Clarke get smaller and smaller. She didn’t know what she’d been expecting. Forgiveness? Punishment? Clarke had given her neither, which is what she knew she deserved.
She had never written a paper more carefully, never thought about the ideas so closely, never danced so delicately around sentence structure and tense. In a twisted way, she was proud of it. It was sophisticated but accessible, and completely defensible. Even if Clarke had tried to accuse her, she was sure she would have won.
She shook her head sharply. That’s not who I am. But it was. She was intelligent and ambitious and ready for a breakthrough. She knew Titus had been threatening her, but she also knew that what she had been writing with Clarke was good. Really good. She had never felt so alive in her work as when she was in conversation with Clarke. No one had ever challenged or inspired her like that. Even after that first paper, her debates with Clarke from essay to essay were electric, almost feverish. Clarke tapped something in her that was insatiable.
She picked up her laptop and opened some of the first emails she and Clarke had exchanged after Bloomington. She couldn’t help but smile. There had been a giddiness to them, this breathless excitement to constantly share new discoveries, interesting connections. They had sent seven, sometimes eight, messages a day. Thousands of words.
And that night in Bloomington.
She closed the laptop. Was it worth it? For months, Lexa had tried to convince herself that it had just been one night, that she didn’t even really know Clarke. When she saw Clarke on that sidewalk tonight, though, she knew that was all bullshit.
They had been falling for each other the best way they knew how. Lexa had betrayed all of it.
—-
Lexa was sitting on the floor outside Clarke’s office when she arrived the next morning.
Clarke sighed. “Seriously?” She didn’t look at her as she slid her key in the lock. “What are you doing here?”
“I had a meeting to cancel.” Lexa shrugged, not getting up.
Clarke pushed her door open. “I don’t have anything else to say to you, Dr. Woods.”
“I withdrew my name.”
Clarke froze. “Why?” Clarke noticed jeans and a sweater under Lexa’s coat. Her hair was pulled back in a messy bun. She was serious.
“You know why.”
Clarke’s eyes narrowed. “You didn’t have to do that.”
“Yes, I did,” Lexa said steadily as she stood up. The smallness from the night before was gone. She stood tall, her shoulders thrown back. “I don’t know who else they’re interviewing, but I’m not your competition anymore.” She swallowed and looked into Clarke’s eyes. “I don’t want to be your competition anymore.”
Clarke let out a breath she didn’t know she was holding. She wanted to say, Good luck, Dr. Woods, and close the door behind her, but instead she felt herself pushing the door open, heard herself saying, “Come in.”
Lexa bit her lip. “You sure?”
Clarke nodded and ushered her in. The door clicked as it closed behind them. Clarke set her bag down and sat at her desk. She shook her head, frustrated. “I just want to hate you. That’s all. I want to tell you to fuck off, and I want to go on with my life.”
Lexa sat in the reading chair in the corner of Clarke’s office. She nodded, looking down at her hands. “Then why don’t you?”
Clarke huffed, a cynical laugh. “I can’t get away. You’re everywhere.” She threw up her hands. “I saw you on the fucking New Yorker site this morning. How did you land that?” A rhetorical question. “I assign your essays for my classes. I have to. I hate how good you are.”
“You’re good, too, Clarke,” Lexa said quietly. She looked up. “Very good. I keep researching and writing because you keep responding.”
Clarke closed her eyes. She knew it was the same for her, but she didn’t want to say it. Finally she looked up. “Why did you do it?”
Lexa looked past her at Clarke’s diplomas on the wall. Undergrad at Cornell. She shook her head, almost said I don’t know, but she didn’t want to lie. “I wanted to do something big.” She gathered the courage to look at Clarke’s face. “I wanted to do it with you, but my dean pressured me to take solo authorship.” She closed her eyes, ashamed. “And I was a coward.”
“Yeah.” Clarke leaned back in her chair. “You were.”
Everything that came into Lexa’s head to say felt like an excuse, so she kept her mouth shut. They both did, the loud ticking of the cheap clock on the wall cutting through the silence.
Finally Clarke shook her head. A corner of her mouth curved up. “It was really beautifully done.”
Lexa looked up, her head tilted.
“I was so fucking angry, Lexa.” Clarke breathed out like she was letting something go. “I should have been a coauthor, but, fuck, it was well written. Like it was on a whole other level.”
Lexa’s green eyes were bright as they locked in on Clarke’s. “You inspire me, Dr. Griffin.” She sat back. “It’s what I wanted to talk to you about.” She paused and sucked in her lips. “I think we should write a book together.”
As soon as Clarke heard the words, she knew it was a good idea. Maybe the best idea. But all that would come out was, “Fuck you, Lexa.” It was almost a laugh.
Lexa’s face was stone, but her eyes were alive. “An editor already approached me. If I brought you on…”
“You can’t buy your way out of the shitty thing you did, Lexa.”
“That’s not what I meant.” Lexa ran her hand over her hair then looked up, her face suddenly soft. “I meant it, Clarke. I’m better with you.” She shrugged. “And I think you’re better with me, too.”
Clarke bit her lip. She took in a heavy breath, and let it out in a long sigh. She stood up. “Come here.”
Lexa squinted her eyes.
“Just come here, please. You owe me that.”
Lexa stood up in front of Clarke. Clarke lifted her hand to her face and leaned in, her lips barely touching Lexa’s. Lexa didn’t move, but Clarke felt her shiver. She leaned in and kissed her softly. Then she pulled back.
“I just…” Clarke didn’t know where the end of that sentence was supposed to go, and she didn’t tried to find it. Instead, she lifted her eyes and looked at Lexa as her chest rose and fell, rose and fell.
Lexa held her breath.
Finally Clarke smiled, almost laughing at herself. “That’s not a yes, Dr. Woods. But it’s not a no.”
115 notes
·
View notes
Text
A Tip A Day #38 - PageBlockTable Wrap Text
A Tip A Day #38 – PageBlockTable Wrap Text
This post is a part of the daily blog series A Tip A Day, daily dosage of learning! Day #38 – Wrap Text in PageBlockTable Columns
I have a pageBlockTable on Products. The table displays Product Name and its Description. The description field is long text area and generally, the descriptions length is long. In fact, so long that the description text makes the table stretch ridiculously wide.
View On WordPress
#A Tip A Day#A Tip A Day Blog Series#A Tip A Day sfdcfanboy#best salesforce blog#blog#blog salesforce#columnClasses#couple dress#dress to be outstanding together#dress to match#dress2match#dress2match.com#fan boy#how to wrap text in a column of page block table#how to wrap text in pageblocktable#matching outfits#rowClasses#salesforce#Salesforce blog#salesforce fan#salesforce t shirt buy#Salesforce Tip#Salesforce Tips#Salesforce.com#sfdc#sfdc fan boy#sfdc fanboy#sfdcfan boy#sfdcFanBoy#sfdcfanboy blog
0 notes
Text
Use MySQL BLOB column with PHP to store .pdf file
Like always I am sharing new things I learn here on my blog. I was recently working on a requirement for a LAMP stack web application reporting dashboard in which I needed to store – and eventually – retrieve a .pdf file. I have read in several places (this fantastic book is a great resource) that a viable option is storing images or documents (.pdf in this case) in the actual database table as opposed to on the server file system. MySQL has the BLOB datatype that can be used to store files such as .pdf, .jpg, .txt, and the like. In this blog post, I cover how I accomplished uploading and storing the actual .pdf file in a BLOB column in MySQL using PHP. Any corrections, tips, pointers, and recommendations for best practices are always welcome. We all learn as we go!!! Photo by Laika Notebooks on Unsplash Self-Promotion: If you enjoy the content written here, by all means, share this blog and your favorite post(s) with others who may benefit from or like it as well. Since coffee is my favorite drink, you can even buy me one if you would like! I am using a table named ‘project_pdf’ with 3 columns (see accompanying screenshot) to store the data: ‘id’: type INTEGER ‘project_name’: type TEXT ‘pdf_doc’: type BLOB Table structure for the project_pdf table. With the below simple HTML web form, we can collect the ‘project_name’ and enable the .pdf file attachment upload: Simple web form to upload a pdf to the database. Below is the HTML source code for the above web form:
Upload PDF
Upload A PDF To The Database
Project Name
Submit To Database
Looking at the code… We will use this PHP code stored in a script submit.php – which is the form action – along with some best practices utilizing if/else conditional blocks and wrapping all of the database operations in a try/catch block to complete the .pdf INSERT in the MySQL BLOB column: <!?phpif (isset($_POST['submit']) && !empty($_FILES['pdf_file']['name'])) { //a $_FILES 'error' value of zero means success. Anything else and something wrong with attached file. if ($_FILES['pdf_file']['error'] != 0) { echo 'Something wrong with the file.'; } else { //pdf file uploaded okay. //project_name supplied from the form field $project_name = htmlspecialchars($_POST['project_name']); //attached pdf file information $file_name = $_FILES['pdf_file']['name']; $file_tmp = $_FILES['pdf_file']['tmp_name']; if ($pdf_blob = fopen($file_tmp, "rb")) { try { include __DIR__."/includes/DatabaseConnection.php"; $insert_sql = "INSERT INTO `project_pdf` (`project_name`, `pdf_doc`) VALUES(:project_name, :pdf_doc);"; $stmt = $pdo->prepare($insert_sql); $stmt->bindParam(':project_name', $project_name); $stmt->bindParam(':pdf_doc', $pdf_blob, PDO::PARAM_LOB); if ($stmt->execute() === FALSE) { echo 'Could not save information to the database'; } else { echo 'Information saved'; } } catch (PDOException $e) { echo 'Database Error '. $e->getMessage(). ' in '. $e->getFile(). ': '. $e->getLine(); } } else { //fopen() was not successful in opening the .pdf file for reading. echo 'Could not open the attached pdf file'; } }} else { //submit button was not clicked. No direct script navigation. header('Location: choose_file.php');} Verify the button is clicked and a file is attached The first if/else block verifies that the ‘submit’ button from the form has been clicked and that the ‘pdf_file’ field has an attachment using the PHP functions isset() and empty() (the converse of truth by negating with the not ! operator for the empty() function): 1 isset($_POST['submit']) && !empty($_FILES['pdf_file']['name'])) Tip: More validation can be implemented here to verify the file type is an actual .pdf since that file type is what we are expecting to store in the database. Informational: Visit the official PHP online documentation for more information on isset() and empty(). Check PHP $_FILES array for errors The $_FILES array provides several related error codes for file attachments. A value of 0 (zero) means everything is okay with the file and it is successfully uploaded. In this particular if/else, block if that value is not 0 (zero), then we echo in the browser that something is wrong with the file upload: 1 $_FILES['pdf_file']['error'] != 0 Related: See the official PHP online documentation for more information on file upload errors. PHP $_POST and $_FILES Data The $_POST associative array has the value for the ‘project_name’ input field captured in the form and sent through the HTTP POST method. Likewise, the $_FILES associative array has several values for a file or attachment. I am assigning 2 of them to variables, but using only one – ['tmp_name'] – in the subsequent code: ['name'] – The actual file name from the client. (Could be used in a file name column if needed ['tmp_name'] – Temporary file name of the uploaded file as stored on the server. 123 $project_name = htmlspecialchars($_POST['project_name']);$file_name = $_FILES['pdf_file']['name'];$file_tmp = $_FILES['pdf_file']['tmp_name']; Related: Read more about POST upload methods in the official online PHP documentation. Read in .pdf binary data and prepare to store in MySQL BLOB column with PHP The call to fopen() reads in the file in binary format ("rb") into a ‘$pdf_blob’ variable. If fopen() cannot open the file, this if/else block echo‘s the message in the else block to the browser: 1 $pdf_blob = fopen($file_tmp, "rb") MySQL database connection and prepared statements Finally, we look at the entire try/catch block. I have all database connection information stored in a separate file named DatabaseConnection.php and include it in the script at this point using the include directive. Since we are introducing user-supplied input from the web form into the database, we use prepared statements leveraging the PHP PDO methods: prepare() bindParam() execute() INSERT .pdf file into MySQL BLOB column with PHP If the call to execute() is not successful, we echo a message to the browser that the information could not be saved. Otherwise, the data is successfully inserted and we echo ‘Information saved’: 12345678910111213141516171819 try { include __DIR__."/includes/DatabaseConnection.php"; $insert_sql = "INSERT INTO `project_pdf` (`project_name`, `pdf_doc`) VALUES(:project_name, :pdf_doc);"; $stmt = $pdo->prepare($insert_sql); $stmt->bindParam(':project_name', $project_name); $stmt->bindParam(':pdf_doc', $pdf_blob, PDO::PARAM_LOB); if ($stmt->execute() === FALSE) { echo 'Could not save information to the database'; } else { echo 'Information saved'; }} catch (PDOException $e) { echo 'Database Error '. $e->getMessage(). ' in '. $e->getFile(). ': '. $e->getLine(); } Note: It is generally not a good practice to echo any sort of database error information to the browser. Errors should be written to a log file instead. However, for the purpose of this blog post as a learning experience, I echo out any exceptions that may arise in the catch block. Using the form to store .pdf in MySQL BLOB column with PHP Let’s try out the form and PHP code to verify the upload works. Here is a simple sample .pdf file I created for a demo run: Contents of SamplePDF.pdf document to upload with form. See this screenshot in which I fill in the ‘project name’ field with a generic ‘First Project’ name and attach the SimplePDF.pdf file: Filled out web form with pdf attachment for upload. Upon clicking the ‘Submit’ button, the information is successfully stored in the database and the success message is displayed in the browser: Message displayed in the browser after successful pdf upload. Here is the data saved in the MySQL database table from the successful upload via our web form and the PHP code: The project_pdf table with inserted pdf and project name. It works!!! In the next blog post, I will cover how to retrieve the .pdf file from the database and display it in the browser. If you see anything in the code that I can improve on or any mistake, please let me know via the comments section below. Additional PHP/MySQL Reading Be sure and visit these other blog posts I have written on PHP and MySQL: PHP PDO lastInsertId() method with examples in MySQL Beginning Perspective on PHP Arrays Sorting associative arrays in PHP with array_multisort() – New learning Dynamic HTML drop-down with PHP and MySQL Like what you have read? See anything incorrect? Please comment below and thanks for reading!!! A Call To Action! Thank you for taking the time to read this post. I truly hope you discovered something interesting and enlightening. Please share your findings here, with someone else you know who would get the same value out of it as well. Visit the Portfolio-Projects page to see blog post/technical writing I have completed for clients. To receive email notifications (Never Spam) from this blog (“Digital Owl’s Prose”) for the latest blog posts as they are published, please subscribe (of your own volition) by clicking the ‘Click To Subscribe!’ button in the sidebar on the homepage! (Feel free at any time to review the Digital Owl’s Prose Privacy Policy Page for any questions you may have about: email updates, opt-in, opt-out, contact forms, etc…) Be sure and visit the “Best Of” page for a collection of my best blog posts. Josh Otwell has a passion to study and grow as a SQL Developer and blogger. Other favorite activities find him with his nose buried in a good book, article, or the Linux command line. Among those, he shares a love of tabletop RPG games, reading fantasy novels, and spending time with his wife and two daughters. Disclaimer: The examples presented in this post are hypothetical ideas of how to achieve similar types of results. They are not the utmost best solution(s). The majority, if not all, of the examples provided, is performed on a personal development/learning workstation-environment and should not be considered production quality or ready. Your particular goals and needs may vary. Use those practices that best benefit your needs and goals. Opinions are my own. The post Use MySQL BLOB column with PHP to store .pdf file appeared first on Digital Owl's Prose. https://joshuaotwell.com/use-mysql-blob-column-with-php-to-store-pdf-file/
0 notes
Text
Flexbox vs Grid - How to Build the Most Common HTML Layouts
There are so many great CSS resources all over the internet. But what if you just want a simple layout and you want it NOW?
In this article, I describe the 5 most common web page layouts and how to build them using both Flexbox and Grid.
How this will work
There is a link below every layout for the full HTML and CSS code on CodePen.
Note that I'm using SASS for composing style definitions, so if you want to do the same on your local, install SASS using:
npm i sass -g
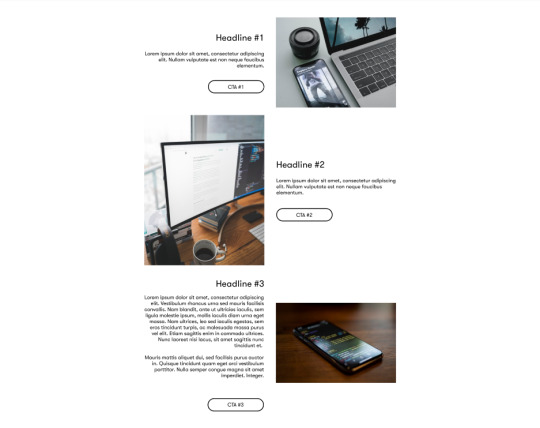
Basic card template
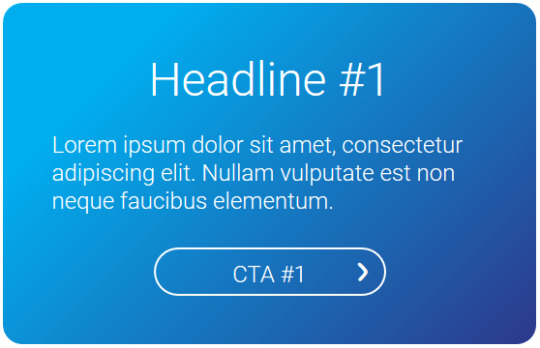
I used the above card as the base of the web page layout. It's composed of three elements in a vertical direction, so normal div blocks would work well. However, I will later need to make the middle element - the text paragraph - stretch.
Here both Flexbox and Grid do the job seamlessly. I prefer Flexbox as it's more straightforward to me.
Winner: Flexbox
CodePen Flexbox, CodePen Grid
Now let's start creating our different layouts.
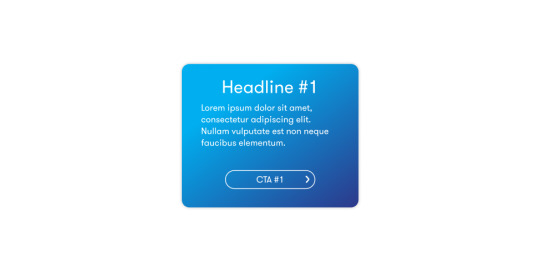
#1 Vertically and horizontally centered card

With Flexbox, we need one element that centers horizontally, and another (the child element) that centers vertically.
The order of items is defined by flex-direction. How the element positions itself in the available space is set by align-self on the element or align-items on its parent.
With Grid, we need three columns and three rows. Then we position the card in the middle cell.
The horizontal centering is easy. We define three columns and their sizes using grid-template-columns: auto 33% auto as the card should be as wide as 1/3 of the visible area.
The problem is, we don't know the vertical dimensions. We want the top and bottom rows to take up the remaining space which is not possible with grid. The card is centered, but its height depends on the height of the window.
However, we can solve this with an additional wrapping element around the card and center it using margin.
Winner: Flexbox
CodePen Flexbox, CodePen Grid
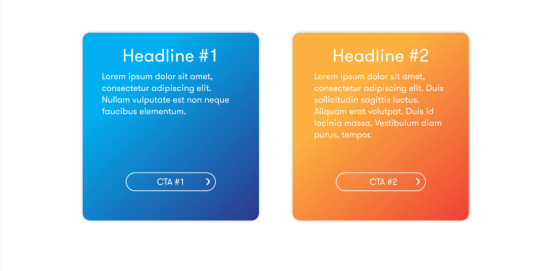
#2 Two cards vertically and horizontally centered

Often we need to center more than just one element. These two cards should also maintain the same height if one or the other contains longer text.
With Flexbox, we need to wrap both cards in another element and use it to center both cards at once.
We can't use align-items here as that applies to the Y-axis in this case. We need to define how the remaining space on the X-axis should be distributed with justify-content: center. That ensures both cards are horizontally centered.
If we omit the variable height problem of Grid, we can achieve the same result even without any additional wrapping elements. This time we define grid with five columns with grid-template-columns: auto 33% 50px 33% auto. The rest stays the same as in the previous example.
Winner: Flexbox
CodePen Flexbox, CodePen Grid
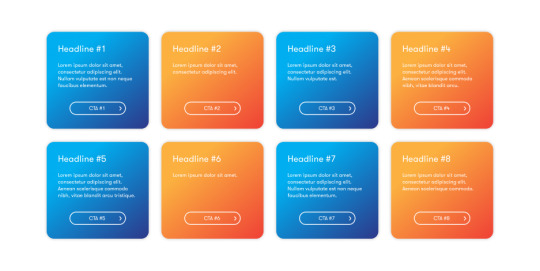
#3 Multiple cards with same width and height

This is another typical use case for blogs, e-commerce sites, or generally any site that displays some kind of listing. We want the cards to have the same width and height. Height needs to be inferred from the greatest element in the list.
This can be done in Flexbox using flex-wrap: wrap. Elements will wrap to the next line if their width exceeds the remaining space of each line. However, the same height is only preserved in the scope of a single line, unless you define it explicitly.

Grid shows its true power here. This layout can be created using grid-auto-rows: 1fr which enforces the same height on all rows.
Winner: Grid
CodePen Flexbox, CodePen Grid
#4 Alternating text and images vertically and horizontally centered

In this example, we have text with CTA buttons accompanied by an image on the other side. Both components should be vertically centered, as their size can vary.
This is a piece of cake for Flexbox. Every row is an article element split into two wrapping containers, .img and .content. They are required for even size distribution (flex-basis: 50%).
Vertical centering of the inner content is defined by align-items: center.
The alternation is achieved by reversing the direction of Flexbox by flex-direction: row-reverse on every odd article.
Grid handles this use-case nicely too. We don't need to define one giant grid, but rather one for each article.
It defines equally wide columns that are vertically centered using align-items: center.
The alternation is defined on the cell-level by switched values for grid-column.
Winner: tie
CodePen Flexbox, CodePen Grid

To achieve this design using Flexbox, both sides of the header need to be represented by a single element.

The logo and company name form one anchor on the left, and the menu is a single nav element on the right. Flexbox positions them with justify-content: space-between.

With Grid, we need two columns - one for the logo and the other for the menu. The menu is another grid that distributes the size of columns evenly using grid-template-columns: repeat(4, minmax(0, 1fr)).
The problem here is that if we want to add another item to the menu, we also need to adjust the CSS.
Winner: Flexbox
CodePen Flexbox, CodePen Grid
And the winner is...
The final score is 5:2 in favor of Flexbox, but this does not mean that it becomes the ultimate CSS winner. There are situations when you need to use one or the other, sometimes even both together, to achieve what you need.
If you need flexible and conditional positioning, use Flexbox. If you want to create listings or similar structures that require equally sized elements or have a table form, use Grid.
As a front-end developer, you won't get away with not knowing both.
Reference guide Flexbox, Reference guide Grid
P.S. If I missed a layout you use on a daily basis, let me know on Twitter and I'll prepare a sequel :-)
0 notes
Photo

Level Up Your CSS Skills with these 20 Pro CSS Tips
Front-end development is quickly becoming more and more focused on efficiency – faster loading and rendering through selector choice and minimizing code. Pre-processors like Less and SCSS go a long way in doing some of the work for us, but there are plenty of ways to write minimal, quick CSS the native way. This guide covers 20 Pro CSS Tips to help you cut down on duplicate rules and overrides, standardize the flow of styling across your layouts and will help you create a personal starting framework that is not only efficient, but solves many common problems.
1 – Use a CSS Reset
CSS reset libraries like normalize.css have been around for years, providing a clean slate for your site’s styles that help ensure better consistency across browsers. Most projects don’t really need all of the rules these libraries include, and can get by with one simple rule to remove all the margins and paddings applied to most elements in your layout by the browser’s default box-model:
* { box-sizing: border-box; margin: 0; padding: 0; }
Using the box-sizing declaration is optional – if you follow the Inherit box-sizing tip below, you can skip it.
2 – Inherit box-sizing
Let box-sizing be inherited from html:
html { box-sizing: border-box; } *, *:before, *:after { box-sizing: inherit; }
This makes it easier to change box-sizing when code is introduced through 3rd party plugins or applications that use different behavior.
3 – Get Rid of Margin Hacks With Flexbox
How many times have you tried designing a grid, such as a portfolio or image gallery, where you used floats and then had to clear them or reset margins to get the columns to break into the number of rows you want? Get rid of nth-, first-, and last-child hacks by using the space-between property value in flexbox:
.flex-container { display: flex; justify-content: space-between; } .flex-container .item { flex-basis: 23%; }
4 – Use :not() to Style Borders on Lists
A very common practice in web design has been to use :last-child or :nth-child selectors to undo a style previously declared on the parent selector. Think of a navigation menu that uses borders to create a separator between each link, and the second rule added to take that border off the end:
.nav li { border-right: 1px solid #666; } .nav li:last-child { border-right: none; }
This is quite messy as it not only forces the browser to render things one way, then undo it for a specific selector. Resetting styles this way is sometimes unavoidable, but for the most part, you can use the :not() pseudo-class to only apply a style to the elements you want in one single statement:
.nav li:not(:last-child) { border-right: 1px solid #666; }
This says, put a border on all the .nav list items except the last one. Simple!
Sure, you can also use .nav li + li or even .nav li:first-child ~ li, but :not() will always be more semantic and easy to understand.
5 – Add line-height to body
The one thing that leads to inefficient stylesheets is repeating declarations over and over again. The better you get at planning your project and combining rules, the more fluid your CSS will be. One way to do this is understanding the cascade and how the styles you write for general selectors can be inherited elsewhere. Line height is one property you can set for your entire project, not only to minimize lines of code but to enforce a standard look to your site’s typography.
Rather than add line-height to each <p>, <h*> and so on, add it to body:
body { line-height: 1.5; }
Note we don’t declare a unit here – we just tell it to make the line height one and a half times more than the font size for the rendered text.
6 – Vertically-Center Anything
Setting a global rule to vertically center your layout is a great way to set a foundation for elegantly set content layouts where you’re not ready to use CSS Grid.
html, body { height: 100%; margin: 0; } body { -webkit-align-items: center; -ms-flex-align: center; align-items: center; display: -webkit-flex; display: flex; }
7 – Use SVG for Icons
SVG scales well for all resolution types and is supported in all browsers. So ditch your .png, .jpg, or .gif-jif-whatev files. Even FontAwesome now offers SVG Icon Fonts in FontAwesome 5. Setting SVG works just like any other image type:
.logo { background: url("logo.svg"); }
Accessibility tip:If you use SVGs for interactable elements such as buttons, and the SVG fails to load, a rule like this one will help maintain accessibility (make sure it has the appropriate aria attributes set in the HTML):
.no-svg .icon-only:after { content: attr(aria-label); }
8 – Use the “Owl” Selector
Using the universal selector (*) with the adjacent sibling selector (+) provides a powerful CSS capability that allows us to set rules for all elements in the flow of the document that specifically follow other elements:
* + * { margin-top: 1.5rem; }
This is another great trick that can help you create more uniform type and spacing. In the example above, all elements that follow other elements, like an H4 that follows an H3, or a paragraph following another paragraph, will each have at least 1.5rems of space (equal to about 30px.)
9 – Consistent Vertical Rhythm
Consistent vertical rhythm provides a visual aesthetic that makes content far more readable. Where the owl selector may be too general, use a universal selector (*) within an element to create a consistent vertical rhythm for specific sections of your layout:
.intro > * { margin-bottom: 1.25rem; }
10 – Use box-decoration-break For Prettier Wrapped Text
Say you want to apply uniform spacing, margins, highlights or background colors to long lines of text that wrap to more than one line, but don’t want the whole paragraph or heading to look like one large block. The box-decoration-break property allows you to apply styles to just the text while keeping padding and margins intact. This is particularly useful if you want to apply highlights on hover, or style sub-text in a slider to have a highlighted look:
.p { display: inline-block; box-decoration-break: clone; -o-box-decoration-break: clone; -webkit-box-decoration-break: clone; }
The inline-block declaration allows the colors, backgrounds, margins and padding to be applied to each line of text rather than the entire element, and the clone declaration makes sure those styles are applied consistently to each line equally.
11 – Equal-Width Table Cells
Tables can be a pain to work with so try using table-layout: fixed to keep cells at equal width:
.calendar { table-layout: fixed; }
12 – Force Empty Links to Show with Attribute Selectors
This is especially useful for links that are inserted via a CMS, which don’t usually have a class attribute and helps you style them specifically without generically affecting the cascade. For example, the <a> element has no text value but the href attribute has a link:
a[href^="http"]:empty::before { content: attr(href); }
13 – Style “Default” Links
Speaking of link styling, you can find a generic a style in just about every stylesheet. This forces you to write additional overrides and style rules for any links in a child element, and when working with a CMS like WordPress can lead to problems with your king link style trumping a button text color, for example. Try this less-intrusive way to add a style for “default” links:
a[href]:not([class]) { color: #999; text-decoration: none; transition: all ease-in-out .3s; }
Now the style will only apply itself to links that otherwise have no other style rule.
14 – Intrinsic Ratio Boxes
To create a box with an intrinsic ratio, all you need to do is apply top or bottom padding to a div:
.container { height: 0; padding-bottom: 20%; position: relative; } .container div { border: 2px dashed #ddd; height: 100%; left: 0; position: absolute; top: 0; width: 100%; }
Using 20% for padding makes the height of the box equal to 20% of its width. No matter the width of the viewport, the child div will keep its aspect ratio (100% / 20% = 5:1).
15 – Style Broken Images
This tip is less about code reduction and more about refining the detail of your designs. Broken images happen for a number of reasons, and are either unsightly or lead to confusion (just an empty element). Create more aesthetically-pleasing with this little bit of CSS:
img { display: block; font-family: Helvetica, Arial, sans-serif; font-weight: 300; height: auto; line-height: 2; position: relative; text-align: center; width: 100%; } img:before { content: "We're sorry, the image below is missing :("; display: block; margin-bottom: 10px; } img:after { content: "(url: " attr(src) ")"; display: block; font-size: 12px; }
16 – Use rem for Global Sizing; Use em for Local Sizing
After setting the base font size at the root, for example html{font-size: 15px;}, you can set font-size for containing elements to rem:
article { font-size: 1.25rem; } aside { font-size: .9rem; }
Then set the font size for textual elements to em:
h2 { font-size: 2em; } p { font-size: 1em; }
Now each containing element becomes compartmentalized and easier to style, more maintainable, and flexible.
17 – Hide Autoplay Videos That Aren’t Muted
This is a great trick for a custom user stylesheet when working with content you can’t easily control from the source. This trick will help you avoid annoying your visitors with sound from an auto-playing video when the page is loaded, and again features the wonderful :not() pseudo-selector:
video[autoplay]:not([muted]) { display: none; }
18 – Use :root for Flexible Type
The font size in a responsive layout should be able to adjust to the viewport automatically, saving you the work of writing media-queries just to deal with font sizing. You can calculate the font size based on the viewport height and width using :root: and viewport units:
:root { font-size: calc(1vw + 1vh + .5vmin); }
Now you can utilize the root em unit based on the value calculated by :root:
body { font: 1rem/1.6 sans-serif; }
19 – Set font-size on Form Elements for a Better Mobile Experience
To avoid mobile browsers (iOS Safari, etc.) from zooming in on HTML form elements when a <select> drop-down is tapped, add font-size to the input styles:
input[type="text"], input[type="number"], select, textarea { font-size: 16px; }
20 – Use CSS Variables!
Last but not least, the most powerful CSS level-up comes from CSS variables, which allow you to declare a set of common property values that can be reused via a keyword anywhere in the stylesheet. Your brand may have a set of colors to be used across the project to keep things consistent. Repeating these color values over and over again in your CSS is not only a chore, but also error prone. If a color needs to be changed at some point, your forced to find-and-replace, which is not reliable or fast, and when building products for end-users, variables make customization that much easier. For example:
:root { --main-color: #06c; --accent-color: #999; } h1, h2, h3 { color: var(--main-color); } a[href]:not([class]), p, footer span{ color: var(--accent-color); }
0 notes
Text
CSS Flexbox In A Nutshell

As web design trends have evolved since the early days of the internet, there have been different standard ways to arrange elements on a website. CSS flexbox is a relatively new yet powerful way to create layouts and something every web developer and designer should be familiar with. If you don’t know how to use it yet, this in-depth flexbox tutorial aims to change that. The post below will talk about what flexbox is, why it matters, and its underlying concept. After that, we will go over the CSS properties and values associated with flexbox in detail and finish up with an example of a use case. If you don’t know how to use it yet, this in-depth flexbox tutorial aims to change that. The post below will talk about what flexbox is, why it matters, and its underlying concept. After that, we will go over the CSS properties and values associated with flexbox in detail and finish up with an example of a use case.
What is CSS Flexbox?
Flexbox stands for flexible box. It’s a layout module for CSS aimed at giving you an efficient way to arrange, organize, and size website elements to create highly adaptive designs. Of course, the technology to place web components on a page is not new. Since the beginning of the Internet, web designers have used different ways to place images, text, and other content where they wanted it to be. However, these were either not suitable for responsive design (tables), were never intended for as a layout tool in the first place (float), didn’t allow you to define equal heights for elements (inline-block), or had other issues. So, while designers and developers made do for a long time, there were still a bunch of design patterns that were either impossible or needed JavaScript to work. Common examples are vertical centering and equal columns, two of the holy grails of web design. How is Flexbox Different? The way flexbox works is quite simple on the surface: You have a container (flex container) with children (any elements contained within, called flex items), which are placed along flex lines. Lines and items can be manipulated in layout, size, spacing, and more along both the vertical and horizontal axis using a multitude of operators. This allows you to best take advantage of the available space and lets elements arrange themselves automatically according to it. If that is hard to visualize, here’s a schematic (courtesy of W3.org) to make things clearer:

Still not entirely sure? I can’t blame you. Let’s talk about it in more detail. The Underlying Concept As mentioned, flexbox is a whole CSS module, not a single property. Therefore, it comes with a whole lot of its own operators, some for the parent container, some for its children. To understand how they work, it’s important that you know the concepts and terminology of flexbox, which are displayed in the image above: main axis — This is the axis at which the items are laid out. Important: it can be both vertical or horizontal, depending on the flex-direction property. main-start, main-end — These represent the start and end point of where items are arranged. main size — This denotes either the width or height of the flex items, depending on the direction of the main axis. cross axis — The axis perpendicular to the main axis. Its direction, too, depends on how the main axis is defined. cross-start, cross-end — Start of and direction in which flex lines will be filled. cross size — Denotes the other dimension of flex items that is not defined by main size. writing-mode — Allows you to switch the direction of writing from left-to-right to right-to-left or even to vertical. It’s a work in progress with little to no browser support, however, it’s important to know for some of the properties further below. As you can see, a lot about flexbox is rather abstract and not absolutely defined. Consequently, much of the CSS below is dependent on your setup. When to Use Flexbox While you can use flexbox to build entire web pages, however, that’s not the recommended use case. For larger layouts, consider Grid (more on that some other time). Flexbox, on the other hand, is most appropriate for small-scale layouts and applications, such as: navigation menus card layouts media items web forms Browser Support Flexbox was first proposed at the beginning of the past decade and recommended by the W3C for adoption in 2012. Since then, browsers have started supporting it and, by now, all modern browsers are able to deal with flexbox.

Available Flexbox CSS Properties
Alright, now that we have settled the theory, let’s see what flexbox can do. With the properties below, you can manipulate your layout both by assigning traits to the container and also to items individually. We will start with the former and then move on to the latter. flex-direction This defines the main axis and, as a consequence, the direction in which your flex items are placed. This also allows you to change the order of items, which used to require altering the underlying HTML. Available properties are: row — The default. Arranges flex items left to right unless you are in a right-to-left environment due to writing mode. row-reverse — Arranges items horizontally but in reversed order. column — The same as row but vertical with items arranged top to bottom. column-reverse — You can probably guess this one. column-reverse displays items bottom to top.

flex-wrap The default behavior of items within a flex container is to arrange themselves in one row. flex-wrap allows you to change that. nowrap — The default value that places all items in one line. wrap — If a single line isn’t enough, with this, items will arrange themselves into multiple lines from top to bottom. wrap-reverse — Same as wrap but with items ordered from bottom to top.

flex-flow This is a shorthand for flex-direction and flex-wrap. Usage: .flex-container { display: flex; flex-flow: row wrap; } The flex-flow property allows you to define both main axes of the container. The default value is row nowrap, all possible values from the two properties above apply. justify-content The next flexbox CSS property defines the item alignment on the main axis. It decides what happens with any available free space and has some control over the alignment when items get wider than their container. Here are the values you can choose from: flex-start — Default value. Items align towards the front of flex-direction. flex-end — Places items at the end of flex-direction. start — Defines the beginning of writing-mode as the starting point. end — Moves items towards the end of writing-mode. left — Aligns flex items towards the left edge of the container. If that doesn’t make sense due to flex-direction, it behaves like start. right — The same as left but for the right edge. center — Items center horizontally. space-between — Distributes items evenly within the container. The first towards the start, the last toward its end with even space between them (hence the name). space-around — Items are evenly placed with equal space around them. Note that it behaves like margin or padding where you have double the space between items as towards the edges. space-evenly — Items reside evenly placed within the container but the spacing between each and toward the container edges is even.

Beware that browser support for these values is a bit spotty. For example, space-between is not supported in some versions of Edge and start/end/left/right aren’t in Chrome yet. The safest values are flex-start, flex-end, and center. align-items This property controls how items align across the cross axis. It’s the equivalent of what justify-content is for main axis. Here are the available values: stretch — Default value that stretches items to fill the container. flex-start, start, self-start — Aligns flex items at the start of the cross axis. start and self-start adhere to flex-direction and writing-mode respectively. flex-end, end, self-end — The same as above but placing items at the end of the cross axis. center — Items reside at the center of the cross axis. baseline — Aligns flex items along their baselines.

Here, too, it’s important to note the browser support. align-content This property is responsible for controlling flex lines if there is extra space available on the cross axis. It’s similar to justify-content. You need more than one row of items for the values below to take effect. stretch — Default value. The lines stretch to take up all available space. flex-start, start — Items align at the beginning of the container. flex-start adheres to flex-direction, start to writing-mode. flex-end, end — Same deal as flex-start and start only that items move to the end of the container. center — Centers items on the cross axis inside the container. space-between — Evenly distributes flex lines inside the container with the first row being placed at its start, the last at the end. space-around — Even distribution with even space around each line. space-evenly — Even distribution with equal space around items.

order Beginning with this one, the remaining rules all apply to flex items instead of the container. The order property controls in which order items appear inside their container.

For example, the default value for all flex items is order: 0;. If you want to move a particular item to the front or back of the line, you can do so by giving it a value like 1 or -1. This also works across row or column boundaries unlike row-reverse or column-reverse which will reverse the order per line individually. Here’s the code for the example image above: 1 2 3 4 flex-grow Controls the ability for flex items to grow within the container as necessary. flex-grow takes a number that describes a proportion. Example: if all items are set to flex-grow: 1; they are all evenly distributed inside their container. However, if one is set to 1 and another to 3, the latter will try to take up three quarters of the available space.

flex-shrink Similar to flex-grow but defines the ability of items to shrink in relation to other items. The higher the number, the more an item will reduce in size and vice versa. flex-basis

Defines the default element size (height or width depending on the axis). It can be a relative value like 15% or absolute like 30px. Here’s how I achieved the above: 1 2 3 4 Other possible values: auto — This is the default. content — Sets the size according to the item’s content. It’s not well supported yet, same as max-content, min-content, and fit-content that also exist. flex Shorthand for flex-grow, flex-shrink, and flex-basis together. Only the first parameter is mandatory and the default value is 0 1 auto. 1 2 3 4 It often makes sense to use this property instead of flex-grow, flex-shrink, or flex-basis individually as it applies sensible values to the operators you are not using. flex can also take initial (adheres to the defined size if there is one), auto (making it fully flexible), and none (making all items inflexible). You can use this, for example, to set some items to a fixed width (via initial) while having others adjust themselves to the available space. align-self This allows you to override the alignment of individual items. It has the same values as align-items.
Flexbox Example: Columns with Equal Height
As a last step, we will go over an example of how to use the above. Let’s create a flexbox layout with columns of equal height. You can build it with HTML like so:
Column 1
Lorem ipsum dolor sit amet, consectetur adipiscing elit.
Column 2
Lorem ipsum dolor sit amet, consectetur adipiscing elit. Morbi interdum et ex a efficitur. Nam consequat elementum tellus, at varius lectus condimentum vulputate.
Column 3
Lorem ipsum dolor sit amet, consectetur adipiscing elit. Morbi interdum et ex a efficitur. After that, add this CSS markup to it: .flex-container { background-color: #aa278c; border-radius: 10px; display: flex; margin-bottom: 10px; } .flex-container > div { background-color: #F7941F; border: 1px solid; border-radius: 10px; flex: 1; font-size: 20px; font-family: tahoma; line-height: 40px; margin: 10px; padding: 16px; width: 60px; } .flex-container > div h2 { text-align:center; } And here is the result:

Why does this work? Well, the only important parts are actually that the flex container is set to display: flex;, while its children take on flex: 1;. All the other markup is just for styling. As you may recall, doing this sets flex-grow and flex-shrink both to 1 and flex-basis to auto. As a consequence, all items take up the same amount of space inside the container and their initial size automatically adapts to the available dimensions. The result: effortless columns of equal height.
Flexbox in a Nutshell
In web design, there are many different ways to create layouts and arrange elements. Flexbox is one that has become more and more common. The CSS module offers a lot of benefits, especially for dynamic layouts, smaller page elements, and mobile design. Above, we have gone over what exactly flexbox is, its abilities, and how to use it. Next time you find yourself wanting use float or inline-block, take a second to think whether or not flexbox might be the better solution. If you enjoyed this post, why not check out this article on how to Add Custom Fonts to your WordPress or ClassicPress Site! Post by Xhostcom Wordpress & Digital Services, subscribe to newsletter for more! Read the full article
0 notes
Link

There are so many great CSS resources all over the internet. But what if you just want a simple layout and you want it NOW?
In this article, I describe the 5 most common web page layouts and how to build them using both Flexbox and Grid.
How this will work
There is a link below every layout for the full HTML and CSS code on CodePen.
Note that I'm using SASS for composing style definitions, so if you want to do the same on your local, install SASS using:
npm i sass -g
Basic card template

I used the above card as the base of the web page layout. It's composed of three elements in a vertical direction, so normal div blocks would work well. However, I will later need to make the middle element - the text paragraph - stretch.
Here both Flexbox and Grid do the job seamlessly. I prefer Flexbox as it's more straightforward to me.
Winner: Flexbox
CodePen Flexbox, CodePen Grid
Now let's start creating our different layouts.
#1 Vertically and horizontally centered card
With Flexbox, we need one element that centers horizontally, and another (the child element) that centers vertically.
The order of items is defined by flex-direction. How the element positions itself in the available space is set by align-self on the element or align-items on its parent.
With Grid, we need three columns and three rows. Then we position the card in the middle cell.
The horizontal centering is easy. We define three columns and their sizes using grid-template-columns: auto 33% auto as the card should be as wide as 1/3 of the visible area.
The problem is, we don't know the vertical dimensions. We want the top and bottom rows to take up the remaining space which is not possible with grid. The card is centered, but its height depends on the height of the window.
However, we can solve this with an additional wrapping element around the card and center it using margin.
Winner: Flexbox
CodePen Flexbox, CodePen Grid
#2 Two cards vertically and horizontally centered
Often we need to center more than just one element. These two cards should also maintain the same height if one or the other contains longer text.
With Flexbox, we need to wrap both cards in another element and use it to center both cards at once.
We can't use align-items here as that applies to the Y-axis in this case. We need to define how the remaining space on the X-axis should be distributed with justify-content: center. That ensures both cards are horizontally centered.
If we omit the variable height problem of Grid, we can achieve the same result even without any additional wrapping elements. This time we define grid with five columns with grid-template-columns: auto 33% 50px 33% auto. The rest stays the same as in the previous example.
Winner: Flexbox
CodePen Flexbox, CodePen Grid
#3 Multiple cards with same width and height
This is another typical use case for blogs, e-commerce sites, or generally any site that displays some kind of listing. We want the cards to have the same width and height. Height needs to be inferred from the greatest element in the list.
This can be done in Flexbox using flex-wrap: wrap. Elements will wrap to the next line if their width exceeds the remaining space of each line. However, the same height is only preserved in the scope of a single line, unless you define it explicitly.

Grid shows its true power here. This layout can be created using grid-auto-rows: 1fr which enforces the same height on all rows.
Winner: Grid
CodePen Flexbox, CodePen Grid
#4 Alternating text and images vertically and horizontally centered
In this example, we have text with CTA buttons accompanied by an image on the other side. Both components should be vertically centered, as their size can vary.
This is a piece of cake for Flexbox. Every row is an article element split into two wrapping containers, .img and .content. They are required for even size distribution (flex-basis: 50%).
Vertical centering of the inner content is defined by align-items: center.
The alternation is achieved by reversing the direction of Flexbox by flex-direction: row-reverse on every odd article.
Grid handles this use-case nicely too. We don't need to define one giant grid, but rather one for each article.
It defines equally wide columns that are vertically centered using align-items: center.
The alternation is defined on the cell-level by switched values for grid-column.
Winner: tie
CodePen Flexbox, CodePen Grid
#5 Horizontal header with menu

To achieve this design using Flexbox, both sides of the header need to be represented by a single element.

The logo and company name form one anchor on the left, and the menu is a single nav element on the right. Flexbox positions them with justify-content: space-between.

With Grid, we need two columns - one for the logo and the other for the menu. The menu is another grid that distributes the size of columns evenly using grid-template-columns: repeat(4, minmax(0, 1fr)).
The problem here is that if we want to add another item to the menu, we also need to adjust the CSS.
Winner: Flexbox
CodePen Flexbox, CodePen Grid
And the winner is...
The final score is 5:2 in favor of Flexbox, but this does not mean that it becomes the ultimate CSS winner. There are situations when you need to use one or the other, sometimes even both together, to achieve what you need.
If you need flexible and conditional positioning, use Flexbox. If you want to create listings or similar structures that require equally sized elements or have a table form, use Grid.
As a front-end developer, you won't get away with not knowing both.
Reference guide Flexbox, Reference guide Grid
0 notes
Link
This article will describe how to format SQL code using SQL Server Management Studio (SSMS) native options and how to format SQL code using a third-party SQL formatter tool.
A well-formatted SQL code is easily readable and reviewing such code can be much easier and faster than a non-formatted SQL code.
Format SQL code using SSMS options
SSMS provides a couple of options to format SQL code. Those options are indenting, tab sizing,
make all code in upper or lower case, comment/uncomment selected code, etc.
In SSMS, there are three options for indenting of SQL code:
None
Block
Smart
These three options are located under the Tabs tab of the All Languages sub-tab:
When the None radio button is selected, every time when hitting the Enter key from the keyboard, the cursor in a query editor goes to the beginning of the next line:
When the Block radio button is chosen, the cursor aligns with the previous line when the Enter key is hit:
With the Smart radio button selected, SSMS determines which indenting style will be used:
In the Tab section of the Tabs tab, how many spaces compose a single indentation or tab can be set.
If you want to use the tab characters for tab and indent operations, select the Keep tabs radio button. To use space characters, choose the Insert space radio button. If the Insert space is selected, then in the Tab size or Indent size, enter the number of space characters, each tab or indent represents respectively:
Now, to indent SQL code, in the query editor, select a code and press the Tab key from the keyboard or from the SQL Editor toolbar, click the Indent button:
To unindent SQL code, in the query editor, select the desired code, then on the keyboard, press the Shift+Tab keys combination or, on the SQL Editor toolbar, click the Unindent button:
These two options can also be found in the Advanced sub-menu under the Edit menu:
SSMS provides two options that can covert space to tabs and vice versa. These two options are:
Tabify Selected Lines – convert space to tabs
Untabify Selected Lines – convert tabs to spaces
When the Tabify Selected Lines command is used, the spaces in the selected SQL code will be converted to tabs:
As mentioned above; this can be done in the opposite way when the Untabify Selected Lines command is used.
The Delete Horizontal White Space option is used to delete white spaces around the selected SQL code at once:
This option is in the Advanced sub-menu of the Editor menu:
Besides the Delete Horizontal White Space option for removing unnecessary spaces from the SQL code, there is one more option (alternative) which is a combination Alt key with the left mouse click.
In the query editor, press and hold the Alt key, and using the left mouse click select the block of spaces that should be removed, and press the Delete key:
In addition, using this method can add a text multiple times at once. For example, a column alias can be added for each table column in a SQL code. Press and hold the Alt key, positing a cursor next to the first column, click and drag down by holding left mouse click. The light blue vertical line should appear, type a letter and dot (.):
In SSMS there are two format SQL code options for converting SQL code to Upper or Lower case. To make SQL code to be in Upper case, in a query editor, select the desired SQL code and, from the Advanced sub-menu, pick the Make Uppercase command:
Use the Make Lowercase command to convert to SQL code in lower case.
Word wrapping is another option available in SSMS for formatting SQL code and it is in the General tab of All Languages under the Test Editor tab:
When the Word wrap and Show visual glyphs for word wrap options are checked, the lengthy T-SQL lines in a query editor will be wrapped with indicators where the wrapping is applied. Also, the horizontal scroll bar will be eliminated:
Format SQL code using third-party SQL formatter tool
ApexSQL Refactor is a free SSMS and Visual Studio add-in for format SQL code. ApexSQL Refactor provides over 200 formatting options that can be used to beautify a SQL code. In this part of the article, how to create a formatting profile and how to use some of the ApexSQL Refactor formatting options will be explained. Also, it will be shown how to format SQL code in a query editor using formatting profiles.
Besides formatting SQL code in a query editor directly, ApexSQL Refactor has features that can format code base SQL objects like stored procedures, functions, views and SQL scripts in batches. More about those formatting features can be found on the Beautify your SQL code using SQL formatter features page.
ApexSQL Refactor comes with four built-in formatting profiles that can be used out of the box to format SQL code.
Built-in ApexSQL Refactor SQL formatting profiles:
ApexSQL – this profile provides the best formatting style by ApexSQL opinion
Compact – all spacing options are unchecked, and indentions options set to 0 (zero) space for a query where the SQL code looks dense
Extended – Spaces and empty lines are added before/after every statement. This profile is opposite of the Compact profile
MSDN SQL BOL – mimic the style from the MSDN resource site
These four formatting profiles among the rest of ApexSQL Refactor formatting options are located under the Options window:
Besides these four built-ins, a custom SQL formatting profile can be created. In the Options window, click the New button and, in the Create profile window, enter a name for the profile, optionally enter the author of a formatting profile and description:
More about SQL formatting profiles can be found on the How to customize SQL formatting profiles page.
After creating a SQL formatting profile, you can start a selection of options in the Options window to format SQL code:
For example, under the Capitalization tab, formatting all SQL keywords in upper case and all system functions in the lower case can be set:
All options for formatting tables in a query editor are located under the Tables sub-tab of the Lists tab:
And all related options for manipulating of columns are located under the Columns sub-tab:
Additional information about SQL formatting options can be found on the links below:
Rules of SQL formatting – Commas and spacing in T-SQL
Rules of SQL formatting – Regular and delimited T-SQL identifiers
Rules of SQL formatting – SQL code commenting
Rules of SQL formatting – SQL naming conventions and capitalization rules
Rules of SQL formatting – Terminating SQL statements with semicolons
Format SQL code
There are a couple of ways to format a SQL code using the custom created formatting profile.
In a query editor, paste some SQL code, go to the ApexSQL Refactor main menu, under the Format SQL by profile sub-menu, choose your newly created formatting profile:
The second way to format a SQL code using custom created SQL formatting profile is via query editor context menu. Right-click in a query editor and, from the context menu, under the Format SQL by profile sub-menu, select the custom created SQL formatting profile:
Additionally, the custom created SQL formatting profile can be set as default SQL formatting profile for the future format SQL code. Open the Options window, in the Profile drop-down box, select the desired SQL formatting profile, click the Set as active button and click the Save button:
Now, when this is set, you have additional SQL formatting command that can be initiated from a query editor, ApexSQL Refactor main menu, ApexSQL Refactor toolbar or using the Ctrl+Shift+Alt+F shortcut:
0 notes
Text
300+ TOP Ext JS Interview Questions and Answers
Ext JS Interview Questions for freshers experienced :-
1. What is Ext Js? Ext JS stands for extended JavaScript. It is a JavaScript framework to develop rich UI web based desktop applications. 2. Why did you choose Ext JS? The overall design of extjs is exemplary.One can learn a lot from it’s unified architecture – no matter which language one is programming in. Extjs requires you to start with one of their base classes – ensuring a consitent model. Consistency is extremely important for the library to be reusable. Extjs documentation seems to be very comprehensive and well maintained. key aspect of the EXTJS Library is the cross-browser support. Build rich Internet applications with Ext JS Ext JS framework is the multitude of rich UI elements provided. These elements include forms, dialog boxes, tabs, trees, and grids. The Ext JS framework includes support for Ajax implementations. Ext JS integration with other Web server frameworks. Ext JS framework development into several popular integrated development environments (IDEs), including Eclipse, Aptana, and Komodo. Ext JS provides excellent performance.The framework is fully object oriented and extensible. Because it’s written in the JavaScript language 3. What are major Web browsers supported by Ext JS framework? Windows® Internet Explorer® version 6 and later. Mozilla Firefox version 1.5 and later (PC and Macintosh). Apple Safari version 2 and later. Opera version 9 and later (PC and Mac). 4. Integration of Web development server-side frameworks with Ext JS? You can use Ext JS with other common Web development server-side frameworks, including PHP, the Java™ language, Microsoft® .NET, Ruby on Rails, and ColdFusion. 5. Where Extjs extended from ? Ext JS as a project to extend the functionality that the YUI Library.A key aspect of the YUI Library is the cross-browser support.The Extjs framework is fully object oriented and extensible. Because it’s written in the JavaScript language. 6. Extjs Ajax implementation? A typical Ext JS Ajax implementation: an HTML text field and button element that posts data in the text field to a Web server when the button is clicked. 7.Do you have any advice for developers using Ext for the first time? Ext can be used by Web Application developers who are familiar with HTML but may have little or no experience with JavaScript application development. If you are starting to build a new web application, or you are revamping an existing application, then take your time to understand the basics of the library including. 8. How to access Dom element using EXTJS? The Element API is fundamental to the entire Ext library. Using traditional Javascript, selecting a DOM node by ID is done like this: var myDiv = document.getElementById(‘myDiv’); Using Extjs: Ext.onReady(function() { var myDiv = Ext.get(‘myDiv’); }); 9. what is the purpose of Element Object in Extjs? Element wraps most of the DOM methods and properties that you’ll need, providing a convenient, unified, cross-browser DOM interface (and you can still get direct access to the underlying DOM node when you need it via Element.dom) The Element.get() method provides internal caching, so multiple calls to retrieve the same object are incredibly fast The most common actions performed on DOM nodes are built into direct, cross-browser Element methods (add/remove CSS classes, add/remove event handlers, positioning, sizing, animation, drag/drop, etc.) 10. what is syntax for Ext js Button click event? Ext.onReady(function() { Ext.get(‘myButton’).on(‘click’, function(){ alert(“You clicked the button”); }); }); ulating it. 11. what is use of Ext.onReady() function ? Ext.onReady is probably the first method that you’ll use on every page. This method is automatically called once the DOM is fully loaded, guaranteeing that any page elements that you may want to reference will be available when the script runs syntax: Ext.onReady(function() { alert(“Congratulations! You have Ext configured correctly!”); }); 12. For example, to show our message when any paragraph in our test page is clicked, what is the extjs code on paragraph click? Ext.onReady(function() { Ext.select(‘p’).on(‘click’, function() { alert(“You clicked a paragraph”); }); }); or Ext.onReady(function() { var paragraphClicked = function() { alert(“You clicked a paragraph”); } Ext.select(‘p’).on(‘click’, paragraphClicked); }); 13. List out the extjs library files to include in JSP page? ext-base.js ext-all-debug.js or ext-all.js ext-all.css base.css or examples.css 14. List out the css file required to apply Extjs Theme property? xtheme-gray.css ext-all.css 15. what is purpose of MessageBox? MessageBox is asynchronous. MessageBox call, which demonstrates the readable message to user. MessageBox used for multiple purpose like Ext.Msg.alert() Ext.Msg.prompt() Ext.Msg.show({}); Ext.Msg.wait(); 16. write syntax for MessageBox show() method? Ext.MessageBox.show({ title: ‘Paragraph Clicked’, msg: ‘User clicked on Paragraph’, width:400, buttons: Ext.MessageBox.OK, animEl: paragraph }); 17. what is method to Update the message box body text for MessageBox? updateText( ) : Ext.MessageBox 18. what is a widget? A widget is a tiny piece or component of functionality. 19.what is parent class for all stores in extjs? how many stores exists? Ext.data.Store is parent class for all stores. A Store object uses its configured implementation of DataProxy to access a data object unless you call loadData directly and pass in your data. subclasses for Store: GroupingStore, JsonStore, SimpleStore 20. How to handle event for a extjs component? using listeners config object. For ex for grid events : listeners: {rowclick: gridRowClickHandler,rowdblclick: gridRowDoubleClickHandler} using addListener( String eventName, Function handler, , ) : void Appends an event handler to this component using on( String eventName, Function handler, , ) : void Appends an event handler to this element (shorthand for addListener) For ex: store.on( “datachanged”, function( store ){ ….. }); 21. How to find no of records in a store? using store.getCount() : Gets the number of cached records. store.getTotalCount() : Gets the total number of records in the dataset as returned by the server. 22. How to handle exception while loading datastore? using loadexception event. syntax: store.loadexception() : Fires if an exception occurs in the Proxy during loading. use beforeload : ( Store this, Object options ) : Fires before a request is made for a new data object. If the beforeload handler returns false the load action will be canceled. syntax: store.on(‘loadexception’, function(event, options, response, error) { alert(“Handling the error”); event.stopEvent(); }); 23. how to handle updates for store changes? use store.commitChanges() 24. what is the purpose of each() in store? Calls the specified function for each of the Records in the cache each( Function fn, ) 25. how to get modified records using store object? store.getModifiedRecords() : Gets all records modified since the last commit. 26. how to get record using index? store.getAt( Number index ) : Get the Record at the specified index. 27. how to get record using id? store.getById( String id ) : Get the Record with the specified id. 28. what is the purpose of load() in store? store.load() : returns boolean Loads the Record cache from the configured Proxy using the configured Reader. For remote data sources, loading is asynchronous, and this call will return before the new data has been loaded. store.load({callback: fnCheckData, scope: this}); 29. what is purpose of loadData() in store? store.loadData( Object data, ) : void Loads data from a passed data block and fires the load event. loadData(storeData,false); False to replace the existing records cache. loadData(storeData,true) : True to append the new Records rather than replace the existing cache. 30. How many types of layout managers exist in extjs?what are they? Layouts fall under this package Ext.layout.* Types of layouts: Absolute Layout: This is a simple layout style that allows you to position items within a container using CSS-style absolute positioning via XY coordinates. Accordion Layout: Displays one panel at a time in a stacked layout. No special config properties are required other than the layout. All panels added to the container will be converted to accordion panels. AnchorLayout: This type of layout is most commonly seen within FormPanels (or any container with a FormLayout) where fields are sized relative to the container without hard-coding their dimensions. BorderLayout: Border layouts can be nested with just about any level of complexity that you might need. Every border layout must at least have a center region. All other regions are optional. CardLayout (TabPanel): The TabPanel component is an excellent example of a sophisticated card layout. Each tab is just a panel managed by the card layout such that only one is visible at a time CardLayout (Wizard): You can use a CardLayout to create your own custom wizard-style screen. FitLayout: A very simple layout that simply fills the container with a single panel. FormLayout: FormLayout has specific logic to deal with form fields, labels, etc.FormLayout in a standard panel, ColumnLayout: This is a useful layout style when you need multiple columns that can have varying content height.Any fixed-width column widths are calculated first, then any percentage-width columns specified using the columnWidth config TableLayout: Outputs a standard HTML table as the layout container.you want to allow the contents to flow naturally based on standard browser table layout rules. data, plus manip 31. How we can apply pagination in grid panel ? using Ext.PagingToolbar plugin, we can implement pagination to a grid panel syntax: new Ext.PagingToolbar({ pageSize: 25, store: store, displayInfo: true, displayMsg: ‘Displaying topics {0} – {1} of {2}’, emptyMsg: “No topics to display”, }) // trigger the data store load store.load({params:{start:0, limit:25}}); 32. what is xtype? The xtype will be looked up at render time up to determine what type of child Component like TextField, NumberField etc to create. i,e xtype = Class ———————- button = Ext.Button textfield = Ext.form.TextField radio – Ext.form.Radio grid = Ext.grid.GridPanel combo = Ext.form.Combobox toolbar = Ext.Toolbar 33. what is vtype? The validations provided are basic and intended to be easily customizable and extended. Few vtypes provided by extjs are as below: emailText : String, The error text to display when the email validation function returns false alphanumText : String, The error text to display when the alphanumeric validation function returns false urlText : String, The error text to display when the url validation function returns false 34.Why we need javascript Library? Javascript is an awesome language. It’s super flexible.Browsers are the modern UI paradigm. The javascript Libraries now must provide a rich set of UI Widgets. javascript libraries: JQuery Qooxdoo Dojo Prototype.js mootools extjs 35.how to get record object from store: var record = grid.getStore().getAt(rowIndex); 36. purpose of Load mask? To apply mask to page level / component level. restrict user not to access any components in page var pageProcessBox = new Ext.LoadMask( Ext.getBody(), { msg: ‘Loading Employee details.’ } ); pageProcessBox.show(); 37. purpose of renderer in grid panel? using config option, renderer: fnCellColor where fnCellColor is method to apply color to a cell. 38. how to get selection model used in a grid panel? using grid.getSelectionModel(); method 39. how to stop editing a record? newRecord.endEdit(); 40. how to start editing a record? newRecord.beginEdit(); 41. how to commit a record modification? newRecord.commit(); 42. what is use of combo select event function? To get the selected value from a combo.using getvalue(); var selectedComboValue = mycombo1.getValue(); 43. how to get a value of textfield or combo box? using getvalue(); var selectedValue = mytextfield.getValue(); 44. how to apply css on select of combo box? using config option as emptyClass : ’emptycss’, where emptycss is a css classname 45. what are components required for grid panel? store, columnmodel, id, width,height 46. how to disable menu option for header in columnModel? using menuDisabled: true 47. how to hide the column in grid panel? using hidden : true 48. How to register callbacks to the load and exception events of the JsonStore? var grid = new Ext.grid.GridPanel({ store: new Ext.data.JsonStore({ listeners: { load: this.onLoadSuccess.crateDelegate(this), exception: this.onLoadException.createDelegate(this) } }), onLoadSuccess: function () { // success }, onLoadException: function () { // error }, } 49. extjs decode() ? var json = Ext.decode(response.responseText); Ext.Msg.alert(‘Error’, json.error); 50. Extjs Vs jQuery: ExtJs and JQuery are kind of apples and oranges. You can compare Ext Core to JQuery, and ExtJs to JQuery UI. Ext JS is a full-fledged widget library while jQuery (not jQuery UI) and Mootools are JavaScript frameworks that help with DOM manipulation etc. Whilst jQuery and Mootools help with the general workings of a site. jQuery UI is a much less rich set of components. Ext JS seems to be focussed on tables and storing Ext JS Questions and Answers pdf Download Read the full article
0 notes
Text
GPS Watch Fitness Tracker Sports Running Better then Garmin Forrunner Waterproof
New Post has been published on https://fitnesstech.website/product/gps-watch-fitness-tracker-sports-running-better-then-garmin-forrunner-waterproof/
GPS Watch Fitness Tracker Sports Running Better then Garmin Forrunner Waterproof
@charset “utf-8″; /* CSS Document */ * padding: 0; margin: 0; outline: none; border: none; list-style: none; box-sizing: border-box; font-family: ‘Lato’, sans-serif; p font-size: 16px; line-height: 26px; color: #231f20; img max-width: 100%; .wrapper margin: 0 auto; width: 90%; max-width: 1100px; .clear clear: both; header, section, .content_inner width: 100%; float: left; header padding: 0 0 25px 0; text-align: center; .features background: #f1f1f1; border-top: 1px solid #e3e3e3; border-bottom: 1px solid #e3e3e3; .features ul width: 100%; float: left; .features ul li width: 25%; display: table; border-right: 1px solid #d9d9d9; float: left; .features ul li:last-child border: none; .features ul li div width: 30%; height: 80px; display: table-cell; text-align: center; vertical-align: middle; .features ul li span padding: 0 20px 0 10px; width: 70%; height: 80px; display: table-cell; vertical-align: middle; font-size: 14px; letter-spacing: 1px; line-height: 22px; font-weight: 300; color: #676867; .content padding: 25px 0; .content h2 padding: 10px 20px 15px 20px; background: #f1f1f1; text-align: center; font-weight: 400; font-size: 30px; color: #FFF; .content_inner background: #f1f1f1; .image_gallery padding: 20px; width: 50%; background: #FFF; border: 1px solid #e3e3e3; text-align: center; float: left; /*GALLERY CSS*/ .container width: 100%; position: relative; margin:0 auto; .thumbnails text-align: center; list-style: none; font-size: 0; .thumbnails li margin: 10px 5px 0 5px; width: 100px; height: 100px; background: #fff; display: inline-block; text-align: center; vertical-align: middle; .thumbnails input[name=”select”] display: none; .thumbnails .item-hugger padding: 5px; width: 100%; height: 100%; position: relative; display: flex; flex-direction: column; justify-content: center; align-items: center; border: 1px solid #e3e3e3; transition: all 150ms ease-in-out; .thumbnails label position: absolute; top: 0; left: 0; right: 0; bottom: 0; cursor: pointer; .thumbnails .title padding: 20px 0 0; font-size: 18px; color: #555; transition: all 150ms linear; .thumbnails .gallery_content max-width: 540px; width: 100%; height: 540px; background: #fff; transition: all 150ms linear; display: flex; flex-direction: column; justify-content: center; align-items: center; overflow: hidden; opacity: 0; position: absolute; top: 0; left: 50%; transform: translateX(-50%); .thumbnails input[name=”select”]:checked + .item-hugger border-color: #00aeef; .thumbnails input[name=”select”]:checked ~ .gallery_content opacity: 1; .white-box height: 540px; overflow: hidden; .item_desc padding: 25px; width: 50%; float: left; .item_desc h3 margin-bottom: 10px; font-size: 26px; font-weight: 300; color: #00aeef; .item_desc ul margin-bottom: 10px; .item_desc ul li, .tab ul li list-style-type: disc; list-style-position: inside; font-size: 16px; line-height: 26px; color: #231f20; /* CSS TAB */ .tabs margin-top: 25px; display: flex; flex-wrap: wrap; width: 100%; float: left; .tabs label margin-right: 3px; padding: 10px 20px; background: #00aeef; border: 1px solid #00aeef; order: 1; display: block; cursor: pointer; text-align: center; font-size: 18px; font-weight: 300; line-height: 25px; color: #FFF; position: relative; z-index: 1; .tabs .tab order: 99; flex-grow: 1; width: 100%; max-height: 0; visibility: hidden; text-align: left; background: #f1f1f1; border: 1px solid #e1e1e1; margin-top: -1px; overflow-y: hidden; display: none; .tabs input[type=”radio”] display: none; .tabs input[type=”radio”]:checked + label color: #231f20; background: #f1f1f1; border: 1px solid #e1e1e1; border-bottom: 1px solid #f1f1f1; .tabs input[type=”radio”]:checked + label + .tab padding: 20px; visibility: visible; display: block; max-height: none; footer padding: 25px 0; width: 100%; background: #231f20; float: left; footer p color: #646464; footer p span color: #00aeef; @media only screen and (max-width: 1100px) .tabs label padding: 10px 15px; font-size: 16px; @media only screen and (max-width: 1024px) .features ul li width: 50%; border-bottom: 1px solid #e3e3e3; .features ul li:nth-child(2) border-right: none; .features ul li:nth-child(3) border-bottom: none; @media only screen and (max-width: 980px) .image_gallery, .item_desc width: 100%; .tabs .tab, .tabs label order: initial; transition: 300ms all; display: block; .tabs label width: 100%; margin-right: 0; margin-top: 0.2rem; .tabs input[type=”radio”]:checked + label background: #f1f1f1; border-bottom: 1px solid #e1e1e1; .tabs input[type=”radio”]:checked + label + .tab max-height: 400px; overflow-y: scroll; @media only screen and (max-width: 540px) .features ul li width: 100%; border-right: none !important; .features ul li:nth-child(3) border-bottom: 1px solid #e3e3e3; .thumbnails .gallery_content, .white-box height: 400px; .thumbnails li width: 70px; height: 70px;
FAST & FREE SHIPPING
SAFE AND SECURE PAYMENT
60 DAY MONEY BACK GUARANTEE
EXCELLENT CUSTOMER SERVICE
GPS Watch Fitness Tracker Sports Running Better then Garmin Forrunner Waterproof
2018✔️Android iPhone✔️Waterproof Blood Pressure✔️GPS (For iPhone Smart Phone / For Men Women Kids / Pedometer / IP68)
Features
Support IOS/Android system
Information synchronization language: Follow the connect smartphone system
GPS :Built In GPS, Independent GPS record
Heart Rate Detection :Support
Pedometer:Support
Sleep Monitoring: Support
Call alert : Support
Bluetooth Version: Bluetooth 4.2
Vibrating Motor: Support
Multi Sport Mode: Support(Walking / Running / Climbing / Swimming / Biking)
Waterproof: IP68
Specifications
Battery: 350mAh (20 day standby time)
Screen:1 inch 240 x 240 LED Color Display
App support language:
Russian, German, Italian, Czech, Japanese, French, Polish, Thai, Chinese, Traditional Chinese, English, Portuguese, Spanish
Package contents
1 x Smart Watch
1 x Charging Cable
1 x User Manual(for multi-countries )
SHIPPING
Depending on the item(s) you purchase and the location to which the items will be delivered, different shipping methods are available. At checkout, you will be prompted to choose a shipping method. Shipping costs are based on the shipping method that you choose. Your total shipping charges will automatically compute during checkout prior to the completion of your order.
Generally, you will have the option to upgrade your shipping method for faster delivery (such as One-Day service). If you choose to upgrade your shipping method, your order must be received and clear credit authorization by 2:00 p.m. or your order will not be processed until the following business day. Business days are Monday-Friday, excluding public holidays within the Ireland.
WITHIN IRELAND
ECONOMY SHIPPING
4 – 7 business days
Economy is the least expensive and is serviced by Anpost Standard Post. Final delivery is made by a postal carrier.
STANDARD SHIPPING
3 – 5 business days
Standard is shipped using Anpost Express post depending on the weight and destination.
ONE-DAY SHIPPING
1 – 2 business days
Express is shipped using Anpost Express or DPD Next Day Service depending on the weight and destination.
Domestic shipments will be supplied a delivery confirmation and or a tracking number.
Shipments are processed once payment clears and shipped within 1 business day.
OUTSIDE IRELAND
Our standard international services include Anpost Standard Post or DPD Express Service (there are no brokerage fees associated with this shipping method, delivery would be made by the same carrier that would deliver a the parcel). Which service used is determined by weight and destination. Sorry, but we do not adhere to requests for a preferred service. Standard parcels can take in excess of 4-6 weeks to arrive due to customs delays, but typically arrive within 2 weeks. For guaranteed tracking, we recommend selecting our express service, Anpost Express Post.
Shipments are processed once payment clears, and shipped within 1 business day.
International Standard shipping may not come with tracking. For guaranteed tracking, select Anpost Express Post.
Shipments to Canada can take 3-8 weeks for delivery due to customs delays; select Anpost Express Post for Fast Delivery
Import duties & taxes are not included in item price or shipping costs and are the buyer’s responsibility.
Check with your country’s customs office to determine import costs prior to bidding/buying.
Due to frequent customs delays, allow 6-8 weeks for arrival of packages shipped to the following destinations: Armenia, Australia, Brazil, Croatia, France, Israel, Italy, Kazakhstan, Moldova, New Zealand, Poland, Spain, and Ukraine.
FEEDBACK
We offer a 100% money back guarantee.
We are committed to ensuring each customer is entirely satisfied with their purchase and our service.
Please contact us before leaving any feedback and give us an opportunity to resolve your issue.
We promise we will do our best and will 100% resolve any of your issues promptly.
Thank you
PAYMENT
We accept Paypal. You may also use your Visa, Mastercard, American Express, or Discover card through Paypal.
When you are ready to pay, Simply click the “Pay Now” button at the top of the eBay item page to submit a secure payment through checkout.
Purchase multiple items and save on shipping.
If you plan to purchase multiple items to save on combined shipping, Do not pay until all items are purchased. We offer 14 days to combine all of your items into one checkout with one low shipping cost! Items must be purchased using the same user I.D. If you are buying multiple items to save on COMBINED SHIPPING, the auctions should end within 14 days of each other and must be checked out at the same time, with ONE payment.
Paying for multiple items? Here’s How:
Bid on all items for up to 14 days after you win your first item
Click “Pay Now” on the item you have won
Select each item you would like to combine shipping, then hit “Continue”
Checkout using eBay’s Checkout System
How much is combined shipping for each additional item?
Domestic (within the Ireland): You will pay full shipping on the first item or whichever item in your order has the highest shipping rate. For each additional item you will save 50% off of the advertised shipping price.
International (outside the Ireland): You will pay full shipping on the first item or whichever item in your order has the highest shipping rate. For each additional item you will save 50% off of the advertised shipping price.
RETURN
We want you to be completely happy!
If for any reason you are not happy with your purchase we will gladly accept returns ( excluding items damaged due to bad installation or misused ).
You will receive a full refund for the cost of the merchandise less all shipping costs.
Item(s) must be returned in original, unused condition within 60 days with original tags/packaging.
If there are any signs of damage or misuse the item will be mailed back to you.
If applicable, any protective inner lining must be intact.
When we receive your package we will process the return within 14 business days.
You will receive a refund for the purchase price less all shipping costs.
Please contact us through ebay messaging system and we can send you the return address and further instruction for return.
CONTACT US
We want to hear from you! We are dedicated to our customers and want you to have the personal attention you deserve.
Not only do we offer incredible pricing, but it is our desire to earn 5 Stars from you every day.
We continue to make YOU, our customer, our number one priority.
We want your continued business! We would love to hear from you if you have questions, suggestions or just want to chat!
Please contact us through ebay messaging system only
0 notes
Text
How to Update Your Old WordPress Posts with Gutenberg Block Editor
Wondering how to update your old blog posts with Gutenberg, the new WordPress block editor? If you haven’t upgraded to WordPress 5.0, then you’re not alone.
A lot of readers are concerned because Gutenberg is a completely new experience. The good news is that your old articles are safe even after upgrading to Gutenberg. In this article, we’ll show you how to update your old articles with Gutenberg, the new WordPress Block editor.
You may also want to know what will happen to your existing content after upgrading your blog to Gutenberg.
What’s The Difference Between Classic Editor and Gutenberg Editor?
Before we get started, let’s first discuss the major differences between the old Classic Editor and the new Gutenberg Editor.
The Classic Editor was a text editor that looked very similar to Microsoft Word. It had a single editing field with formatting options at the top. Here’s what the Classic Editor looks like:
On the other hand, the new Gutenberg editor is a fully block-based editor. You’ll add all the content in the form of blocks. Here’s how the Gutenberg Block Editor looks like:
Blocks are content elements which are separate from each other with their own set of formatting options. There’re individual blocks for every piece of content including:
Regular text or paragraph
Image
Button
Gallery
List
Table
Embeds, etc.
Plus, you can find more blocks and widgets provided by your plugins and theme.
In order to create or edit a post in the new Gutenberg editor, you’ll need to use blocks. Here’s how to update your old blog posts and pages with Gutenberg block editor.
Editing Your Older WordPress Articles with Gutenberg
If you’ve updated your WordPress blog to 5.0 or the later version, then you’ll have the new Gutenberg block editor as your default editor.
The good part about Gutenberg is that it doesn’t affect any of your old content, and you can easily edit them.
To edit an older article, simply edit it as you would normally do in WordPress.
On the post edit screen, you’ll see the entire content wrapped inside a single Classic block.
The same post would look like the screenshot below in the old classic editor.
As you can notice, the content is same however the way it’s organized looks slightly different.
Yes, that’s the only change you’ll see.
The new WordPress block editor will not make any changes to the content, and it would still look the same on your website.
Now, you have two options to edit your old blog posts and pages:
Continue editing inside the Classic block
Convert your old content to new Gutenberg blocks
The first option is to continue editing your old article inside the Classic block.
The Classic block offers you the same Classic editor interface with formatting options at the top. This should be fairly straight forward.
The second option is converting your old content into new Gutenberg blocks.
You can do this by clicking on the three-dot menu option on the top right corner of Classic block.
From the menu dropdown, you need to select Convert to Blocks option.
That’s it!
Your old content will be automatically converted into appropriate blocks. The content inside the Classic block will be split into several different blocks.
Now, you can edit your old article using the new Gutenberg editor blocks. Each block is a separate entity with its own formatting options, styles, and design options.
For example, in our screenshot above, there’s an image block and a paragraph block.
If you want to make changes to how the image appears, then you can simply click the image to select the block, and the editing options will appear at the top.
You will also see more options under the Block tab in the right column of the screen.
You can realign the image, make it full width, add Alt text, change image dimensions, add a link, and more.
Following the same process, you can edit all of the blocks and make your article look visually impressive.
Once you’re done making all the necessary edits, you can simply click the Update button at the top right of the screen to save your changes.
Note: Although Gutenberg works fine with most themes and plugins, some may still not have Gutenberg support. It’s better to test your theme and plugins for Gutenberg compatibility before switching to it.
The new WordPress Gutenberg editor offers an easy and flexible way of creating content in WordPress. However if you are not ready to use it yet, then you can disable Gutenberg and keep using the classic editor.
You can keep using the Classic editor until 2022 which should be enough time for getting familiar with the new WordPress block editor. We have a complete Gutenberg Block Editor tutorial for beginners that you should check out.
We hope this article helped you learn how to update your old articles with Gutenberg Block Editor. You may also want to see our list of the must have WordPress plugins for professional websites.
If you liked this article, then please subscribe to our YouTube Channel for WordPress video tutorials. You can also find us on Twitter and Facebook.
The post How to Update Your Old WordPress Posts with Gutenberg Block Editor appeared first on WPBeginner.
😉SiliconWebX | 🌐WPBeginner
0 notes
Text
How to Update Your Old WordPress Posts with Gutenberg Block Editor
Wondering how to update your old blog posts with Gutenberg, the new WordPress block editor? If you haven’t upgraded to WordPress 5.0, then you’re not alone.
A lot of readers are concerned because Gutenberg is a completely new experience. The good news is that your old articles are safe even after upgrading to Gutenberg. In this article, we’ll show you how to update your old articles with Gutenberg, the new WordPress Block editor.
You may also want to know what will happen to your existing content after upgrading your blog to Gutenberg.
What’s The Difference Between Classic Editor and Gutenberg Editor?
Before we get started, let’s first discuss the major differences between the old Classic Editor and the new Gutenberg Editor.
The Classic Editor was a text editor that looked very similar to Microsoft Word. It had a single editing field with formatting options at the top. Here’s what the Classic Editor looks like:
On the other hand, the new Gutenberg editor is a fully block-based editor. You’ll add all the content in the form of blocks. Here’s how the Gutenberg Block Editor looks like:
Blocks are content elements which are separate from each other with their own set of formatting options. There’re individual blocks for every piece of content including:
Regular text or paragraph
Image
Button
Gallery
List
Table
Embeds, etc.
Plus, you can find more blocks and widgets provided by your plugins and theme.
In order to create or edit a post in the new Gutenberg editor, you’ll need to use blocks. Here’s how to update your old blog posts and pages with Gutenberg block editor.
Editing Your Older WordPress Articles with Gutenberg
If you’ve updated your WordPress blog to 5.0 or the later version, then you’ll have the new Gutenberg block editor as your default editor.
The good part about Gutenberg is that it doesn’t affect any of your old content, and you can easily edit them.
To edit an older article, simply edit it as you would normally do in WordPress.
On the post edit screen, you’ll see the entire content wrapped inside a single Classic block.
The same post would look like the screenshot below in the old classic editor.
As you can notice, the content is same however the way it’s organized looks slightly different.
Yes, that’s the only change you’ll see.
The new WordPress block editor will not make any changes to the content, and it would still look the same on your website.
Now, you have two options to edit your old blog posts and pages:
Continue editing inside the Classic block
Convert your old content to new Gutenberg blocks
The first option is to continue editing your old article inside the Classic block.
The Classic block offers you the same Classic editor interface with formatting options at the top. This should be fairly straight forward.
The second option is converting your old content into new Gutenberg blocks.
You can do this by clicking on the three-dot menu option on the top right corner of Classic block.
From the menu dropdown, you need to select Convert to Blocks option.
That’s it!
Your old content will be automatically converted into appropriate blocks. The content inside the Classic block will be split into several different blocks.
Now, you can edit your old article using the new Gutenberg editor blocks. Each block is a separate entity with its own formatting options, styles, and design options.
For example, in our screenshot above, there’s an image block and a paragraph block.
If you want to make changes to how the image appears, then you can simply click the image to select the block, and the editing options will appear at the top.
You will also see more options under the Block tab in the right column of the screen.
You can realign the image, make it full width, add Alt text, change image dimensions, add a link, and more.
Following the same process, you can edit all of the blocks and make your article look visually impressive.
Once you’re done making all the necessary edits, you can simply click the Update button at the top right of the screen to save your changes.
Note: Although Gutenberg works fine with most themes and plugins, some may still not have Gutenberg support. It’s better to test your theme and plugins for Gutenberg compatibility before switching to it.
The new WordPress Gutenberg editor offers an easy and flexible way of creating content in WordPress. However if you are not ready to use it yet, then you can disable Gutenberg and keep using the classic editor.
You can keep using the Classic editor until 2022 which should be enough time for getting familiar with the new WordPress block editor. We have a complete Gutenberg Block Editor tutorial for beginners that you should check out.
We hope this article helped you learn how to update your old articles with Gutenberg Block Editor. You may also want to see our list of the must have WordPress plugins for professional websites.
If you liked this article, then please subscribe to our YouTube Channel for WordPress video tutorials. You can also find us on Twitter and Facebook.
The post How to Update Your Old WordPress Posts with Gutenberg Block Editor appeared first on WPBeginner.
from WPBeginner https://www.wpbeginner.com/beginners-guide/how-to-update-your-old-wordpress-posts-with-gutenberg-block-editor/
0 notes
Text
README
Welcome to MWeb for iOS
MWeb first is a Markdown editor, the use of Github Flavored Markdown, referred to as GFM, which is one of the most widely used Markdown syntax. If you do not know what Markdown is, it is recommended to take a look at the "Markdown Syntax.md" documentation. GFM in addition to support the official syntax, but also extended a lot of grammar, the specific circumstances will be described later in this article.
Introducing MWeb for iOS

The figure of left: Home, the figure of right: Cloud Documents
Setting Page.
Recent uses documents.
Favorites documents and folders.
Home.
Library: to be use Library, you need a MWeb for Mac.
Cloud Documents: you can add Dropbox folder to sync now!
Local Documents.
When you in Cloud Documents page, you can use right-bottom add folder button to add Dropbox folder to sync.
Folder Setting button (i), when you tap, you can set the files sort, default document extension, image save position when you insert image, please see the bellow for detail.

The figure of left: Folder Setting, the figure of right: get into the folder
Set the folder default sort, default extension for new document.
Where to save to image when you insert. The default is save to the media folder in the document position, you can change it (the figure of left is change to "images"). The "Save Path" is set to "Relative" by default. for example: when the document "folder/sub/sub2/sub3/doc.md" insert a image, the image will save to "folder/sub/sub2/sub3/media". but when you set the "Save Path" to "Absolute", the image will save to "folder/media".
Auto Upload Images. If you enable it, when you insert the image, the image will auto upload to the selected images upload service. You can to the Setting page to add the image upload service.
Back to Home.
Add to the Favorites.
Change to sort.
New folder or document.

The figure of left: document outline view, the figure of right: markdown keyboard.
Document Outline.
Add to the favorites.
Preview the markdown document.
New document.
Export, Publish. Export to HTML, Image, PDF. Publish to Wordpress, Wordpress.com, Metaweblog API, Evernote, Blogger, Medium.
Markdown keyboard.
Change editor theme and preview style.

Publish services. Publish to Wordpress, Wordpress.com, Metaweblog API, Evernote, Blogger, Medium. you can go to the Setting page to add the publish service.
Change the style.
Config MWeb for Mac Library in MWeb for iOS
MWeb for iOS support link to MWeb for Mac Library. You can view, edit the MWeb for Mac Library and add new document to the Library. If you want to use this feature, please go to the MWeb for Mac Preferences - General - Library Location, use "Save as..." button to save to Library to iCloud Drive MWeb's folder or Dropbox. Please see the bellow:

If you want to save the Library to the iCloud Drive and not found the MWeb's folder in the iCloud Drive, you can try to go to iOS system settings - iCloud, close iCloud Drive and open again.
When you save the Library to the Cloud and finished to sync, you can config MWeb for Mac Library in MWeb for iOS, please see the bellow:

Enable the MWeb for Mac Library.
tap Change/Set Library Location, choose the Library location. Notice: the Library folder will has a "mainlib.db" file and a "docs" folder.
When you finish, go back to the Home page and tap the "Library" button in the bottom, you will get into the Library.
Notice for use the Library in iOS: when you add new Library document, the document always in the "Inbox" and "Uncategorized".
Other references.
Publish to self hosted wordpress and Metaweblog API guide
How to use MWeb Images Upload services
How to use Custom Local Images Upload service
How to use MWeb for Mac Library in iOS
GFM syntax guide
Newlines
End a line with two or more spaces + enter. Just typing enter to newline,please go to Settings and enable "Translate newlines to <br> tags" ( default is enable ).
Task lists
Example:
- [ ] task one not finish `- + SPACE + [ ]` - [x] task two finished `- + SPACE + [x]`
Result:
task one not finish - + SPACE + [ ]
task two finished - + SPACE + [x]
Image size and alignment (Only in MWeb)
Setting image width, align left, align right, align center syntax. For example: , -w450 mean set the image width: 450.  --> align left, width:500.  --> align right, width:500.  --> align center, width:500.
Multi-line code
Example:
```js function fancyAlert(arg) { if(arg) { $.facebox({div:'#foo'}) } } ```
Result:
function fancyAlert(arg) { if(arg) { $.facebox({div:'#foo'}) } }
Tables
Example:
First Header | Second Header ------------ | ------------- Content from cell 1 | Content from cell 2 Content in the first column | Content in the second column
You can create tables by assembling a list of words and dividing them with hyphens - (for the first row), and then separating each column with a pipe |:
Result:
First Header Second Header Content from cell 1 Content from cell 2 Content in the first column Content in the second column
Strikethrough
Example:
(like ~~this~~)
Result:
Any word wrapped with two tildes (like this) will appear crossed out.
LaTeX
Use double US dollors sign pair for Block level Math formula, and one US dollor sign pair for Inline Level.
For example this is a Block level $$x = {-b \pm \sqrt{b^2-4ac} \over 2a}$$ formula, and this is an inline Level $x = {-b \pm \sqrt{b^2-4ac} \over 2a}$ formula. \\[ \frac{1}{\Bigl(\sqrt{\phi \sqrt{5}}-\phi\Bigr) e^{\frac25 \pi}} = 1+\frac{e^{-2\pi}} {1+\frac{e^{-4\pi}} {1+\frac{e^{-6\pi}} {1+\frac{e^{-8\pi}} {1+\ldots} } } } \\]
Result:
For example this is a Block level \[x = {-b \pm \sqrt{b^2-4ac} \over 2a}\] formula, and this is an inline Level \(x = {-b \pm \sqrt{b^2-4ac} \over 2a}\) formula.
\[ \frac{1}{\Bigl(\sqrt{\phi \sqrt{5}}-\phi\Bigr) e^{\frac25 \pi}} = 1+\frac{e^{-2\pi}} {1+\frac{e^{-4\pi}} {1+\frac{e^{-6\pi}} {1+\frac{e^{-8\pi}} {1+\ldots} } } } \]
Footnote
Example:
This is a footnote:[^sample_footnote]
Result:
This is a footnote:1
Comment And Read More..
TOC
Example:
[TOC]
Result:
Welcome to MWeb for iOS
Introducing MWeb for iOS
Config MWeb for Mac Library in MWeb for iOS
Other references.
GFM syntax guide
Newlines
Task lists
Image size and alignment (Only in MWeb)
Multi-line code
Tables
Strikethrough
LaTeX
Footnote
Comment And Read More..
TOC
footnote text detail... ↩
0 notes
Photo

Tutorial: Creative Spitscreen Layout with CSS3 Animations (Pt. 2)
A few weeks ago, I demonstrated how to build a split-screen website layout using CSS flexbox and viewport units that offers an alternative way to present a brand’s featured content. Clicking on one side or the other navigates further into the site without a page load, using CSS transitions and 3d transforms. This week, I’ll show you how to use these same techniques to add animation and movement to the content and buttons.
Check out Part 1
See the Pen CSS Responsive Full Screen Duo Layout With Animated Overlay by Markus Sladek (@SDesignerMagazine) on CodePen.
Structure If you followed along for part one, you should already have created the overlay, or wrapper for your content and added a jQuery snippet to animate its entrance using Animate.css classes. Here is a refresher on which pieces we start with, using the left or west side as an example:
<div id="west-overlay" class="overlay"> content goes here </div>
$("#west .content").click( function() { $("#west-overlay").addClass("animated fadeInLeft open").one('webkitAnimationEnd mozAnimationEnd MSAnimationEnd oanimationend animationend', function(){ $(this).removeClass("animated fadeInLeft"); }); });
In keeping with the two-column style of the design, this page will also use flexbox to create a single column within which the content can be layed out:
<div id="west-overlay" class="overlay"> <div class="grid"> <div class="column"> <img src="photo-url"/> </div> <div class="column"> <div class="product-content"> <h1>Rainbow Chasers</h1> <p>...</p> <div class="price"> <span class="currency">$</span> <span class="amount">89.99</span> </div> <a href="#" class="buy-button"><span>Buy Me</span></a> <div class="size-guide-link underline-link">Size guide</div> </div> </div> </div><!--End Grid--> <div class="close-icon"> <div></div> <div></div> </div></div> </div>
Within the overlay, we have created a grid wrapper to hold our flex items, starting with two columns. The left column holds an image, and the right column holds our page content, which in this case is a heading, description, price and call to action for a featured product. Spans are used to allow us to style specific text elements separately without affecting how the text naturally sits in its parent element.
Finally, a close-icon is created in pure CSS and placed within the main overlay, consisting of one main div and two inner divs to create the X.
Styling
The existing grid rule used for our main layout is applied to setup our flexbox.
.grid { position: relative; width: 100vw; height: 100vh; display: flex; flex-direction: row; flex-wrap: wrap; }
To vertically center the content responsively, we will use table. This could also be done with flexbox inception, but table is much simpler. Learn more about vertical centering here.
.overlay .column{ display: table; height: 100%; } .product-content{ font-size: 1.4rem; padding: 10%; display: table-cell; vertical-align: middle; }
Animating the Content
This demo makes use of two kinds of animation – the static kind gained through transitions, and the more complex kind using keyframes. In the case of transitions, you select the property you want to transition, which can be anything from a background gradient to a transform. For animations, you select the keyframe block. The magic happens once you declare the duration length for the animation or transition.
The transition timing function is what controls the values of intermediate states between the start and end declarations. It’s optional, and defaults to ease. When dealing with simple animations and transitions, you’ve probably used ease-in-out to make link hovers, buttons and other simple movements appear more graceful, but transition is not enough to move an element along a path on a specified timeline, allowing it to change in multiple ways. That is where CSS animation is useful.
When the diamond area of our layout, selected with #west .content is clicked, our content div with the ID of #west-overlay will get three new classes: animated, fadeInLeft and open. When the animation ends, the animation classes will be removed.
The open class makes the div visible and adds a transition effect.
The animated class, provided by Animate.css, sets up the animation duration and primary rules for the movement.
The fadeInLeft class, provided by Animate.css, fades in the div and moves it into position from the left.
You can change the animation type by replacing fadeInLeft with any of the available animations in Animate.css, or with your own animation name. Here is a look at what fadeInLeft looks like using CSS animation keyframes:
@keyframes fadeInLeft { from { opacity: 0; transform: translate3d(-100%, 0, 0); } to { opacity: 1; transform: none; } } .fadeInLeft { animation-name: fadeInLeft; }
Pretty simple, right? Over a default animation-duration of one second, the overlay div will fade in and be moved into position.
The content of the overlay can be animated in the same way, using an endless combination of styles. Create another jQuery statement inside the click function for the #west .content selector:
$("#west-overlay .product-content").addClass("animated flipInY ").one('webkitAnimationEnd mozAnimationEnd MSAnimationEnd oanimationend animationend', function(){ $(this).removeClass("animated flipInY"); });
Delays and Duration
So when the diamond area is clicked, both the overlay animation and the content animation are kicked off. If you wanted your content to begin animating only after the overlay does, you would tuck it into the one function instead, just after $(this).removeClass("animated fadeInLeft");
Using what you’ve learned about using these functions, you can select any part of your content to animate it separately, such as fading in the image, sliding down the heading and then flipping in the button, for example. To add a delay for the animations, or make the animation slower or faster, the following properties can be added to your CSS rules for the element you are adding the animation class to:
.product-content { animation-duration: 3s; animation-delay: 2s; }
As you can see, the visual effects are achieved through transitions and transforms, whereas movement along a path is achieved through the additional use of CSS animation. In the next section, we’ll look at the static effects used to add more interest and life to the interactions on the page, meant to entertain our visitors and keep them more engaged.
Interactions
To get the layered look of the button, we use styling of pseudo-elements ::before and ::after, and a span for the button text so we can position it properly when the button is pressed.
A transition is added to the span to give the transform we will add on hover a smooth animation.
.buy-button{ height: 50px; width: 100%; margin: 2rem 0; position: relative; background: #eee; border: 3px solid #f9efb2; } .buy-button > span { display: block; position: relative; font-weight: 700; font-size: 1rem; text-transform: uppercase; color: #1f1f22; transition: opacity 0.35s, transform 0.35s; z-index: 10; line-height: 60px; }
The pseudo-elements are given a border and transition to match the above. They are offset using absolute positioning and sent behind our span using z-index to give the button some dimension.
.buy-button:after, .buy-button:before { content: ''; position: absolute; top: 0; left: 0; border: 3px solid #f9efb2; transition: opacity 0.35s, transform 0.35s, ease-in-out .3s; } .buy-button:before { background: #FFF; margin: 0px 0 0 0px; top: 5px; left: 5px; width: calc(100% + 2px); height: calc(100% + 2px); z-index: 1; }
The hover effect is created using translate3d to move the top face of the button a few pixels backwards. Simple!
.buy-button:hover span, .buy-button:hover:before { transform: translate3d(-4px, -4px, 0px); }
Link Underline
Next we have a subtle "animated" underline on our Size Guide link. The line is created using a pseudo-element:
.underline-link::before { content: ''; position: absolute; bottom: 0; left: 0; width: 100%; height: 1px; background: #202023; transform-origin: left; transform: scaleX(0); transition: transform .2s ease-in-out; }
The transform-origin: left declaration draws the line from the left. Remove this if you want it to grow from the center. The transform: scaleX(0) declaration establishes the starting point as 0 which we will grow to 1 on hover, and a basic ease-in-out transition is added to the transform to create a smooth "animated" look when we change its value on hover:
.underline-link.active::before, .underline-link.hovered::before, .underline-link:hover::before { transform: scaleX(1); }
Close Button
Going back to transition timing functions like ease and linear, you may have noticed that they are somewhat limited. If you want more control over the speed of the effect as it is played out, the cubic-bezier property does the trick. To put it simply, cubic-bezier allows your transition to play out along a bezier curve rather than a straight line, allowing for 4 points of control rather than two. This can be used to create more dimensional effects, or in the case of our Close Button, to give each "leg" of our X the appearance of separate animations while only applying the effect to two divs.
.close-icon div { display: block; height: 3px; position: relative; transition: transform 0.6s cubic-bezier(0.19, 1, 0.22, 1) 0s, opacity 0.4s cubic-bezier(0.19, 1, 0.22, 1) 0s; width: 36px; }
The button itself is created from our two inner divs and the ::before and ::after pseudo-elements, formed into an X using translate3d transforms.
.close-icon div::after, .close-icon div::before { content: ""; display: block; height: 100%; pointer-events: none; position: absolute; width: 100%; } .close-icon div::before { background: none repeat scroll 0 0 #34d5cf; opacity: 1; transform: translate3d(0px, 0px, 0px); } .close-icon div::after { background: none repeat scroll 0 0 #ead918; opacity: 0; transform: translate3d(100%, 0px, 0px); } .close-icon div:first-child { transform: translate3d(0px, 10px, 0px) rotate3d(0, 0, 1, -45deg); } .close-icon div:first-child::after, .close-icon div:first-child::before { transition: transform 0.6s cubic-bezier(0.19, 1, 0.22, 1) 0s, opacity 0.2s cubic-bezier(0.19, 1, 0.22, 1) 0s; } .close-icon div:last-child { transform: translate3d(0px, 8px, 0px) rotate3d(0, 0, 1, 45deg); } .close-icon div:last-child::after, .close-icon div:last-child::before { transition: transform 0.6s cubic-bezier(0.19, 1, 0.22, 1) 0.2s, opacity 0.2s cubic-bezier(0.19, 1, 0.22, 1) 0.18s; } .close-icon:hover div::before { opacity: 0; transform: translate3d(-100%, 0px, 0px); } .close-icon:hover div::after { opacity: 1; transform: translate3d(0px, 0px, 0px); }
A cubic-bezier transition is then added to the opacity and transform to get the effect of each "leg" flying in or out when changed on hover:
.close-icon:hover div::before { opacity: 0; transform: translate3d(-100%, 0px, 0px); } .close-icon:hover div::after { opacity: 1; transform: translate3d(0px, 0px, 0px); }
Finally, we need to add one last jQuery function to animate and hide the overlay when it is closed by clicking on our close button.
$("#west-overlay .close-icon").click( function() { $("#west-overlay").addClass("animated flipOutY ").one('webkitAnimationEnd mozAnimationEnd MSAnimationEnd oanimationend animationend', function(){ $(this).removeClass("animated flipOutY open"); }); });
Here we add the Animate.css class animated and our chosen animation class, detect when the animation ends with one, then remove the animation classes as well as the open class to hide the overlay and bring us back to our main layout.
Resources:
CSS Transitions
CSS Animation
Animate.css
scale()
translate3d()
transform-origin
cubic-bezier() helper
Full Screen Demo
Download File
1 note
·
View note
Text
CSS Flexbox In A Nutshell

As web design trends have evolved since the early days of the internet, there have been different standard ways to arrange elements on a website. CSS flexbox is a relatively new yet powerful way to create layouts and something every web developer and designer should be familiar with. If you don’t know how to use it yet, this in-depth flexbox tutorial aims to change that. The post below will talk about what flexbox is, why it matters, and its underlying concept. After that, we will go over the CSS properties and values associated with flexbox in detail and finish up with an example of a use case. If you don’t know how to use it yet, this in-depth flexbox tutorial aims to change that. The post below will talk about what flexbox is, why it matters, and its underlying concept. After that, we will go over the CSS properties and values associated with flexbox in detail and finish up with an example of a use case.
What is CSS Flexbox?
Flexbox stands for flexible box. It’s a layout module for CSS aimed at giving you an efficient way to arrange, organize, and size website elements to create highly adaptive designs. Of course, the technology to place web components on a page is not new. Since the beginning of the Internet, web designers have used different ways to place images, text, and other content where they wanted it to be. However, these were either not suitable for responsive design (tables), were never intended for as a layout tool in the first place (float), didn’t allow you to define equal heights for elements (inline-block), or had other issues. So, while designers and developers made do for a long time, there were still a bunch of design patterns that were either impossible or needed JavaScript to work. Common examples are vertical centering and equal columns, two of the holy grails of web design. How is Flexbox Different? The way flexbox works is quite simple on the surface: You have a container (flex container) with children (any elements contained within, called flex items), which are placed along flex lines. Lines and items can be manipulated in layout, size, spacing, and more along both the vertical and horizontal axis using a multitude of operators. This allows you to best take advantage of the available space and lets elements arrange themselves automatically according to it. If that is hard to visualize, here’s a schematic (courtesy of W3.org) to make things clearer:

Still not entirely sure? I can’t blame you. Let’s talk about it in more detail. The Underlying Concept As mentioned, flexbox is a whole CSS module, not a single property. Therefore, it comes with a whole lot of its own operators, some for the parent container, some for its children. To understand how they work, it’s important that you know the concepts and terminology of flexbox, which are displayed in the image above: main axis — This is the axis at which the items are laid out. Important: it can be both vertical or horizontal, depending on the flex-direction property. main-start, main-end — These represent the start and end point of where items are arranged. main size — This denotes either the width or height of the flex items, depending on the direction of the main axis. cross axis — The axis perpendicular to the main axis. Its direction, too, depends on how the main axis is defined. cross-start, cross-end — Start of and direction in which flex lines will be filled. cross size — Denotes the other dimension of flex items that is not defined by main size. writing-mode — Allows you to switch the direction of writing from left-to-right to right-to-left or even to vertical. It’s a work in progress with little to no browser support, however, it’s important to know for some of the properties further below. As you can see, a lot about flexbox is rather abstract and not absolutely defined. Consequently, much of the CSS below is dependent on your setup. When to Use Flexbox While you can use flexbox to build entire web pages, however, that’s not the recommended use case. For larger layouts, consider Grid (more on that some other time). Flexbox, on the other hand, is most appropriate for small-scale layouts and applications, such as: navigation menus card layouts media items web forms Browser Support Flexbox was first proposed at the beginning of the past decade and recommended by the W3C for adoption in 2012. Since then, browsers have started supporting it and, by now, all modern browsers are able to deal with flexbox.

Available Flexbox CSS Properties
Alright, now that we have settled the theory, let’s see what flexbox can do. With the properties below, you can manipulate your layout both by assigning traits to the container and also to items individually. We will start with the former and then move on to the latter. flex-direction This defines the main axis and, as a consequence, the direction in which your flex items are placed. This also allows you to change the order of items, which used to require altering the underlying HTML. Available properties are: row — The default. Arranges flex items left to right unless you are in a right-to-left environment due to writing mode. row-reverse — Arranges items horizontally but in reversed order. column — The same as row but vertical with items arranged top to bottom. column-reverse — You can probably guess this one. column-reverse displays items bottom to top.

flex-wrap The default behavior of items within a flex container is to arrange themselves in one row. flex-wrap allows you to change that. nowrap — The default value that places all items in one line. wrap — If a single line isn’t enough, with this, items will arrange themselves into multiple lines from top to bottom. wrap-reverse — Same as wrap but with items ordered from bottom to top.

flex-flow This is a shorthand for flex-direction and flex-wrap. Usage: .flex-container { display: flex; flex-flow: row wrap; } The flex-flow property allows you to define both main axes of the container. The default value is row nowrap, all possible values from the two properties above apply. justify-content The next flexbox CSS property defines the item alignment on the main axis. It decides what happens with any available free space and has some control over the alignment when items get wider than their container. Here are the values you can choose from: flex-start — Default value. Items align towards the front of flex-direction. flex-end — Places items at the end of flex-direction. start — Defines the beginning of writing-mode as the starting point. end — Moves items towards the end of writing-mode. left — Aligns flex items towards the left edge of the container. If that doesn’t make sense due to flex-direction, it behaves like start. right — The same as left but for the right edge. center — Items center horizontally. space-between — Distributes items evenly within the container. The first towards the start, the last toward its end with even space between them (hence the name). space-around — Items are evenly placed with equal space around them. Note that it behaves like margin or padding where you have double the space between items as towards the edges. space-evenly — Items reside evenly placed within the container but the spacing between each and toward the container edges is even.

Beware that browser support for these values is a bit spotty. For example, space-between is not supported in some versions of Edge and start/end/left/right aren’t in Chrome yet. The safest values are flex-start, flex-end, and center. align-items This property controls how items align across the cross axis. It’s the equivalent of what justify-content is for main axis. Here are the available values: stretch — Default value that stretches items to fill the container. flex-start, start, self-start — Aligns flex items at the start of the cross axis. start and self-start adhere to flex-direction and writing-mode respectively. flex-end, end, self-end — The same as above but placing items at the end of the cross axis. center — Items reside at the center of the cross axis. baseline — Aligns flex items along their baselines.

Here, too, it’s important to note the browser support. align-content This property is responsible for controlling flex lines if there is extra space available on the cross axis. It’s similar to justify-content. You need more than one row of items for the values below to take effect. stretch — Default value. The lines stretch to take up all available space. flex-start, start — Items align at the beginning of the container. flex-start adheres to flex-direction, start to writing-mode. flex-end, end — Same deal as flex-start and start only that items move to the end of the container. center — Centers items on the cross axis inside the container. space-between — Evenly distributes flex lines inside the container with the first row being placed at its start, the last at the end. space-around — Even distribution with even space around each line. space-evenly — Even distribution with equal space around items.
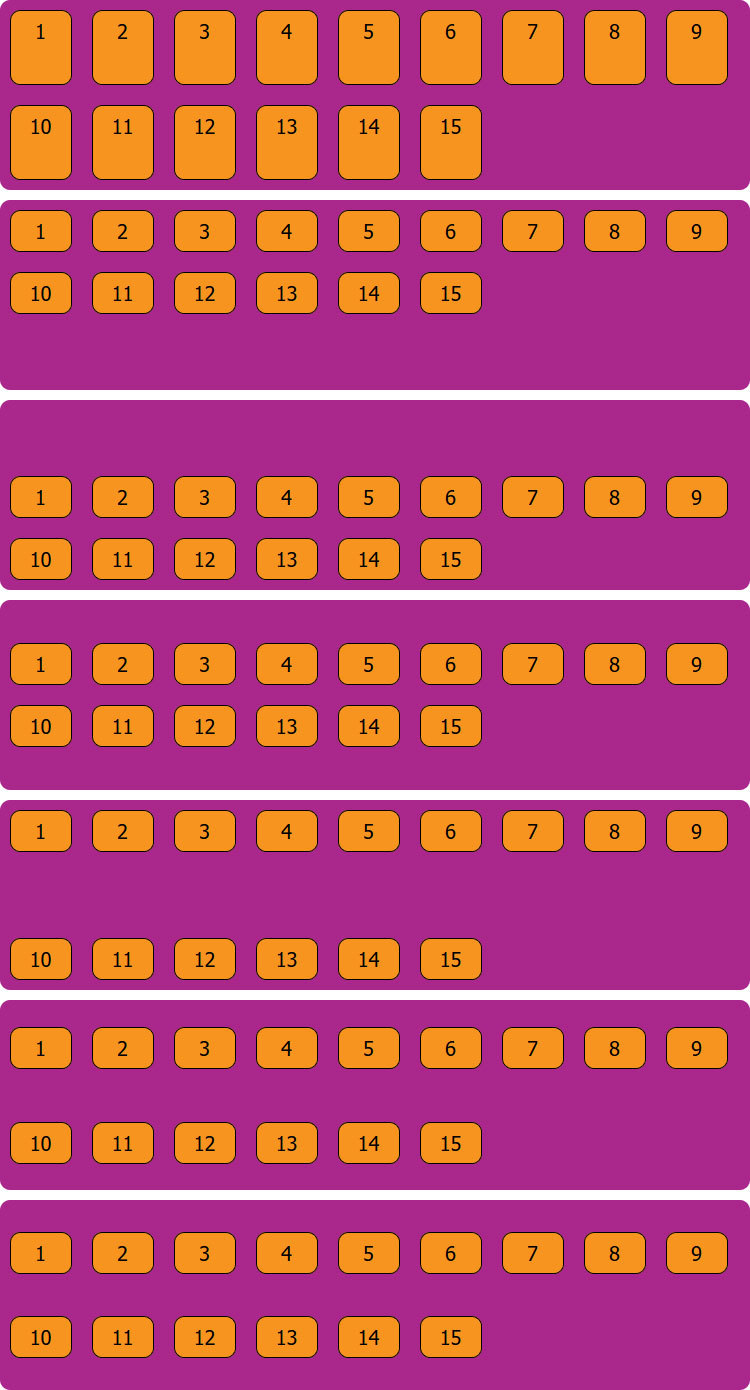
order Beginning with this one, the remaining rules all apply to flex items instead of the container. The order property controls in which order items appear inside their container.

For example, the default value for all flex items is order: 0;. If you want to move a particular item to the front or back of the line, you can do so by giving it a value like 1 or -1. This also works across row or column boundaries unlike row-reverse or column-reverse which will reverse the order per line individually. Here’s the code for the example image above: 1 2 3 4 flex-grow Controls the ability for flex items to grow within the container as necessary. flex-grow takes a number that describes a proportion. Example: if all items are set to flex-grow: 1; they are all evenly distributed inside their container. However, if one is set to 1 and another to 3, the latter will try to take up three quarters of the available space.

flex-shrink Similar to flex-grow but defines the ability of items to shrink in relation to other items. The higher the number, the more an item will reduce in size and vice versa. flex-basis

Defines the default element size (height or width depending on the axis). It can be a relative value like 15% or absolute like 30px. Here’s how I achieved the above: 1 2 3 4 Other possible values: auto — This is the default. content — Sets the size according to the item’s content. It’s not well supported yet, same as max-content, min-content, and fit-content that also exist. flex Shorthand for flex-grow, flex-shrink, and flex-basis together. Only the first parameter is mandatory and the default value is 0 1 auto. 1 2 3 4 It often makes sense to use this property instead of flex-grow, flex-shrink, or flex-basis individually as it applies sensible values to the operators you are not using. flex can also take initial (adheres to the defined size if there is one), auto (making it fully flexible), and none (making all items inflexible). You can use this, for example, to set some items to a fixed width (via initial) while having others adjust themselves to the available space. align-self This allows you to override the alignment of individual items. It has the same values as align-items.
Flexbox Example: Columns with Equal Height
As a last step, we will go over an example of how to use the above. Let’s create a flexbox layout with columns of equal height. You can build it with HTML like so:
Column 1
Lorem ipsum dolor sit amet, consectetur adipiscing elit.
Column 2
Lorem ipsum dolor sit amet, consectetur adipiscing elit. Morbi interdum et ex a efficitur. Nam consequat elementum tellus, at varius lectus condimentum vulputate.
Column 3
Lorem ipsum dolor sit amet, consectetur adipiscing elit. Morbi interdum et ex a efficitur. After that, add this CSS markup to it: .flex-container { background-color: #aa278c; border-radius: 10px; display: flex; margin-bottom: 10px; } .flex-container > div { background-color: #F7941F; border: 1px solid; border-radius: 10px; flex: 1; font-size: 20px; font-family: tahoma; line-height: 40px; margin: 10px; padding: 16px; width: 60px; } .flex-container > div h2 { text-align:center; } And here is the result:

Why does this work? Well, the only important parts are actually that the flex container is set to display: flex;, while its children take on flex: 1;. All the other markup is just for styling. As you may recall, doing this sets flex-grow and flex-shrink both to 1 and flex-basis to auto. As a consequence, all items take up the same amount of space inside the container and their initial size automatically adapts to the available dimensions. The result: effortless columns of equal height.
Flexbox in a Nutshell
In web design, there are many different ways to create layouts and arrange elements. Flexbox is one that has become more and more common. The CSS module offers a lot of benefits, especially for dynamic layouts, smaller page elements, and mobile design. Above, we have gone over what exactly flexbox is, its abilities, and how to use it. Next time you find yourself wanting use float or inline-block, take a second to think whether or not flexbox might be the better solution. If you enjoyed this post, why not check out this article on how to Add Custom Fonts to your WordPress or ClassicPress Site! Post by Xhostcom Wordpress & Digital Services, subscribe to newsletter for more! Read the full article
0 notes
Text
Preserve Meta-Characters during Replacement & Enhanced LINQ Reporting Engine inside Java Apps
What's New in this Release?
Aspose development team is happy to announce the monthly release of Aspose.Words for Java 18.1.0. There are 63 improvements and fixes in this regular monthly release. The most notable includes improved character spacing control logic, improved space shrinking for Verdana font, improved “allow handing punctuation” handling when kerning is enabled, Fixed clip issue with semi-broken tables, Fixed draw order of wrapped shapes in 2013 mode, Fixed repeated header height problem during field update, Fixed the bug causing error in page numbers in multi-page documents rendered into PostScript, Proper calculation of undocumented margins in DrawingML Charts implemented, Horizontal axis of Bubble Chart scaling fixed, Vertical axis of 3DArea Chart scaling fixed, MS Word 2016 approach for rendering of DrawingML Charts axis labels implemented; (Labels are rotated to fit the chart), Fixed rendering of Legend markers for 3D-LineChart, Improved rendering of composite (with multiple series) charts and Chart title with ManualLayout rendering fixed. This release has enhanced the support of data band inside a single-column table row for LINQ Reporting Engine. In previous versions of Aspose.Words, when opening and closing foreach tags are inside same cell, the output contents would be in the same cell. Starting from Aspose.Words 18.1, users can export the single-column data band in separate new row using greedy switch. This has enhanced the support of conditional blocks in table’s row for LINQ Reporting Engine. If users put an opening if, elseif, or else tag and a closing if tag in the same cell, the engine treats a template option formed by these tags as a common one rather than a table-row one by default. However, users can override this behavior making the engine to treat such a template option as a table-row one by specifying a greedy switch. It has added FindReplaceOptions.PreserveMetaCharacters property in Aspose.Words 18.1 to preserve meta-characters beginning with “&” during replacement. In this release, Aspose team has removed following obsolete public method from CompositeNode class. The parameter “isLive” is not used anymore. Please use CompositeNode.GetChildNodes(NodeType nodeType, bool isDeep) instead. It has added new feature in the release of Aspose.Words to show or hide the chart axis. You can use ChartAxis.Hidden property to achieve this. XmlMapping.StoreItemId property has been added in this release to specify the custom XML data identifier for the custom XML data part. Please read DataBinding class for more detail about storeItemID property. The list of new and improved features added in this release are given below
Add feature to show/hide axis of chart
API to get geometric position of element in Word Doc
Add feature to get w:storeItemID of StructuredDocumentTag
Add feature to add multiple replies to comment using Comment.AddReply
RTF to Pdf conversion issue with text-box position
Empty row gets added when closing tag <</foreach>> is in last row of table
Incorrect ChartDataPoint Cloning
Some headers/footers have height of 0 in XMLs obtained by internal layout API
Rework Pdf digital signing code to be compatible with NetStandart 2.0
The length of superscripted footnote's text is incorrect in RTF output.
Shape is not rendered correctly in output PDF
Cleen up System.Security.Cryptography.Xml.
Removed Aspose.Xamarin.Security project.
Gradient fill image is filled as solid fill in PDF
Thai words are showing as squares when converted to DOC.
Document.UpdateFields does not update LastSavedTime.
Bullets rendering issue on Linux
Header contents are overlapped with body contents after conversion from Docx to Pdf
Content overlaps footer
Right borders specified for "tr" or "tbody" elements are not applied to cell
ReplacingArgs.Replacement returns incorrect value
Scaling issue of charts in DOCX to PDF conversion
Difference in values of axis in DOCX to PDF rendering
Barcode images are missing upon RTF conversion
DOCX to PDF conversion loses some images
Font information garbled in RTF document
White Paragraphs in Cells Turn Black during Saving a RTF
Incorrect TOC page number in RTF to DOCX conversion
Incorrect TOC page number in RTF to DOCX conversion
System.NullReferenceException is thrown when RevisionOptions.ShowRevisionBalloons is set to true
Repeating Section Content Control is not rendered in output PDF
RTF to DOCX conversion issue for Footnote Words Become Superscript
Incorrect rotation of the X-axis label text when exporting to PDF
Legend markers for 3D-LineChart are rendered incorrectly when exporting to PDF
Incorrect TOC page number in RTF to DOCX conversion
Error in page number when converting to PostScript
Range.Replace text within GroupShape does not Replace
DOCX to HTML conversion issue with chart rendering
OfficeMath is changed after re-saving DOCX
AllowHangingPunctuation rule is improperly processed
When open DOCX file, an exception occurs
Html save as Odt - view of table is different than in Docx and in MS Word
Document.Compare returns incorrect revisions
Incorrect TOC page number in RTF to DOCX conversion
Other most recent bug fixes are also included in this release
Newly added documentation pages and articles
Some new tips and articles have now been added into Aspose.Words for .NET documentation that may guide users briefly how to use Aspose.Words for performing different tasks like the followings.
Working with Table-Row Data Bands
Working with Table-Row Conditional Blocks
Overview: Aspose.Words
Aspose.Words is a word processing component that enables .NET, Java & Android applications to read, write and modify Word documents without using Microsoft Word. Other useful features include document creation, content and formatting manipulation, mail merge abilities, reporting features, TOC updated/rebuilt, Embedded OOXML, Footnotes rendering and support of DOCX, DOC, WordprocessingML, HTML, XHTML, TXT and PDF formats (requires Aspose.Pdf). It supports both 32-bit and 64-bit operating systems. You can even use Aspose.Words for .NET to build applications with Mono.
More about Aspose.Words
Homepage Java Word Library
Download Aspose.Words for Java
#Show Hide Chart Axis#Single-Column Table Data Bands#Conditional Blocks for LINQ Reporting Engine#Preserve Meta-Characters During Replacement#Java Word Processing#DOCX to HTML conversion
0 notes