#how to do veg biryani in rice cooker
Explore tagged Tumblr posts
Text
veg biryani in cooker - how to make vegetable biryani in cooker - easy pressure cooker biryani
veg biryani in cooker – how to make vegetable biryani in cooker – easy pressure cooker biryani
Veg biryani in cooker : https://yummyindiankitchen.com/veg-biryani-in-cooker-pressure-cooker-veg-biryani/
For business enquiries email id: [email protected] Find Us On Website: https://yummyindiankitchen.com/ Facebook: https://www.facebook.com/yummyindiankitchen Google Plus: https://plus.google.com/+Yummyindiankitchen Pi…
View On WordPress
#easy biryani in cooker#easy veg biryani in cooker#how to do veg biryani in rice cooker#how to make veg biryani in cooker#How to make vegetable biryani#how to make vegetable biryani in cooker#instant pot#instant pot recipe#multi-cooker#pressure cooker#pressure cooker biryani#pressure cooker biryani recipe#pressure cooker veg biryani#Recipes#veg biryani in cooker#veg biryani in pressure cooker#veg biryani recipe in cooker#veg dum biryani in pressure cooker#vegetable biryani recipe in cooker#vegetable biryani recipe in pressure cooker
0 notes
Text
Biryani
History of Biryani in India
The Indian subcontinent has a history of foreign rulers, with each ruler introducing the country to various cultures and traditions as well as cuisines. The Turks, Afghans, Persians, and Arabs have left behind a rich culture of foods and feasts, while the Europeans have introduced the country to the popular vegetables such as potatoes and tomatoes. Even the tea we swear by had been growing wild in the northeast until the Britishers started its commercial production. Traditionally made as mutton and chicken. Biryani is derived from the Persian word Birian, which means ‘fried before cooking’ and Birinj, the Persian word for rice. While there are multiple theories about how biryani made its way to India, it is generally accepted that it originated in West Asia.One legend has it that the Turk-Mongol conqueror, Timur, brought the precursor to the biryani with him when he arrived at the frontiers of India in 1398. Believed to be the war campaign diet of Timur’s army, an earthen pot full of rice, spices and whatever meats were available would be buried in a hot pit, before being eventually dug up and served to the warriors.
Another legend has it that the dish was brought to the southern Malabar coast of India by Arab traders who were frequent visitors there. There are records of a rice dish known as Oon Soru in Tamil literature as early as the year 2 A.D. Oon Soru was said to be made of rice, ghee, meat, turmeric, coriander, pepper, and bay leaf, and was used to feed military warriors.

the most popular story traces the origins of the dish to Mumtaz Mahal, Shah Jahan’s beautiful queen.
Mumtaz once visited the army barracks and found the Mughal soldiers looking weak and undernourished. She asked the chef to prepare a special dish that combined meat and rice to provide balanced nutrition to the soldiers – and the result was biryani of course! At the time, rice was fried in ghee, without washing, to give it a nutty flavour and prevent it from clumping. Meat, aromatic spices, and saffron were added to it before cooking the mix over a wood fire.
The Nizams of Hyderabad and Nawabs of Lucknow were also famous for their appreciation of the subtle nuances of biryani. Their chefs were renowned the world over for their signature dishes. These rulers too were responsible for popularising their versions of the biryani .
long grain brown rice was traditionally used to make biryani. It has today been replaced by the fragrant basmati rice. On the other hand, in the south, biryanis were and are still made using local varieties of rice, like the zeera samba, kaima, jeerakashala and kala bhaat, that lend their distinct taste, texture and aroma to the dish.
there are two types of Biryani – the Kutchi (raw) biryani and the Pukki (cooked) biryani.
In Kutchi biryani, the meat is layered with raw rice in a handi (a thick bottomed pot) and cooked, while in Pukki biryani cooked meat and rice are layered in the handi,

There many varities of biryani;
1. Mughlai Biriyani :( with vegitable)
The Mughal Emperors were very fond of lavish dining experiences and looked upon cooking as an art.. This biryani definitely smells and tastes royal !
How to make Mughlai biryani.
prepping:
1- Pick and rinse 1.5 cups (300 grams) basmati rice in running water till the water runs clear of starch. Soak the rice in enough water for 30 minutes.
2. After 30 minutes drain the rice and keep aside.
3. Soak 10 to 12 almonds and 1 tbsp melon seeds/magaz in ⅓ cup hot water for 30 minutes.
4. Later strain the almonds and melon seeds. Peel the almonds. Add both the almonds and melon seeds to a small grinder jar. Also, add 1 tbsp desiccated coconut.
5. Add 2 to 3 tbsp water and grind to a smooth paste. Keep aside.
6. When the rice and almonds, melon seeds are soaking prep the other ingredients.
Rinse, peel and chop all the veggies. I have used 3 cups mixed veggies (carrots, french beans, potatoes, mushrooms) including green peas. You can use your choice of mixed vegetables.
Slice 1 large onion thinly. (about 1 cup tightly packed thinly sliced onions). Crush 1 inch ginger and 7 to 8 medium garlic cloves to a paste in mortar-pestle. (gives about 1 tbsp ginger-garlic paste). Chop a few mint leaves. (about 2 tbsp chopped mint leaves).
Cooking rice for Mughlai biryani.
1. Now we need to cook the rice. For cooking rice, you can use any method –
microwave, pressure cooking or cooking in a pot. For cooking rice in a pot, take a deep bottomed pan. Add 5 cups water and bring the water to a boil on a high flame.
2. Add whole spices – 1 inch cinnamon, 1 medium tej patta (Indian bay leaf), 2 to 3 single strands of mace, 3 cloves and 3 green cardamoms.
3. Now add the rice.
4. Next add ½ tsp salt or add as required.
5. Keep the flame on high and cook the rice.
6. The rice has to be 75% or ¾ᵗʰ cooked. The grains should have a slight bite to them when cooked. The rice should not be fully cooked but almost cooked.
7. Next strain the rice in a colander. you can also rinse the rice gently with water so that the grains stop cooking. Keep aside. You can also check.
Preparing vegetable gravy for Mughlai biryani.
1. In a pressure cooker, heat 3 to 4 tbsp ghee. add 10 to 12 almonds.
2. Fry them till they get golden. Remove and keep aside in a plate.
3. Next add 15 to 16 raisins. Fry the raisins till they swell and become plump. remove and keep aside.
4. Then add 10 to 12 cashews and fry them till the cashews turn golden. remove and keep aside.
5. Now add the thinly sliced onions.
6. Begin to stir and sauté them on a low to medium flame. onions take time to cook, so add a pinch of salt to quicken the cooking process. sauté the onions till they turn golden and caramelize. Switch off the flame.
7. keep the cooker down. Quickly remove ½ of the fried onions from the pressure cooker and keep aside.
8. Keep the cooker back again on the stovetop. Add whole spices – 1 medium sized tej patta (Indian bay leaf), 3 cloves, 1 inch cinnamon, 2 single strands of mace, 3 green cardamoms, 1 black cardamom, 8 to 9 black pepper and 1 tsp shah jeera. (keep all the spices ready in a plate, so that the onions do not burn. Add all the spices in one go. If you remove the jars, add one by one, the onions will get burnt by then. )
9. Next add 1 tbsp ginger-garlic paste. Stir and saute for a few seconds.
10. Add the mixed veggies and ½ tsp Kashmiri red chili powder.
11. Sauté for 2 to 3 minutes.
12. Add the ground white paste.
13. Add ½ cup of fresh curd (yogurt).
14. Add ⅔ cup of water.
15. Mix and stir very well.
16. Season with salt. Stir well and pressure cook the vegetable gravy for 8 to 9 minutes or 1 to 2 whistles.
17. When the pressure settles down on its own, check the gravy. if the gravy looks thin, then do simmer till it becomes slightly thick.
18. Add ½ tsp garam masala powder or biryani masala powder to the gravy. Mix well.
Assembling and layering Mughlai biryani
1. When the veggies are pressure cooking, soak ⅛ tsp saffron strands in 3 tbsp warm milk. Stir and keep aside.
2. Grease a heatproof oven-safe bowl with some ghee or butter.
3. Pour the first layer of half of the vegetable gravy.
4. Add some paneer cubes. Adding paneer is optional and you can skip this step.
5. Layer with the rice. Also sprinkle some of the saffron soaked milk on the rice.
6. Now add half of the fried nuts, fried onions and half of the chopped mint leaves evenly all over.
7. Layer with the remaining vegetable gravy. Also top with the paneer cubes.
8. Layer with half of the rice. Also sprinkle some of the saffron soaked milk on the rice. repeat the rice layer, fried nuts, fried onions, mint leaves and saffron milk. Also sprinkle evenly 2 tsp rose water or kewra water (optional).
9. seal tightly with an aluminum foil.
10. dum cooking Mughlai biryani on a stovetop, then also you can cover with a foil or with a moist kitchen towel. Place the pan on a hot tava/griddle. On a low to medium flame dum cook the veg biryani for 30 to 35 minutes.
11. Serve veg Mughlai biryani with onion tomato raita or biryani gravy.

1 note
·
View note
Text
How To make Amazing Veg Biryani |
Biryani is one of the most amazing royal delicacies introduced to Indians by the Mughals. Since then it has been much popular and is considered to be a luxurious treat to enjoy on special occasions. Making a chicken biryani in authentic dum style does take some time and needs little expertise. Traditional chicken biryani is made by layering marinated chicken and then layered with parboiled rice, herbs,saffron milk & then ghee. I have shared that traditional HYDERABADI BIRYANI HERE. The recipe shared here in this post details a short cut method to make a simple one pot delicious chicken biryani in a pressure cooker or a pot. So what I have shared in this post is not a dum style biriyani yet it will surprise you with a good aroma and taste. This recipe yields a chicken biryani that isn’t too oily, spicy, hot or pungent as it looks to be in the pictures. However you can reduce the amount of red chili powder if you do not prefer the heat. This is best served with a RAITA, SHORBA, LASSI and papads. You can also find the older version of this chicken biryani recipe towards the end of this post as recipe 2. Step-by-step photos Preparation for chicken biryani recipe 1. Make few slits on all the chicken pieces and add to a large bowl. Then add 3 tablespoons plain yogurt (Indian curd) 1¼ tablespoons ginger garlic paste ½ to 1 tablespoon garam masala (or biriyani masala) ½ teaspoon salt ½ to 1 teaspoon red chili powder (reduce for kids) ¼ teaspoon ground turmeric 1 tablespoon lemon juice (optional) 2. Mix everything well and marinate the chicken. Cover and set this aside for 1 hour. You can also rest it overnight in the fridge. 3. Meanwhile add 2 cups basmati rice to a large pot and rinse it at least thrice. Drain and soak in fresh water for 30 mins. Drain to a colander after 30 mins. Optional – Soak a pinch of saffron strands in 2 tablespoons hot milk. Cooking chicken 4. Heat ghee or oil in a heavy bottom pot or pressure cooker. Make sure you use a large one for this. Using whole spices is optional but recommended. Use whatever you have. I use 1 bay leaf 4 green cardamoms 6 cloves 1 inch cinnamon piece 1 star anise ¾ teaspoon shahi jeera (caraway seeds) 1 strand mace 5. Add thinly sliced onions. On a medium heat, fry them stirring often until uniformly light brown. 6. This is the correct color of the onions. Do not burn them as they leave a bitter taste. (check video) 7. Add marinated chicken & saute until it becomes pale for 5 minutes. 8. Lower the flame completely. Cover and cook until the chicken is soft, tender and completely cooked. 9. Check if the chicken is cooked by pricking with a fork or knife. It has to be just cooked and not overdone. Evaporate any excess moisture left in the pot by cooking further without the lid. 10. Taste test and add more salt if needed. I added ¼ more salt here. Add ¼ cup plain yogurt (Indian curd) 1 teaspoon garam masala (or biryani masala) ¼ to ½ teaspoon red chili powder (optional) 1 slit green chili pepper (optional) 2 tablespoons chopped mint leaves (pudina) How to make chicken biryani 11. Mix everything well. Spread it evenly in a single layer. 12. Layer drained rice all over the chicken. To a separate bowl, pour 3 cups water and add ¼ to ½ teaspoon salt. If cooking in a pot, use 3½ cups water. Stir and taste the water. It must be slightly salty. Pour 2 cups of this across the sides of the cooker or pot. Pour rest of the water over the rice gently. (check video) 13. Level the rice gently on top. Add 2 tablespoons more mint leaves.Do not mix up everything, the taste of the biryani cooked in the shown method is good. Optionally you can sprinkle 2 tablespoons fried onions & saffron soaked milk. 14. Finally cover the pot or cooker. If cooking in a pot, cook on a medium heat until the rice is done completely. Turn off when done and rest it covered for 15 mins. If cooking in a cooker, cook for 1 whistle. Later remove the cooker from the hot burner to stop cooking further. 15. When the pressure releases naturally, open the lid. Gently fluff up with a fork. Serve chicken biryani in layers – top layer with rice and bottom layer with chicken. Enjoy with RAIT more recipe visit Biryani Maxx
1 note
·
View note
Photo

That Sunday Meal Because Of My Bestie - Done I really don't understand how @somuchtolike & I are friends leave alone being besties🤦♀️She just can not cook. She's always kept a cook but now with no help coming, she had no choice but to cook. She called me to ask me how to make a veg Pulao with leftover rice. I thought everybody knows how to do that but no. Not Madam Khursheed🤦♀️ I called her & told her how to make it using whatever she had at home. But it made me now crave a pulao. So this happened with what I had in my fridge & pantry In a cooker, I tempered ghee with whole garam masala, asafoetida, curry leaves, green chillies, ginger-garlic pastes & onions. I added potatoes, a little water, salt & pressure cooked got 1 whistle. I released the pressure & added red chilli powder, a store bought biryani masala powder, tomatoes, brocolli, more water, rinsed basmati rice, fresh coriander & dried fenugreek leaves. Once it came to a boil I put on the cooker's lid & pressure cooked for one whistle. I did not let the steam out & opened the cooker only after the steam released naturally Was so so nice to eat with a generous squeeze of lime juice. @somuchtolike you'd have loved this & now you have a written recipe so cook!! Do you also wonder how you're friends with someone who's so different from you? (at One North) https://www.instagram.com/p/B-4grzIgC8h/?igshid=g0qs0j7mzm7l
0 notes
Text
Yellow Moong Dal Khichdi a one pot simple meal with split yellow moong beans and rice. Creamy, soft, light on stomach with detoxifying properties!!
Khichdi or Kitchari is considered a comfort meal by many in India due to the comfort and ease of making and it’s digestive properties. Khichdi means ‘all mixed up’ in local language. It is prepared by mixing and soaking lentils with rice then dumping it in the cooker/vessel with cumin, turmeric tempering in Desi ghee. All the ingredients used in making this khichdi have Ayurvedic benefits on the body .
There are many variations in making khichdi. Lentils like Split Pigeon Pea, Split chickpea Lentils are also used in making Khichdi. But, as these lentils are heavy on stomach and also takes a little more time to cook as compared to moong lentils. So Moong lentil Khichdi is the first choice to make when someone is not feeling well or recovering from some illness or have some digestive issue.
Ayurveda strongly recommends fasting for a day and then breaking the fast with this simple Khichdi. It is one of the best and cheapest detox 🙂 !!
I love to have Khichdi with Cilantro chutney and my kids like to have papads with it. A glass of buttermilk with some cucumber slices or any yogurt raita, makes it a whole and filling meal.
Another detoxifying Khichdi from the blog is.. Hari Moong Dal Khichdi, that is equally nutritious and simple to prepare.
How to make Simple Yellow Moong Dal Khichdi..
Simple Yellow Moong Dal Khichdi can be made in just a few minutes. No chopping, frying or sautéing the masala, not time-consuming tasks are involved. It is recommended to soak lentils and rice for at least 15-30 mins as it speeds up the cooking process and makes the grains easily digestible.
I make Khichdi with or without vegetables. Most of the times, I just temper and cook Khichdi in cumin and turmeric with desi ghee and sometime I do add finely chopped carrots and peas to it. But we mostly like it simple topped with a spoonful of Desi Ghee.
Feel free to add vegetables in your Khichdi, but if you want a detoxifying and light meal, just leave the vegetables and keep it simple. Also many people like to temper it with red chill, cumin in ghee while serving. I skip it as we like to have it plain with absolutely no spices.
Simple Khichdi is a satvik no-onion and no-garlic meal and it is also suitable for Vegans. You can use Vegetable oil to make. But studies have shown that Desi ghee can be conveniently consumed by vegans or those who have lactose intolerance. I am not recommending it. You can confirm from the your reliable resources before consuming it.
How to cook Simple Khichdi..
Khichdi is usually cooked in Pressure Cooker to save the time, as lentils and rice take time to cook in open pan. These days we can make it in Instant Pot too. Just dump everything, add some water and set the timings.
Cooking in Open Pan..
In a heavy bottomed open pan, add ghee/oil, add hing and cumin seeds, once the seeds crackle, add turmeric powder and the add soaked rice lentil mix.as water in 4:1 ratio to moong and rice mix.This gives Khichdi of creamy consistency. We love it this way. If you like thicker texture, add less water. Cover the pan with little space for steam to escape and cook khichdi till the grains are done.
Cooking Khichdi in Instant Pot/Pressure Cooker
Cooking Khichdi in open pan takes time.So it is usually made in pressure cooker to save the time. Initial steps remain the same as followed in Open Pan method, only difference is the ratio of water. Add 3 Cups water when cooking in Instant Pot or Stovetop Pressure cooker.
Cook Khichdi in Pressure Cooker for 3-4 whistles on medium flame and in Instant Pot ‘Pressure cook Mode(High)’ take 7-8 minutes ( sans the time it takes to come to pressure).
Please see the recipe card for detailed recipe.
Let’s see how I make this so easy and simple Yellow Moong Dal Khichdi..
Yellow Moong Dal Khichdi
Yellow Moong Dal Khichdi a one pot simple meal with split yellow moong beans and rice. Creamy, soft, light on stomach with detoxifying properties!!
1/2 Cup Yellow Moong Dal/Split Yellow Moong Lentils
1/2 Cup Rice
1 tbsp Desi Ghee/Oil
1 tsp Cumin Seeds/Jeera
1/2 tsp Turmeric Powder
Salt as per taste.
Wash rice and lentils together 2-3 times in water.Soak for 15-30 minutes.
Instant Pot Method
Set the SAUTE MODE of Instant Pot on on high for 5 mins.
Add ghee to it. Once the display shows HOT, add cumin seeds. Once the seeds crackle, add turmeric powder.
Drain water from rice and lentil mix, add add to the inner pot, mix and saute for a minute.
Add water around 3 cups and Cancel the SAUTE Mode.
Cover and seal the lid, and set the PRESSURE COOKER Mode on High for 8 minutes.
Once the timer goes off, let it go on warm mode, if your are planning to have it after some time. Else, release Pressure using QRP after 2-3 minutes. Check for the doneness of grains and have it warm with a spoonful of ghee!!
Pressure Cook Method
In Pressure Cooker, add ghee, keep it on medium flame, add cumin seeds once ghee is hot.
When seeds crackle, add turmeric , rice and lentil mix, saute for a minute then add water(3 cups), cover and cook on medium flame for 3-4 whistles. Let the pressure go naturally.
Serve hot!!
I use Basmati Rice for Cooking. You can use any rice(Broken , Jasmine, Sona Masoori).
Use oil for the vegan friendly version.
Skip Hing or Asafoetida for Gluten-free version.
#gallery-0-4 { margin: auto; } #gallery-0-4 .gallery-item { float: left; margin-top: 10px; text-align: center; width: 33%; } #gallery-0-4 img { border: 2px solid #cfcfcf; } #gallery-0-4 .gallery-caption { margin-left: 0; } /* see gallery_shortcode() in wp-includes/media.php */
Do make this simple and light meal on days when you want something light and comforting, homemade and without too much standing in Kitchen. It is a very healthy and nutritious meal for babies you start feeding them grain based meals. Good for elderly and sick people or those who have we weak digestive system.
Give your feedback how you liked and if you have any queries do write to me.
Do visit my social media accounts.. FB, Pinterest and Instagram. Whenever you make this, do post on my FB page or tag me on Instagram. Pin the recipes for later use.
Hit the follow button and subscribe to the blog to get notifications on new posts and share the blog with your loved ones. I promise won’t spam your mailbox 🙂.
This is 25th in my series of A-Z Biryani/Pulao/Khichdi dishes, that I am taking to Mega Blogging Marathon April ’19.
Day 25. Yellow Moong Dal Khichdi
Mega Blogging Marathon, is an event where I along with a group of fellow bloggers are blogging everyday about Biryani/Pulao/Khichdi dishes this whole April, with Sundays off.
My earlier posts for the event..
Day 1. A.. Aloo Matar Ki Tehri
Day 2. B..Broccoli Mushroom Pulao
Day 3 . C..Chana Dal Khichdi
Day 4. D..Dhaniya Pulao
Day 5. E.. Easy Steamed Rice in Instant Pot with Pot in Pot Method
Day 6. F.. Fresh Mint and Peas Pulao
Day 7. G.. Gatte Ka Pulao
Day 8. H.. Hari Moong Dal Khichdi
Day 9. I.. Iyengar Puliyogare(Instant)
Day 10. J.. Jeera Rice
Day 11. K.. Kashmiri Pulao
Day 12. L.. Lucknowi Veg. Dum Biryani
Day 13. M.. Mixed Veg Pulao
Day 14. N.. No-Onion No-Garlic Kadhai Paneer Pulao
Day 15. O.. Oats and Moong Dal Khichdi
Day 16. P.. Pearl Pulao
Day 17. Q..Quinoa Pulao
Day 18. R.. Rajasthani Kabuli(Jodhpuri Pulao)
Day 19. S.. Spicy Chilli Garlic and Bell Pepper Rice
Day 20. T.. Tomato Corn and Basil Pulao
Day 22. V. Vegetable Biryani in Instant Pot
Day 23. W. Walnut and Cranberry Rice
Day 24. Vermicelli Pulao
Check out the Blogging Marathon page for the other Blogging Marathoners doing BM#99

Thanks for stopping by!!
Yellow Moong Dal Khichdi Yellow Moong Dal Khichdi a one pot simple meal with split yellow moong beans and rice. Creamy, soft, light on stomach with detoxifying properties!!
0 notes
Text
Top ten popular Indian dishes
Whether it is brand, sports, actor, movie, politician, food & drink, we rate different categories and their value in terms of their popularity. How popular a particular thing is…..we believe that is good, most of the time it is right also.
How a particular thing does gains popularity or becomes famous? When people like it more and more then that particular thing becomes famous among the people because the spread of word plays a vital role in the popularity of anything.
So here as in my topic mentioned above I am presenting you top ten popular Indian dishes….we may observe that when we usually search for any delicious and tasty recipes we search like
Popular dishes,
Popular cuisines,
Popular breakfasts,
Popular sweet recipes,
Popular snack recipes,
Popular nonvegetarian recipes
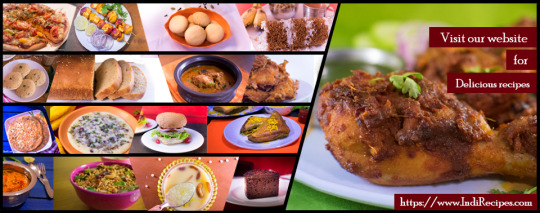
So like this, we believe that whichever dish is popular it is very good to taste and enjoyable as food because here the logic is so many people liked this dish means the dishes or recipes have been tasted which have something unique and delicious taste compared to other dishes.
So like these popular things become more popular, so here we will discuss top ten Indian dishes which are most popular.
We will start with breakfast as our day starts with breakfast, in this category we have many different breakfast recipes, in them, dose recipes which are most popular among the Indians especially in south India, and it is like a staple breakfast food.
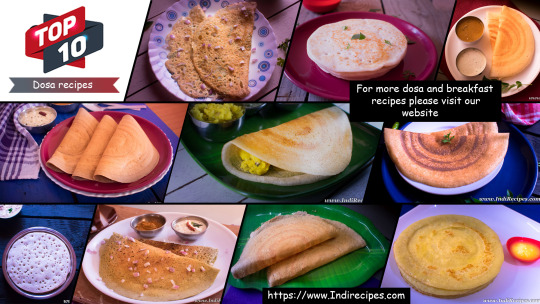
This breakfast is becoming very popular in all over world, because of its varieties, taste and deliciousness and enhances the taste when we eat this crispy plain dosa with aloo curry and coconut chutney.
As we talked about the south Indian breakfast recipes, now let’s come to the north Indian recipes and their paratha recipe which is their most popular breakfast and it is like a national breakfast.
Aloo Paratha is stuffed with cooked and mashed potatoes and roasted with oil. Aloo Paratha is a simple yet tasty alternative to chapathi, which you can have any time for Breakfast, Lunch or Dinner.
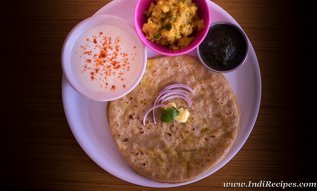
The good thing about Paratha is that it does not need any special Curry, even with curd also it gives a good taste. Try in your Kitchen and serve with butter to get more taste, especially kids will love this because they can eat parathas by making it as a roll.
Now after breakfast recipes here will talk about one more popular vegetarian recipe called vegetable biryani.
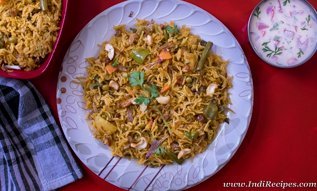
Biryani does not require any introduction because it is one of the most famous category of rice recipes, we have much famous non-veg biryani recipes and in between them, it has its own group of biryani lovers and followers.
Veg biryani or vegetable biryani which is prepared with different healthy vegetables and with some masala used for nice flavor which makes this delicious and healthy too.
If you want to prepare delicious vegetarian recipes for someone, veg biryani is one dish you can prepare and it never goes wrong.
Now coming to the non-vegetarian recipes… In this category the non-veg starter recipes are most popular for example. Onion Chicken Kabab, which is very much famous among the non-veg lovers. Why do you want to go to a Restaurant when you can bring the restaurant to your home!!!... Restaurant Style Tasty Crunchy Chicken Kababs can be prepared at home by just following this simple & Easy Recipe...Try this at the comfort of your home and serve it among your loved ones and watch them munching and asking for more.

One more popular category of food is non-veg biryani recipes
What is a Biryani without some succulent pieces of chicken wrapped in a perfect blend of aromatic spices and herbs??? Yes, all the non-veg biryani lovers know this taste of delicious biryanis… That’s why I am sharing one of the most popular recipes which fall in this type of categories which is called Chicken Dum Biryani. Most commonly basmati rice is used to prepare this One Pot Recipe which tastes better when it is cooked in the cooker. This recipe can be prepared in two ways one is kachhi method and another one is a pakki method.
Try this perfect Dish in your Kitchen whichever way or method you like or prefer and enjoy the delicious biryani!
In the coastal regions which are surrounded by sea,river or beaches their seafood recipes are famous.

Ayala Fish Fry MackerelFishFry Recipe… Mackerel Fish which are commonly found in the Indian Ocean and surrounding seas are also known as Bangada, Bangde, Ayala, Kumula in various Indian Languages. This Recipe comes in Sea Food Categories and it is a simple and easy recipe, which is one of the most popular fish recipes. This is Healthy Food which can be prepared with very few ingredients, especially for Sea Food overs.
Now coming to snacks and cookies, cookies are commonly used with evening coffee/Tea as a tea time snack.
Here I like to mention one cookie or you may call it as biscuits because these are famously known as biscuits here in India, tutti fruiti cookies or Karachi biscuits. These biscuits are not only popular in India even these are very famous biscuits in our neighboring countries especially in Pakistan, this biscuit is also named after the city of Pakistan called Karachi.

Try this World famous Karachi Biscuits Recipe Kids will definitely love this one, Easy to make and fun to serve...do try this at home and share how it turned out to you.
As we are talking about snacks or time pass foods here I like to share one recipe which is my favorite too.
One street food which will make you drool literally when you hear the name of it and that is Pani Puri, which is one of the most popular snacks of India. Popular street food in North India it is also known as Golgappa.
Nowadays many people are afraid of eating outside pani puri because of hearing unhealthy ways of preparing puris. Don’t worry Prepare this crunchy puris for pani puri at home and enjoy the pani puri street food in a healthy way with same flavor and taste of Pani as outside.

And you may be thinking of how I left out mentioning any baking recipes which are most popular among all. Here I will share one cake recipe, a flavor of cake most popular which you can get in any category of cake recipes and it is chocolate flavor recipe.
Do you want to learn Cake making??? And still, you are a beginner? For that, I think this Cake Recipe is perfect to start with a simple and yet Delicious Cake called Eggless Chocolate Cake.
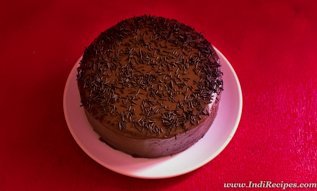
It can be used as a base for any cake recipe, which can be prepared with very few ingredients even without egg and butter. As in its name eggless, without egg also the cake is moist with soft and beautiful texture and taste. Prepare cake in your Kitchen and celebrate happy moments with self-made cake.
Any meal, we would like to end with one recipe and that is sweet dishes or deserts recipes as India is filled by many cultures and it follows different languages, culture, food and the way of leaving.
In this, the sweets also have different names, in different languages of the Indian states or region, a sweet is called by numerous names.
One common name is "Mithai" commonly its main ingredients are sugar, milk etc.
So here we get different region dishes like
North Indian sweets
South Indian Sweets
Festival sweets
But here I like to end with one simple sweet recipe called semiya payasam or shavige payasam which is prepared in all over India.
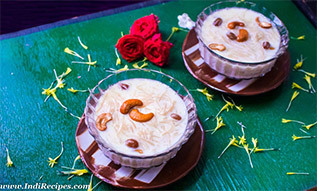
Semiya Payasam is one sweet recipe which can be prepared during any simple occasion to big festival season. It is one of the simple yet popular tasty Payasam recipe, which can be prepared even by bachelors or newbies just under a few minutes. Try this quick and delicious sweet dish and enjoy with family.
I hope you all like the popular recipes from all over India
#top ten indian dishes#top ten popular recipes#top ten famous food#top ten delicious recipes#top ten yummy recipes#Indian famous recipes
0 notes
Text
veg biryani in cooker | how to make vegetable biryani recipe in cooker
veg biryani in cooker | how to make vegetable biryani recipe in cooker
full recipe: http://hebbarskitchen.com/veg-biryani-cooker-vegetable-biryani/
download android app: https://play.google.com/store/apps/details?id=com.hebbarskitchen.android&hl=en
download iOS app: https://itunes.apple.com/us/app/id1176001245
Email – [email protected] Website – http://hebbarskitchen.com/ Facebook – https://ww…
View On WordPress
#chicken biryani recipe in cooker#Chicken dum biryani#cooking veg biryani in pressure cooker#easy veg biryani in cooker#easy veg biryani in pressure cooker#how to cook veg biryani in electric cooker#how to cook veg dum biryani in pressure cooker#how to do veg biryani in rice cooker#how to make veg biryani in cooker in hindi#how to make veg biryani in pressure cooker at home#how to make veg biryani in rice cooker in hindi#hyderabadi veg biryani#instant pot#instant pot recipe#multi-cooker#pressure cooker#Recipes#Veg dum Biryani recipe
0 notes
Text
Quinoa (pronounced as kee-wah) is one of the ancient grains and is very popular these days especially among the people who want to avoid rice. It is also known as the superfood of the future. Quinoa is a complete protein as it is loaded with all the 9 essential amino acids. A rich source of iron, magnesium, and riboflavin which is known to improve the energy levels in brain and muscle cells.
This grain is a native of South America(Peru) and was discovered 4-5 thousand years ago. These days lot of people have started eating it. We use it in salads, soups and as an alternative to rice. In short from salads, to sides , from breakfast to main it can form an integral part of your everyday meal. Many of my friends have included Quinoa and other ancient grains in their diet.Till now somehow I have not included these grains in my everyday meal. Though I got packs of quinoa, black rice and couscous for trying out, but I still believe in having my typical North Indian meal of Dal, Roti,Subzi and Chawal(rice ). I know these are the healthy options to carbohydrate rich Rice , but somehow rice is still the ‘to go’ meal for me. I like to have quinoa once in a while in my salads or when I want to have break from my usual rice eating routine or use to make burger patties with red beans. Rajeev and kids do not like it much except they have it in form of burger patties.
I like to have quinoa in form of Quinoa Pulao. It is made by cooking quinoa with veggies in Indian spices, just like the way we cook Rice Pulao. It is a one pot meal, and can be prepared within 20 minutes when cooked in pressure cooker or Instant Pot. A perfect wholesome meal for packing in lunch box. Cooking Quinoa in open pan can take long time as the grain takes time to cook. Pressure cooking reduces the time and also retains the nutrients which can be destroyed with overcooking of the grain.
Let’s see how I make this Quinoa Pulao..
Quinoa Pulao can be made just like the way we make Mixed Veg. Pulao. I do not use whole spices in preparing it.You can add paneer/tofu or soya chunks along with the vegetables.
If you see the stepwise pics, I have not used the onions and tomatoes in the recipe, I have used my homemade bhuna masala(onion-ginger and garlic masala) that I keep ready for making quick curries and dals. But in the recipe I have given the amount of onions and tomatoes to be used in the recipe.
Quinoa Pulao
Healthy and Gluten-free Quinoa cooked with vegetable like carrots, corn, peas. Learn how to make Quinoa on Stove-top Pressure Cooker
1/2 Cup Quinoa
1/4 Cup Mixed Vegetables
1/2 Onion finely chopped
1 tbsp Ginger-Garlic Paste
1 Tomato
1/2 tsp Garam Masala
1 tbsp Oil
Salt to taste
1/2 tsp Cumin Seeds
Wash Quinoa very nicely in running tap water, till it is clear.
In pressure cooker, add oil. Add cumin seeds when the oil is hot enough.When seeds crackle, add ginger garlic paste. When the raw smell of garlic goes away, add onions and saute till translucent.
Add finely chopped tomatoes or tomato puree. Cook for 2-3 minutes.
Add vegetables saute for few seconds.
Add quinoa and water . For 1/2 Cup quinoa add 1 cup water. Add asalt and garam masala.
Cover the lid and cook for 3-4 whistles on medium flame.
Quinoa is cooked when the grains become translucent, and you can see tiny sprouts on the cooked grain. Fluff with fork and serve hot with chutney or raita or curry of your choice.
I have used Onion-Garlic-Ginger masala that I keep ready in my refrigerator for preparing quick meals. You can use Bhuna Masala for the same.
I have used Tomato puree, you can use wither puree or finely chopped fresh tomatoes.
I do not use whole spices like bay leaf and cardamoms that are used in making Pulao or biryani. You can add these with cumin seeds.
#gallery-0-4 { margin: auto; } #gallery-0-4 .gallery-item { float: left; margin-top: 10px; text-align: center; width: 25%; } #gallery-0-4 img { border: 2px solid #cfcfcf; } #gallery-0-4 .gallery-caption { margin-left: 0; } /* see gallery_shortcode() in wp-includes/media.php */
This is 16th in my series of A-Z Biryani/Pulao/Khichdi dishes, that I am taking to Mega Blogging Marathon April’19.
Day 16. Q.. Quinoa Pulao
This is an event where I along with a group of fellow bloggers are blogging everyday about Biryani/Pulao/Khichdi dishes this whole April, with Sundays off.
My earlier posts for the event..
Day 1. A.. Aloo Matar Ki Tehri
Day 2. B..Broccoli Mushroom Pulao
Day 3 . C..Chana Dal Khichdi
Day 4. D..Dhaniya Pulao
Day 5. E.. Easy Steamed Rice in Instant Pot with Pot in Pot Method
Day 6. F.. Fresh Mint and Peas Pulao
Day 7. G.. Gatte Ka Pulao
Day 8. H.. Hari Moong Dal Khichdi
Day 9. I.. Iyengar Puliyogare(Instant)
Day 10. J.. Jeera Rice
Day 11. K.. Kashmiri Pulao
Day 12. L.. Lucknowi Veg. Dum Biryani
Day 13. M..Mixed Veg Pulao
Day 14. N.. No-Onion No-Garlic Kadhai Paneer Pulao
Day 15. O.. Oats and Moong Dal Khichdi
Day 16. P. Pearl Pulao
Check out the Blogging Marathon page for the other Blogging Marathoners doing BM#99

Quinoa Pulao Quinoa (pronounced as kee-wah) is one of the ancient grains and is very popular these days especially among the people who want to avoid rice.
0 notes
Text
Easy and Tasty Veg Biryani Recipe in pressure cooker | ಬಿರಿಯಾನಿ ರೆಸಿಪಿ | One pot biryani
Easy and Tasty Veg Biryani Recipe in pressure cooker | ಬಿರಿಯಾನಿ ರೆಸಿಪಿ | One pot biryani
Veg Biryani is an authentic Indian rice recipe made with Basmati Rice , Vegetables and some spices. In this video I have shown How to make Veg biryani in pressure cooker. This video is definitely gonna help for the one who finds difficulty in making veg dum biryani. Do give it a try and let me know how it turned out for you.
Music:
View On WordPress
0 notes
Text
Tehri or Tahri, is a one pot meal made with rice and vegetables cooked in aromatic Indian whole spices with desi ghee/mustard oil.
This flavourful rice dish hails from Uttar Pradesh(India) and is a popular weekend meal with raita, papad and pickle. It is popularly associated with Awadhi cuisine but as per me not only in the Awadh region(Lucknow and adjoining areas) . It is one of the most popular comfort meals in also in other parts like Western Uttar Pradesh. It is so popular in U.P that every region and every household has its own version of this dish. There is Aloo Matar ki Tehri, Vadi(Sun-dried Lentil Dumplings) aur Aloo Ki Tehri, Vadi and fresh Toor Dal beans(Lilva Beans/Fresh Split Pigeon Pea). You can also find variations in the way of making. Many add dahi/yogurt while making it, while many skip adding ginger and garlic paste to it. Tehri can be called a variation of Biryani and Pulao, somewhere in between the two.
Tehri and it’s variations
Tehri is a regular dish that make quite often. I make it in its simplest form that I am presenting in this post. No ginger and garlic, simple vegetables like peas and potatoes and add either Dal Vadis or Soya granules whatever is available with me . Adding spoonful of desi ghee and eating tehri with yogurt and pickle gives you the ultimate comfort food experience. Fresh Peas add on to the taste of this dish but you can use frozen as a well. It takes just a few minutes to make it, only thing is you need to soak rice 15-20 minutes before making it. Also, many people add cauliflower to it, but I skip it as I don’t like the cauliflower in pulao or tehri. You can add if you want.
What kind of Rice is used for making Tehri..
Long Grain Rice like Basmati Rice is the best to make it. We don’t use any other rice variety so can’t comment on what will be the next best rice to use.
Ingredients and how to make it..
Here I am presenting you the simplest variation of Tehri that I make. The main of the dish comes from the whole spices like Bay leaf, Cinnamon, Cloves, Black Pepper, and Black Cardamom. Cooking it in Mustard oil, adds on to the rustic flavour. You can use any flavourless oil or desi ghee(that I use quite often).
Let’s see how I make this Aloo Matar ki Tehri
We can cook Tehri in Instant Pot as well as n Pressure cooker in stove-top. I have included bot the method with different recipe cards.
Instant Pot Method..
Aloo Matar Ki Tehri(Instant Pot Method)
Tehri or Tahri call it by any name, is a one pot meal made with rice and vegetables cooked in aromatice Indian whole spices with desi ghee/mustard oil. Serve with raita, pickle or chutney or even plain yogurt. Instant Pot Method of making Aloo Matar Ki Tehri.
1 Cup Basmati Rice
1/2 Cup Soya Granules/Nutrela
1 Potato Medium
1/2 Cup Peas ((Fresh/Frozen))
2 Tomatoes
1 Onion(Medium)
1-2 Whole Green Chillies
1 tsp Cumin Seeds/Jeera
1 Bay Leaf
1 Cinnamon Stick(small)
4-5 Cloves
4-5 Black peppercorns
1-2 Black Cardamom
2 tbsp Oil/Desi Ghee/Mustard Oil
1 tsp Coriander Powder
1-2 tsp Garam Masala
1/2 tsp Turmeric Powder
1/2-1 tsp Red Chilli Powder (optional)
Salt to taste
Wash and soak rice in enough water.
Roughly chop Onions and tomatoes.
In a pan heat water, once the water starts boiling add 1/4 tsp , add soya granules to it. Switch off the flame and let the granules soak in water for few minutes. Strain the granules and keep aside.
Making it in Instant Pot
Switch on the saute mode of Instant pot on high for 10 minutes.
Add oil/ghee, when it warms up(the screen shows hot), add cumin seeds and other whole spices.
When the aroma from the spices starts coming, add onions and whole green chillies. You can also finely chop chillies.
When the onions start turning translucent, add tomatoes and cook till it starts getting soft.
Add garam masala powder, red chilli powder and turmeric powder. Mix nicely.
Add the potatoes. peas and soya granules and mix with onion tomato masala.
Drain the water from the rice and mix with the veggie masala. Add salt and mix well.
Cancel the saute mode add water just enough to soak rice.
Cover the lid and set the pressure cook mode(high) with timer for 5 minutes.
Once the timer goes off cancel the pressure cook mode, release the pressure, and open the lid. Fluff rice lightly, with fork.
Serve hot with choice of raita/yogurt and spoonful of desi ghee on it.
Please note the total time in cooking the dish may be longer than 5 minutes. When I say Cooking time 5 minutes, it is the time after IP comes to pressure and the timer beeps for start pressure cook mode. The total time to come to pressure may vary as per the quantity in the inner pot.
Also, when using Mustard oil, heat the oil to its smoking point, cool it a bit and then add the whole spices. You can heat oil in a separate pan and then add to inner pot for preparing tehri.
5 minutes for cooking when the rice is soaked for a minimum of 20 minutes. If you are adding rice without any soaking time for soaking just for 5 minutes, increase the time to 7-8 minutes.
Rice mode is also used to cook Rice but I prefer cooking rice on pressure cook mode.
Stove-Top Method
Aloo Matar Ki Tehri(Pressure Cooker Method)
Tehri or Tahri call it by any name, is a one pot meal made with rice and vegetables cooked in aromatice Indian whole spices with desi ghee/mustard oil. Serve with raita, pickle or chutney or even plain yogurt. Stove-Top Method of making Aloo Matar Ki Tehri.
1 Cup Basmati Rice
1/2 Soya Granules/Nutrela
1 Potato Medium
1/2 Cup Peas
2 Tomatoes
1 Onion(Medium)
1-2 Whole Green Chillies
1 tsp Cumin Seeds/Jeera
1 Bay Leaf
1 Cinnamon Stick(small)
4-5 Cloves
4-5 Black peppercorns
1-2 Black Cardamom
2 tbsp Oil/Desi Ghee/Mustard Oil
1 tsp Coriander Powder
1-2 tsp Garam Masala
1/2 tsp Turmeric Powder
1-1/2 tsp Red Chilli Powder (optional)
Salt to taste
Wash and soak rice in enough water.
Roughly chop Onions and tomatoes.
In a pan heat water, once the water starts boiling add 1/4 tsp , add soya granules to it. Switch off the flame and let the granules soak in water for few minutes. Strain the granules and keep aside.
Keep pressure cooker on medium flame. Add oil/ghee, when it warms up, add cumin seeds and other whole spices.
When the aroma from the spices starts coming, add onions and whole green chillies. You can also finely chop chillies.
When the onions start turning translucent, add tomatoes and cook till it starts getting soft.
Add garam masala powder, red chilli powder and turmeric powder. Mix nicely.
Add the potatoes. peas and soya granules and mix with onion tomato masala.
Drain the water from the rice and mix with the veggie masala. Add salt and mix well.
Add water just enough to soak rice. Cook rice on medium flame till 2 whistles.
Once done, release the pressure, and open the lid. Fluff the rice lightly.
Serve hot with choice of raita/yogurt and spoonful of desi ghee on it.
Stepwise pics..
#gallery-0-4 { margin: auto; } #gallery-0-4 .gallery-item { float: left; margin-top: 10px; text-align: center; width: 33%; } #gallery-0-4 img { border: 2px solid #cfcfcf; } #gallery-0-4 .gallery-caption { margin-left: 0; } /* see gallery_shortcode() in wp-includes/media.php */
I served it with Boondi Raita, Mix Veg Raita and Cilantro and Mint Chutney. Even Chaas/Indian Buttermilk or plain yogurt with Mango pickle goes very well with it.
I am linking this Aloo Matar Ki tehri to Mega Blogging Marathon, where group of bloggers will be blogging non-stop continuously for a month, with Sundays off. This is the first time I am participating in Mega Marathon, though I have been a part of Blogging Marathon since last few months.
This is my entry for the theme.. with A..Aloo Matar Ki Tehri
The theme, for Mega Blogging Marathon is “Biryani/Pulao/Khichdi Festival!! all of this April, by Srivalli from Spice Your Life. Click here to know more about Mega Blogging Marathon… ” We would be sharing 26 different recipes with only sunday’s off. There is one simple rule in this theme, is that the dish has to feature a grain. Hopefully I will manage and share 26 different recipes healthy recipes with Rice, and some healthy grains like Quinoa, Bajra and many more. Some cooked in Instant Pot and some in Pressure Cooker or both the versions.
Do make this simple and rustic rice dish. I am sure you and your family will love this.
Say hello to me on my social media accounts.. FB, Pinterest and Instagram. Whenever you make this do post on my FB page or tag me on Instagram. Pin the recipes for later use.
If you like my work, then do hit the follow button and subscribe to the blog to get notifications on new posts and share the blog with your loved ones. I promise won’t spam your mailbox 🙂.
Thanks for stopping by and keep coming back!!
Pin the recipes for later use.
Aloo Matar Ki Tehri/Tahri Tehri or Tahri, is a one pot meal made with rice and vegetables cooked in aromatic Indian whole spices with desi ghee/mustard oil.
#featured#gluten-free#Instant Pot Cooking#Instant Pot Rice Recipes#Mega Blogging Marathon#One Pot Meals#Tehri recipe#Uttar Pradesh Cuisine#Uttar Pradesh recipes#vegan#vegetarian
0 notes
Text
Why Indian Biryani’s are so famous among all???
About Indian Biryani’s

Biryani who doesn’t like this recipe???? I think it’s one of those Indian foods, which are most favorite among many. A biryani is a recipe which is known for its masala, spices, and herbs and its yummy taste…A biryani is an evergreen classic and yummy taste food which doesn't require any introduction….
So we will discuss in detail about biryani recipes like….
What is biryani?
It is varieties!
It's masala!
It's popularity!
It is healthy ingredients!
How much popular Indian biryanis are all over the world?
What is biryani?
A biryani is an Indian recipe which is made using rice as the main ingredient and it blends with aromatic spices and herbs….
There are different varieties of biryani recipes we have in India which are all famous….
These biryanis can be mainly divided in two main categories ….
Vegetarian category
Non-veg category
About vegetarian biryani
Vegetarian biryanis are favorite for those who are vegetarian and this biryani recipe is blended with fresh vegetables and herbs masala which is cooked in cooker which gives it a unique taste.
Veg biryani is one of the famous one-pot recipes which is mostly ordered by vegetarians in Indian restaurants…
If you want to prepare a perfect veg biryani which taste as same as restaurant style...
Follow the below link which will help you in making a tasty and yummy “veg biryani”
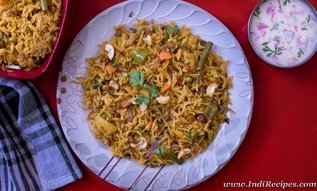
https://www.indirecipes.com/vegetable-biryani/
This is a simple and easy method to make veg biryani, you can cook or prepare this recipe in quick time also for example when you don’t have much time but you want special dish for your lunch or dinner.
Try this food because it takes less time to prepare compared to other biryani recipes. It is a recipe which can be had during breakfast, lunch and dinner also as it suits in all time….
In non-vegetarian biryani category, it’s a whole different level as we have many famous biryani recipes in India.
Non-Vegetarian biryanis are made with chicken and mutton and egg combination
What’s a biryani without some succulent pieces of mutton or chicken wrapped in a perfect blend of aromatic spices and herbs!? Yes, though other meats being more common, biryani eaters all over the world can easily swear by mutton or chicken
Some of the most famous non-veg biryani recipes are :-
We can categorize them in chicken, mutton and prawns biryanis
In Chicken, biryani category is as follows
chicken-dum-biryani
andhra-chicken-pulav
In mutton biryani recipes category
hyderabadi-mutton-dum-biryani
ambur-mutton-biryani
In egg category biryani
Egg biryani or motte biryani
In seafood biryani category
Prawns biryani
We will discuss one by one famous biryani and its specialty
Chicken dum biryani
When you are seriously craving for a biryani and do not have enough time to follow that elaborate procedure in making biryani.
It is an easy and quick one pot meal prepared with chicken, rice and aromatic spices. If you want to try this popular chicken dum biryani follow the below link which will help you in preparing delicious biryani….

https://www.indirecipes.com/chicken-dum-biryani/
And these are the recipes which we mostly try out in restaurants because we believe that we can't cook the non-veg biryanis as tastier as a restaurant but truth is we can cook a biryani better than the restaurant.
The only thing is that you have to follow the proper recipe links and follow the step by step method strictly, nothing more than that is required for a tasty biryani …
If we go to a restaurant to have non-veg biryani, they are quite costly, but if we make them in the home as the same style we can prepare any type of biryani in our budget only, and in that range, the whole family can enjoy the biryani recipes.
Here is one more popular biryani called Hyderabad dum biryani which is popular authentic mutton biryani. Hyderabad-mutton-dum-biryani/ or Khachha gosht Ki biryani is one of the #Recipe of Hyderabad which is world famous for its biryani recipe.
Hyderabad Dum biryani is one biryani which is very tasty and its popularity made all other biryanis popular, one who tried this recipe and its taste will make them try a variety of biryanis.
If you want to prepare a food for any special occasion this is a perfect dish to try out in your kitchen and enjoy the delicious food, use the below link to prepare a world-famous biryani.
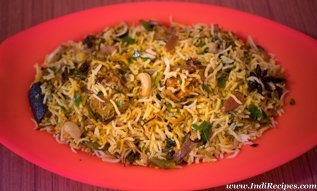
https://www.indirecipes.com/hyderabadi-mutton-dum-biryani/
Any special occasion whether it may be big or small, if we as a family live together, eat together, the joy and happiness doubles and those moments we can't get it when we have food or time without family.
Indian culture is famous for its diversity, and this diversity culture only made us different and special in all over the world by proving the world “we have unity in diversity”.
India is a country where living in a joint family is so common, but nowadays the new generation thinks it has become old fashioned and burden of living together with family. But still, we have that strong bonding somewhere in living together with family; of that bonding and connection our food also plays an important part which helps us to live a happy life together.
In our Indian houses, our mother is the master chef; I can bet you that the food which is made by mother for their children with all the love and care is not a less than any master chef. Because she knows the type of food, taste, Variety all about eating habits of family members very well and she cooks according to them….
Mother made biryani also tastes awesome. You do remember the taste even after a long time of her hand cooked biryani recipes when you are away from home.
If you are missing your home-cooked biryani then take a look at here, If you are a beginner you don’t know cooking but you love to eat biryani here I can suggest you start with a simple and easy recipe called “Egg biryani”
Biryanis are an elaborate procedure and require a lot of time, but if you want to cook and have a tasty biryani in quick time, then our Egg Biryani is perfect Dish for you!
In this Recipe, we are using egg as we know eggs are the most comfort Food and an excellent source of protein.
Try this One Pot Recipe in your Kitchen using fresh whole spices and masala and enjoy delicious biryani using the below link which will help you learn how to cook egg biryani.
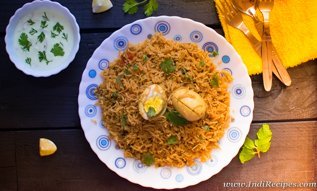
https://www.indirecipes.com/egg-biryani-mutta-biryani/
We can prepare a biryani in any style and in any taste if you want to prepare biryani with seafood and if you are a seafood lover follow the below recipes which are called Prawns biryani
This is a very easy seafood biryani recipe with amazing flavor and aroma. Prawns require very less marination time and also get cooked faster than chicken or meat. Hence, prawns biryani makes an easy and quick biryani to prepare. You can serve prawns biryani with any simple raita or vegetable salad.
Prawns or shrimps are good sources of protein, omega-3 fatty acids, vitamin B12, and other nutrients. They are also low in calories and fat.
Consuming prawns helps to improve heart, brain health, prevent hair loss, improved thyroid function promotes new bone growth, improve skin health. As it gives a variety of healthy nutrients, it is recommended moderately in your balanced diet.
For trying out this seafood biryani use the below link and have an awesome biryani recipe.

https://www.indirecipes.com/prawns-biryani-chemmeen-biryani/
As we try to know the biryani recipes it’s like we tried all kind of Indian recipes because the recipes and its specialties are like that only and it gives the whole idea of our Indian culture and Indian recipes.
I hope you like this series of biryani recipes and especially if you want to know more Indian biryani recipes follow the below link which has more biryani recipes and easy step by step guide on how to prepare tasty biryanis with very less effort.

https://www.indirecipes.com/tag/biriyani-recipes/
#Biryani recipes#veg biryani recipe#non-veg biryani#Indian recipes#Chicken dum biryani recipe#hyderbad biryani recipe#egg biryani recipe#prwns biryani#rice recipes
0 notes