#hasthemes
Explore tagged Tumblr posts
Visit Tumblr Blog
Explore Tumblr blogs with no restrictions, modern design and the best experience.
Last Seen Tumblr Blogs


Fun Fact
Users from the US are the majority of Tumblr visitors.
Text
i need access to the 3d models fromthat fucking mob psycho mobile game. i needthem. i need to put teru in gmod. if anyone out there hasthem contact me IMMEDIATELY
16 notes
·
View notes
Text
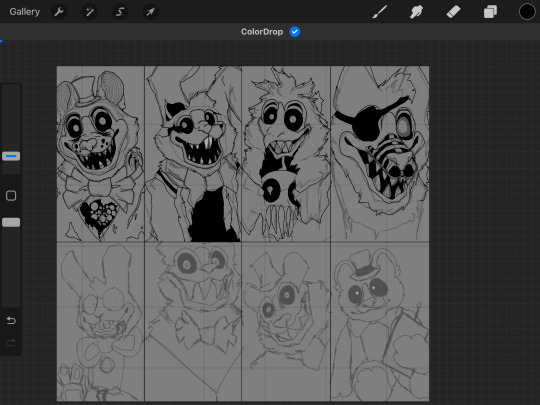
just a little wip dont mind me <3
btw should i give foxy braces? since. my mike hasthem. should any of them have braces?
#raccoon rambles#fnaf#raccoon doodles#minor trypophobia#yes bonnie is wearing a uh. varsity jacket#raccoon's wips
11 notes
·
View notes
Text

HasThemes - Unwrap Your Exclusive Deals - Up to 72% OFF http://tinyurl.com/2tnx533d
Dive into Design & Web Development Excellence with HasThemes Exclusive Deals! https://tinyurl.com/58vn3bzd Save Up to 72% on Premium Themes and Templates!
Whether you're a blogger, entrepreneur, or creative enthusiast, HasThemes has the perfect solution to make your digital dreams come true!
#HasThemesBFandCM#HasThemesDiscount#HasThemesExclusives#wplearninglab#WPTuts#websitelearners#WPTutorials#ferdykorpershoek#bjornallpas#PaulCharlton#farjanarashid#wordpress#wordpresstheme#wordpressthemes#wordpressplugin#wordpressplugins#WordPressTutorials#webagency#webdevelopment#webdeveloper#webdevelopers#webdevelopmentcompany#websitedeals#wwwdeals#wwwoffer#webdesign#webdesigner#webdesigning#webdesignagency#webdesigncompany
0 notes
Video
youtube
How to add Hero Slider in 99fy WooCommerce WordPress Theme
99fy is a Free WooCommerce WordPress Theme, it is a responsive and fast loading theme. 99 Home pages are included in this theme. 99fy using Elementor Page Builder to create pages easily, and supports popular WooCommerce Addon - WooLentor. WooLentor helps to create custom templates for shop and product pages. All of the popular niches for WooCommerce Stores are included in this theme. Niches are Animals & Pets, Books & Library, Cosmetics, Cars & Motors, Electronics, Fashion, Furniture, Fruits, Food, Flower, Handmade, Health & beauty, Minimal Stores, Jewelry, Kitchen, Kids Store, Matcha Store, Perfume, Maternity, Plant & Nursery, Sports, Shapewear, Tools & Equipment, Watch, etc.. More niches are added regularly. Check the demos: https://bit.ly/2zHD0BX Check us out on Facebook: https://lnkd.in/gP7xiTf Subscribe our YouTube Channel: https://bit.ly/3cGaU7r
#hasthemes#WooCommerce#elementor#wordpress theme#wordpress#web design#wordpress website#99fy#ecommerce website#99fy WooCommerce theme#dropshipping#best Woocommerce Theme#best Woocommerce Theme 2020#beautiful#amazing
1 note
·
View note
Link
The majority of the companies today need an internet presence and to find that online existence, one ought to create a site and host it. Website hosting identifies this term where your site is hosted on a specific server so it may be considered by most people world around.
0 notes
Link
If you work at home or are attempting to get that elusive first job, creating a professional website is a significant step. As a home for your business, your site can showcase your abilities, provide information of your experience, and give potential customers and customers a convenient way to get in touchwith
0 notes
Link
What Has themes offer?
Contents [show]
Has themes offer a wide range of website themes and templates which you can use for making website for your personal interest or business purposes. They provide services right from the initial stage of creating a website till its final establishment. They are helping out clients in the most efficient manner from a long time. As we know that designing a website is a complex task for a lay man, Has themes actively assist its clients as per their requirements.
Features
Numerous bundles
Hasthemes have different varieties of bundles for its customers suiting best with their need for example Shopify theme bundle, HTML template bundle, WordPress Theme & Plugin bundle. The agencies as well as developers find it very cost-effective to use their service for developing a website.
Amazing Plugins
HasTheme offer various core business solutions and empowerment via Plugins. It allows clients to experience a hassle-free way of creating a functional website without any complication. Entrepreneurs find their products and services very helpful in order to run their venture innovatively. Thus presenting themselves through a systematic website is generally the initial step for any entrepreneur which is supported by Has Theme very efficiently.
Awards and Recognitions
Has theme with its excellent customised web designing operations bagged various achievements including Elite Author, National ITC Awards, Connecting Startup, Startup Challenge award and many more.
Wide market
They serve more than 100,000 customers across the globe with maximum customer base in United States followed by India, UK, Italy and France out of which, majority of customers utilize WordPress Plugins. All the users find their service extremely helpful in flourishing their business.
React template
The user interface requires added features for making their website look attractive and engaging. For fulfilling this requirement, Has theme render react templates whenever there is any considerable change in the data in order to provide appropriate component. Such templates significantly highlight the USP of the website and make the content look more appealing for the online audience.
Hasthemes Benefits
Highly beneficial for the new age tech geeks
These days’ entrepreneurs find it very convenient to reach its audience over social media platform and nothing supports better than a well-designed website. Has Theme takes care of the present scenario and plan to deliver services which will support such needs. It is evident that websites play a crucial role in today’s business world owing to the concept of globalization. Hence, it is equally essential for Has Theme to come up with latest update in website designs.
Economical
The themes offered by them are economical in terms of cost, loading time and response which makes their service highly appreciable. Their service lay out SEO friendly results so that the user can have a broad horizon in internet-based market too. Due to the increasing trend of online shopping, sellers opt for such likewise opportunities that will boost their sales and help them increase their customer base.
Conclusion of Hasthemes
The concept of digitalization is growing everyday as millenniums are constantly syncing with the updated technology. Has Themes is a great tool to establish an elegant website according to the personal preference. It gives ample of options to the interface user for beautifying their e-commerce store. It includes templates which are compatible with almost every project. The framework used by Has Themes impart a mobile-friendly and fast processing website which will ultimately take your business in the right direction via better connections.
#wordpresslandingpage#realinfopoint#blogposting#blogpostingideas#guestblogposting#blogpostingservice
1 note
·
View note
Note
I just read your tagged personal post and YOU KNOW STARSET????!!!!! It's so fucking rare for me to find people who also hasthem as one of their favorite bands and I'm hella happy rn
YASSSSS!! Their new album?? 😩👌 Though Transmissions will always be a classic imo. I actually found them through the recommended section on some In This Moment videos (who is another fave of mine 👀).
1 note
·
View note
Text
Watch "briga mais fofa" on YouTube
The Corgi getting a lot of fights with cats when the queen is not around and then trying to tell her something where are you we're in trouble. And she's not answering so there's something wrong they said they're trying for a few days and then hearing other people it don't sound as strong.
And he says maybe she's in that movie with him and doesn't look like her it could be her and she has some sort of mutation in the face in Riddick the White Queen something will think it is her and our son says if it's not her then who is it so they're trying to figure it out and they can't. Well like I will see that guy there's some brothers even to her and her son is somewhat evil.
And he says you have a motorcycle ready for her when she wakes up. It feels a little better and sleeps for a while it starts with the cat again just wanted to hear your voice looks around says it starts laughing it's not exactly fighting with her says laughing okay cuz of the latest I know you want and I'm trying to get the motorcycle there it's not there yet I think he's saying just looking at a motorcycle that's one of the house like a toy and she figured it out it's hers when she gets up and I think that might be her since you seen her before in that form since the frontal lobe thing says crying oh God now baby hurt too tighten and I think I help them get out
So she says how they do that fly to a place that hasthem
The smiles and says you know how it's going and what it's like it's no not Kingsley and I know the guy like his friend says hold on that one
Is trouble now but he's a friend happy and slept some more starts laughing who the hell is that this is great I'm getting help so don't see anything I'm going to pull the whole way you moron
Thor Freya
0 notes
Link
#HasThemes a team of 45 experienced #designers & #developers. 100,000 customers from more than 80 countries using our #product & services. We are selling #websites templates and #themes (#HTML, #WordPress, #Shopify) and custom #web_design services from 2012.
We Provide Best Our Services
We provide almost all #website design services to both individuals and #businesses. We help our clients from the start to finish and ensure that each of our #clients gets fully satisfied after getting services from us and we have been doing this successfully for a long time. #Website #designing is a little tedious job when you have no #knowledge about it. But don't worry, we are here to help you with all your needs. We'll assist you to turn your dreams into reality. Learn more about our services and check which one is perfect for you.
0 notes
Text
Twin Peaks With You & Just Because
Chicago garage-rock bandTwin Peaks---don't click that tag page unless you're ready for some David Lynchspoilers---have released the latest tracksfrom their Sweet '17 Singles series, which hasthem releasing two new songs per month through the second half of 2017. "With You" and "Just Because"explore the lighter side of feeling romantically underwhelmed, with laid-back guitars and lyricslike,
0 notes
Video
youtube
How to Import Template from Template library in 99fy WooCommerce WordPress Theme
1 note
·
View note
Video
youtube
10 Best Golf Club WordPress Themes | Golfing WordPress Themes
Looking for the Best Golf Club WordPress Themes? Check out our top 5 Best WordPress themes for golf courses and golf clubs collection in 2021.
✅ Uplands - Golf Course WordPress Theme
Unlike other golf course WordPress themes, Uplands Golf Course Website Theme is a live theme that is beautifully designed for a Golf Course or Country Club website. With its modern approach, Uplands is the perfect WordPress theme for your golf course website!
More Details: https://hasthemes.com/blog/uplands-wp-yt
✅ Brentwood - Golf Course Theme
Brentwood golf club WordPress Theme is beautifully crafted. With course-ready graphics, layouts, and styles for both the front and back-end, you can look like a pro before you take your first swing.
More Details: https://hasthemes.com/blog/brentwood-wp-yt
✅ N7 | Golf Club & Course Sports & Events WordPress Theme
N7 is a modern & attractive golf WordPress theme. It is a perfect option for golf clubs (as well as other sports), personal golf trainers, golf coaches, games, sports centers, sports review magazines, tennis clubs, sports blogs, and sports stores.
More Details: https://hasthemes.com/blog/n7-wp-yt
✅ Triompher | Golf Course & Sports Club WordPress Theme
Triompher is a stylish, trendy, and powerful Golf Club WordPress Theme. It's the perfect choice for setting up your golf club website with a modern design and functionality. Triompher is easy to use out of the box thanks to well-organized features and settings. The theme offers an intuitive user interface to manage the site content.
More Details: https://hasthemes.com/blog/triompher-wp-yt
✅ FairwayGreen - Golf Club
FairwayGreen is the WordPress theme for golf clubs. It's designed to be responsive, SEO-friendly, and provide a clean, modern look that is easy to read. We know you have high standards for your website, so we work hard to ensure that you'll love our theme.
More Details: https://hasthemes.com/blog/fairwaygreen-wp-yt
🔥 260+ Bootstrap Templates Bundle 🔥 If you are running a web agency or freelancing business, you can check our Bootstrap Templates Bundle, which includes 260 items and costs only $99. Grab the deal: https://hasthemes.com/blog/html-bundle-yt
🔥 React Templates Bundle 🔥 If you want to build your website with React, you can try our amazing, well-coded, and modern React JS templates. They are available both as a single template or in a bundle. Grab the deal: https://hasthemes.com/blog/react-templates-yt
We are available on other social media platforms, so don't hesitate to connect with us there.
❤️ Check us out on Facebook: https://facebook.com/hasthemes/
❤️ Check us out on Twitter: https://twitter.com/hasthemes
❤️ Check us out on LinkedIn: ✔️ https://bd.linkedin.com/company/hasthemes/
❤️ Subscribe and hit the bell to see new videos: https://www.youtube.com/c/hasthemes?sub_confirmation=1
Here we've shown you the specialties of the best golf club WordPress themes in 2021. Go to the preview links of your desired themes in the description above and preview them. Let us know if you have any more queries by dropping us a line in the comment section.
0 notes
Video
youtube
How to add Special day offer banner in WoCommerce store using WooLentor
There are many special occasions such as Black Friday Christmas Day or Halloween, for which you have to give special offers/discounts for your products.
Discounts and special offers help you boost the sales of your online store. Since a banner helps you grab the attention of the visitors, you can increase the conversion rate by 15 to 30% by adding a banner.
We have recently added a widget to add a special day offer on the online store using our Woolentor Plugin.
In this banner, you can get vital options to add a sale badge, banner title, subtitle, a short description, and a button with a link.
In this video, I will show you how to use it. First of all, go to Elementor Page Edit Screen and then Search by the offer. There you will find a special day offer widget. Drag the widget. We have added 04 banners here to make it easier to understand.
Okay, so let’s see how we add this. There are a few content positions. Here, Merry Christmas is the content. You can change the positions, such as the top, center, bottom, etc. Next, add the background image. In the title field here, let’s add the text and line break tag. In case you don’t want to show the field data, simply ignore any field. After that, add a short description here. At the offer amount, here I have put 50%. If you want to remove the tagline, simply delete the text for a week. Let’s go ahead and add a banner link and button text.
In this banner, we add a badge for promoting a 50% discount offer. You can increase or decrease the badge width. Now, if you want to move it horizontally or vertically, you have to change the value.
It is really a handy feature to place your badge at any position. Now, let’s move on to the style tab where you can find options to align the content.
You will also find options there to change color, fonts, margin padding for title, subtitle or text, etc.
If you need any assistance or have any questions or suggestions please leave us a comment below. And if you found this video helpful, please subscribe to our channel to get more videos like these You can also feel free to contact us at our website hasthemes.com for any queries. Preview and Download: https://hasthemes.sjv.io/woolentor Check us out on Facebook: https://facebook.com/hasthemes Check us out on Twitter: https://twitter.com/hasthemes Subscribe and hit the bell to see new videos: https://www.youtube.com/c/hasthemes?sub_confirmation=1
0 notes
Video
youtube
Call for price and suggest a price in WooCommerce Product using WooLentor
In this video, we will learn about Call for price and suggest a price in WooCommerce Product Page using WooLentor. In your online store, sometimes you may have products without a price.
So, to know the price, the customers may call you. There are many websites where products are displayed without any price. For such kind of websites, we have added two new features to our Wooolentor Plugin. One is Call for Price and another is Suggest Price.
By clicking on the "Call For Price" from mobile, a customer can easily contact by phone. Hence, it makes a website more user-friendly to a customer.
The Suggest Price Option enables your customers to suggest price for the products you offer. You can add this button anywhere within your Products Details Page.
Here, we have put it at the right side of the Add to Cart button. As soon as a customer will click here, a contact form will open to send the price suggestion.
Now, let me show you how to add these buttons. Right now, you can add this button by using the custom templates only.
We will soon add the feature to manage it globally from the Plugins Option Panel.
If you search by price, you will find the right widget here. Drag the widget to the right side. Now, Button text can be changed Add the phone number where you want to receive the call.
From the style tab, let’s customize the button styles like background color and text.
In case you want to add the Suggest Price Button, you can do it by going to your product templates and searching by Suggest Price or Price. Drag the widget to the respective position, Modify the button text as you prefer, add your email where you want to receive the message.
You can also edit the submit button text, the placeholder text, and the confirmation message text.
Moving on to the Style Tab, you can customize the design for this button and forms.
That’s all for today. If you have any questions or suggestions regarding our plugin, please leave us a comment below. And if you found this video informative, please subscribe to our channel to get more videos like these. Feel free to contact us at hasthemes.com. Thank you.
Preview and Download: https://hasthemes.sjv.io/woolentor
Check us out on Facebook: https://facebook.com/hasthemes
Check us out on Twitter: https://twitter.com/hastechit
Subscribe and hit the bell to see new videos: https://www.youtube.com/c/hasthemes?sub_confirmation=1
0 notes